#notion dashboard
Text
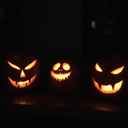
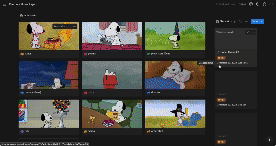
Just made my themed notion planner for November. I'm really focusing on organization as the semester picks up.
#studyblr#nursing studyblr#study aesthetic#nursing student#study motivation#study blog#studyspo#study space#college#college student#university#nursing school#notion#studying#note taking#productivity#notion inspo#notion aesthetic#notion dashboard#planning#planner addict#planner inspo#digital planner
547 notes
·
View notes
Text
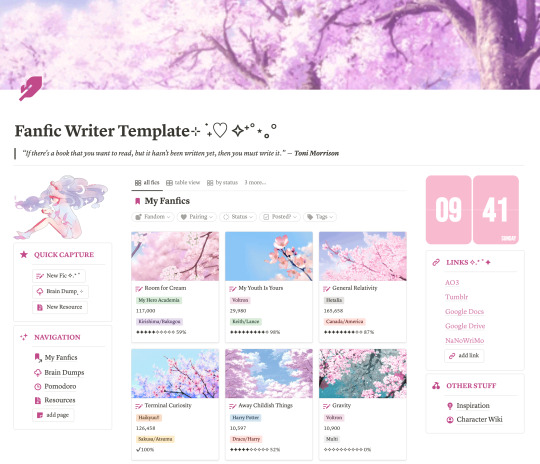
Fanfic Writer Notion Template | Notion Template for Fanfiction Writers | Writing Notion Template | WIP Organizer Template
Hello! I'm very excited to finally share the Notion template I've created for fanfic writers!
Admittedly, I am more of a fanfiction reader than a fanfiction writer, but I wanted to try my hand at creating this Notion template. That being said, I'm not sure if I've organized the template in a way that is super helpful or makes sense for a writer, so any advice/suggestions you have would be greatly appreciated! I am definitely planning on revising the template - this is a very early iteration.
Feel free to contact me if you have any suggestions! :)
#fanfiction#fanfiction resources#fanfiction writers#notion#notion template#fanfiction writing#writing#writing resources#writing template#character wiki#character wiki template#fanfic writers#fanfic#ao3#fanfic organizer#notion workspace#notion dashboard#writer's dashboard#writer's life
292 notes
·
View notes
Text
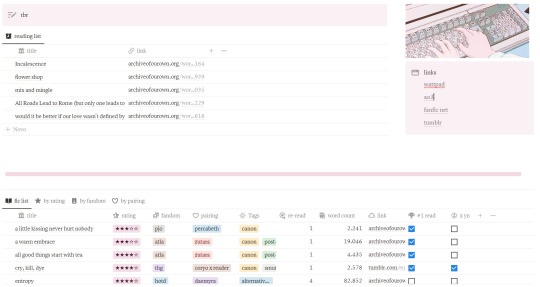
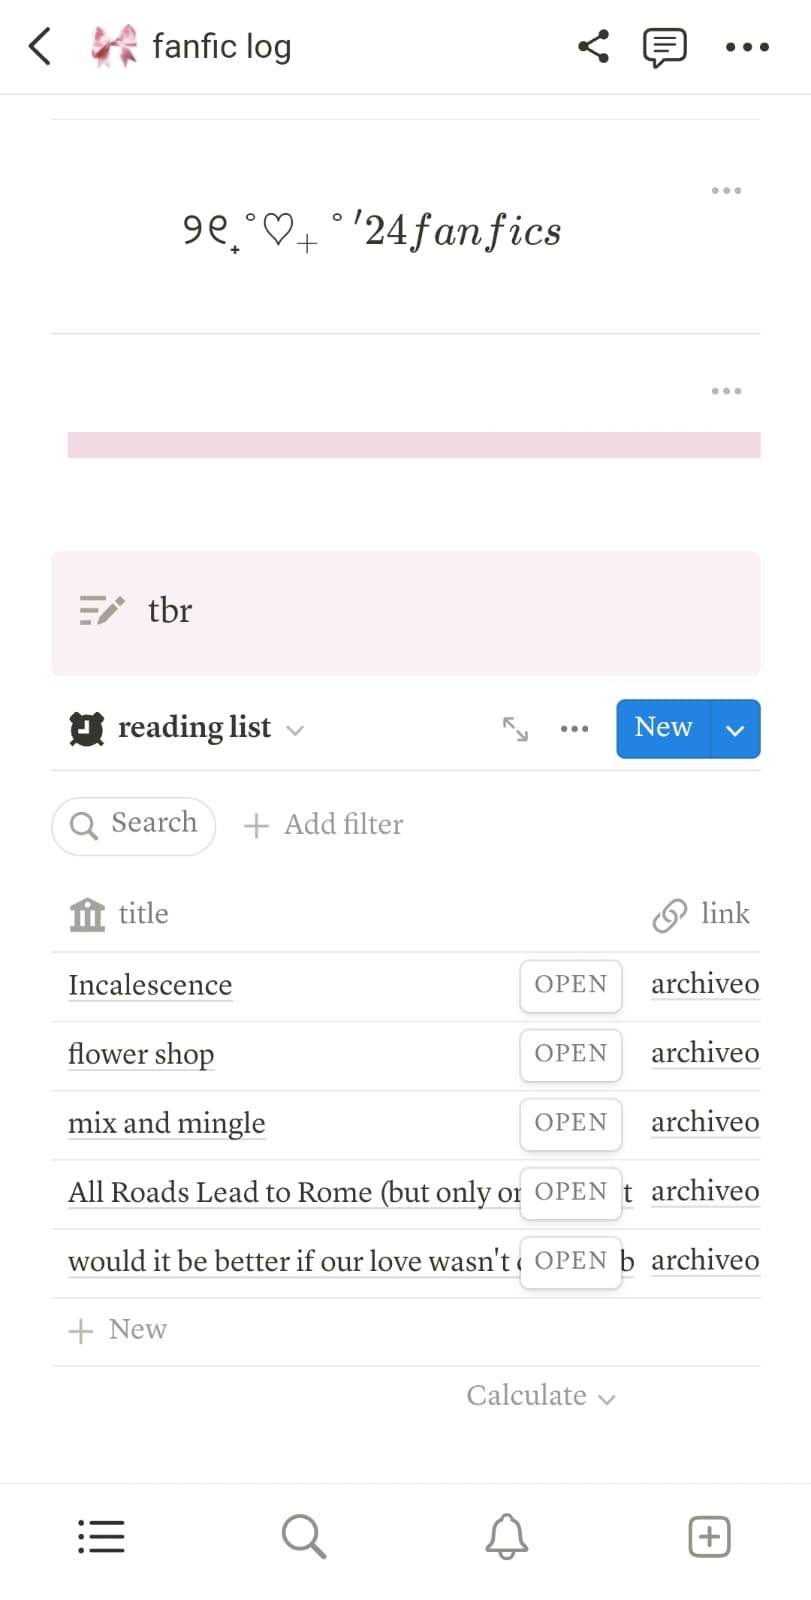
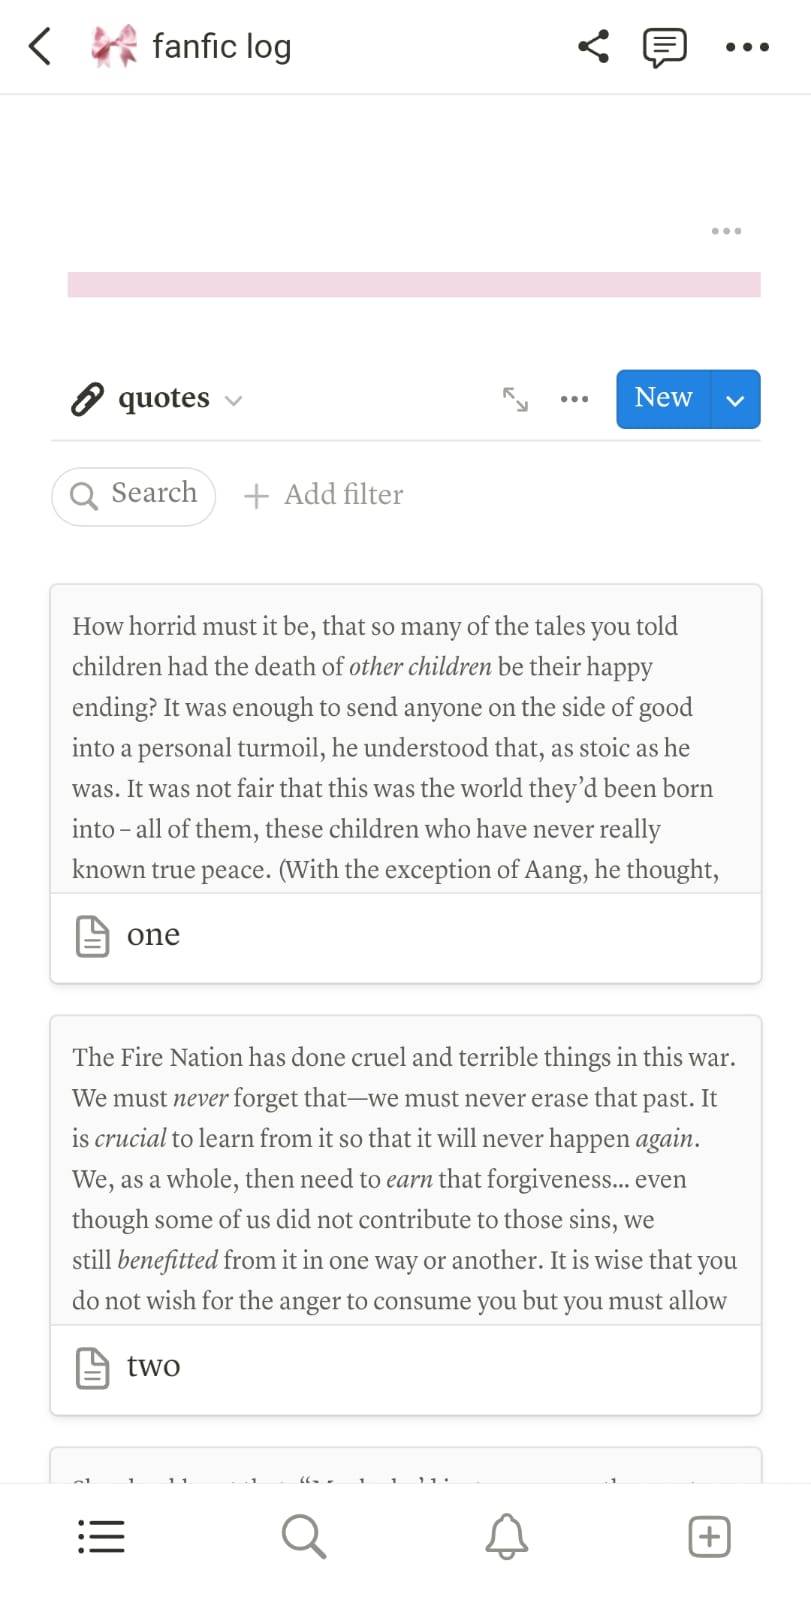
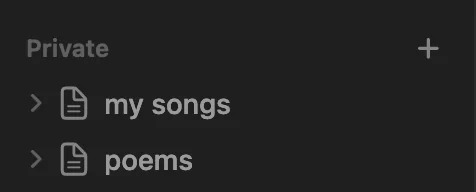
FANFIC LOG - NOTION FREE TEMPLATE
CONTENT:
- reading list, division by fandom, pairing, rating, tags and quotes.
EXTRA:
- you can drag the item from the reading list to the fanfic list afte you've read it
- the list view can be altered according to your preferences
LINK HERE!! + (buy me a coffee?)
MOBILE VERSION


#template#notion#notion template#fanfic#fanfic rec notion#pink template#notion dashboard#fic library#fic tracker#media tacker#free template#free notion
62 notes
·
View notes
Text
Hey writeblr, I made an author template on Notion. I've been using Notion to organize my WIPs for a couple of years now and thought some people might like the system I've developed for myself, so I made it available on my ko-fi shop!
(the icons I used are also by me and also available on the shop ^^)
#notion#notion template#writeblr#creative writing#writers on tumblr#notion dashboard#notion setup#ko fi support#artist on kofi#kofi shop#naiveheart
42 notes
·
View notes
Text

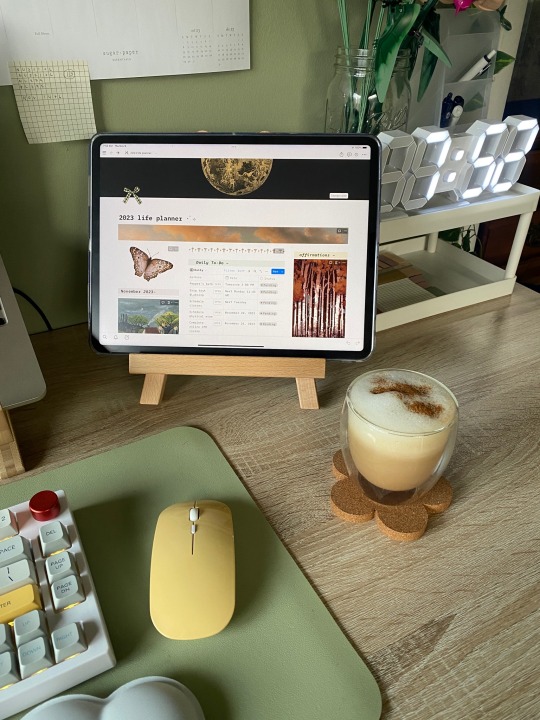
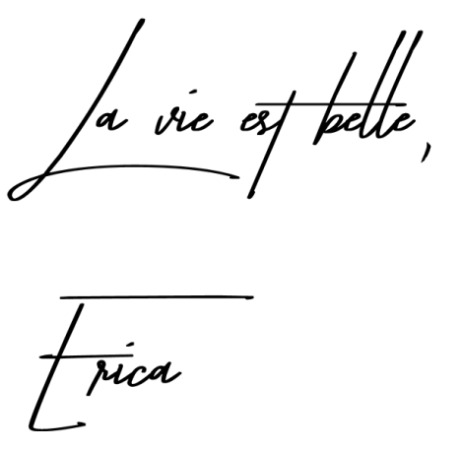
Saturday mornings
#dark academia#light academia#daily journal#journal#study desk#studyblr#study motivation#study aesthetic#coffee#coffee aesthetic#coffee and books#journal inspo#keyboard#study blog#mechanical keyboard#notion#notion inspo#notion creator#notion dashboard#notion template#aesthetic notion#intentional living#productivity#wellness#desk goals#desk tour#desk decor#coffee time#coffee mug#aesthetic
100 notes
·
View notes
Text
Evernote to Notion Tutorial!
As an avid Notion user whose first love was Evernote, I was also very upset at the sudden high charge and limit of Evernote to 50 free notes... I already had 565 notes in there, and was a fan of the simplistic yet useful mechanism for taking notes with a click, organizing them in notebooks, and being able to use tags, archived files, etc.
So I have taken it upon myself to recreate the mechanism as closely as possible.
This is my final result: easy to make into your own!

Template link, though I suggest looking over this tutorial most of all:)
I also have to say, I love how it is relatively great for the mobile option as well! Especially with my gallery views and button for new notes.


**I recommend using a computer/laptop for this!
Step 1: Importing all your notes
- Instructions directly quoted from the Notion website:
You can import all of your Evernote data into Notion in one go, and retain its organization.
From the import window, choose Evernote
Sign into your Evernote account.
Authorize Evernote to connect to Notion.
Once your Evernote account is linked, check the boxes next to the notebooks you'd like to move and click Import
Your Evernote notebooks will appear as pages in Notion's sidebar. Inside, you'll find your notes as items in a list database.
Each note can be dragged and dropped anywhere else within Notion
Step 2: Move notebooks into ONE database
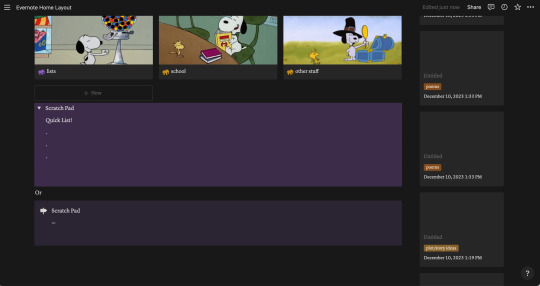
Let all your notebooks load correctly -- I personally checked the amount of notes each notebook had to match the ones in Evernote. The notebooks will go into the Notion pages on the sidebar like the picture, and each page will automatically add the notes into a NEW DATABASE table, which tells the amount of notes at the bottom.
Create a new blank page: this will be your EVERNOTE HOME layout
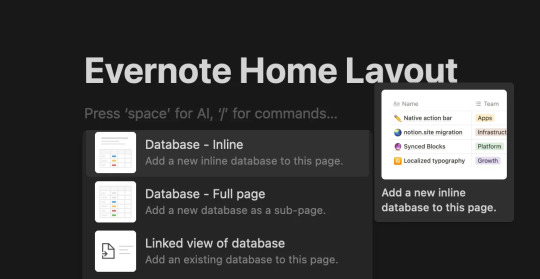
Inside this page, create a New Database (preferably in Table form)

This will be the MAIN DATABASE
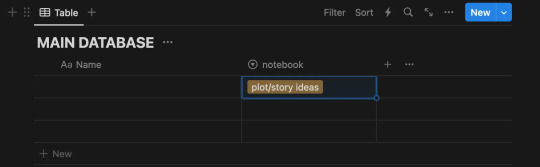
In this database, click ...
Then click + Add a new property and click Select.
I named the property "notebook". Then include in the options all the different notebooks you had in Evernote! Here is my specific example:

4. Add ALL the notes to the new database
Each "notebook" is automatically a separate database, we don't want that!
With tedious work, copy all the notes from the first notebook into the new database
Go into the first "notebook" (on the sidebar, just imported from Evernote) and press CTRL-A or Command-A to select all the notes. Then copy them with CTRL-V or Command-V.
Then go into your EVERNOTE HOME LAYOUT
Paste the notes into your MAIN DATABASE
Make sure the notes are inside the database, they will be part of the MAIN DATABASE table!
WARNING!!! BEFORE PASTING THE OTHER NOTEBOOKS' NOTES:
After pasting the First Notebook notes on the MAIN DATABASE, put the correct notebook property in each one!
I could not find a better way to do this than selecting a Single Note > Click on the "Notebook" property > Select the preferred notebook ("plot/story ideas") > click away > click back on the square until it is selected (the whole square turns blue) > then copy it (CTRL-C or Command-C) > then select the rest of the notes in that property column (like in picture 3) - and pasting the property to all of them at once.

(select property + CTRL-C or Command-C)
(select the rest of the notes - for ease, click on one, then press SHIFT and arrow down!)
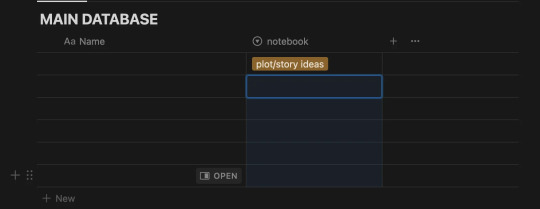
(Paste the property to the rest of the notes all at once)

-- Thank you @ myself for complicating a very simple procedure --
Continuing:
5. Next - copy and paste the notes of each note book into the MAIN DATABASE, each time making sure you add the "notebook" property as said in Step 4.
For ease: I found it helpful to sort the notes (... > Sort > Updated > Descending)
When this is done, you should have all your notes into a single database (MAIN DATABASE), organized by notebooks.
Make the Evernote Home Layout - 2 options
*If you're new to Notion, you will slowly get the hang of databases, don't worry. I am making this as detailed as possible:)
Option 1: Use my free template!
Please let me know if you have any problems accessing it.
Option 2: Follow my instructions and make your layout your own
You can follow my steps as I create my preferred layout, and change things around (magic of notion) to make this into your own.
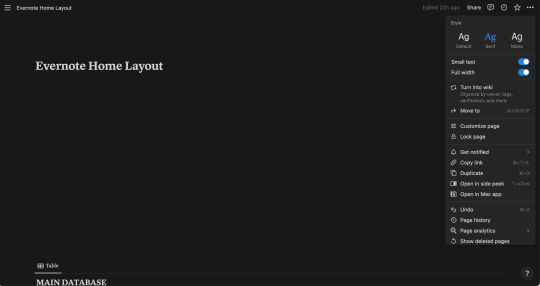
I prefer to make my page Full Width, Small text, and change the font (upper right corner: ...)
With the space bar I give some space to the whole ordeal.
Now, what exactly am I saving from a normal Evernote Home Page?
Recent notes
Scratch pad
(Would be so very easy to get a pinned note, and recently captured as well, though I don't do this in this tutorial)

Notebooks Gallery Tutorial
Press anywhere on the page > Click + > Scroll and Click on Gallery View > Click New Database
It should look like this
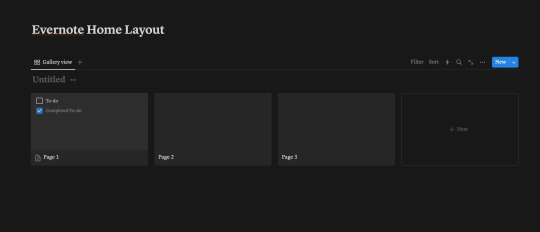
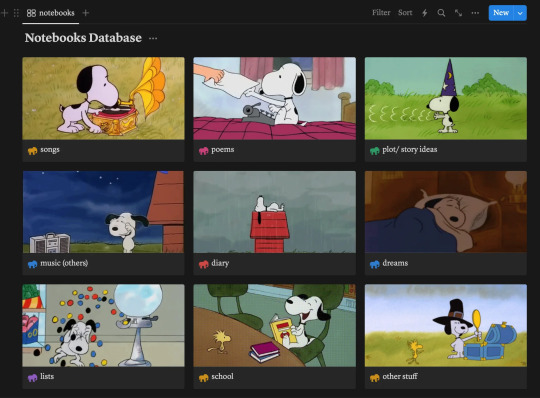
This here is a new database that we will call "Notebooks Database"
Each page shown there can be each notebook, and if you don't wish to show it in Gallery view, and instead have a simple list, you can!
For that Press ... > Layout > List
I will continue showing how to make the Gallery View like my own layout however:)

You can customize each page by clicking on it, changing the name (to each notebook you have), adding a cover and icon, however you wish.
Notion Tip: Instead of having to download images, you can Copy Image Link to almost any GIF of image on Google, Pinterest, etc, and then pasting the link!

Make sure you select "Page Cover" to be shown for your Notebooks Database Gallery View!
... > Layout > Gallery > Card Preview > Page Cover
My final result:
Notion Tip: To hide the name of "Notebooks Database", click the three dots ... next to it and click Hide Database Title
2. Recent Notes Gallery Tutorial:
To explain how to add the RECENT notes view I will make a video:
This is exactly what I do:
Make space after the title > Move a Block next to another Block to create 2 columns > Drag the Notebooks Database Gallery to Column 1
In column 2: Add a New Gallery View > Choose Main Database > Add whatever Properties you would like shown > Sort > By Created Time/ Updated Time (depending on preference)

For this one, make sure you put "Page Content" to be shown
... > Layout > Gallery > Card Preview > Page Content

3. New Note Shortcut Button Tutorial
To add a button so you can quickly add a new note like in Evernote, do the following (shown in the video below)
Click anywhere > + > Button > Add page > (Add page to) "MAIN DATABASE" > (Delete the name property) > + Add another step > Open Page > Select Page > New Page Added
Explore all the other features of this new button!
4. Finally, customize each Notebook Page:
Click on each Notebook page > Add a Gallery/List/Table view > Filter > Choose selected notebook tag > Sort > Updated time > Descendant
(video/gif tutorial shows how i personalized mine, I still have more stuff I want to add but those are the basics!)
BONUS: Add a Scratch Pad
Click anywhere > + > Add a Toggle List > ::: > Customize color
OR
Click anywhere > + > Add Callout > Customize color and Icon
Thank you for following this tutorial and I hope it was helpful and less daunting for new Notion users after the Evernote downfall:) Please send any questions, feel free to add your own ways to make things easier and other tips and hacks you may have!
#evernote#notion#evernote alternative#notion tutorial#notion template#notion free template#notion dashboard#organization#notes app#productivity#productive#notes#time management
43 notes
·
View notes
Text
Best Apps For Productivity & Studying
Hello there lovelies! It hasn’t been long since I started my vacay and soon enough, school is about to start. A few days from now I’ll be entering my school as a junior, aka 3rd-year college student. Time flies fast, doesn’t it? I started this blog when I was in my junior year of high school and now I’m a college student!
Speaking of school, I have here 4 apps that I really love to use for studying and any academic-related tasks, or whenever I need to be productive. These are 4 of the best apps out there that can help you be more productive and track your progress. You can also use these apps regardless if you’re in high school or college. Another thing about these apps is they are all easy to use and navigate. Lastly, these are all free to download on IOS and Android devices.

(Photo by Reclaim.ai)
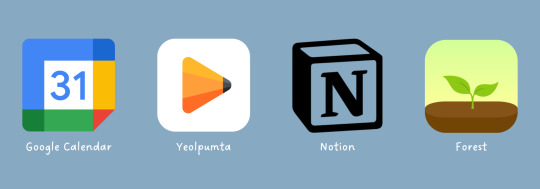
1. Google Calendar
First on the list is Google Calendar. Of all the calendar apps to choose from, this is my favorite. I have tried several calendar apps in the past and this is the only one I continue using and will use forever!
The layout is simple, easy to use, customizable, and it has a lot of features. I like that you can notify yourself multiple times for an event or task. I also like that you share an event (or calendar/tasks) with your organization, friends, and family. Another thing that I like about this app is how convenient it is because you can use it via desktop or your mobile devices.
Note: you can also add more colors for your calendar/event by clicking the three dots when hovering over a calendar, then click add custom color.
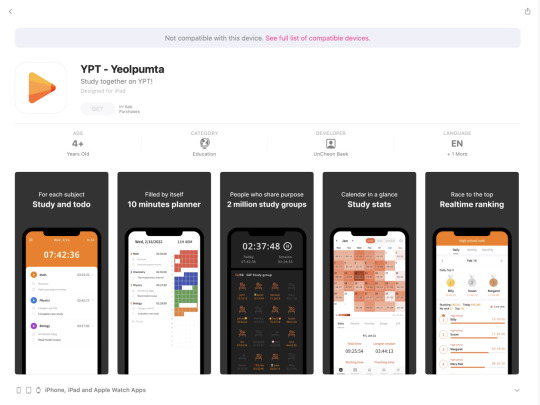
2. Yeolpumta
This is probably one of my best discoveries last semester! It’s easy to use, very customizable, functional, and of course, very aesthetically pleasing.
The app itself looks very minimalist and there arent a lot of distractions. Aside from that, you can use this app for a wide range of options such as a habit tracker, study tracker, pomodoro, etc. I personally use this as a progress and study tracker. This also helps you to stay focused because it wont let you leave the screen unless you’re using one of the allowed apps, which you can also choose which to include. In addition, it also has tons of features like the timer and calculator option, a dictionary, and white noise feature as well as see the users who are also studying at that time.
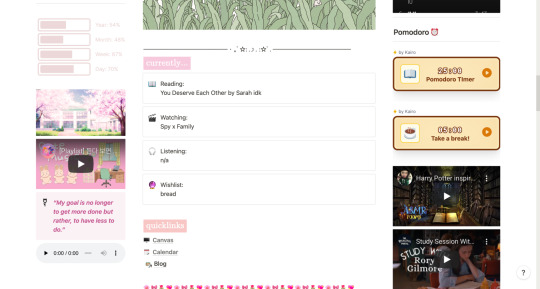
3. Notion
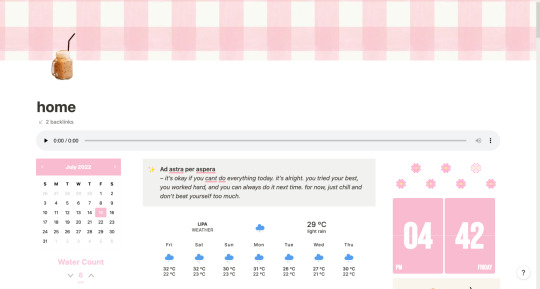
Notion is one of my favorite apps and I’ve been using it since I started college. I use Notion for everything! My habit tracker, expense tracker, reading tracker, journal, class schedule, to-do list, or basically my life is in here. The screenshots above is what half of my Notion dashboard looks like.
You can find lots of cool templates online or you can just create your own. It can be overwhelming at first, but once you get the gist of it, the things that you can create are endless. You may search for Alyanna Ross on Youtube because she has a lot of Notion-related videos and you can learn so much from her.
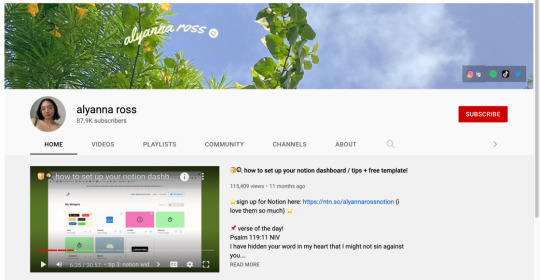
(Alyanna Ross is one of my fave YouTubers so go check her out!)
As mentioned above, you can use Notion for various things, may it be for school, work, life, or productivity. You can add lots of widgets to further customize your setup and make it more tailored to your needs. Take advantage also of the tables and columns to enhance your Notion setup.
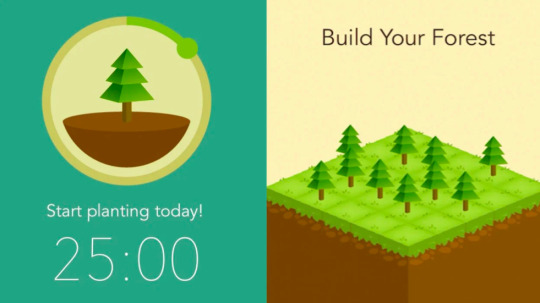
4. Forest
This app is one of my faves to record how long I am studying. It’s also easy to use and can be used on your mobile devices or as a Chrome extension. It’s up to you to select the time or minutes of studying and after that, you get to plant a tree. If you stop, your tree also withers.
I honestly prefer Yeolpumta nowadays because it has more features. However, I am also after the plant a real-life tree feature of Forest and so far, I have already planted 5 trees! Sadly tho, 5 is the maximum.
----------------------
That’s all for today’s blog post, loves! I also just want to say that this is not sponsored. I personally use all the apps that I have mentioned on this post. Anyway, at the end of the day, your progress depends upon your will to take action and nothing will happen if you will not act. Nonetheless, I hope that these apps can also help you to be productive as much as they helped me.
Originally posted on my Wordpress blog Aestrophilia.
Stay self and healthy everyone!
Lets stay connected:
ask.fm: ereecuh
email: aestrophilia@aestrophilia
.
#2022#aestrophilia#apps#studyblr#studygram#studyph#studygramph#study community#studyblurph#studyblur#accountancy#bsa#college#university#productivity#motivation#notion#notion dashboard#notion template#aesthetic#blog#blogger#blogging#lifestyle#septermber 2022#september 2022#september#school#study#studying
425 notes
·
View notes
Text

updates:
only logging study sessions on notion now that aren't already recorded from an app like hellochinese's streak or anki (to remove redundancy)
updated goals and study plan to focus more on grammar (i forgot most of it already)
revisiting anki this end of the week (i'm scared there's a lot to review)
added cute moodboard covers from pinterest :)
27 notes
·
View notes
Text
🌷 Aesthetic Life Planner Notion Template by bitsofshanshine ⋅˚₊‧
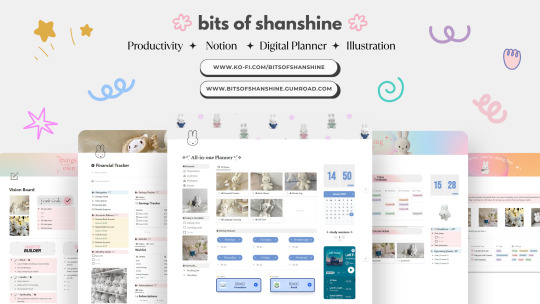
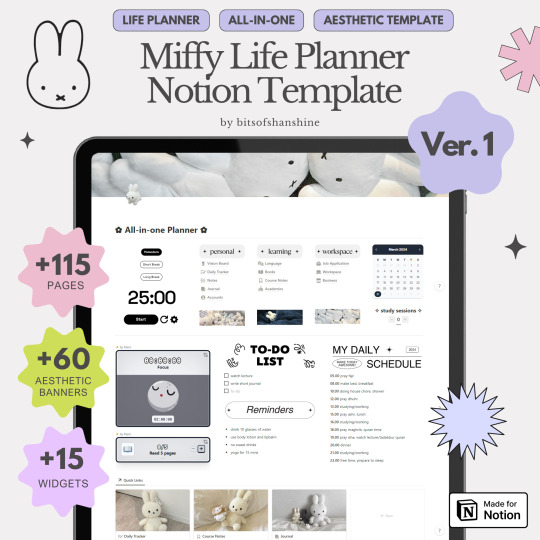
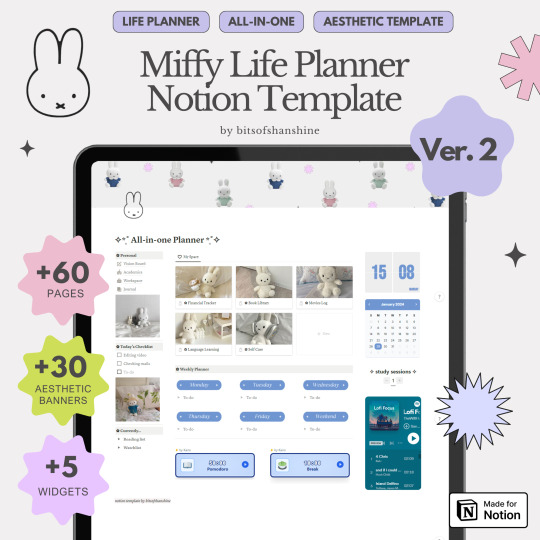
Hi everyone! (´。• ◡ •。`) ♡
I am Shaniya, a Notion template creator. I have been using Notion for years and it was a life changing for me. Notion is like my second-brain, it keeps me accountable on my routines and make me easier to organize my work 🌱 ₊˚✧ ゚.
Now, I create Notion templates with the goal of helping people better manage all aspects of their life. I try to create an aesthetically pleasing template that can motivated the people that are using it :)
Visit my Gumroad and Ko-fi to shop my Notion templates! I usually post and promote my own work on Twitter & Pinterest! Now I started to promote on Tumblr as well!
I will post more about Notion things and my templates, so please follow me so you won’t miss any updates! ପ(๑•ᴗ•๑)ଓ ♡
#notion#notion template#notion inspo#notion aesthetic#notion dashboard#notion setup#notion.so#notion guide#template#productivity#planner#digital planner#studyblr#miffy#aesthetic#studyspo#habit tracker#journal#notion template ideas#digital journal#journaling#study aesthetic#study blog#goal tracker#notion tutorial#girlblogging#it girl#pinterest#2024 goals#vision board
16 notes
·
View notes
Text
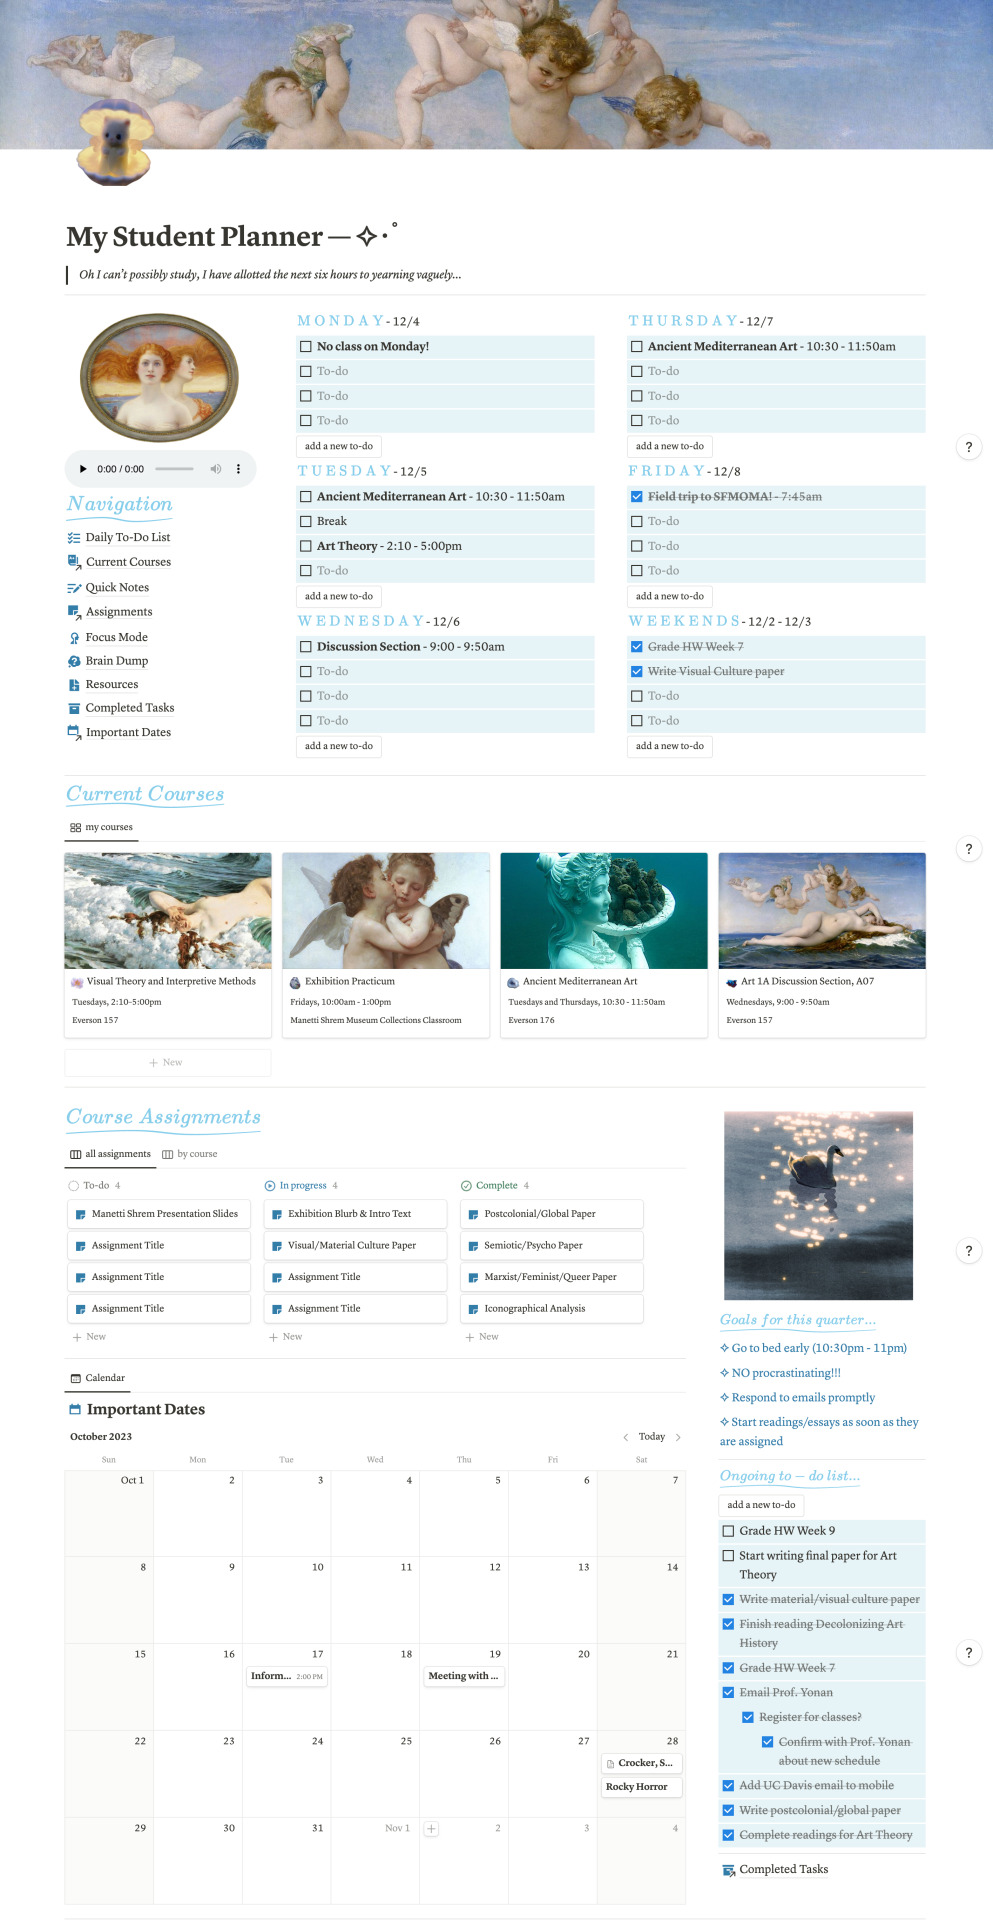
My Current MA Student in Art History Notion setup!!! ✧・゚: *✧・゚:*
#notion#student planner#art history#ma in art history#graduate school#grad student#studyblr#studying inspo#academia#aesthetic#notion dashboard#student life
39 notes
·
View notes
Text
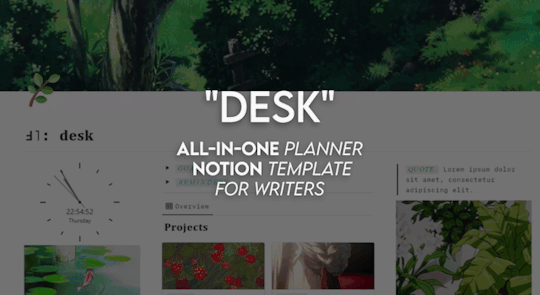
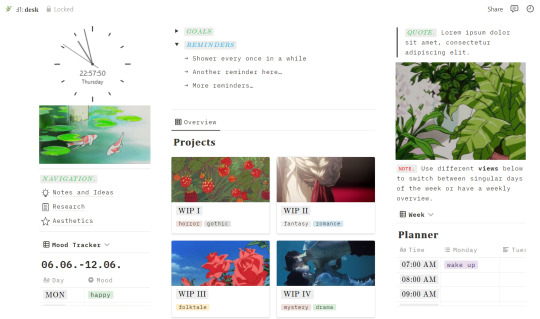
ALL-IN-ONE PLANNER NOTION: “DESK”
a highly customizable, simplistic but fancy notion template for writers needing some tidiness (and green for good luck) in their life. perfect for planning out your day, week, month without losing track of your projects while keeping it aesthetically-pleasing to look at. to download / copy, click “duplicate” top-right to copy it to your notion.
features:
task board with custom statuses to choose from
visual and simple overview of works in progress (including a tags system e.g. genres, priority)
detailed weekly planner
mood tracker and self-reflection section
goals and reminders section
navigation section for other pages
please like / reblog if you’re using or interested in using it!
#notion#notion template#notion dashboard#organization#writing#resources#rp resources#rp docs#spreads#planner#.some color for this summer#.and a home page due to popular demand :)
636 notes
·
View notes
Text

100 Days of Productivity [15/100]
11.30.23 | Today was a doozy. I went to my religions class, and then had to drive a long distance for an errand. I finished my lab report after staring at it for days, and then had a nighttime Zoom class for Women and Gender Studies, which ended early.
Here’s a little peek at my December notion theme. I’ll share more about it tomorrow, but I went with some darker mystical photos to match the cold weather.
#nursing student#nursing studyblr#study aesthetic#study blog#study motivation#studyblr#studyspo#nursing school#study space#studying#notion aesthetic#notion dashboard#notion inspo#study notes#university
64 notes
·
View notes
Text
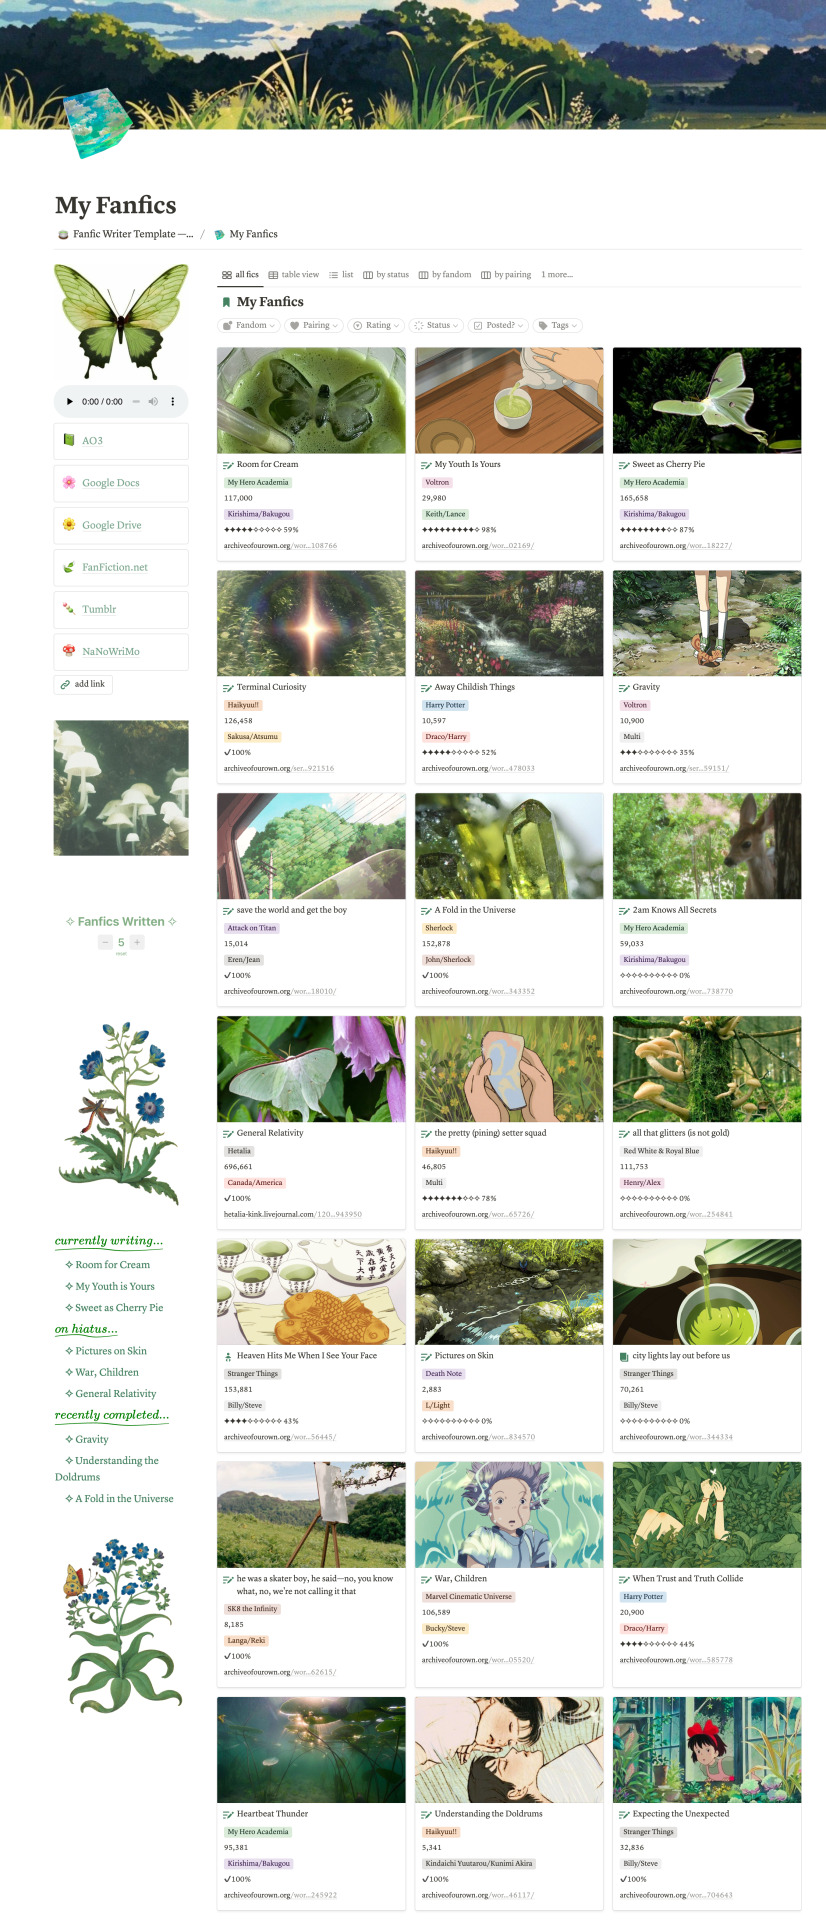
The green version of my Fanfic Writer Notion Template!
#fanfiction#fanfiction resources#fanfiction writers#notion#notion template#fanfiction writing#writing#writing resources#writing template#character wiki#character wiki template#fanfic writers#fanfic#ao3#fanfic organizer#notion workspace#notion dashboard#writer's dashboard#writer's life#aesthetic green notion template#green#matcha#matcha green#studio ghibli#studio ghibli notion
36 notes
·
View notes
Text

decided to revamp my notion. wanted to create a 'second brain' so trying to make it as detailed as possible. I found my previous one to be bland and boring.
Found this cuuute template, and decided to bellleamify it!
🎀 Template: https://twitter.com/daphnedi_/status/1434735933799034888?s=20
47 notes
·
View notes
Text

Here's my free migraine tracker!!
#notion#notion creator#notion dashboard#notion template#aesthetic notion#productivity#intentional living#planner#migraine#health tracker#mental health#health & fitness#notion inspo#health#headache#wellness#life planner#freebies#notion tips#chronic migraine#chronic pain#minimal#study aesthetic#daily routine#morning routine#evening routine#migraine relief#migraine awareness#light academia
54 notes
·
View notes
Text

My Notion Student Dashboard: Acadashboard.com
#notion#productivity#planner#planning#productive#studying#notion template#notion aesthetic#notion dashboard#notion inspo#notion app
24 notes
·
View notes
Last Seen Blogs

kateellawolf
Katie's words
hollowed-theory-hall
My Little Conspiracy Corner

sociallychallengednerd
I'm vegan so no anime or anime by-products

vampyrsdread
Morrigan graves