#owenpatrickjoyner
Text
*taps mic*
Hello
*inhales*
VOTE FOR EDGE OF GREAT AT THE MTVS SO WE CAN GET THE SECOND FUCKING SEASON OF OUR GHOSTHIMBO SHOW PLEASE I AM ON MY KNEES BEGGING YOU
*starts sobbing*
#julie and the phantoms#julie and the himbos#julie and her himbos#mtvs#edge of great#jatp#madison reyes#charlie gillespie#owenpatrickjoyner#jeremyshada#lukepatterson#juliemolina#reggiepeters#alexmercer#tryingtoburymyactualnotesinpointlesstags#this is the first time a show has made me feel seen#and i found it during a time i was grieving various things at once and it means#so so so so so so much to me#I just really want it back#the cast and the characters#the SONGS!!!#the ships#my juke and willex heart cannot#just please#if this mtv means a second season#if please Netflix could you listen to us when we scream at you#anyway#stream edge of great#mine#.
186 notes
·
View notes
Text
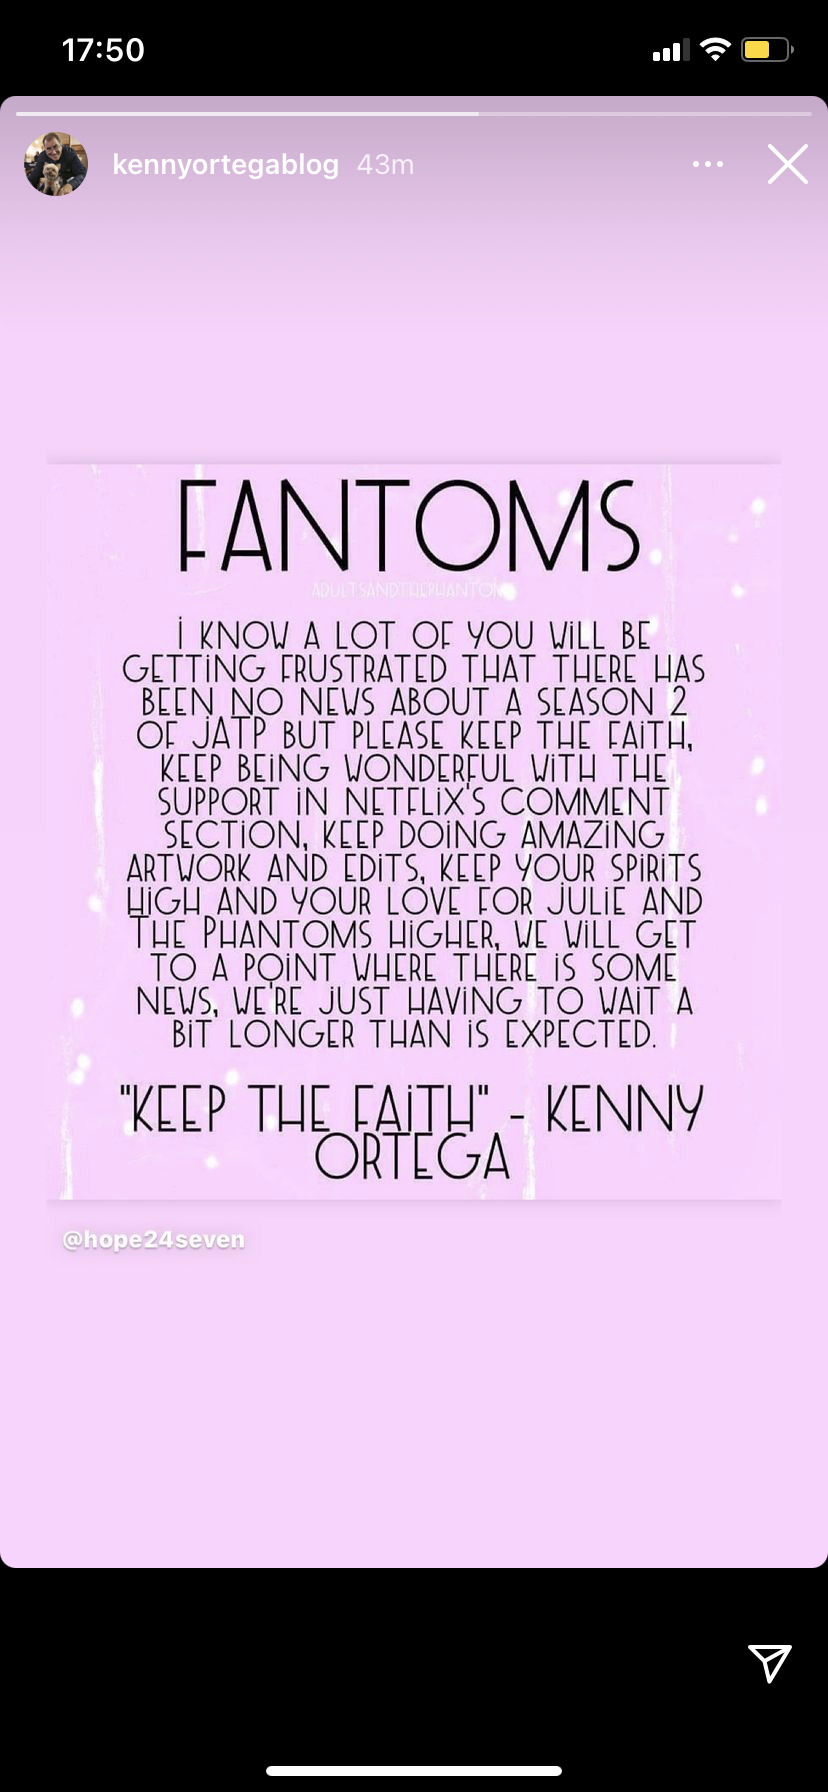
From Kenny Ortegas Instagram story!! Keep hoping fantoms! Together we can do this! RENEW JATP!!!
#jatp#julie and the phantoms#julie and her himbos#julie and the fat ones#julie and the himbos#alex mercer#charlie gillespie#julie molina#luke patterson#madison reyes#owenpatrickjoyner#jeremy shada#reggie peters#kenny ortega#netflixwewantjatps2#come on netflix#fantoms#jatp season 2#willex
126 notes
·
View notes
Photo
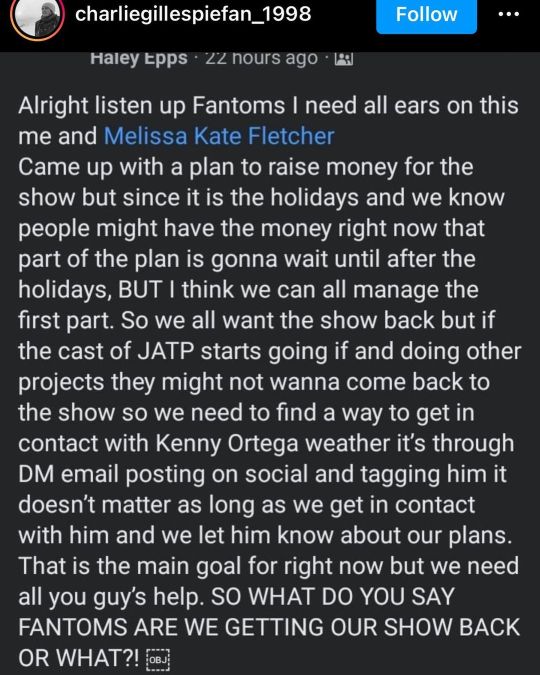
The post says it all. Come on! Let’s do this Fantoms! #julieandthephantoms #jatp #savejatp #madisonreyes #charliegillespie #owenpatrickjoyner #owenjoyner #jeremyshada https://www.instagram.com/p/CXslBCarz8M/?utm_medium=tumblr
#julieandthephantoms#jatp#savejatp#madisonreyes#charliegillespie#owenpatrickjoyner#owenjoyner#jeremyshada
1 note
·
View note
Photo
like or reblog if u use
#owen joyner#owen patrick joyner#owen patrick joyner icons#owen joyner icons#owenjoyner#owenpatrickjoyner#julieandthephantoms#julie and the phantoms#julie and the phantoms icons#jatp icons
14 notes
·
View notes
Photo
1 note
·
View note
Text
TV: Alex y ¿Willie?
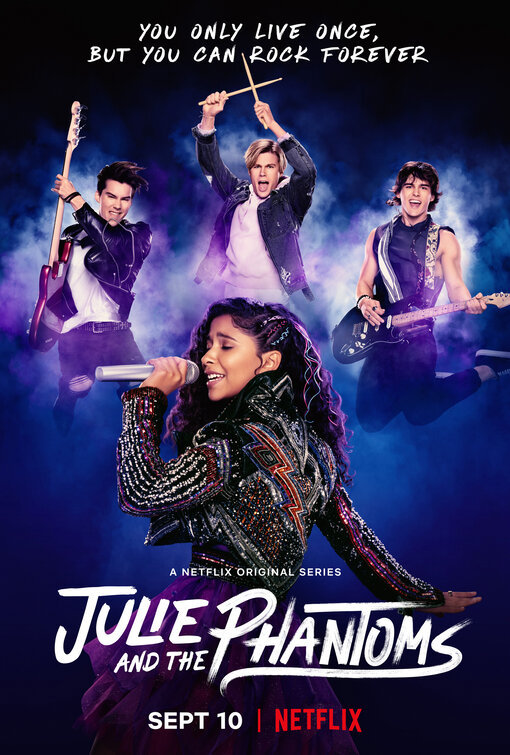

“Julie y los fantasmas“. Si ese título te suena de algún lado es porque fue el de una serie brasileña (estrenada entre 2011 y 2012 en el canal Band) emitida por Nickelodeon para Latinoamérica. Casi una década más tarde, el productor Kenny Ortega, a quien sin duda conocerás por dirigir las películas de la saga “High School Musical”, así también como la serie de Disney Plus que la toma por referencia (”High School Musical: El musical: La Serie”) o la película “Abracadabra” (”Hocus Pocus”, 1993). se une a los creadores Dan Cross y David Hoge para reescribir la idea.
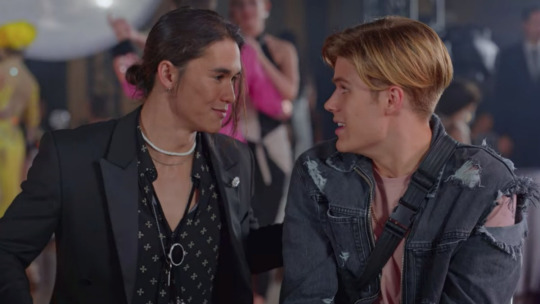
Luke (Charlie Gillespie), Alex (Owen Patrick Joyner) y Reggie (Jeremy Shada) forman el grupo Sunset Curve y están a punto de alcanzar su sueño de tocar en el Orfeo de Los Angeles, pero tienen un pequeño inconveniente que les impide lograrlo: fallecen misteriosamente.
Veinticinco años más tarde, de forma accidental, la joven Julie Molina (Madison Reyes), que ha perdido a su madre, contacta a los fantasmas, a quienes sólo ella puede ver, y buscará conocerlos, ayudarlos a saldar su cuenta pendiente para pasar a la otra vida y, en el camino, buscar un lugar propio en el mundo de la música.
En su vida terrenal, Alex fue gay, cuestión ya aceptada por sus amigos; en la sobrenatural se encuentra con Willie (Booboo Stewart), un chico skater que le enseña ciertas realidades sobre lo que significa ser fantasma (al fin y al cabo, él también lo es). La serie, que por el momento lleva una sola temporada y nueve capítulos, no determina si Willie también es gay, pero sí deja en claro que mantiene una relación muy amistosa con Alex. Relación que lo conduce a Caleb Covington (Cheyenne Jackson), espíritu propietario del Hollywood Ghost Club, un personaje misterioso que los puede llevar a la gloria o a la esclavitud eterna.
youtube
#tv#adolescencia#gay#JulieAndThePhantoms#nickelodeon#JulieYLosFantasmas#HighSchoolMusicalTheMusicalTheSeries#KennyOrtega#DanCross#DavidHoge#Luke#CharlieGillespie#Alex#OwenPatrickJoyner#Reggie#JeremyShada#SunsetCurve#Orfeo#JulieMolina#MadisonReyes#Willie#BoobooStewart#CalebCovington#CheyenneJackson#HollywoodGhostClub#EstadosUnidos#Brasil
3 notes
·
View notes
Link
#Owen Patrick Joyner#owenpatrickjoyner#Owen Joyner#Owenjoyner#Julie and the Phantoms#JATP#julieandthephantoms
7 notes
·
View notes
Video
What Dreams Are Made Of - #juke 🎸 #JulieAndThePhantoms
Video Edit I made
JATP is the best show ever I love it so much
This song is called What Dreams Are Made Of.
It’s still about shipping Julie & Luke but also
About the whole band making it big time💗
#JATP #Phantoms #Juke
#SunsetCurve #JulieAndThePhantoms
#julieandthephantoms#phantoms#juke#jatp#tellyourfriends#madisonreyes#charliegillespie#jeremyshada#owenpatrickjoyner#fan edit
1 note
·
View note
Text
JATP TikTok
Just spent the last hour scrolling through the jatp tag on tiktok so I can be on Julie And The Phantoms TikTok, just me?
#jatp#julieandthephantoms#tiktok#Reggie#lukepatterson#alex#juliemolina#charliegillespie#owenpatrickjoyner#jeremyshada#madisonreyes
5 notes
·
View notes
Photo

because yes❤️🥲 #owenpatrickjoyner #owenpatrickjoyneredit #rares #alexmercer #alexmerceredit #owenjoyner #owenjoynerpic #fingerguns #hottiealert #julieandthephantoms #julieandthephantomsedit #julieandthephantomsart #willex #iconic #jatp #jatpmemes #jatpedit #alex #ilovehim #icon #netflix #julieandthefatones #stan #fandom #fandomaccount #fanart #fanaccount #dressup #juliemolina #reggiepeters (at Help plz) https://www.instagram.com/p/CJkQ84WBfDS/?igshid=18kjv4r4yuv6t
#owenpatrickjoyner#owenpatrickjoyneredit#rares#alexmercer#alexmerceredit#owenjoyner#owenjoynerpic#fingerguns#hottiealert#julieandthephantoms#julieandthephantomsedit#julieandthephantomsart#willex#iconic#jatp#jatpmemes#jatpedit#alex#ilovehim#icon#netflix#julieandthefatones#stan#fandom#fandomaccount#fanart#fanaccount#dressup#juliemolina#reggiepeters
1 note
·
View note
Text
ma’am where are you going
#jatp#Julie and the phantoms#madison reyes#netflix#charlie gillespie#julie and her himbos#owenpatrickjoyner#jeremyshada#juliemolina#lukepatterson#alexmercer#reggiepeters#.
30 notes
·
View notes
Text
I feel like we need a video of Charlie Gillespie and Owen Joyner reading Thirsty tweets and DMs 🤣🤣 I feel like the two of them would just laugh together about it and it would be amazing and soooo funny!!!! I need these besties to do this!!!!

#charlie gillespie#owen patrick joyner#jatp#julie and her himbos#julie and the fat ones#julie and the himbos#julie and the phantoms#alex mercer#luke patterson#come on netflix#jatp netflix#netflixwewantjatp2#owenpatrickjoyner#notjeremyshadaoutofrespectforhiswife
35 notes
·
View notes
Photo
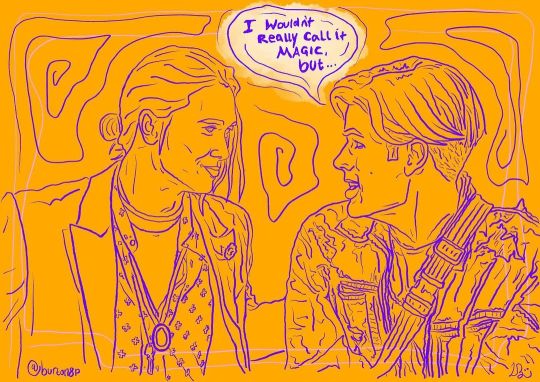
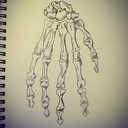
MAGIC. 2. Speech bubble 💬 vs thought bubble 💭 which wins? #owenpatrickjoyner #booboostewart #willex #fanart #illustration #sketch #sketching #digitalillustration #digitalart #julieandthephantomsart #jatpart #julieandthephantoms #fantomfriday #fandom #doodle #artistsoninstagram #art #owenjoyner #sketch #drawing #characterart #characterillustration #alexmercer #digitalillustration #burtonsdoodles https://www.instagram.com/p/CKscpB0nmbG/?igshid=o5at65ukq0z5
#owenpatrickjoyner#booboostewart#willex#fanart#illustration#sketch#sketching#digitalillustration#digitalart#julieandthephantomsart#jatpart#julieandthephantoms#fantomfriday#fandom#doodle#artistsoninstagram#art#owenjoyner#drawing#characterart#characterillustration#alexmercer#burtonsdoodles
0 notes
Text
Background Text Effect Tutorial
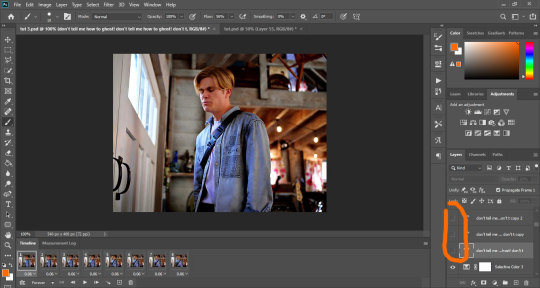
Got asked by @owenpatrickjoyners how I did the effect for this gif:

First of all, let me preface by saying that this actually took a whole lot of time and it still came out really choppy, so the first tip I can give you is if you’re gonna do this effect, you better have a shit ton of patience and choose a gif where the character doesn’t move alot because it will make things so much easier.
I’m using photoshop 2020.
This is an advanced tutorial that supposes that you already know how to create gifs and add text (i’ve explained how to add text layers here, if you want), so the first thing you wanna do is make the your gif, resize, sharpen, add adjustment layers and whatever else you want to add and then save the psd files (just as a precaution).
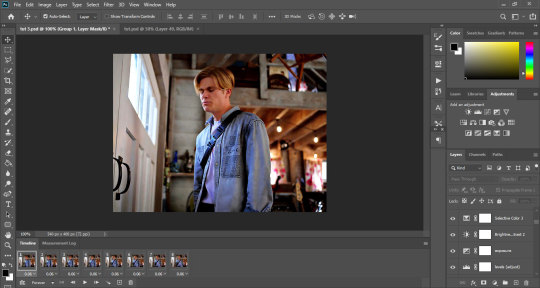
Once you’re satisfied with the gif, open your animation timeline bar to the frames animation mode.
This is what mine currently looks like (I’m just doing 8 frames for the tutorial):
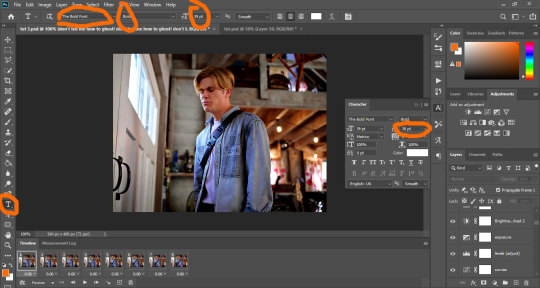
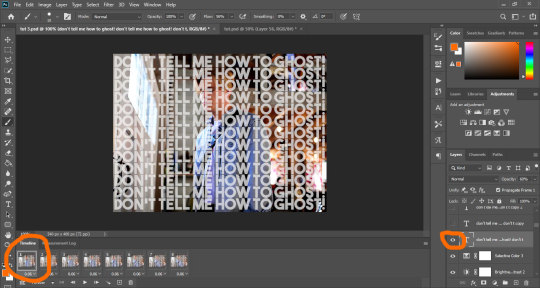
Now we’re gonna add the text layer that’s later gonna become the background. I’m choosing The Bold Font as my font, set to Bold, size 29pt, line spacing set to 30pt.
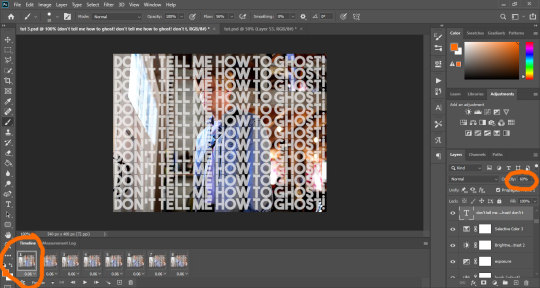
You’re gonna fill the page with the text so it fills the whole space, then you’re gonna make sure the first frame in your animation bar is selected and you’re gonna set the text layer’s opacity to 60.
The first thing you’re gonna do is duplicate the text layer to match the number of frames you have. I have 8 frames, so I’m creating 8 text layers. Then you’re gonna hide them all by clicking on the small eye icon next to them:

Your text should now be hidden:
So, this is where it gets tricky, because to get a good result (which I didn’t really manage that well), you have to work the layers one by one.
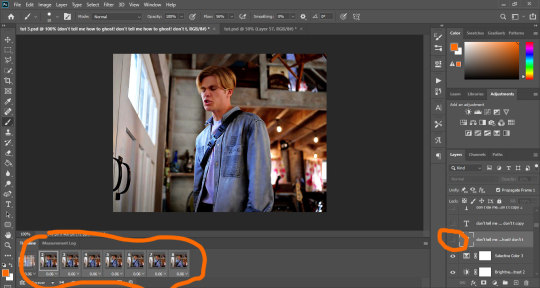
Start with the first layer. Make sure the first frame is selected in the animation bar, and click on the small eye icon of the first text layer to make it appear.
For the first frame, if you make any change, it applies to the rest of the frames, so before we do anything else, we’re gonna make sure it doesn’t. To do that, just select all the other frames, and hide the text on those by clicking the eye icon:
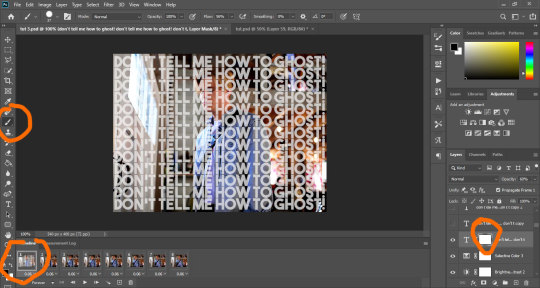
Now, select the first frame again. Add a layer mask to the text layer by clicking on the mask icon at the bottom of the layer tray.
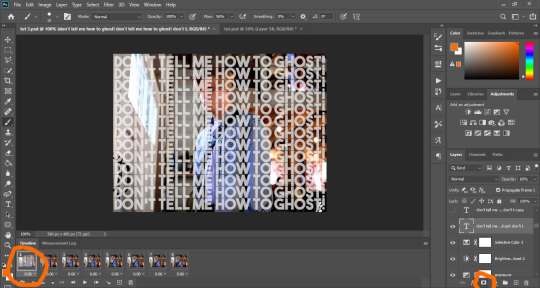
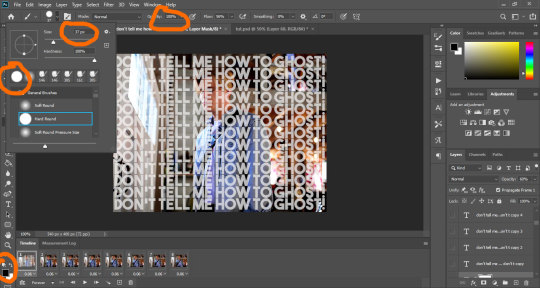
Your text layer should now have a small white rectangle next to it. Click on that rectangle, grab a hard round brush, make sure the selected color is black, opacity set to 100%, and use it to hide the text on Alex. You do that just by clicking and dragging the brush all over him. I’m starting with my brush sized to 37, but depending on what I need, I might change the size to make sure I get the edges.
If you don’t know much about layer masks and how to use them, I’ve explained it a little bit in this tutorial.
Basically, the black brush hides anything on the layer, and the white brush makes it reappear.
As you work and mask the text, you’ll notice the white rectangle start getting some black color in the shape you’re hiding. Once you’re done and satisfied, your frame should look something like this:

Now you’re gonna move on to the next layer. You’re gonna select the second frame on the animation bar (which should only show owen with no text). You’re gonna make the second layer of text appear by clicking on the eye, add a layer mask to it like we did before, and then start masking the text on owen the same way you did before.
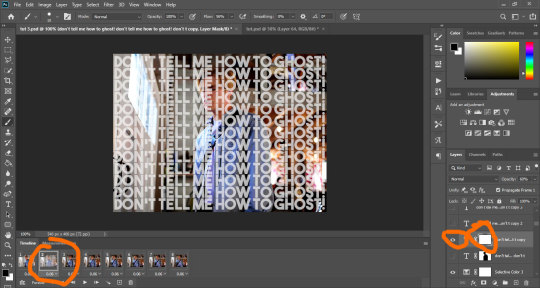
Alternatively, you could just duplicate the original text layer and work on the existing mask, but you would have to go back and hide that layer from the first frame and all the other frames. It’s up to you.
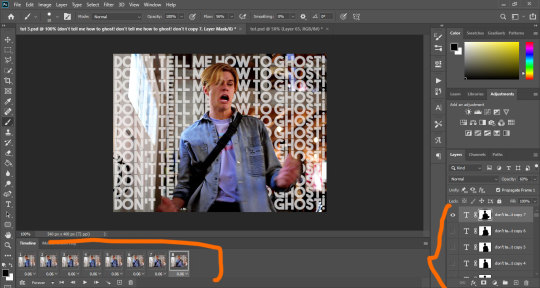
And now you’re gonna repeat the process on each frame. Select a new text layer, add the mask, hide the text on owen. It takes a whole lot of time, energy and patience, and if you look closely at my og gif, I didn’t do much of a good job, lmao.
This is why I mentioned it might be better to use gif with minimal movement - if the characters are not moving, the edges stay aligned and you can use the same layer on multiple frames instead of having to do them one by one.
Anyway, once you’ve done all your frames and layers, your psd looks something like this:
And once I save (check this for more details on my save settings), my gif looks like this:

And that’s it!
If I skimmed over anything or you feel it’s not clear, just hmu and I’ll try to do a better job at explaining things :)
I hope this works for you! <3
#tutorials#resources#photoshop 2020#photoshop tutorials#gif tutorials#my edits#kinda#tuts*#owenpatrickjoyners
78 notes
·
View notes
Note
hey!! so i just wanted to drop by and say not only do you do phenomenal fanart for jatp, but for rwrb too!??! and it's so amazing and i love your art style and your jatp art ALWAYS makes me smile and i read rwrb for the first time this year and i follow you on ig too so when i saw you start to post firstprince art i SCREAMED. you're such a phenomenal artist and i just had to come by and tell you 😍
Omgggg 😭💕😭💕😭💕😭💕😭 thank you! I love it when interests align like this aaaaa! I’m stoked you get to understand both fandoms I’m currently drawing for 🥺
26 notes
·
View notes
Note
I BOOKMARKED THE AU SO I CAN READ IN A LITTLE BIT BUT I WANTED TO DROP BY AND SCREAM ABT HOW EXCITED I AM BECAUSE I HAVE BEEN FOLLOWING AND WAITING FOR THIS AU!!!!!!!! 🥰
AHHH THANK YOU SO MUCH ALEXANDRA THAT’S SO SWEET 🥺🥺🥺 I HOPE YOU LIKE IT WHEN U FINALLY GET TO READ! ❤️
7 notes
·
View notes
Last Seen Blogs
almostseverepirate
Untitled

endlessstudypoint2
ENDLESS STUDY POINT
cbaker152
My Creative Space
yobekind
welcome!