#project: 1024
Text
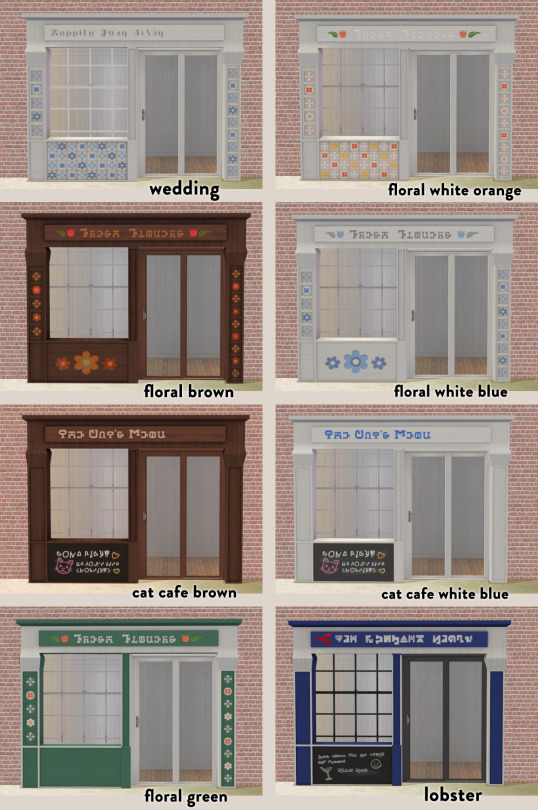
i got a youtube comment on my cat cafe speedbuild asking if I could upload my cat cafe recolor of storefront1 from this conversion set by beautifulnerdkitty.
typical me this was a big project from forever ago that I got bored of, abandoned and forgot about entirely 😭. I threw together in this folder all of the storefront recolors I had made. Some are cuter than others but hopefully someone can enjoy them! Plz note the bottom two have little specks of color on the right side corner (left side in the photo, you can see if u zoom in) b/c at the time I didn't know how to look at mapping in photoshop and the mapping of it was tricky for me. I used cluedo wood textures, images from freepic, simlish fonts by Franzilla at MTS and my own drawings.
DOWNLOAD SFS -
mesh included, 1024 textures (sized down from og texture which is 2048), compressorized.
Please note if you want to use a double door with these storefronts, put the storefront on a walk through block or sims won't be able to get through. single door on the left side works fine w/o a walkthrough block.
648 notes
·
View notes
Text
Kiwisim4 Spoopy Piano 4t2 Conversion
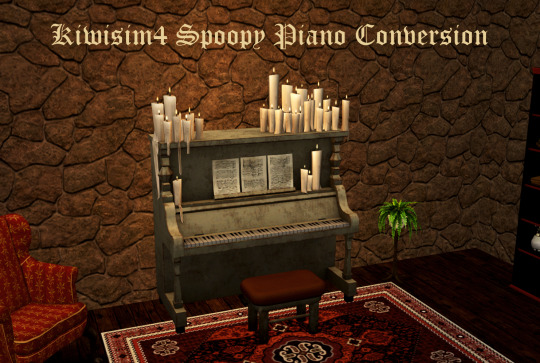
It's the spooky season and this piano looked as a perfect project 🎃
And you know I love me new pianos 🎹
This is a conversion of a Spoopy Piano by @kiwisim4.
Comes with all the original recolors (16 of them). The candles are a separate object repositoried to piano and function as a light (found under lighting-misc), they slot on the piano without cheats. Texture size is 1024 (lowered from 2048).
Polycount:
Piano: 2066
Candles: 980
Repair animation will look weird because there's no separated upper lid (it's blocked with candles ;))
Compressed, clearly labelled, picture included.
Download at SFS
286 notes
·
View notes
Note
HIIIIIII can youuuu make leo valdez x child of athena hcs by chance? I lovve your stuff
leo valdez x athena!reader hcs
⛧° 。 ⋆ ⋆ ⋆ ⋆ ⋆ ⋆༺♱༻⋆ ⋆ ⋆ ⋆ ⋆ ⋆ 。°⛧


⛧° 。 ⋆ ⋆ ⋆ ⋆ ⋆ ⋆༺♱༻⋆ ⋆ ⋆ ⋆ ⋆ ⋆ 。°⛧
content: leo valdez x athena! reader
warnings: references to sexual stuff, but nothing other than that
a/n: gods this is so fucking bad and short i’m so sorry, i just needed to write something, but it’s terrible. i’m sorry!!!
⛧° 。 ⋆ ⋆ ⋆ ⋆ ⋆ ⋆༺♱༻⋆ ⋆ ⋆ ⋆ ⋆ ⋆ 。°⛧
Literally smartie pants and smartest pants.
The nerd couple, always together.
It started with him having trouble with English and he needed help
So who’s better to ask for help than a daughter of Athena?
He looked for Annabeth and she told him that you were the best person she knew with english.
And, obviously, he couldn’t help but notice how cute you were, even if you were trying your hardest to explain Edgar Allan Poe to him.
But he couldn’t understand.
He was too focused on mapping the freckles in your cheeks.
You were just so beautiful in his eyes.
And once you started dating, he made sure you knew that.
“Hey, cariño?”
“Yeah, fireboy?”
“Looking good today. Are you single?”
“Shut up, Valdez.”
Just flirting everyday.
It was his life mission to flirt with you every single day.
He was always sure that you knew you were the most beautiful woman in the whole world.
And when your friends discovered, Annabeth was… kind of weirded out.
Cause she never thought Leo was your type.
But it happened he was, indeed.
And he made you gifts.
Lots of gifts.
Metal flowers and necklaces and earrings and
You got the point.
He was so thoughtful with absolutely everything
If you were out in a date and he sees something that reminds him of you, he makes you go to a store you like and goes back to buy the thing he saw
He’s just so cute
Our favorite latino boy fr
You two spent most of your time together in bunker nine, whether designing projects or building stuff or just hanging out
He helped you whenever you needed help with your architecture and you helped him with his inventions
You’re both so good at maths
And you just keep making stupid little competitions with each other
Like “I bet that the fifth root of 1024 is 4” “No, it’s 2” (it’s 4)
And then the one who loses has to give something to the other
Like, anything
And Leo gets so happy when you loses cause he gets you to do anything for him
And it’s just so fun in his opinion
When you’re at class together, the competition never stops
So when you got a question right, you smirk and looks at him with an ‘do better’ smirk
And it’s just so fun that you can’t seem to stop.
Well, the nerd couple.
Just two nerds that can’t seem to stop loving each other
#postcards from leah#leo valdez#leo valdez x reader#leo valdez x y/n#leo valdez x you#heroes of olympus x reader#heroes of olympus#pjo hoo toa#pjo
112 notes
·
View notes
Text
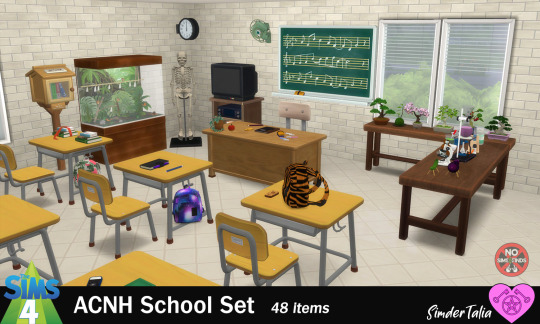
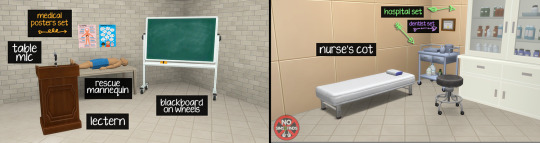
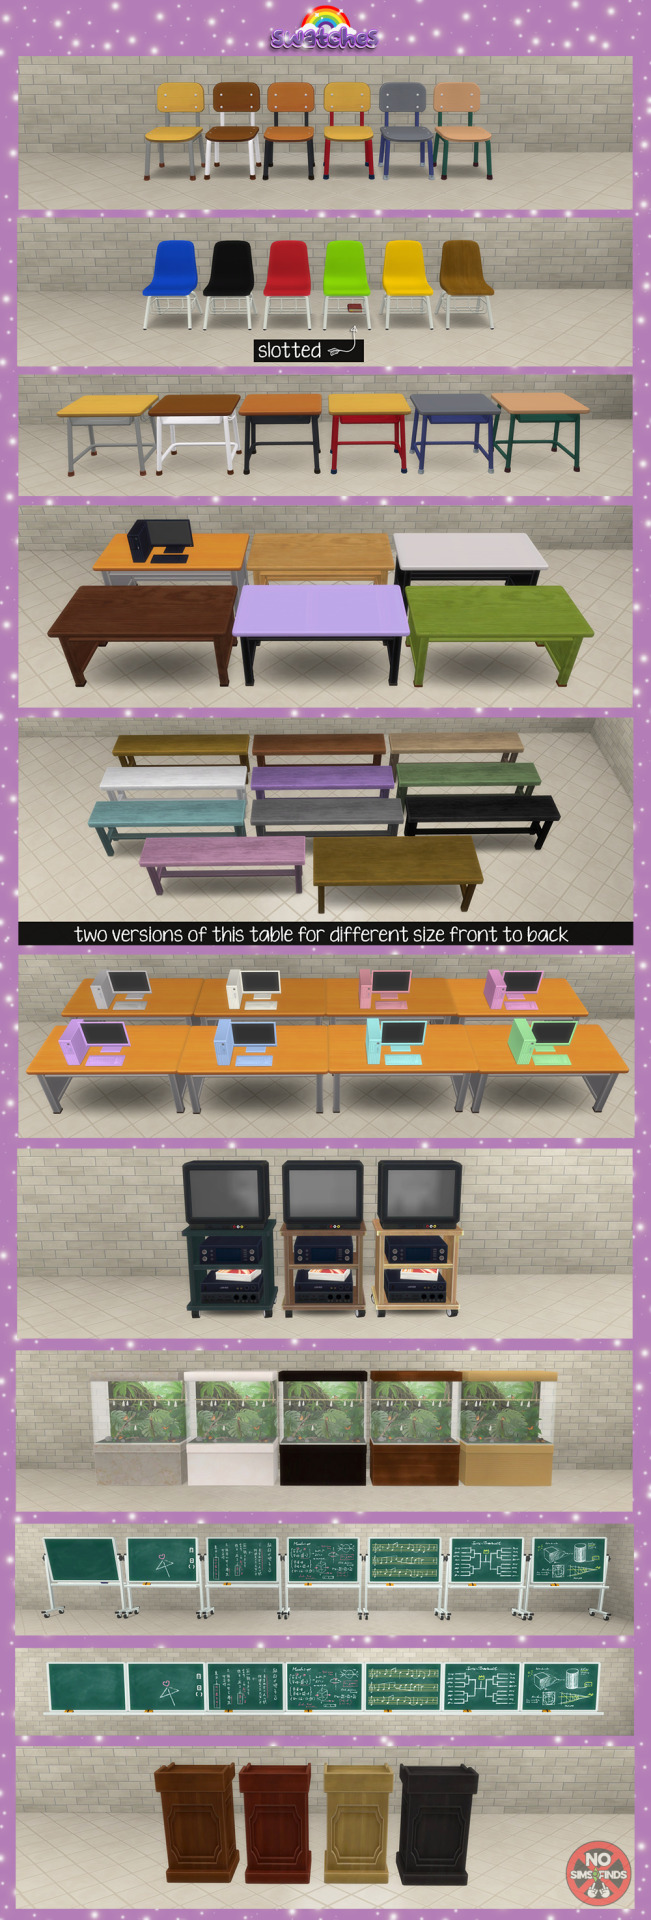


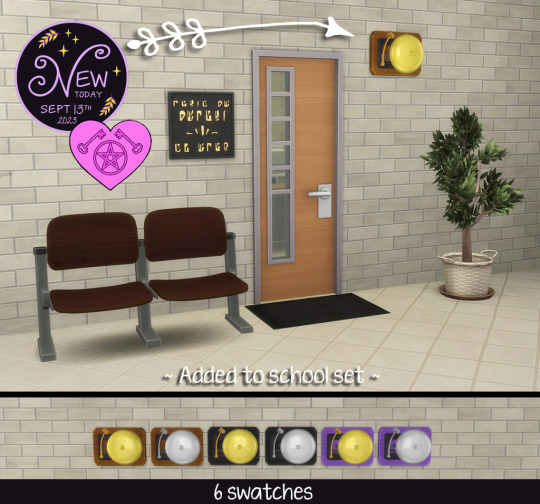
🍎 ACNH School Set ✏️
48 Now 49 items (I added a school bell for the wall) | Sims 4, Base game compatible.
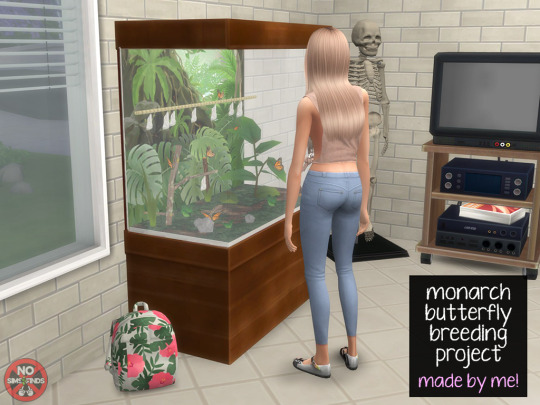
As usual, all original swatches included with lots of extras added by me! ☺️💗 I'm very excited to share the Monarch butterfly Breeding Project, which I made myself. When I was in school we raised some Monarchs and released them when they emerged & matured, it was really cool AND I love to share items that also raise some kind of awareness on important issues when the inspiration strikes me. Saving the Monarch butterflies is definitely one of them! You can read about how to help them here.
Type “ACNH School” into the search query in build mode to find quickly. You can always find items like this, just begin typing the title and it will appear.
Always suggested: bb.objects ON, it makes placing items much easier. For further placement tweaking, check out the TOOL mod.
Use the scale up & down feature on your keyboard to make the items larger or smaller to your liking. If you have a non-US keyboard, it may be different keys depending on which alphabet it uses. (I used this to "hang" the backpacks from the hook on the side of the student desk in the preview image above, for instance. To put it at the correct height, raise the backback 2 times.)
I hope you enjoy!
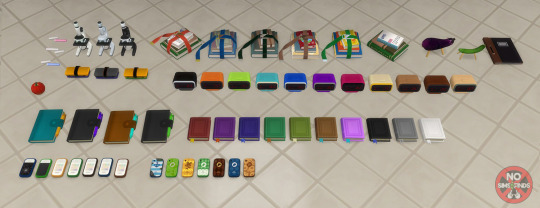
Set contains:
-Apple | 1 swatch | 420 poly
-Backpack Decor | 6 swatches | 768 poly
-Bell | 6 swatches | 880 poly
-Blackboard Eraser | 3 swatches | 324 poly
-Blackboard - Wall | 7 swatches | 780 poly
-Blackboard - Wheels | 7 swatches | 2418 poly
-Bonsai Liberated 1-3 | 7,9 ,& 6 swatches | 846, 718, & 844 poly
-Bonsai - Moss | 4 swatches | 1277 poly
-Bonsai - Pine | 7 swatches | 1198 poly
-Bonsai - Sakura | 14 swatches | 1942 poly
-Bonsai Shelf - Decluttered | 10 swatches | 238 poly
-Bonsai Shelf - Bigger | 10 swatches | 238 poly
-Book | 10 swatches | 268 poly
-Books - Tied | 5 swatches | 1154 poly
-Books - No Strap | 5 swatches | 346 poly
-Cafeteria Salad Bar | 9 swatches | 2407 poly
-Chair | 6 swatches | 1226 poly
-Chair - Plastic (slotted) | 6 swatches | 1212 poly
-Chalk | 3 swatches | 98 poly
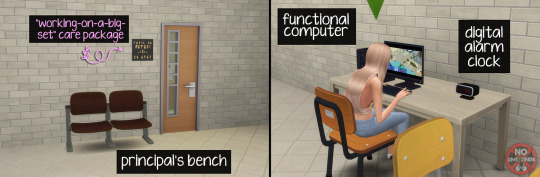
-Computer (functional) | 9 swatches | 742 poly
-Cucumber Horse | 1 swatch | 490 poly
-Digital Alarm Clock | 11 swatches | 962 poly
-Eggplant Cow | 1 swatch | 616 poly
-Gradebook | 1 swatch | 236 poly
-Lectern (slotted) | 4 swatches | 538 poly
-Metal Wall Fan | 8 swatches | 1108 poly
-Micro-Library | 6 swatches | 1172 poly
-Microscope | 3 swatches | 1226 poly
-Monarch Breeding Project | 5 swatches | 10907 poly
-Movie Day Cart (functional TV) | 3 swatches | 1024 poly
-Nurse's Cot (functions as a loveseat) | 5 swatches | 1150 poly
-Pencil | 3 swatches | 34 poly
-Planner | 4 swatches | 610 poly
-Principal's Bench | 2 swatches | 1980 poly
-Rescue Mannequin | 12 swatches | 2310 poly
-Science Set | 1 swatch | 2373 poly | Requires Cats & Dogs for animation
-Science Set (steam animation) | 1 swatch | 2373 poly
-Skeleton Display | 1 swatch | 1354 poly
-Smartphone V1 & V2 | 7 swatches each | 458 poly
-Student Desk | 6 swatches | 998 poly
-Tabletop Microphone | 1 swatch | 940 poly
-Teacher Desk | 6 swatches | 656 poly
-Teacher Plant | 8 swatches | 1164 poly
-Trophy Case | 6 swatches | 2401 poly
-Trophy Case - Decluttered & Slotted | 6 swatches | 142 poly
-Wall Clock | 10 swatches | 950 poly
📁 Download all or pick & choose
(SFS, No Ads): HERE
📁 Alt Mega Download (still no ads): HERE
📁 DL on Patreon
Will be public on September 29th, 2023
As always, please let me know if you have any issues! Happy Simming! 💗
✨ If you like my work, please consider supporting me
★ Patreon 🎉 ❤️ |★ Ko-Fi ☕️ ❤️
★ Instagram📷
Thank you for reblogging ❤️ ❤️ ❤️
@sssvitlanz @maxismatchccworld @mmoutfitters @coffee-cc-finds @itsjessicaccfinds @gamommypeach @stargazer-sims-finds @khelga68 @suricringe @vaporwavesims @mystictrance15 @public-ccfinds
#s4cc#ts4cc#sims 4 maxis match#sims 4 school#sims 4 desk#sims 4 chair#sims 4 furniture#sims 4 functional object#sims 4 object#sims 4 book#sims 4 books#sims 4 butterfly#sims 4 alchemy#sims 4 science#sims 4 plants#sims 4 bonsai#sims 4 apple#sims 4 shelf#sims 4 bench#sims 4 electronics#sims 4 phone#sims 4 tv#sims 4 sofa#sims 4 clock#sims 4 table#sims 4 backpack#sims 4 toddler#sims 4 child#sims 4 teens#sims 4 university
239 notes
·
View notes
Text
Updating... The Tattooer (ver. 3.4)!

Finally! Took me a while, huh. This is the updated version of the Tattooer project. It skips some steps, making the workflow much, much faster! Huge thanks to @applewatersugar for his
suggestion on how to bake textures while preserving the transparency. This is kind of a repost of the original Tattooer post, but it actually has some new stuff and a few changes here and there, so please take a look if you want to learn how to use this new version.
This is a series of Blender template files already set up to quickly bake textures from The Sims 4 to The Sims 2. The different Blender files will allow you to:
-Bake body textures from TS4 to TS2 (Female)
-Bake body textures from TS4 to TS2 (Male)
-Bake body textures from TS4 (Female) to TS2 (Male)
-Bake body textures from TS2 (Female) to TS2 (Male) [Bonus!]
-New! Bake face textures from TS4 to TS2 (Unisex) [Bonus!]
-Bake head textures from TS4 to TS2 (Face + Scalp) (Unisex) [Still experimental]
Check the file names to see which one is which, and the resolution of the baked texture it will give.
Everything you see in the render above was 100% converted using those Blender files.
Download here! SFS / GD
Update: Version 3.4.1 (27/08/2023) Fixed some issues on the shoulders for the AF-body-4t2-1024 and AF-body-4t2-2048 templates. Now the top straps on most converted underwear/swimwear should look right.
Update: Same version (13/12/2023) As requested, added a new spanish version of the included pdf guide!
These templates were made mainly to bake and convert tattoos, but there’s more you can do with them if you get creative. I have to say, these are NOT perfect. Results may vary depending on what you are trying to convert, so! With that in mind, this is all the stuff you will be able to convert almost seamlessly from TS4 to TS2:
-Tattoos.
-Other body details such as body hair, scars, freckles, supernatural/occult details…
-Body painted underwear and swimwear, as well as some other clothing that’s mostly painted on the body.
-Socks, stockings and maybe leggings.
-Even skintones! In some areas they will look weird, so I recommend editing and blending them with other existing TS2 skins.
-Makeup, eyebrows and beards. In the old version this was just a proof of concept, but now I’ve added a new Face file template which gives some pretty decent results!
-Hair scalps. Very useful when converting some hairs! Although keep in mind part of that texture might also need to be baked on the face mesh, you know, that hairline makeup stuff.
Got your attention? Nice! Editing some of the textures from TS4 to match the UV mapping in TS2 using a 2D editing program can be incredibly hard. That’s where texture baking in Blender comes to the rescue!
You will need to download Blender, at least version 3.4, but you could always use a newer version. It is only incompatible with versions older than 3.4.
-You can download Blender for free here.
-You will also need Sims 4 Studio to extract the original Sims 4 CC textures you want.
In the first version of these Blender files, there was a necessary step using Photoshop, but that’s no longer needed. However, there’s still a tiny extra step which requires resizing the newly baked texture on some of the high resolution templates, so you might need a 2D editing program like Photoshop. More on that later.
So, before we begin, let’s clear out some questions you might have. What the heck is this texture baking thing and what does it do? Well, let’s imagine you have a video projector and point an image into a blank wall. Then you pick up some brushes and start painting and copying that projected image in that wall. Texture baking is kinda like that when it comes to 3D models. You align two models and match them as closely as you can in shape and form, and once you adjust some parameters and values, Blender does the rest for you: it will give you a new texture for a new model with a different UV map. These files I’m sharing have everything already set up, so it’s a matter of plopping in that Sims 4 texture and you will get that new texture for TS2 in just a few clicks.
This tutorial assumes you know literally nothing about how to use Blender, so if you feel uncomfortable with it, worry no more! This will guide you with pictures showing where you need to click and explaining what is happening. For Sims 4 Studio and Photoshop the process might be a bit less detailed, but still this should be pretty beginner friendly. For this tutorial, I will use some tattoos as an example (properly credited at the end of the post). Alright, enough with the rambling. Let’s get started!
·EXTRACTING TEXTURES IN SIMS 4 STUDIO:
First things first, you will need to extract as pngs all the textures you want to convert from TS4 using Sims 4 Studio. It should be pretty straightforward. Just open the packages and export the Diffuse textures. Keep them organized in a folder for easy access.
·BAKING THE TEXTURES IN BLENDER:
PRELIMINARY STEP 1: CONFIGURING BLENDER’S GRAPHICS SETTINGS:
Open your preferred Blender file depending on what you’re going to bake and the desired resolution (in this example I’m going to use the AF-body-4t2-1024 file). Before we start messing around in Blender, there’s one thing you should set up. It is a onetime step, and once it’s done, you won’t need to do it again. So, does your computer have a dedicated graphics card? If you don’t know or you’re not sure, just skip to the next step. Configuring Blender so it uses your graphics card instead of your CPU will make the baking render much faster, so it is recommended you set it up correctly.
If your computer has a dedicated graphics card, click File (1) > Preferences (2) > and on the window that pops up click System (3) > and select CUDA and make sure your graphics card is there and tick it (4). I have an Nvidia Graphics card but your case may vary. Once you’re done, click on the tiny button on the bottom left corner and Save Preferences (5).

PRELIMINARY STEP 2: CHOOSING THE RENDERING DEVICE:
Click on the tiny camera button on the right, called Render Properties (1), and on Device (2) select GPU Compute if it’s not already selected. If you’re not sure if you have a graphics card or not, just select CPU. Then select the Material Properties tab (3) and Save your changes, either by pressing Ctrl + S, or clicking File (4) > Save (5). You might need to do this second step with the other Blender files, but once you have it done and saved, you won’t need to do this again. Okay, time to get into the good stuff!

·STEP 1: LOADING YOUR TS4 BASE TEXTURE:
In the Material Properties tab, click the folder icon that says Open (1) and on the window that pops up, navigate through your folders and select your first texture. To navigate easily, the 3 buttons on the top right (2) are for the display mode. They will show your files in list mode, vertical and horizontal, and the one on the right will display the file thumbnails, pretty useful if you want to easily preview your textures here. The icons on the left side (3) will let you go one folder back and forward, go to the parent directory, and refresh the folder in case you just dropped something new in there. Double click on the image you need and that will load the texture into the Sims 4 body model, named “ts4 body”.

·STEP 2: SETTING UP YOUR SELECTION AND BAKING THE TEXTURE:
On the top right of the screen, you will see the names of the 2 models in the scene. Hold the Ctrl key in your keyboard and left click on the “ts2 body” model (1). If you did it correctly, you should see “ts2 body” in a yellowish orange color, and right down below, “ts4 body” should look more like a red orange. If not, try again by clicking first on ts4 body, and then while holding Ctrl click again on ts2 body. Then switch to the Render Properties tab by clicking the tiny camera icon (2) and click Bake (3). Depending on your screen resolution, you might need to scroll down a bit with your mouse to see the Bake button. Wait a few seconds for it to finish. You will see the progress percentage down on the bottom of your screen. Don’t panic if you notice your computer fans start ramping up, that’s completely normal! As I said in the beginning, using your GPU will bake the textures much faster than the CPU.

·STEP 3: SAVING YOUR NEW TS2 TEXTURE:
Once it’s finished, switch to the UV Editing Mode by clicking “UV Editing” on the top of your screen. And there it is: your new texture! You might have to scroll up your mouse wheel a bit to zoom in and see it in all its glory on the left side of the screen. We’re still not done yet though. You need to save it to yet another new folder (always try to keep your stuff organized!).

You can save it by pressing Shift + Alt + S, or clicking on Image* (1) and then Save As… (2). That will pop a window where you’ll need to navigate again and save it somewhere. Give it a proper name (3) and hit Enter to save it… well, Enter doesn’t always work for me for some reason, so if that happens just click Save As Image (4). And that’s it! You’ve successfully converted your baked texture. Congrats!

·STEP 4: GOING BACK TO STEP 1:
Alright! If you’re done with your textures, you can close Blender without saving and call it a day. But let’s say you want to keep baking other swatches. In order to go back to step 1 and start the process once again, click Layout (1), go back to the Material Properties tab (2), select “ts4 body” (3) and click on the folder icon (4) to open and load your next swatch.

Then it’s just a matter of repeating the process from step 2. When you’re ready to move on, close Blender without saving. If you see a small check telling you it will save some images, make sure you uncheck it, so you will be able to use it again in the future from the starting point with no issues. I don’t think it really matters if you accidentally save your progress in these files, but I like to keep it clean and fresh so I can do the process where I left it from the beginning next time I open it. And in case you mess up and save somewhere, you can always just delete the .blend file and download the template files again.
In case you’d like a video tutorial on how to use these files, the amazing @platinumaspiration recorded this fantastic video showcasing the process! You can watch it here.
One final note: some of the baking .blend files save the textures with a resolution of 2048x2048 pixels, as clearly stated at the end of their file name. That’s way too overkill, because TS2 only properly supports up to 1024x1024 for most of its textures and you should always resize your final product to that max resolution (or lower if needed). I just made those 2048 versions because there might be some really tiny and slim details on some tattoos that might look a little too blurry when baked into a 1024 resolution texture, so for those cases use that if you want and then resize them using your 2D editing software of choice.
In Photoshop, in the Resample mode of the Image Size menu, there are a few options to choose. For the fine details, I like the Nearest Neighbor (hard edges) option, which, even if it looks a bit pixelated, it still preserves most of the texture and quality.

For anything else, I would just directly bake them using the 1024 versions in Blender (512 for the face and scalp).
And for the folks who feel comfortable playing around in Blender, this is just the beginning! Texture baking opens a LOT of possibilities, so feel free to move stuff around and edit the models to your liking! If you notice the baked textures look warped or stretched somewhere, or don’t like where some textures are placed in the S2 body, poke around that area moving stuff and then give it another try. The main objective of the baking process is keeping both overlapping models as close in shape as possible. You may also edit and save new copies of the templates, or make new ones from scratch using mine as a reference (keep a close look on those Baking settings and values, I think they work pretty well) and share them if you want to. Go ham, do whatever you want with them! I still have plans on making templates to convert body textures from Sims 3 to Sims 2, but for now it’s not on my priorities, so we’ll see when that happens.
Whew! Hope none of this was too confusing. Need help or have any issues with these? Please ask/message me here and I’ll be glad to help when I’m able to!
Credits for the CC used in the render demonstration:
-Skin by Sims3Melancholic.
-Eyes by Northern Siberia Winds.
-Eyebrows by PeachyFaerie.
-Tattoos by xtc.
-Top by SerenityCC.
And the Tattoo I used for the tutorial can be found here, by ValhallanSim.
Last but not least, a huge thanks to all the people who somehow contributed to make this project and update possible, either by doing initial testing, finding issues to fix, or teaching me new Blender tricks to make the workflow way faster and easier. So thanks again to @elvisgrace @moyokeansimblr and @applewatersugar on Tumblr! <3
And thank you for reading! Hope you have fun playing with this (not so) new toy hehe.
#tattooer project#tattooer update#ts2 tutorial#ts2 resources#ts2 blender#ts2 overlays#ts2 texture baking#4t2 conversion tutorial#this took me so LONG to update#im really sorry for the delay :(
293 notes
·
View notes
Text
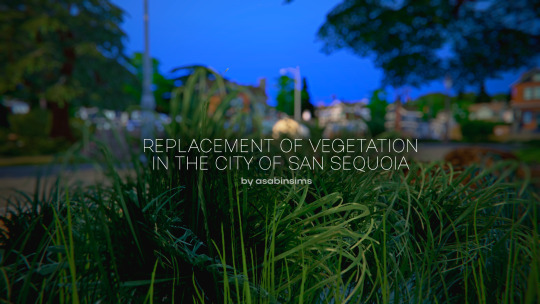
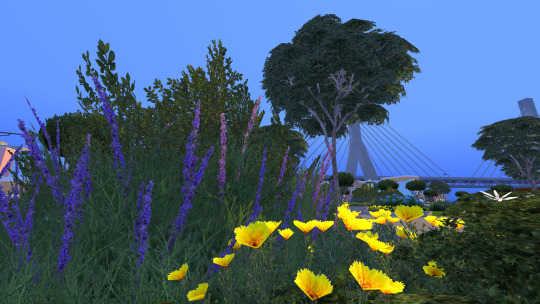
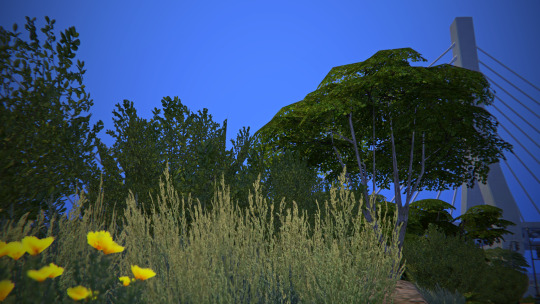
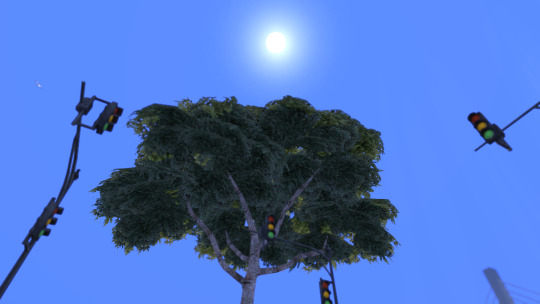
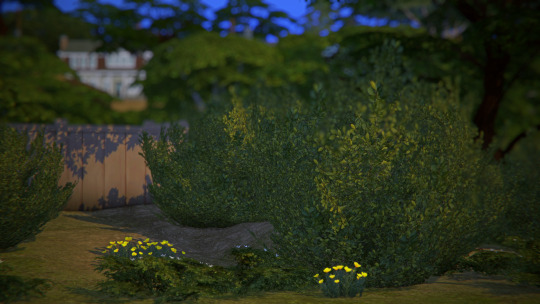
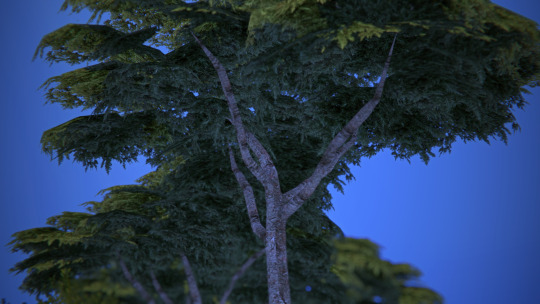
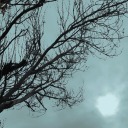
Replacement of vegetation in the city of San Sequoia
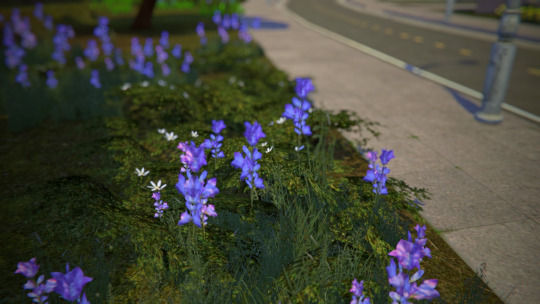
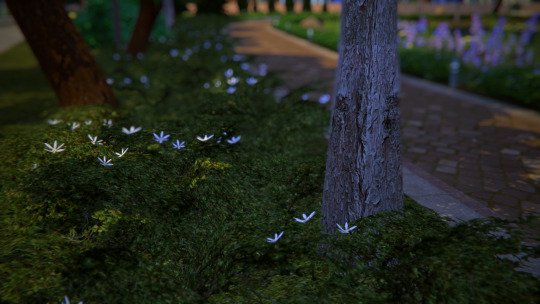
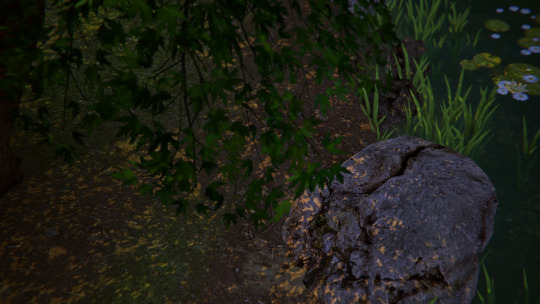
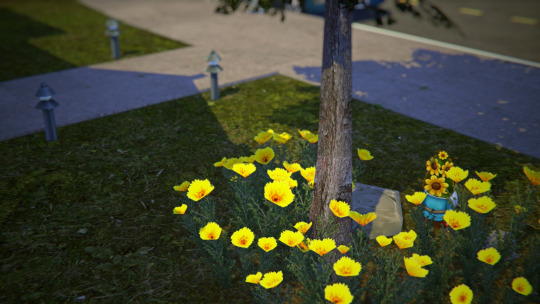
It's been three years since I released my latest vegetation replacement mod. And so, now I am pleased to present you my new project: Vegetation replacement in the city of San Sequoia. This mod will replace 80 percent of the trees and plants and stones in the city. Texture sizes: 512, 1024, 2048px For a more beautiful picture, it is recommended to use reshade. Have a nice game experience
Recommended to use with my other replacement mod
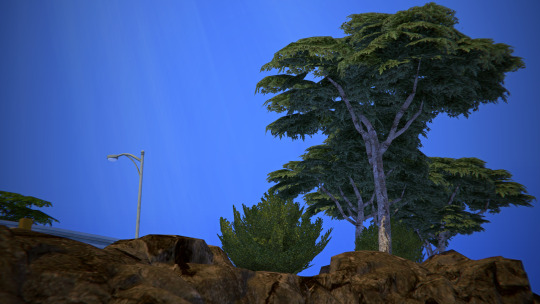
DL or DL
#ts4#TS4 SCREENSHOTS#ts4 picture#ts4 simblr#ts4 screenies#ts4 custom content#ts4 cc#ts4 cc alpha#ts4 cc download
472 notes
·
View notes
Text
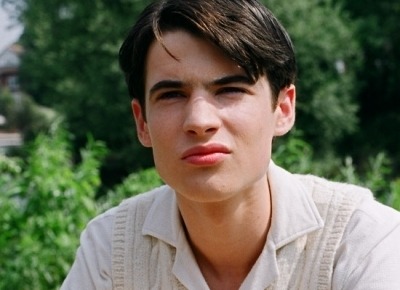
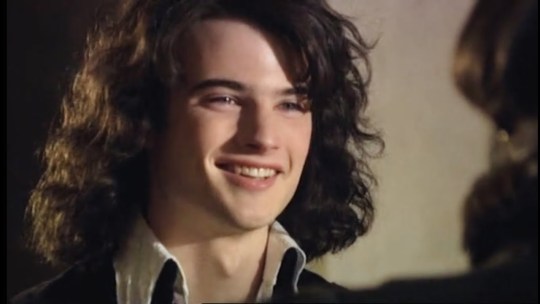
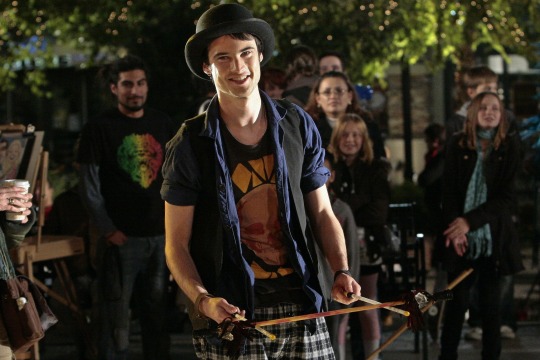
Tom Sturridge Movie Masterpost
Hey you guys!
So if something like this already exists, please let me know, but I am not aware of anything like this, so...this is a masterpost to share all the Tom Sturridge movies with you guys that I own.
If you have any of these movies to share, please let me know, I would love to include the links in here, in case any of the stuff gets taken down.

gif by tsintotwo
This is very much a group project , feel free to contribute and share, so new fans may have the opportunity to see some of these :3
Recent Updates:
added backups for "Sweetbitter" & "Irma Vepp" thanks to @wintersmitth ; added link to "Like Minds" thanks to @mysticalya ; added audible audio book version of "Sea Wall / A Life"
added "Hollow Crown" thanks to @peageetibbs
added "A Waste of Shame" thanks to the generosity of @thelastdayalive
added "Vanity Fair", "Being Julia", "3 Way Junction", "Skin" & "Irma Vep" thanks to the generosity of @peageetibbs
added MEGA back-up for "Far from the Maddening Crowd" and "Velvet Buzzsaw"

Vanity Fair (2004)
resolution unknown | online stream
link
Being Julia (2004)
resolution unknown | online stream
link
not me looking at these pics just going "look at the BB! bb bb bb bb bb bb" in tones only audible for dogs x.x
A Waste of Shame (2004)
720 x 576 | 1.3 GB
google drive

Like Minds (2007)
resolution unknown | online stream
stream over tubi with US VPN

The Boat That Rocked (Pirate Radio | 2009)
1940 x 814 | 2.48 GB
google drive
Waiting for Forever (2010)
1920 x 1024 | 1.51 GB
google drive
Junkhearts (2011)
640 x 346 | 383 MB movie is smol potat like me uwu
link | google drive

On the Road (2012)
1920 x 816 | 1.86 GB
google drive
Effie Gray (2013)
1920 x 800 | 1.64 GB
google drive

Far from the Madding Crowd (2015)
1920 x 800 | 1.65 GB
google drive ; MEGA
Remainder (2015)
1920 x 800 | 1.72 GB
google drive ; youtube
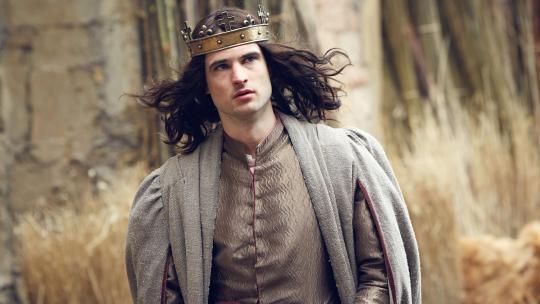
The Hollow Crown (2016)
resolution unknown | online stream
link 1 ; link 2

Song to Song (2017)
1920 x 800 | 1.96 GB
google drive
sidenote: idk how much he is this movie, so if not a lot, I am sorry x.x
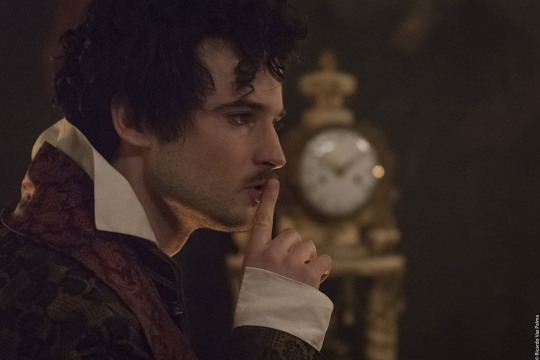
Mary Shelly (2017)
1920 x 800 | 1.92 GB
google drive
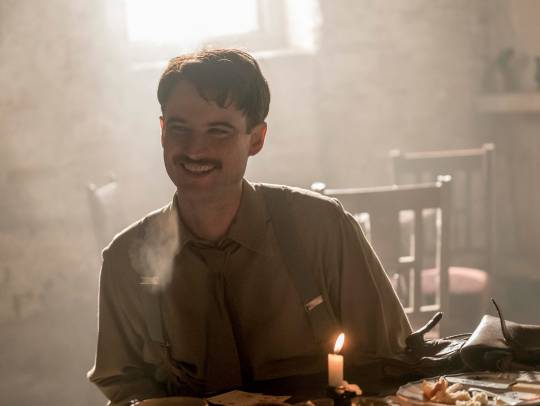
Journey's End (2017)
1920 x 800 | 1.73 GB
google drive

3 Way Junction (2018)
resolution unknown | online stream
link
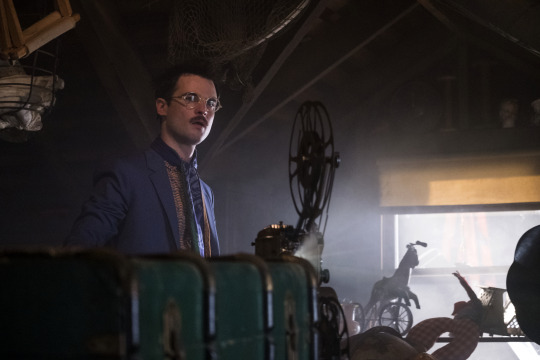
Velvet Buzzsaw (2018)
1920 x 1080 | 2.35 GB
google drive ; MEGA

Sweetbitter (2018-2019)
1920 x 1080 | 9.84 GB (S1); 15.8 GB (S2)
google drive | MEGA backup: season 1 ; season 2
Skin (2019)
resolution unknown | online stream
link

Irma Vep (2022)
resolution unknown (online stream) | 6,66 GB
link 1 ; link 2 | MEGA
Theater performances

Sea Wall / A Life (2019)
google drive
1h 22min | 75,5 MB; mp3
TW: child death & related trauma in "Sea Wall"
This is all for now, I know I'm missing a lot of stuff, if you have any links or movies you host, feel free to share!
#tom sturridge#tom sturridge movies#junkhearts#the boat that rocked#sweetbitter#on the road#far from the madding crowd#velvet buzzsaw#song to song#effie gray#mary shelley#remainder#waiting for forever#journeys end#irma vep#skin#3 Way Junction#being julia#vanity fair#like minds#sea wall / a life
523 notes
·
View notes
Text

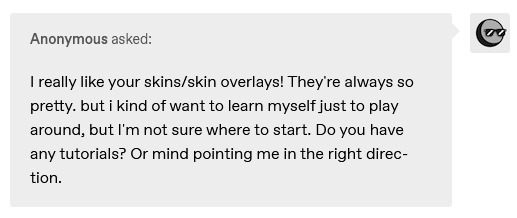
i didn't have a tutorial yet... so i made one lol. its longer than i wanted it to be, but i wanted to make sure it's easy to follow for people who've never made cc or have no experience with photo editing software, and fully explain my process. it's by no means hard at all though lol, i guarantee you making skin details is the easiest thing aside from recolors and if you want to learn this is a good place to start :-)
for people who are more experienced than that, and want to know specific things-- i've sectioned everything so it should be easy to skim through until you find what you need!
requirements.
this tutorial will only require sims 4 studio (free) and photoshop (not free) or gimp (free). i pirated photoshop 2022 myself. any version will do but i think 2022 just has nice new features for making content! if you don't want to buy or pirate, gimp is a similar alternative.

1.1 how to find skins to use as a base.
in case you don't have (a) skin(s) in mind to use for your skinblend, my tip is to download as much random ones as you can find. this way you have a lot to choose from and it's easier to get an idea of what you want.
go-to creators for maxis match skins: heihu, madmono, pyxiidis, faaeish, miikocc, emmibouquet and stretchskeleton.
creators for maxis mix/alpha skins: sims3melancholic, obscurus, ddarkstonee and pralinesims.
creators for maxis mix/alpha skins that only allow editing for private use: northernsiberiawinds, remussirrion and thisisthem.
go into cas and try them all out. if you like a part of a skin, write down which skin it is and what part(s) you want to use of it from which swatch if it has multiple.
for example, i almost always use one or two skins for just the nose shape, one for the eyebags, one to three for the lips and one for the basic shading of the face. don't be afraid to use the opposite style skins of what you're going for, you can always add or erase details.
1.2 exporting the skins.
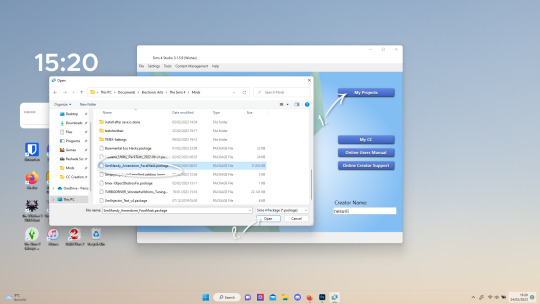
now we're gonna export the skins with sims 4 studio. click on "my projects" (1) and navigate to whereever you have the skins you want to use, and select one and click "open" (2).
the colored little boxes in the top right are the swatches. click whichever swatch you wanted to use something from (1), then click the "export" button (2). you'll get a window to save the exported skin now.
tip: i highly recommend making an organized folder for your skinblend, to have all your files together and easy to find. if you haven't made it already you can easily do so within this window.
i put mine in a folder called "resources" in a folder named "unnamed skin" for example.
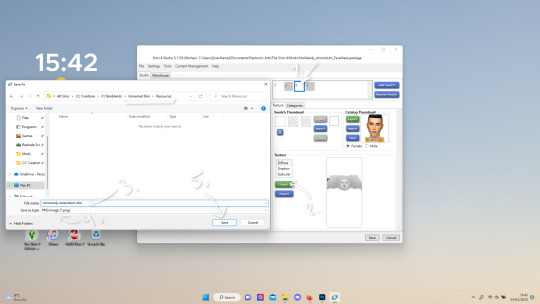
name the exported skin file (3) and make sure the "save as type" is set to .png (4).
after saving the file, you can just click "cancel" on the bottom right to go back to sims4studio's starting screen. if you have multiple skins you want to use, repeat the above process for all the other skins to export them too.

2.1 opening the exported files in photoshop/gimp.
open your program of choice and click on "file" from the top bar (1) and then "open..." and navigate to the skin files. you can left click and hold down your CTRL key to select multiple at once to open.
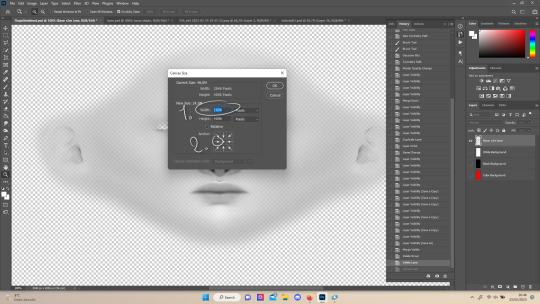
we have to layer them all in one file, but before we do that we have to check if they're all the same size.
note: some skindetails might be 2048x4096, others may be 1024x2048. unless you want your skin to be compatible with the HQ mod, you should just opt for 1024x2048, as without the mod both resolutions look identical. the bigger one will just make your fize unnecessarily large.
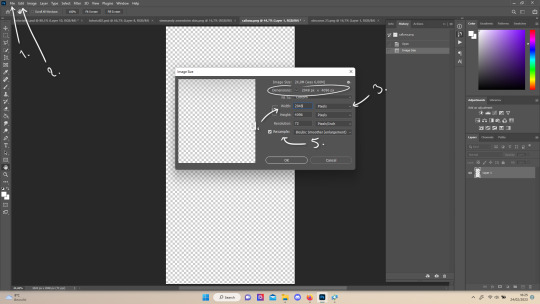
click "image" at the top bar (2), then "image size". it'll say the size at dimensions. if it's at the size you want it to be at, just exit the window.
if you need to edit it, select "pixels" from the dropdown menu (3), and put in 1024 for width and 2048 for height OR 2048 for width and 4096 for height. if you're sizing up select "bicubic smoother (enlargement)" under resample (5).
repeat this for every skin you opened.
2.2 layering the skins together.

copy and paste all the skins individually onto one by selecting them with CTRL + A and CTRL + C on your keyboard, and pasting them into one of the other opened skins with CTRL + SHIFT + V. you can then close all the other tabs.
the file now has multiple layers. you can rename them by double clicking the layer name. this makes it easier to keep track of whats what. you can reorder them as well by dragging them with your mouse. put the skin you want to use as base (for the general facial shading, highlighting) at the bottom.
tip: i recommend making all white and all black background layers to see the skins better. you can do so by pressing D, then CTRL + SHIFT + N. for the white layer then press CTRL + BACKSPACE and for the black layer repeat the first two steps and then press ALT + BACKSPACE. now there should be two new layers in black and white. drag them to the bottom of the list. i prefer using white so i put black last.
2.3 changing the opacity in parts of the base skin layer.
to make ea's preset details (cheek/nose bridge sharpness, dimples) come through your skinblend, you need to change the opacity of the base skin sometimes. alpha skins tend to be fully opaque but maxis match skins are usually already transparant enough.
hide all the layers aside from this base layer by clicking the eye icon next to the layer names. you can see the transparancy with the visibility of the grey-white blocks or if you find it easier you can also unhide the black background to see it instead.
to change the opacity, you can either edit the entire layer's opacity (1) or use the eraser tool (E key) to add transparancy at specific parts.
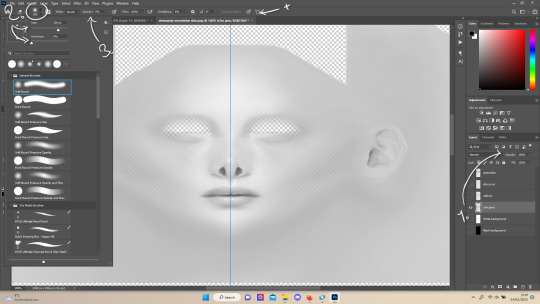
if you have photoshop 2022, turn on vertical symmetry (+). if you don't have it, you can choose to edit only one side of the skin and mirror it later or do both sides and embrace some asymmetry.
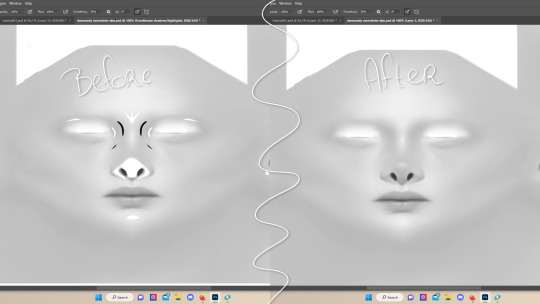
i selected the eraser (2) and set the brush size to about 200px and 0% hardness. the opacity of the brush i set to about 10% (3). i used the eraser on the lower cheeks, the nose bridge and tip and the bottom of the chin. i also erase the upper eyelid 100%, cause i prefer to have eyelid freedom :p. it then looks like the above! this will very subtly let through details, if you want more you should make it more transparant.
2.4 optionally: editing out freckles, pores and/or eyelashes.
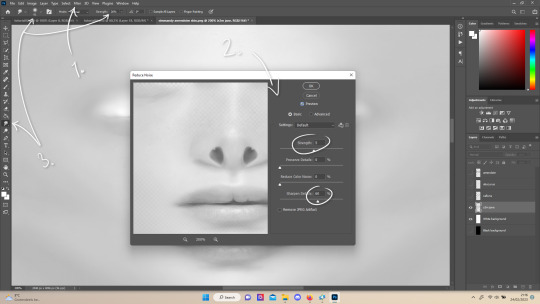
your base may have pores, freckles or moles you want to get rid of. to smoothen everything at once, click "filter" at the top bar (1), "noise" and then "reduce noise". i only edit the strength and sharpen details setting (2), this setting erased the pores and most of the freckles for me while keeping the details looking sharp, but you likely have to adjust it a little cause it depends on how large/fine the details are.
the remaining freckles, pores and eyelashes i remove by using the smudge tool, with 0% brush hardness and at 25% strength. (3) brush size depends on the size of the details. i just go over it in circular motions until the freckle or whatever it is has been blended away without pixelation.

for this part i'm going to only show how i do the nose as an example, however it works the same for editing in eyebags, lips, jaw lines or whatever you want to add in too.

unhide the layer of the skin you want to use a part of, and hide the base layer.
if you are going to use multiple parts of that skin (for example, you want both the nose and the lips of that skin), duplicate the layer by right clicking the layer name and choosing "duplicate layer...". then hide the duplicated layer. it's easier to edit one part at a time.
use the selection tool (M) to select the part. press CTRL + SHIFT + I and then DELETE. press CTRL + D to unselect. should look something like the above.
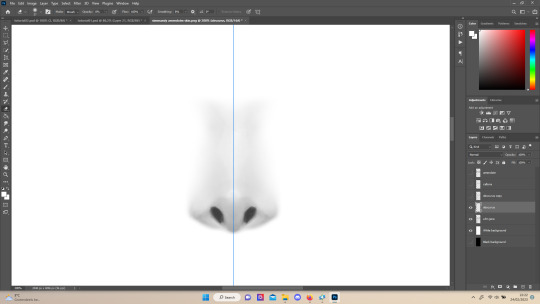
use the eraser tool (E) at a moderately small size like 30px~ with about 30% hardness and 100% opacity to erase around "hard lines", like the nostrils in this case and the bottom of the nose. the nose bridge has "soft lines", so if you were to use a hard brush for that, the shading of the nose bridge would look far too harsh and unblended.
for the soft lines, set the eraser tool at a bigger size like 100px~ with 0% hardness and a lowered opacity between 15-45%. erase soft lines "gradually", so the shadows blend in with the layers underneath it. should look something like the picture above.
always look at the newly added part with both a black and white background to see if there's anything you need to erase more. then look if it blends in properly with the layers underneath. if it's too dark or light, you can click on "image" on the top bar, then "adjustments" and "brightness/contrast", and lower or raise the brightness until it blends in better.
i'm using two separate skins to make the nose, so i've repeated the process above for the second nose skin, then used the method of step 2.3 to erase certain parts and make other parts more transparant / blended in. as you can see above, it's now the perfect offspring between the two noses i used.
note: for a maxis match nose, you'll want to avoid a completely opaque nose, mainly at the nose bridge it should be more transparant. i always make sure the lips and eyebags are fully opaque though, unless you're going for a vanilla type of skin it doesn't look good transparant.

at this point, i like to save the file with the white background layer on and see what it looks like in sims 4 studio. this gives you a better idea of what it looks like on sims and what you may want to change or add. press CTRL + SHIFT + S and name your file, and set the file type to .png.
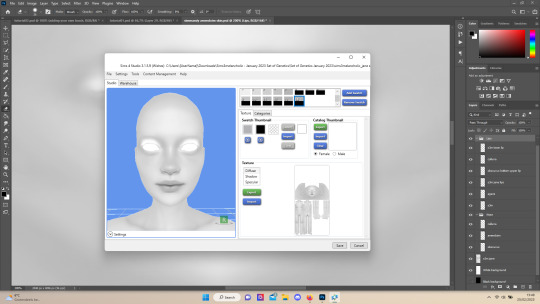
open any skin or skin detail cc file just like in step 1.2, and instead of exporting anything, click "import". now navigate to the file you just saved, and open it. the sim model now displays what your skin looks like. should look something like the above! you can click cancel after you've looked enough, so you don't have to worry about ruining the original cc file.

maybe you're happy with the skins current state... but in case you want to add or change some things, here's a step by step how i do it.
5.1 drawing shadows & highlights.
as you probably have noticed, everything needs to be done in greyscale, so select black (for shadows) or white (for highlights) in the top right colored box. make a new layer (CTRL + SHIFT + N). select the brush tool (B) and set the brush at about 0px with 100% opacity. draw the shape of the shadow or highlight where you want it. make sure to make a new layer for every shadow and highlight!
now you can either use the smudge tool to blend it out, but i prefer using "filter" from the top bar, "blur" > "gaussian blur". i just play around with the radius until it's blended out but still has some shape to it. it depends on how small or wide and blended you want it to be.
then i use the eraser to shape the shadow/highlight further. for example, i want the shadow in this case more blended out towards the eye, but harder towards the forehead and nose, so i use the eraser on that side. lastly i change the layer opacity to make the shadow/highlight less dark/light. my preference lays with subtle details, but of course you can make it as contrasted as you like!
5.2 drawing small details.
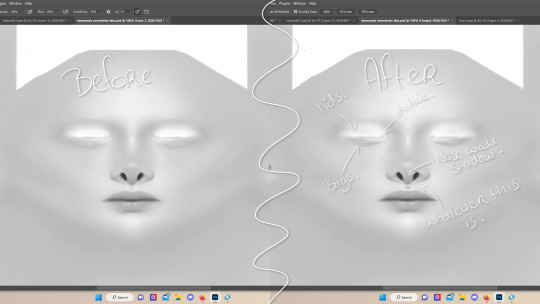
to draw your own details, use the brush in 1-3px brush size, 100% opacity in black. i can't help you here cause it's just drawing where you want and then blending it out with the smudging or blurring tool where needed, and using the eraser at lower opacity to blend it in.
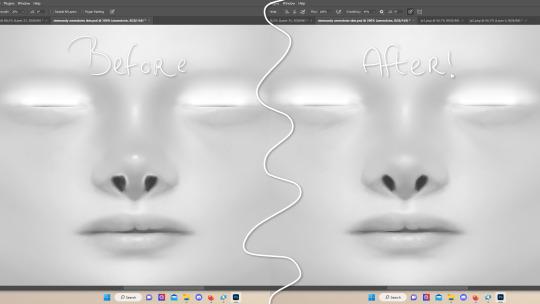
to give you some ideas, i usually draw some details on the nose like sharper nostrils or a nose wall, some texture on the lips and the eyebags. i like using reference pictures of real peoples skins to see where and how to draw things. before and after pictured above! (i'm so proud of these eyebags yall T-T)
5.3 adding other creators cc skin details.
if you don't like drawing things yourself or know just the right cc skin detail your skin needs, you can also use other creators' skin details on yours.
maxis match + mix details: pyxidis about face, miikocc face kits, okruee face details, sammi-xox face details, lamingtonsims face details.
maxis mix + alpha details: detail overlays by obscurus-sims, ddarkstonee & sims3melancholic
like in step 1.2, just open the file in s4s and export whatever swatches you want to use. remember to make sure the resolution of the file is the same as your skin's before copy and pasting it on your skinblend! and remember you can lower the opacity layer for these too.
5.4 mirroring your skin.
if your skin isn't mirrored/symmetrical yet, save your file as a .psd and then right click the layers, click "merge visible", press CTRL + ALT + C, and set the canvas width to half what it is now (either 1024 or 512). (1) click the arrow in the left middle if you want to mirror the left side, or the arrow on the right middle for the right side. (2) press "ok".
press CTRL + A, then CTRL + X, then CTRL + SHIFT + V. delete the layer beneath the active one (it's empty). then press CTRL + ALT + C again, and put the canvas width back to the original (2048 or 1024). select the same arrow you selected before, and click "ok".
press CTRL + A again, then CTRL + C. now click "image" from the top bar, "image rotation" and then "flip canvas horizontal". now press CTRL + SHIFT + V .... and voila, your skin should now be mirrored.
note: ik there's a ridiculous amount of steps for such a simple thing so i feel like there's probably a much faster way to do this, but i hate following tutorials and guides (the irony) so this is just the way i taught myself lmao
5.5 last test & optional last touches.
at this point, i'm done with the skin. i erase everything aside from the face if the skin still has a full body texture cause i prefer face-only skinoverlays. i always save as .psd and .png, .psd is to edit it later on if need be. once again import your skin into s4s like in step 4, and see if you're happy with the skin. if not, just keep editing whatever you need!
i also like to add alternate versions of the skin lastly here. some examples: a soft nose or hard nose bridge (justice for flat soft noses, simblr loves to erase them lol), different eyebags, lighter or darker lip option, version with eyelid overlay or without.

6.1 creating the package file.

to make the package file for your skinblend, open s4s and select "create cas standalone" and then click "cas". (2) now select "skin detail forehead" from part type (3), click the most left forehead wrinkle and click "next" (4). name the skin file whatever you want, you can always change it later!
click "import" and open your skin file. and voila! you're pretty much done!
6.2 editing the age, gender & occult flags and category.
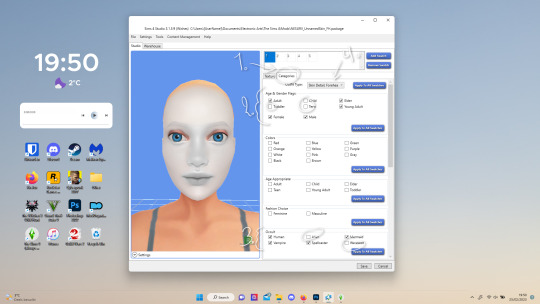
right now your skinblend is only available for young adult to elder sims, and not for aliens and werewolves, so you probably want to change this. go to "categories" (1) and check the boxes you want under "age & gender flags" and "occult" (2). you don't need to change any of the other things.
if you wish to change the skin detail slot it's in, you can change it at "outfit type". most people use either forehead or mouth crease, but you can use any of the ones that start with 'skindetail'.
6.3 adding swatch colors, thumbnails or additional swatches.
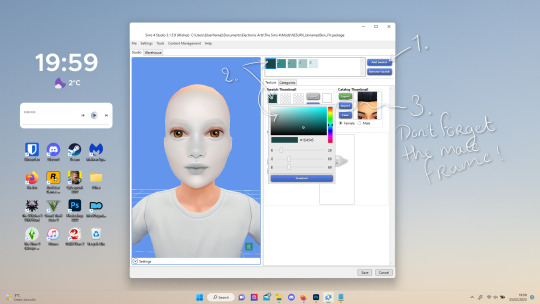
if you want, you can add multiple swatches (1). you can also edit the color of the swatches (2) and upload a custom thumbail with 104x148px resolution (3), make sure to upload for both male and female frames.
6.4 editing the sorting layer.
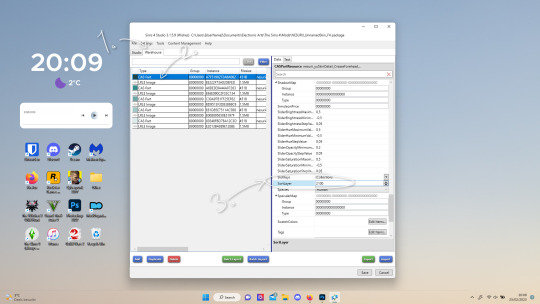
it's not the end of the world if you don't do this, but you may run into some skin details or freckles/moles that won't display on top of your skinblend if you don't edit it :).
click on the "warehouse" tab (1), select the first "cas part" (2). scroll down on the right to find "sort layer" (3) and put in 2100. you're gonna want to change this for each cas part individually.
now just save your file... and try it out in game!
if you need any help or have any questions please comment below <3 feel free to tag me in the end result if you want too.
(my end result)
242 notes
·
View notes
Text
hello. remember me?
so ive been away a long time. i started this blog before i started university and now im about to get my bachelor's in linguistics. now that ive reached the end of my course, i know so much more about linguistic theory and structures than when i started and my mind is overflowing with ideas. now that i have a bunch more free time, ive decided to start work on this project again, and that includes pretty much starting this blog fresh and redoing the entire language (not like i had much to begin with anyway) except for some words that have stuck.
some ideas and plans i have at the moment:
im renaming the language, havent decided what though. ive also redone with phonetic inventory
i want the language to feel block-buildy to reflect the nature of minecraft. therefore this language will be highly agglutinative (many morphemes per word) and will contain complex predication
there's 16 light verbs that will combine with ~32-64 coverbs (havent decided how many), resulting in a total of 512-1024 predicating elements
light verbs will contain tense prefixes as well as the subject suffix
coverbs with contain aspectual/modal prefixes as well as the object suffix
im planning on figuring out if i can have no adjectives in this language, because why not. adjectives will instead be expressed by be/have + [noun], e.g. "happy" = "have happiness". i havent fully decided yet though
there will be a rudimentary noun class system. animate (human/non-human), inanimate (wood, sand, stone, plant, water) and abstract. i havent fully fleshed this out just yet but it may be some kind of definite article situation.
there will be final-consonant mutation depending on the proceding phone -- inspired by the same process which occurs in the bretonic and celtic languages
pronouns are expressed as a clitic that occur as a suffix on verbs (how they will be conjugated), prepositions (to express "to me" or "for me", etc) and directional words ("toward me", away from me", etc). maybe more if i can find more room for them
a proprietive morpheme that will express "with" (much like an instrumental case) and a privative morpheme (without). this will also function like an archaic locative morpheme. e.g. "a bird is in the tree" will be something like "tree.PROP bird exist=3P.SG.ANIM"
anyway, thats what ive been thinking about for the past week. hope youre all well :]
48 notes
·
View notes
Text
This time of day was his favourite. There was something nostalgic about it. He used to spend a lot of time in the palace gardens with his mother, talking for hours, not noticing time passing until the light started to fade.
While Thor was off with his friends, Loki stayed behind with his mother, and she gave him lessons in gardening.
...
Settled on the timeline with Mobius, Loki thinks about how far they've come.
Words: 1024, Chapters: 1/1, Language: English
Rating: General Audiences
Archive Warning: Creator Chose Not To Use Archive Warnings
Category: M/M
Fandom: Loki (TV 2021)
Relationship: Loki/Mobius M. Mobius
Additional Tags: Fluff, Domestic Fluff, Gardens & Gardening, Language of Flowers, Mentioned O.B. | Ouroboros (Loki TV), Mentioned Casey (Loki TV), Mentioned Frigga (Marvel), POV Loki (Marvel)
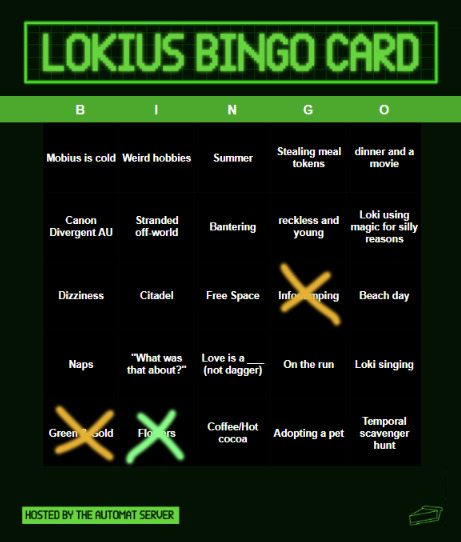
written for the @lokiusbingo event!
bingo card under the cut:
12 notes
·
View notes
Text
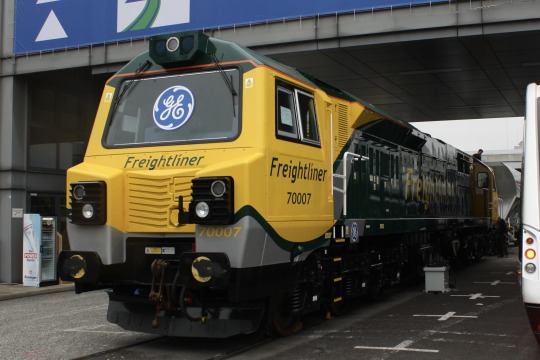
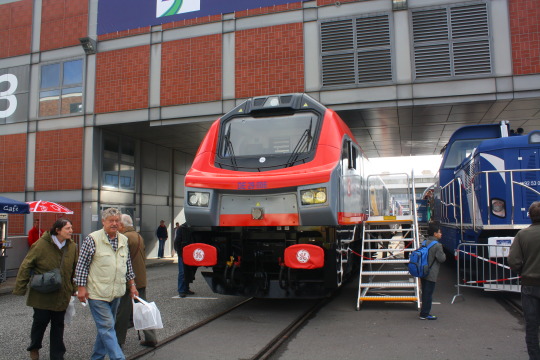
GE PowerHaul
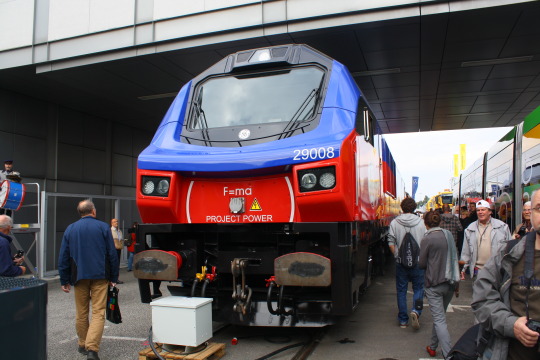
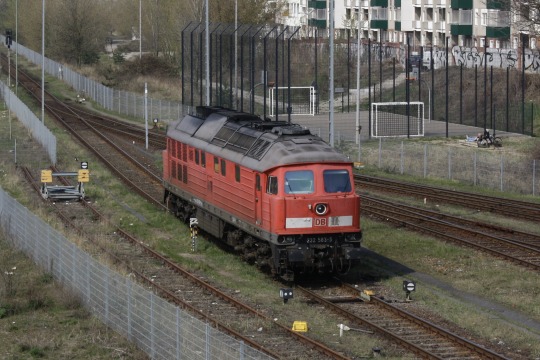
After I offered, @valtionrautatiet-official asked me to post some pictures of the locomotive that is nowadays known as the Dr20, used by the private freight operator North Rail in Finland. Here it is in 2012, long before anyone ever even considered sending it to Finland, in Berlin. The reason that it's in Berlin specifically is that it's at Innotrans, the biggest trade fair and exhibition for railroads that exists. At this point it had the paint job of HHPI (Heavy Haul Power International, despite the important sounding name really just one of many European freight rail companies with headquarters in Germany), with their trademark blue and red and their company policy of putting Newton's second law on it. "Project Power" also sounds cool, doesn't it? Well, it turns out they never entered service for HHPI. Way too much history under the cut.
The story behind these eight locomotives is weird and opaque, and there is a lot of stuff we may never know, but on a very fundamental level it seems to be one of the victims of what I call the six-axle diesel curse. This basic of that theory of mine is that it's impossible to sell big, heavy, powerful diesel locomotives, the kind that are so powerful that they need six axles for all the weight from their big engine and diesel tank, in (West) Germany and to a certain extent central and Western Europe, at least nowadays, unless you do it by accident.
The German locomotive industry has wanted to build big six-axle diesel locomotives since the end of steam traction. There was a prototype six-axle version of the V 200, named V 300, in the 1950s, but DB didn't want it (a related but less powerful version was sold to Yugoslavia to haul Tito's private train). For the Americans here, the Krauss-Maffei locomotives of the Southern Pacific and Rio Grande were related to that.
A few years later, in 1962, we get the V 320, a six-axle version of the V 160 locomotive family. The four-axle version was very popular and is still in service, but they only built the prototype of the six-axle version. Interestingly, that one prototype is still around as well, hauling construction trains. Deutsche Bahn was never interested, they preferred the flexibility of having more smaller units. And anyway, they were busy electrifying the busy main lines that would have made the most use of those heavy machines.
In the 1970s Henschel and BBC (the electric equipment one, not the British TV one) built three copies of the DE 2500 both with four and six axles, but those were really more experimental machines.
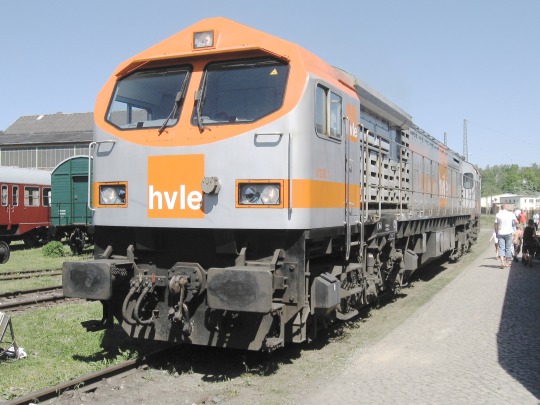
In the late 1980s and early 1990s, MaK tried to sell their DE 1024, and I actually have a picture of that ne.
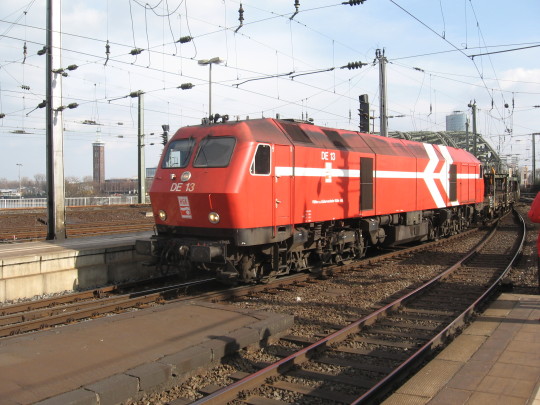
They built three prototypes, and Deutsche Bahn seemed to genuinely toy with the idea… but in the end it was decided to electrify the lines in the (mostly flat) north that hadn't been electrified yet anyway.
And at the same time, the wall fell, and suddenly Germany had access to all the locomotives of the east, now mostly surplus since mostly the industry they served did not survive the transition to western markets. East Germany had bought powerful six-axle diesel locomotives in enormous numbers from the Soviet Union, specifically modern-day Ukraine, and those were available, good enough and already paid for. In particular the class 232 and related, known as "Ludmilla" among rail fans, have proven very useful.
MaK was able to sell an altered version of that locomotive to Norway, but that turned out to be be a huge disaster as they developed a habit of catching on fire. Eventually Siemens (who briefly owned MaK) had to take them back, and since then they've changed hands an astonishing number of times - apparently right now Hector Rail and RDC Autozug have a lot of them. Here's one in Hamburg Altona when it was used on regional trains there.

The three prototypes went to locally owned operator HGK, where two of them also burned down. DB probably dodged a bullet there. Interestingly enough, the only one that didn't burn down was number 13, but that was finally scrapped a few years ago.
In the mid-1990s, ADtranz (later Bombardier) and GE got together to build the Blue Tiger locomotive, a very distinctive-looking and noisy machine. They sold 11 to various private operators in Germany, 30 to Pakistan and 20 to Malaysia. Not terrible, but not a huge success either.
But in the 2000s, things were changing. Liberalisation meant that more and more companies were running services all throughout Europe. The busy main lines were electrified, but many of the border crossings weren't yet, so there was a new need for big six-axle diesel locomotives.
The big beneficiary of this was EMD from North America, who were already supplying such locomotives to Great Britain. The rail companies there needed these machines to replace unreliable British-built power, and to replace environmentally friendly electric locomotives, because most of the British network is not electrified and the few sections that are have way too much traffic on them.
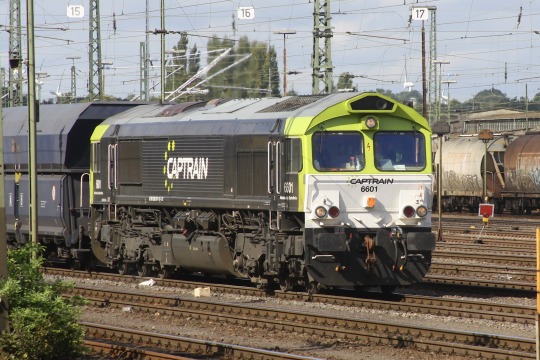
The Class 66 is an ugly mess, designed by figuratively building a metal shed in the inside of a tiny British rail tunnel. It's so noisy that drivers in Norway get hazard pay for being in them. But it works and it was mass produced, and a lot of them made their way to the continent in short order.
Other companies wanted in on that business. Voith decided to enter locomotive building after previously supplying traction equipment. They had high hopes for their Maxima series of locomotives, which they started building in 2008, and they had their own leasing company. They did a lot of marketing and the machine won prestigious design awards.
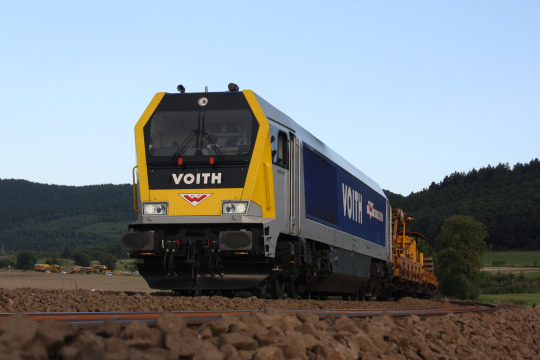
At one point they had a hundred pre-orders. In the end their own leasing company folded, and they only built twenty, which they didn't even manage to sell that quickly. Nowadays they've stopped producing locomotives again.
General Electric, the other North American locomotive company, wanted in on that action as well. Sure, it hadn't worked with the Blue Tiger, but years had passed and things were different now. For their new product, the PowerHaul, they decided to follow what EMD had done. They started with the class 77 for the British market, first shown at Innotrans in 2010.
Then they wanted to work their way out to wider Europe, with a special continental version that was designed with a bigger shell to match the larger tunnels on the continent. That way they weren't quite as cramped. EMD had considered a similar idea, a European-sized class 66, but decided against that.
GE also did not intend to make them themselves. Instead after the initial batch of British 77s, they transferred production to their Turkish partner Tülomsaş, who supplied some more British ones and the ones for central Europe. 29008 is one of them.
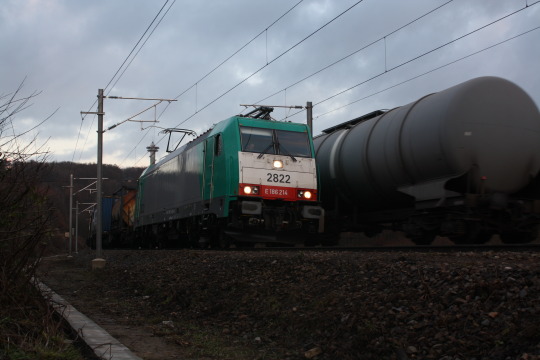
In the end all of these plans fell through. A lot of the international border crossings did get electrified much quicker than the diesel sellers had hoped. The one near where I live, the Montzenroute, started electric running in December of 2008, and it was actually the makers of electric locomotives who made bank off of the new international railway world. Here is a Bombardier TRAXX electric locomotive during the first week that freight trains from Germany to Belgium were running with electric power, just a few hundred meters from the border.
But the business changing is one thing, the story of the PowerHauls seems to be even more complicated. After all, GE did have a launch customer for their PowerHaul, in the form of HHPI. The locomotives were built, painted in HHPI colors, and tested. And then… well, nothing. They never entered service, instead sitting for years in Cottbus, Germany. I have no idea whether they ever got approved for service in Germany. Finnish Wikipedia says "HHPI had no use for them", but that sounds like a euphemism. Clearly HHPI had some use for powerful locomotives, they've recently taken delivery of some Stadler EuroDuals.
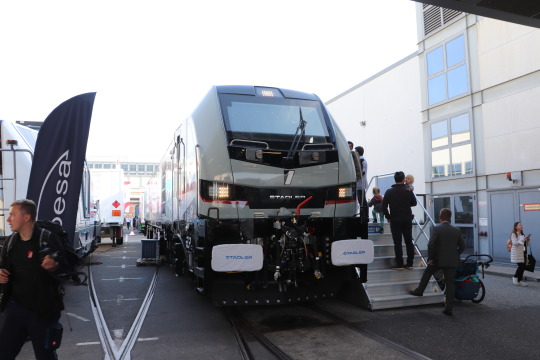
The EuroDual and the closely related Euro9000, pictured below, seem to be the solution to the six axle diesel curse though the conceptually simple but technologically difficult trick of simultaneously being a very powerful electric locomotive as well. They have already delivered more of them than Voith Maxima, GE Blue Tiger and GE PowerHaul combined. Sorry for the pictures, they don't park the locomotives well for good photos at Innotrans.
Also, GE was not able to find any customer in Germany, nor in Sweden, where some units of that type were tested at some point. Locomotives of that type were built for Turkey, though, and I haven't heard anything negative about them there. Those were also at Innotrans, in 2014.
And then, years after everyone had forgotten about these machines, they suddenly turned up in Finland, in the hands of North Rail (formerly Operail), one of the few private companies there. That required at least new couplings, new axles (Finland has a different rail gauge, the measurement of how far the rails are apart), probably adjustments to the breaks, new train control systems and so on.
It's possible that North Rail was thoroughly convinced by the advantages of GE's concept or something, but I think it's far more likely that they just got a really good deal because GE was happy someone took them off their hands.
The reason they're in Finland is almost certainly that Operail needed some cheap machines that weren't doing anything, and these units were just that. But why were they not doing anything? Why were these machines doomed to sit in Cottbus for years, essentially still in new condition, painted for an operator that didn't want them? I'm sure you'll find plenty of theories if you look on online forums, and it's even possible that one of them is the truth, but unless some rail journalist decides to really dig into that, we'll probably never know for certain.
If you allow me to speculate: It certainly doesn't sound like a success story, and there have been all sorts of other stories where trains didn't get approval to run in the country they were ordered for, or had severe technical defects. Ask an Austrian rail fan about the Talent 3, a danish about the IC 4 or a dutch or Belgian about the Fyra to get some really fun rants. I don't know if these locomotives belong in that hall of shame, but it would certainly be an explanation.
My guess is that there won't be any more of these machines ever. GE Transportation doesn't even exist anymore, the whole part of the business got sold to Wabtec a few years ago. But if these machines are doing well in Finland now, good for them! Finally someone found something to do with these weird-looking units.
16 notes
·
View notes
Text
DevBlog Abridged #2 - Locations and World Building
Architecture & Set Design
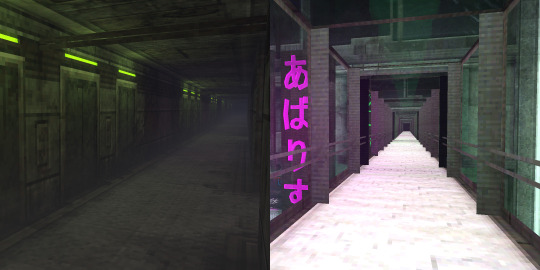
By creating a teaser as the first major step in the project, we were tasked early on with the need for a diverse range of locations that hinted at the scope of Sydney3 and the world in which the series would take place.

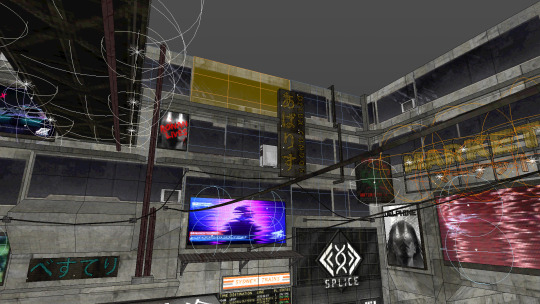
The future of 20XX is one dominated by pollution and sprawling cityscapes, a decision that bleeds through every facet of the location design. Even with the neon and splashes of colour, we made sure that every location had a certain level of grime and haziness to reflect the state of the world.

The architecture followed a brutalist base with hacked-together corrugated awnings and piping. Drawing inspiration from Ghost in the Shell (1995)—and, by extension, modern-day Hong Kong—we aimed for a densely-packed, functional labyrinth of residential and commercial dwellings all rolled into one.
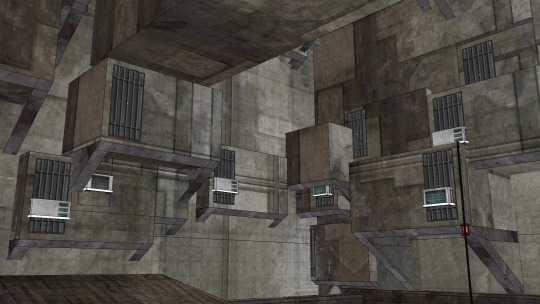
PlayStation games of the mid-to-late 90s utilised low draw distance coupled with dense render fog, but we needed to have extensive, expansive sets for the camera to shoot in. In addition, the angles were oftentimes low, showing much more of the ceilings and skies than would otherwise be necessary in a PS1 game.
Textures and Lighting
Although the original PlayStation only allowed up to 256² pixels for texture maps, our building faces were much more complex than cubic, flat walls. With diagonals, protrusions and chamfered geometry, we needed the flexibility of higher numbers without modernising the look.

We had no real upper limit on texture size, so a series of grey checkered images were created with varying sizes (32², 48², 64², 96², 128², etc.) up to 1024² to determine the scale needed for a particular building or design element. Once a texture’s pixel size looked good in-universe, the other textures’ sizes would be based on that to maintain consistency.

Some environments—mainly those with windows or glossy surfaces—called for more advanced texturing including reflections and luminance. For the most part, textures were colour/diffuse/albedo channels only, with lights in close proximity to simulate global illumination or light sources. However, reflections added a lot of depth to an otherwise confined space, allowing more room for the eye to explore.
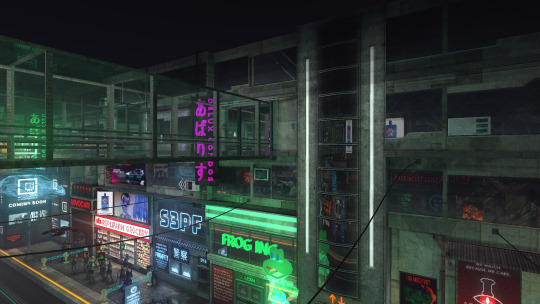
Extreme reflections were also sometimes used for simple set extension, but it was never noticeable unless you were looking for it.
The Next Step
What do you think of these older Dev Blogs being posted here, do you want to see more? If there's interest we'd love to keep doing more of them, but don't forget these are just abridged versions of our blogs which can be found on Patreon.
Thanks for reading!
#samurai unicorn#ps1 graphics#psx#indie dev#game dev#indie games#video games#devblog#behind the scenes#cyberpunk
84 notes
·
View notes
Text
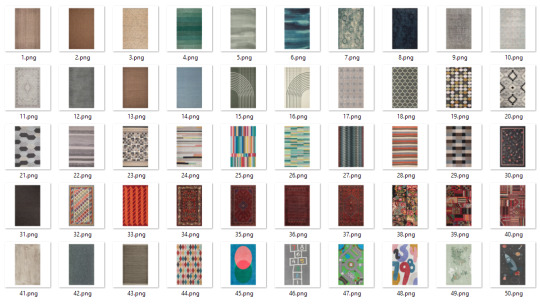
RUGS RUGS RUGS - Part 1
I love rugs and I never have enough of them, especially in the styles and colors than suit my taste. So I made me some (a lot) and decided to share. There will be several parts to this project.
This first part features rugs from Ikea (mainly) and H&M put on Isotopia (50), Ikea PS (2) and ULDUM (6) rug meshes. Texture size is 1024 pixels because I don’t like rugs that look like a blurry mess, especially on resized meshes by @deedee-sims and @littlelittlesimmies. You can find resized ULDUM and Ikea PS rugs here and here, they are by @littlelittlesimmies.
For the three simlish kid’s H&M rugs I also used Lorem Ipsim font by @simsinlowspace 💙
Lazy swatches!
Isotopia:
ULDUM:

Yes, there are two of the same textures for Isotopia and Uldum. Just only keep the version you prefer. Or both. Or none.
Ikea PS:
Compressed, swatches included, file numbers correspond to numbers on swatches.
Part 2 is here
Part 3 is here
Part 4 is here
Part 5 is here
Kids edition is here
Download at SFS
#s2#s2cc#bytvickiesims#rugs#rugs recolors#uldum#uldum rug#ikea ps#ikea ps rug#isotopia#isotopia rug#ikea#h&m#hm
184 notes
·
View notes
Text
New age swap fic!
Arataka is very curious about ex-Claw Mob, and becomes pen pals with an inmate.
Starts off 1024, will end I think 1328 or 1428, the 2nd draft is done but the pace is up in the air still.
9 notes
·
View notes
Text

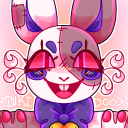
Set 15 of my 1000 faces project, I'm up to 960 of these now so the next time you see them it'll be all 1024 of the finished project at once
33 notes
·
View notes
Photo
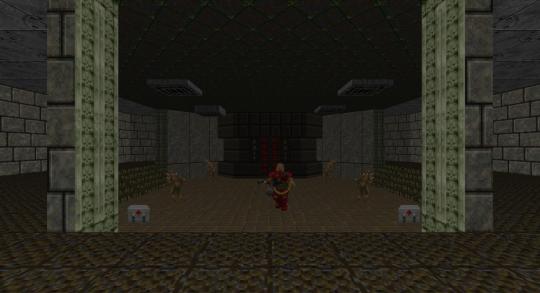
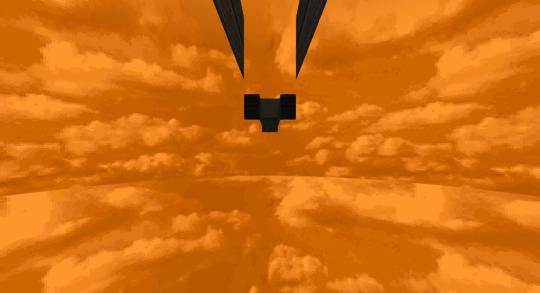
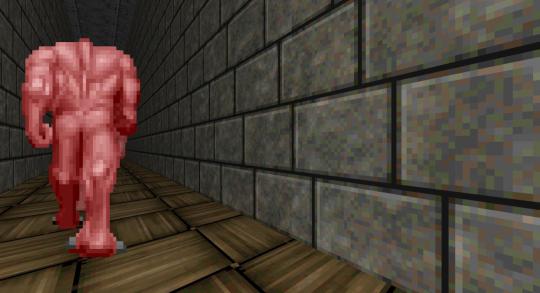
2048vr_v1.6.wad: 2048 Units of /vr/ - Clean Edition
MAP04: Lobachevsky Overdrive (0, -432, 0)
Author: Various
Date: 2020-11-01
Description:
This project contains 32 maps in the main wad, plus an additional 6 that didn't make the cut contained in the extra wad. Inspired by projects like MAYhem 2048 and Congestion 1024, we sought to make a project with similar restrictions: make a boom-compatible map where the playable areas are within a 2048x2048 unit space and optionally use textures from gothictx.
This version of the wad does not contain the DeHackEd guns. Feel free to experiment with mods of your choice.
8 notes
·
View notes
Last Seen Blogs

sandstormedd
SANDbored
xnotnatalie
Natalie
pinkidoodle
girl help
hollow-girl
Untitled
im-with-nasa
angel on fire