#tattooer update
Text
Updating... The Tattooer (ver. 3.4)!

Finally! Took me a while, huh. This is the updated version of the Tattooer project. It skips some steps, making the workflow much, much faster! Huge thanks to @applewatersugar for his
suggestion on how to bake textures while preserving the transparency. This is kind of a repost of the original Tattooer post, but it actually has some new stuff and a few changes here and there, so please take a look if you want to learn how to use this new version.
This is a series of Blender template files already set up to quickly bake textures from The Sims 4 to The Sims 2. The different Blender files will allow you to:
-Bake body textures from TS4 to TS2 (Female)
-Bake body textures from TS4 to TS2 (Male)
-Bake body textures from TS4 (Female) to TS2 (Male)
-Bake body textures from TS2 (Female) to TS2 (Male) [Bonus!]
-New! Bake face textures from TS4 to TS2 (Unisex) [Bonus!]
-Bake head textures from TS4 to TS2 (Face + Scalp) (Unisex) [Still experimental]
Check the file names to see which one is which, and the resolution of the baked texture it will give.
Everything you see in the render above was 100% converted using those Blender files.
Download here! SFS / GD
Update: Version 3.4.1 (27/08/2023) Fixed some issues on the shoulders for the AF-body-4t2-1024 and AF-body-4t2-2048 templates. Now the top straps on most converted underwear/swimwear should look right.
Update: Same version (13/12/2023) As requested, added a new spanish version of the included pdf guide!
These templates were made mainly to bake and convert tattoos, but there’s more you can do with them if you get creative. I have to say, these are NOT perfect. Results may vary depending on what you are trying to convert, so! With that in mind, this is all the stuff you will be able to convert almost seamlessly from TS4 to TS2:
-Tattoos.
-Other body details such as body hair, scars, freckles, supernatural/occult details…
-Body painted underwear and swimwear, as well as some other clothing that’s mostly painted on the body.
-Socks, stockings and maybe leggings.
-Even skintones! In some areas they will look weird, so I recommend editing and blending them with other existing TS2 skins.
-Makeup, eyebrows and beards. In the old version this was just a proof of concept, but now I’ve added a new Face file template which gives some pretty decent results!
-Hair scalps. Very useful when converting some hairs! Although keep in mind part of that texture might also need to be baked on the face mesh, you know, that hairline makeup stuff.
Got your attention? Nice! Editing some of the textures from TS4 to match the UV mapping in TS2 using a 2D editing program can be incredibly hard. That’s where texture baking in Blender comes to the rescue!
You will need to download Blender, at least version 3.4, but you could always use a newer version. It is only incompatible with versions older than 3.4.
-You can download Blender for free here.
-You will also need Sims 4 Studio to extract the original Sims 4 CC textures you want.
In the first version of these Blender files, there was a necessary step using Photoshop, but that’s no longer needed. However, there’s still a tiny extra step which requires resizing the newly baked texture on some of the high resolution templates, so you might need a 2D editing program like Photoshop. More on that later.
So, before we begin, let’s clear out some questions you might have. What the heck is this texture baking thing and what does it do? Well, let’s imagine you have a video projector and point an image into a blank wall. Then you pick up some brushes and start painting and copying that projected image in that wall. Texture baking is kinda like that when it comes to 3D models. You align two models and match them as closely as you can in shape and form, and once you adjust some parameters and values, Blender does the rest for you: it will give you a new texture for a new model with a different UV map. These files I’m sharing have everything already set up, so it’s a matter of plopping in that Sims 4 texture and you will get that new texture for TS2 in just a few clicks.
This tutorial assumes you know literally nothing about how to use Blender, so if you feel uncomfortable with it, worry no more! This will guide you with pictures showing where you need to click and explaining what is happening. For Sims 4 Studio and Photoshop the process might be a bit less detailed, but still this should be pretty beginner friendly. For this tutorial, I will use some tattoos as an example (properly credited at the end of the post). Alright, enough with the rambling. Let’s get started!
·EXTRACTING TEXTURES IN SIMS 4 STUDIO:
First things first, you will need to extract as pngs all the textures you want to convert from TS4 using Sims 4 Studio. It should be pretty straightforward. Just open the packages and export the Diffuse textures. Keep them organized in a folder for easy access.
·BAKING THE TEXTURES IN BLENDER:
PRELIMINARY STEP 1: CONFIGURING BLENDER’S GRAPHICS SETTINGS:
Open your preferred Blender file depending on what you’re going to bake and the desired resolution (in this example I’m going to use the AF-body-4t2-1024 file). Before we start messing around in Blender, there’s one thing you should set up. It is a onetime step, and once it’s done, you won’t need to do it again. So, does your computer have a dedicated graphics card? If you don’t know or you’re not sure, just skip to the next step. Configuring Blender so it uses your graphics card instead of your CPU will make the baking render much faster, so it is recommended you set it up correctly.
If your computer has a dedicated graphics card, click File (1) > Preferences (2) > and on the window that pops up click System (3) > and select CUDA and make sure your graphics card is there and tick it (4). I have an Nvidia Graphics card but your case may vary. Once you’re done, click on the tiny button on the bottom left corner and Save Preferences (5).

PRELIMINARY STEP 2: CHOOSING THE RENDERING DEVICE:
Click on the tiny camera button on the right, called Render Properties (1), and on Device (2) select GPU Compute if it’s not already selected. If you’re not sure if you have a graphics card or not, just select CPU. Then select the Material Properties tab (3) and Save your changes, either by pressing Ctrl + S, or clicking File (4) > Save (5). You might need to do this second step with the other Blender files, but once you have it done and saved, you won’t need to do this again. Okay, time to get into the good stuff!

·STEP 1: LOADING YOUR TS4 BASE TEXTURE:
In the Material Properties tab, click the folder icon that says Open (1) and on the window that pops up, navigate through your folders and select your first texture. To navigate easily, the 3 buttons on the top right (2) are for the display mode. They will show your files in list mode, vertical and horizontal, and the one on the right will display the file thumbnails, pretty useful if you want to easily preview your textures here. The icons on the left side (3) will let you go one folder back and forward, go to the parent directory, and refresh the folder in case you just dropped something new in there. Double click on the image you need and that will load the texture into the Sims 4 body model, named “ts4 body”.

·STEP 2: SETTING UP YOUR SELECTION AND BAKING THE TEXTURE:
On the top right of the screen, you will see the names of the 2 models in the scene. Hold the Ctrl key in your keyboard and left click on the “ts2 body” model (1). If you did it correctly, you should see “ts2 body” in a yellowish orange color, and right down below, “ts4 body” should look more like a red orange. If not, try again by clicking first on ts4 body, and then while holding Ctrl click again on ts2 body. Then switch to the Render Properties tab by clicking the tiny camera icon (2) and click Bake (3). Depending on your screen resolution, you might need to scroll down a bit with your mouse to see the Bake button. Wait a few seconds for it to finish. You will see the progress percentage down on the bottom of your screen. Don’t panic if you notice your computer fans start ramping up, that’s completely normal! As I said in the beginning, using your GPU will bake the textures much faster than the CPU.

·STEP 3: SAVING YOUR NEW TS2 TEXTURE:
Once it’s finished, switch to the UV Editing Mode by clicking “UV Editing” on the top of your screen. And there it is: your new texture! You might have to scroll up your mouse wheel a bit to zoom in and see it in all its glory on the left side of the screen. We’re still not done yet though. You need to save it to yet another new folder (always try to keep your stuff organized!).

You can save it by pressing Shift + Alt + S, or clicking on Image* (1) and then Save As… (2). That will pop a window where you’ll need to navigate again and save it somewhere. Give it a proper name (3) and hit Enter to save it… well, Enter doesn’t always work for me for some reason, so if that happens just click Save As Image (4). And that’s it! You’ve successfully converted your baked texture. Congrats!

·STEP 4: GOING BACK TO STEP 1:
Alright! If you’re done with your textures, you can close Blender without saving and call it a day. But let’s say you want to keep baking other swatches. In order to go back to step 1 and start the process once again, click Layout (1), go back to the Material Properties tab (2), select “ts4 body” (3) and click on the folder icon (4) to open and load your next swatch.

Then it’s just a matter of repeating the process from step 2. When you’re ready to move on, close Blender without saving. If you see a small check telling you it will save some images, make sure you uncheck it, so you will be able to use it again in the future from the starting point with no issues. I don’t think it really matters if you accidentally save your progress in these files, but I like to keep it clean and fresh so I can do the process where I left it from the beginning next time I open it. And in case you mess up and save somewhere, you can always just delete the .blend file and download the template files again.
In case you’d like a video tutorial on how to use these files, the amazing @platinumaspiration recorded this fantastic video showcasing the process! You can watch it here.
One final note: some of the baking .blend files save the textures with a resolution of 2048x2048 pixels, as clearly stated at the end of their file name. That’s way too overkill, because TS2 only properly supports up to 1024x1024 for most of its textures and you should always resize your final product to that max resolution (or lower if needed). I just made those 2048 versions because there might be some really tiny and slim details on some tattoos that might look a little too blurry when baked into a 1024 resolution texture, so for those cases use that if you want and then resize them using your 2D editing software of choice.
In Photoshop, in the Resample mode of the Image Size menu, there are a few options to choose. For the fine details, I like the Nearest Neighbor (hard edges) option, which, even if it looks a bit pixelated, it still preserves most of the texture and quality.

For anything else, I would just directly bake them using the 1024 versions in Blender (512 for the face and scalp).
And for the folks who feel comfortable playing around in Blender, this is just the beginning! Texture baking opens a LOT of possibilities, so feel free to move stuff around and edit the models to your liking! If you notice the baked textures look warped or stretched somewhere, or don’t like where some textures are placed in the S2 body, poke around that area moving stuff and then give it another try. The main objective of the baking process is keeping both overlapping models as close in shape as possible. You may also edit and save new copies of the templates, or make new ones from scratch using mine as a reference (keep a close look on those Baking settings and values, I think they work pretty well) and share them if you want to. Go ham, do whatever you want with them! I still have plans on making templates to convert body textures from Sims 3 to Sims 2, but for now it’s not on my priorities, so we’ll see when that happens.
Whew! Hope none of this was too confusing. Need help or have any issues with these? Please ask/message me here and I’ll be glad to help when I’m able to!
Credits for the CC used in the render demonstration:
-Skin by Sims3Melancholic.
-Eyes by Northern Siberia Winds.
-Eyebrows by PeachyFaerie.
-Tattoos by xtc.
-Top by SerenityCC.
And the Tattoo I used for the tutorial can be found here, by ValhallanSim.
Last but not least, a huge thanks to all the people who somehow contributed to make this project and update possible, either by doing initial testing, finding issues to fix, or teaching me new Blender tricks to make the workflow way faster and easier. So thanks again to @elvisgrace @moyokeansimblr and @applewatersugar on Tumblr! <3
And thank you for reading! Hope you have fun playing with this (not so) new toy hehe.
#tattooer project#tattooer update#ts2 tutorial#ts2 resources#ts2 blender#ts2 overlays#ts2 texture baking#4t2 conversion tutorial#this took me so LONG to update#im really sorry for the delay :(
297 notes
·
View notes
Text
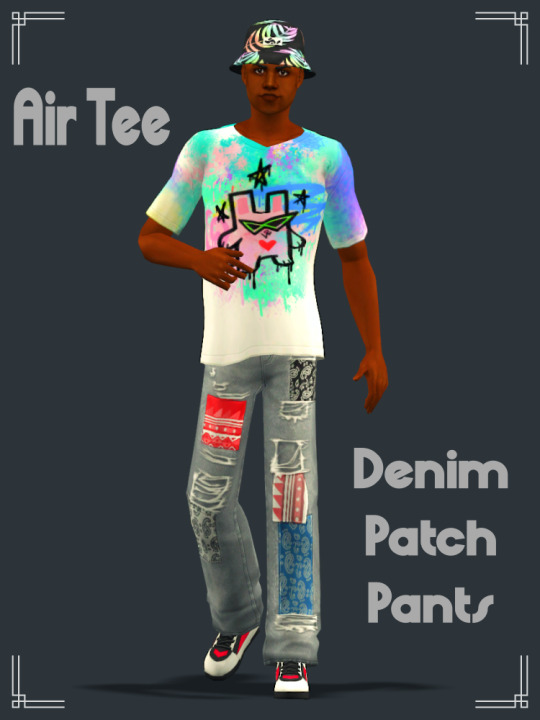
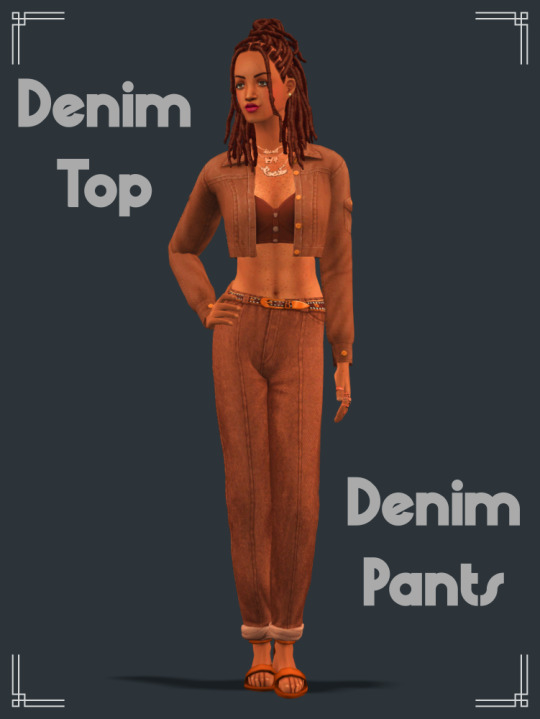
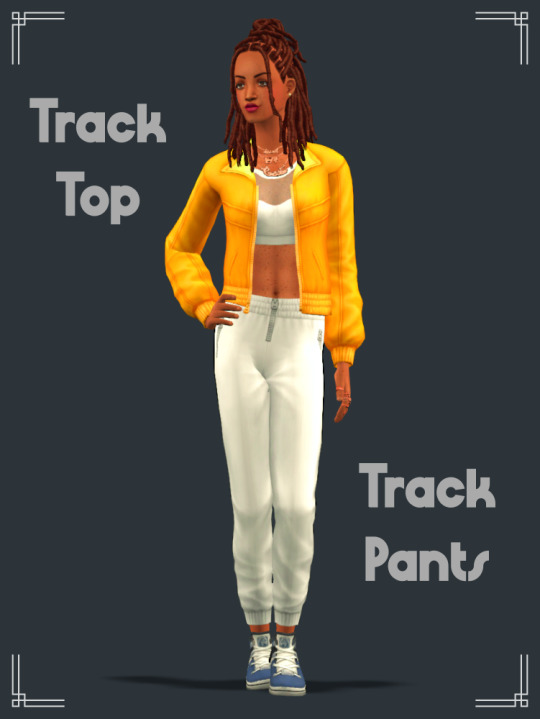
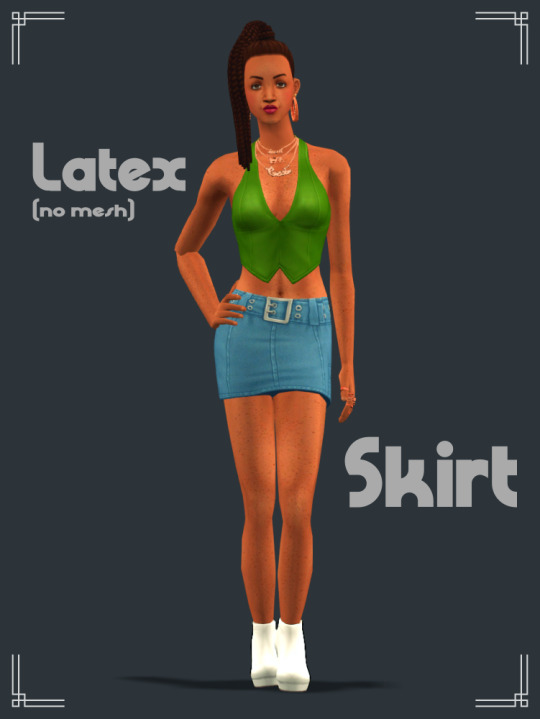
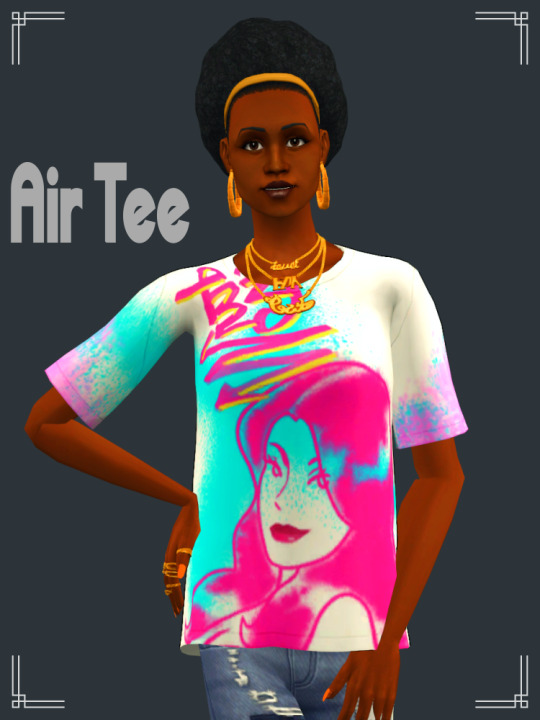
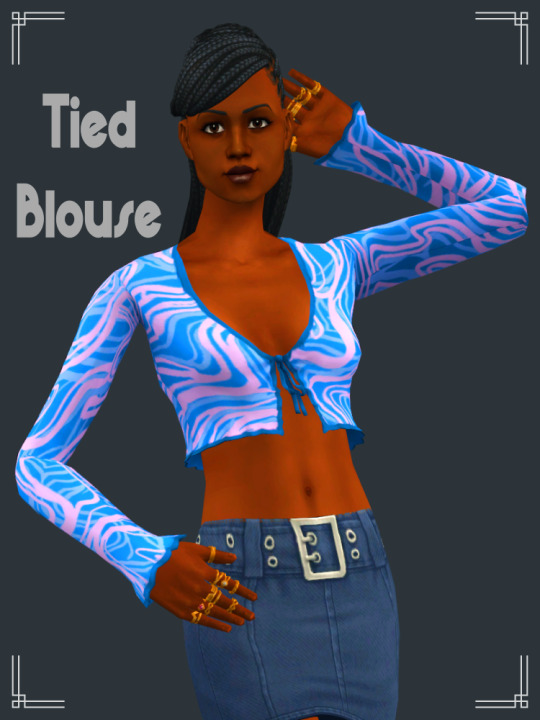
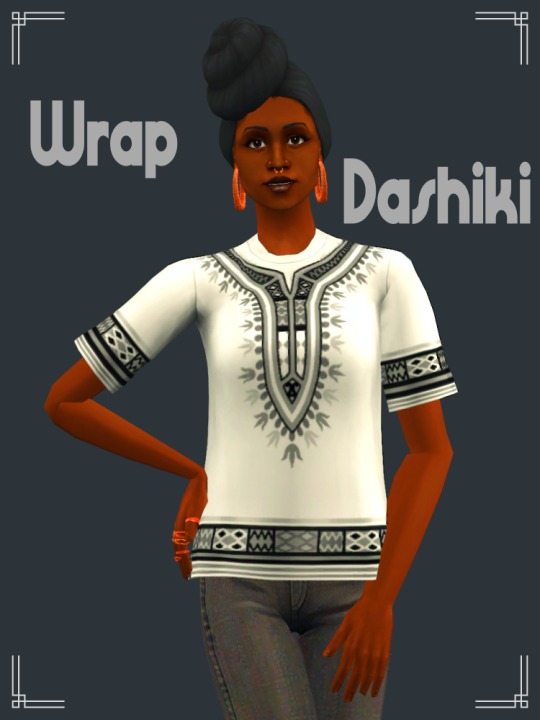
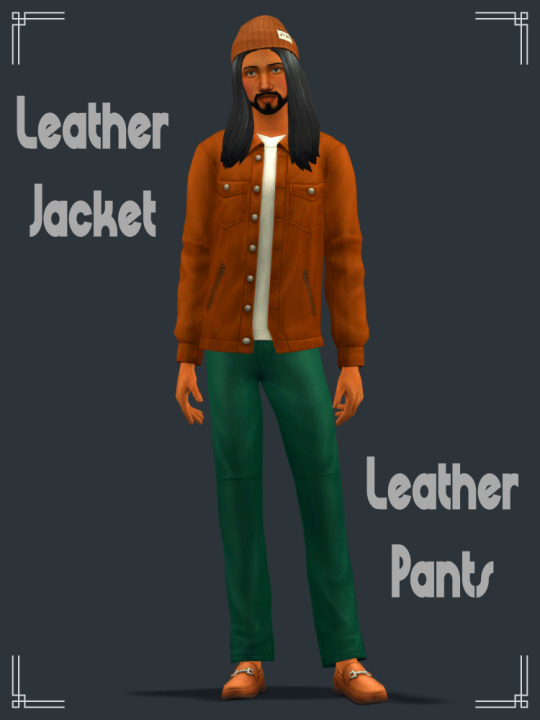
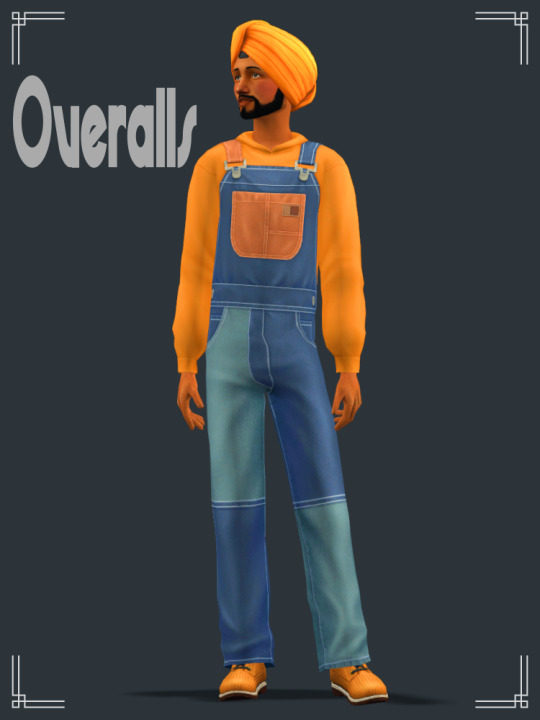
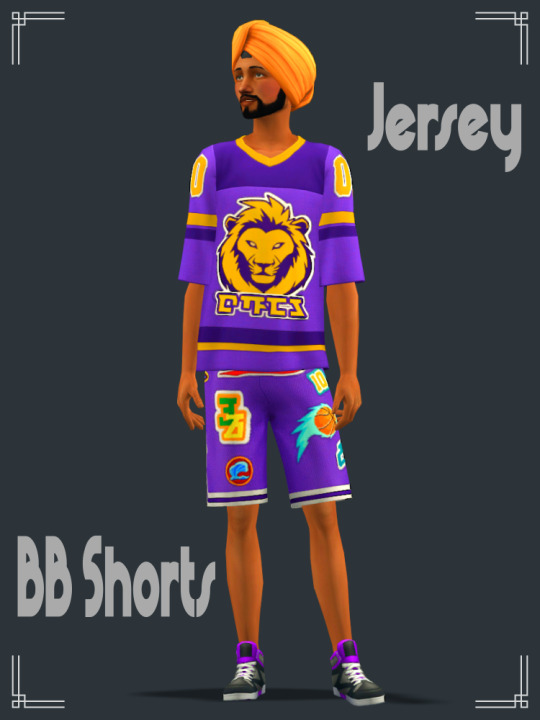
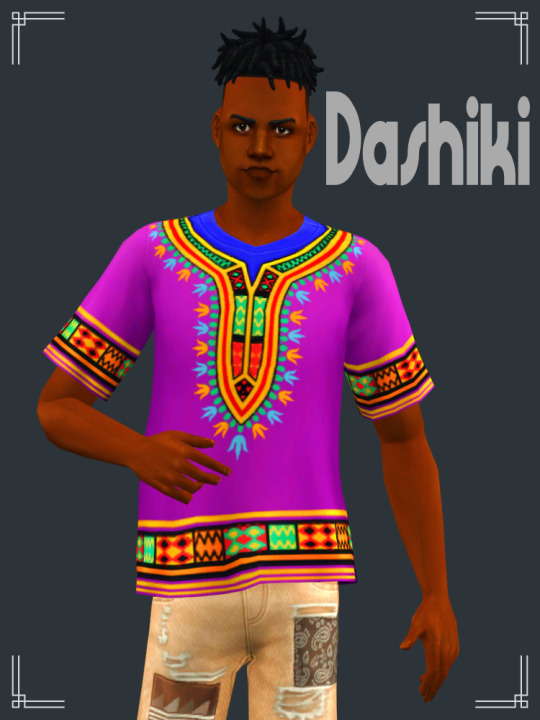
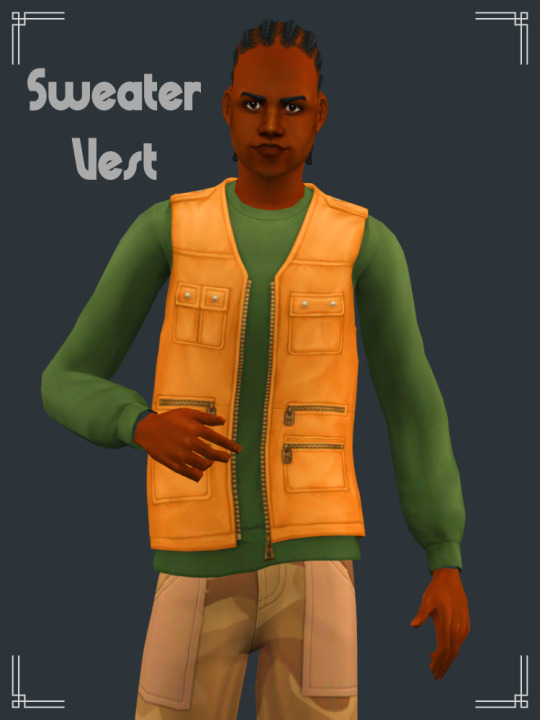
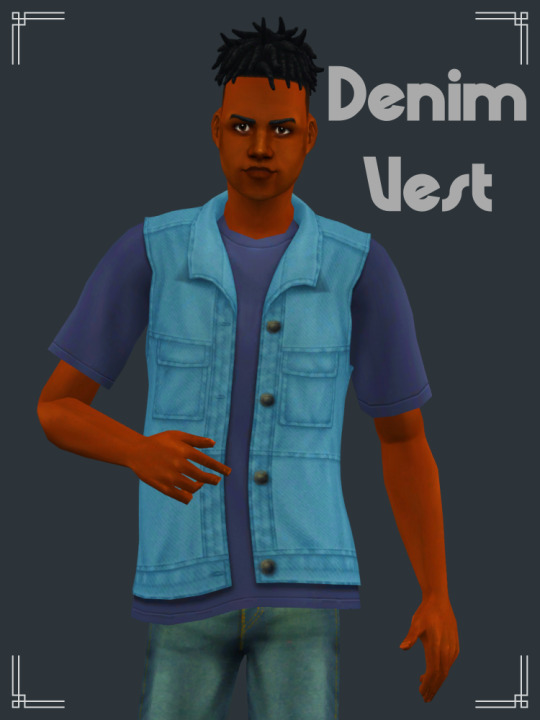
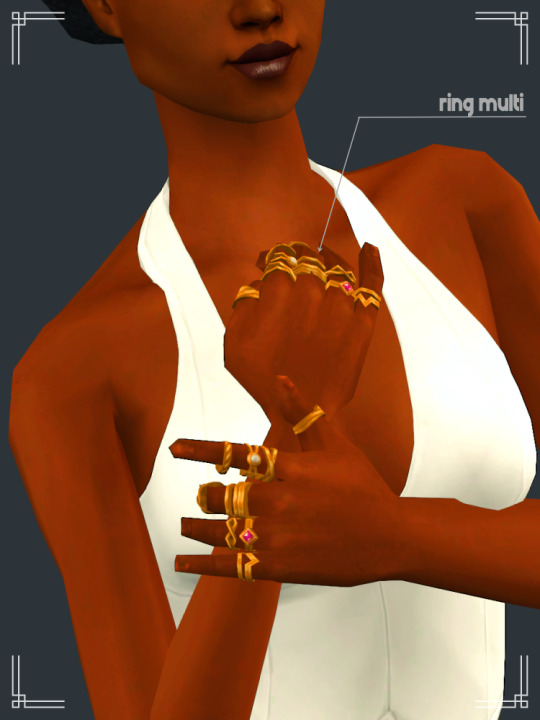
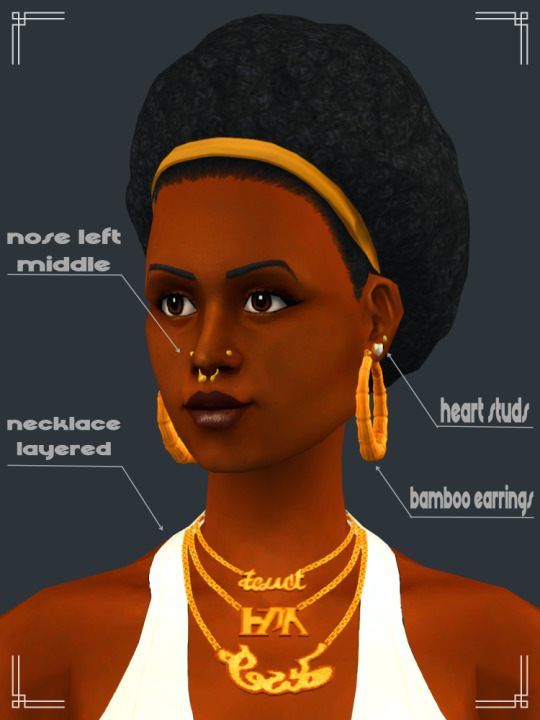
4t2 Urban Homage
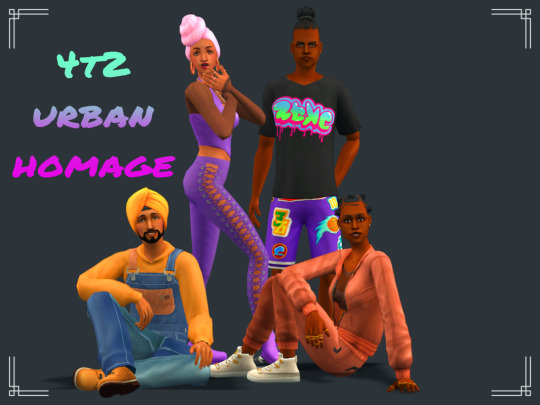
I had so much fun converting the majority of this kit - not so much fun with the previews lol.
I think the only thing I left out otherwise was the unitard... wasn't feeling it, personally. Don't forget to grab the butterfly top from @lucilla-sims! The hoop style earrings are not compatible with all hairstyles.
A .txt is included that has a breakdown of the content. Swatches are also included. Anyway, enjoy!
Download All (Repo) - SFS | MF
Download All (Standalone) - SFS | MF
Pick & Choose - SFS | MF
Updated 11 May 2024
credit: paluding (tattooer), pforest (sandals), mdpthatsme (skirt)
please comment below if any issues. My asks are disabled.
pics under the cut


#4t2#s2cc#ts2cc#sims 2 cc#sims 2 download#ts2 download#4t2cc#4t2 conversion#the sims 2 cc#sims 4t2#4t2 clothes#ts2 cc#ts2 custom content#4t2 hair#4t2 cc#download#dl:h#dl:fh#dl:c#dl:fc#dl:fcb#dl:fct#dl:mc#dl:mcb#dl:mct#dl:acc#dl:jewelry#dl:head
548 notes
·
View notes
Text


part 1 of some requests from ghoularcade at the wishing tree... and some extras!! i realise it's only april, but have @nolan-sims' warlock wears, madame mystique, and borrower's outfit, taken from various simblreen treats of theirs, converted from ts4 to ts2! 3 spring treats just for you 🤍
they're all largely medium-poly and for at least 2 ages, with all appropriate morphs. not all of them turned out exactly as i was hoping for them to, but i'm so relieved that they're done. stay tuned for more... soon, i hope? there's more stuff and details under the cut!
DOWNLOAD: SFS | MF 🌼
credits go of course to @nolan-sims for the original ts4 outfits and their meshes & textures; to @madlensims and ea/maxis for the original shoes used in the outfits; and last but not least to @paluding, without whose tattooer the madame mystique dress would not have been possible! 🥰
CLOSE-UPS + DETAILS

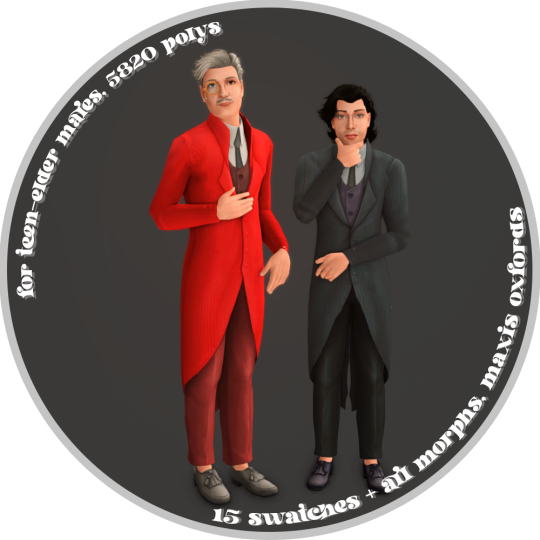
4T2 NOLANSIMS WARLOCK WEARS OUTFIT [SFS | MF]
- for tm-am, but elder enabled
- 5820 polys, all morphs
- 15 swatches with tm repo'd to am
- categorised as everyday/formal/outerwear
- paired with 4t2 bg oxford fringe, converted by me

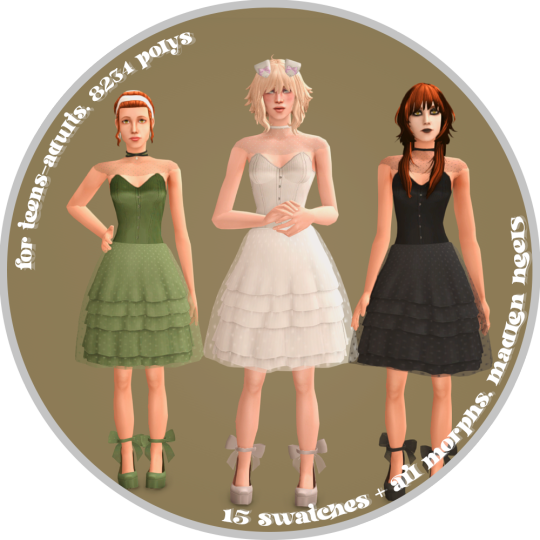
4T2 NOLANSIMS MADAME MYSTIQUE OUTFIT [SFS | MF]
- for tf-af only
- 8234 polys, all morphs
- 15 swatches with tf repo'd to af
- categorised as everyday/formalwear
- paired with 4t2 @madlensims sonata heels, converted by me
*note: the original had shoulder straps, but these were wonky and i couldn't bone-assign them properly... so i yeeted them. think of it as a stylistic choice? if you know a way to convert the outfit with the straps, PLEASE DO, i'm so sad that i couldn't include them!
@paluding has added the straps back to the outfit!! MAJOR thanks to them, grab the updated meshes here!!


4T2 NOLANSIMS BORROWER'S OUTFIT [SFS | MF]
- for tm-am, but elder enabled
- 5041 polys, all morphs
- 15 swatches with tm repo'd to am
- categorised as everyday/outerwear
- paired with 4t2 gp04 button boots, converted by me

if there are any issues that you find with this set, please don't be afraid to let me know! happy simming, and when you download this, do keep in mind,
Love,
~ Ky 💗
#sims 2 download#the sims 2 cc#ts2cc#s2cc#sims 2 cc#the sims 2#sims 2#4t2#4t2 cas#suggestions#sims 2 suggestions
271 notes
·
View notes
Text
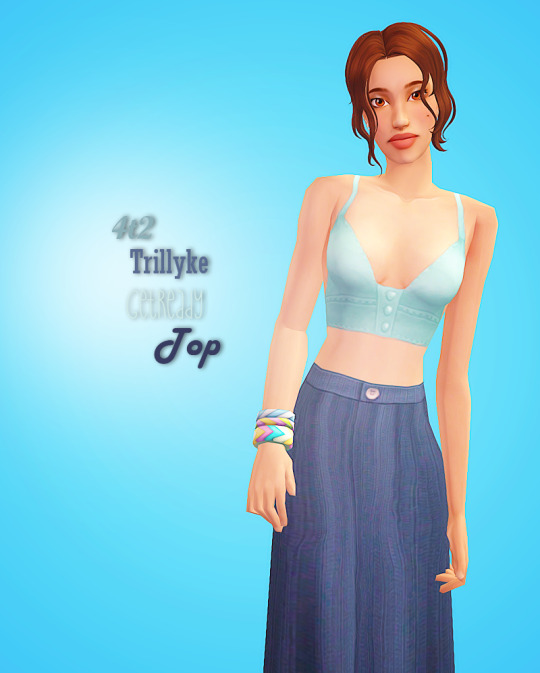
4t2 Trillyke’s Get Ready Top
Hello guys! 😊
I really fell in love with tattooer 😅😁so this time just quick top by @trillyke.
Info:
AF and TF
Categorized as Casual Top
Texture size 1024x1024
Appropriate morphs included
1,2K Poly
10 colors
Files are compressed
Full credit to @trillyke. ❤️TS4 version you can find HERE
*19/3 teen version updated!
Swatch:

🌷DOWNLOAD ( Standalone versions )🌷: SFS
🌷DOWNLOAD ( RepoD version )🌷: SFS
Credits: EAxis, Sims4Studio, @trillyke, @paluding for an amazing tattooer!
#4t2 conversion#4t2 clothes#sims2cc#s2clothes#ts2#the sims 2#ts2 female clothes#sims2clothes#ts2 cc#4t2 female clothes#4t2 tops#s2cc#ts2 download#ts2 custom content#the sims 2 female teen clothes
210 notes
·
View notes
Text


🦋cosimetic eyeliner n224 v1 converted to ts2🦋
so, the sims tattooer was updated, and apparently makeup looks a bit better than it did and honestly @paluding wasn't wrong! on a sim with exaggerated features, this eyeliner i converted genuinely looks good so im pleased to share it today :)
also, say hello to @fdicaprio's gorgeous ceres!!! i love her so much ^.^
i've merged it into a single package file, tooltipped them and compressed them. get it below :D
dl @ sfs
credits - paluding, cosimetic
159 notes
·
View notes
Text
Making a pinned post 🐀
Hi I'm Shu, I love drawing messed up little men and potentially covering them in tears and blood and I kinda like scary stuff, but I also have love for other wholesome things (sometimes)
Tumblr is the place for me to meet new friends, so feel free to leave comments or send msg or so than just using the tags
Besides this insanity here I'm an illustrator and tattooer, if you wanna find out how different that other world is you can find me as @maiyashu on Instagram (I stopped updating that blog here)
Attached a photo of me:
#my art#< use that tag to skip over my bullshits#original art#<for my original stuff#More:#sketches#my tattoos#my commissions
33 notes
·
View notes
Text
tattoo FAQ
Where can I see you tattoos and flash?
Here's the tag! You can also follow my instagram for more detailed updates.
"Can I get a flash done by you?"
Yeah, if you can get to Antwerp, you're totally welcome! I do handpoked tattooing, send me a message with what you're interested in and I'll see what I can do.
"I don't live near you, can I get a flash tattooed by someone else?"
Some designs are available for sale, starting at €40. Keep in mind this doesn't guarantee you local tattooer wont ask full price for doing the tattoo. Message me for more info.
How long have you been tattooing/who taught you?
I am a beginning artist when it comes to tattooing. I get my guidance and teaching by my partner who is a professional tattoo artist. I'm not affiliated with a studio so I basically get a private apprenticeship.
What is hand poked tattooing?
hand poke means tattooing without electricity, so there's no machine. The design gets 'poked' into the skin by hand. Besides that, it's done with the same needles, ink and hygiene as a modern tattoo (so no, not the stick-and-poke with sewing needles and indian ink) Here's a short video about hand poked tattooing if you want to see it in action.
benefits off handpoked tattooing:
- it's way easier on the skin. Getting it done is generally less painful, and the healing process is much faster
- You don't get the buzzing noises, which some people find more scary than the actual tattooing ;) Als you can easily keep up a conversation
- it's a fun part of tattooing history.
downsizes:
- it's a slow proces, expect to sit at least 4 hours for most of my flash.
I'd rather have it done electric :(
I can arrange to have something done by my partner Danny, who primarely does electric tattooing. Shoot me a message and I'll see what's possible and send you over to them.
If you want to just have a look at my partners flash you can visit their instagram and contact them directly if you want some of their designs or a commission. They do have quite a busy schedule, so if you're only in Antwerp for a limited time make sure to book way in advance to ensure a spot at the right time!
What's the price?
Pricing depends on the size of the tattoo, and the placement. Because I haven't been tattooing very long I follow apprentice tradition and charge €60 as my minimum price (half of the starting price of a pro) This will go up as I gain experience so this is the time to get a deal ;)
I have more questions
feel free to dm me! Tumblr does sometimes swallow my messages for hours or days so if you want to have a timely answer don't be afraid to send me the same message on instagram
9 notes
·
View notes
Text
update on the situation i was venting ab lol
never hv i seen someone w more audacity than this bitch who gave the most meaningless non apology where they blatantly lied ab everything they said 5 texts ago. like its all right there if you just scroll up!!! they made such uninformed accusations on my and a friends character and then said some weird batshit reasoning for how they didnt actually and they were uniformed but speaking on the situation but also didnt bc they were uniformed and didnt want to misspeak.
but anyway, even though the other person/inciting incident person threw a fit on social media, i think things r going to blow over and any more escelation on their part is just going to make her look bad and nuke her career prospects so im feeling better. im over tattooer drama, it was fun for me to spectate from a distance but its just not fun for me at all anymore and i just want to be able to focus on clients and the craft
0 notes
Photo
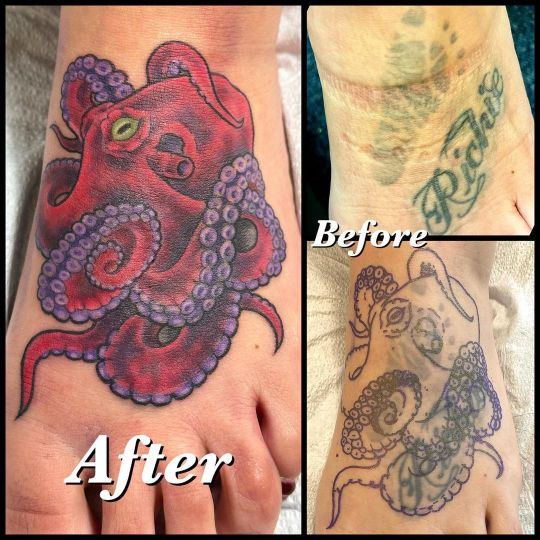
Back to tattoos! Here are some really fun cover ups (the last one more of a rework) that I did before my trip: an octopus update to a baby name and footprint for my dear @suzannegillis81, hibiscus cover up of an old flower for Tamara, and a reworked and reimagined lotus for Amber…I appreciate these creative challenges, and am so grateful for the trust of my clients! 🥰🖤🐙🌺🪷 . . @joatwood @avalontattoo_2 #joatwoodtattoos #angelhandstattoo #avalontattoo2 #AdamsAve #sandiegotattoo #northparktattoo #ladytattooers #tattoo #tattooer #inked #freshlyinked #radtattoos #sandiegotattooshop #sandiegotattooartist #northparktattooer #femaletattooartists #tattoosofinstagram #NorthPark #NorthParkSD #art #artistsofinstagram #coverup #coveruptattoo #octopustattoo #hibiscus #hibiscustattoo #lotus #lotustattoo #mehndi #lotusmehndi (at Avalon Tattoo II) https://www.instagram.com/p/Cothr0ertPk/?igshid=NGJjMDIxMWI=
#joatwoodtattoos#angelhandstattoo#avalontattoo2#adamsave#sandiegotattoo#northparktattoo#ladytattooers#tattoo#tattooer#inked#freshlyinked#radtattoos#sandiegotattooshop#sandiegotattooartist#northparktattooer#femaletattooartists#tattoosofinstagram#northpark#northparksd#art#artistsofinstagram#coverup#coveruptattoo#octopustattoo#hibiscus#hibiscustattoo#lotus#lotustattoo#mehndi#lotusmehndi
0 notes
Text
Which Tattoo Course Online Is Right For You?
If you are thinking about pursuing a career as a tattoo artist, then taking an online tattoo course is an excellent option. These courses are designed to educate tattoo artists on the different types of inks used for tattooing. You will find more information on the various methods for using these inks and the proper use of different equipment, including metal tips and grips. The course also covers cross-contamination and basic hygiene standards.
Unlike in-person workshops, which can cost thousands of dollars, tattoo course online classes are much cheaper and offer more flexibility. A tattoo course will usually cost you between twenty and three thousand dollars, so it is important to consider your budget. Make sure the course you choose is updated for 2022. Online courses will give you access to the latest information, and you will be able to schedule your classes according to your availability and schedule.
Tattoo School Online is a comprehensive online tattooing course, and a great place to start your career. Unlike a traditional school, the program at florida tattoo academy is designed to train a tattoo artist from beginner to intermediate level. You will learn the various tattoo styles, tattooing sanitation, and how to set up a tattoo station. You will also learn how to market your tattoo business, and you'll have access to a supportive online community. The school also offers the unique opportunity to work with other aspiring tattoo artists, which is beneficial to your overall growth as an artist.
In addition to educating tattoo artists about the various needles and methods, tattoo courses also cover the various techniques for drawing and shading on skin. There is also a comprehensive study of the history of tattooing, different skin types, and anatomical considerations. The best online tattoo course will also include video lessons to enhance your learning.
Kevo Tattoo Course is one of the best tattooing courses available online, and it offers the best audiovisual content. While it is a bit more expensive, it is ideal for experienced tattooers who are looking to advance in their career. The Kevo Course focuses on your drawing skills, and is an excellent way to learn how to tattoo properly.
The most important thing to remember when learning to draw tattoos is that you should be able to transfer your ideas from paper to skin. You should also make sure to create an art that compliments the wearer. Drawing is one of the most important elements of tattooing, and Coreh Lopez teaches this in her courses.
The videos also include a short documentary by Grace. This documentary gives a powerful context for tattoos. In addition to presenting tattoos in an informative way, the video also includes video zoom recording. You'll get to see how Grace conveys her ideas and what she does to get the word across without filters. Visit here for more information: https://en.wikipedia.org/wiki/Tattoo.
0 notes
Note
Hi paluding! i recently saw you have set up your game in spanish... i didn't know you were spanish speaker!! genial. the question is, can you PLEASE translate your sim tattooer tutorial for us who doesn't really know english very well? ¡gracias!
¡Dicho y hecho!
Added spanish translation for the Tattooer guide :D
Descárgalo otra vez y verás un nuevo pdf con la guía en español. Si tienes dudas con algo, házmelo saber y estaré encantado de echarte un cable en lo que sea.
#tattooer project#tiny update#nothing changed for the tattooer though so no worries if you're not a spanish speaker!
5 notes
·
View notes
Note
Hello, I'm so sorry to bother you, but the 【DRAMAtical Murder】's fan game [The Tattooer] has been unable to download and obtain. Do you have a backup of this fan game? Could you share it with me?Or could you please show me the way to download the game? I really like and want to get it .(T_T)Because the dynamic is very old, I don't know if I can get a response. I hope I can get your reply! Thank you for everything!;-)
Hello there! It's no problem at all; I have a copy saved on my computer so I've reuploaded it for you. I guess it must have gotten deleted from Mega at some point, it is seven years old... (And now I feel old haha.)
Anyway, here's the link! I hope you enjoy! :)
5 notes
·
View notes
Photo

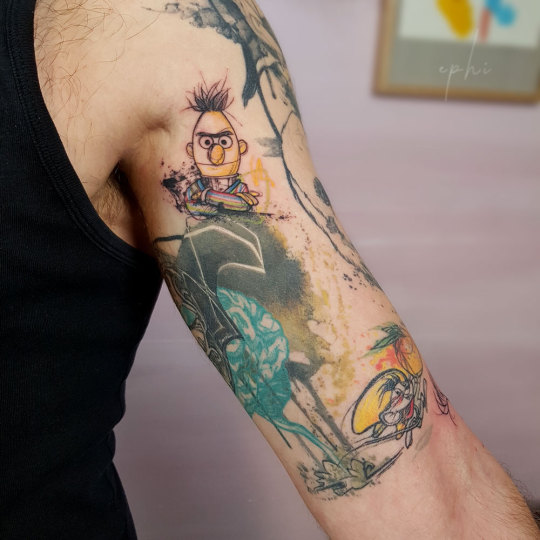
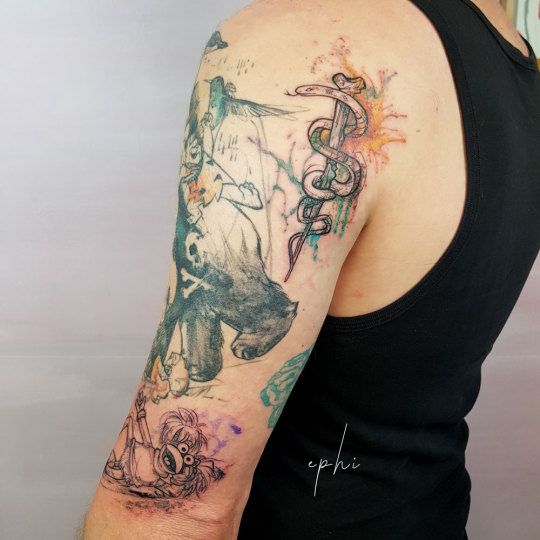

New Updates!
Probably my favorite thing about this project is that the more updates we add, the clearer it becomes for Jan's colleagues and the more obscure it gets for basically everyone else what the hell of a collection this is.😂
Most of it healed; Medic, Bert, and beginnings of a Fraggle fresh...
(Plus video HERE.)
#tattoo#tattoos#vegan tattoo#fuxprinzessin#4strelka#berlin tattoo#SEO tattoo#sEO update#watercolor tattoo#sketch tattoo#graphic tattoo#half sleeve#nerd tattoo#medic#bert#fraggle#tatttoo art#german tattooers#female tattoo artist
32 notes
·
View notes
Photo
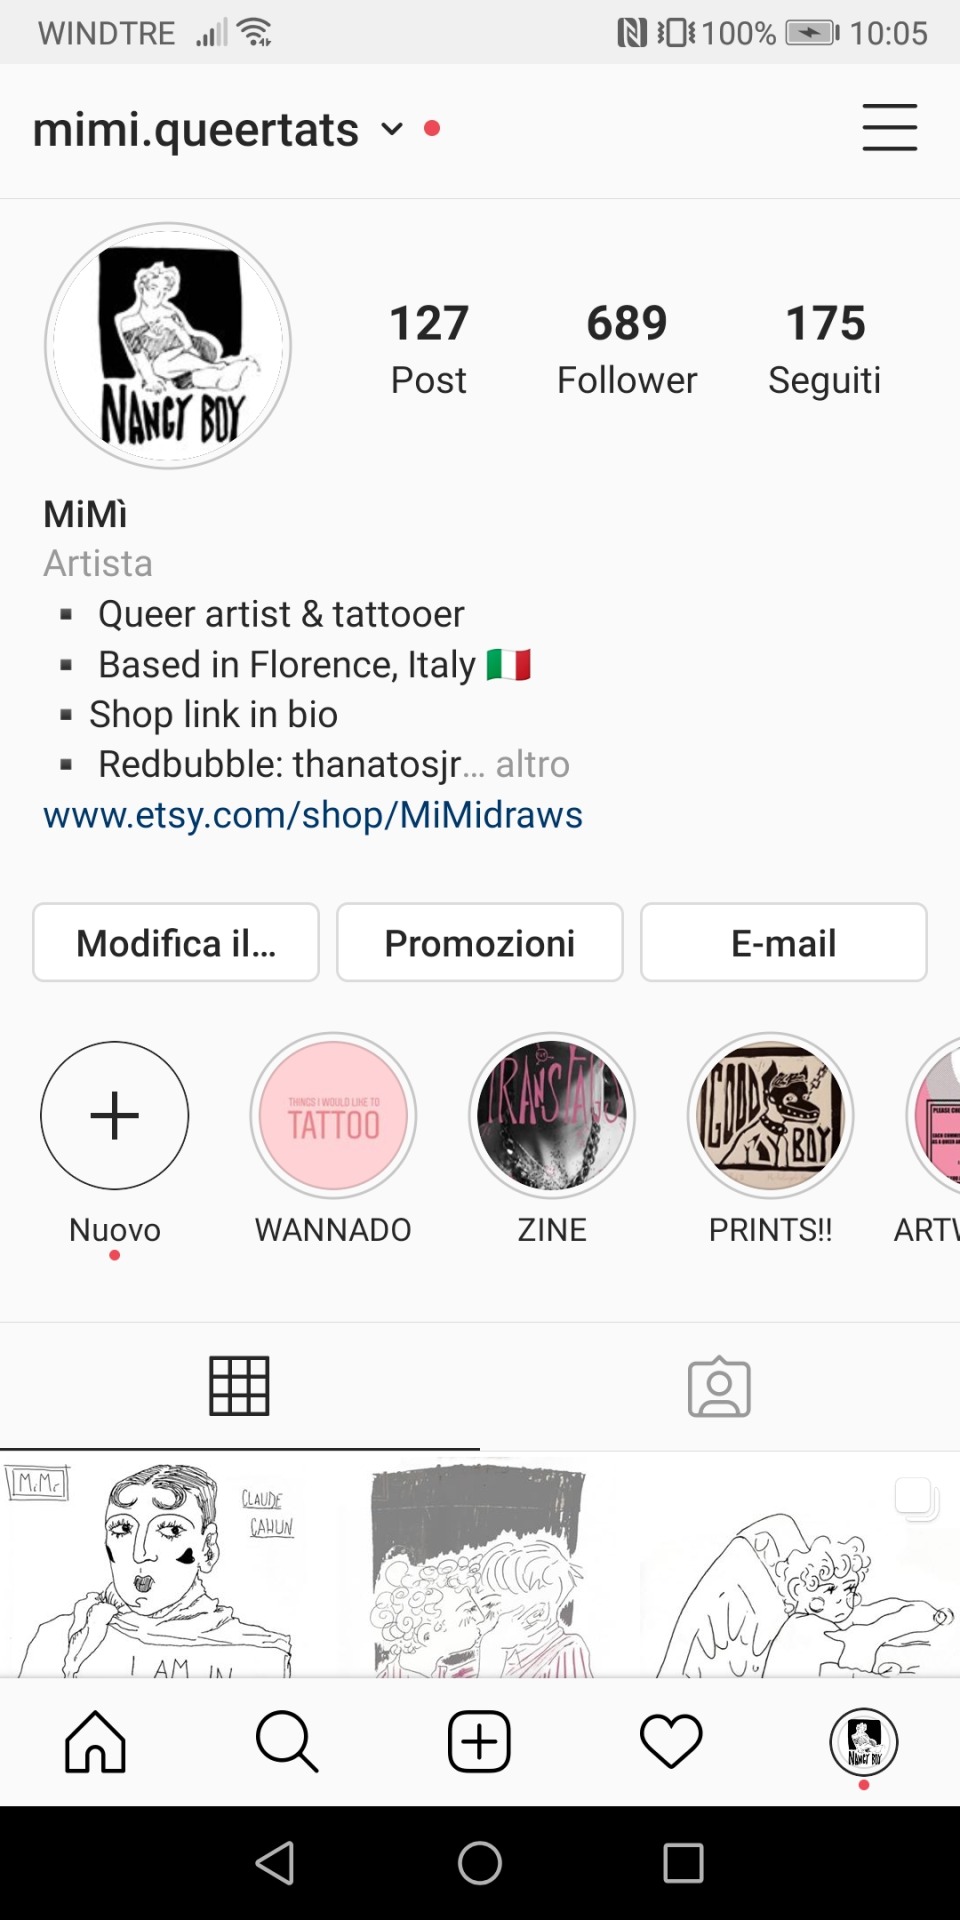


Hey guys, I haven’t been active on here since ages and I think I might start using it again because my blog made for a good archive that I could use to draw and stuff.
I just wanted to update you on some things, first thing is I’m a tattooer now!!
I have an instagram where I post everything related to my art which is @ mimi.queertats, and I also have an etsy shop where I sell some really cool stuff, mostly zines and linocut prints (I’m gonna put up new ones soon).
This twitter account is where I post everything art related.
I still use redbubble too if that’s more up your alley.
Last but not least if anybody wants it my personal account on instagram now is @helio.gabalus
love you!!! :)
19 notes
·
View notes
Note
Hey! I was wondering (if you don’t mind me asking) how did you learn to convert custom makeup? Thanks:)
i've been converting makeup for about three years now, but since i've been back on here there's been an easier tutorial/process to do it. @paluding's tattooer is in simple terms the 'convert skin textures to ts2 from ts4' tool, and since being updated it does it quite well :)
i dont know if there's a youtube tutorial, but paluding's tutorial is p straight forward anyways so i'm going to link u right over here.
general tips would be:
for lipsticks, pooklet uploaded a joblot of alphas on a psd here that are very nice!
for eyeshadows, i've put together my own psd of my personal favourite alphas
i've uploaded a base psd to create alphas here :)
if you have the money/have the skill (or not, it doesn't rlly matter), try and invest in a graphics tablet. i mean, it's not necessary for converting but if you're particularly fond of makeup creating, painting and drawing your own is v fun!
to ensure you don't have low quality textures in bodyshop, here's a wikihow tutorial on fixing it.
i personally don't use any dds method in creating (unless it's skinblending) as i personally feel it's a waste of time, lol. it comes out the same either way, or maybe there are small artifacts, but i'm never that up close to care lol.
any questions feel free to shoot another message!
13 notes
·
View notes
Text

Been practising a lot of portraiture latey
And digital painting
And self care
I've been helping set up a new nonprofit
By and for supporting the trans community
I've been missing tattooing
I've not been missing tattooing
Working a night shift
And that's hard
To remember to just go on walks
To find time for my relationships
I've been sick a lot this autumn
I've been anxious
About elections
Supreme Court decisions
Money
Career
Climate change
It's a lot
And setbacks are part of recovering but
Mostly feeling stronger
And better
And happier
Grounded
Loved
Me
12 notes
·
View notes
Last Seen Blogs

alibicannon4
Без названия

santosfuller23
SantosFuller23

567090
you can be as pretty as you want

grandbrook223
Grand Brook Memory Care
atomicsurvivor-isleofskye
Atomic Survivor: Isle of Skye