#but the blending tool on procreate was actually working
Text
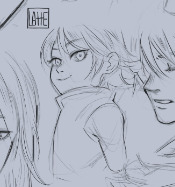
marina doodle🩵
#i dont usually blend because i suck at it#but the blending tool on procreate was actually working#so i did it#my art#splatoon#splatoon art#splatoon 2#splatoon 2 art#splatoon fanart#splatoon 2 fanart#splatoon fandom#splatoon 2 fandom#marina#marina ida#marina off the hook#off the hook#doodle#digital art
45 notes
·
View notes
Text
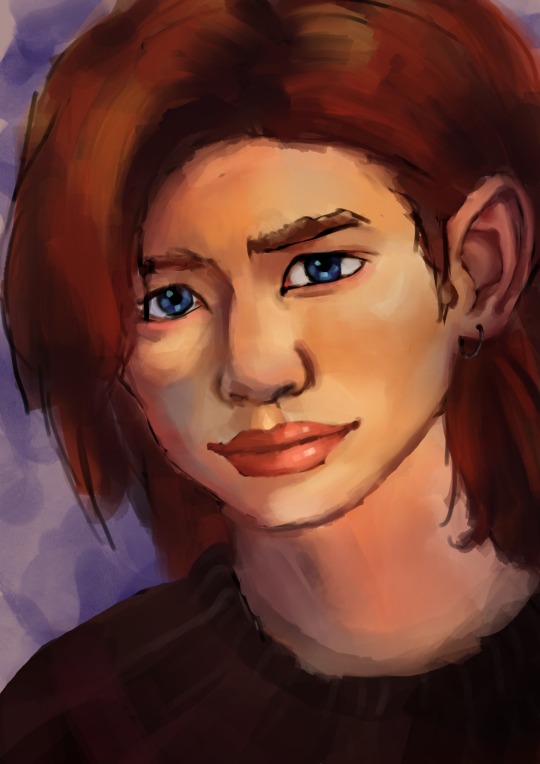
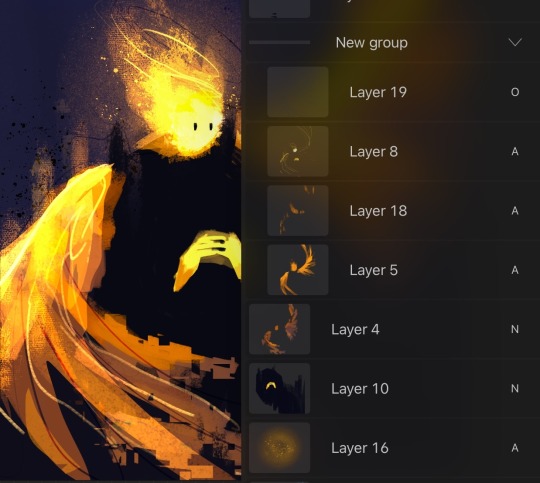
Decided to color the lineart anyway. Trying to relearn the blending tools in Clip Studio Paint.
#not perfect .. but hmmmm#it is wild to me that the blend tools in procreate/cps seem to work completely differently#it's a dabbing smear vs a blurred dot#cps blurs less pixely than procreate .. but it's smear function doesn't seems too loose and buttery to me#procreate's smear can actually feel like physical mediums if i pick the right pen... hmmmmmmm#i'll have to try cps's oil painting function because procreate's is kinda poor if i remember right#my art#my ocs
11 notes
·
View notes
Note
Hey! I love your art so much and was wondering what brushes and/or art programs you use, I'm an artist myself and am just genuinely curious. Sorry if this is a strange ask or anything... I don't use or get on Tumblr too often. Thanks for reading this ask and have a good day/night. (This is my first ask to anyone I think)
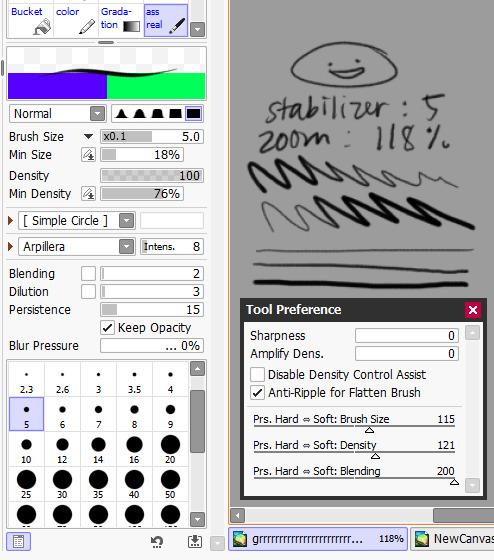
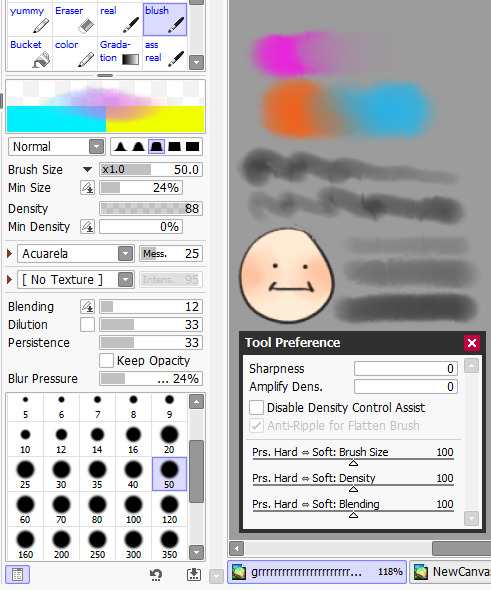
hey!!! i use Paint Tool SAI 2!
as of the moment (which means i constantly change it)
here is my main doodling/sketching/lineart brush:
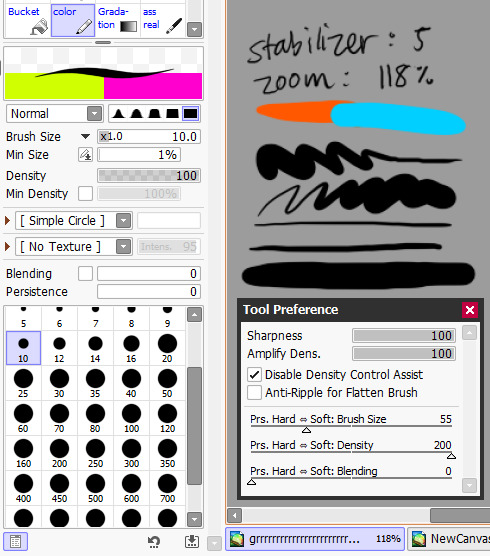
my coloring brush:
any hard edged basic brush will do, you can also use the bucket tool or the lasso tool, it's simply for coloring
my blushing brush:
i blend this brush out by switching to transparency (making it an eraser) and lightly tapping the outside of the paint! (sai users, do this by pressing C on your keyboard. lifesaver been using this shortcut for years)
it's versatile, i love using it for gradients
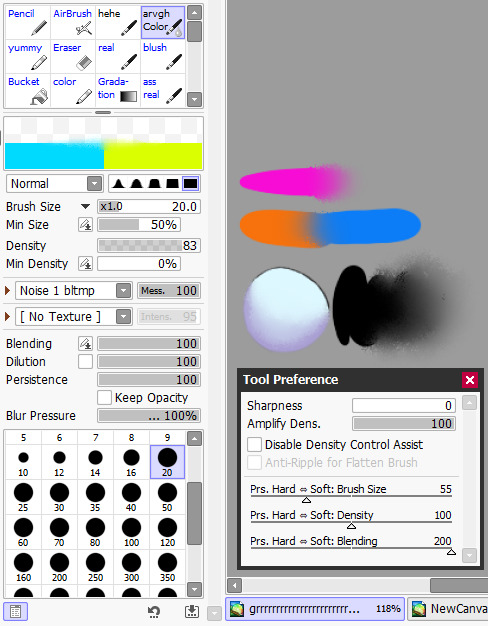
marker brush (usually for ecto):
i use this brush only when i want to paint ecto (which i don't do often) but you can use this for other purposes too!
it's not my favorite, not even good enough for ecto imo, because my sai 1 version is much better
i blend things out the EXACT SAME WAY as the blush brush so please keep that in mind!

a basic brush im testing out for shading purposes:
it has a little bit of texture and is made for baaasically cel shading but slightly softer and has the tiniest bit of color mixing

blending brush i barely use and don't actually really like that much:
i'm still testing out blending brushes that i like because i can't find one that i like that isn't just blurring colors together or making them muddy when mixed together.
if anybody has suggestions, PLEASE let me know! anything like a procreate or csp blending brush that can be recreated would be great
and finally, my rendering brush:
it's basically a basic hard edged brush that can pick up the smallest bit of color
i use it to clean up and add final touches by using the drop picker often and over the entire artwork

ofc, change anything to your preferences. that's how it goes
these are just the settings that work for me :)
this also goes for the program LOL i know sai is not for everyone (but it's my baby my bestie my 5ever so like this is about ME)
i have an in-depth post about my CSP brushes and how i work with them (and i don't really ever use csp unless it's a big piece so it's not changing anytime soon) if that's what you have or prefer
my #ref tag is also a treasure trove of my old settings over the years if you'd like to see those too
74 notes
·
View notes
Note
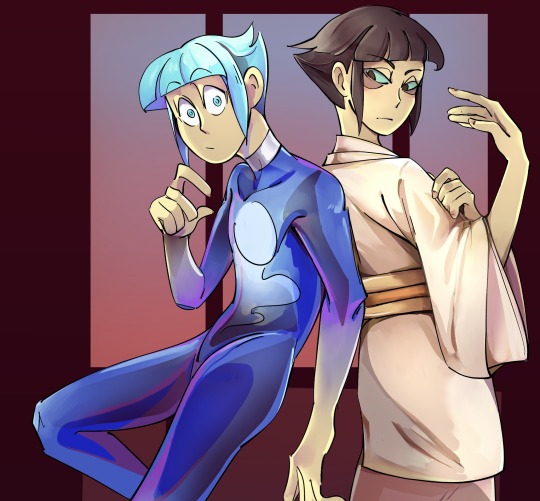
That last piece aaaaaaaah beautiful and sweet, really captures how Lav feels about Randy :D
Also I love how you colour and shade everything, how do you do it? Do you think you could record a speed paint or something? What brushes do you use? Canvas size? How do you painstakingly colour within the lines? What device do you use?
Sorry for so many questions in one ask, I’m really curious lol. Hope you can answer these! No rush :3
First off, thank you so much!
I use Procreate on iPad, which has a handy-dandy little feature where it automatically records everything you do on a canvas, and you can create a time lapse of it. So, yes, I can give a speed paint. :3
(Yes I painted this specifically for this ask.)
For comics (and this painting sample), I use a canvas that's 1813X2263.
For doodle dumps and other less dedicated projects, I use a 1955X2357 canvas, rotating as I want or need to.
If I have a bigger project I want to do, I start with Procreates "Square" canvas default (2048X2048) and crop as I need to as I work.
I've been sticking to this Jingsketch brush set for a while now, though I've modified some to make them more comfortable. As of now the set is free to download. (There appears to be a larger Jingsketch set that costs about $15--I may get that someday lol)
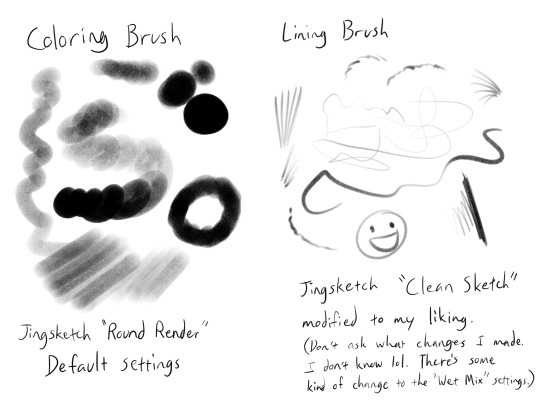
For smudging of shadows and markings, I use the Jingsketch "Jittery Smudge".
Alright, prepare for a thorough rundown of the time lapse. X3
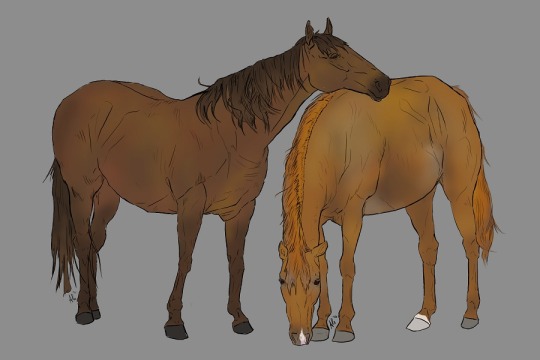
As for how I color, the video shows my two most used methods. I do the Momo method when I want it to look a little neater or smoother, and the Midas method for when I don't care how unpolished it looks and just want to show a colored image.
For flats (the solid red seen in the video) I do it on a layer under the lines. I usually put all the flats on one layer, but this time I did their flats on separate layers for demonstration purposes, and merged them once they were both filled.
For Momo, I colored by drawing just inside the lines, erasing what went outside. Then used a Freehand (or equivalent) selection tool to fill in the inside. This is the more time consuming but smooth of the two methods, in my opinion.
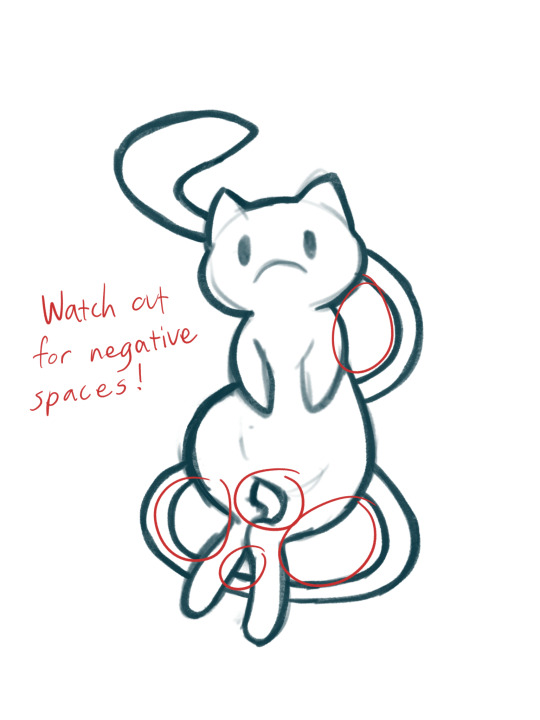
For Midas, I specifically drew the outer lines thicker so that I could use the "automatic" (I guess that's "wand" in other programs? I'm not sure) selection to do a quick fill. This method will usually leave the colors with a hard, semi-unappealing edge. (Feathering the selection a little or smudging the flats can probably help with that, but I don't do that very often.)

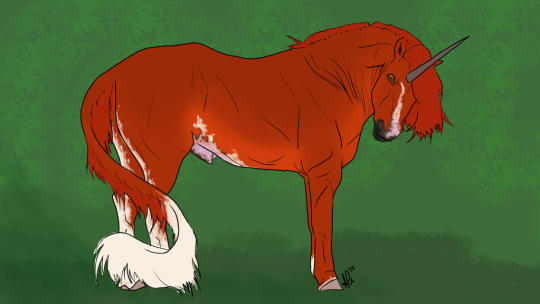
What I do is select the OUTSIDE of the lines, expand the "Selection Threshold" so that it barely selects JUST outside the lines, then invert the selection so that it filles everything INSIDE the lines. With this method you need to be careful to get all the negative zones as well--I didn't think about demonstrating that in this painting, so here a mini-tut on that.


For the actual colors, I usually do each color on a separate layer set as a "Clipping Mask" to the flats layer. Eyes usually get a layer of their own--The iris colors and pupil (if present) get the Clipping Mask treatment until I'm satisfied with them and merge them into one eye layer.
For shading, I'll fill an entire layer, still Clipped to the flats, with my color of choice, usually set it to the Multiply blend mode, and adjust the opacity as I want. I usually shade the main body separately from the eyes, but try to match the blend mode and opacity settings.
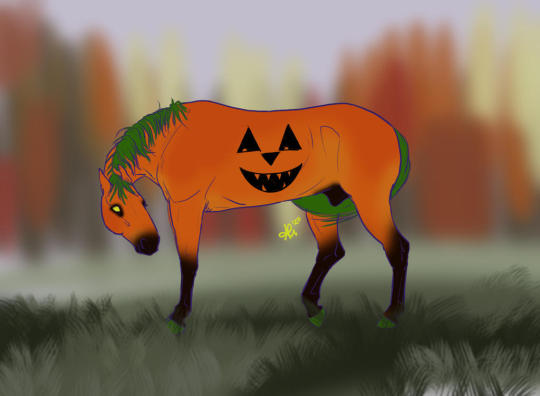
For more high-effort projects, I'll fill a layer with a solid color under the shadow layer but above all the other colors so that I have a better idea of the shapes. Colors like on Midas here can really badly mess with the perception of the shapes and shadow locations. I may also add more Multiply layers if necessary.
And that's my lengthy and extensive look into how I paint~ Keep in mind this is MY process, and I admit I work in a rather quick, dirty, and even somewhat lazy way. So take what you will from this, and go arting as YOU please! ^w^
94 notes
·
View notes
Note
please post a tutorial or walkthrough or even just a longer process video talking about how you draw!! im obsessed with the textures and colors but i cant seem to wrap my head around it!! (i would pay money for a whole mini course tbh if you were interested in uploading one to gumroad or wherever 😵💫)
thank you, i'm flattered :') texture and colour are really important to me so i'm always fine-tuning them to find what works. to be honest i feel like i'm not qualified to teach others since i haven't really even settled on a process, i just kind of mess around until i like what i'm looking at. there are certain things i do much of the time but it's definitely not a linear process!
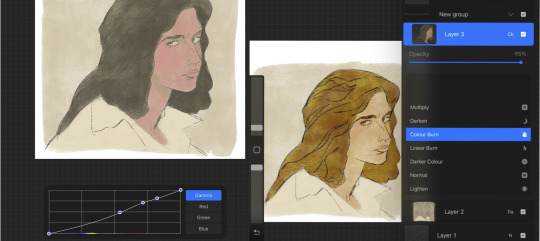
that being said lately i've been experimenting with traditional media and i've found i really enjoy how gouache behaves so i've been trying to replicate the process in digital. i'll try and explain how i've went about it recently using this super boring piece of a random person...
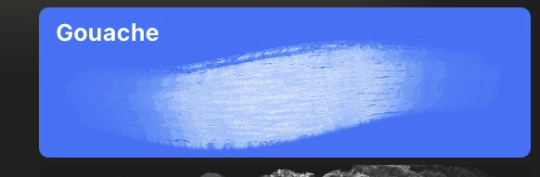
i'm using a basic pencil brush and a default procreate brush called gouache. i picked it for the name when i was looking for something similar to the paints i'd been using but honestly it looks more like a marker to me.

i find trying to do separate inks on top of a sketch distracting so i just erase what i won't need. i'll add a darken layer on top of the sketch and go over it with a single colour as a kind of underpainting. i did the flat colours on a separate darken layer here but generally i'll just work on one layer.
we'll add some colour variation and shading, it looks super subtle here but i'll punch it up later. i think the critical thing with this kind of brush is working with transparent layers so you don't lose the texture and you can play with mixing colours.
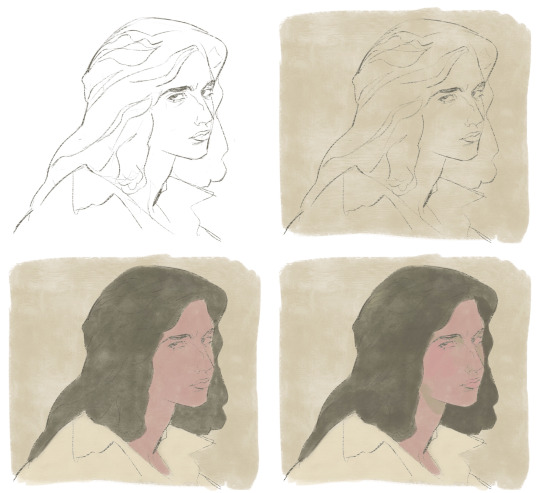
i'll often mess with the curve tool a lot but this piece is pretty simple and i ended up only using it once or twice. when i'm happy i'll duplicate the colour layer and see which blending mode i like, testing stuff out at different levels of opacity until i find something cool. i think i went with a transparent overlay layer here.
the lineart is getting buried so i duplicate that layer as well, drag it to the top of the pile and repeat the process of stacking blending modes. something i like to do is add one layer with the lineart blurred to give it a softer look.
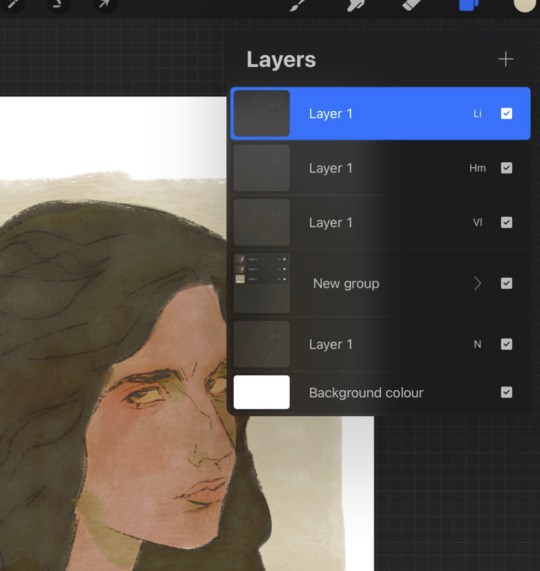
i'll fill a new layer with a dark colour, add about 80% noise scaled up a bit and set the layer to saturation. again you can experiment with the blending mode but i've been using this one recently.
this next part might be pointless but i save the image, open the new file and resize it without actually changing the resolution much, then sharpen it to bring back the detail. maybe it's in my head but i feel like this makes the image look a tiny bit more finished and adds some crunch.

finally i duplicate the whole thing, blur the layer on top and set it to luminosity on low opacity to create a soft glow effect.
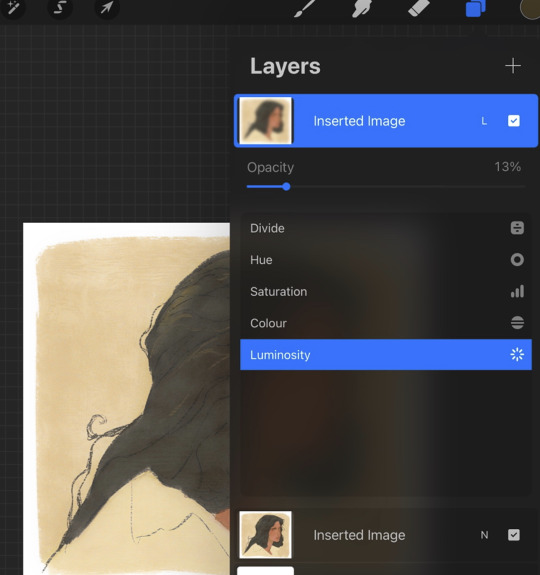
final touch-ups and you're done!
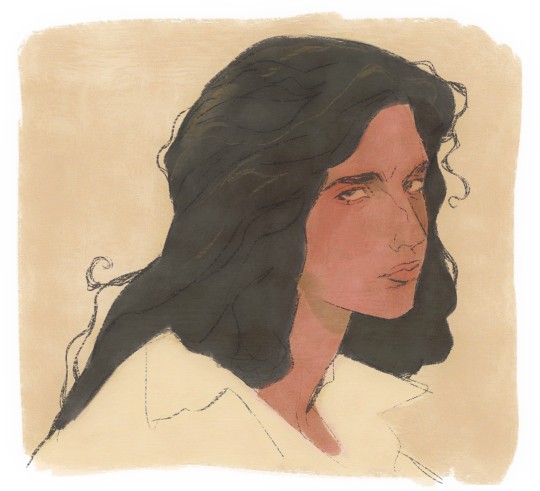
sorry for the convoluted explanation! my process tends to messy, i get distracted and don't often work in distinct steps but i think i managed to describe some of the things i do the majority of the time. i hope it's even a little helpful :)
98 notes
·
View notes
Note
uhh hi ! sorry to bother you, what brushes do you use? im sorry if this has already been answered lol.
Don't worry about it!! I actually haven't been asked this before so you're all good!
To answer your question, I only work on Procreate right now so my brushes are exclusive to Procreate. When I do work in CSP I do my best to find brushes that mimic the same feel but so far I haven't had the time to do that, so I can't recommend any from there at the moment.
For sketching, I use this 6B pencil from Olguioo's starter brush pack

this brush set is free and has a lot of nice brushes, I use the fountain pen brush in the same set for my more 'manga' drawings.

For paintings, I use both the wet and soft brush from HAEYOON's Portrait brush set. This one is not for free. Its 12 dollars (usd) so its a bit of a steep price imo but i use it in every art. I use 'wet' for more precision painting and soft for color fill or for bigger areas.

From the same set, I use the soft blend brush for the smudge tool/blending. The flower petals in this art was done with the oil brush of this set to try and mimic some classical paintings but that needs a little more practice. :B
Anyway, I hope that helps!! Thanks for asking and I hope you have a good day!!
13 notes
·
View notes
Text

Yes, I'm still working on stuff! Been working on quite a few illustrations actually, which is why things have been taking so long.
Anyhoo, someone on here said that they liked the way I rendered my drawings, so I figured I'd show my process a bit here; a little something-something to hold you guys over.
It's nothing really special here...I just use the airbrush and watercolor to blend in Paint Tool Sai. Backgrounds I usually render in Procreate because I love the texture of the Tamar brush; it adds a nice contrast to the smoother shaded character.
But, yeah. That's about it.
I should probably head to bed now.
#jamil viper#twisted wonderland#disney#fan art#work in progress#illustrators on tumblr#artists on tumblr#twistedglass-arts
15 notes
·
View notes
Text


Elliott art dump!
These pictures are quite mid so I decided to post a whole bunch of them at once. Back when I was starting Tumblr I really wanted as much likes as possible. Yeah. It’s cringe. But I’m a furry. I’m all cringe. It’s especially cringe because likes and followers don’t matter much on Tumblr. You’re never gonna make any money on here! Oh boy. Isn’t being disabled and incapable of work fun!
Well. Now I got some stability with responses. About four per non Squirrel and Hedgehog related stuff. In the past I would spit these three into separate posts. Thus gaining about 12 likes if I’m lucky all together. But now I will post them all together because I’m not such an attention whore anymore.
So now about these fellas. The first Elliott is actually the last one with the sea background. I wanted to impress with the best one so I put the latest one to show first. But this sea background one. He was an attempt at the jelly art style. I still have a long way to go, don’t I? He’s kind of cute. Though he could use more polish. They all could. He was supposed to be more realistic but after I finished the sketch I didn’t pay much attention to the reference photo. A lot of the time my painting don’t have the best of anatomy. That’s quite strange because anatomy in my sketches while not perfect is pretty good. My art teacher said that it’s because I get so engrossed in painting I forget to pay attention to it.
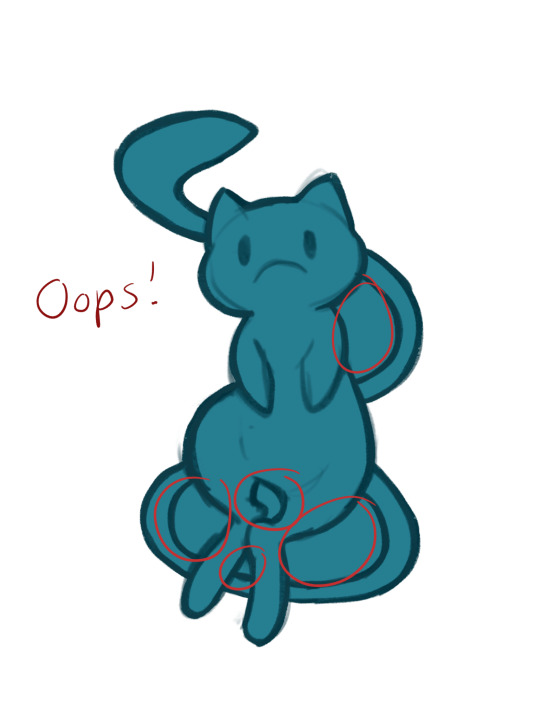
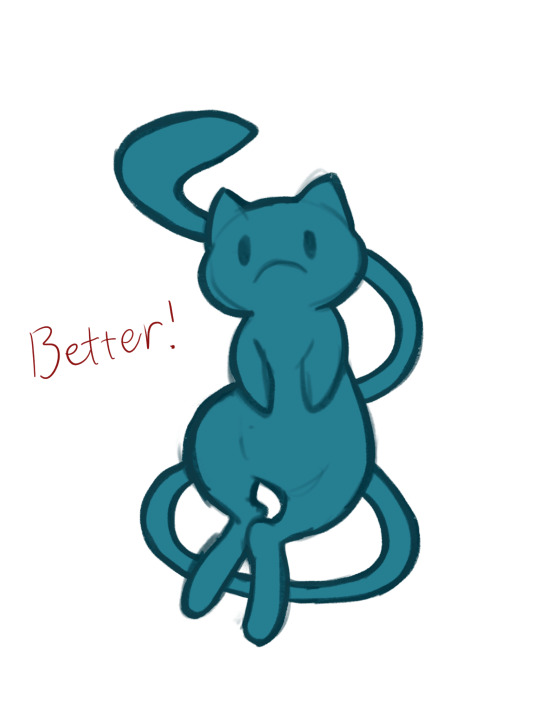
I did learn something on this piece though. Using the blend tool. I first block out under my sketch with a flat base paint. Then I add (lol I wrote ass by accident!) a clipping layer onto the flat base. There I do all the colours. Then I merge the base and the colours to blend it. Don’t forget to use alpha lock! Then merge that with the sketch layer on top. Blend away the lines. Switch off alpha lock and do the polishing.
Got all that? No? You didn’t understand a word what I just said? Ehm. Moving on.
The middle one. I quite like this one. Even though I didn’t do enough blending around the eyes so he got some sick eyeliner. By now you noticed that Elliott doesn’t look the most like his in game appearance. I really love the earlier designs. He’s just so dorky! I also base my head cannon version of him from the actor Haruma Muira. I’ve got a whole bunch written about my head cannon if you’re willing to scroll for two hours down my blog. There’s not much to say about this drawing. It’s sketchy. It works. I went lazy with the sweater. It turned out pretty good.
Now the top one. The eye catching furry version of Elliott. I drew him as antro lion before. But then I remembered that lions are supposed to have a collar like mane. Not just hair on top. For the life of me I couldn’t figure out how to make him a twink though!!! I did challenge @32girassoisdevangogh but it seems they chickened out! That or they have more important stuff to attend to…
IMPORTANT!!! IMPORTANT!!!!
@32girassoisdevangogh is not a chicken!!! They drew Elliott as both a lion and a Iriomote catand did and incredible job doing so! Really taught me not to do cheap jabs at people because they will make a big fool of you!!
INTERMISSION OVER!
So I changed the species to a Iriomote cat. Which works far more for the story I have for him. My head cannon is he’s a 2nd generation immigrant from the Gotoro Empire, which is like Stardew’s version of Japan in my head. Everyone thinks he’s white because though he has monolid eyes and bronzish skin (when he dares to go out his cabin) he still got ocean blue eyes and red hair. Iriomote cats do look like your usual street cat unless you look close. I won’t have him be a furry if I ever get around to writing the fanfic about him. I don’t want Zootopia 2 Bad Racism Allegory Boogaloo.
This picture looks… alright. I have a lot of learning to do when it comes to digital paintings. Do you have some suggestions for what I should work on? I draw in Procreate.
Bobby out!
#my art#fanart#procreate#digital art#furry art#stardew valley#stardew elliott#digital painting#art criticism#give art advice please!
8 notes
·
View notes
Text
-Full Procreate Dreams review-
firstly, i am by no means an animator, i’ve done a few short animations but nothing big or frequent, so if you don’t think i have the authority to judge an animation based app, then that’s totally fine
(also i’m sorry it’s super long, i added a TLDR as compensation)
outline:
🔺Overview of Procreate Dreams
i will judge it on:
🔺Bare minimum (does it do the bare minimum as an animation app)
🔺Features (are the features it has good, are there enough, does it need any more, etc.)
🔺User-friendliness (can it be easily understood without using tutorials)
🔺Functionality (do the features function, in its current state are there any frequent glitches or errors)
🔺Money worth (is it worth the $20 USD spent on it)
🔺Final conclusion
🔺TLDR
review under cut:
-Overview of Procreate Dreams-
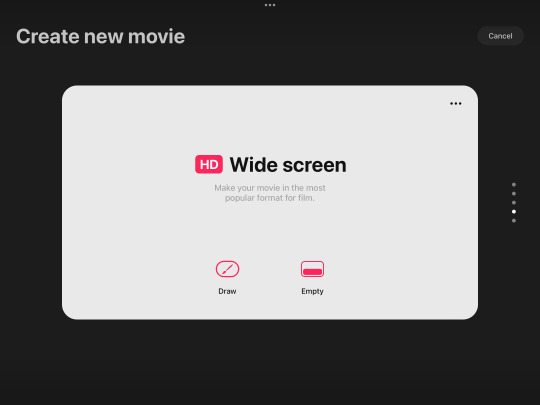
The UI is similar to Procreate but not exactly the same

once you click + to make a canvas you get this screen showing various presets of canvas sizes (if you press the … you can choose frame rate, a note to add is that you can’t choose the exact number, only from presets, and the lowest is 12 fps)
this is the main workspace UI with the animation timeline down at bottom and drawing on top
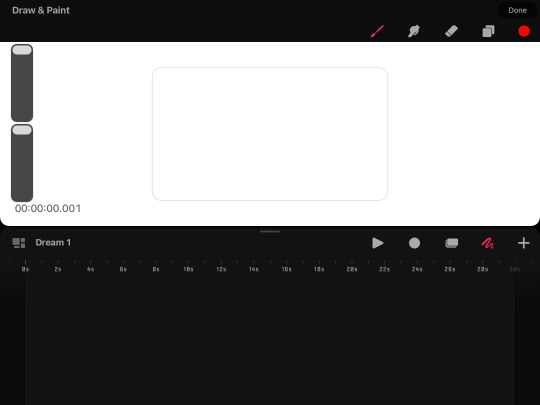
the drawing part works roughly the same as procreate (if you haven’t used procreate, well uh L i don’t have time to do an overview of that too) but some notable absences are no brush editing, no transform tool, no select tool, no flip canvas tool, and no liquify tool
the app is based primarily in gesture controls, so much so that there isn’t even an undo or redo button, to undo you have to click with 2 fingers and redo is click with 3 fingers
it also has 2 main forms of animation, one in which it favors
frame by frame, or as procreate dreams calls it “flipbook” and animation mainly by editing parts of existing art (such as tweening, blurring, warping, etc.)
this is what the flipbook looks like, you cannot x out of the flipbook without it going back to the split timeline/drawing screen (previous screenshot) you can move the flipbook around the screen but cannot enlarge or shrink it

in the alternative animation style you can set key frames and click and hold to open easing options, the default is ease in & out
along with key frames for move and scale, there’s also distort, warp, opacity, gaussian blur, noise, sharpen, and HSB (adjustment of hue, value, and saturation)

general notes:
procreate dreams has a “perform” button, which basically means that if you click it and press play, you can move a part of a drawing (or multiple parts if you select multiple or put them in a group on the timeline) and it will record how you move it and automatically add the keyframes which you can adjust afterward
you can adjust the canvas size by typing the exact pixel size, but unlike procreate it does not allow for as large of a size (it couldn’t reach 2000x2000)
-Bare minimum-
can you actually use it to animate??
i would say absolute bare minimum for frame by frame is have onion skins, able to choose fps, have it flip through the frames so it’s you know like an actual animation, have functioning, and preferably have layers
and bare minimum for the other style is have basic scaling options, have functioning export, and tweening with optional easing
procreate dreams passes bare minimum ✅ (wow what an accomplishment /s)
-Features-
it has the basic features such as onion skins, keyframes, etc.
it does allow for import of video, audio, photo, and text
the “perform” feature (explained in overview) is unique to procreate dreams from what i know
oddly enough the foreground and background feature that was in procreate animation was not added to procreate dreams
clipping mask, layer mask, and blending modes are there
BUT there is an extreme lacking of certain vital features
in frame by frame animation you can use many layers, but cannot re order them, and re ordering the actual frames is possible but rather difficult and i’m not actually sure how to do it intentionally and deleting frames is also a nuisance in the same way
you can also not re arrange the gallery images, i’m guessing this is because unlike procreate which stores art in the app, procreate dreams stores it in the files
there is no select tool and transform can only be done in the timeline which is just inconvenient, but to do any rotation you have to manually type a number of degrees it should rotate, you CANNOT rotate it normally
there is no physical undo/redo button, only the gesture for it, there is no brush editing, there is no physical import button for brushes (you can still import brushes but it is less convenient)
original procreate had a feature to hold down the pen after drawing a shape, and it would automatically make the shape but perfect and you could adjust points of it, procreate dreams does not have this
(there are of course more features but these are the major things i thought should be mentioned)
in features, procreate dreams is lacking, it has many good features but really important ones are missing ❌
-User-Friendliness-
i am a bit biased in this category because the UI and way it functions is many times very similar to procreate which i have been using for 4 years so take what i say here with a grain of salt
most everything in the app i figured out on my own without tutorials, and i did it rather quickly
i find it to be very easy to understand even for someone who has never seen the app ✅
-Functionality-
most of the features do function, but there are a few issues i should mention
occasionally on the gallery screen it just froze, but closing and opening the app again fixed it, and that didnt happen much
the brushes also look a bit more pixelated and not as smooth as procreate’s(??)
the import video and audio feature issues however, did happen much
i don’t know if this would be an issue for a newer ipad but any time i tried importing a video (even as short as 2 seconds) it said “this video exceeds your device’s capabilities” or if i tried importing too long a video it just crashed
purely audio files are a similar issue, except it COULD import a 2 second audio, but crashed at a 30 second one
in its current state, functionality is mostly passing, but audio is oftentimes such an important part of animation that i cannot truthfully give this a pass, but i won’t give it a fail either ❓
-Money worth-
in terms of money,
No.
$20 is an outrageous amount for an app that fails to import longer than a 2 second audio, having no select tool, an annoying transform tool, and many other missing features that even FLIPACLIP can do without even paying ❌
-Final conclusion-
i have full faith in the procreate team, i truly believe they can make this an absolutely amazing app, but right now, i would highly advise against buying it
i was really excited for it because i’ve been a loyal procreate fan for 4 years and go on about how amazing procreate is, but this is just disappointing
i will update you all on if it receives any major updates that fixes or adds features, until then, my conclusion is that procreate dreams is not currently worth your money ❌
-TLDR-
Procreate Dreams is missing a lot of really important features like a select tool, rotation, and the transform tool which it has but is inconvenient to use, and the audio import barely even works
i have full hope that the procreate dreams devs can and will fix it and make it a great app, but as it is now, you’d have better luck using flipaclip for free
it is actually painful for me to say that you shouldn’t get procreate dreams cause i love procreate so much, but i know that this is just BAD
go buy procreate instead, i have literally no complaints about that one it’s the best and i love it
also i’ve got art going up tomorrow!! so you get that at least
-updates-
-clipping mask added
-custom frame rates added
-drag and drop layer organization added
10 notes
·
View notes
Note
Sorry if u been asked this before but what brushes do u use? And what app 😭🔥 also ur art is DIVINE 🙏🙏
Oh my gosh thank you, you're so sweet! I can answer all of that in a convoluted little tutorial I shall give now without anyone asking~
I use Autodesk Sketchbook for Windows, as it is free and versatile enough for a digital art babychild like me to adapt. Here's a basic run-through of my work process:
Sketching:
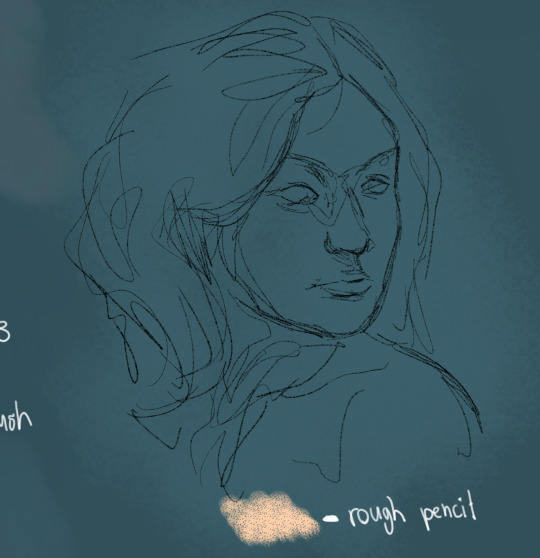
As a self-employed rule, lineart is fucking dead to me and I'll never use it because it'll always show off my shaky hand and blase drawing style as less of a quirk and more of a deficiency. Sketching however is my best friend in the whole world and I'll usually use a thin rough pencil brush (see above) to keep a traditional look about it. I'm oldschool what can I say.
Colouring:

Although for the example work I actually dove right into building tones without adhering to my usual system, I always use the stock paintbrush to fill in the form. Call me a troglodyte because I certainly am one, but hey it gets the job done, and I can always have fun later with the groovier brushes.

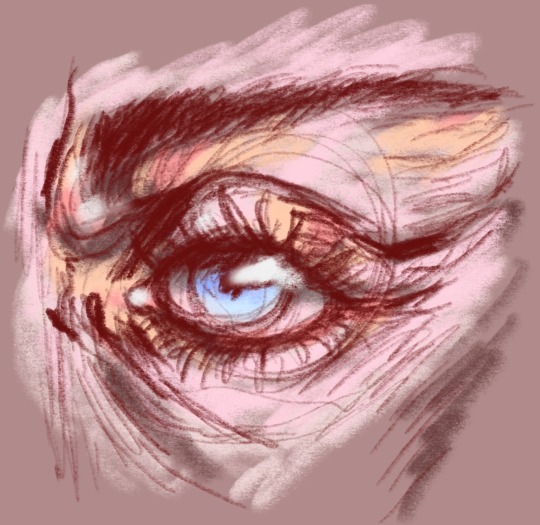
Now this is my favourite part, making the form look less like an unevolved slime worm was here, by utilizing the super ultra groovy brushes, like my favourite two shown here (and usually the only two I'll bother with). The Synthetic flat bristle brush I use as a substitute for the blending tool (another one I heavily depend on in the stock brush phase), because it makes the work look less manufactured and more real, like a real life human did it. Typically, I use it for hair and clothes, but sometimes skin too, when I want it looking raw.
And the rake brush! Not a single work of mine will be without it, I'm fully obsessed, and I'll use it wherever I can get away with. It looks fantastic with hair and using it as a soft highlight.
Editing:
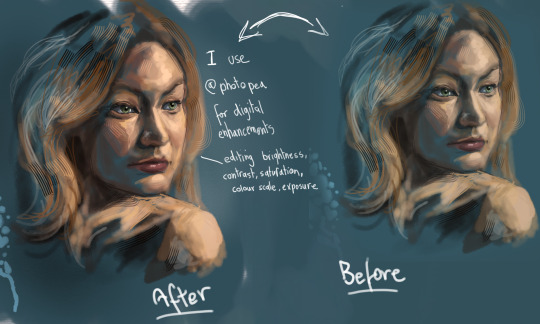
Actually I lied, THIS is my favourite phase. Editing baby!
Although a brush isn't involved in this stage I'll mention it anyway to shout out Photopea, which is a free online photoshop substitute with nearly all of the same features, without that hefty pricetag. I use it to enhance or muck around with colours and tones, or sometimes just for ideas. It's goddamn brilliant and I couldn't recommend it enough.
Finalising:

After playing around with values and tones, I can go back to sketchbook and finalise my work, adding anything it needs before I put my pen down and say enough. Sometimes the process is helpful because I can take a break, look back, and see elements I need to fix and improve that I didn't see before, and huzzah! She's complete!
Anywho I hope you found my drabble helpful, and someone please help me find the torrent to procreate for windows because goddamn I wanna try it so fucking bad. But not enough to let the fly out of my wallet, it's currently the only thing in it XD.
#thanks for the ask man I'm sorry that i babbled on so much i just cant help myself#asks#art tips#art tutorial#goddamn lecture more like#digital artist#digital art#autodesksketchbook#photopea
30 notes
·
View notes
Text
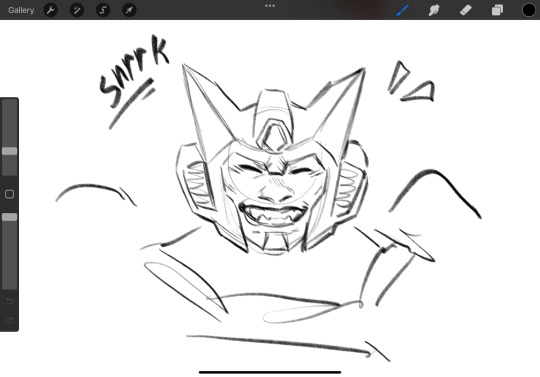
Entry 3: Playing around with Procreate
I have always been a Photoshop person to create digital paintings, I still prefer it over the other softwares. My favorite aspect of it is the blending process. The way that the tools worked is similar to mixing colors irl, where you get the hues that are in-between the colors you’re mixing, creating new ones. The other thing is some of the brushes are designed in order to detect the angle of the pen tip and so the brush would rotate or tilt accordingly, making it able to mimic a traditional drawing tool like a pencil or a charcoal stick. In my relatively short experience with Procreate, I struggled to get the colors to blend to my liking. I absolutely hated that my only two options were either smudge the colors together or to alternate the opacity of the colors to give the ‘illusion’ of mixed hues, which they’re technically not. Adjusting the settings of the brushes felt like a solving a puzzle, it was hard to keep track of what I did or didn’t modify, and the differences in the settings were undetectable. So for the most part, I used Procreate for rough sketches only and finished the rest on Fresco.
Adobe Fresco is the equivalent of Photoshop but made specifically to be used on a tablet. It functions very similarly to how Photoshop brushes usually do. I would dare say that the smart brushes on Fresco are even better than the og software, they’re phenomenal and very fun to play around with. But sadly, recently it’s been glitching on me and those features are no longer working (it could be due to a number of factors, it could need a system update or something else. I still haven’t gotten to the bottom of it) However, something about Procreate that seemed appealing to me. For a starter, it’s a one-time purchase app, no monthly/yearly subscription shenanigans, which is always a bonus. But also, perhaps it’s the plethora of great art pieces that I see people make by using it. Some of the brush sets, blending techniques, line-works look absolutely impeccable, which piques a curious itch in my brain that makes me want to explore this app more. It can’t be this much of a lost-cause to work with, right?
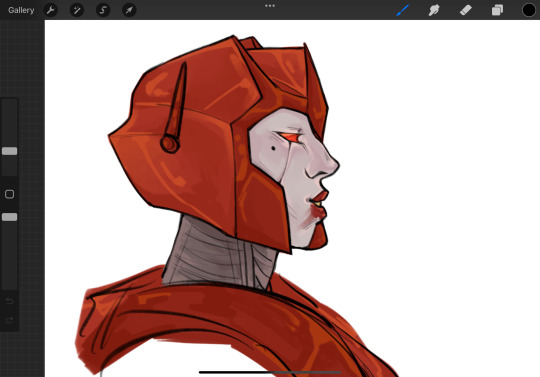
Today, I changed the pressure and smoothing settings for the pencil. I saw a blog focusing on the different variations of the pressure curves to suit your own preference, and I tweaked around until I feel like I got it to work in a manner that feels more comfortable for me. It was relatively simple, I just adjusted the physical pressure I need to use to get the maximum opacity of the strokes to about 25%. This is kinda rich coming from a heavy-handed bastard like myself lol. But with this adjustment, I am consciously using less pressure which makes sketching feel like a breeze honestly.
So I made this sketch fully aware that nothing about it makes sense, not the anatomy, nor the colors, or pretty much anything. But what I like about it is that it didn’t strain my hand, the ‘loosness’ of the sketch actually felt quick and loose, something I really appreciate. I think I’ll have more fun using Procreate after those small adjustments. My next target to tackle is definitely gonna be the brushes. but in the meantime, the current ones that I got are definitely gonna feel different now that the pressure settings are set to something completely new :)
Cece M.
090324 : 0230
💙
2 notes
·
View notes
Note
What brushes do you use for inking/sketching?
Hoo boy uhh skdks I will be the first to admit that my brushes are a bit eclectic! I also flip between different ones fairly frequently, so fair warning that there’s no smooth answer to this question in my case lol. However all my downloaded brushes are available for free online because I’m disabled and broke so this setup is friendly to all, though I’d recommend buying from any of these brush makers if you can to support them
For sketches I mostly use The ELDER 3.0 or 2.0 (the 3.0 is just a softer version of the 2.0) from this comic ink brush set (pay what you can) I like them cause they’ve got a chisel shape with a soft, grainy pencil texture and really good pressure sensitivity/weight variation, all of which I think compliments my style better than smooth rigid brushes. They work for loose sketches and they clean up really well for soft lines!

For legit line art though? I don’t actually do that too often, most of my recent art has either been sketches or paintings, but I use a modified version of the Mercury brush, which is a Procreate default. I just made a duplicate of the original Mercury and then switched off the burnt edges so it doesn’t layer colors like it did originally. It’s a solid inker with a crunchy, textured edge and plenty of pressure sensitivity, so it retains a sort of sketchy pen and paper look that I’m fond of.


But like I said, I don’t usually line finished pieces much anymore, or I disguise the lines when I do. Mostly I paint cause I like the texture it provides my colors. For that I use Fish’s everything brush & sketchy block (pay what you can) and I blend my soft shadows with the TrueGrit Sampler classic watercolor wash which you can download for free along with a whole host of other amazing brushes by subscribing to their newsletter.


But regardless of my comfort zones, I experiment with new brushes frequently and highly recommended that all artists new and old do the same! It’s less about the brush and more about finding the right brush for you and your style that plays to your technical strengths. I like big blocky shapes and soft round edges and rough textures, so my usual brushes reflect that, but those might not be the brushes that work for everyone. Tool around with new things whenever possible and eventually you’ll stumble across the right combination of qualities for you!
7 notes
·
View notes
Note
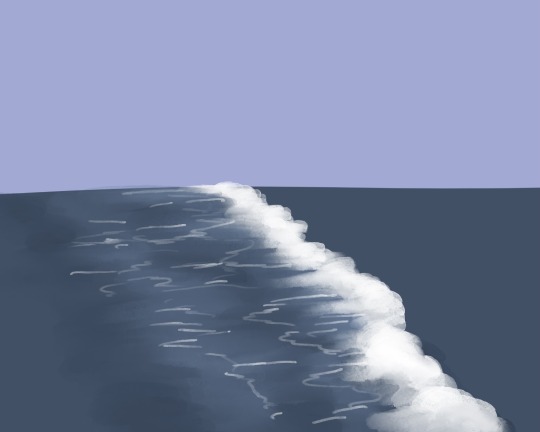
I recently found out about you and your selkie story! And two questions: can you do a tutorial of the rain and sea and did the girl cried 7 tears in the ocean to summon her selkie girlfriend like in the legends?
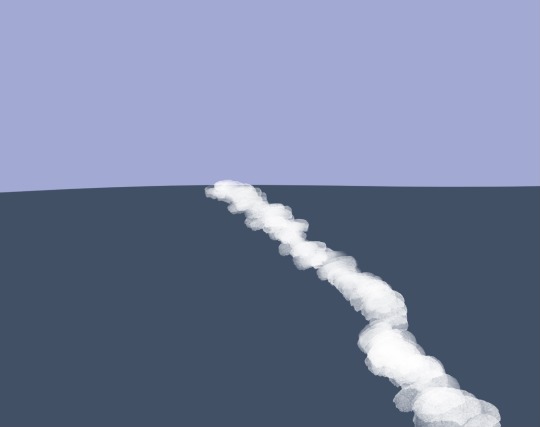
Alrighty I don’t often make tutorials so I will do my best here! (Working in Procreate for these shots)
First I use a large solid brush to block in the water, and then I start the wave with any brush that has texture and variation in opacity. I tend to do a more solid block first, but not so solid that the foam will look unnatural, just enough to plan out the look and path of the wave. Then I use a similar or same brush on the smudge tool to both pull it out, away from the direction the wave is traveling, and also towards, again for variation. I don’t smudge the front of the wave to keep the look of sea foam being pushed towards the shore, I don’t want it too soft looking. Myself personally for stuff like this I really like the watercolor maxpack by Max Ulichney, but there’s plenty of great options in just default brushes. Anything that’s more painty looking, again, the textured brushes really help. Lots of options in the painting and artistic brush categories.
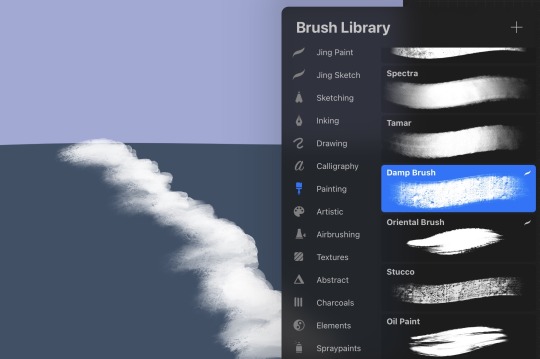
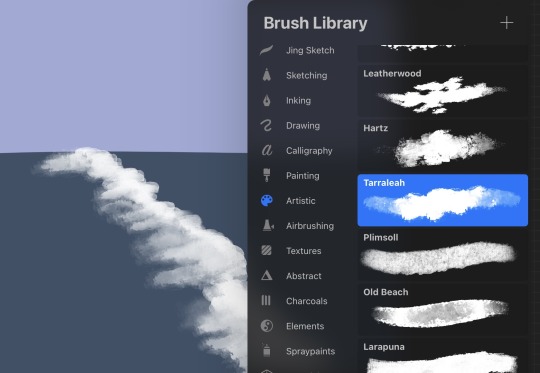
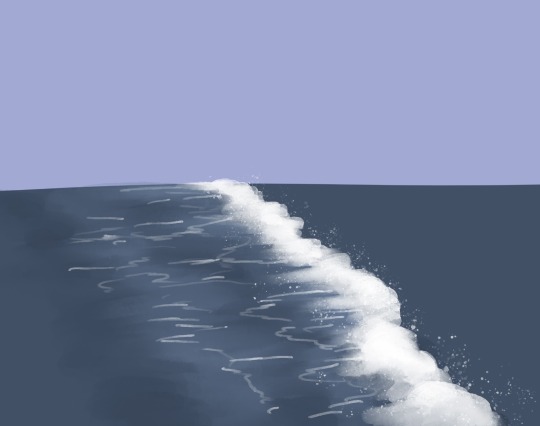
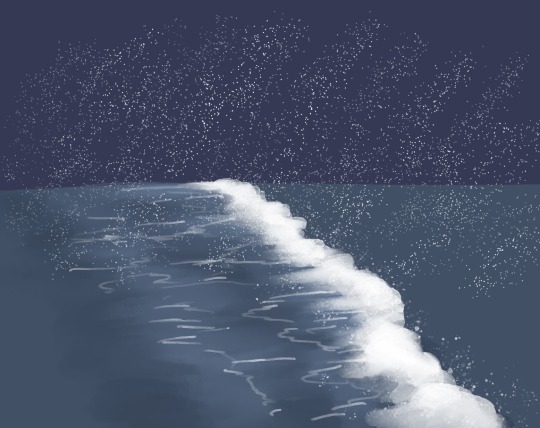
Next I add some smaller details, where the foam breaks up and disperses behind the path of the wave, as well as some variation in the color of the water, and blending it in to the solid base color to soften it. And then the spray where the foam is rolling and breaking, you can use any spray paint brush, or anything that looks like paint flecks! Rinse and repeat, giving some variation in size of the waves, as well as how “even” the flow of the water is. Like some parts of the same wave will reach shore before other parts, instead of hitting in one straight line.
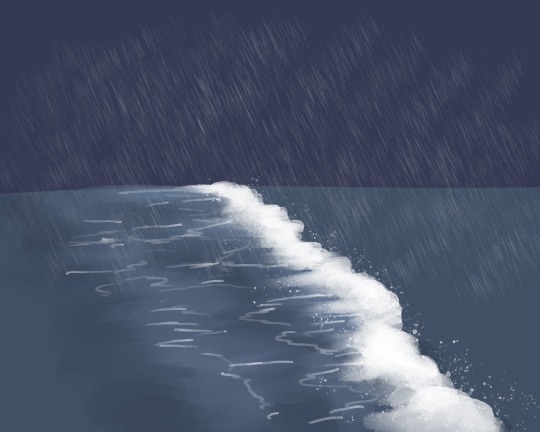
As for the rain, I believe when I did that comic I used the standard spray paint tool and then a motion blur. Not the most elegant looking rain but it’s easy and you don’t have to draw a ton of individual rain drops~
And as for your question on the story, I actually hadn’t been thinking of any kind of legends or established selkie lore! The unspoken part of the story is basically the selkie hears the crying of the girl on the pier and comes to investigate. She asks what’s wrong and the answer is kind of “everything,” and the selkie offers a change, that maybe ocean life would be better. And I don’t know if selkies can turn humans into selkies but I decided they can, enter the good old “sharing magic through a kiss” trope and hooray! Selkie girlfriends!
11 notes
·
View notes
Note
hey! i am consistently in awe of your work, i genuinely adore it (I’d love to get prints of some of your pieces if that’s available anywhere 👀) but im writing to ask abt your technique and brushes! Im new to digital art, and i wanna create the sort of effect you make and i cannot for the life of me figure out how to do it! you have these strokes that look sort of like charcoal but also paint? also refracted light???? idk what program u use or anything and im just a noob still learning how to get the most out of the brushes that come w procreate, but even if you’re using a different program and stuff, I’d love to see if there’s anyway i can translate that effect somehow to the tools I’m using. It’s really cool stuff!! im sorry if you’ve already answered this somewhere 😅
hey! ok first off take anything i say with a grain of salt because 1. i'm self taught 2. there are many many ways to do art, there's no One Right Way. experiment and settle on what works best for you!
atm I basically only use procreate on ipad with an apple pencil.
I've compiled the brushes I use most into this post click here, I'd say download some sets and try them out! this seems to be a bit of an unpopular opinion because I regularly see advice to stick to the basic brushes however if you were making traditional art you wouldn't unnecessarily limit yourself to the cheapest brushes/paints either (assuming you could afford everything), so. go ham.
the main technique I use is a pretty common one where I use a big textured brush and then use a base color layer + clipping masks (you can google how to use these) or selection tool to get sharp edges. so I'll make a selection of the shape I want to paint and then paint within that selection. i often do this with light strokes and/or the brush on lower opacity so i'll keep texture. if you look at concept artists on instagram you'll see this technique used a lot too :) 'edge control' is a term to google to find more about hard/soft edges and how they'll improve your art!
for the light, even for digital art I would very very much recommend james gurney's book 'color and light' because it teaches you almost all you need to know about, well, color and light, and you can apply these principles to digital art too. it's well worth the price but if you can't afford it then there are perhaps some copies to be found online ;) for the actual method in procreate, I like to use layers on the add and screen blending modes, sparingly, and NOT with white highlights but with the actual color of the light e.g. yellow, blue-ish, etc. for stuff like wings, it's usually multiple layers stacked on top of each other!
(i am not organized)
as a final note i will add that i painted traditionally for years before starting digital art, so i do think that'll have influenced my approach in a couple ways because i basically took all that knowledge and methods into digital rather than starting from scratch.
#hope this is comprehensible and sorry for lack of more pics I just know it’d have taken even longer otherwise#feel free to dm me if you have more questions#if anyone is wondering about a specific painting let me know and i'll happily explain howeverrrr#am terrible with answering asks tho so pls be patient & just in case too many ppl ask i may not get around to all of it#not art#mjulmjul answertime#LONG post
26 notes
·
View notes
Note
Heya thank you so much for the art advice earlier! I was wondering if you had any specific suggestions for programs and/or brushes (you know specifically for someone whose only fine art experience has been in pencil and charcoal 😭) .
I’m currently using iArtbook because it’s free. I know Procreate is probably the most popular program but I’m literally -$300+ in my bank account right now, so that isn’t a current option 😅.
However I do believe you can upload brushes to the iArtBook app, honestly I’m not sure, I haven’t tried but you can edit the brushes in a very similar fashion to Adobe Photoshop. So I’m assuming you can also download and upload brushes. I actually really like this program because it has a similar feel to Adobe programs and as a Photographer I’m very experienced with Adobe (I have an Adobe Cloud Account).
In all honesty I’ve never been a good illustrator (since my main focus in my fine arts education was always photography) , but I find the activity meditative and I’m ALWAYS looking to improve.
(Also I was gonna DM you but cant so sorry for the long question 😅)
Yo, it's all good. No apology necessary.
I can only suggest what I know. I've never used Procreate, and I've never even heard of iArtbook. I'm also one of those that absolutely will torrent my art program of choice. And have.
A long, long time ago (like probably thirteen years), I got a copy of Corel (Coral? Idek anymore) free with the purchase of my Wacom bamboo tablet. I didn't know what I was doing yet and I hated it. My laptop hated it. It was very heavy and lagged big time.
I switch to Gimp, which is legally free and open source. I used Gimp for years with zero problems. You can import a lot of Photoshop brushes into Gimp without issue. Compared to Photoshop and Paint Studio, it's incredibly underpowered. Looking back at the art I made, however, I was not poorly off.
From Gimp, wanting more, I then switched to Photoshop CS5. It was incredibly easy to find and install. Personally, I say screw Adobe, since their current model is subscription based. I hate that. I used PS for yearsssssss, up until last year, I believe. It wasn't too heavy for my laptop to handle unless I used too big of a brush. It allowed me to expand my knowledge of digital art programs. It has way more to offer than I'll ever use. But as i mentioned before, the natural art brushes are ... okay, and the blending tool is awful. I learned to NOT ever use the blending tool because of PS.
Throughout time in my PS years, I switched from a Wacom Bamboo tablet to a Huion pen tablet (three different ones) to a Huion Kamvas 16 Pro tablet. With my family's help, I put money towards improving my art by way of hardware, and each tablet became significantly better. A good tablet will help TREMENDOUSLY, but by no means does anyone *need* to splurge on a screen tablet like the Kamvas series. I recommend Huion. It's hard to go wrong with them. In case that ever tickles your fancy.
Like, I'm pulling examples of art I've done with these programs and tablets, specifically unshaded pieces, to show that the software and hardware doesn't necessarily make the piece.
Now, I'm using Clip Studio Paint because it comes with so many native traditional brushes. Again, the company switched or threatened to switch to a subscription pay, so I have no qualms in resorting to circumventing their purchase page.
I will say, I think I love Clip Studio more than I ever did Photoshop. The brushes are just ... perfect.
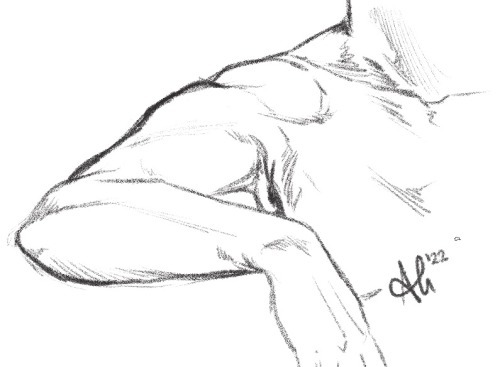
Like this. This isn't pencil and paper! It's the pencil brush that comes with Clip Studio. It draws JUST like a pencil and I feel like I'm in my natural element when I get to use it.
If you do decide to use PS, or a program that is PS brush compatible, I'll have to find that set of brushes that works similarly to these.
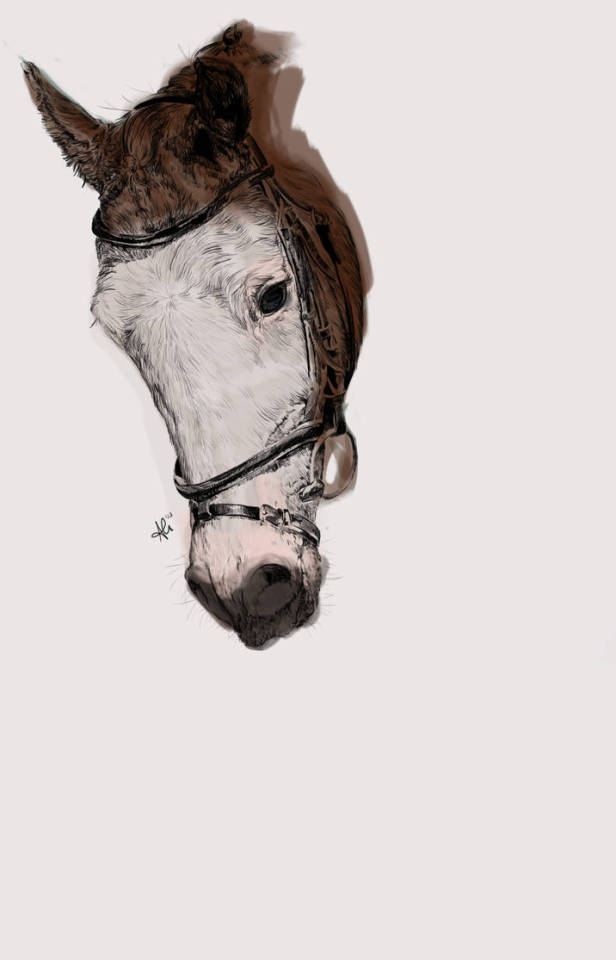
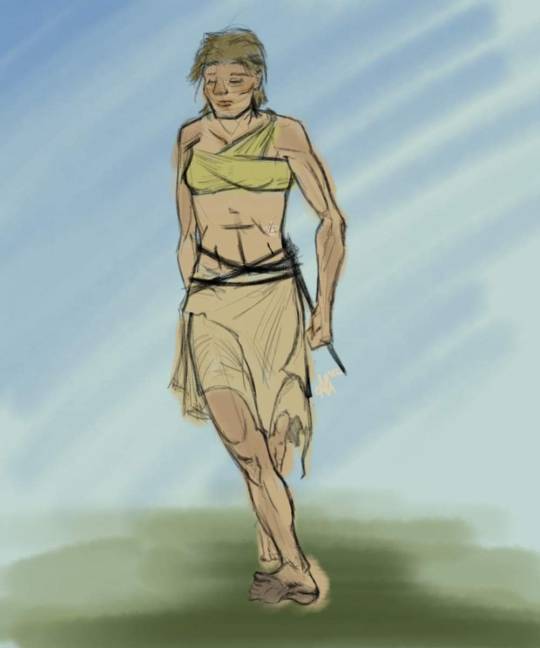
These pictures both used one of the pencil brushes from that set in PS. The horse was painted with a watercolor wash brush; the human with a chalk brush. It's nowhere near as versatile as what can be used in Clip, though.
But I'm sure you could find many brushes through dA and gumroad to use until you find the one that works for you, too!
4 notes
·
View notes
Text
Master Sky Painting Secrets in Procreate Information
Master Sky Painting Secrets in Procreate is an online course offered by Angrymikko. It is designed to teach students how to create realistic and stunning sky paintings using the Procreate app. The course is focused specifically on digital sky painting techniques and aims to help participants develop their skills and unlock the secrets to painting beautiful skies.
What You’ll Learn In This Course?
Everything you need to get started in painting, from how to use brushes, layers, and different layer techniques all the way to mastering advanced editing techniques.
Practical tutorials for actually completing each phase while learning the underlying design principles of creating illustrations.
Understand how to implement color theory in palette creation and give all your artwork a strong, consistent atmosphere.
Information-packed lessons organized from beginner basics to mastering professional workflows.
Learn how to construct a layer structure that is optimized for speed and editing possibilities.
Tutorials on layer masks, clipping masks, alpha locks, and how to use them to make the painting process easier.
Paint light and shadow on any surface.
Master composition with a checklist method that has been developed and tested during 6 years of my concept art classes. I use this method for every one of my illustrations.
Exclusive brush set for painting everything from stylized to realistic skyscapes and all the tools used in the lessons.
Massive library of color palettes. Easily find moody dawns, golden hours, and burning sunsets from palettes made for every hour of the day.
Take the guesswork out of blend modes by understanding how they work and how to use them.
Color edit like a professional and learn to push the colors in your art for maximum visual impact.
Unlock your storytelling skills by learning how the eye moves in an image and using it to create memorable illustrations.
You will create a detailed skyscape illustration and gain technical skills that you can use in all of your art.
More courses from the same author: Angrymikko
0 notes
Last Seen Blogs
artofbriantrainor
Art of Brian Trainor
nferrm-blog
P O I N T OF V I E W

dejdecho-blog
Untitled
coffeetheactualjellii
Arch Enemy Of Tea!!
hotjeans4me
Me, Jeans & Denim