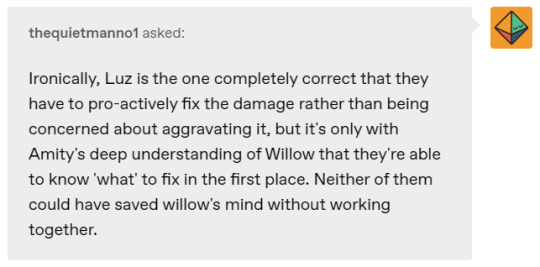
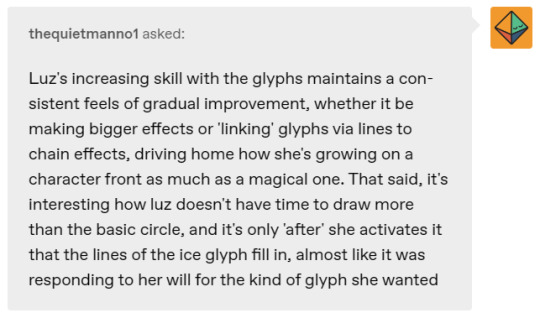
#click the first one to see the full image it got cropped and I wanted the two images side by side 🥲
Text
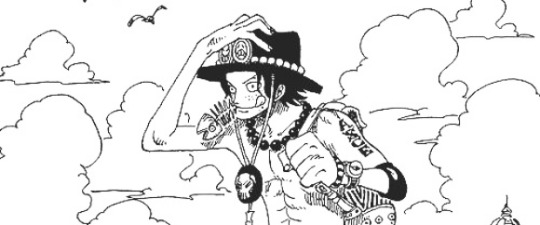
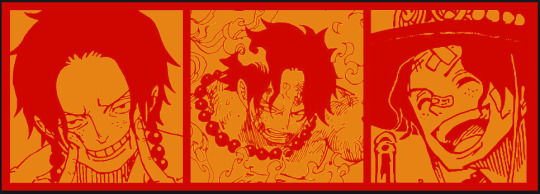
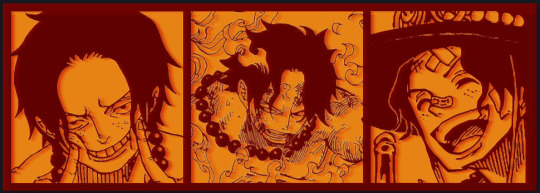
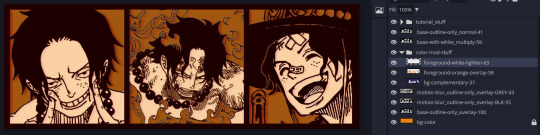
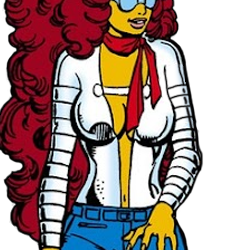
the contrast between these two scenes...
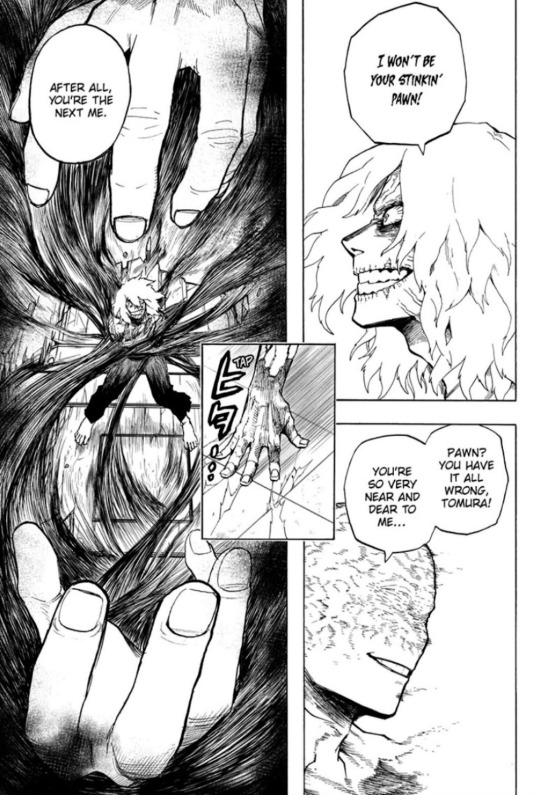

you can argue that afo was lying when he told tomura that he was "near and dear to him", but I actually think he was being truthful here. he loves who tomura shigaraki is because he's something he helped create with his own hands and it's who he projects all his own desires/will onto, all so he could become him as he sees the image of tomura as the idealized version of himself. tomura isn't just a pawn to him, he's what afo is putting his whole future on. everything tomura became is what afo wants to be. which is why he was guided onto that path by afo and why later afo took his body for himself.
however when faced with tenko, tomura's core and who he really is in the inside, he has nothing but contempt for him. tenko is nothing afo wants to be and he despises tenko's own desire to be a hero. he doesn't care for who tenko is, only what he wants him to be. he has no use for a small, crying child therefore he only has nothing but spiteful words towards him.
it's sad in that shigaraki really believed afo cared for him as a person. afo was the only one who stopped to help him when he was alone, and gave him a home to live in and guided him to becoming stronger. shigaraki thought that meant he was loved and valued by afo but the reality was that he was being groomed for one specific purpose only and that the plan to take over his body had been in motion before he was even born.
#click the first one to see the full image it got cropped and I wanted the two images side by side 🥲#anyways body snatching plot my beloved#imagine if a41's name is tomura though....
26 notes
·
View notes
Note
Ellie what the fUCK ARE YOU DOING
Camboy Leon? Huh?? You’re gonna drop that and not elaborate? Didn’t realize you were such a PRUDE /j
I would pay so much money to see this guy’s onlyfans, it’s not even funny anymore
(It’s worth noting that I’ve been having an absolute existential crisis every time I think about dick. Leon’s dick would probably cure all of my chronic illness; both mental and physical)
stands over you menacingly :) camboy leon you shall have teehee <3 dare me to expand this into a full fic ehe
(cws: camboy!leon, masturbation, voyeurism, piercings, pining, work crushes)

Leon who works with you at the DSO and, for a special agent, seems pretty neutral. he's stoic but has that dry sense of humour you love, puffing out teasing comments here and there whenever he has the chance. he's admired by everyone but never has any girls on his arm, never dates, never does more than purse his lips in secrecy when the guys boast about their sexual exploits. but even so, his tight-lipped response to anything like that gives him more charm–up until people finally start letting it go in favour of bigger, juicier gossip. but you never do, because even though you're just an intern, you can only dream of what it would be like to have a man like Leon. scratch that, you really just want Leon, because he's the whole package in your eyes even though you can't imagine him ever even sparing you a glance.
but one day, months after the Graham rescue mission, your night gets a little….lonely. Leon's been the talk of the office for weeks since he got back, with everyone swapping stories about his exploits and feeding you so much delicious fodder for your wildest fantasies about your work crush–and one day, hoping to try and pry him off of your mind, you click around the web for a bit until you stumble across an explorer page for a new, adult website.
obviously the curiosity gets to you when you spot the directory of public users, each and every one offering "services" for interested viewers–and you scroll through it for quite a while, searching through the names and checking out a few clips until you come across one that really catches your eye.
blondie.scott → new video available!
his profile photo is cute–it's just a cropped photo of his fingers throwing up a peace sign, although it's positioned over his lap where you can clearly see a dark, thick outline in his light-coloured sweatpants. clicking over to his video list, you've got an impressive library to peek through of free videos he offers, with only a few at the top being locked behind a subscriber paywall. the first one you click on looks pretty tame, but even so it has you sweating as the video buffers and you nearly end up shutting it off completely.
but because you're just too curious, you wait for it to start. and when it does, you get an eyeful of this smooth-chested, rough-voiced, absolute adonis of a man touching himself while the camera records it all from the neck down. he grips his cock with tight, long strokes that feel so needy–and it's pretty too, thick and ruddy at the tip and always glistening as he rubs his precum up and down the shaft, occasionally swirling his thumb round the slit to draw a buck from his hips and a groan out of his throat. being shirtless as he does it with his boxers tucked up underneath his hips, your mouth goes dry at the sight of two shiny barbells of silver nestled by each of his plush nipples. piercings. whoever this guy is, he's bold. and he's just….to die for, c'mon. and you can't even get the image of him cumming out of your mind, the raspy whines as he cusses up a storm and the frantic twitches of his cock while it spurts rope after rope all over his hand…your sleep is restless that night, because every time you close your eyes you can only see that handsome stranger fucking his hand like you wish you could get fucked. it's been so long you feel like a virgin at this point.
after that first video, you're hooked. before you know it, you've made a habit of watching this blondie guy's videos and you look forward to cracking open your browser at the end of a long day, especially when things get extra hectic at the DSO. often you're stuck at your desk for long stretches of time then, and after awhile it becomes so routine you slip up a bit and watch some of his clips when you're left alone in the office, drowning in a sea of paperwork when it's late enough at night that nobody else would even consider coming by. it's pretty easy to cover up, but even still some of his videos just rile you up so much you end up leaving a wet, sticky spot in your chair that you're forced to scrub off before your coworkers come in the next morning.
that doesn't mean the site is erased from your computer, though. it doesn't mean it's not accessible just because you've got a passcode to unlock your desktop. and if a certain somebody–who knows your birthday and has a bit of a thing for you–were to take a peek and see what you've been busy watching…well, he'll be quite pleased that you've got such good taste. and maybe he'll make a video just for you, just to hint that he knows your little secret just like you know his.
#leon kennedy#leon kennedy x reader#re4make#resident evil 4#resident evil#spicy writing#ellie writes#anons
476 notes
·
View notes
Note
Can we just get anything NSFW with Terzo?
Anything at all, headcannons, shorts, just- Terzo-
You give me too much power -Death
„The Sinner’s Tease” ♡ Papa Emeritus III x GN! Reader
Many of the Papas have lesser known past times. Hobbies they kept to themselves as the clergy decided they were…unnecessary for the congregation to know about.
Either because they didn’t fit their image or were…more explicit than others. Your curiosity about what Terzo did every Thursday evening when they slipped from the ministry paintless and in plain clothes got the better of you.
You may have followed him one night. You were far too awkward to ask them outright. Though it confused you where Terzo went.
Why were they going into a strip club?
You produced your ID to get into the club, eyes trailing over the dancers currently on the stage. That was something that stood out to you as you looked them over.
It seemed to be amateur night. Specifically for the older population. They all looked very enticing. Though you couldn’t see Terzo anywhere in the crowd weirdly enough. He seemed to have just disappeared.
Then two large hands grabbed your shoulders, guiding you forward as a very familiar voice whispered in your ear.
“When Terzo said he thought someone may have followed him…I was worried I’d have to bury a body. Seems I’ve caught a little mouse wanting a show instead.”
Omega.
You swallowed nervously as Omega sat you on a dual seat in the front row, sitting next to you as he smirked. Maskless with a human glamour on…blending in.
So obviously Terzo was here. But where? And why did Omega have a huge wad of cash?
Your eyes were drawn to the centre stage as the lights came on, widening when you finally put together what was going on. Mouth going dry.
Terzo. In a sinfully tight black crop top. Sparkly purple mini skirt. High heels. Makeup matching the colour scheme and looking far too alluring for it to be legal.
He was on stage. He was going to be stripping on that stage.
They made eye contact with you, the filthy smirk he wore only getting wider. Strutting to the pole as his music started playing.
Treat Me Like A Slut. To be specific.
Your eyes were glued to them as they started the routine on their knees, pretending to ride someone. Only getting more suggestive in the first few seconds as they ran their hands over their body.
Arousal was pulsing through your blood by the time he took of the crop top to reveal the deep purple lacey bralette underneath. Every far too perfect sensual move amplified as that skirt hit the floor. Practically grinding against the pole.
Terzo bent over to show off the arch in their back…and how little those panties were covering. You practically got a full view through the lace of their cunt.
Blushing hard when Omega wiped the drool off your face and passed you the cash.
Though you went redder than a tomato once Terzo strut down the steps of the stage. Pulling a few moves as he walked, pausing to let people slide money into the lingerie. The top getting dropped in one man’s lap.
Before Terzo dropped themself into your lap. Smirking deviously at you as they gave you a lap dance. Leaning in to whisper in your ear as Omega slid the cash onto Terzo’s body since you were busy feeling up the man in your lap.
“Follow Omega…”
The music ended seconds later, Terzo sliding from your lap and strutting backstage again. Collecting money from the front and a bucket of cash from a woman.
Omega getting up as he adjusted himself, gesturing for you to follow with a smirk filled with promise. Chuckling as you followed like a lamb to slaughter.
Terzo waited in a private room in the back, Omega letting you walk in past him before you heard the telltale click of a lock.
They were completely nude now. In a chair that looked an awful lot like a throne, legs open as they lazily rubbed circles around their clit.
Your eyes snapping up from their dripping pussy once his voiced filled the air.
“Crawl to me and put that cute little mouth of yours to good use…sí?”
You hit the floor in seconds. Omega giving a pleased purr.
How could you refuse this opportunity?
~
Written by Death.
Taglist: @charlie-is-a-menace @copias-fluffy-asscheeks @randodummy @tuttifuckinfruttifriday @calliedion-dungeon @randominstake @callmeicaro @dio-niisio @firefirevampire @mybotanicaldemise @emo-mess @natoncesaid @sirlsplayland @thatoddboy @lightbluuestars @strawberriiblossoms @dark-angel-is-back
#ghost band#ghost bc#ghost#ask#anon#ghost band x reader#ghost bc x reader#ghost x reader#papa emeritus iii#papa emeritus 3#terzo#papa terzo#omega ghoul#terzomega#papa emeritus iii x reader#terzo x reader#papa emeritus 3 x reader#papa terzo x reader
65 notes
·
View notes
Note
Heyy, I’ve been reading your wonderful one piece works for a while — and I couldn’t stop wondering how are you actually doing those magnificent headers?
Like… hello? The great quality, with additional 3D-alike details I could catch by my eyes? I got only Ibis Paint X on mobile, since I’m only a young man that literally two months ago went on a life-time ‘adventure’ of living alone in a small apartment.
In short — I got no money to pay for additional graphics/drawing programs, not yet at least
Hello!
Thank you! I'm glad you enjoy my writing - I'm curious to know what's your favorite piece / part? Also I'm so happy you like my headers? Makes it feel worth it to spend time on them! :D
I have excellent news for you, I used a mix of Canva and Photopea. They're both FREE!
I'll be explaining the process for making these two kinda? The full tutorial is below the cut, to be courteous to the other folks, hope you don't mind?
Though I am hearing that Canva has given people some grief. But Photopea is just *chefs kiss*
If you've ever used photoshop, Photopea is essentially a free photoshop, and it even has the automation tools! An absolute lifesaver when you have multiple layers you want to export (but that's for larger projects not this)
I'm going to assume you have basic knowledge of layers in digital drawing programs for this. If anything isn't clear: ask me, I'll clarify!
//-------------------------------------------------
My General Process is:
Search for official art / images
bring it into canva / photopea
crop / arrange images to match the dimensions
select a thematic color that is associated with the character
separate the foreground from the background
mess around and test things until they work
//--------------------------------------------------
Given "Louder than Words" is the latest one I've made, I'll start with the process for it.
Dimensions: 3000 x 1055 px
dpi: 96
//-------------------------------------------
Let's Get Crackin'
Alright let's grab some official art so we're not using any fanart without the artist's permission
I try to pick images that feel relevant enough to what I'm trying to make.
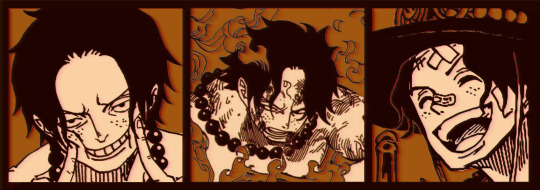
For example: the image for the Matching banner shows the ASCE tattoo which is super important in that fic
2. Let's arrange them onto a banner where each individual image has the same/similar dimensions to the rest
That's probably part of why you like these. To a certain extent they have similar dimensions, so they have a uniformity that's pleasing to the eye! (It's not perfect because I threw perfectionism to the wind because this is tumblr not my portfolio)
Tip: if you have 3 images and only 2 that have similar dimensions, and the 3rd one can't be cropped logically: but the one that's a different aspect ratio in the middle!
3. lets arrange them in such a way that the borders all feel like they're the same/equal width/thickness
you might find that you have to shrink some images for this, that's fine.
ALTERNATIVELY: if you're going with one image crop it so it's just the relevant info and it matches the dimensions (3000 x 1055 px)
We have our base! Now let's add some color, and direct the viewer's eye together!
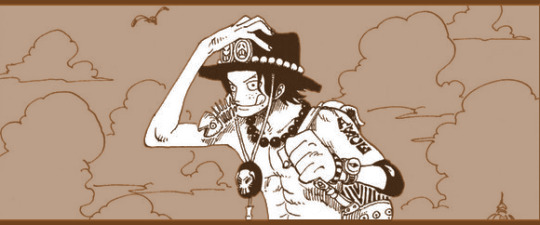
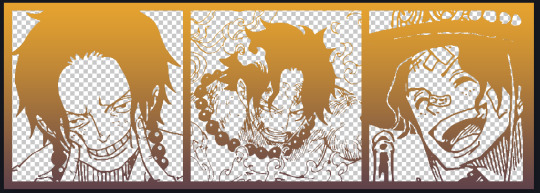
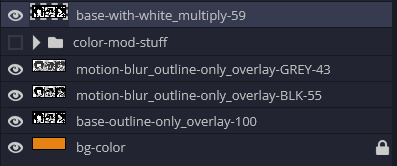
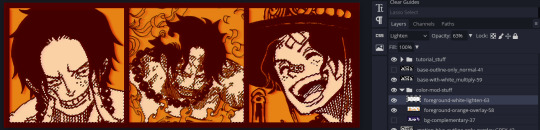
4. pick out a color that you think matches your character / vibe - that color is going to be your background
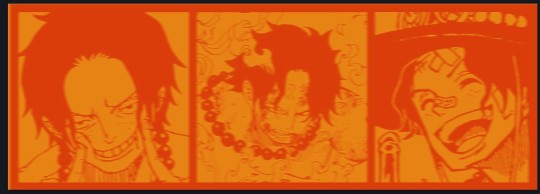
Given I'm making an Ace banner: orange is the color I'm going with
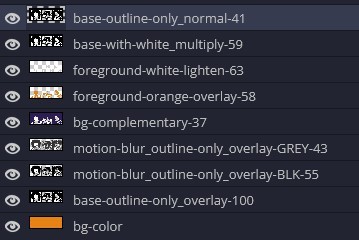
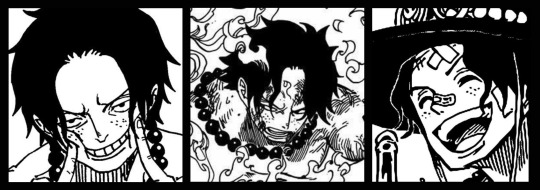
I went and named my layers for this lol. The numbers represent the opacity, and they aren't important. I just kept changing the opacity until I liked the way things looks. But here's the secret to the 3D feel:
Motionblur (+ moving it about)
Separating the foreground and background and dulling out the background.
I'm going to show you my process so you can see the effects, but first let's give you some quick skills:
//------------------------------------
SKILLS / THINGS I THINK ARE HELPFUL
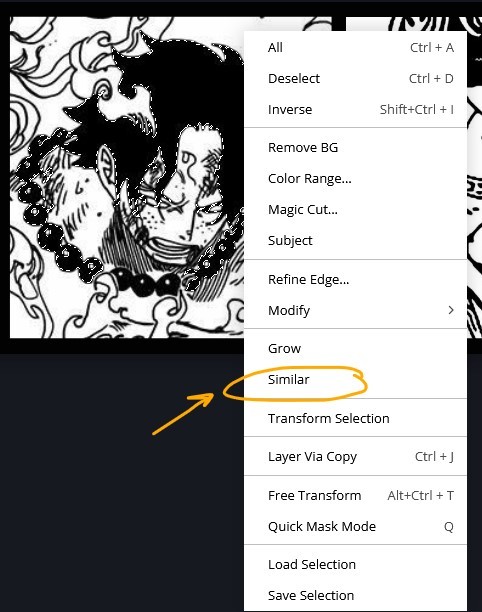
//------- Select Similar
magic wand -> select something -> right-click -> select similar
This works best when you have high contrast images (like manga panels that are black and white). You can select the black or the white areas. Depending on what works better for you.
TIP!
Invert selections with ctrl + i
Say you know that you want to select everything but Ace's face in the second panel. Select his face with the magic wand then ctrl + i, and that's the only thing NOT selected


TIP!!!!!!!!!!!!!!!
Please, please, please, duplicate your original image and work on the duplicate layer. This helps you SO much. !!!!!!!!!!!!!!!!!
TIP!
Check your selection tolerance! This could be why too little, or too much is being selected.

//------- The Move Tool
Shortcut key: v
While the move tool is active, you can nudge the stuff on whatever layer with your arrow keys
Shift + arrow key = 10 px move (generally)
//------- Layer Locking
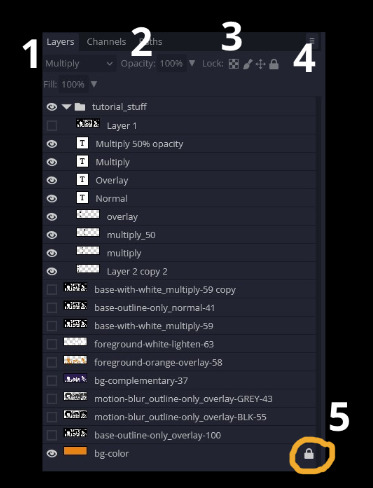
1- Layer Blending Mode (see Overlay vs Multiply vs Normal) for how this can affect results)
2- Opacity: how see through it is / isn't
3- Lock Transparency (it's the little checker board)
4- Lock Layer (looks like a lock)
5- Lock icon that appears when anything on the layer has been locked
More on 3 Lock Transparency: You can only paint on / modify what's on that layer. You CANNOT add anything to any area that is already transparent
Here's a demo of what you can do with this power:
Here's the original Image - notice how it's just the lineart with a transparent background.
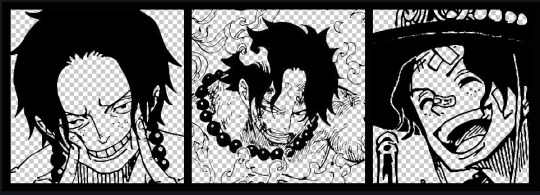

It's powerful: abuse it
//------- Overlay vs Multiply vs Normal
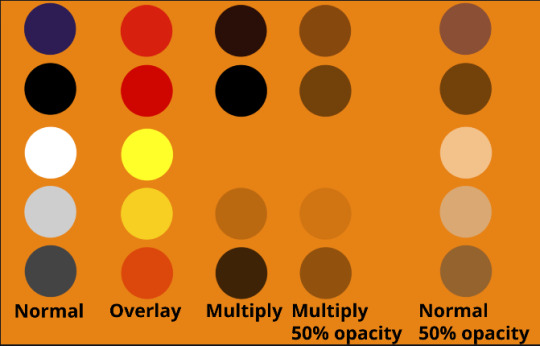
I think seeing this is the best way to visualize how different modes can affect the color.
//--------------------------------
Back to the Tutorial
!!I IMPORTANT NOTE !!
Please play around with the opacity slider to figure out what opacity works best for you on the multiple different layers we're about to make / work with. It's up to your own style to figure this out.
Next: please feel free to not follow all of it. Add more layers, add less layers, take the base principles and go wild! :D
5. Separate the lineart from the background and save it as a new layer
6. Duplicate it and set it to overlay, or set it to overlay immediately
7. Duplicate that lineart layer twice and set the blending mode to overlay
8. lock transparency on the top one and change it to be a dark grey
9. Apply motion blur to both:
Main menu bar -> Filter -> Motion Blur
I made it so that the grey layer was blurrier than the black layer
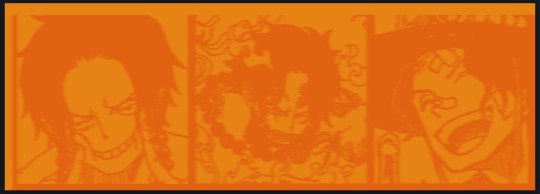
10. More them around a little to give it a "3D effect" as you called it.
It creates shadows under the lines - I was aiming for an effect similar to chromatic aberration (chromatic aberration is a valid way to add punch to your stuff too!)
So this is what things look like now - painful, but let's keep going
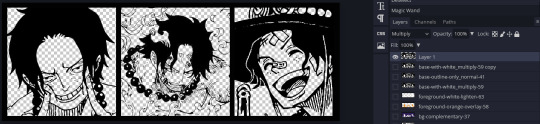
11. Duplicate the ORIGINAL / BASE lineart layer, that you DID not apply motion blur to -> set the blend mode to multiply (reduce opacity for it to actually take effect)
okay that's less painful
here's what the layers look like right now:
let's bring more focus to Ace's face, and push the background farther away:
12. Use the magic wand tool to quickly select large areas of the faces / focal area / foreground and the lasso tool to refine things
TIP!
Hold shift + click -> add to selection
Hold Alt + click -> subtract from selection
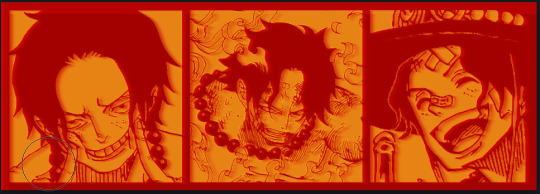
13. On a new layer with blending mode -> lighten, fill that selection to be white
If you look at it, you'll notice that it is ALREADY starting to draw our attention to his face, but the background is kinda aggressive, so let's dim that down
TIP!
Right-click on the gradient tool to find the paint-bucket tool

TIP!
Sample All Layers:
Turning this option off makes it so that you only work with the content on THAT specific layer. Turning it on makes it so that it is working while taking all other layers into consideration.
14. ctrl + click on the "white foreground" layer to select the contents of that specific layer (pink thing is your mouse)
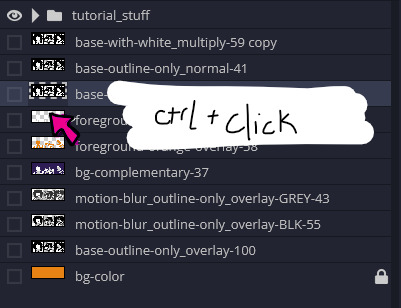
15. ctrl + i to invert selection and ON A NEW LAYER (layer mode -> multiply) fill that with a complementary color

16. I did one last thing where I took the original base (before we separated the lineart) and added it to the very top and played with the opacity to get something less in your face (layer blend mode was set to NORMAL)
And that's it!
More considerations that I take:
I want the banner to be "thin" or not square, so it doesn't take up too much screen real estate on people's devices
I don't want readers having to scroll too much to get to my writing (which is the whole point of the post, let's not waste their time making them look for things)
I want the banner content to be relevant enough?
ie: with Matching: I wanted the ASCE tattoo to be visible. With matching I wanted Ace to not look too happy in some of them.
I'm also trying to avoid spoilers, I hated getting things spoiled, so I'm trying to be careful that the images I pick don't spoil anything really.
Congrats on starting life on your own! I did that whole living by myself thing too! Tip: keep the pantry stocked with lentils, beans, pastas, baking essentials, rice. They really come in a clutch when you're hungry.
#photopea resources#photopea psd#tutorial#tutorials#tumblr banner#photoshop#photoshop tutorial#digital art#fuck adobe#adobe photoshop
11 notes
·
View notes
Text
Hello @crispyliza !! So I'm replying in a separate post because this is too long for a reply on the post. Hope you don't mind. I also think it might benefit others who have asked me in the past and those wishing to start gif making. Especially with whumptober just around the corner.
So here's a full look at how I make my gifs. This got very long so I put it under a read more
A quick thing before I start: I use windows and google chrome. If you're a mac or firefox user I'm not sure of this will work for you in terms of programs. The techniques I use in photoshop should though.
Okay for this demonstration I'm going to show you how I made the gifs for this gifset
To start we need a video. I don't torrent because my internet connection will cut out a random which makes using vpns rather pointless. I've tried. My internet would cut out halfway through a torrent download and then my internet provider was notified to what I was doing. It was just not great. So I found a new way to download videos off the internet! You can use torrents though. If you've got a vpn, go for it.
There are several streaming sites that I go to to get my videos. 1movies, and bstsrs are my go to right now since soap2day is gone (rip i miss you).
Now there are three ways I can get a video depending on what website I'm using. Bstsrs is the easiest because they have a whole bunch of links available. I always go with mixdrop because it has an easy to use built in download button. Unfortunately this site doesn't have movies. Just tv shows and sometimes it's not the best quality or there aren't links available. That's when I go to 1movies. Once you've found your video I use the chrome extension Cococut to download it. Click the extension button to open, then the download button. Then you just have to wait until the video is rendered. Click save. Wait until its downloaded.
Okay we now have our video! The next step is to turn the scene you want to gif into frames. For this we're gonna need KMPlayer. This video player makes it really easy to turn scenes into frames/screencaps. Open your video. Find the the scene you want and pause the video. Type control-g to open this screen:
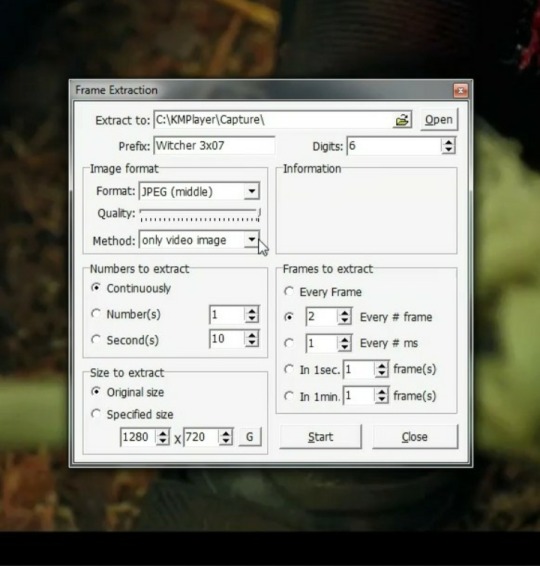
Here you choose the destination you want your frames to be saved. Decide what to name your frames and match up your settings with mine. You want to continuously extract frames, original size, and I stick with every 2 frames. Then, and this is important, choose video images only.
Now click start then start playing your video until the scene you want to gif is done. When you've got everything you wanted, pause the video. Hit ctrl-g again to reopen that screen and click stop. You now have all the frames you need so go ahead and exit out of KMPlayer. You don't need it again unless you need to redo frames or get the dialogue or something.
Next up we are gonna open Photoshop. I use Photoshop CC 2014.
Click on File -> Scripts -> Load files into stack -> Browse.
Go wherever you saved your frames and select the ones you need. Click okay and let the frames load completely before doing any thing else. Depending on how many you've selected this could take a while.
Once all of your frames are loaded, click "Create Frame Animation". Next click the little arrow button on right followed by "Make Frames From Layers" so we have all of our frames laid out. Now we need to reverse the frames because they're backwards so click that little button again and then click "Reverse Frames"

Okay you've got your frames loaded and all set to go. Time for all the cropping, resizing, setting the speed, and editing.
First thing I do is set the speed because otherwise I forget and it's important to do and a pain in the ass to do after all the editing is done. So do it first and get it out of the way. Select all of your frames. Click the little button beneath a frame where it says 0.0 and pick your time. I usually go for .1 seconds but .05 is also a popular speed. Just test one out and see which one you like best for your gif. You can hit the play button at any time to test your gif.
To set speed:
After this I do one of two things. Either I go into cropping and resizing or I separate frames. Depends on how many frames I uploaded. If I uploaded all the frames needed for an entire gifset this is the part where I separate them out onto individual gifs. So let's do that.
Originally I was just gonna do one gif but I have 115 frames uploaded which is waaaay too many for just one gif. I like to keep my gifs between 30 and 80 frames. So I'm going to split this into 3 gifs I think. It'll make a nice balanced gifset.
Select the frames you want for the first gif and copy them using the copy frames option in the same menu as the make frames from layers menu. Open a new document with the same dimensions as your current document. Click "Create Frame Animation" and paste the frames over the selected frame. Make sure that first frame is the same speed as all the other frames. Repeat until you have your desired gifs.
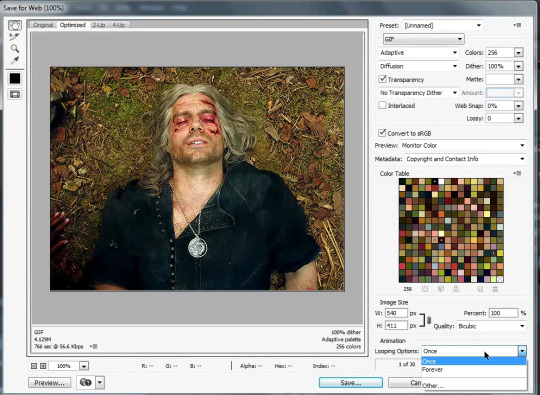
Next up I crop and resize. For this gif I'm going to first crop out the black bars above and below the image because we don't want that in the gif. Use the select tool to pick what you want to keep then "Image" then "Crop".

Now I could leave it as it but I think for this gifset I'm gonna focus more on Geralt so I'm going to crop it in a bit more.
Once cropping is all set i'm going to resize the gif to tumblr dimensions. Click "Image" then "Image Size" and change the width to 540px. The height can be anything and best not to mess with it so your gif keeps it's proportions. 540px is the width of a tumblr post and I plan on making these gifs stacked one on one.
Okay the gifs are all cropped and sized. Now it's time to do some editing. Go back to your first gif. We'll do all the work on this first gif and apply the same things to the other ones later because the scenes are the same. If they were different each gif would be colored and edited individually. First thing to do is turn it from frame animation to timeline. Timeline mode makes applying things like sharpening and brightness much easier and smoother.
So just click this button in the bottom left corner to go into timeline mode. Next up select all your layers. They're on the right side. Make sure you've selected ALL of them. Then click on "Filter" -> "Convert for Smart Filters" THIS IS AN IMPORTANT STEP! We can't edit until this is done.
This button to switch from frames to timeline:
First thing I do is sharpen. You can use one of the presets or try to do manually do it with smart sharpen. I use the preset labelled "sharpen" because I'm lazy and this one does a fine job for my gifs. I also add a layer of surface blur to smooth things out. Just a small touch. Like barely any blur but I think it smooths noise a bit and makes it look better.
Next up: Editing!! This step is going to be different for each and every gif you make. It all depends on the colors in the scene your giffing so you're gonna have to do a lot of experimenting to get the right look you want. Personally that's what I like about it. Makes it fun.
All your adjustments can be found found on the right side of the screen:
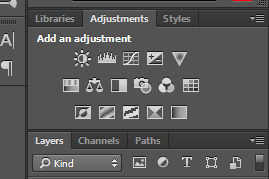
I almost always start with the "Levels" layer to brighten up the image because as we all know, every freaking whump scene is sooo dark. So with levels you just slide the little arrows around until you get a look you like.
Then I add a layer of "Curves". I love curves. With curves you can select the whitest white and the darkest black and the middle tone to change the brightness and colors of your gif. Or you can use this part and just brighten or darken a specific part. It's really versatile and i love it. It does take some practice and experimenting though.
Now a layer of "Contrast" and a layer of "Vibrance".
After this it's all about the selective colors, photo filters, and color balance to work on the colors and brightness. For this gif I'm only doing a tiny bit of editing cause I like the coloring but sometimes I'll have multiple layers of these to create a good coloring.
Once you're satisfied with how your gif looks it's time to save it!
Click "File" -> "Save for Web" and wait until it's all loaded. Important thing too look at here is the size of the gif. You can't upload any gif that is larger than 10mbs so make sure it's under that. Sometimes even 9.8 is too big because tumblr is a butt. I go for anything below 9.8. If your gif is too big try resizing it or removing a few frames. Make sure you gif is set to loop forever. Otherwise it'll just stop after a little bit. Don't forget to change this!
Here are the rest of my settings:
After that you can click save.
And that's it! You've made a gif! Congrats! If you have any questions or want clarification feel free to message me :)
25 notes
·
View notes
Text
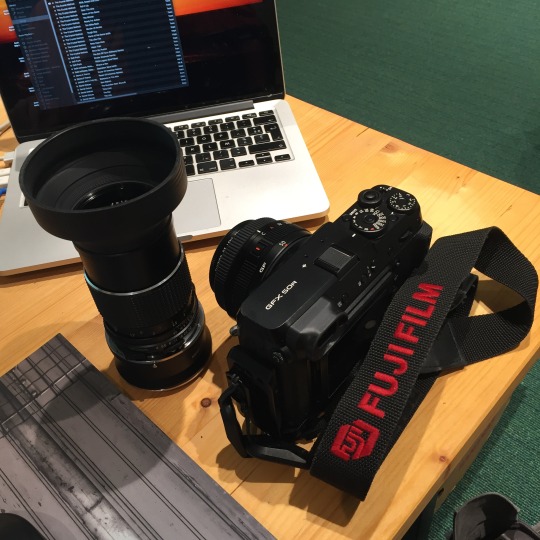
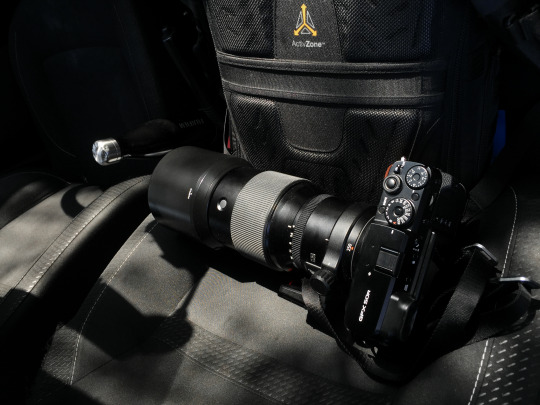
I went Full-Fuji! (GFX One Year Review)
One year ago, I decided to ditch my Nikon DSLRs for a Fujifilm GFX 50R.
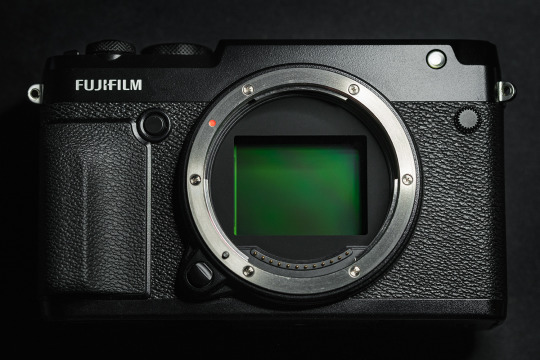
The GFX's sensor is larger than a full-frame sensor with a crop factor of 0.79
A little over a year ago, I still was using a few Nikon DSLRs to do just about anything. For portraits and landscape, I had a very respectable D810. Enough megapixels to provide some room for cropping and a decent dynamic range for most situations. For action and hobby-wildlife I had a D500. A durable mini-tank with performance that to this day would be hard to dismiss even in the light of mirrorless flagship innovation.
However, the question of my camera-future slowly crept into my mind. Was it time to change and upgrade into the Nikon Z system? Switching to a Z7 would indeed have been a sensible move, adapting older lenses while getting the sensor of the D850 in a smaller, cheaper body with an ecosystem of native lenses with the optical quality up to specs for the next decade. On paper and elsewhere, it should have been the obvious choice. Yet my answer to this question was a resounding "no" and I went against reason to set my sights on a Fujifilm GFX 50R. I took that model over the S because I enjoy the rangefinder form factor.
In hindsight, the smartest of all moves would probably have been to remain with what I had, adhering to the ancient photographic wisdom: "lenses are more important than cameras". My kits could have kept me satisfied for probably another 10 years if we are being honest. I could have stayed within the F mount ecosystem and could have taken advantage of its downright insane price drops to get top-of-the-line lenses for peanuts instead of selling the farm on a whim, however carefully considered it might have been.
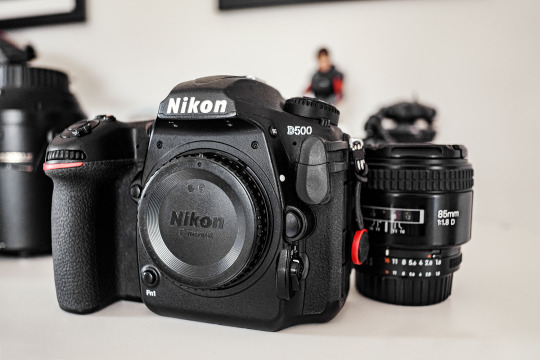
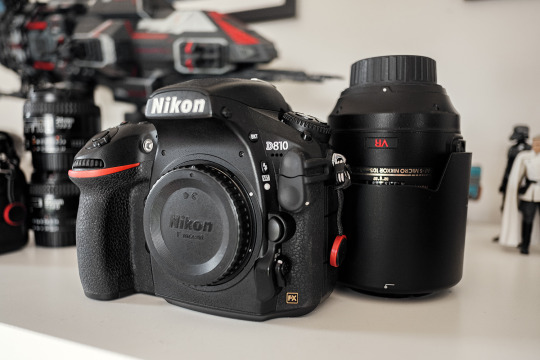
These old and trusty Nikon DSLRs got sold off to finance the 50R
The truth is that after fifteen years of walking the beaten paths camera-wise, I wanted to shake things up. I longed for a change of pace. I felt confident enough in my practice to know what type of photography I would want to engage in for the foreseeable future. I also felt confident enough that I'd be able to answer the call of the occasional assignment using a camera system that would have a non-negligible amount of drawbacks. The challenge even seemed like a fun new variable to add to contracts. Thus, the choice I made for my photographic future has been one born out of love rather than made from a place of reason.
When I think of good photographic memories involving the process — how photography is approached with mind and body — I immediately have two very different ideas jumping to mind and each has an ideal type of tool that best suits it. Neither of these are about efficiency. Neither of these are about performance beside niche-performance, perhaps. But that, is more of an acquired taste and it also comes at a price, but we'll see about that later.
The first idea is an instinctive and spontaneous approach, form of feral and visceral active meditation, akin to Daido's rabid dog method; roaming the streets clear of thoughts and letting the subconscious take the helm. Shooting, shooting, shooting and discovering everything later. No plan, only image-taking. No clear framing, no image-reviewing, no judgement to pass, no threads to weave. Only arrange and make sense later, if there's any of that to find.
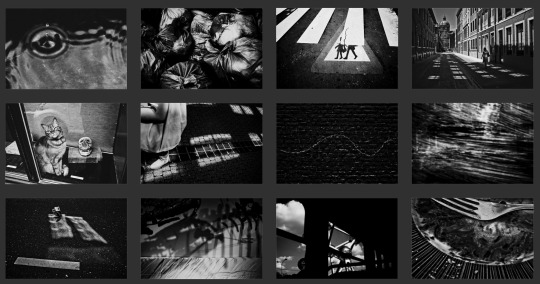
Results using the "rabid dog" method, using a Fujifilm X100, 2014
For this type of photography, the Fujifilm X100 was the tool that instantly clicked with me. The "poorman's Leica" is an apt way to describe what the X100 represented when it came out. I got the original 12mp camera in 2012 as a fun but capable toy to bring along my Nikon D700, until the shutter release button (which also is the on/off switch) broke off in 2020 after one power-up too many. I have since replaced it with a Fuji X-Pro 2 with the XF 18mm F2, 27mm F2.8 and 50mm F2 lenses. To this day, such small Fuji bodies are my tool of choice for this kind of photographic mood (and of course, for family pictures).

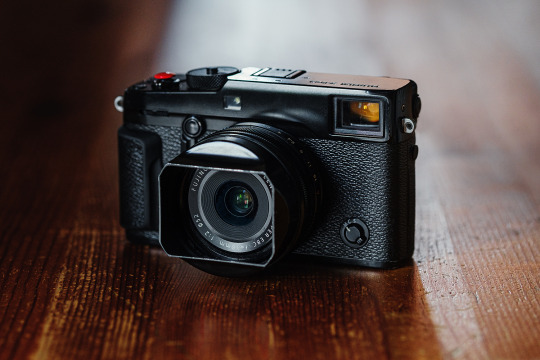
Fuji X100 later replaced by the X-Pro 2 as street photography go-to.
The second photographic process that I tend to naturally gravitate towards stems from my first year of photography school, during which all projects had to be done using film and would have us deal with the whole process (that is to say; shooting, developing, printing, framing, and displaying our work ourselves). It is with nostalgia that I look upon the memories from that time.
There sure is something inherently different in figuring out what to do with the exposures one has left on their film than being able to inconsequentially shoot within two hours three thousand pictures through which you can almost immediately browse. The latter is of course more practical and a welcome technological improvement, but the former brings an unhurried and deliberate focus that I find both refreshing and appealing.
When I think of my strongest recollection of touching the quintessence of the analog experience, the days of using my Mamiya 645 immediately come to mind. Such sluggish, heavy-as-a-couple-bricks box-machines compel one to being careful and purposeful every step of the way. I need that too.
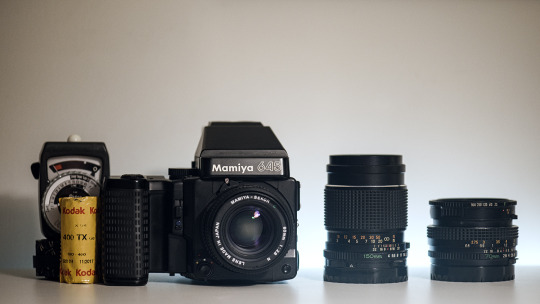
Mamiya 645 Super, since sold to finance GF lenses.
I have for the longest of time considered getting a more serious medium format camera but some quick-math with the price of film, chemicals and photographic paper made me realize that digital medium format was actually much more worth the investment while most definitely retaining some of the core characteristics of its analog counterparts. My love for the film process couldn't hold up against all the advantages of going digital, especially when buying second-hand.
Using medium format always felt like journeying inwards. It has allowed me to spend long hours in daydreaming-states paradoxically laced with an acute awareness of my surroundings. When thinking about medium format, I can recall the soul-washing quality of some of the winds that swept my cheeks while I was standing next to the tripod waiting for the exposure of the 50iso film to finish.
States of contemplation. Another kind of active meditation?
Of course, any camera can provide this type of feeling, but of all of the digital cameras available, medium format is the one type that will weigh you down the most and dictate the pace you work at.
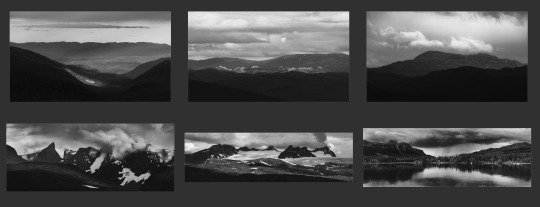
Telepanoramas created with the Fujifilm GFX 50R
Notice how these two ideas are almost the ends of a spectrum?
The first one is nervous and agitated, highly reactive, while the other is composed, meticulous and invites introspective fugue-states, yet they both share one vital element in the way that I approach them in that they take the practical considerations out of the picture to leave more space for what is going on within me.
The setting up of the camera or lack thereof becomes an excuse for something else. Maybe it isn't a surprise, that my adhd-ridden brain experiences this inexorable attraction for both these approaches. For they are in essence, two sides of the same coin, with each side matching different, specific and fluctuating needs.
Let's dive in!
After selling my DSLRs, I started looking for a good second-hand candidate. After a month or so, I found a barely used GFX 50R sold with a 50mm 3.5, a couple additional batteries and an L-bracket to boot. The price was rather attractive for the bundle, so it seemed like the time to take the leap. After a short but excruciating wait for the package to arrive, I finally was able to join the larger-than-35mm-sensor club.
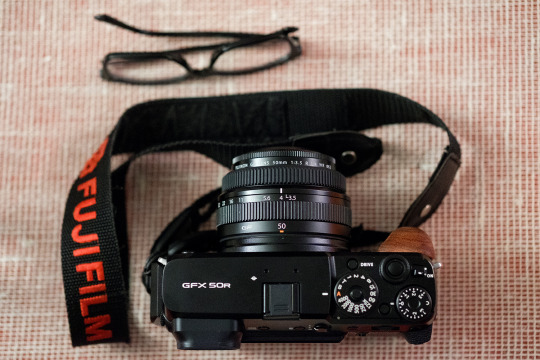
How it started
My first few months with the camera had me immediately blown away by the difference in output. The higher resolution and the sensor's qualities made the (very much existing) noise hardly noticeable when downsized to small printing or screen-viewing sizes. What also immediately struck me, was the looks of the images the camera produced. Images taken with the GFX feel more "3D" to me.
It is a very peculiar and hard to describe feeling. I suspect it is a combination of factors; the depth of field of the larger sensor and the very smooth transitions between what's in focus and what is not that it permits, the colour depth, and the quality of the optics. I've seen many Youtube reviews, read forum threads or been in discussions on Discord about GFX cameras where people (who more often than not don't own one) will maintain that these qualities don't exist at all. After a year in the system I can confidently state that they're wrong.
I can't really put my finger on what causes these differences as I am not as tech-savvy as I could be, but it is still clear as day. To use a pretty apt analogy, I would say that the difference between full-frame and (crop) medium format is akin to the difference between aps-c and full-frame cameras. Are they deal-breaking? Not necessarily. For some people they can be. Are they noticeable? Definitely. It is especially funny to me to see medium format cameras being dismissed by such a many full-frame shooter who at the same time, is constantly bashing aps-c sensors.

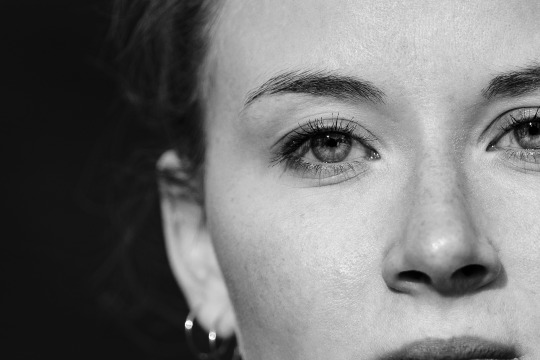
Don't you love to pixel-peep? Omnomnom (imagine with 102mp!)
This being said, I will always fully stand by the statement that full-frame cameras are the more sensible choice as they are better all-rounders by design. High-res cameras like Sony's A7RV or equivalent are also better high-iso performers than the aging IMX161 sensor that the GFX 50 series uses, which sees its operational limit at around 6400iso (but the GFX 100 would be another matter entirely). A top-tier full-frame camera is evidently more practical, lighter and cheaper without any deal-breaking image quality difference to what the medium format niche can offer. When all costs are factored in, the choice would seem self-evident. If you consider medium format, it should be understood that you know this before committing to any bigboy sensor. Or don't heed this and make people who buy second hand happy, as GFX gear loses almost one third of its value once it hits the second hand market (a consequence of too many people jumping on the medium format bandwagon only to realise — way too late — that it wasn't for them).
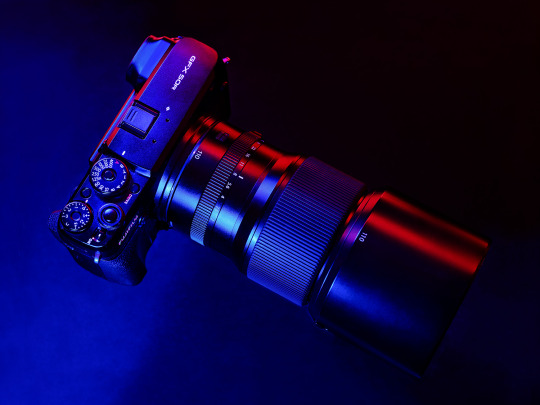
Are we cooking yet?
I need to talk about the GFX's files for a little bit; I'm a raw shooter only — which hopefully you'd have guessed — (in my opinion anyone buying into a medium format to shoot jpeg must have cognitive issues or too much money, or possibly both) and I have to say that when I opened the raw files to give the sliders their very first +100/-100 or +3/+4 EV from base iso (or any combination of these) I was utterly floored by how well the files could handle such an ungodly beating.
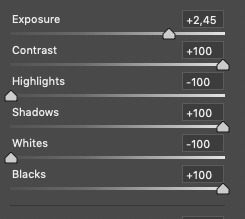
This isn't a joke, I promise.
This type of camera makes the slider memes come true, to a point where for the first few months, my ability to edit properly was severely impaired by the glee I experienced while pushing everything way too far. I believe it is not an uncommon symptom at the start of a medium format journey. It takes a while to come back from that and simply be able to tell yourself "ok here, maybe less dynamic range would be a good edit". I'm getting better at this as I consciously try to avoid overcooking.
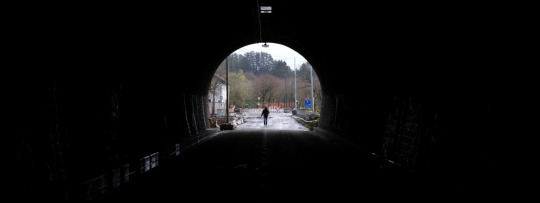
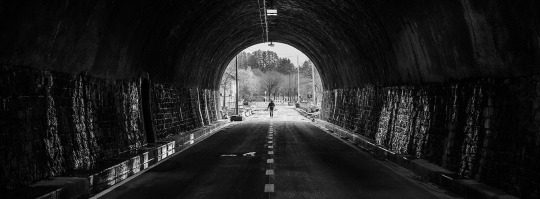
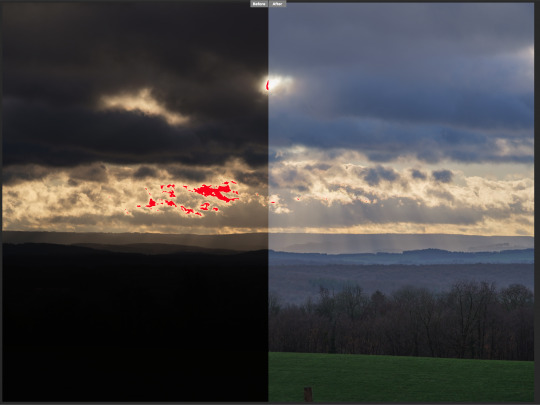
Clean recovery? Can do!
On the image-taking side of things, the major change for me with regards to file-handling is that I'm almost systematically exposing for highlights now. Adding 3EV and boosting shadows in post when shooting at low iso is inconsequential in terms of image quality as there won't be any visible noise whatsoever on the output, unlike my aps-c cameras that will show noise even at base iso. Similarly to many other aspects medium format manages well, this is something I got used to very quickly.
To adapt or to not adapt, that was the question, here's my answer:
At first, I tried adapting my old Mamiya 645 lenses to the 50R. It was useful in the sense that it allowed me to enjoy different fields of view at no cost but it quickly felt like a plaster on a wooden leg. I'm not someone who enjoys the manual focusing as a default and I've grown more and more intolerant of the optical flaws of older lenses as time went by. I realised that it wasn't a viable long term solution for me and quickly chose to sell all my Mamiya cameras and lenses to finance native glass for the GFX.
My experience adapting? It was alright but not at all ideal.
Which lenses then?
Getting into the GFX system I promised myself I would make no compromise whatsoever on optical quality and directly aimed for the 250mm F4 (mainly for tele-landscapes) and 110mm F2 (mainly for portraits). The grind felt long but it really wasn't, as I managed to secure both lenses from the second hand market within 6 months. It is only later that I added the 35-70mm "kit" lens to my arsenal to fill the wide-angle gap I had. As I seldom feel the need to shoot wider than short-tele fields of views, this is more of a lens of convenience.
The difference between adapting older lenses and using native glass was night and day to me. Two things made this the better choice in my view: first, I've been actively seeking the "clinical" quality of modern optics. I do not care much for the "character" of older lenses especially not if the word is used to help one overlook a lens' unforgivable flaws. Second, while there sure are lenses worth adapting out there, this come at a cost for the adapting to be worth it (the cost of an AF-capable adapter and of course the cost of the lenses themselves) which I saw as a waste of my limited resources. I told myself I wasn't going to make compromises, remember?
One year after switching, I am now knee-deep into the system, having sold most of my Nikon gear as well as my Mamiya medium format film-cameras to acquire some of the incredibly hard to resist GF lenses.
After a year of transforming a heap of dormant gear and side-gig revenue into new lenses, I also noticed that the representation I had about the worth of money also changed radically when gear was concerned.
A little over a year ago, an XF lens priced 800€ definitely seemed like a steep investment I'd try to find alternative choices for. Nowadays, 800€ is a mere budget lens in my mind. Seeing the price tags of GF lenses doesn't make my head spin anymore and this is somewhat worrisome for the thrifty Dutchman living in the back of my brain.
With the announcement of the 500mm F5.6 lens being in development (a focal length I definitely miss from my Nikon days, I'm a sucker for ultra-telephoto landscape photography), I fear I will manage to push my monetary boundaries further back yet, which I will help achieve by selling my X-T3 video-oriented kit.
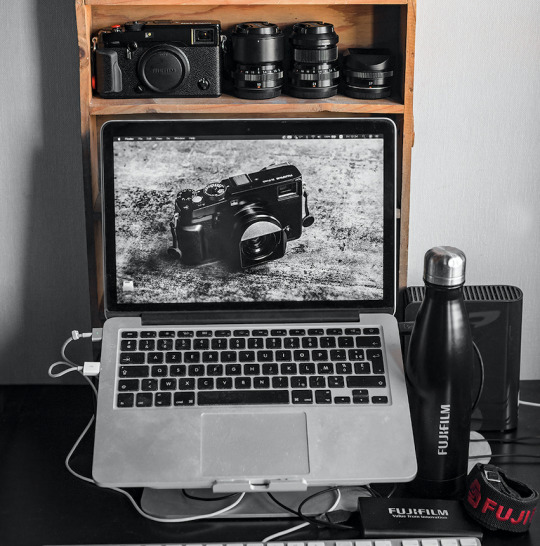
APS-C: you're dead to me.
An unforeseen consequence of my GFX switch was that my aps-c cameras were pretty much relegated to the bottom gear drawer and seldom used barring a few notable exceptions (such as a wedding gig) where the need for its autofocusing speed was greater than the need for image and file quality.
To reuse the analogy I made earlier; my X-Pro 2 and X-T3 have become to me what a micro-four-thirds camera would be to a full-frame camera user. Getting into Fujifilm's medium format system prompted me to think about how I use my cameras and to what end. The realisation that there is a clear split in my photographic approaches I evoked at the very beginning of this article is the result of that thought process.
Although I will sell my X-T3 because it feels superfluous and I want to stop my video gigs completely, (and because my need for GFX lens money is still great), I would never part with my X-Pro 2 nor the few XF lenses that I have as they serve a totally different purpose to that of the GFX's.
Having a compact, fast, discreet yet still capable camera that can be casually put into a pocket is an advantage that I would be a fool to part with. The X-Pro is a more practical choice for street-photography, documentary in less-than-favourable conditions, as well as for family pictures, when packing a brick of a camera and two bricks worth of lenses for a walk in the park in suboptimal weather would be met with a tired roll-eye from my spouse.
My dear X-Pro, I'm Never Ever Gonna Give You Up
Of course there have been many occasions for which I have chosen to take the challenge and went into these situations with the GFX. However, I wouldn't want the GFX to be the only option at my disposal in such cases.
For example, during the last wedding I shot, when the dining room got darker and the guests started moving around a lot (and dancing), the switch to aps-c cameras was absolutely necessary because of how difficult it was to consistently get acceptable results in poor light and with subjects making erratic movements. When you are held under a result-delivering imperative, you have to be able to honour it.
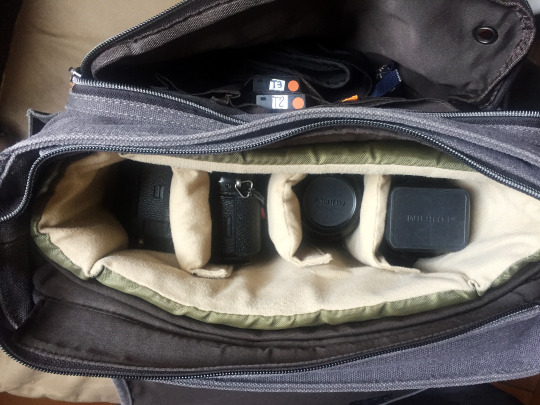
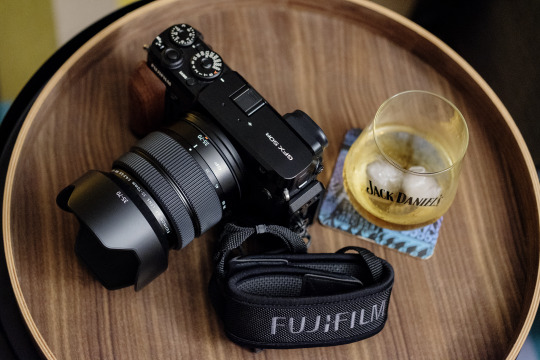
Packing a Fuji GF or Fuji X kit can be a slightly different experience
"Megapickles don't matter!"
This was an idea that I lived by just a few years ago. I changed my mind. I still believe that megapixels don't matter when you don't have them. Just like one should shoot with the camera one has / is able to afford. It doesn't matter in the grand scheme of things but all these technical niceties just make one's life more comfortable. Cropping, denoising through file reduction algorithms, or enjoying detail endlessly because one can, these are just the icing on the cake. I just happen to like my cakes with more icing than cake now.
Regarding resolution specifically, it's been another area in which there seems to be no possible coming back. Nowadays, every time a manufacturer announces a new camera and I discover they plan to fit it with a 24MP sensor I dismiss the information entirely. It doesn't register anymore. 32-36 is the new 24 in my mind now and it's sometimes difficult to come back from those expectations.
This being said I have no issue using lower resolution aps-c that I own and could perhaps even have fun with a X-Pro 1 because then the output quality wouldn't be my prime concern. It is only concerning new releases that my interest dips firmly for "low" MP cameras.
Did I tell you that medium format AF sucks?
Before I conclude this one-year review, let me hammer this point in with a two-handed mace; it can't be understated, especially for the GFX 50 series which uses contrast detection — the autofocus will throw you back to the early 2000s. Be ready to be stuck on single point, single AF mode because that's the only thing that will be consistent enough.
Then let's not forget other factors that add to the bad and make it worse; the shutter lag is half a second, the sensor readout speed is 1/4th of a second, and the time the shutter takes to clear the large sensor in combination with the camera's high resolution means you'll need higher shutter speeds in order to get rid of motion blur when shooting handheld (count about one stop faster than usual). Those would be valid reasons as to why a less niche camera system makes more sense for a lot of people.
The final comment:
Despite its sometimes dramatic drawbacks, I definitely have found the pleasure I sought when I originated this system switch. The change and the adapting my process is engaging and makes me think more about what I do, what I use, when and why. This is a win on its own.
All in all I feel like I am still at the very start of my journey though I've had the opportunity to test my GFX 50R in a wide array of situations in the past year (portrait, landscape, documentary) it seems like the way forward is clear and also opened for plunging deeper into this incredibly fun (but needlessly expensive) rabbit hole.
The upcoming 500mm, the prospect of finding an original GFX 100 (with its weirdly appealing tiltable EVF) are ideas that will — for the foreseeable future — definitely keep pulling me back in (and emptying my pockets).
Fun! Fun! Fun!
8 notes
·
View notes
Text

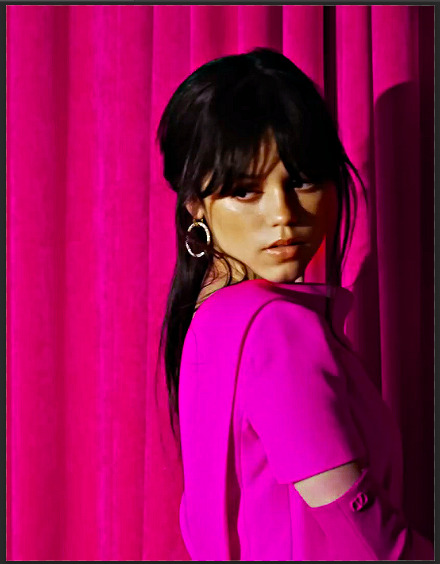
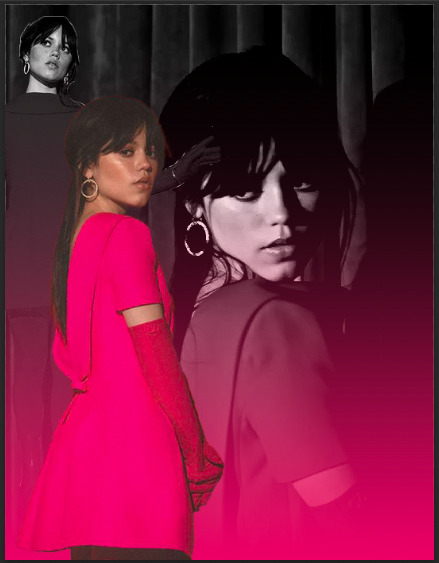
anonymous asked 💬 Hello there! Could you please make a tutorial on how you combined gifs and images in your edit THE RECENT FASHIONS OF JENNA ORTEGA? It's incredible. Thanks!
tysm for this ask 🫶🏼 below the cut is a step by step on how to do this kind of set. i will be using photoshop 2023 for this tutorial.
original inspiration was taken from sith-maul’s zendaya lookbook gifset !
step 1: cropping
for this style to work, your gif needs to be tall. the best dimensions are 540x700. make sure you don’t have too many frames because the bigger the crop, the bigger the file size !!
the other thing you want to do is crop it a little to the left or to the right, whichever works best. this is so you can slot in the photos of the outfit :)
step 2: colouring
to make the whole thing more cohesive later on, how you colour your set is important. for the demonstration, i’m using a clip of jenna from her interview with who what wear, which has a lot of easy to manipulate colours. because the main colour is obviously pink, i’ll use a colour balance layer, a selective colour layer and a hue/sat. layer.
be mindful when using hue/sat and colour balance that you’re not whitewashing your subject or dramatically altering their skin tone. if there is low movement in the gif, you can use layer masks to prevent this.
you can see here that there’s a huge difference in the old vs. new colouring, which is what we want !!

step 3: source your pics
probably the easiest step. you can either just google search for pictures [person] [event/photoshoot] is the best way to search for that, or you can search for something on pinterest. you want one picture that’s ideally head to toe, plus another showcasing the outfit from around waist up.
step 4: edit the photos.
now that we’ve got our photos, load those into ps. once loaded in, you’re going to want to go to select > subject and then go option + cmd + x (for mac, i’m sorry idk the windows prompt !) and then just paste that on a new layer.
depending, the photo may select some of the background. but there’s really nothing you can do about that, so you just have to tidy it up manually using the eraser tool.
now my photo looks like this !

crop the photo to the same size as your gif and repeat the same process for the other photo.
step 5: placement of the photos
first off, duplicate your photos onto the gif. then, resize them to your liking. ideally, you want the full shot going from top to bottom on the gif, and the medium shot positioned down from it.
i also make the medium shot a little bit smaller, so we can highlight the head to toe. as well as that, put the head to toe shot behind the medium shot by swapping their layer orders.
here’s a ss of what mine looks like, just to give you an idea.
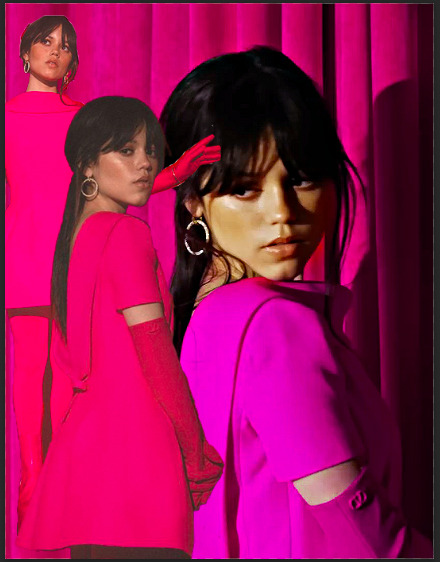
step 6: colouring the photos
first stop: add a black and white gradient map. completely ignore the fact the gradient map will go over everything; we’ll fix it in one sec ! colour the photos as normal: curves, levels, anything you do in your normal colouring process. just make sure all the layers are underneath your gradient map layer !
on top of it all, add a gradient layer and change it to a colour in the outfit. you can click and drag it in all different directions to get to a good point. don’t forget to change the angle of it so it fits best !
for example, here’s mine:
you can see that the gradient gradually goes up on the outfit, leaving it almost half half.
now, select all the layers that are over the first picture and right click > clipping mask. this clipping mask will make sure that all your colouring layers ‘clip’ only to your picture. DO NOT select the picture layer as well. this should be what you have:

the arrows show that it has clipped to the subject.
now, just repeat those colouring steps on the other pic so you’re starting to look like this:

OPTIONAL: i usually change the blending mode of my gradient layer to ‘colour’ so it blends nicer on the picture, it’s not compulsory, but the result looks better. you can also choose to sharpen your pictures if you like !
step 7: typography
there’s two main things you want: the title of it (this could be a fashion brand or maybe a show/film name if you want to do this for a character) which will be in a statement font as well as the location or the date (could be the episode and the episode air date or the film premiere date) to start, create your layer above the colouring layers for the gif, but below the pictures of your person.
for this tutorial, i’m using the font ‘magazine’ but you can really use any font you want, as long as it stands out against the cover.

next up, you’ll want to search ‘map pin point png’ on google and get your little pin point icon. this will be so you can add the location and the date, or whatever you want to add. i change the font that i use for the subheading, just to switch things up ! you can do whatever you like though.

here’s what i’ve got for my subheadings. make sure that you’re placing it in the empty space on the bottom corner, not on top of your pictures.
and that’s it ! you can add any other finishing touches that you’d like, or do any other effects that you want. this is simply a base for you to work off, but you can change things wherever you deem it necessary to improve upon. apologies for this being so long 😭 hopefully it helped a little though !
#*tutorial#asks#gif tutorial#clubgif#userriel#tusercat#usercim#usersmia#userv#thingschanged#userzesty#userlp#userpjo
39 notes
·
View notes
Note
Hi! So I'm really liking your LO AU so far, but I do have a few critiques. For one thing, the art is inconsistent in some places (ex: Hades has a long nose in the first panel, but then every appearance after, it's ordinary; ironically, I've heard this be said as a critique about the original too), and when Hermes explains why he got a job in the Underworld, the text is really hard to see when the red text is set against a black speech bubble, even when zooming in. This might also just be a Tumblr thing, but some panels also appear slightly blurry compared to others.
Aw I'm glad you like it! And thanks for the pointers! I am going to respond to them in my own defense a lil' if you don't mind (but rest assured I do recognize them as issues):
1.) That first episode was my first time drawing a Rekindled episode in full color (before I had even decided I wanted to stick with color, back then I was planning on just doing black and grey with color gradients) and it was more of a tribute to S1 LO/a coloring test that doubled as a potential opening for Rekindled (due to how it does diverge slightly from LO and is still relevant to Rekindled's plot). So that was before I realized looking back on old LO material that Hades' nose is, in fact, normal in the original pilot version of the comic! So I decided "Yeah, I'm gonna give him his normal hooked nose back" and it wasn't until I was on episode 2 or 3 that I realized that meant Episode 1 still had Pinocchio nose Hades 🤣 So that's something I may go back and fix later on but that's just like, the context of what happened there LMAO
2.) Yes, I've had someone else also point out to me that text issue and I've been neglecting going back and fixing it, that will be something I try to get to tonight!
3.) That's unfortunately a Tumblr thing, my way around it is just to crop each panel individually as much as I can to ensure they show up clearly in the feed, but not every panel will show up equally (despite all being drawn and exported in the same resolution). So my best recommendation for the user end is to either click it open on mobile or on desktop, click it open then right click "Open Image in New Tab". Tumblr doesn't display images vertically quite as cleanly as WT does but I have no plans to upload to WT (as I would get crucified by RS, WT, and the LO fanbase) so this is the only workaround for now until I find some kind of alternative. Sorry about that 😅
Thank you for taking the time to leave those points! Regarding #1 and #2, those are just things I can find time at some point to go back and tweak, #2 is easier than #1 but I'm sure I can still find a way LMAO In the meantime, I hope those responses clear up your questions or concerns!
#lore olympus au#lore rekindled#lore rekindled comic#lore rekindled crit#ama#ask me anything#anon ask me anything#anon ama
25 notes
·
View notes
Note
Hi, can I ask you how to cut different panel scenes and have them the same size without warping them? sorry if this is a stupid question but I have less knowledge of editing than my grandmother.
oh, sure! happy to explain some things. this is like, not so much a walkthru of the process as things to look for, but i'll try to provide examples.
quick note just to say: i’m focusing on a figure more than a scene in this, but the same principles apply. everything i say about sizing up/down, selecting panels, and avoiding weird ratios is just as true with a panel that has a background as it is for a silhouette, or anything you work with. it’s all just pixels!
the main tip i have is that you want to start with high quality scans of a page -- like, not a screenshot, but by right clicking and opening the image in a new tab and saving it, or by just right click-saving it when possible. that'll give you the best resolution in terms of digital scans that already exist. you want the clearest image possible to work with.
the second thing is to check the images you want to use to make sure they're at least of a similar level of detail when you select your panels. take these three kori panels, just as an example:

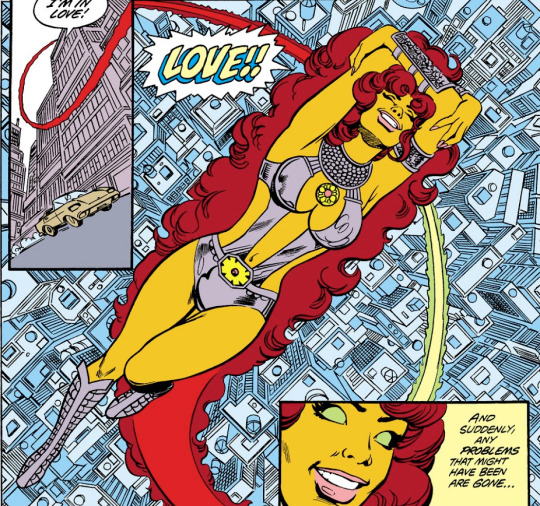
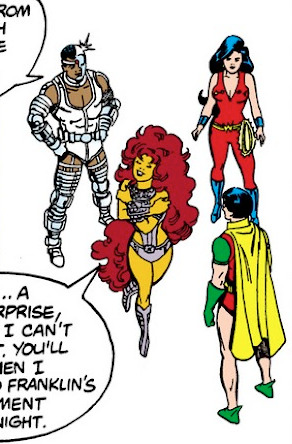
they're all very different sizes and levels of detail. one is a small panel in a bigger spread, one is a full-page splash panel, and the other is a brief little group shot. you can't bring the first one up to the same size as the second one, and you definitely can't bring the third one up to the same size as either of the first two. doing so would make either of them pixelated and distorted, or at the very least blur the edges. it just wouldn't look... right.
so the third one would be an automatic no for me, generally, unless for some reason i need a really tiny and cute kory emoji. (who doesn't?)
but! you can take that middle one down to the size of the first one, and it'll look pretty close. because they're both detailed, where the third one is meant to be more of a far-off view with less detailing. just tilt that middle image and crop it to be about the same as the first, then remove all the extra details and fill in the blank spots.
you end up with these:
you can see that one is fuzzier and less defined, because of the sizing differences and original quality of the panels, but like... they aren't so different that it's jarring. to get a better idea, let's look at sizing.
the first image, from the smaller panel, is currently 262 pixels wide and 368 pixels tall, and the larger is 427x632. that's a pretty big discrepancy. the key here is that you never want to make the smaller one... bigger. that'll make all the blurring worse, and ruin any definition that the image has. instead, you want to downsize the larger image to match. that way, it isn't getting pixelated -- it just translates better, generally.
you can do this by "transforming" the image and scaling it down to the same height as the other image, because they don't have identical ratios. they'll still be off in terms of width, but that's not something we'll worry about here. make sure to either "constrain proportions" or "preserve ratio," anything along those lines. that'll make sure you aren't making it too wide or too tall and skewing the thing to look like a funhouse mirror, if that makes sense. in photoshop, it's that little like... chainlink? between the width and height measurements.

here's the kory image at its new size:
again, still clear, still defined. just a little smaller now. at this point, i'd use some filters to make it better match the original image. we'll lose some clarity -- and some quality -- but it'll make it look better next to the first one in the final edit. if you fiddle with the "palette knife" filter in photoshop, you can get it closer to that old vintage fuzz sometimes. here's what we got:
so now you can take that, and you can use it to make any kind of edit you want alongside the first image -- so long as your final edit is not any bigger than either of those panels. again, sizing up will make it worse.
here you are:
hope this helps! happy editing!
3 notes
·
View notes
Text
i recently came across a scanned image (at this website) of an essay written by Theodore Sturgeon, published June 1967 in Cavalier Magazine, where Sturgeon describes his 'signature mark' and the ethos it represents for him. i decided to transcribe the article for future reference, and figured that people who follow me might also find it insightful and inspiring.
especially when it can be so easy to take something that has been presented as a fact at face value, i think we can always benefit from a reminder to ask the next question.
the symbol being described is an uppercase letter Q with a right-facing arrow striking through it. in my transcription i chose to represent the symbol with (-Q->). check out the scanned image of the essay to see how it was originally printed.
⠂⠄⠄⠂⠁⠁⠂⠄⠄⠂⠁⠁⠂⠄⠄⠂⠁⠁⠂⠄⠄⠂⠁⠁⠂⠄
I give you this symbol. I want you to wear it between your eyeball and your eyelid and look at the world through it. I want to do this, and I want you to do what I say, because you are not the crawling blob in that big bucket of ooze which, down deep, you think you are: you are Mankind. That isn't the best thing in the Universe to be, but it can be. It can be. It will be, if you do what I tell you. All I ask of you is that you hear me out.
Here is the symbol: (-Q->)
What it means is: Ask the next question.
Every advance this species has ever made is the result of someone, somewhere, looking at his world, his neighborhood, his neighbor, his cave, or himself, and asking that next question. Every deadly error this species has committed, every sin against itself and its high destiny, is the result of not asking the next question, or of not listening to those who do ask it.
That next question, (-Q->), is nothing more than a signboard which points toward the truth; the absolute, furthermost irreducible truth. there are not many absolutes, but we know one thing about them all: they are not complicated. More on that later.
First, an example of (-Q->) in action. Let's take something that has filled countless thousands of newspaper inches, in computable hours of argument and temper, a rich crop of injustice and stupidity, and has wasted a great deal more time than it is worth - the pornography question. We'll start with the warcry "we've got to get that filth off the newsstands!"
This is quite enough, in many communities, to gain a majority support right now. "Right-thinking people" gather up their axe-handles and burning torches and rally round what looks to them like the ultimate and self-defining truth. Now we ask that next question:
(-Q->): Why?
A: Because it can get into the hands of young people
At this point, for many people, doors close, shutters bang, and all the lights go out inside. But that answer isn't an answer, as you can discover by asking the next question:
(-Q->): What happens if it gets into the hands of young people?
A: It might arouse them.
Slam. Bang. Click... but wait. Isn't there another question? Sure!
(-Q->): What happens if they get aroused?
This will probably get you a variety of answers, and you'll forgive me if I don't pursue them in this question-and-answer format, because I haven't much space and I mean to pack it as full as I can. But you get the pattern: every time anyone answers that next question, that (-Q->), see if there isn't another one which can be asked. In this instance you can run the thing down until you find out on the highest scientific (and morally ethical) authority that it doesn't harm anyone to get sexually stimulated with no outlet; that it happens all the time to virtually everyone; that the list of things which stimulate one person or another at various times are by no means limited to what one finds in the girlie books, but include such things as pieces of string, wash on the line, sunsets, music, dogs howling, and a thousand other things, and if you got rid of all that filth you'd find yourself on a desert or in a cell - where, probably, your imagination would do a whole heap worse than any professional pornographer; further, that if the young person is stimulated to find an outlet it is, in a vast majority of cases, masturbation, which does not make green hairs grow in the palms of your hands, which does not cause pimples, and in the case of hyperactive individuals leaves them less likely to commit rape than more - especially if they are free of guilt about it. How do I know all this? By getting my questions answered, and by unfailingly asking that one more. If you do the same, you'll find the references, the carefully performed and documented experiments, the careful analyses and cross-checked conclusions. Let me here caution you never to abandon the (-Q->) technique when it leads you to a conclusion you like. Ask that one more question again, and ask it again... really, the only time you won't be able to ask it will be when you're up against a truth so basic and so simple that the question can't be asked.
And I've never had an answer that was that close to the truth - not ever. But in looking for it I've gotten rid of an awful lot of well-known facts that just ain't so. It makes you very light-hearted, very sure, and rather hard to hurt.
Now about basics and simplicity: complicated and subtle things can be overwhelming and they can change your whole life and the face of the world, but if they are complicated they are not (in the most important sense) important. Now here's a simple basic: living things change. Growth is one of the many kinds of change; what you can be sure of is that anything that has stopped changing has stopped living. Got it?
You are alive. Your family and your town and the county and state and nation are, each in its way, living things. All living things want to feel secure. Human beings are accursed with something that makes most of them, at one time or another in his life, seek security by stopping. He wants things stable and permanent and unchanging, like a pyramid. But there is another kind of stability - dynamic stability - the steadiness of a gull's flight. It's something that cannot happen unless the bird is in motion.
And by and large, friend, gulls outlast pyramids.
This is the kind of conclusion that the (-Q->) process leads you to, and armed with it you can look about you with a kind of Man from Mars astonishment. Living things (nations, cities, towns, families, people) trying to be dead. Trying to stop - stop time, stop change, stop thought, when they could spread their wings and rise it... Listen:
Laws are always late. Usually in the past, and certainly in a faster-and-ever-faster moving future, by the time a law is passed the circumstances which brought it about have already begun to change, which is why so many of them rule us by "the dead hand." As far as I know, no human group has ever tried to establish a whole body of laws with tenure - laws which would expire on a certain date unless the community voted to continue them! How much public apathy do you think you'd find in a democracy like that? Listen:
(-Q->): What is the function of the incest taboo? No - wait - don't give me those answers that "everybody knows," because nobody knows. If you start out on that recessive defective gene bit, with the idiot children of first cousins and all that, I'll only refer you to animal breeders the world over, and hope you enjoyed those idiot pork chops last night, and have fun with the loot you picked up at the $2 window, courtesy of the dark horse who paid 83 to 1 and who is the result of a dozen generations of inbreeding. Men are different from hogs and horses - but biologically they are not all that different. Listen:
Olaf Stapledon, bless his memory, wrote a book called Last and First Men which traces the history of Man through the next couple of hundred billion years. He speaks of something similar to what I call the (-Q->) process, and calls it "the precious insight." Through the generations, he says, it appears repeatedly and is repeatedly struck down by accidents large or small (well, we can't do much about that) "or," he says, "by an access of racial imbecility, or by the mere cowardice and vertigo that dares not look down the precipice of the fact."
I think we are in such a period of "racial imbecility" as he describes. I think that there are a few people around - you, for example - who can cure it because they are not afraid to look down the precipice of the fact, no matter how deep the pit, no matter how different.
All I ask of you is that you look at what is there, and ask that next question. In exchange I offer more than those who claim that this act idea, or that, will save this species from extinction. I offer this species its maturity and triumph.
I just heard a voice from one of you:
(-Q->): Just who the hell do you think you are?
A: That's it. Don't stop there.
-- TheodoreSturgeon, 1967
#more emphasis: i didn't write this#please let me know if there are any transcription errors!#i just really wanted to transcribe it to personally draw from later and figured i might as well share it with anyone who might be intereste#it also started me down a bit of a rabbit hole about who theodore sturgeon was and i've found some pretty cool stuff#plus i always find it fascinating when something 'from so long ago' is so incredibly relevant to current affairs and this essay definitely#falls into that category#theodore sturgeon#ask the next question#media literacy#critical thinking#essay#stochastic ramblings#long post
1 note
·
View note
Note
Luz's good-intentioned desires to meddle with and 'fix' amity and willow's friendship makes a parallel to the blight's prior meddling that broke it for several years

1. Hmm, an interesting point! Amity definitely has some issues with people meddling in her business and invading her privacy, and I wouldn’t be surprised if that stems at least partly from her parents meddling in her business and invading her privacy. Of course, as you’ve mentioned, the defining difference here is intention: since Luz intended to bring people together rather than tearing them apart, the end result was much happier for everyone involved.
2. Good point; it took both Luz’s proactivity and Amity’s knowledge of the past to restore Willow’s mind. Teamwork, indeed!
3. Yeah, it makes perfect sense that Amity would be most drawn in by Luz’s positive attitude. She doesn’t really have a lot of that in her life!
Luz defies conventions and doesn’t seem to worry all that much about what others think of her, and that’s a mindset that Amity’s likely been locked out of for a long time. She has to be concerned about how others perceive her, she has to act in the way her family and the people around her require of her.
But with Luz, all of that stuff doesn’t seem to matter so much. No wonder Amity’s got that little crush.
4. To be honest, I didn’t even consider the possibility that Luz might be referring to King or Hooty there - my first thought was that the “night critters” were related to Eda warning Luz and King in Episode 2 to come back before dark?
And yeah, that mental image is pretty fun!
5. A concerning stance, but definitely on-brand for Luz!
6. Oooh, I actually didn’t catch that one! That’s an interesting thought; I wonder if Luz was able to get away with not drawing the glyph because she was in Willow’s mind and the regular rules of glyph magic didn’t apply there, or if it’s actually possible to use glyph magic without explicitly drawing out the full glyph if you’ve practiced it enough?
I’ll have to keep an eye out for how Luz casts spells in future episodes...
7-8. As I’ve mentioned before, I love how Luz and Amity’s dynamic is developing. Amity can be open with Luz in a way she can’t really be with anyone else - there’s a lot of baggage with both her family and her current friend group, not to mention her one real friend, and despite the drama that’s cropped up in many of her interactions with Luz so far, that baggage just... doesn’t exist between them.
It does seem quite likely that Amity still sometimes worries that Luz will judge her if given reason to, since one of the most plausible explanations for why she was avoiding the birthday memory was that she didn’t want Luz to see what she’d done (especially following Luz’s reaction to her burning the photos). But Luz proved her wrong many times over by being, well, the opposite of judgmental throughout the episode, so perhaps she’s starting to let go of some of that worry...
...especially since Willow also proved her wrong in the end, about that implied assumption that there was no salvaging their friendship.
9. Ohh, that’s very interesting... I don’t think it quite clicked while I was initially watching the episode that Amity wasn’t consciously invoking her memory of what happened, but looking at how the whole situation plays out, it does make sense!
It looked as though Inner Willow was already manipulating the space in that memory (which actually leads me to wonder if the memory was originally supposed to cover the moment featured in the photo, and Inner Willow just skipped ahead to the part where everything went wrong...) so perhaps that allowed Amity’s subconscious mind to insert her own memory into the space, even though they were technically in Willow’s mind and not hers..?
All of this raises a lot of questions about how these mindscapes work, and I’m not sure if we’re going to get any answers, but it’s certainly fun to speculate on!
6 notes
·
View notes
Photo
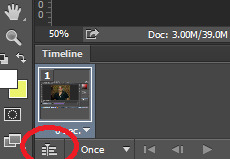
💜 HOW TO MAKE A GIF WITH PHOTOPEA 💜
Hey everyone! I recently got asked to do a tutorial on how I make my gifs. I know that many people (such as myself) don’t have access to Photoshop for various reasons but they’d like to get into gif making. When I started making gifs, I only had a free trial of Photoshop, but when that ran out, I had to find another way to make gifs. Enter Photopea! A free, web-based software that you can use anywhere and that works just like Photoshop!
In this tutorial, I’ll teach you how to make a basic gif like the one I did above. I use a macbook air, but it should be doable on a regular pc too!
If you found this helpful, feel free to share it with your friends! The tutorial can be found under the cut below 💜
THINGS YOU’LL NEED
A browser (I switch between Safari and Chrome, more about this later)
A screencapping software (like MPlayer OSX Extended) or, alternatively, a presentation program like Keynote or Powerpoint.
A program to screenrecord or a program that let’s you download from YouTube
Lots of patience bc gifs are annoying little shits <3
1. GETTING A VIDEO BY SCREENRECORDING
First things first, you need to have the clip you want make a gif out of. There are plenty of ways that you can get them. I’ve seen some gifmakers say that they torrent entire movies and gif from that. The way I do is I screenrecord the part I want to gif directly from where I’m watching the movie or show (like Disney+ or Netflix [or something like 123movies if you’re a pirate 🏴☠️)]). That way, I don’t have to download the entire movie and I have just the part that I want.
To screenrecord, I use my macbook’s built-in program called Screenshot.
Open the program by pressing ctrl + command + 5 on your keyboard and you get these funny little buttons.
Click on the button that says record entire screen. The program is now recording your screen. Play the scene and make sure you expand the video into full screen so you get a full resolution. When you’re done, click the stop button that is at the top right of your screen (next to the wifi and battery symbols.)

If you don’t have Mac, I suggest you look into how to screenrecord on your computer, as I don’t know how other operating systems work. Sorry!
1B. GETTING A VIDEO FROM YOUTUBE WITH CLIPGRAB
Another way you can get videos is from Youtube. I use a program called ClipGrab for this. Download and open the program. You’ll get this window

Simply paste the link and chose the highest quality, then click ‘grab this clip!’. Done!
2. SCREENCAPPING
After we’ve obtained the clip we wanted, we can do this two ways. The first way is to use the program MPlayer OSX Extended. Here’s a tutorial on how to set it up, make sure you do this if it’s your first time using the program. Make sure that you have a special screenshot folder!
Open MPlayer, then go to file > open and find the video of the scene you screenrecorded or downloaded. MPlayer will now play the video. Use the left and right keys (< and >) to go go backwards or forwards 1 minute, but try not to move around too much because the software crashes if you do. If that happens, just click the reopen button when the popup comes on, and reload the video again.
When you’ve gotten to the point you want in the video, press the command + shift + s buttons at the same time and the program will now take a screencap of every single frame until you stop.
If everything goes smoothly, you should find all your frames in your screenshot folder that you’ve made before when setting up the program!
2B. USING A PRESENTATION SOFTWARE TO MAKE A GIF
If you want to skip the screencapping part and you want to have a fully completed gif, you can do the second option. That’s what I used to do before I got MPlayer. In my experience, it’s a really fast way to make a gif, but the quality isn’t really good.
Here’s a tutorial on how to turn a slide into a gif in Keynote.
Here’s a similar tutorial on how to make a gif on PowerPoint.
Basically, you make sure that the size of your presentation is the same as your video, and that you make sure to export one slide into a gif. Also make sure that you export in the highest quality!
3. LOADING THE FRAMES IN PHOTOPEA
Finally, we can start giffing! As I said at the start, Photopea can be used anywhere, but I switch between Safari and Chrome. The reason why is that if I upload the frames in Chrome, the frames will be out of order. In Safari, that doesn’t happen, but the downside is that once I start editing, Safari will reload the page because it takes up too much memory.
So, first I go to photopea.com on Safari. I click New Project and put in the same dimensions as the screencaps (in my case, they are 1440x900 px). You’ll get an empty project.
Then click file > open & place and select your screenshots. Wait until Photopea has loaded all the frames, then, at the speed of light, quickly click file > save as psd before Safari reloads! You’ll find it in your folder where all your downloads are.
Next, I open Chrome (I use the incognito window because I have adblock on my usual Chrome, the program won’t work as usual if you have it enabled) and I click Open From Computer, locate your saved .psd file that you saved from Safari.
Now, you’ll see all the frames as individual layers. Select everything by clicking on the first layer, then golding the shift button and clicking on the last layer. Press command + G to group the frames into a folder. Here’s how everything should look after you’ve grouped the layers.
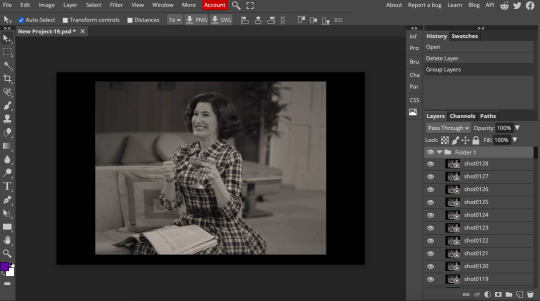
^^ See how Agnes approves! Agnes things you’re going a great job!
Now, it’s time to crop the gif and get rid of the black borders. Making sure that the folder is selected, click on the crop tool (or press C) and click on Fixed Size

W is Width and H is Height, write in your sizing here. Tumblr’s max width is 540, so I put the width as such. For the height, I use 405. Then you just drag the corners until you’ve selected the part that you want, like this
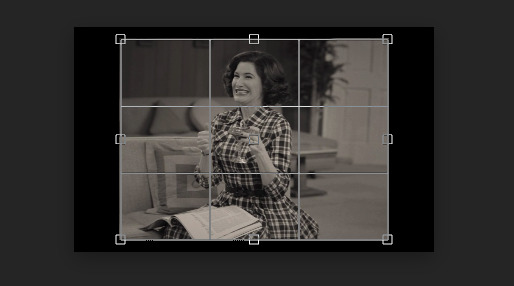
Press enter and the image will be sized down 540x405 px.
Now, our gif looks like this after cropping!
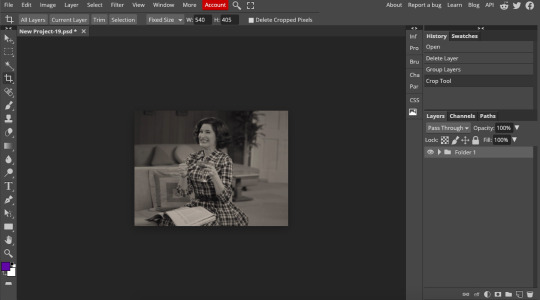
Open the folder so you can see all the layers. Select all your layers and right click on them, then click rasterize.
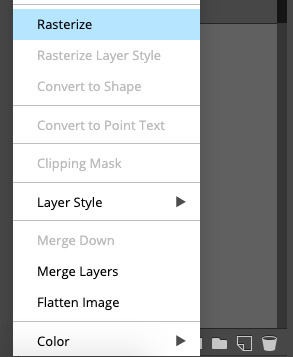
Then, go to layer > animation > make frames. You’ll now see that each layer begins with _a_ - this is crucial because this is how Photopea knows that the layers are part of a gif. If your layers don’t begin with _a_, then it will not play as a gif
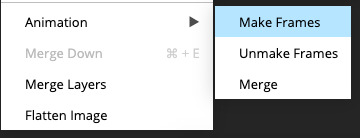
If you instead already have a gif done, all you have to do instead is simply click open from computer when you first open Photopea and load your already finished gif and it’ll have the _a_ at the start of every layer. You won’t have to go through the steps of loading your frames into a new project to make your gif as it’s already done and in a folder :) Just start cropping once you load it
You can preview your work by going to file > export as > gif. Make sure to change the speed in the preview window until your gif plays the way you want it! I put my speed at 500%
4. SHARPENING
Hooray, we now have our gif! But to make it look a little nicer, it’s good to sharpen it. I always use Smart Sharpen when I sharpen my gifs, and many other gifmakers use that too. It’s really good :D
To sharpen your gif, again, make sure that all your layers are selected. Go to filter > sharpen > smart sharpen. I use two different settings for my gifs, it really depends on the gif.
Setting 1 (which is the default setting)
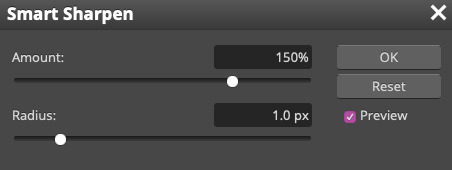
Setting 2
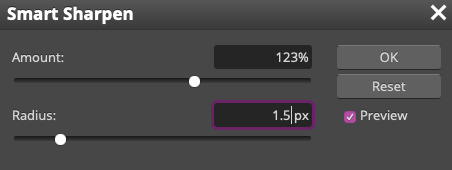
Again, it depends on the gif, play around until it looks good to you!
Here’s our gif after sharpening it
I ended up deleting the last few layers as the gif got bigger than 10mb (that’s Tumblr’s file limit, it your file is bigger than 10mb, it won’t upload). I also added a gradient map and it made the file size smaller, more about that in the next segment!
5. COLORING
Here’s the fun part! Now we get to play around with the gif, making it brighter and look Extra Nice™! Since this is a black and white scene, I make sure that the blacks and the whites really pop.
Notice how in the original scene it’s not actually b&w, it has a slight sepia tint to it. I want to remove this, so I add a gradient map by clicking on the white square with a black circle (I want to point out that we’ll be clicking on this button a lot in this step)

and I change the blending mode to Saturation
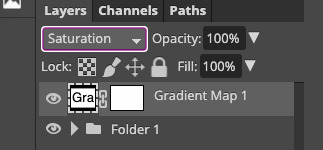
Then I add a curves layer using these settings
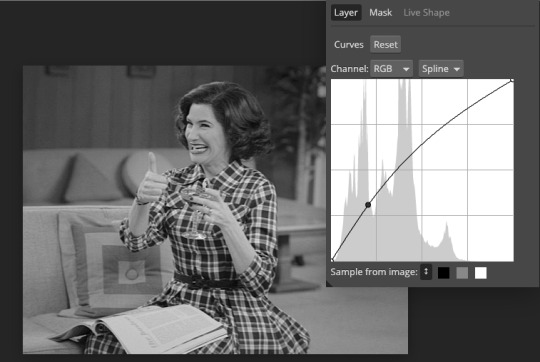
Then a second curves layer
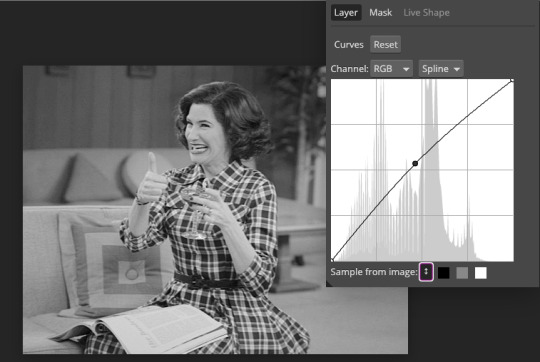
Brightness/contrast
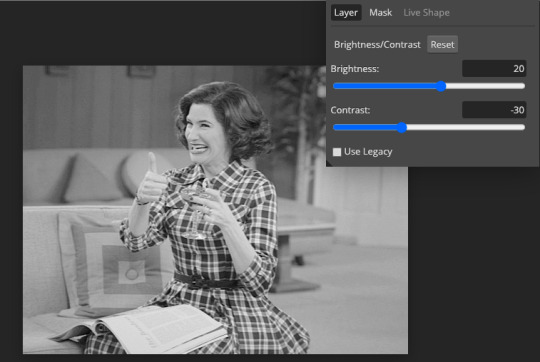
Then my favourite! Selective color! First layer, I deepen up the blacks
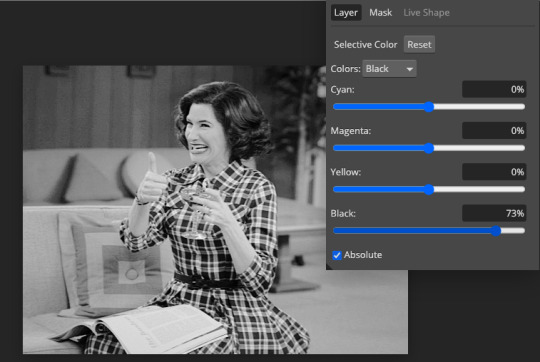
Then another selective color layer, this time the whites
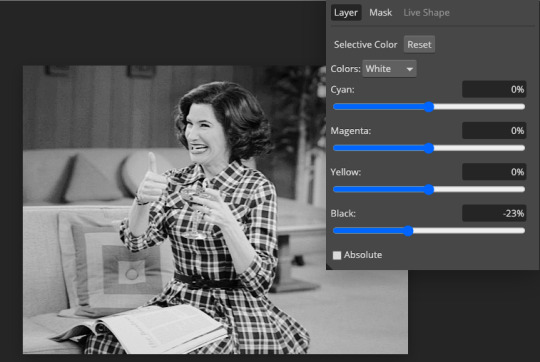
Lastly the neutrals

Here we have the final results!
Wasn’t this a gas! I hope this helped you out, let me know if you want to know anything else about gifmaking, I’m happy to help! Also, sorry if I wasn’t very clear, I’m bad at explaining 🙈
MORE RESOURCES:
Here are some other tutorials that are really helpful in making gifs. These users use Photoshop, but you can still use their tips most of the time in Photopea too, you just need to play around and see what works for you!
Gifmaking for beginners by @chloezhao (this one saved my life)
Pale coloring tutorial by @itsphotoshop
Two-Toned Gif Background by @clubgif
Text with white outline tutorial by @anya-chalotra
#resources#tutorial#gif tutorial#photopea#photoshop tutorial#photopea tutorial#tuserfran#userlaur#userlaura#usermirna#(tagging mutuals if you wanna share :P)#my tutorials
979 notes
·
View notes
Text
Someone said they wanted a Cricut tutorial, so here goes:
First of all, disclaimer, I do not really want to give Cricut money. This means I'm doing this with the least expensive tools I can find. Literally the only reason I went with Cricut instead of another brand is that Cricut sells the Cricut Joy, which is like $120, making it the cheapest computer cutter out there AFAIK.
One of the parts of the Cricut line that I don't have is a subscription to Cricut Access. Cricut Access is an online library of assets that are all digitized for the Cricut and are ready to use. I didn't get my Cricut to make baby onesies that say "Sorry I made big bad poopoo pants" on them or whatever the cricut wine moms make. I got a Cricut to put my own designs onto stuff.
So, if I'm doing a cricut tutorial, I'm going to start by showing how to make your own designs for the cricut. While this normally requires some kind of digital art software, which is going to get its own tutorial, here's a really fast technique that doesn't require that.
Part 1: draw thing.
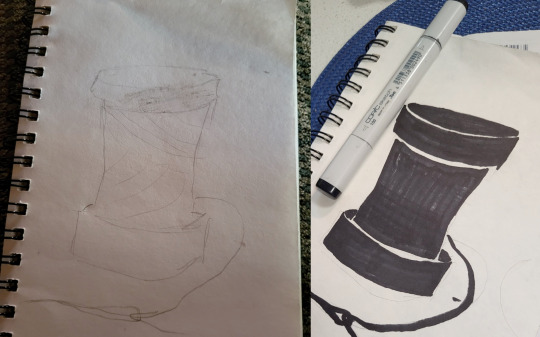
Part 2: Using some kind of dark marker to color in your design. You can get more detailed than this. However, make sure that you're keeping in mind that these shapes need to be cut out. You can only get so detailed with this before the machine can't figure out what to do.
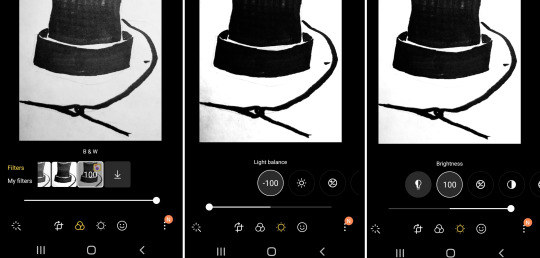
Part 3: take advantage of your portable, pocket-sized* image editor. Your phone usually has some kind of image adjusting options. You need the black outline to be as dark as possible, and the white to be as light as possible. First, crop the image so that it is as small as it can possibly be without cutting your design. Then, I started by putting a stark black-and-white filter on it, and then adjusted the sliders until that dark part on the bottom-right corner was gone.
____
*okay, depending on your pockets. I have some pants that won't even fit an iphone 4 or a motorolla razr
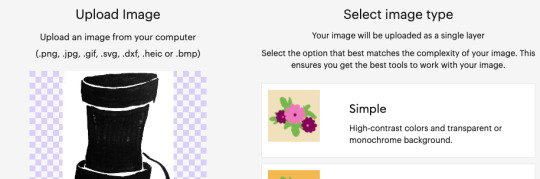
I've never used the Design Space mobile app, so I just emailed the picture to myself and uploaded it into the desktop version. After repeatedly declining Cricut's offer of a free month of Circut Access and just $9.99 a month after that, we're ready to upload the image.
When the software asks you what kind of image, you hit "simple." Full honesty, I feel like any image that makes you hit anything other than simple probably needs to be reworked on my end before trying to make Design Space understand that.
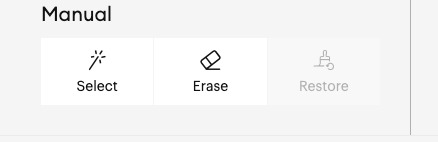
After you've uploaded it, and declined the offer of a free month of Cricut Access and just $9.99 a month after that, you'll get access to these tools.
If your image is good, you can start by just clicking the magic wand tool into the white areas of your design. This will erase them and make them transparent.
Note: with the way this process works, you don't actually need to fill in the whole of the dark areas, as long as you outline them dark enough and have no gaps. I did it anyway for this design, to make it easier to see the process. However, if you have a more detailed design, you can get sharper lines by just using a 1.0 sized multiliner and leaving your fill-ins blank.
I also went in with the eraser to make sure that the gaps between my pieces were large enough to stop the pieces from touching.
Then, you upload it as a cut-type image, and it'll open in the canvas.
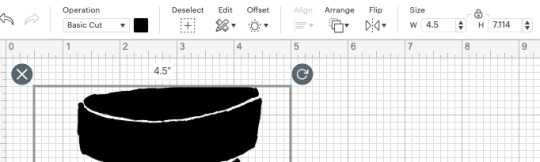
Since we're using the Circut Joy here, I went into the size box in the top right and set the smaller of the two dimensions down to 4.5. 4.5" is the maximum width that the Joy can cut, so this will make the piece cut as large as possible.
Since the Joy can also cut 24" long, you could combine a lot of little designs on the Design Space canvas and make a file for a border print. However, it's probably a better idea to learn the basics of an image editing software and do the combining there; Design Space likes to crash on me if I load too many images into one cut.

Then you just cut it out and stick it on something.
Final notes:
1) This is a really great technique if you know calligraphy, which I do not.
2) Because your lines are not as smooth as a computer-generated one, the blade is going to jitter when it cuts. This is normal and won't her the basic cutting blade. It might really annoy the knife/rotary blade, but I don't know for sure, because I don't have a Maker.
3) A brayer is a useful tool for sticking transfer tape onto your cut vinyl, and for sticking your vinyl onto things. If your local craft store is a Joann, be aware of this:
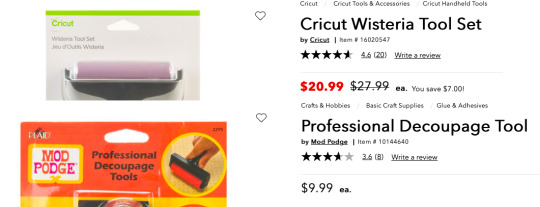
Cricut products are ineligible for coupons, even when they are no on sale. Mod Podge products have no such restrictions. If your store doesn't have the Mod Podge on in the glue aisle, you can check the scrapbooking section next to all the embossing powder and Zim Holtz stuff.
4) You can totally reuse transfer tape if you're careful.
5) it's pronounced "cricket". If you want to say it wrong, that's your right, but if you're going to rudely "correct" a craft store employee who got trained by the company, and you're wrong, be aware that you WILL be mercilessly mocked by that employee and several of their coworkers in the break room. If you want to be wrong, please be polite.
Okay, so that's your easy shortcut way to digitize without having to learn any software. Stick around for other ways to digitize your stuff, and that tutorial about making border prints with it.
22 notes
·
View notes
Text
HOW TO GIF USING TIMELINE INSTEAD OF FRAMES
I’m coming to change your life and teach you how to make gifs using timeline animation and screen recording. This is an update of a previous tutorial I made that used Quicktime Player but we’re going to bypass quicktime player in this one since I don’t find it works as well anymore. The benefit to this method in my opinion is that it’s fast, requires little set up per gif, and gets rid of any mess regarding frame skipping and glitching.
what you’ll need: photoshop, basic photoshop knowledge, an HD video, VLC player.
I know lots of people use frame animation. I used to always make my gifs that way. This is just a way that I found worked better for me and was a lot faster and made gifs come out cleaner (making frame caps got real slow on my computer for some strange reason).
ANYWAY so what you need for this, most importantly, is an HD video, VLC Player and Photoshop. At least for the screen recording process. But if you are making gifs of short videos like youtube or something, you don’t necessarily have to record them with quick time as long as you download them. VLC player is super easy to download if you don’t have it already just google it. There’s a MAC and PC version. Now here we go:
First, I open the video I want to gif in VLC player. For this tutorial, it’s an episode of Legacies in 1080p. I get the video to about 30 seconds before the scene I want to gif (keep in mind you can do the whole scene, you’re going to cut it up later). Pause the video.
Then you’ll go up to “playback” in the menu and select record.

Play the scene through and when you’re done, go back up there and click record again to turn recording off.
The video should save automatically to your video or movie folder on your computer. Mine saves in user/movies on a mac. You’ll see that they save with these VLC labels so if you can’t find yours, try searching for that.
I’m going to click the one I want, and just drag it straight to photoshop. When you do that, it’ll open like this:
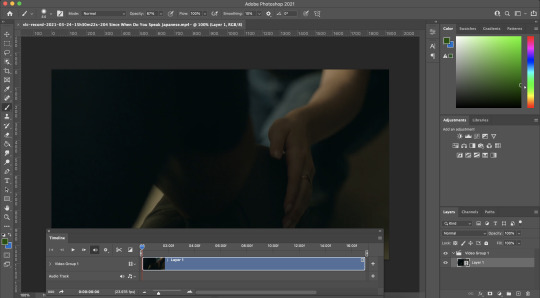
That window at the bottom is called “timeline.” If you don’t see it, go up to the menu, select window then timeline and it’ll appear.
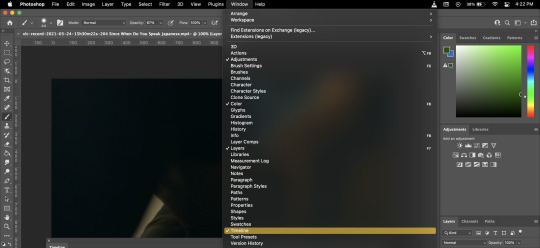
Now your video is ready to work with. The first thing you’ll need to do is change the speed and then the size. To change the speed, you’ll go down to timeline and select the tiny arrow in the far right corner of the video.
[NOTE: IT IS IMPORTANT TO ALWAYS CHANGE THE SPEED AS YOUR FIRST STEP. Once your video is converted to a smart object in the resizing step, you can’t alter the timing as easily.]
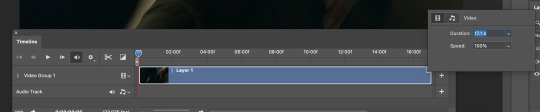
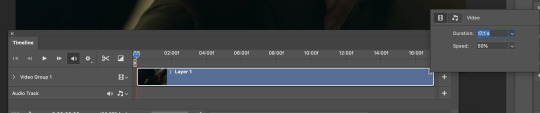
Change the speed from 100% to 50% or 40 if you need it slower.
Next, you’ll need to double the length of the video since you just cut that speed in half. Just grab ahold of the far right side of the video and drag it to the right until it won’t let you drag it any further.
Now in the timeline, you’ll see three things: the red line, and the two gray ends at the left and right sides. Those can all be moved. Anything between the gray ends is what will be saved when you export. The red line effects what you see on your screen. I’m going to drag the red line to the point I want a gif of just to help guide my cropping process. It’s landed here.
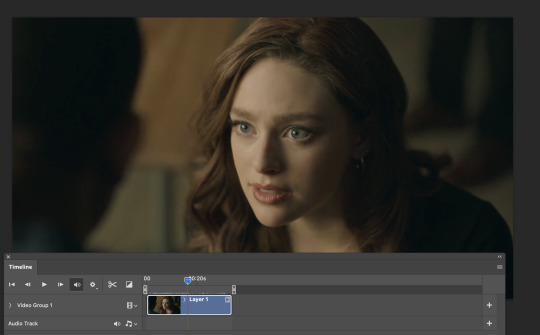
Now, you can use the crop tool to select the shape of your gif and what you want in frame. Since this tutorial is about giffing on timeline, I’ll assume you already know how to crop. But if you have questions, ask me. Cropping my gif got me here:
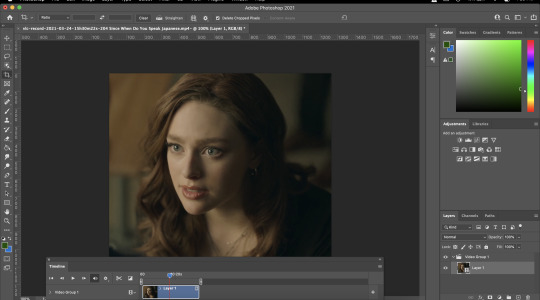
Now, I need to resize it so the gif isn’t 2930832 pixels. I go to image u in the top menu bar, and then image size. And resize the width to 540 for tumblr and here I am.
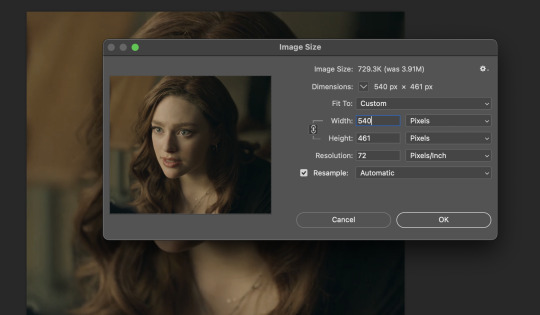
Photoshop will ask if you’re okay with converting the video, select convert.
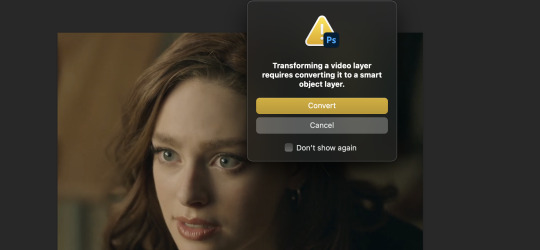
You’ll see the video get smaller and you’re here:
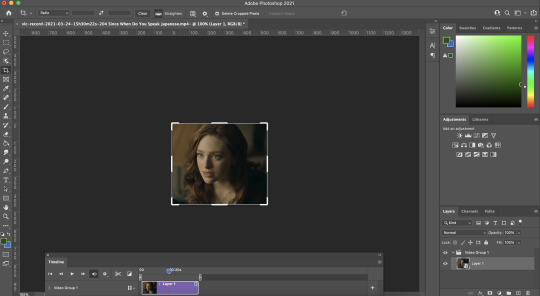
I zoom in to the size I want it for editing and now you can begin adding your sharpening and coloring.
To sharpen, make sure your video layer is still selected over on the right, and then select filter + sharpen + smart sharpen
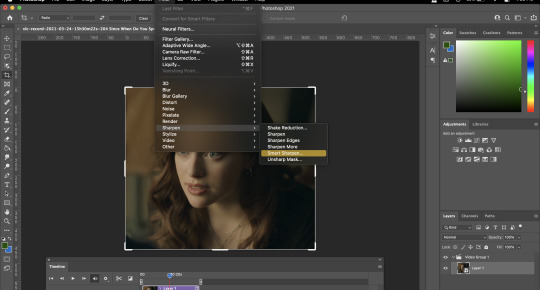
Now add your sharpening settings as you like them. Mine look like this, and as you can see when I add them, they are added to the video layer on the right:
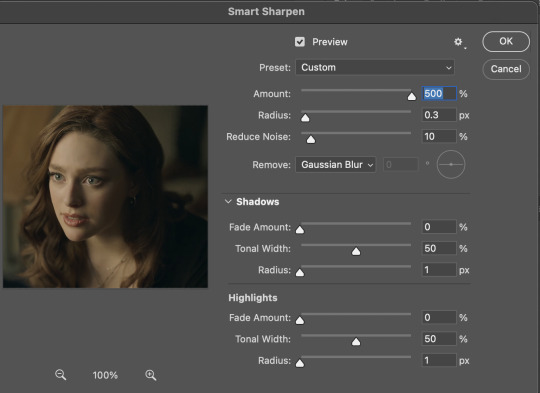
Now that you have a sharpening, you can add coloring as you see fit. It’s up to you how you add your colorings. I like to keep mine inside the video group on the right. If you put the outside of it/above it, they’ll show up on the timeline as separate layers. That’s dealers choice. Once you apply your coloring, it should look like this:

Once you have your scene colored, sharpened, and properly sized, you can select the area you want to export as a gif. Use the gray sliders on the timeline to select the area you want. Keep it to roughly 6-8 seconds long for larger gifs so you can fit under the tumblr limit. But this will vary depending on colors and such.
The little mountains with the slider underneath the timeline will help you to zoom in and out along the timeline to focus in on smaller chunks.
As you can see down here, I selected the area I want to gif for my first gif.

Now, I can hit file, export, save for web and export my first gif.

[Full disclosure, I went back and resized mine before I added it here because I realized 540 was going to be too big for the tutorial but that’s the width i usually use for big gifs. ]
Once that’s saved, you’ll be brought back to your photoshop document. And now, you can go right ahead and make the next gif in your set without having to do or change anything besides the sliders. So I’m going to just move the sliders over and gif Rafael.
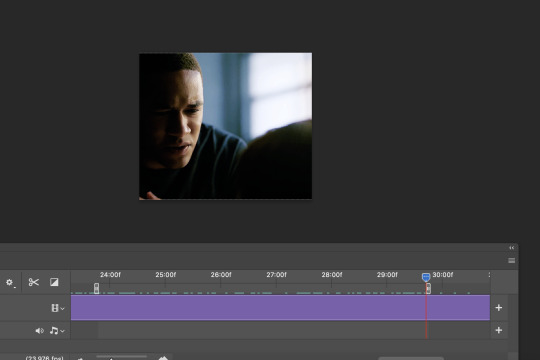
As you can see, he’s a little off center. So I’m just going to grab right ahold of the video layer using the move tool, and move him over.
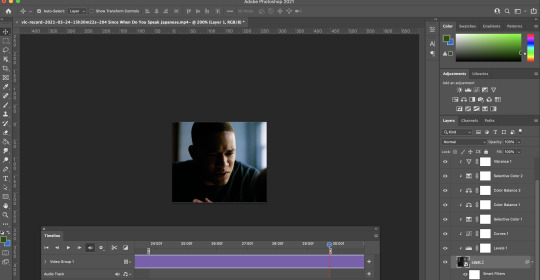
Now I export + save for web again. And save my second gif.
And I can keep going if I choose to.
The beauty of this method is that once you get set up, you can make 934828423 gifs from one scene at once and you only have to color, crop, size, and sharpen once. Sometimes, you’ll need to make some coloring or placement adjustments along the way, but it’s al in one document. And you’ll also see that in time, the early steps like timing and sizing come in second nature and take just a few simple seconds making this method really quick and breezy.
#userbru#photoshop tutorial#dearindies#gif tutorial#userfleur#userdrea#usermeliorn#idk whoever wants to reblog this that's cool#mine#tutorial#quirkyresources#i know the last time i made one of these people had their minds blown so hopefully it helps someone
336 notes
·
View notes
Text
Home Is in My Arms
Tony Stark had had a daughter.
Her name had been Penelope.
She had had superpowers.
And he hadn't seen her in four years.
The ten year-old had last been seen on March thirty-first, 2012. The day of the Chitauri invasion. Tony had seen her that morning, and he guessed he could at least be grateful that their last interaction hadn't been like his own with his parents. Instead of a fight that was never resolved, the two had giggled on the couch of the newly furnished tower, him and Pepper with glasses of wine and Penny with her mint milkshake. Pepper had side-eyed them exasperatedly, as though their laughs and jokes had been the worst ruckus anyone had ever made.
And then Coulson. And then Steve. And then Natasha and Bruce and a God he had learned about in history when he was younger. And then Loki and the Helicarrier and explosions that had left Tony's head ringing--but nothing had hurt more than the loss of his friend.
Everything had gone by so quickly, so desperately, there had been no time to do anything about anything except gear up and go. The biggest reassurance he had given himself was that his homework had caused Pepper and Penny to leave the city for a couple of days while the girl was on Spring Break. It meant they were safe from everything was about to happen, and that he didn't have to worry past New York.
And they had won. The Avengers had been formed under desperate circumstances. They had saved the world.
And Penny had been gone.
Pepper had left on the plane, but Penny had managed to convince her godmother that she should stay at her friend's house for a sleepover. The aliens hadn't even been able to make it past the perimeter and into Queens, but the hectic of it had been enough. Or maybe she had run off to help. Even at ten she was braver than he was. Better. And equipped with superpowers from a field trip's rogue spider that made her stronger than even Captain America.
But it hadn't been enough.
No body was ever recovered. No trace of her was ever found. No footage or DNA or witnesses. There was nothing. Nothing for him to even try and grasp onto what had happened to her. How she had died. The best anyone could do was assume that a Chitauri weapon had vaporized her and to try to grieve from there.
And by God did he try.
After the Mandarin and almost losing Pepper, he'd put in more effort than he ever had. He visited the grave where no body was buried, leaving flowers and trinkets and books he knew she would have loved. He talked. To people who had known her like he had. Pepper and Rhodey and Happy and even Natasha.
The two had been so close when the woman had spied on him. Closer than he had been, still trying to change and learn to be a father better than his own after Afghanistan. He'd been dying and hadn't focused on anything but himself. About what he wanted to do before he was gone, instead of what would happen to his family afterwards.
So Tony tried. He tried a lot, but trying didn't always end in success. No, sometimes it ended in helicarriers made for HYDRA to control. Or a robot meant to protect only trying to destroy. Or in the fracturing of the Avengers, with Natasha and Steve on the run while the others sat in a max security prison that he spent every living moment trying to get them out of.
Except for now. Or maybe now too. Tony didn't know why Natasha had texted him. Only that she had betrayed him and texted only a couple of weeks later with a location out in Birmingham, England and nothing else but the message 'Get here quick.'
And he had. With nothing but a quick word to Pepper to keep Ross off of his aching back for a day, he'd stepped onto his plane and arrived in just over six hours. From there the billionaire had stepped into a waiting car and zoomed towards the address the spy had sent him, his heart racing just as fast as the vehicle's as he curved through city traffic.
Tony's thoughts strayed to Steve and Barnes and what had happened the last time he'd zoomed off to help his teammate. He swallowed down on his stuttering fear, reassured partly by the guantlet-watch sat snugly on his wrist and partly because he knew Natasha. Well, he knew her better than he ever had Steve anyway. Him and Natasha had fought, and there'd always been room for disagreements and anger, but at the end of the day they knew each other. And they were family.
The mechanic pulled up outside the run-down apartment complex, giving it a onceover before parking, pulling a baseball cap on low, and stepping out.
There was a drizzle, light and cold for the summer, even in England. He frowned, but only pulled his hood up with a shiver and stepped through the rusted metal gate, allowing him access to the first floor of apartments and a set of spindly stairs that he hoped didn't lead to any kind of locked door. He didn't exactly have a key, and Tony would prefer to not draw any attention to himself while here.
The man didn't need anymore grief from Ross. Not while he was desperate to pin something on Tony, and meeting with a violator of the Accords wouldn't exactly do much for his public image.
Biting on a sigh, Tony headed up the stairs towards the apartment number that Natasha had sent him. Thankfully, there was no locked door in his way, and the only person in the hallway that the stairs had led him to seemed to be much too out of it to pay him any mind. Quicker than he really would have liked, Tony was outside Apartment 9B, the number rusted and close to falling off of its hinges. Sucking in a breath, he knocked.
It only took a few seconds for the door to click! and then crack open just enough for him to catch familiar blue eyes and cropped platinum hair interrupted by a second lock's chain.
Natasha let out a short breath of relief, unlocking the door fully and opening the door just enough that he could slip inside. He glanced around the apartment once as she locked the door back up, surprised to see it was basically exactly what he had expected. It was small and old, orderly but not quite well-kempt, with evidence of past fights staining and fracturing the walls.
"Nice place," he commented. "Very runaway."
"Very last minute," Natasha responded. "It's not as easy as you think it is to get an apartment when everyone's trying to arrest you."
"You seem to slip away no matter what. By the way, how did you get away from Ross last week? I've got to know your trick on that, because I could use some pointers."
Natasha stopped beside him, a small smile tugging at her lips as she crossed her arms over her chest. Despite his forcefully loose and nonchalant posture, Tony felt himself freeze up looking at the Avenger. Her expression, no matter what it was, had always been hard for Tony to discern when she was practically the perfect spy. But now, this smile--it was sad and joyful and regretfully guilty.
"What happened?" he asked, his voice dropping to something softer. Rarely sincere.
Natasha glanced away from him to stare at a door for a moment before glancing back at him. Her lips twitched and her eyes threatened tears in a way that he hadn't thought she would express to him.
She swallowed. "Penny's alive. And I found her."
Tony--
Tony didn't react. Not for nearly a minute. Instead he stared, his entire body stilling--even his damaged heart--before he seemed to come back to life all at once like a broken wound-up toy.
The man stumbled back a step, falling into the nearest gray wall. One lonely breath coming in in a strangled gasp as he willed for something--anything--to make sense.
"She's alive?"
Natasha nodded.
"How?" he demanded. "How--in England? From New York? There's no way anybody could've just taken her while I was--"
The man cut himself off, dragging in another wheeze that rattled through his entire chest. His legs began to collapse under him, but his friend caught him, managing to maneuver him onto the floor slowly. Tony leaned against the wall as Natasha sat beside him, her head propped up against the wall beside him.
Neither said anything. Not for a few minutes at least at Tony's shaking and gasping ebbed. Not until he could force out images and nightmares of Penny his mind had tortured him with for years. He locked them in a box and dropped it in an ocean of useless thoughts, because his daughter was alive. Because she wasn't dead and none of it--a painful death full of fear and confusion while Tony was only blocks away that he had been tortured by for years--had ever happened.
Natasha spoke up when he'd finally managed to take in eight consistent breaths.
"I was raised in the Red Room," she started. "I was taken from my family and tortured for years. I tried to make a family there, and I did. For a little bit at least. But that family was taken too, replaced by the only world I had ever known. One based on pain and dictated structure. A cruel trick to play on a child, but it was normal for the Red Room. What wasn't normal was me not only succeeding more than they had ever dreamed, but succeeding past them. Escaping and deserting. Killing Dreykov was the last step of my defection to SHIELD. It was revenge and justice all at once. The others would be freed and I could clear out my ledger in a life I chose."
She swallowed, taking a moment.
"I failed. I failed and I didn't know." Natasha turned from staring ahead at the wall to stare at Tony. Suffering blue met broken brown, tired and guilty reflecting. In a whisper, she said, "Dreykov lived. He lived until a week ago. And the Red Room, and every Widow in it, lived under him."
Tony was touched to be trusted this much. To be trusted with even a sliver of what his friend had gone through in such a time of suspicion and betrayal. But he was scared. He was terrified, because Natasha never shared just to share. Everything she said had a point, a reason, a direction.
He tore his eyes away, shoving a hand over them and letting his head drop onto his knees. Unwillingly, he croaked, "No... Nat, please don't tell me--"
"Penny's a Widow."
Tony bit his lip, chewing on his cheek so harshly there was the tang of blood in his mouth. He took a moment, letting his head fall against the cracked and stained cement wall. Penny was alive. And she had been trained--no. Natasha's descriptions, however few and miniscule they had been, could not be described as simply training. Penny had been tortured. For four years. And what had he done but grieve and give up? If only he'd known. If only he'd found out sooner.
Natasha continued.
"The Red Room..." She took a breath and licked her lips. "After I escaped, they changed their whole system. Their method. How they hid and how they trained and--and how they controlled the women."
Something about the way Natasha said the last part sent a cold feeling down his throat.
"What did they do to her?" he croaked.
"They um...well, for lack of my understanding of it, they mind controlled her."
"They--Nat what? How would they even--"
"They controlled the brain’s neuropathways through external manipulation," came a new voice, their accent thick. Tony whipped his head around to stare at a woman he had never seen before. Like Natasha, she wore a regular hoodie and sweatpants but still looked as though she could take his life in less than a minute. There was an intensity about her, from her stance to her tied back hair to her ghostly blue eyes that stared at him suspiciously. "It was based off of blueprints for the Winter Soldier. Me and Natasha were part of the mission to retrieve them when we were young."
Despite the insanity of every new piece of information shot his way, he managed to piece it together in his head quickly enough that he opened his mouth to respond with a snapped remark, but Natasha managed to speak before he did.
"What are you doing out here? You're supposed to be looking after Penny."
"I was, but then I heard how badly you were explaining everything and I came to help." Natasha glared. "Relax. I finished braiding her hair and now she's pretending to be asleep so she can listen to everyone talking."
The last part was said with a pointed look down the narrow apartment hall, but everything after Natasha had said "Penny" didn't seem to make sense anymore.
"She's here?" he asked, already scrambling to his feet. He glanced between Natasha and the woman desperately. "Penny's here right now?"
"We found her yesterday," Natasha answered cautiously. "Me and Yelena just started to free the Widows deployed around the world. We managed to give her the antidote during a shootout in Estonia. After that a friend of mine managed to get us here."
"A shoot--is she okay?"
"Just a couple of burns," Yelena said. "She may be enhanced, but she still has plenty to learn. She could still kick your ass, though."
"Thank you. Truly," Tony said, a bite of sarcasm to his voice, before turning back to Natasha, his desperation bubbling. "Which room?"
"Tony, I don't think you need to just go bursting in there. Let me--"
Tony stopped listening, every word his friend was saying dying out on his ears as he spotted a brunette and wide brown eyes poking around the corner over Natasha's shoulder. He felt his breath catch in his throat as their eyes clicked.
Penny had grown. She'd sprouted almost an entire foot from the short ten year old she had been, awkward and gangly limbs that the girl had always seemed to struggle with were replaced by obvious muscle and carefully controlled movement as she stepped out from behind the wall, their stare still holding. Despite the sharper angle of her chin and jaw, she still held baby fat in her cheeks that dwindled the look of her down by a couple of years, not helped at all by the familiar roundness of her deeply brown eyes.
He swallowed. His voice broke.
"Penny?"
—-
“Penny?"
It had been years since Penny had seen her dad. Since she'd heard him. Anything about her father not privy to missions had been carefully shielded away from the teenager for years. Sometimes on the few missions she had been sent on she would catch news clippings and pictures on TV channels before she had to move on or that terrible voice in her mind would force her to ignore him. But, despite the scarcity of which she was allowed to know about her father, she had always thought about him.
Penny had swam in her memories whenever she could. Whenever she needed. She'd think about the games she and her dad had used to play. About lessons he'd taught her and days they'd spent together. About hugs and braided hair and kisses to her head. The memories had felt faint and washed away underneath everything, but she'd clung to them like a lifeline.
That being said, she hadn't expected Dad's voice to sound like that. For him to look like this. He was always so put together in her mind--so strong--even when he was messy from the lab or tired from a long day of work, always accompanied by fond child-like adoration. But now he didn't look it.
There were bruises on his face, faint but still noticeably purple. His hair wasn't as dark or thick as she remembered, growing back just a little higher on his hairline, and more lines grabbed and pulled at his face. But that wasn't what ruined her memory of strength and warmth, people aged after all, that was just reality. It was the expression on his face and glossing over his eyes. It was the way he'd said her name, so unsure and weary.
Penny, finally, looked away from Dad, instead glancing over at Yelena and trying not to look like she was too desperate for help. Yelena stared back, raising her brows and gesturing to Tony with a slight nod of her head, as if telling her to not be a coward. But Penny didn't know how to do that. Not now.
Thankfully, Natasha took over.
"I'm going to go get us some dinner. Yelena?"
Okay, so not the kind of help she'd been looking for.
Yelena gave Penny one last glance, nodded, and then followed the Avenger out of the door.
The door clicked shut and then it was just father and daughter.
"Penny," he tried again.
She hid a flinch at how small and tired his voice was, how broken he felt standing only feet from her. She hid her shock and her fear and apprehension exactly how she'd been taught, schooling her features into something easy and bored. She let her shoulders drop and her posture loosen, but the hardest part was hardening her stare. That had always been the biggest complaint of her handlers. Her senses had been sharp but her expression always so readable by her eyes.
"Hi, Dad," she said, her voice cool and casual on default. The words felt terrible leaving her lips, so she crossed her arms in an attempt to feel more stable. "It's been a while."
He chuckled, short and sad. "Yeah. You could say that."
And then there was silence. It trickled in, slow, awkward, and tense between them. Penny tried not to let it get to her, but she couldn't deny that she wasn't tired and disappointed. When Yelena had smashed the antidote beside her, it was the first time the teenager had seen clearly in a long time, and her first thought had been of her Dad. There had been worries about if he missed her and if he'd been okay, but a fear had stabbed at her so strongly that she was still thinking about it.
Would he still love her? After all she'd done? She had hurt people. She had killed people. Not in defense. Not in good reason. But in fear and control.
"I, uh..." Penny blinked at her dad's voice, beating away her thoughts and instead focusing back on the bruised and stuttering man in front of her. "Sorry. I would've thought of something better to say if I'd known I was going to see you again. Maybe some presents too. Do you still like those peanut butter cookies?"
"The ones we used to make?" she asked. "With the Hershey Kisses?"
"Those are the ones."
She shrugged. "I don't know. I haven't had them since I was with you."
"Oh. Yeah. I guess you wouldn't have..." he trailed off, glancing down for a moment. She stared at him, watching his expression carefully as he loosened and looked back up at her. "Well, we can't make them again? At home?"
"Sure. Sounds fun."
Penny couldn't stand how dull her voice sounds, like she couldn't care less about something that really made her want to cry in happiness. But...she didn't know what else to do. What to say. The Red Room had made sure she always knew what to do and what to say, but that had been for politicians and businessmen and people she was supposed to trick. She didn't want to trick her dad. She just--she wanted to--
Dad stepped closer, brows furrowed and mouth pulled down in a deep and concerned frown. She kept a wary eye on him as he approached, trying to force down feelings of apprehension and fear that she had become familiar with whenever anybody was in her space. But he stopped about a foot short, his reached out hand halting just away from her face as he whispered, "Oh, piccolina. It's okay." His voice broke. "It's okay. I'm gonna make sure it is... I promise."
And finally she broke.
And it hurt. It really, really hurt.
Penny leaned her cheek into his open hand as hot beads of tears caught on her eyelashes, allowing for Dad to cup his other hand around the back of her head and tentatively pull her in. It took the teenager a moment to adjust, so wired on the need to fight and never let her guard down, but then she just--crumpled.
Like a switch had been flicked, Penny buried her nose into his neck and wrapped her arms around him in a tight squeeze, swallowing down tears. Dad pulled her in tighter, his nose pressed into her tightly braided crown.
And then he sobbed.
It was a strangled, inhuman kind of sound that rumbled from his chest to escape the back of his throat. He cleared his throat, as if embarrassed, but Penny wasn't an idiot. She could still hear his heart thumping and feel a tear slip from his chin onto the back of her neck. It all shocked her, but the sound found itself ringing in her ears painfully more than anything.
She flinched in his hug.
"Oh, Penny. I'm so sorry," he apologized, his voice sore with tears. "So, so sorry."
"For what?" she asked. "Not finding me? You wouldn't have been able to, Dad, even being you. Draykov made sure of it."
"I don't care. I should've done something! I should've--I should've--"
"Dad." He fell silent as she pulled away from him, crossing her arms back over her chest as she came back to her training. Dad stared at her, his dark copper eyes as guilty as she felt. "Please, just... Don't be sorry. Because I'm sorry, and if you're sorry then we're both sorry and we can't both be sorry it's--"
"What on Earth do you have to be sorry for?"
"You'd be surprised."
"Penny--"
"I'm not ten anymore, Dad. I don't think I'm even a kid anymore... I've--I've done too much harm. I have a lot to be sorry for."
Dad stared at her, a familiar sadness in his eyes. He chewed his cheek, brows furrowed in thought, and she was brought back to a time when she would watch him solve problems in the lab, or try to answer one of her inane questions that she never seemed to be able to stop asking.
"Let me ask you something," he started. "Do you think I'm a bad person? That I'm at fault for losing you?"
"No," she answered immediately, because her dad had always tried, no matter what. She'd known he wasn't perfect, and that a lot of people hated him for the mistakes he'd made, but she'd always known how much he really cared. How much he really cared and tried for the world. For the Avengers. For her.
"Well, then what makes you a bad person? What makes you not a kid anymore?"
Penny could only stare. She could only answer, "I've hurt people."
"I know. And I have too. But you don't think I'm a bad person, so you're not a bad person either. And what about Nat? Or your new very scary friend?"
"I forgot how much I hated arguing with you," she deadpanned.
"'Trying' to argue with me," he corrected, a smile pulling at his face. Surprisingly, she managed to smile back. Even more surprisingly, it didn't feel fake. Sure, it was small and tired, but Penny couldn't remember the last time she'd actually smiled. "See? Everything's going to be okay."
"How do you know?" she asked. "I'm a violator of the Accords. If it ever gets out that I was part of the Red Room--what I did for the Red Room--almost nothing could keep me out of prison. You'll have to explain how you found me and it would make you a violator--"
"I'll handle it," Dad said. "I always handle it. And just because you don't feel like a kid doesn't mean you aren't one. There are protections for you. And we found protections for Nat. Wanda too, if she would've taken them." He muttered the last part under his breath, the words emotionless but regret and guilt clear in his eyes. He cleared his throat and looked back at her with a raised brow. "And how do you know about the Accords? Do they have a current events class in the Red Room?"
"We do actually have to keep up with some events for missions. But, no. I've been reading old newspapers. Did you know you were on the front page for almost two weeks in June?"
"No. Nobody reads the paper anymore. Unless you're a dinosaur anyway."
"Uncle Rhodey likes the paper," she said with that still small but still real smile. "For the crossword puzzles."
"Yeah. Like I said: Dinosaur." With that, the jokes seemed to slide away as he took on a more serious tone. "But I'll handle it. I've already been trying to handle the Accords. You'll be safe, and free, at home, Penny. I promise."
"I can really come home?"
Dad paused. "Did you think you wouldn't?"
Penny shrugged. "I don't know. I wanted to. I want to. But I just... I didn't know how safe it would be, and I know how to live by myself. How to avoid suspicion. I was...I was prepared for other options."
"If you were planning on running, why did you meet with me?"
"I don't know," she said. But truthfully, there had been a hole in her heart. A knot in her stomach. She'd just--she'd needed to see her dad. To apologize and let him know she was okay. She'd missed her family for so long, she had to imagine they'd missed her too. In fact, Penny had wanted nothing more to know they'd missed her. That those years in the Red Room wondering where her family was hadn't been because they didn't care.
Realistically, Penny knew Dad had missed her. Had loved her enough to grieve and look for her, but being there for so long--so terribly long--had been enough for seeds of doubt to sprout and root itself in her mind. But the teenager didn't tell her dad that. That would make him upset, and Penny was tired of being upset. Instead, she said, "Just missed you. Wanted to know that you're okay."
"Well, now you're gonna know every day," he said. "And you're going to know that Pepper is okay. And Rhodey and Happy. And you're never going to miss us again."
"Never?"
"Nope. Well, maybe when you go to school. But we can homeschool if you would prefer that. Would you?"
"Oh, uh, I don't--"
"Yeah, never mind. You don't have to know right now," he said with a wave. Then he smiled at her again, that genuine smile that squinted his eyes and pulled at his wrinkled laugh lines. "Right now, why don't we just go home?"
"Yeah," she said. And suddenly no other thought occupied her mind. Home was all she could think of. Of tall New York skyscrapers and the bustling city. Or maybe they'd go back to Malibu, even if his house was gone. Either way she'd see her uncle again. And Pepper. And Happy, who were all family to her. Family she hadn't seen in so long. "Let's go home."
Dad smiled, his eyes misty. Penny smiled back, taking his hand and leaning against him in another hug. He readily accepted, wrapping his arms around her and pressing a light kiss to the crown of her head.
The best part: Nothing about him whispered danger. Or discomfort or uneasiness. There was just...comfort.
Just home.
It was the best feeling in the entire world.
—-
“Should we tell Uncle Rhodey we're on the way?"
"Nah. He loves surprises."
"He hates surprises."
"Exactly!"
Penny laughed. And the sound, the feeling, was just like home.
#peter parker#tony stark#female peter parker#irondad#irondad and spiderson#iron man fanfiction#spiderman fanfiction#marvel fanfiction
69 notes
·
View notes
Text
how to make this style of ‘security footage’ gif for your sims gifs:

things you’ll need
a screen recording software (i personally use OBS, free and literally the best)
photoshop version with a timeline (i use photoshop 2020)
know how to make a basic gif. lots of tutorials online!! and on tumblr.
okay, first off all, you’ll need your video! there are many OBS tutorials online so im skipping explaining how to record your screen (it can either be your full desktop window or just the sims 4 window). with OBS since its outside the sims, you can use reshade to record your videos with no problem.
after your video is recorded, we have to import our video frames to layers. to do this you go file > import > video frames to layers. look for your video in the folder you saved!

you now get this pop-up window:
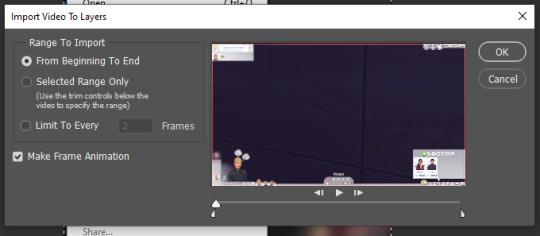
i recommend: NOT limit to 2 frames or more. it looks wonky, it skips, and it uhm... NOT AESTHETICALLY NICE !!!!!!! for a smooth animation, you want every layer! so you’ll now select ‘Selected Range Only’ and with the lil white markers below the video, look for the exact part you want to make a gif:
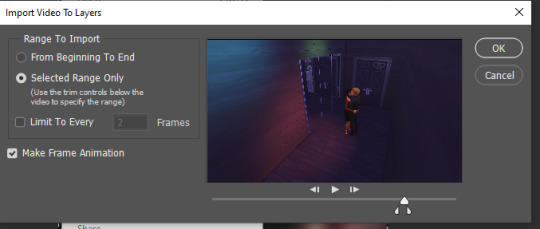
click okay!!! now your photoshop will load all the layers. as a reminder, remember you are on the ‘motion’ workspace.
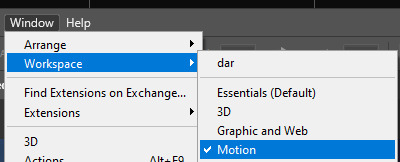
so overall it should be lookin kinda like this :
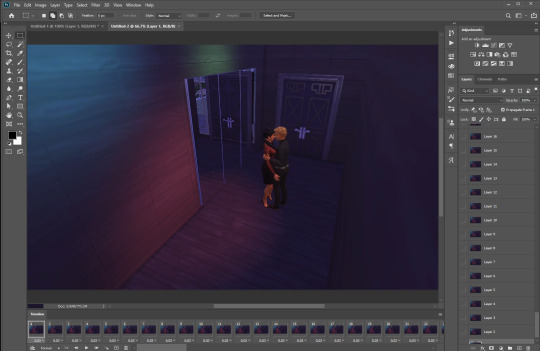
again, not a gif tutorial! if you have a preferred gif speed, go ahead and change it! i like to do 0.05. if you’re like what the hell is she saying?, you do this by going on the lil three bars on the timeline bar on the right, clicking select all frames,
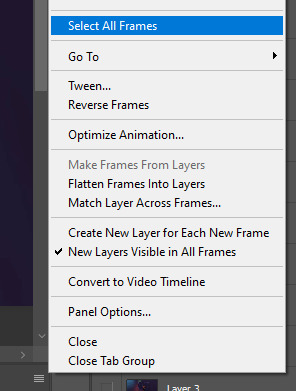
then clicking on whatever frame arrow, clicking ‘other...’ and on the pop up menu changing it to 0.05 and clicking ‘ok’

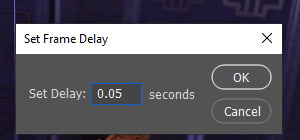
now you have to convert to timeline. you do this by clicking on well, the convert to timeline icon next to ‘Forever’

now your timeline should be lookin like this!!

to put the ‘security camera’ footage effect, we have to convert it to a smart object. to do this you select ALL layers in your Layers panel:
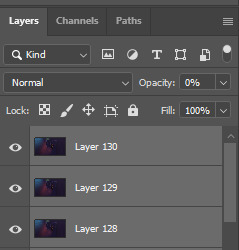
MAKE YOU YOU HAVE ALL LAYERS!!!!!!!!!!!!!!!!!! right click on whichever and select ’convert to smart object’.
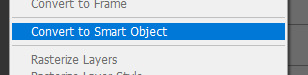
now your file should be lookin like this in the layer panel and on the timeline:


if you click the playbutton (or the space bar) and the gif moves, then WOOO!! we made it!!! you have a gif!! but we arent done yet! im skipping showing you this, but crop it to your preferred dimensions, add your psd if you have one, etc. the next step after you do all this is adding a black and white filter.
you go layer > adjustment layer > black and white. i prefer black and white to just adding a simple gradient because you can make certain colors brighter or darker.


if you have NO idea what any of those numbers mean, you can play around or leave them like it is! for a thing in my gif, i know theres reds and blues, so if i change the values, this being if i decrease the reds, they’re gonna get darker. if i increase them, the reds are gonna get brighter. so it all depends on your video/gif!
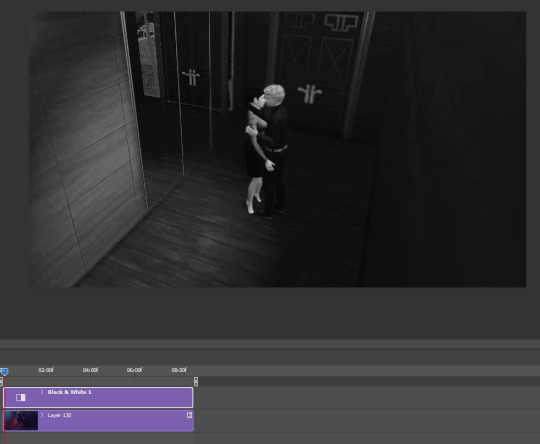
what we’re gonna do next is add the ‘camera footage’ effect, which is really JUST adding noise to the gif. we do, while making sure we are on your smart object layer, for me this is Layer 130, filter > noise > add noise
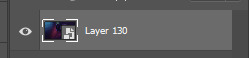
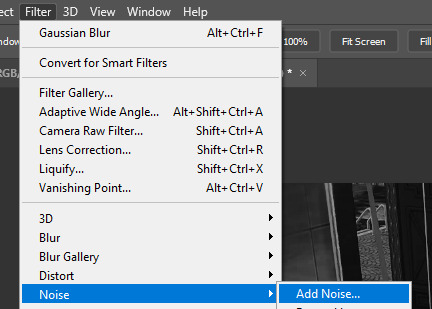
the amount of noise is really up to you! when you have your desired value, click ok!

so now your gif should move and have a noise effect! so we are HALFWAY there

now, we need a camera footage overlay! you can literally google ‘security footage overlay‘ and use whichever you want and see fit! im using this one for this tutorial and its literally the first result ehkjdfjksdf

copy paste into your gif, remember it has to be on top in the layers panel! and adjust so its around the same size as your gif:

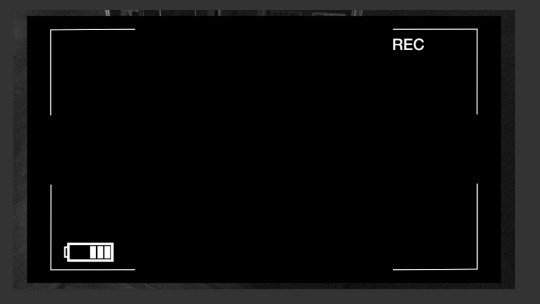
next, we change the layer mode to SCREEN so you can see through it!


in the timeline, you’re gonna have to increase the overlays length to match your gif’s. when you go near its corner a lil icon will appear and you just have to drag it.
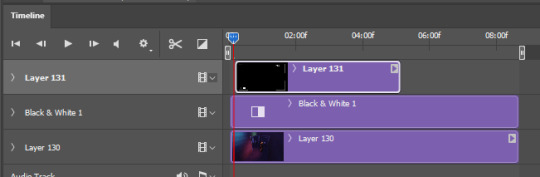

now, our gif is DONE!!!!!! A WIN !!!! we made it. now to save it, its file > export > save for web.

remember to select gif on this drop down menu:
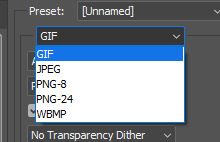
AND for saving gifs i use these settings:

now its the time of TRUTH!!!! tumblr has a size limit of 8mb for gifs. depending on the size of the video (mine is 1920x1280), you’ll either have to: trim the gif OR decrease the size. sometimes decreasing the size works, but sometimes its not enough and YOU’LL HAVE TO trim the gif.
[everyone laughed] BUT if your gif is under 8mb ... CONGRATS!!! you can save the gif and it’ll work on tumblr if not..............we have 2 make some sacrifices. click ‘cancel’ and lets go back to the file. we’ll resize it first.
go to image > image size

make sure the lil lock is clicked and resize to a smaller size. if your gif was like, 9mb, then you dont have to decrease the size SO much. maybe 100px less, but since mine is HUGE im resizing it to tumblr’s size of 540px
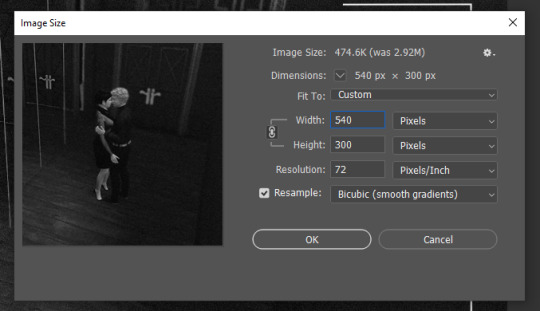
now that we resized, lets go trim out clip! to do that just move the lil marker at the edge of your timeline closer to the other one
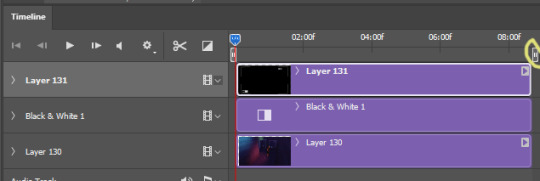
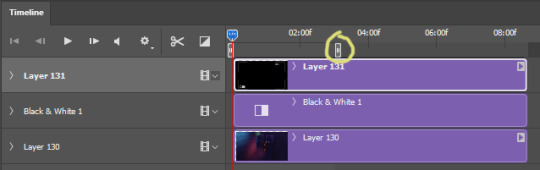
now lets go check our gif size! remember, under 8mbs is the goal. again file > export > save for web

under 8mbs! a win. now click ‘Save...’ and save on your desired folder/destination!! we are NOT done yet. theres still one more step to go!! you’ll have to open your recently saved gif. just go on file > open and look for it!
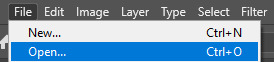
after your open your recently saved gif, you should be looking at something like this :
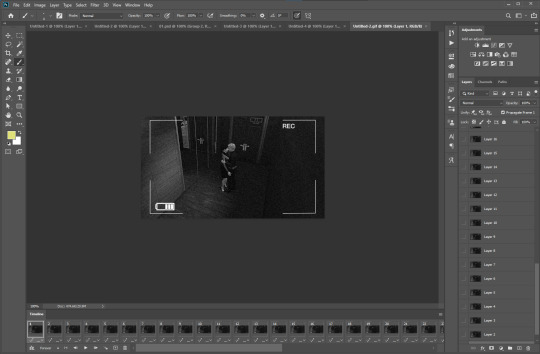
the reason why you have to reopen its because smart objects by default increase the speed. so remember how we saved the gif with 0.05? by saving it as a smart object, it got increased to 0.07. so it’ll be SKIPPY n slow. to fix that we do the same steps of selecting all layers as above.

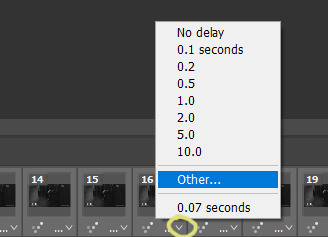

now all you need to do is ONCE AGAIN, save it like before. im skippin showing u this bc i explained it before!! file > export > save for web etc. AND WE ARE DONE !!!!!!!!!!!! AAAAAAAAAAAAAAAAAAAAAAAA
#howto#THIS POST is long. and for some reason i had to rewrite these tags like 5 times#thanks tumblr FOR NOTHING!!!#but if anyone is wondering how i made other gifs just lmk!! i dont do many just bc u know...if u do them too often its borin#gifs are special treats mhm !!!#idk what to tag this again#ts4 tutorial#ts4#ts4 simblr#simblr#ts4 resources
69 notes
·
View notes
Last Seen Blogs

ahouseinthewoodland-blog
welcome to the woods

leemontoast
A cage for a cage...
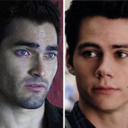
sterekstorm
Derek&Stiles
opojsds
OLD PHOTOS OF JAPANESE STUDENTS DOING STUFF

kokokumaduy
A Fellowship destined for Postive Energy