#or are currently working on it
Text

Source

Source
54K notes
·
View notes
Text
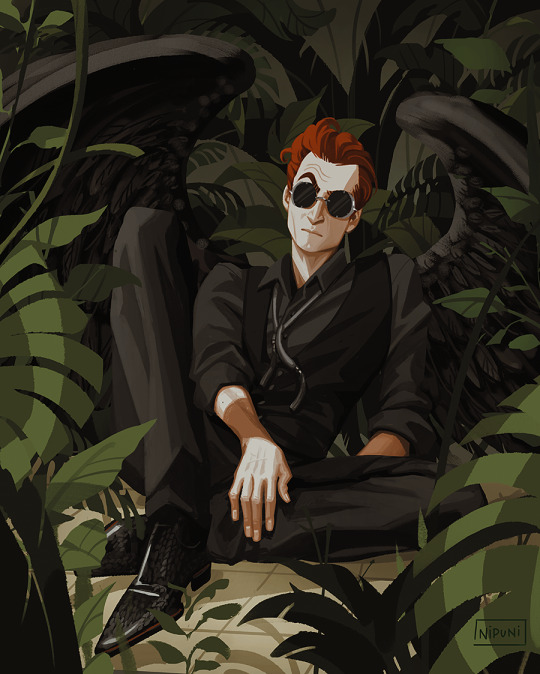
the snake of eden 🥰
#good omens#good omens 2#ineffable husbands#crowley#anthony j crowley#my art#I love him!!!#something quick because I'm very busy im sorry 😭#I have a ton of gomens sketches I want to work on when I'm done with my current deadlines I can't wait#I'm also making new outfits inspired by them!!#and I have a couple of poto paintings to finish!! and more poto content to share very soon eughuehg#also tempted to make doctor who fan art because I love tenth is there even still an audience for it? lmao#the audience is me 😌#I'm always the most inspired when I'm busy as hell 🥲#aaaaaa
36K notes
·
View notes
Text
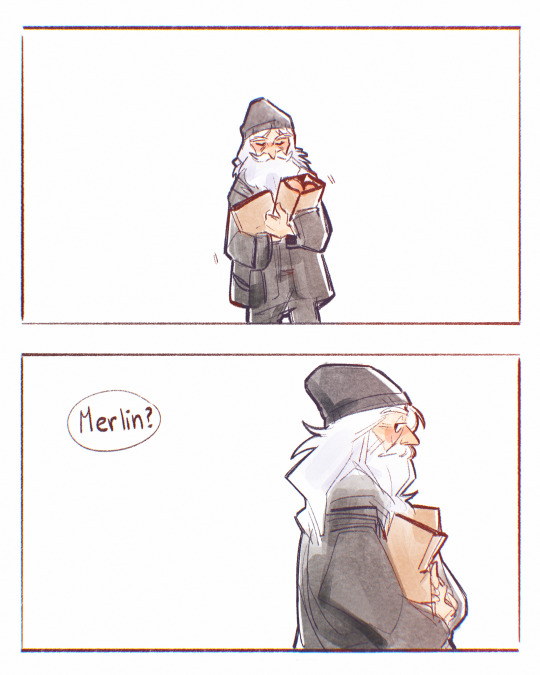
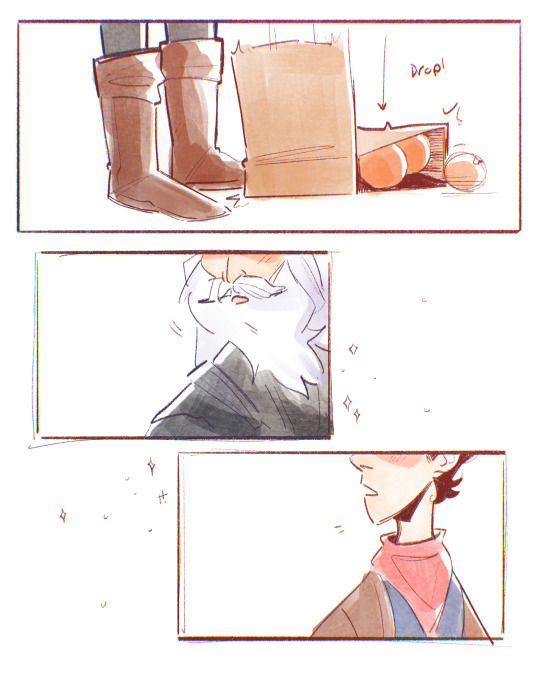
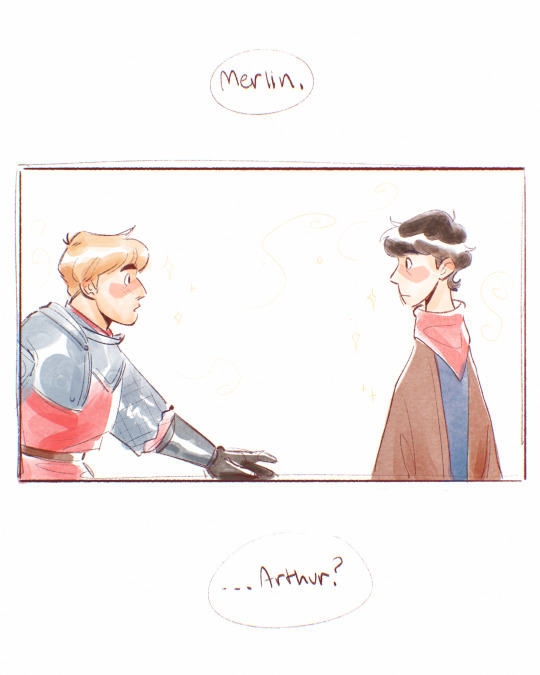
Returning home
#I like to think it works like Sophie being old in Howls moving castle#without his friends and family and Arthur Merlin obviously ages#but Arthur makes him feel young again - like who he was with him#because Arthur woke up obviously because that’s what happens#it’s true and canon and I said so#(don’t tell anyone im only on season three currently)#my art#Merlin#bbc merlin#merlin emrys#arthur pendragon#Merthur
5K notes
·
View notes
Text

#artists on tumblr#the horrors are neverending#by horrors i mean waking up early and going to work#even though i currently work from home#i remember alarms going off at 7am like it was yesterday#waking up early when it's pitch black outside and going out into the cold is torture#every day i dread the day i have a 7am alarm again#you never really escape it unless you're crazy rich#the horrors persist and always lurk behind the corner#can we make working from home the norm...
8K notes
·
View notes
Text

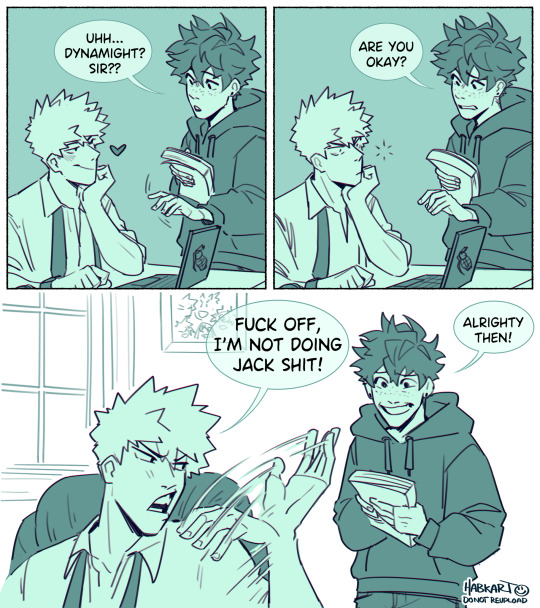
IT!deku meets Pro Hero!Bakugou for the first time!
scammers to lovers | 1 | 2 | 3 | 4 | 5
#bnha#mha#my hero academia#midoriya izuku#bakugou katsuki#bkdk#dkbk#bakudeku#dekubaku#kirishima eijiro#kaminari denki#mina ashido#sero hanta#la brava#habs art#doodles#scammers to lovers#I’m currently working on the second part of the villain attack comic if you wanna toss a coin my way on ko-fi I’d appreciate it so much
10K notes
·
View notes
Text

The IDF is counting on people to not have any critical thinking skills at this point
#like what a joke#they cant even do basic research#it doesnt take much to figure out how an mri works#cant make this shit up#current events#idf#israel#jerusalem#gaza#palestine#from the river to the sea palestine will be free#news#trending#twitter#viral#text post
6K notes
·
View notes
Text

Vermis I & II (hardcover edition)
#hollow press recently decided to release hardcover versions of both books : ) ! They’re nice looking#this versions only vary on the cover and the size; the contents are the same#thanks a lot for the support. I’m currently working on more stuff I hope you like it.
2K notes
·
View notes
Text
ok but the news of a One Piece animation remake is so funny because the current anime is STILL running, and will likely continue to air for several years to come...
like man, sorry if you ain't a fan, but it looks like One Piece will live forever 🏴☠️
#One Piece#like is this the first anime in history where the current anime is still airing and yet there's already a remake in the works?? lmao#i ain't complaining tho!!
3K notes
·
View notes
Text
random userbase data time
(listed almost every/every game as one option in case you skipped out on some of the multiplayer ones)
please reblog after you vote for Maximum Data, even if you voted no! if you voted for one of the other options, tag your favorite game(s)!
I am just very interested in the presence of the zelda fanbase :>
please note that, for the sake of this poll, remakes count as one game. so like, if you've played the original ocarina of time and master quest and the 3ds version, that counts as one game.
#by the way! there are currently 19 games#including breath of the wild and not counting tears of the kingdom or any remakes#and INCLUDING multiplayer spinoffs like four swords#I have played them all except for triforce heroes#legend of zelda#polls#random stuff#ocarina of time#skyward sword#twilight princess#breath of the wild#zelda is my favorite franchise of all time. I can talk about it for so long#god I hope this works
10K notes
·
View notes
Text
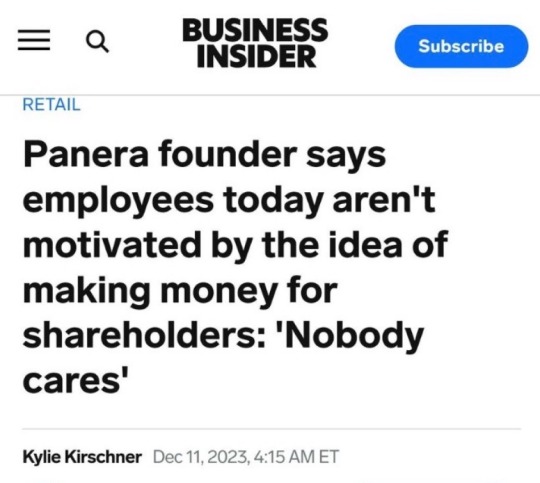

Source

Source
#capitalism#eat the rich#news#current events#working class#workers#the left#end capitalism#twitter post
49K notes
·
View notes
Text
This post is your reminder that you are not obligated to blog about current events.
Things are bad. Really bad. Do not let people guilt trip you into tormenting yourself even further over the fact that things are bad. Doomscrolling is not activism.
If you're just on tumblr to blorbopost or reblog pretty pictures, you are not harming people by inaction.
You are not a bad person for not dedicating every aspect of your life and leisure space to whatever disgusting mask-off attack on human life and dignity some government has decided to enact.
Take action where you can, but don't confuse doomscrolling and digital self harm for action.
If you need to lose yourself in blorboposting, go for it.
If you need to log off for the day, whether it's to take irl action or to protect what little sanity any of us have left over the past 7 years, then by all means, do.
Morale is important. Hope is important. Small joys keep us from burning out completely in times like this. Do not let any "if you don't reblog this I'm judging you" guilt trip convince you otherwise.
#serious tag#current events#im gonna be offline for the day working on making doll clothes#this is why i keep my blogging and my activism as separate as i can#and only talk about the dynamics of big irl issues as they apply to hobby spaces most of the time -#because i know myself well enough to know that i WILL fall victim to the doomscrolling cycle#it's happened before and im not going there again
56K notes
·
View notes
Text
WHO NEEDS MIDDLE BITS WHEN YOU CAN HAVE ✨ 𝒔 𝒄 𝒆 𝒏 𝒆 𝒔 ✨
#destination procrastination station#writing memes#writing humor#writing#writeblr#my writing#fantasy#fantasy author#romantasy#ya fantasy#writerscommunity#ya romance#novelist#writers#writer#writers on tumblr#novelist memes#novel#procrastination#wip#current wip#work in progress#feral writing#writing blog#meme blog#author#ya fantasy author#authors#cat fayssoux#writers of tumblr
2K notes
·
View notes
Text
AU where after Jason died, Tim decided to become one of Batman's villains to keep him in line.
His logic is; Batman, no matter how far gone, would never want to see a child resort to crime and villainy.
He's right.
A little too right.
Batman is now obsessed with the child villain, determined to rescue the kid from himself. Tim, however, is committing to the bit.
#batman au#third robin au#bruce is now hyperfixating on little villain tim#tim is having a hell of a time dodging him#eventually his luck will run out#but currently it's working overdrive#*disclaimer the luck is the base level thugs. they think it's adorable and don't want batman to break his bones
2K notes
·
View notes
Text
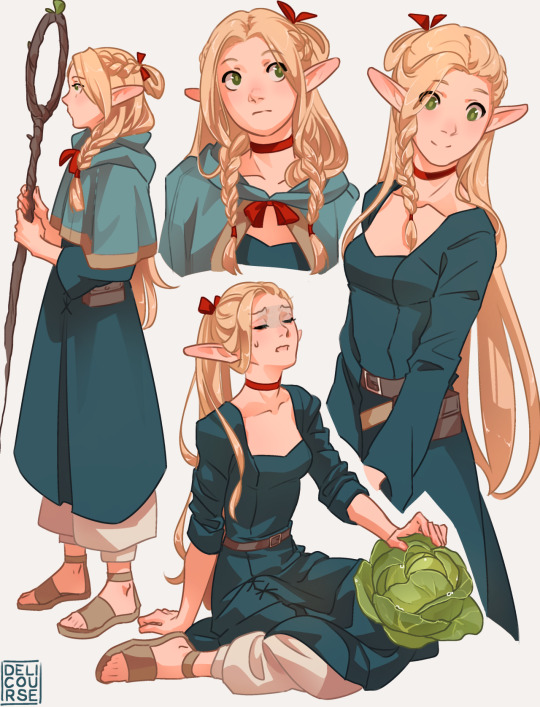
been watching dungeon meshi...🌱
#marcille donato#dungeon meshi#delicious in dungeon#dunmeshi#girl i dont know what tags are right.#deliart#normally i stay away from the fantasy medieval rpg etc aesthetic but this anime is nice so far ! felt a little refreshing.#i appreciate the textured linework in the anime. although as someone who also does that. i really felt the slight bleed on the colors#in some spots. i wanted to get in there to fix it soo bad in the beginning#textured linework requires a lot of effort to look clean.....but it looks lovely. seems difficult if u gotta color a whole animation#id do neat linework for this but i am base sketch pen for linework pilled rn. post more work less#got more serious wips currently but those are all on the backburner<3 sorrie.....
2K notes
·
View notes
Text
@ writers, just out of curiosity.... when you write multichapter fics, do you have each chapter in a separate doc or have everything on one big doc?
#holly.txt#currently working on smth and i have a folder on my google drive with one doc per chapter in it#and i'm just like ???? would having one big doc with all the chapters in it be more effecient or smth??? idk#efficient*
7K notes
·
View notes
Note
Any tips on learning to make buttonholes? I've been putting it off for.... *checks notes* like three years.... but better late than never and all that. I don't have any fancy machines so I gotta do it by hand but that seems right up your alley.
Thanks!
It IS up my alley, yes, I do most of my buttonholes by hand!
I'm actually part way through filming an 18th century buttonhole tutorial, but I expect it'll be a few more weeks before I finish that and put it on the youtubes, so in the meantime here's the very very short version. (The long version is looking like it'll probably be about 40 minutes maybe, judging by how much script I've written compared to my last video?)
Mark your line, a bit longer than your button is wide. I usually use a graphite mechanical pencil on light fabrics, and a light coloured pencil crayon on dark ones. (I have fabric pencils too, but they're much softer and leave a thicker line.)
You may want to baste the layers together around all the marked buttonholes if you're working on something big and the layers are shifty and slippery. I'm not basting here because this is just a pants placket.

Do a little running stitch (or perhaps a running backstitch) in fine thread around the line at the width you want the finished buttonhole to be. This holds the layers of fabric together and acts as a nice little guide for when you do the buttonhole stitches.

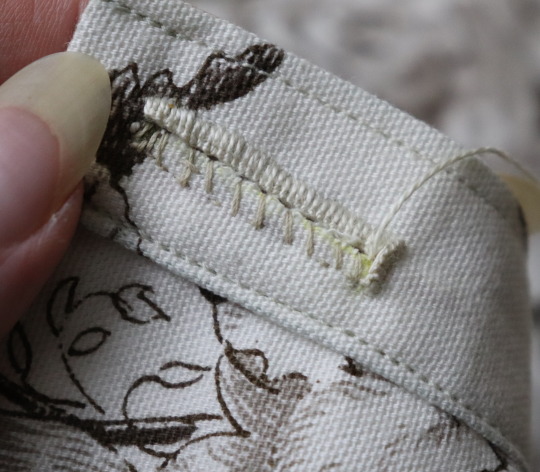
Cut along the marked line using a buttonhole cutter, or a woodworking chisel. Glossy magazines are the best surface to put underneath your work as you push down, and you can give it a little tap with a rubber mallet if it's not going through all the way.

I'm aware that there are some people who cut their buttonholes open using seam rippers, and if any of them are reading this please know that that is abhorrent behaviour and I need you to stop it immediately. Stop it.
Go get a buttonhole cutter for 10 bucks and your life will be better for it. Or go to the nearest hardware store and get a little woodworking chisel. This includes machine buttonholes, use the buttonhole cutter on them too. If you continue to cut open buttonholes with a seam ripper after reading this you are personally responsible for at least 3 of the grey hairs on my head.
Do a whipstitch around the cut edges, to help prevent fraying while you work and to keep all those threads out of the way. (For my everyday shirts I usually do a machine buttonhole instead of this step, and then just hand stitch over it, because it's a bit faster and a lot sturdier on the thin fabrics.)

I like to mark out my button locations at this point, because I can mark them through the holes without the buttonhole stitches getting in the way.
For the actual buttonhole stitches it's really nice if you have silk buttonhole twist, but I usually use those little balls of DMC cotton pearl/perle because it's cheap and a good weight. NOT stranded embroidery floss, no separate strands! It's got to be one smooth twisted thing!
Here's a comparison pic between silk buttonhole twist (left) and cotton pearl (right). Both can make nice looking buttonholes, but the silk is a bit nicer to work with and the knots line up more smoothly.

I've actually only used the silk for one garment ever, but am going to try to do it more often on my nicer things. I find the cotton holds up well enough to daily wear though, despite being not ideal. The buttonholes are never the first part of my garments to wear out.
I cut a piece of about one arm's length more or less, depending on the size of buttonhole. For any hole longer than about 4cm I use 2 threads, one to do each side, because the end gets very frayed and scruffy by the time you've put it through the fabric that many times.
I wax about 2cm of the tip (Not the entire thread. I wax the outlining/overcasting thread but not the buttonhole thread itself.) to make it stick in the fabric better when I start off the thread.
I don't tend to tie it, I just do a couple of stabstitches or backstitches and it holds well. (I'm generally very thorough with tying off my threads when it comes to hand sewing, but a buttonhole is basically a long row of knots, so it's pretty sturdy.)

Put the needle through underneath, with the tip coming up right along that little outline you sewed earlier. And I personally like to take the ends that are already in my hand and wrap them around the tip of the needle like so, but a lot of people loop the other end up around the other way, so here's a link to a buttonhole video with that method. Try both and see which one you prefer, the resulting knot is the same either way.


Sometimes I can pull the thread from the end near the needle and have the stitch look nice, but often I grab it closer to the base and give it a little wiggle to nestle it into place. This is more necessary with the cotton than it is with the silk.
The knot should be on top of the cut edge of the fabric, not in front of it.

You can put your stitches further apart than I do if you want, they'll still work if they've got little gaps in between them.
Keep going up that edge and when you get to the end you can either flip immediately to the other side and start back down again, or you can do a bar tack. (You can also fan out the stitches around the end if you want, but I don't like to anymore because I think the rectangular ends look nicer.)
Here's a bar tack vs. no bar tack sample. They just make it look more sharp, and they reinforce the ends.

For a bar tack do a few long stitches across the entire end.

And then do buttonhole stitches on top of those long stitches. I also like to snag a tiny bit of the fabric underneath.

Then stick the needle down into the fabric right where you ended that last stitch on the corner of the bar tack, so you don't pull that corner out of shape, and then just go back to making buttonhole stitches down the other side.
Then do the second bar tack once you get back to the end.

To finish off my thread I make it sticky with a bit more beeswax, waxing it as close to the fabric as I can get, and then bring it through to the back and pull it underneath the stitches down one side and trim it off.


In my experience it stays put perfectly well this way without tying it off.
Voila! An beautiful buttonholes!


If you want keyhole ones you can clip or punch a little rounded bit at one end of the cut and fan your stitches out around that and only do the bar tack at one end, like I did on my 1830's dressing gown.

(I won't do that style in my video though, because they're not 18th century.)
Do samples before doing them on a garment! Do as many practice ones as you need to, it takes a while for them to get good! Mine did not look this nice 10 years ago.
Your first one will probably look pretty bad, but your hundredth will be much better!
Edit: Video finished!
youtube
And here's the blog post, which is mostly a slightly longer version of this post.
#ask#buttonholes#sewing#hand sewing#sewing tutorial#I've been procrastinating on the video this week#I want it done! I don't want to work on it I want new projects! I want to cut out more gloves!#currently forcing myself to do the last few buttonholes on these pants and then maybe I can cut out new gloves? as a treat?#but I hope I get some filming done tomorrow too
3K notes
·
View notes
Last Seen Blogs
edupcn
Sem título

deb-1106
Risen from the flames: Debramcg1106

fentygoddess
QUEENS

birdverse-best-verse-blog
~❀~Butterfly Spork~❀~

attorneyowolabimsalis
Attorney Owolabi M. Salis