#let rest for 20 minutes then divide into 12 portions
Text
The other day I made meatbuns again but usually someone ELSE marinades and cooks the meat first before I recook it and add vegetables and seasoning. So I did that for the first time and totally messed up. Too much water, not the right color, charred the sides, it ended up being kinda flavorless. So when I recooked it I added a bit more oyster sauce just so it would taste like SOMETHING. Somehow, everyone else likes it better than usual. It's sweeter than usual, but I prefer salty meatbuns so I'm the only one not satisfied :/
#talking tag#marinade pork in xia siu powder bought from the store after its sat for like 8 hours sear the sides on the frying pan#then cover the pan then flip after 15 minutes then flip after 15 minutes idk this is the part i messed up on dont trust me then add a bit#of water to let it steam i guess and cover it then once its all cooked through and not charred take it out chop into half centimeter cubes#then dice half an onion then add oil to the bottom of the pan and cook the onions until fragrant then add the meat cubes then add 1 large#spoonful of hoisin sauce oyster sauce and suger then add a mixture of a half cup of water and a large spoonful of flour then stir and cook#until the water dissipates and it just kinda looks like moist meat slop then set it aside and let it cool and like stir it up every now and#then so it cools faster yknow then to make the dough you get 1 cup of room temp milk and add 2 tsp instant yeast then mix and set aside#then get 500g flour 90g sugar 0.25 tsp salt 1 egg 1 stick of butter softened add the milk and yeast mixture then knead#let rest for 20 minutes then divide into 12 portions#flatten with roller and wrap filling with dough then brush egg yolk over the top bake in oven at 320F for 15 minutes then change temp to#350F for 15 minutes take it out then brush a mixture of equal parts melted butter and honey over the top except i skip this part because it#makes it sticky and gross to store in a plastic bag#one time i made the filling out of leftover rotisserie chicken and cabbage and the same sauces and sugar so the filling can be anything#i also once had leftover dough so i made biscuits. they taste like biscuits i dont know what i expected. i dont like biscuits
6 notes
·
View notes
Text
Pumpkin Shaped Dinner Rolls

"On Halloween night, the Great Pumpkin rises from his pumpkin patch and flies through the air with his bag of toys to [give to] all the children." - Linus, It’s The Great Pumpkin, Charlie Brown!
Happy Halloween everyone! I’ve been a huge fan of Charlie Brown for as long as I can remember. Every year, my family watches the specials on TV and I must have read each volume in my grandmother’s massive collection at least three times.
So, when I saw this tumblr post late last year, I knew exactly what I wanted to make for Halloween this year… but with a twist! After some trial and error, I’ve found a way to add cinnamon/pumpkin spice sugar to these rolls while avoiding a massive pocket of it.
So, grab your fall-themed drink of choice and check out below for how to make a batch of these delicious pull-apart dinner rolls for yourself! The great pumpkin may just pay you a visit for your troubles…
(Based on the post by Chef John from All Recipes and the tumblr post linked above.)
Prep: 20 mins Cook: 3 hrs Total: 3 hrs 20 mins
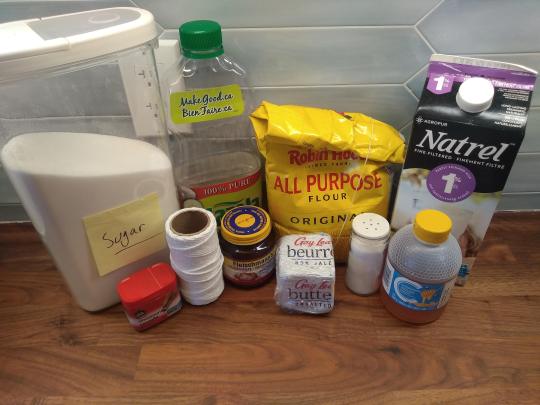
Ingredients:
1 cup (240 ml) milk, warm
1 packet (2 ½ tsp, 6.5 g) active dry yeast
1 tbsp. (15 ml) honey
4 tbsp. (57 g) butter, melted
1 tsp (6 g) salt
2 ¾ cup (345 g) all-purpose flour, plus ¼ cup (30 g) more for dusting
Kitchen string cut into 12 32-inch long pieces
Vegetable oil

Pour in the warm milk, yeast, honey, and butter into a large bowl and stir to combine (top-left).
Next, add the salt and the 2 ¾ cups of flour. Using a wooden spoon, stir in the flour until a shaggy, sticky dough forms (top-right).

Turn the sticky dough out onto a clean, lightly floured work surface and knead the dough until it becomes smooth, elastic, and is no longer sticky, about 10 minutes.
Form the dough into a rough ball shape by tucking in the sides. Lightly coat a medium or large bowl with vegetable oil and transfer the dough seam-side down (top-left).
Cover the bowl with lightly greased plastic wrap or a dish cloth and let rise until the dough has doubled in size, about 1 ½ hours (top-right).
Meanwhile, prepare two baking trays with parchment paper or reusable silicon liners.
TIP: I found that only about 3 tsp (8 g) of the reserved dusting flour spread out onto the board was needed to keep the dough workable without the buns becoming dense.
TIP: Remember from the video, you’ll know the dough has been kneaded enough when it springs back after being lightly pressed and you can stretch out a piece the dough like a windowpane without it ripping. The windowpane should also be able to support the weight of the rest of the piece of dough without ripping.

Once the dough has doubled in size, turn it out onto your clean work surface and knead it a few times to bring it back together.
Next, either cut the dough in half and divide each half into six even wedges or divide the dough into 50g - 55g portions using a kitchen scale.
Knead each portion a little and then pull in the edges of the dough to create a ball (like the big dough ball). Secure the its shape by placing the ball seam-side down on the work surface and gently rolling it with the palm of a clawed hand, for about 10 seconds.
Once the smaller dough balls have been formed, place them seam-side down on the prepared baking tray, cover, and let rest for 15 minutes.
Meanwhile, place the pieces of kitchen string in bowl and toss them with a generous amount of vegetable oil.
NOTE: Do not move onto the next step without this first rest. The dough will expand way too much around the string if you wrap it immediately.
Optional addition to this step:

If you’d would like slightly sweeter rolls to dip in coffee or tea, you can add some cinnamon/pumpkin spice sugar after kneading the measured portions and before shaping the rolls.
First, roll the dough flat and spread ~⅛ tsp. of the sugar mixture on one half (top left). Then, fold in half so the sugar mixture is covered and spread another ~⅛ tsp. on half of the folded dough (top right).
Fold in half again and follow the shaping instructions above to seal the rolls.
NOTE: If you put ¼ tsp. of the sugar mixture in the middle of the rolled dough and shape it from there, the mixture will not be evenly distributed throughout the dough - you’ll just get a dry sugar bomb in the middle of the roll.

After letting them rest, working one roll at a time, place the end of one piece of string on the seam-side of the roll with enough of an overhang to tie a double knot latter, ~2 inches (5 cm).
Wrap the string around the dough so eight sections are created. Unlike the tumblr video in the intro, I wrap the string around the dough in one motion (no crisscrossing or twisting strings).
The string should be secure but loose enough that it isn’t pressing much on the dough before the knot is tied.
Once wrapped, double knot the string so there is enough pressure to form small indents and return the roll to the baking tray knot-side down (which should also be seam-side down).
Cover and let rest for an additional 30 minutes. Preheat the oven to 375॰F (190॰C) with the oven rack in the middle of the oven.
TIP: Any adjustments to the placement of the string should be made before the knot is tied. The string is virtually unmovable at that point.
TIP: If you’re choosing to add the sugar mixture, set a 15 minute timer once you’ve shaped the first roll. Depending on how long it takes to get through all the dough, you may be able to start wrapping the string around the rolls as soon as you finish shaping the last one.

Sift a little bit of flour on top of each roll (top left).
Bake until the rolls have lightly browned and sound hollow when knocked, about 20 to 25 mins (top right).

Once the rolls have cooled enough to handle, cut the strings off of each roll from the bottom. Slowly and carefully unwrap each roll, removing any strands of string that get stuck.
NOTE: It might have been the string I was using, but I found a lot of little strands were left behind as I unwrapped the rolls. The best solution for this I found was:
Not to wring out any of the vegetable oil from the string when I took it from the bowl and,
Have my finger directly behind the string as it slowly peeled away from the roll to help all the little strands come off.
You’ll probably still need to go in an remove some from where the knot was tied, but this should get rid of most of them.
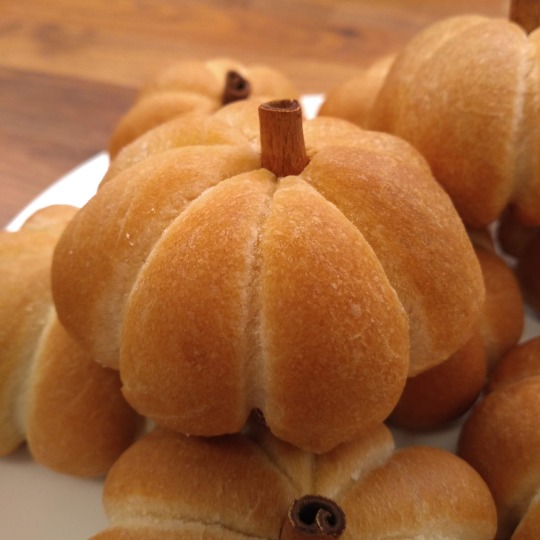
Finally, cut one or two cinnamon sticks into ¾ inch (2 cm) pieces and press one into the tops of each roll to create the stems.
TIP: To cut the cinnamon sticks, use a steak knife to make a small groove and then snap them at that mark. It’ll really save the durability of your knives. Use long sawing motions instead of short ones.
Voilà, your very own pumpkin dinner rolls! Overall, I would give these a 4.5/5 for the regular ones and a 4/5 for the sugar mixture ones - not because of the taste, but for the process.
Cutting the string, soaking them in oil, plus the wrapping, tying, and unwrapping nearly drove me insane each time. I would recommend making these, especially the sugar mixture ones, with a friend. The extra hands (and jokes) will go a long way.
In the end, although they were a little awkward to make, they were definitely a fun way to get into the spirit of the season (and flex on everyone /j)!
#it took me 45 minutes to pose Linus#worth it but *screech*#halloween#charlie brown#its the great pumpkin charlie brown#pumpkin shaped dinner rolls#bread#tv shows#movies#dessert#homemade#homecooking#homemade dessert#homebaking#homecook#baking#recipe#food#foodblr#heroes feasting
39 notes
·
View notes
Text
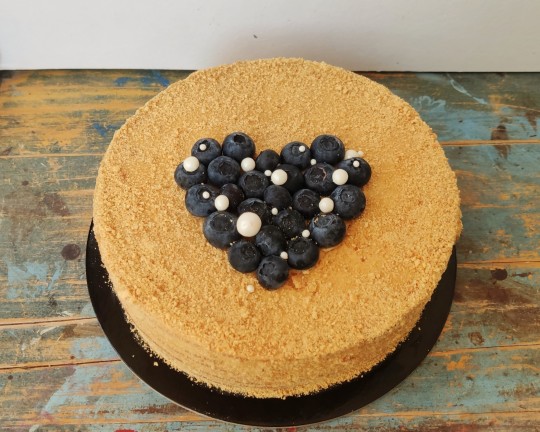
Medovik(Russian Honey Cake)
This is not a classic soviet(GOST) recipe, I've modified this recipe to significantly decrease the sweetness and also added a can of dulce de leche to the filling. This recipe makes one 1.2kg medovik(honey cake) that has 9 layers. I use an 18cm cake ring to cut the layers before baking, after baking they shrink to 16.5cm.
Ingredients:
Cake Layers:
75g 82% butter
2 eggs
40g honey
100g white sugar
1tsp baking soda
300g flour
1tsp baking powder
1/8tsp table salt
Filling:
600g 20% sour cream
1 can(398g) dulce de leche/cooked condensed milk
Instructions:
Cake Layers:
In a bowl whisk together with baking soda, until the egg becomes homogenous.
In a separate bowl whisk together flour with baking powder and salt.
Meanwhile in a large saucepan heat butter, sugar and honey until the sugar dissolves
Cool the sugar/butter mixture to 65-70C. Whisking vigorously stir in the egg melange. The mixture will start to foam. Take it off the heat.
Add in half the flour, mix until no large clumps of flour remain. Add in the rest of the flour, mix the dough until no lumps remain.
Transfer dough into a bowl/container and cover.
Place in the fridge to chill for at least 2 hours.
When your dough has chilled, divide the dough into 9 equal pieces(use a scale).
Roll each piece into a 2mm thickness(you should be able to see the parchment paper/baking mat through the rolled out dough).
Use an 18cm cake ring to cut the cake layers. Dock the dough. Don't remove the scraps(the pieces that are outside the circle that you cut out), they will be used to coat the outside of the cake.
Bake at a preheated to 200C oven for 2-5 minutes*. The cake should look golden brown. It will be soft straight from the oven, but as it cools it will become hard.
Grind(in a food processor/blender or with a rolling pin/mortar and pestle) the scraps.
Filling:
Whisk together cold sour cream with dulce de leche. Don't whip, just whisk it together. Excessive whipping will cause the filling to separate.
Divide the filling into nine portions. Spread each portion in between the layers. The ninth portion will go on top of the last layer and the sides.**
Chill the cake for 2 hours. Cover with crumbs that you made in step 12.
Chill for at least 2 hours, decorate and serve.
Notes:
* The time will vary greatly depending on the oven you use, while baking the first layer keep an eye on it and determine that correct time for you oven. It should take 2-15 minutes.
**I like to assemble and let my cake chill inside an adjustable cake ring, because the filling is very soft and it's very likely for the cake to end up crooked without the support of the cake ring.
0 notes
Text
Ingredients for Yule Bread
2 tablespoons honey
1 package dry yeast (about 2 1/4 teaspoons)
1 cup warm water (Body temp)
1 teaspoon water
1 large egg
2 1/3 cups all-purpose flour, divided (about 10 1/2 ounces)
1 cup whole wheat flour (about 4 3/4 ounces)
1 1/2 teaspoons kosher salt (leave out if you’re not making it for humans)
1 1/2 teaspoon caraway seeds.
Cooking spray
Preparation
Dissolve honey and yeast in 1 cup warm water in a large bowl; let stand 5 minutes. Combine 1 teaspoon water and egg, stirring well with a whisk. Place 1 tablespoon egg mixture in a small bowl. Cover and chill. Add remaining egg mixture to yeast mixture.
Lightly spoon flours into dry measuring cups; level with a knife. Add 2 cups all-purpose flour, 1 cup of whole wheat flour, salt, 1 teaspoon caraway seeds to yeast mixture; stir to form a soft dough. Turn dough out onto a floured surface. Knead until smooth and elastic (about 10 minutes); add enough of remaining all-purpose flour, 1 tablespoon at a time, to prevent dough from sticking to hands (dough may feel sticky).
Place the dough in a large bowl coated with cooking spray, turning to coat top. Cover and let rise in a warm place (20°c ), free from drafts, 45 minutes or until doubled in size. (Gently press two fingers into dough. If indentation remains, dough has risen enough.) Punch the dough down; cover and let rest for 5 minutes. Divide dough in three. Working with one portion at a time, roll each portion into a 12-inch rope on a lightly floured surface. Plait ropes together, and pinch ends to seal in a circle.
Place dough in an 8-inch loaf pan coated with cooking spray. Cover and let rise for 30 minutes or until doubled in size.
Preheat oven to 190°c.
Uncover dough. Brush reserved egg mixture over loaf, and sprinkle with remaining 1/2 teaspoon caraway seeds. Bake at 190°c for 30 minutes or until loaf is browned on bottom and sounds hollow when tapped. Remove from pan; cool on a wire rack.
0 notes
Photo
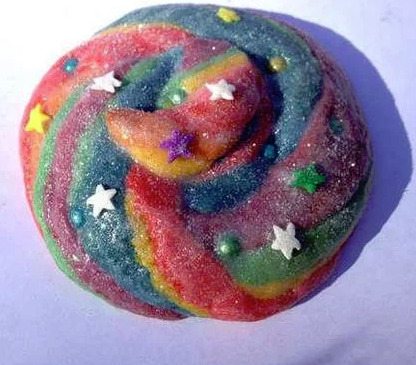
Unicorn Poop Cookies
prep: 1 hr 30 mins cook: 10 mins cool: 45 mins total: 2 hrs 25 mins Yield: 24 servings (Serving size: 1 Cookie)
Ingredients
Main Ingredients
1 cup Sugar
½ cup Butter - Softened
½ cup Shortening
3 ½ tablespoons Cream Cheese - Softened
½ teaspoon Salt
1 whole Egg
½ teaspoon Almond Extract
2 cups All Purpose Flour
Food Coloring (As many different colors as you want the cookies to be!)
Decorations
Silver Candy Balls (If Desired)
Food Sprinkles (If Desired)
Sparkle Gel
Edible Glitter
Directions
*Step 1 - Dough Coloring Tint
*Step 2 - Do this prior to chilling the dough, so that you don't undo the chilling process with your body heat.
*Step 3 - Place each portion of dough into individual wraps of plastic and tint the dough different colors (See Below for instructions on how to tint the dough)
*Step 4 - Chill tinted dough in the refrigerator 1 hour or freezer 15-20 minutes.
*Step 5 - Divide each tinted chilled dough ball into 8 equal pieces.
*Step 6 - Take one piece of each colored dough (leaving the rest in the fridge while you work) and roll out like a rope or snake on your counter-top. If you use a piece of waxed paper on the counter, you shouldn't have to add any flour.
*Step 7 - Roll the rope shape to about 6 inches long. Continue rolling all the colors and stacking them into a pile. Gently press the ropes together and roll the large multicolored "rope" on the counter to round and smooth it and if desired to lengthen it to 10 to 12".
*Step 8 - Cut the multicolored "rope" into two pieces, using both hands, roll with your palms in different directions on both end of the rope pieces to twist it gently.
*Step 9 - Coil the rope into a poop shape, using your imagination as to what you think unicorn poop should look like
*Step 10 - Press in some silver candy balls (dragee) into the dough pieces to decorate if desired. Place dough on greased cookie sheet (or one covered with parchment or silicone mat) and bake at 375 F for 8-10 minutes until cookies are set and bottoms are light brown, they will not spread very much.
*Step 11 - Cool on wire rack.
*Step 12 - Coat with sparkle gel and/or edible glitter to give them some sparkle and add some sprinkles to the still wet gel for more texture. Let cookies dry completely before stacking.
*Step 13 - Get a large piece of plastic wrap (to protect your hands and table from the dye), place a ball of cookie dough in the middle.
*Step 14 - Poke a well in the center with your thumb.
*Step 15 - Add the food coloring to the well and then fold the dough over the coloring.
*Step 16 - Wrap it in the plastic wrap, and begin kneading the food coloring into your dough.
*Step 17 - This may take a while and you may find that you need more food coloring (Hint: Colored Cookie Dough bakes lighter than what you see when you first tint the dough, once you've gotten the right color tint, add more).
3 notes
·
View notes
Text
So, bath scenes. Amirite?

The Witcher fandom is quite blessed. Over the course one season, the showrunners decided to gift us with not one but two scenes of Henry Cavill, naked in a bathtub, two episodes in a ro-
Wait a minute.
Two back-to-back episodes featuring drawn out bath scenes that go on for 2-3 minutes each. That's a lot of time to dedicate to fanservice when you only have 8 episodes to get your point across. Unless, of course… No. They wouldn't. Or would they?
I re-watched these scenes more times than I care to admit. For science. They’re interesting for numerous of reasons (Henry Cavills’ pecs being only two of them). But you know what’s even more interesting? Some sexy, sexy cinematic and narrative parallels and contrasts.
(Obligatory linebreak for your protection. You thought I went overboard analysing Her Sweet Kiss? This is worse. If you’re on mobile – I apologise. Now’s the time to scroll fast. It’ll take longer than you’re expecting, trust me. I’m sorry.)
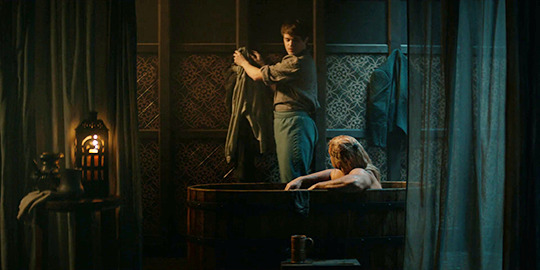
Bath in “Of Banquets, Bastards and Burials”
Bath in “Bottled Appetites”
Please excuse the terrible of the second clip. It’s the only one I could find that had the whole scene in it.
First things first,
the setting

The scene in “Of Banquets, Bastards and Burials” takes place in an inn. The room is dark. Throughout the scene you can hear chatter from the bar. Candles are the only visible light source, although, at the beginning of the scene you can see more light coming in through what’s presumably a window outside the shot. Due to the lighting, the majority of the room has a noticeably blue tint, except for the cabinets on each side of the room where most of the candles are placed. Apart from the cabinets, the bathtub Geralt is sitting in is the only area that’s properly illuminated.
The room itself seems big enough, although we only get to see the bathing area which is separated from the rest of the room by blue curtains, but due the way the scene is shot – frequent close ups of the actors, wider shots frequently partially blocked by the curtains – it appears smaller than it actually is.
Geralt stands out against the background due to his skin appearing orange in the candle light; in wider shots he usually appears centred.
In contrast, Jaskier moves from one side of the room to the other a lot and doesn’t remain in either light source for long. Unlike Geralt’s skin, the colour of his clothes matches the background. This is somewhat unusual because in many of his scenes Jaskier and his colourful outfits tend to stick out like a sore thumb – the red outfit in “Rare Species” probably the most visually distracting out of the bunch – but in this scene, the exact opposite happens. Whenever Jaskier’s not the focus of the shot he frequently fades into the background or even gets obstructed by the curtains.
(While I’d love to add visual references for every single point I touch upon, honestly, the amount of editing that’d require is astronomical. Jokes on me though, because it already is. Watching the scenes should give you a better idea of what I’m talking about, though. Also, full disclosure, screenshots and gifs had their brightness an colours altered slightly for better visibility.)
Now, on the other hand, we have the room inside the mayor’s house, which – while also dimly lit by candlelight – appears open and spacious. Due to the candles, the room appears tinged only in colours on the orange/yellow spectrum. No curtains to obstruct parts of the shot, and unlike the inn, this room has got visible windows one of which sits behind Geralt. That window in particular lets in a stream of blue light that, in wider shots, often appears to frame either Geralt alone or both, Geralt and Yennefer. However, the blue light remains behind the characters, neither Geralt nor Yennefer are ever directly illuminated by it.

Why is she going on and on about the lighting you might ask? It’s because there’s basically a whole science to colour theory, colour grading, and the ways they’re used in visual media. It’s one of the reasons why, for example, Guillermo del Toro movies are always such goddamn feasts for the eyes. TV Tropes also has a page dedicated to it, if you wanna get a rough idea of what’s going on here.
Both bath scenes in the Witcher (2019) are gorgeous examples of colour grading and set design. You can tell that a whole lot of thought went into it. “Bottled Appetites” even takes it a step further, carrying the orange/blue colour scheme over into the next scene and directly contrasting the bed frame that’s bathed in amber light with the blue windows it’s framed by.
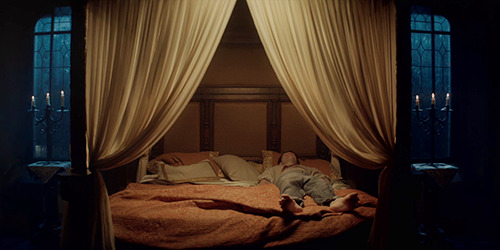
Fun fact, while colour grading can be used to give colours that certain “pop”, you can also achieve the exact opposite effect. See how washed out and grey Jaskier and his blue clothes appear on the orange bedding in this shot? It becomes even more apparent later on in the scene.

He might as well be one of the pillows for the way his clothes make your eyes just kinda slip over him. Honestly, I wanna marry whoever was in charge of doing colour correction on the Witcher. That person is a fucking artist. I’ll get back to the matter of colours and backgrounds in a minute. For now, let’s talk about
body positioning

Or in other words, yet another reason I’d sell my immortal soul to directors Alex Garcia Lopez and Charlotte Brändström.
One thing the scenes have in common (apart from the copious amounts of eye candy) is that Geralt remains mostly stationary at the centre throughout the scene. Jaskier moves around a lot. He dries his hands behind Geralt, moves in front of him to fiddle with the bath salts, sits down next to Geralt, sets Geralt’s mug down on the cabinet behind him and only stops his continuous back and forth motion when the conversation takes a turn for the serious and he settles down in front of Geralt.
Yennefer, on the other hand, starts off at Geralt’s right hand side, slightly to the back of him. She briefly lies down, stands up, and moves to Geralt’s left while taking off her gown. Same as the other scene, Yennefer settles down as the conversation is about to grow more serious. However, unlike Jaskier, Yennefer is far less restless, once she’s moved to Geralt’s left she settled down and doesn’t get up again.
What’s really interesting about this scene is that throughout the entirety of their interaction, Yennefer and Geralt never look at each other at the same time. They both alternate between staring off into the distance with varying degrees of wistfulness and/or melancholia and turning to look at the other. But their eyes never quite meet, not even when Geralt turns around in surprise after Yennefer says she won’t be taking any payment. The conversation ends with Geralt abruptly getting up and out of the tub and Yennefer turning around to watch him leave (dry up? get dressed? who knows what he’s getting up to in that moment). Notably, when the shot focuses on Yennefer alone in the tub, a significant portion of the room that previously appeared mostly orange suddenly is tinted almost all blue.
However, where eye contact is conspicuously absent in the scene in “Bottled Appetites”, it’s a vital component of the scene in “Of Banquets, Bastards and Burials”. Eye contact is a significant part of Geralt and Jaskiers communication. Mainly because Geralt spends a significant amount time sending glares Jaskier’s way with Jaskier paying him varying amounts of mind, even poking fun at his “scary face” when the opportunity presents itself. Jaskier is all over the place in every sense of the word. His attention is divided between Geralt, the bath, the banquet, etc. before it eventually turns back to Geralt and the whole cycle begins anew. The shift in conversation, from the banquet to Geralt, coincides with a shift in Jaskier’s behaviour. He stops moving around the room and his attention settles on Geralt. He then kneels down and holds Geralt’s gaze until Geralt abruptly switches the subject.
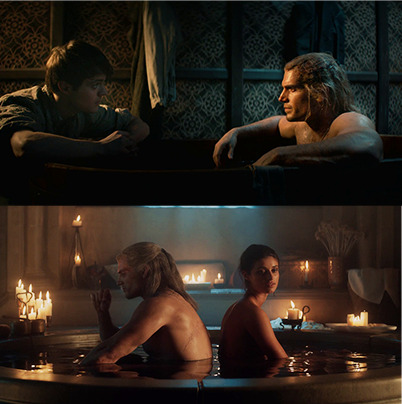
Look at the screencaps above. See how, even in a screencap, the lighting is capable of creating an entire visual narrative all by itself? Yennefer and Geralt are sitting in the water together with their backs to each other in a room full of orange light but their immediate surroundings are tinted blue. Jaskier and Geralt are facing each other directly but despite the orange light surrounding him Jaskier appears shadowed as he kneels in front of the tub while Geralt who is sitting inside the tub glows orange against a blue background.
There’s a metaphor hiding somewhere in that juxtaposition but I can’t quite put my finger on it yet.
edit 12/01/20: I actually got a submission from odense who elaborated on the blocking of the scenes from a theatrical perspective. Go read it for even more meta on the bath scenes.
Anyway, moving on. Next on my list is
the matter of service

What, no more Film Studies for Fandom 101, I hear you ask? Well. Originally, I wanted this part to be about the conversation as a whole but that would’ve gone on for too long (ha! too long, she says like that means anything) so I divided it.
Both scenes deal with the performance of service in one way or another. Jaskier is trying to convince Geralt to act as his bodyguard for a night, while Geralt asked Yennefer to break the djinn’s curse and they’re still settling the matter of payment.
In a way, you could look at both scenes as very, very unusual forms of negotiation. Jaskier may spend a lot of time talking about himself but his actions are almost all focused on Geralt. He douses him with water, “rubbed chamomile onto his lovely bottom” at some point (decide for yourself what you wanna make of that statement), prepares the bath salts for Geralt’s bath, and – also at some point – arranged for Geralt’s clothes to be washed. All throughout the scene, he’s performing a variety of services. He’s taking care of Geralt, whether Geralt likes it or not, and does so like it’s the most natural thing in the world, to the point where it just kinda comes across like more of Jaskier’s usual antics and theatrics.
Geralt may claim he needs no one and doesn’t want anyone needing him but there is some form of reciprocity in their relationship – big things like the shared adventures and the ballads about which made both of them famous in their own right, but then there are the little things like drawing your friend a bath, or watching his back at a banquet so he doesn’t get stabbed by a jealous husband, which Geralt eventually agrees to do despite all of his grumbling and glaring protests.
Which is one of the reasons “And yet... here we are.” is such a brilliant line. Just from this context, you could read it in a number of ways. Jaskier could be calling Geralt out on his bullshit like, e.g. “You might not like it, but yeah, you do need me and I need you.” or he could be asking him to make a decision, e.g. “I know you don’t like it but I really do need your help. What will you do?” or it could be an affirmation, e.g. “I know you didn’t want it but somehow we still ended up here.” etc., etc. And you might have guessed, there’s still more to come regarding this line. Later.
So while Jaskier’s scene is about getting Geralt to perform a service, Yennefer’s scene is about figuring out the cost of the service Geralt asked of her in the previous scenes. Where the first bath scene was about persuasion, this one is about payment. The initial negotiation has already happened, the service been rendered, what’s left to do is figure out the price. And Geralt already offered to pay whatever the price.
Since Geralt seems intent on honouring his promise, that creates a bit of a power imbalance between Yennefer and Geralt at the start of the scene because Yennefer could ask for whatever she wanted, Geralt even brings up that he’s worried about “having agreed to indentured servitude”. (That being said, he does not seem too bothered by current the situation or Yennefer’s company. Quite the opposite, he actually seems quite comfortable talking to her.)
Aside from the payment they haven’t agreed on yet, Geralt’s also got a second promise to make good on since he initially offered Yennefer to “indulge her curiosities” (take that however you will). It’s quite apparent that Geralt is a lot more forthcoming with his thoughts and emotions (actually, his words in general) with Yennefer than he is with Jaskier. In Yennefer’s scene, she and Geralt talk about equal amounts whereas in the other scene Jaskier mostly carries the conversation by himself while Geralt reacts.
However, Jaskier also reaches out where Yennefer keeps to herself. She occasionally teasingly bumps her back against Geralt’s as she’s washing herself but other than that she makes an effort to keep out of sight, even magically turning away a mirror to hide herself, whereas Jaskier touches, quite literally gets all up in Geralt’s “scary face” and just generally repeatedly puts himself in Geralt’s line of sight going so far as to kneel down until they’re at eye level.
Despite the matter of coin coming up repeatedly (mostly in the form of harmless teasing about brothels and prostitution, but also on a more serious way when Geralt accuses her of making a profit off the townspeople), Yennefer eventually decides not to ask Geralt for anything in return for saving Jaskier’s life, determining his “company and conversation payment enough”.
Interestingly, in the scene preceding the bath in “Of Banquets, Bastards and Burials” Jaskier also broaches the topic of coin as he’s setting up to ask Geralt for help. In a sense, Jaskier initially attempts to use that thing about reciprocity I brought up earlier to convince Geralt to do him a favour. He lectures Geralt on his role in making him famous and that he should be making money off their arrangement in an attempt to make the favour he’s about to ask off Geralt seem irrelevant in comparison, like “Look at everything I’ve done for you. Please do this tiny little thing for me.” Obviously, that approach doesn’t work. The (un)holy trinity of “food, women and wine, Geralt”, on the other hand, seems to do the trick. Or maybe it’s the bath and a heart-to-heart. Kind of like Geralt’s company and conversation were payment enough for Yennefer?
While we’re still on the matter of conversation, let’s talk about one of the components that make up part of the emotional core of the scenes. Let’s talk about
the matter of past and future

Geralt has lived a long, long life and its history is written on his body in a web of scars. What struck me is how differently the bath scenes deal with those scars.
With Yennefer, the scars are on full display. She notices and scrutinises them as someone seeing Geralt naked for the first time can be expected to. The scars on his shoulders and back are placed front and centre of the shot several times.

In contrast, with Jaskier, you, as a viewer, barely notice the scars. Most of the time they’re simply not visible to the camera. They’re never in the foreground of the shot and you never even get to see Geralt’s back. The scar on Geralt’s shoulder that Yennefer noticed could easily be mistaken for remnants of dead selkiemore. There’s only one moment that draws attention to the scarred shoulder and that’s when Jaskier pats it as he’s getting up to put away Geralt’s mug of ale.

Again, I feel like there’s a metaphor hiding somewhere in there but what do I know?
Back to the point. While Geralt and Yennefer are talking in the bathtub it immediately becomes obvious that they have a connection. They’ve both had unhappy childhoods, lived long lives and as Yennefer points out Geralt was “created by magic. Our magic.” They have an understanding that quickly let’s you forget that they’re virtual strangers at this point in the Witcher canon.
In the other scene, Jaskier and Geralt have known each other for quite a while already, yet the conversation seems to be restricted to superficial topics at first, mainly Jaskier’s prowess as bard and lover. However, Jaskier unwittingly steers the conversation in a more serious direction when he asks Geralt about retirement, what he wants to do when “all this... monster hunting nonsense” is over and done with.
So far, there’s a pattern in the show that when Jaskier talks to Geralt about serious matters, he starts making plans for the future. After the incident with the elves in Posada he promises to work hard to change Geralt’s reputation. In the infamous scene in “Rare Species” he’s trying to figure out what to do with his own future and offers Geralt to go to the coast with him. Here, in this scene, he’s trying to work out what Geralt wants from his future. Even if Geralt claims to want nothing.
At that point, Jaskier’s already made good on his promise to change the public tune about Geralt. The people in the beginning of the episode are talking about the White Wolf, not the Butcher of Blaviken, which makes for such an interesting parallel when paired with Yennefer’s comment about “Our magic”.
Yennefer’s magic created the Witcher; Jaskier’s song created the White Wolf.
Which, in all frankness, would be a good point to end this post but what’s the point of doing anything if you’re not gonna overdo it? I said the matter of past and future makes up part of the emotional core of the bath scenes. So there must be other parts of that supposed emotional core, right? Of course, there’s still
the matter of want and need

While discussing Geralt’s lack of retirement plan, Jaskier and Geralt keep tossing the word “want” back and forth. Jaskier tries to find out what Geralt wants; Geralt rebuffs him, he wants nothing; Jaskier turns it around on him by saying, well, maybe someone will want you. You could, of course, read that as your run-of-the-mill “just wait, the right person will come along (and that person might just so happen to be me – if you’re wearing shipping goggles)” shtick but the thing is, that’s the kind of reply you usually offer someone who’s bemoaning the fact that they’re single, the exact opposite of what Geralt is doing, and Jaskier strikes me as someone who’s emotionally intelligent enough to know that wouldn’t work on Geralt. I think Jaskier might be very literal when he’s saying “Maybe someone out there will want you.” As in, “even if you want nothing, maybe someone who wants you will come along (and that person might just so happen to be me – again, if you’re wearing shipping goggle).” But Geralt changes strategies and rebuffs him again, he needs no one. And the last thing he wants is someone needing him.
What’s interesting about this bit is the body language. I mentioned Jaskier and Geralt communicating a lot via eye contact. And Geralt is looking at Jaskier quite intently right up until Jaskier kneels down in front of him as he’s saying “Maybe someone out there will want you.” The camera cuts to Geralt and he’s looking off to the side while he says “I want no one.” Then, a pronounced pause follows before he turns to look Jaskier directly in the eye as he finishes, “And the last thing I want is someone needing me.” (I really want to say that this looks so much like he’s warning Jaskier to reconsider whatever he’s building up to say. But alas, that’s just fantasy.) The camera cuts away again and we see that Jaskier’s now looking down behind his clasped hands before looking up and answering “And yet... here we are.” Geralt acknowledges his answer with one of his famed “Hm”s. Then, he immediately changes the subject to the whereabouts of his clothes which Jaskier sent away to be washed.
In the other scene, Geralt and Yennefer breach the topic of “want” and “need” while talking about coin. Geralt claims she’s profiting off the political situation, whereas Yennefer claims she’s working in the interest of the people, “filling a need. Ever heard of it?” Which, yes, Geralt has, literally one episode ago, and he pulls a face that’s simply beyond words. (btw, kudos to Henry Cavill for cramming like five different emotions into one expression.)

Geralt and Jaskier had an entire conversation about how Geralt wants nothing and needs nobody. Jaskier even references that conversation when he yells at Geralt while they’re arguing over the djinn. “You always say you want nothing from life, so how was I supposed to know you wanted three wishes all to yourself!” he screams.
(Also, upon rewatching that scene, I literally just realised that Jaskier was drinking at the beginning of the scene. Combine that with the fact that he repeatedly brings up the Countess de Stael, and flat out states he’s currently heartbroken, and yeah, that explains a lot about his comparatively sour mood and short temper; also, why his speech comes across as much more chaotic than usual. Seriously, compare it to the way he speaks to Geralt after he’s gutted the selkiemore. He talks a lot in both – ok, Jaskier always does – but in the selkiemore scene, or basically any scene that isn’t the djinn scene, his diction is eloquent, artistic, florid; in the djinn scene, it’s all over the place, repetitive, and often bordering on the nonsensical. Frankly, you could probably make a whole post about that scene by itself. I’ll get back to that some other day.)
(Also, am I implying that Jaskier seems bitter over the fact that Geralt apparently keeps telling him he wants nothin from life? ...Yesn’t. Hard to pretend I’m not wearing shipping goggles when I’m literally almost 4000 words deep into a meta post. But remember, nothing but speculation!)
Anyway, and now there’s Yennefer broaching the subject, asking him if he’s ever heard of “filling a need”.
The conversation carries on until Geralt is blindsided by Yennefer telling him that his company and conversation are payment enough. He whirls around but Yennefer isn’t looking at him so he hurriedly gets out of the bath. In the next scene, he emerges with a new set of clothes he doesn’t like, which his companion from the previous scene procured for him. Now why does that feel familiar?
In conclusion...
honestly, I don’t even know where I was going with this originally. This started off as a joke but then things inevitably escalated and now I’m really tired and I wanna go to sleep. (Also, the whole djinn thing is giving me feels now which kinda puts a dampener on the humour in the episode. Jaskier’d already been having a bad day and things just. Keep. Getting. Worse. Ugh, my heart.) But I feel like this post needs a proper conclusion.
I feel like, in the context of these scenes Jaskier and Yennefer could be seen as foils to each other? They’re two of the few people Geralt lets close, very close, actually, since getting naked in front of someone is frequently equated with showing vulnerability to someone. In a lot of ways, Jaskier and Yennefer’s roles work in ways that are the exact opposite of that of the other. Jaskier tries to be seen where Yennefer wants to remain hidden, yet Jaskier gets obscured by the environment while Yennefer is exposed. Jaskier is asking Geralt for a favour, Yennefer did Geralt a favour; Jaskier insists on taking care of Geralt where Yennefer gives him space. Yennefer sees Geralt’s past, Jaskier his future. Jaskier touches the scar but doesn’t look, Yennefer looks but doesn’t touch. But both find a way to scratch at the emotional walls that Geralt’s put up and both times Geralt reacts by immediately trying to escape the situation. Both times, he ends up wearing clothes he doesn’t like in the following scene.
Speaking about nudity and emotional vulnerability, maybe that’s kind of part of the conclusion as well? Sorta? Especially, since Geralt seems to start looking for his clothes or for a way out of the tub the moment someone gets too close. Furthermore, afterwards, he never seems comfortable in the clothes he’s been given, which you could read as a metaphor of sorts, I guess? Like something inside Geralt getting knocked loose in the conversation with his companion and Geralt consequently having to arrange himself with an uncomfortable truth in the aftermath? Does that make sense? Have we finally reached the point where I’m getting too cerebral? Or did we sail past that point like 4000 words ago? God, my brain hurts.
#the witcher#the witcher netflix#geralt of rivia#yennefer of vengerberg#jaskier#geralt x jaskier#geraskier#geralt x yennefer#gerlion#fantastically foolish literary analysis#this might take the crown as dumbest idea i ever saw through#i have written college essays shorter than this#how do people 'enjoy' things casually?#i mean#if you haven't written at least half a thesis' worth of meta about a show#can you honestly say you've watched it?#somebody commented 'op your galaxy brain' on that post about Her Sweet Kiss#i've been trying to see how much further i can push it ever since#this is it#this is as far as my brain'll take me#now it's fried#just waiting to see how long it'll take for someone to go#'welp'#'looks like she's finally gone off her rocker'#'nothing we can do now'#god i miss livejournal#tumblr really isn't cut out for posts of this length#this might be the longest post i've ever written#i just realised that the fact that i can honestly say 'might be' is kind of concerning
2K notes
·
View notes
Text

I've got the pretzel recipe fine-tuned; here it is.
Sourdough Pretzels
Levain
50 g bread flour
25 g sourdough starter (active but it does not need to be freshly fed)
50 g water
Dough
500 g bread flour (plus a bit more when kneading)
150 g water
85 g milk
20 g honey or sugar
1 g active dry yeast
40 g softened butter
10 g table salt
1 tablespoon sodium carbonate (baked baking soda) - you should be OK with baking soda as well, but sodium carbonate gives the pretzels a more authentic taste.
Coarse sea salt for topping
Directions
Make a levain by mixing the starter, flour and water. Set aside loosely covered for 4-12 hours depending on the warmth of the room. You should see bubbles and it should double in volume.
Once the levain is ready, in the bowl you intend to make the dough in (or a stand or dough mixer) measure the flour, water and milk, mix. Let stand between 20 minutes to an hour to autolyze.
Meanwhile, mix in together the levain, the yeast and the honey or sugar. (You can do this in the container you rose the levain in).
After the dough has autolyzed, knead the starter mixture into the flour, along with the butter, and keep kneading. When it's incorporated, add the salt and continue to knead. You'll need a bit more flour (a few tablespoons max) in the kneading process. With a mixer I sprinkle it over about 3-4 minutes in.
You want a smooth and elastic dough - you should be able to stretch it out and perform a "windowpane test." Using a dough mixer, I set it for 25 minutes, which is probably about the time it would take by hand. A stand mixer will take a bit less time.
Cover the bowl and let rest at room temperature 1-3 hours and then overnight in the fridge.
Turn the dough out onto a clean work surface and use a bench scraper to divide into 8 equal pieces. (I weigh them - they are usually 110-120 g).
Roll each piece into a ball [NOTE - this is a good point to freeze individual portions on a tray in a single layer. Once frozen, you can store the balls in a bag. To make later, defrost completely in the refrigerator before continuing].
To shape, roll each ball on the counter into a long thin snake, hold both free ends so you have a thin U and twist the two free ends round one another twice. Fold that down over the curve of the U and that should give you the pretzel shape.
Arrange the pretzels on a parchment lined baking sheet (I prefer to use a baker's linen couche) or a tea towel will work, cover with another tea towel and let rest for 30-60 minutes or until puffy.
Preheat your oven to 450°F (218°) (I use a pizza stone on the bottom rack) and prepare a pot of boiling water, at least 3" deep I use a 3 qt - small - enameled Dutch oven with 1 tablespoon of baking soda or sodium carbonate added.
Boil the pretzels, a few at a time, for 1-2 minutes on each side and place them back onto the parchment paper (or a rack, but that makes dents sometimes).
Sprinkle with coarse salt or leave plain.
Bake on the stone at 450°F (218°C) for 16-18 minutes, or until golden brown and internal temperature of 205°-210°F.
Serve with mustard!
Note on Sodium Carbonate: Sodium carbonate is also used in smaller quantities to give ramen dough its bounciness. To make it, bake 100 g baking soda on a foil-lined sheet at 250F for one hour. It should weigh around 66 g - the sodium bicarbonate becomes sodium carbonate - a stronger alkali. It is a caustic substance, use carefully (non-reactive cookware, wash it out reasonably quickly).
15 notes
·
View notes
Text
Doc Southernwood's Old West Recipes | FOOD EDITION: Pan de Campo!
Pan de Campo, or as I like to call it, Cowboy Bread, is easy as...well...it's pretty damn easy. I found a recipe (source at the end) for it. The website itself has more in-depth writing to it (as well as metric measurements) but the general recipe is as follows:
Prep Time: 10 minutes | Cook Time: 12 minutes
12 Servings
US Imperial
INGREDIENTS4 cups all-purpose flour
1/2 cup shortening
1/2 tsp baking powder
2 tsp salt
1 - 11/2 cups hot water
INSTRUCTIONS
Preheat your oven to 425F.
To start, mix all of your dry ingredients in a large bowl. Using a pastry cutter or your hands, cut in the shortening until it is the size of large peas. Add hot water to make a thick dough.
Turn the dough onto a floured surface and knead the dough two to three minutes, making sure not to overwork it. Divide the dough into two portions and let rest 20 minutes.
Form the dough into rounds with a rolling pin and place it in a preheated cast iron skillet.
Bake the bread for 6 minutes, then flip the bread and bake an additional 6 minutes. Remove from oven and slather with honey butter.
#pan de campo#cowboy bread#old west#state bread of texas#texas#fuck you texas#you're breads good i'll give you that much#and your cows are cute#but your abortion laws are just fucking stupid#recipes#bread#traditional cowboy bread#yum#Doc Southernwood's Old West Recipes | FOOD EDITION
5 notes
·
View notes
Text
Wednesday 5 September 1838
6 5
8
up in the night at one and a half to the pot one motion also before getting into bed last night and one on getting up this morning was this owing to the strawberries I ate last night after dinner? very comfortable bed and slept well – very fine morning – reading A-‘s brochure, Lettres inédites de Monsieur Ramond. Toulouse. Chez Devers. Rue St. Rome n°5 1834.
Abies picea, le plus beau de Sapiens (vide p. 11)
Cembro and Wetter schirm of the Alps and Vosges
not in the Pyrenees
reading this brochure before and after breakfast (breakfast about 7 ½) till 9 10 these letters dated 1826 he died the year after – off from Arreau at 9 55 – went into the neat old church des Templiers near the bridge over the Neste (towards Toulouse) – a little gilt about the altar à l’Espagnole – off from here at 10 5 recrossed the bridge and repassed the picturesque old covered market place or halle, and went a little way along the Vielle road, till turned (right) up the hill to the Hourquette d’Arreau – valle d’Aure a valle of conical wooded hills close up to the back of the town of Arreau, pic d’Arbizon at a little distance behind towards the right, as I looked up the valley while standing at the old church door – up beech-wooded hill with pines towards the top – the opposite hill (forming the opposite side of our little valley up to the hourquette) beech the 1st ½ the valley and then pine-forest – Sapins (spruce firs) all here – all Scotch firs hereabouts near about Luchon – Hourquette d’Aspin much better for views than Hourquette d’Arreau – or at least the road down from the former much better for views than the road thro’ the wood we are going now from which little can be seen – about 10 55 get into the pine-wood – at 11 in a clear spot reaching up to the top of the hill, and 3 nice scattered cottages with each a grande – a very good mountain-road except a little bit just out of Arreau on first leaving the high road to Vielle – except this bit A- could have ridden down all the way – at the top at 11 35 the Hourquette a picturesque narrow cleft thro’ the argillaceous perpendicular schist – good view all the way in the clear part near the top of the Mouné (its peaky summit towering above all the rest) that we were to have gone to from Bagnères de Luchon – Le pic du midi not near so fine from here as from the hourquette d’Aspin – here we are close under the pic d’Arbizon and behind it the pic d’Antarooy – before reaching the hourquette we had overtaken a Bagnères de Bigorre intelligent guide who went with us as far as Paillole [Payolle] – he pointed out the old silver mine at the foot of the pic d’Arbizon which our young serrurier had spoken of as we went to the hourquette d’Aspin – our B. de B- guide also told us that the three Germans who had undertaken the mine d’argent at the foot of the valle de Louron had subscribed 50,000 fr. a piece for working the mine – and it is likely to answer – our host at Arreau (M. Clarière) had spoken of this mine – 4 hours from Arreau – 20 kilos of ore field 20 francs of silver, besides a considerable portion of lead – but I understood him as well as the serrurier that this mine is in the valle d’Aure above Arreau – 5 minutes at the top, and off down at 11 40 both sides of the mountains called the mountain de Transport – even this side, down to Paillole [Payolle] belongs to the valle d’Aure – to 4 communes of the valle d’Aure called les quatre voisins – there was a trail about it in Paris and the valle de Campan sent and paid ‘une homme de confiance’ to plead her right, but was bought off and Campan lost her claim – she has the right to send cattle to pasture on the mountain but not to let them sleep on the mountain, so that the cattle cannot go far – at 12 enter the pine forest – preserved by government, or it would soon be destroyed – guardians to take care of it, and a heavy fine on people found cutting wood – before government took it up, the people particularly of the valle d’Aure had a considerable trade in wood from here – (500/. fine says Charles for being found cutting the beech wood above Barèges) – A- dismounted at 12 5 (I had walked all the way down from the hourquette) and walked about ¼ hour when we both remounted in the forest – at the prè de St. Jean or Camp Bataillé, where tradition says Messala lieutenant of Augusuts beat the Bigorras Chaussenque [Chausenque] i.353 at 12 25 – not a Vératre to be seen (vide rep. 14 line 7) – at the carrière de Campan at 12 ¾ and then send Charles with the horses to bait at the little auberge at Paillole [Payolle] – nice view of the pic du midi from the upper part of the quarry in the midst of forest of spruce fir – about 30 workmen employed – one part of the carrier red with horizontal white stripes – the mottled green and white, and greed, red, and white, marble very pretty even in the rough – went down to the village of workmens’ cottages close by, and from there to another little quarry just opened in the gorge or wooded cabine (a little above the village) – then walked to the auberge about ¼ mile off and there at 1 35 a few drops of rain having hurried us there, for shelter – A- and I had each a boiled egg (à la coq) and were off at 2 5 a few light drops of rain rather frightened us, and before 3 I had put on and off my cape once or twice –at 3 fine look down upon the scattered village of Grip – the whole green bottom of the valley a camp-like village as far as Ste. Mary (could see no farther) – descend by a little sentier, leaving the auberge at Grip on the right and behind us, and get into the highroad about ½ hour beyond the auberge – the long hill-ridge we had passed from Paillole [Payolle], fertile and covered with cottages and granges all along the top, divides the large valley into 2 almost as far down as to Ste. Marie, the division on this side being Grip, and on the other the valle de Seoube [Séoube ]– In the highroad to the Tourmalet at 3 ¾ - at 4 10 thunder lightning and rain – Charles had said just before he thought we had better turn back – I hoped the storm would blow off – or not last long and A- and I were so anxious to avoid sleeping at Grip, that we determined to try what we could do – but on mounting the hill out of Tramesaigues [Tramezaigues] the wind was so strong we could not carry
SH:7/ML/E/22/0013
umbrellas, and the rain was heavy enough to wet us through so soon, that I began to think it was foolish to expose A- to such a storm, especially as if the wind did not abate (which was improbable) it would be terrible (said Charles – il y a quoi de mourir) at the top of the port – we could not possible sit on horseback and should have to struggle thro’ on foot - .:. about 200 or 300 yards beyond Tramesaigues [Tramezaigues], at 4 20 we turned back – at 4 50 passed the little bridge over the Adour we had crossed to get into the highroad – at 5 10 alighted at the Inn at Grip – tho’ it rained smartly all the way we were not much wet, having got under the wind at Tramesaigues [Tramezaigues] and been able to carry our umbrellas – our cape and cloaks were however wet, and we filled a room at the auberge with them hung over chairs etc. to dry – I went to the kitchen to see about our dinner and helped to make the soupe à l’oignon, and boil 4 eggs and 8 trout put into the frying pan – a civil French woman who with her husband from Bagnères de Bigorre were detained by the weather helped me to boil the eggs – and told me poached eggs were Oeufs en chemise - A- had hot water and drank the remainder pint bottle of our St. Sauveur Vilodry – I had boiled milk – soup à l’oignon – 2.S. of water boiled in the frying pan – then salt and a lump of butter and 2. S. of onions cut in small slices, and a little bread (I would not have much) all stewed or rather fried together till done enough – there ought to have been a little vinegar but I was afraid of its disagreeing with A- and it is common to blanchir la soupe with white of egg or cream – dinner about 6, and fair about that time or soon after – but soon afterwards thick again on the mountains – came to our bedroom at 7 the large room over the kitchen Charles in the next room but one – thankful to be so well sheltered – fine day till the rain threatening about 1 ½ at Paillole [Payolle], and afterwards nothing to signify till the storm came on at 4 10 – fair or thereabouts soon after 6 – but afterwards thick on the mountains and highish wind during the night –
7 notes
·
View notes
Text
⭐Nutritional Bone Stock Recipe⭐
Most of the items below are stock piles from previous meals/cooking and divided/frozen in sandwich bags:
🦴Bones: all bones, marrow, legs, steak, chicken carcass, ham bones -we save all of our bones
🥬Celery: I always buy the biggest bunch since they are sold at "each" prices and not by weight, divvy it up into 4-5 stalks the length of the ziplock.
🧅 peels/ends and veggie ends: carrot ends, cabbage cores, romaine/leafy greens that started to wilt and more -I will also scour the bagged fresh veggies for clearance items to add in.
🍄Mushrooms: oyster or shiitake are preferred, but any will do and you only need 4-6 each time.
🫀Pigs tails, Chicken feet/liver/hearts: these add a great source of cartilage/gelatin and essential vitamins from the organs that help support healthy organs/growing bones
🥚10-20 crushed egg shells: a natural source of fluoride that is minimal in impact on the body -we don't use fluoride toothpaste for other reasons.
🍯1c ACV w/mother: this helps to break down the bones and other foods while also giving the benefits of ACV.
🧄3 tbs minced garlic: has many benefits, I use the pre-minced from a jar because I don't have storage space nor enough time to prep the amount of garlic I use in everything, no worries about vampires here!
🌿Parsley stems: before I started growing it, I used about 1/4 cup for it's many benefits, now I focus on stems and leaves that may not be the prettiest.
🏆2 tbs turmeric: this is my secret ingredient in everything, if you do no regularly ingest this and did not eat it during pregnancy, I would start with 1tsp and slowly increase with each batch until reaching your desired amount.
I start by filling the bottom of my pressure cooker (16qt) with 2 inches of water and turn the heat up to 8 out of 10 (electric stove 😡). Adding all the above ingredients, the idea is to fill the pot as level as possible and stay 2 inches below the max water line. Then add water to the fill line, pop your lid on securely and place 15lbs of pressure on the cooker. I let it heat up until the pressure gauge as begins teetering and has been maintained for 10 minutes. After that I turn the heat down to 1/Low and let cook for 8 or so hours. I then allow it to cool for an additional full day, never removing the lid or the pressure gauge until I'm ready to continue. When straining the stock I gently squeeze the bones, crushing any that have broken down into a fine crumble. Any bones that remain intact, are saved for the next batch. Organs and soft tissue will have mostly dissolved and the remaining veggies should easily turn to mush. After finding and setting aside bones for next time, I continue to crush/mush anything left in the pot with my hands. Allow this to rest for 10-15 minutes. With a super fine mesh strainer and a pot at least 12qts large, begin to scoop the liquid and strain through the mesh into your new pot. Once you get down to more solid material in the pressure cooker, gather in your hands and wring out the liquid over the cooker. All solids left in your hands, or emptied from the strainer, are great for your compost! Once the cooker is completely emptied, add 1x 32oz container of flavorless baby electrolytes, and let the new pot sit in the fridge for at least 12-24 hours. This will allow the marrow to settle and the fat to rise. I gather the fat off the top for my dogs and jar/freeze the clearest of broth, with shallow scoops, for my son and future daughter. Once you start seeing the marrow and sediment rising as you scoop, it's time to grab your 32 oz jars, stir the pot thoroughly and divvy it up for cooking -making sure to stir each 1/3 of a jar you fill.
I not only use this in cooking dinner/soups/baby food, but I also replace a portion of the water in the baby's bottles with it (hence not wanting any particles and little to no fat.) I'm sure I will remember more to add to this, but I wanted to get this post started before my hands are full again 😅
9 notes
·
View notes
Text
Chapter three! I already skimmed through it and just. Holy fuck I’m falling in love with this series all over again, and this is just the opening arc, how the hell is this so good??? I’m genuinely just in awe and fuck is it making it hard to decide where to have a cut-off point for this chapter. I suppose we’ll just have to see what fate decides.
(Also, the temptation to just paste in all of the last three pages of the chapter is so incredibly strong, you don’t understand.)
[No. 3 - Entrance Exam]
We start off with some exposition: UA’s hero course is designed to give students all they need to go pro, and is the toughest and most popular hero course in the country, with only a 1 in 300 acceptance rate. Discounting the four slots that are recommendation students, that’s 36 slots a year, which is about…

Yeah. That’s a lotta applications, and that’s just for the hero course!
Several alumni are mentioned: All Might, who declined the people’s choice award; Endeavor, who’s stopped more crimes than anyone else in recorded history; and Best Jeanist, who’s won the Best Jeanist award eight years running. (One of these things is not like the other~ One of these things just doesn’t belong~) The exposition suggests that graduating from UA is basically a requirement for becoming a great hero - something which we’ll learn soon enough isn’t quite true.
But yeah, Endeavor with the record for crime handling, even above All Might. Quite the impressive hero, though that face…

Not precisely reassuring.
So yeah, Izuku here mentions the date of the exam - February 26th. I figure that this has to be a Sunday, for the simple fact that Japan has a slightly different school schedule than us. Most notably: Japanese schools (some of them, anyways) have 5.5 day school weeks. Yes, that means the first half of Saturday can still be a school day.
While I couldn’t confirm for sure whether this is more common among the higher end schools, I feel like a school like UA, with its ‘Plus Ultra’ motto, would definitely be a school to have a half-day (or even a full day) on Saturdays, and since they also have to accomodate for middle schools that have Saturday morning classes, I figure that it would make the most sense for UA to schedule this exam on a Sunday.
The benefits of this, as we’ve already seen, is that we can then narrow down the timeline for the rest of the series, just based on that single, confirmed date. We know from the last chapter that the Sludge Villain had to happen on a Thursday or Friday of the first week of school (April 14th/15th), with the first training session two days later (the 16th/17th). But what this also gives us is when Izuku’s first year of UA starts, AND the possible years it could start on.
Since we see the glowing baby is in a modern hospital, we can assume that’s correlated to about our times. Give it a few generations, and we can guess that we’re in the 2200s or 2300s for the current era. Based on that assumption, we get the following years that have February 26th on a Sunday:
23rd century potential years: 2204, 2209, 2215, 2226, 2232, 2237, 2243, 2254, 2260, 2265, 2271, 2282, 2288, 2293, 2299
24th century potential years: 2310, 2316, 2321, 2327, 2338, 2344, 2349, 2355, 2366, 2372, 2377, 2383, 2394, 2400
As a side note, when I got into the series, my brain weirdly latched onto the idea that this had to all be happening in the year 2317. I don’t know why I decided on that number, but that’s what I rolled with, and hilariously I could be RIGHT about the year the current manga arc is happening in, provided Izuku’s first year is in 2316. Sometimes you just know, ya know? I know at least one other friend made these calcs independently of me and chose to run with 2237, which is totally valid! Probably makes more sense to be in the 2200s, but there’s room depending on how much time one thinks has passed.
As for when Izuku’s high school school year starts, we know that Japanese schools start on the second Monday of April. Since we don’t know if this is a leap year or not, we’ll end up with two dates, but that’s fine!
Feb 26 (Sun) -> Feb 27 (Mon) -> March (6/5, 13/12, 20/19, 27/26) -> April (3/2, 10/9)
Therefore, Izuku’s first day of classes (not counting the orientation, which I’ve seen a few other timelines assume is on the Sunday before classes start) is April 10th (or the 9th if a leap year)! I know this is all in the future from this chapter, but still, I wanted to share this at some point and figured now was as good a time as always.
Math!

Sorry, I’ve just wanted to share this math I did for a while now, I put a lot of work into it and I am very proud of it. Let’s get back to the chapter.
So Izuku lives a 40 minute train ride away from UA, and has made it just in time for the exam. Apparently, this is only the practical portion? Or well, that’s the part that gets focused on in this chapter, with no mention of the paper exam. I would imagine they’d be the same day, though? But I suppose one can do whatever they like with it.
He’s standing there looking at the school, thinking about how he didn’t have a chance to test the power, while the other students head in-
Excuse me, Toga?? I know that hairstyle is just a bit off, but… ???
...right, anyways. Izuku is wondering whether the hair really did anything (also, it was apparently sour, which, ew.) Katsuki comes up behind him and tells him to move aside.

Truly a flattering image. Izuku panics a bit and greets him, but Katsuki just walks by without another word or gesture, leaving Izuku confused as he watches him head on into the building. The narrative notes that since the villain incident, Katsuki hadn’t bothered Izuku, while the unnamed characters in the background apparently recognize Katsuki from the ‘sludge’ incident (well, not shocked how the fandom held onto that name).
Izuku notes that he’s gotta stop flinching instinctively, and then tries to hype himself up, noting that it’s not like before, and think about the past ten months while taking a wobbly step forward- and then tripping over himself.
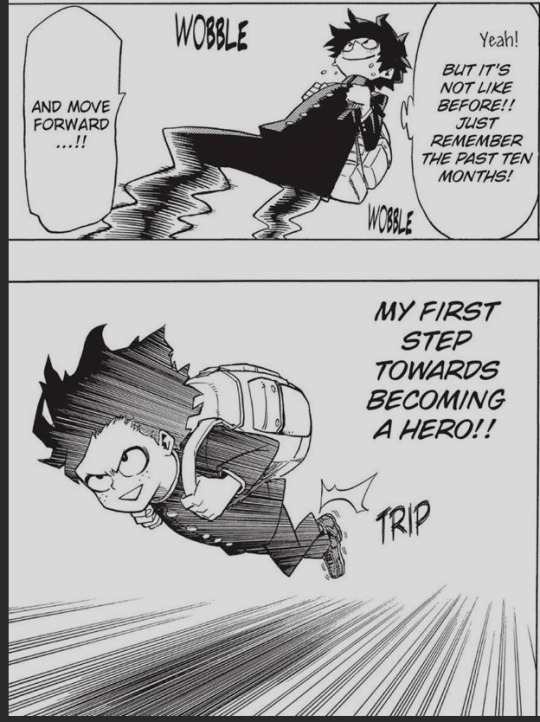
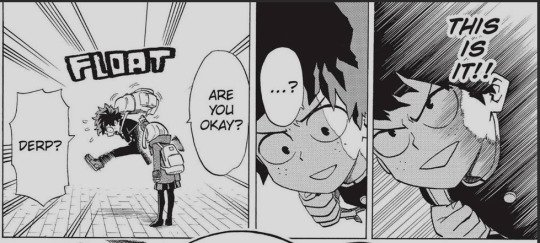
I’m sorry Izuku just has so many fantastic faces in this chapter I am crying trying to limit myself to just a few. But yeah, that little derp as he realizes what’s happening is adorable, especially while Ochako gently sets him back on his feet. She mentions that it’s her quirk, and apologizes for using it, but that it’s a bad omen to trip and fall. (I wonder if that gets played with again during later parts of the series… will have to check to see.)
While Izuku freaks out over talking to a girl, Ochako notes that the exam is nerve-wracking, and then heads off while wishing both of them luck as Izuku stares after.
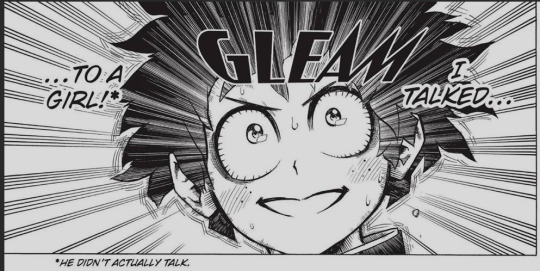
This fucking kid. I love him so much. His flustered excitement gets him some weird looks from the others still outside.
We transition to a new character (Present Mic) who immediately shows off his performative side by calling for a ‘hey!’ which… is met with silence from the crowd. He doesn’t let this throw him off, instead letting them know that he’ll present the guidelines for the practical, followed with a ‘YEAH!’ that gets met with an even heavier silence.
Izuku and Katsuki are seated next to each other, with Izuku descending right into excited muttering over Present Mic and how he listens to his radio show every week. Also with the assumption that all the UA teachers are pro heroes, which I mean, true, but still. Katsuki tells Izuku to shut up.
Present Mic explains the test: ten minute long ‘mock cityscape maneuvers’, with the applicants split among seven arenas, labelled ‘A’ through ‘G’. With more than 10k applicants total, that’s about…

Yeah, more than 1500 per arena. Fucking hell, no wonder the robots deplete so quickly in only a few minutes. Also of interest:
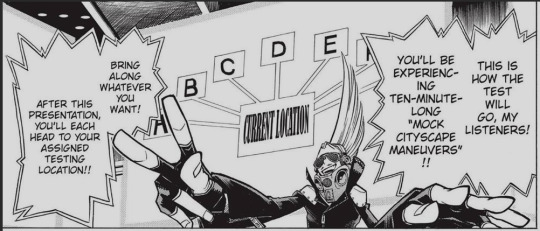
“Bring along whatever you want.” So technically, if Izuku were able to procure the tech and training to handle the robots, there would be nothing keeping him from getting into UA quirkless… though I imagine any kid who gets in mostly on tech probably gets side-eyed… though if said kid made their OWN tech, they might also get an offer from the Support department.
(AU where Mei accidentally took the heroics exam and got a shitload of points, but she ended up taking the offer for Support instead despite setting the record for most points in said exam. Katsuki forever wants to fight her. Izuku and her are good friends.)
Also, another thing I love is how Katsuki just told Izuku to shut up a moment ago, and then:
He’s the one to initiate conversation on the details of the test, basically agreeing on the reasoning behind dividing up the students between arenas. Katsuki is annoyed at not being able to crush Izuku, which has Izuku awkwardly silent.
Also mini-Mic.
Poor, poor Mic. He just wants audience participation. Anyways, he continues on to explain the points system, with the help of cute little Mario-themed silhouettes. There are three kinds of faux villains, with different points awarded for defeating each based on their difficulty levels. Also, attacking other examinees is prohibited!
A student (cough Tenya) raises their hand to ask a question, going on to note that the handout sheet appears to have four varieties of villain, and that such a blatant error (if it is one) reflects poorly on Japan’s top academy. He then spins around and points at Izuku, calling him out for his muttering and how distracting he’s been, and that ‘if this is some sort of game to you, then please leave immediately!’

Is that… Mineta seated behind Izuku? I can’t find another panel that disproves that theory, so. Whelp. If you ever for some reason want to have Izuku accidentally deal with the grape early, he’s right there.
Anyways, Present Mic brings the convo back to the initial question/comment, noting that the fourth villain is worth zero points, and is more of an obstacle. He then brings up Super Mario Brothers, the old retro game, and compares the Zero Pointer to a thwomp. There’s one per site, serving as a gimmick that’ll rampage in close quarters. Tenya thanks Mic and apologizes for the interruption.
And so we get our final words from Present Mic:

??? either he's referencing the original guy (which I think would be a misquote because I doubt OG Nap ever noted anything like that) or some French hero or the like who took on the name.
Discord offered this to me while putting together the post:

So there you have it. Tentatively confirmed.

Those EYES man, dude’s got the Rinnegan going on.
Honestly, I have to end on this panel just because of that last line from Present Mic. Like, look me in the eyes and tell me this isn’t the exact point to end on.
The discord’s takeaway from this:


#chapter 3#opening arcs#readthrough#boku no hero academia#my hero academia#midoriya izuku#bakugou katsuki#uraraka ochako#yamada hizashi#iida tenya#I seriously cannot believe they actually said 'break a leg' while Midoriya Izuku was in the area#like talk about tempting fate#and that little bow#like 'yes sir i will do my best to break a leg'#'in fact i will break both legs AND an arm'#'Plus Ultra!'
32 notes
·
View notes
Text
theshamelesshussy said: Can I get the recipe if I explain how to close them? You can dampen the edges of the dough and pinch with your fingers (looks like scallops), press the edges with the tines of a fork, making ribs, or there is a rolling thing that is sold in kitchen gadgets.
thanks!! my mother-in-law just pinches them closed and it works for her is the thing, (witchery!), but i guess i will take the extra step of wetting the edges next time after all.
anyway sure, recipe! these quantities make twelve pirozhki:
DOUGH:
* warm 160 g milk, add 1.5 t yeast and 80 g sugar, let foam ~5 min
* mix 420 g flour with 1/2 t salt
* add milk mixture, 1 egg, and 60 g melted butter to flour
* knead till it's smooth, and rest in oiled bowl for an hour
CHERRY FILLING:
* pit a pint of sour cherries, should get ~350 g when done
* mix with 45 g sugar, cook in pot on medium till it bubbles
* meanwhile mix another 45 g sugar with 20 g starch
* when the cherries bubble, stir in sugar/starch mixture, and keep stirring till the mixture thickens.. should only take a few min!
ASSEMBLY:
* divide your dough ball into 12 equal portions, ~63 g each, (you do not have to measure, i am just Like That)
* roll them into balls and let rest 10 minutes
* one at a time, roll each ball flat
* and put a heaping tablespoon of cherry filling in the center
* try to pinch them closed better than i did!!!
* brush the tops with beaten egg (you will not use the whole egg)
* bake at 350 F for 20 minutes
FURTHER NOTES:
* theoretically you should let them rise a final half hour after assembly, but i was feeling impatient? idk it worked okay like this
* they were a just a little sweeter than i'd prefer, so next time i am planning to try 60 g of sugar in the dough and 60 g in the cherries. but i think as written is a 'normal' level of sweetness.
3 notes
·
View notes
Text
Litha Recipes with Correspondences and Vegan Alternatives

Cinnamon Red Sun Tea
Ingredients:
- 6 cups water
- 1/4 cup loose red (rooibos) tea leaves
- 2 Cinnamon Sticks
- Simple syrup or Agave to taste
Directions:
- Place water, tea leaves and cinnamon sticks in large container or pitcher. Stir. Cover with lid or plastic wrap. Let stand in sun for 3 to 5 hours.
- Strain tea, discarding tea leaves and cinnamon sticks. Serve tea over ice or refrigerate until chilled. Sweeten with Simple Syrup, if desired.
Correspondances:
- Tea ~ courage, mental powers, prosperity, restfulness, strength
- Water ~ purification
- Cinnamon ~ healing, love, luck, lust, peace, protection, psychic powers, strength, success
- Sugar ~ love
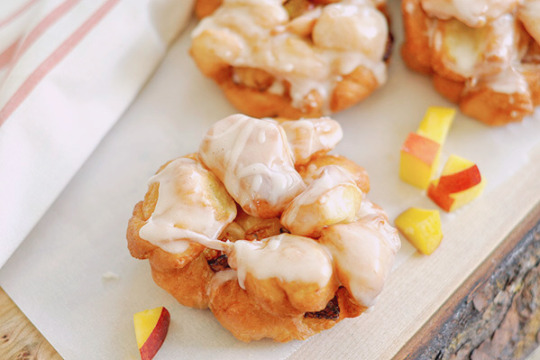
Peach Earl Grey Fritters
Ingredients:
- 1 1/2 cups whole milk (almond or soy for vegan)
- 1/3 cup earl grey tea
- 4 tablespoons unsalted butter (coconut oil for vegan)
- 5 cups all-purpose flour
- 1 pinch nutmeg
- 1 pinch cinnamon
- 1 teaspoon salt
- 1/4 cup sugar
- 1 tablespoon active dry yeast
- 2 eggs (egg substitute for vegan)
- 6 cups Vegetable oil, for frying (use more if needed)
- 3 large peaches, diced
For Icing:
- 1 cup powdered sugar
- 3 tablespoons honey (agave or maple syrup for vegan)
- 1/2 teaspoon cinnamon
- 2-3 tablespoons milk or cream (almond or soy for vegan)
Directions:
- In a small pot, heat the milk, tea, and butter until the butter has melted and the mixture is warm. Remove from heat and allow to cool slightly.
- Mix the flour, nutmeg, cinnamon, salt, sugar, and yeast in the bowl of a mixer (or a large bowl if mixing by hand). Add the warm milk mixture and mix to combine.
- Add the eggs, scraping the bowl well. Turn the mixer up to medium speed, and, using a dough hook, mix until the dough begins to pull away from the edges. If mixing by hand, knead until it easily pulls away from the sides of the bowl as you knead (it will still be quite sticky).
- Transfer the finished dough to a well-oiled container and cover. Allow it to rise until doubled in size, about 1 hour. Alternatively, you can refrigerate the dough overnight so that it’s ready to make in the morning—but you may need to punch the dough down once or twice during that period to prevent it from over-fermenting.
- Roll out the doughnut dough on a lightly floured surface into a rectangle about 1/2 inch thick. Size/precision of the rectangle isn’t important—just focus on an even thickness for the dough.
- Use a knife, pastry scraper, or bench knife to cut the dough into long vertical strips about 1/2 inch wide.
- Next, cut the strips horizontally about 1/2 inch wide—this should make a whole bunch of 1/2 inch squares.
- Divide the dough squares into 12 even portions.
- To shape each doughnut, take about 2/3 of one portion of dough squares and smoosh them gently together. Place about 1/4 to 1/3 cup of diced peaches on top of the dough.
- Top with the remaining 1/3 of the portion of dough squares and smoosh the dough gently to adhere to the peaches and other dough. It’s best for each piece of peach to be touching dough in two places (on top and on bottom), otherwise some may fall out when you go to fry them.
- Cover the doughnuts with greased plastic wrap and let them rise for 20 to 30 minutes.
- While the doughnuts rises heat the oil. If you have one, use a deep-fry thermometer to test the oil and help regulate the temperature—around 350° F is best. If you don’t have one, throw a doughnut hole or scrap piece of dough into the oil and see if it sizzles and rises to the surface. When it does, you’re good to go.
- Working in batches, gently drop the doughnuts into the oil, frying until they’re golden brown on both sides, 2-3 minutes per side. It’s helpful to use a spider or slotted spoon to support the fritter for the first 15-30 seconds, until the dough sets.
- Drain the doughnuts on several layers of absorbent paper towels. Let cool for 5-10 minutes.
-In a small bowl, whisk the powdered sugar, honey, cinnamon, and milk or cream to combine. Add more milk or cream as needed to make drizzly glaze. Drizzle each doughnut into the glaze, and serve immediately.
Correspondances:
- Milk ~ Goddess energy, love, nurturing, spirituality
- Tea ~ courage, mental powers, prosperity, restfulness, strength
- Butter ~ smoothing relationships, spirituality, tenacity
- Flour ~ revealing hidden matters, consistency
- Nutmeg ~ confidence, emotional openness, fidelity, healing, luck, prosperity, social interaction
- Cinnamon ~ healing, love, luck, lust, peace, protection, psychic powers, strength, success
- Salt ~ cleansing & purification, grounding, protection
- Sugar ~ love
- Yeast ~ grounding, purification
- Egg ~ fertility, lust, protection, spirituality, strength
- Oil ~ spirituality
- Peach ~ happiness, healing, fertility, longevity, love, wisdom
- Honey ~ happiness, healing, love, lust, purification, spirituality, sweet things in life, weight loss, wisdom
- Maple Syrup ~ prosperity, love

Raspberry Banana Bread
Ingredients:
- 3/4 cup fresh or frozen raspberries, thawed
- 1 ripe banana
- 1 1/2 cups all-purpose flour
- 3/4 teaspoon ground cinnamon
- 1/2 teaspoon baking soda
- 1/4 teaspoon salt
- 1/8 teaspoon ground nutmeg
- 1 cup white sugar
- 2 eggs (egg substitute for vegan)
- 1/2 cup vegetable oil
- 1/2 teaspoon lemon extract
Directions:
- Preheat oven to 325 degrees F (165 degrees C). Grease a loaf pan.
- Mash raspberries in a bowl with a fork. Mash banana in another bowl with a fork.
- Combine flour, cinnamon, baking soda, salt, and nutmeg in a bowl.
- Beat sugar, eggs, raspberries, banana, and vegetable oil in a bowl with an electric mixer set on low until smooth, 2 to 3 minutes.
- Stir flour mixture into raspberry mixture until batter is just moistened; stir in lemon extract. Pour batter into prepared loaf pan.
- Bake in the preheated oven until a toothpick inserted into the center comes out clean, about 1 hour. Cool in the pan for 10 minutes before removing to cool completely on a wire rack.
Correspondances:
- Bread ~ (in general) kinship, sustenance
- Cake ~ (in general) celebrations, hospitality
- Raspberry ~ happiness, love, protection, stamina, vigor
- Banana ~ fertility, love, luck, potency, prosperity, spirituality
- Flour ~ revealing hidden matters, consistency
- Cinnamon ~ healing, love, luck, lust, peace, protection, psychic powers, strength, success
- Baking soda ~ raising energy or expectations
- Salt ~ cleansing & purification, grounding, protection
- Nutmeg ~ confidence, emotional openness, fidelity, healing, luck, prosperity, social interaction
- Sugar ~ love
- Egg ~ fertility, lust, protection, spirituality, strength
- Oil ~ spirituality
- Lemon ~ faithfulness, friendship, happiness, longevity, love, marriage
113 notes
·
View notes
Text
I am having a lot of unpleasant, varied, and confusing feelings this morning, which I intend to release as kinetic energy by beating up some yeast dough. I think this is one of the great things about bread. Here's recipe.
(Adapted slightly from the Challah For Hunger basic recipe, which makes a soft, feathery, rich-tasting but not heavy loaf that is vegan if you don't do an egg wash, It was recommended to me by multiple people both online and offline, and I finally tried it out last week, the first time I have made challah in almost 10 years.)
-
Challah with Chocolate Coconut Filling
INGREDIENTS
For the bread:
- 1 tbsp active dry yeast
- 1/2 cup water, warm (100-110 degrees Fahrenheit)
- 2 tsp white granulated sugar
- 2 cups water, not too hot or too cold
- 3/4 cup white granulated sugar
- 1/2 cup coconut oil, melted, plus a small amount in reserve
- 1-1/2 tsp salt
- 6 to 8 cups all-purpose flour
- 1 egg for an egg wash, if desired
- 2 tbsp water for an egg wash, if desired
For the filling:
- About 1/4 cup coconut oil, melted
- Dash of vanilla extract
- Pinch of salt
- Sprinkle of cinnamon
- About 3/4 cup brown sugar
- About 1/2 cup finely shredded unsweetened coconut
- Handful or two of semi-sweet or dark chocolate chips
PROCEDURE
For the bread:
01. Proof the yeast by stirring it together with the 1/2 cup warm water and 2 tsp sugar and allowing it to sit for 10 minutes or until it foams. (It's fine to use instant yeast, which you don't have to proof; I just only had active yeast, so that's what I used.)
02. In a large bowl, mix water, sugar, oil, and salt until blended. Add the yeast mixture and mix more.
03. Slowly stir in 3 cups of the flour. The whole deal will be lumpy and sticky. Don't worry about it right now.
04. Slowly add 3-5 cups flour, cup by cup, until the dough is solid but not stiff. The Challah For Hunger recipe says: "Add flour until you reach the point when, if you press the dough gently with clean fingers, no dough sticks to your hands."
05. Let rest for 10 minutes.
06. Turn the dough out on a lightly floured surface and knead for 6 minutes. Punch the dough, throw it around, talk to it. (ETA: Don't punch it too hard like I did today. Ow!)
07. Return your dough to its bowl and wipe it over with the reserved coconut oil -- this will discourage it from forming a hard crust on top. Let rise in a warm place for about an hour, or until the dough doubles in size. Make sure to check on it so that it doesn't overflow the bowl.
08. (This is when you may want to prepare the filling.)
09. After your dough has risen, punch it down -- very exciting part -- and turn out onto a lightly floured surface again.
10. Divide the dough in half, then divide each of those halves into three pieces. You can use a kitchen scale if you have one during this part to make sure the portions are weighing about even.
11. For each of your six portions of dough: Get a rolling pin, or something that you can use like a rolling pin (clean smooth-sided glass of strong plastic?), and roll the dough portion out like a pizza. Put filling down the middle in a line with room around it. Roll the dough up like a jelly roll and pinch the seams closed. This was a tip from Veena Azmanov in her Easiest Challah Recipe, and it really helps make the braids smooth and pretty.
12. Once you have three strands filled and rolled up, put one down straight, and place the other two on top of it in an x. Braid by bringing one strand of the x under the central strand and then doing that with the other strand of the x. Here's an illustrative diagram I did in Paint. When you run out of braid, pinch and smooth over at the end.

13. Once you've braided one side of the challah, braid the other side. Place the braided challah on a lightly greased baking sheet while you braid your other challah.
14. Let the challot rise for about 20 minutes. Preheat your oven to 350 degrees Fahrenheit and let the bread rise for another 20 minutes.
15. Apply the egg wash if desired. This is basically: mix up an egg with 2 tbsp water, then brush or dab onto the loaves until they are thinly coated with egg. It will give them the classic shiny look of challah. If you don't have a pastry brush, I had luck soaking a nice paper towel in the egg wash and dabbing it on.
16. Bake on lightly greased baking sheets at 350 degrees Fahrenheit for 30 to 45 minutes, or until the loaf is golden brown and the bottom is solid/makes a sort of hollow noise when you knock on it.
For the filling:
01. Melt coconut oil. Mix with vanilla, salt, cinnamon, brown sugar, and shredded coconut until sandy.
02. Add chocolate chips and toss. They will probably melt. This is fine and nice.
(I did not really measure my ingredients here; it was sort of a "does this look good" thing. You could totally do something different. I wanted something that was streusel-like but not with butter, and I had the coconut and chocolate already. It didn't turn out streusel-like, but it was good.
(I bet you could add all kinds of things to a base of brown sugar + neutral oil, like crushed toasted or caramelized nuts, nut butter, dried or cooked fruit... all kinds of things. The Trail Mix Challah on the Challah For Hunger website looks really good, for example. Also I made dried fig jam recently, chopped dried figs simmered with water + sugar + honey + apple cider vinegar + balsamic vinegar + bit of vanilla, that might be nice on its own as a filling. The world is full of possibilities.)
1 note
·
View note
Text
Matcha streusel bread
This bread is so pretty I almost did not want to eat it - but then it also tastes so goood <3
Bread note:
- I only use bread flour (higher protein content than plain flour) - not sure why I never succeed with plain flour ? I didn’t knead enough - anyway, I find it so difficult to knead into a nice strong dough ball with plain flour so I don’t bother trying anymore
- I use a bread machine (too lazy/weak to knead haha) but you can also use stand mixer with dough attachment, or your handsss
- Use cooking matcha - it is lower quality than actual matcha but the colour is so much more vibrant
- Measure your wet ingredients by total amount (eggs vary in size)
Bread measurements:
- 2g salt = 1/2 tsp
- 3g yeast = 1tsp
- 7.5g milk powder = 1 tbsp
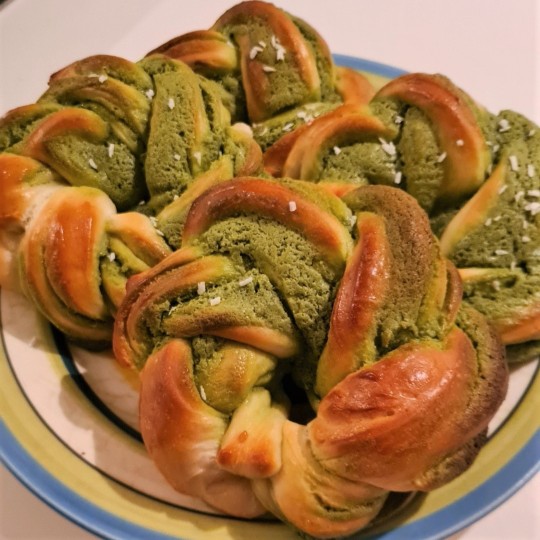
Bread
- 415 bread flour
- 5g instant yeast
- 15g milk powder
- 65g sugar
- 4g salt
- 1 egg (50g) + 55g milk + 165g water = total 270g (adjust according to your egg size)
- 45g unsalted butter, cubed
Matcha streusel
- 105g unsalted butter (room temperature)
- 40g caster sugar
- 30g egg
- 50g cake flour (40g plain flour + 10g corn starch)
- 70g milk powder
- 5g matcha powder
Instructions:
- Measure bread flour, make 3 holes in the flour and add yeast, sugar and salt into each, mix
- Add milk powder, mix
- Measure wet ingredients, mix into flour mixture, knead for about 10′
- Rest 20 minutes in the fridge
- Further knead until membrane test comes out thin but jagged edge
- Add butter gradually add knead until smooth edge
- 1st proof: Form a nice tense ball, place in a oil-lined bowl to proof until double in size - about 1 hour in the UK but maybe quicker if somewhere warmer
- 2nd proof: Punch to release air, divide into 8 portions, roll into balls and cover for 25-30 minutes
Make matcha streusel:
- Add sugar into room temperature butter, mix until smooth; add egg in 2 batches, mix well each time until no runny liquid
- Add sifted flour & milk powder, mix
- Add sifted matcha powder, mix
- Roll each ball into a rectangle 15x20cm, spread filling evenly, roll tightly
- Cover and let rest for 5-10 minutes
- Gently roll each roll to about 30cm length, cut in the middle then cross braid into a wreath
- 3rd proof: cover, place into warm oven (either with just light on, or place a bowl of hot water together with the dough - 45 minutes, or until 1.5 size
- Preheat oven to 190C
- Brush with egg wash (left over egg from streusel + 1tbsp milk), sprinkle with almond flakes
- Bake for 12-14 minutes until the top is just golden
youtube
6 notes
·
View notes
Video
youtube
Hema’s 2 North Indian Meal Recipes Combo | Phulka | Paneer Butter Masala #Phulka #paratharecipe #PaneerButterMasala #PaneerMakhani #Paneerrecipe #paneerbuttermasalarecipe To Make Phulka Prep time: 20 mins Cook time: 20 mins Number of Servings: 4-5 persons Ingredients 2 cups - wheat flour Warm water for kneading Salt Method 1. Firstly in a mixing bowl, add the wheat flour, salt and mix it well 2. Add warm water gradually and knead it to get a soft dough or give good punches to the dough. 3. Cover the dough with a muslin cloth and rest it aside for about 15 minutes. 4. Once the dough is rested, knead it again 5. Divide the dough into small equal sized portions. Take each portion and make round balls out of it. 6. Use a rolling pin and board. Onto the board dust some wheat flour. Take a round portion of the dough and place it on the flour dusted area. 7. Start rolling out the dough until we get a round or circular disc like shaped roti. The size of the phulka should not be too thick or thin. 8. Heat the tawa/skillet. Place the roti on the tawa. 9. Cook the bottom side for few seconds on medium flame. 10. When slight air bubbles appear at the top flip the roti and cook the other side very well. 11. Lift the phulka roti with the help of pair of tongs, flip it and place the roti directly on the flame. The side which was cooked for few seconds should be facing the flame. 12. Once the roti is placed on the flame, it begins to puff up. Immediately take the roti on a plate. 13. Apply ghee/butter. Serve hot. Paneer Butter Masala Ingredients: Paneer - 300 Gms (Buy: https://amzn.to/2GC7aWS) Oil - 1 Tbsp (Buy: https://amzn.to/2RGYvrw) Onion - 2 Nos (Chopped) Red Chilies - 10 Nos. (Buy: https://amzn.to/37DAVT1) Tomato - 3 Nos Chopped Salt - 1 Tsp (Buy: https://amzn.to/2vg124l) Cashew Nuts - 1/4 Cup (Buy: https://amzn.to/36IbEpv) Ghee - 3 Tsp (Buy: https://amzn.to/2RBvKxw) Kashmiri Chili Powder - 2 Tsp (Buy: https://amzn.to/2GgLsrp) Garam Masala - 1 Tsp (Buy: https://amzn.to/2TPe8jd) Kasuri Methi (Buy: https://amzn.to/2TRtrYS) Coriander Leaves Unsweetened Khoya - 50 Gms (Buy: https://amzn.to/2SHIqmX) Milk - 3 Tbsp (Buy: https://amzn.to/2Gz9D4r) Fresh Cream - 2 Tbsp (Buy: https://amzn.to/2UcrxSF) Sugar - 1 Tsp (Buy: https://amzn.to/38wnYus) Water - 1/4 Cup Salt - 1 Tsp (Buy: https://amzn.to/2vg124l) Method: 1. Heat some oil in a kadai, add onions, red chilies, tomatoes, and cashews and saute till they are completely cooked. 2. Add salt and cook till tomatoes are mushy. Turn off the stove. 3. Cool the ingredients and grind them to a smooth paste. 4. Heat a kadai with ghee, add red chili powder. 5. Pour in the ground paste and add a little water which was added to the mixer jar to remove the paste stuck to it. 6. Now add garam masala, kasuri methi and chopped coriander leaves. 7. Close the kadai and let it simmer for about 10 minutes on low flame. 8. To a mixer jar, add khoya and milk. Grind them into a fine paste to give the curry a creamier texture. 9. Add fresh cream, ground khoya mixture and sugar to the gravy and give it a quick mix. 10. Add water, season the gravy with salt and mix it well. 11. Now add paneer cubes to the gravy, close the kadai and cook for 10 minutes on low-flame. 12. Turn off the stove and serve it hot with a dollop of butter. by HomeCookingShow
8 notes
·
View notes
Last Seen Blogs

vivvidli
vivian

mycatishandsome
Auggie

minty-moretea
La di-da~

junkrockets
nocebo

chonce91
Fan Account