#budget gardening
Text
Supporting Your Plants for Cheap
This is my fifth post in a series I'll be making on how to increase biodiversity on a budget! I’m not an expert--just an enthusiast--but I hope something you find here helps!
Once you start gardening, you’ll find a lot of things go into it, and it can be a bit daunting to think about--especially if you’re trying to keep things low-cost. Fortunately, it doesn’t have to be as hard--or as expensive--as it initially appears.
Composting
There’s several different ways to compost, any of which are helpful indirecting food waste and nutrients out of landfills and into your soil--which in and of itself can help increase biodiversity by making the space more livable for microorganisms and insects, which then cycles around to the rest of the habitat.
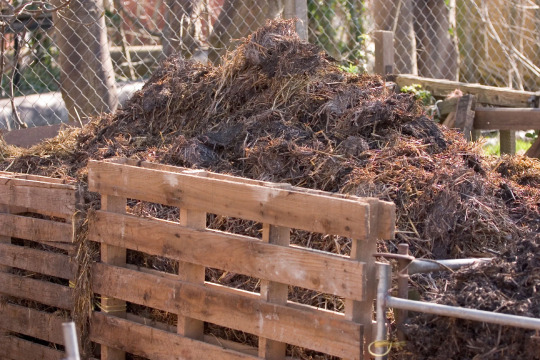
The classic one you see is hot composting. Most of the time, when I see hot composting set ups online, or hear people talking about them, it’s like listening to a wizard cast an intricate spell and prattle on about ratios and temperatures and special ingredients while standing over a detailed self-built setup made of the finest wood money can buy. Fortunately, it doesn’t have to be complicated. First off, there’s lots of ways to make compost bins--some can be more expensive than others, but there’s definitely options asides from buying pre-made tumblers or getting an engineering degree. I’ve seen people use metal trash cans dug into the ground, make compost pile setups out of old pallets, or just pile stuff up and leave it. While using different ratios of certain items can help them decompose faster, it’s ultimately not something you need to worry about a lot. If it can break down, it’ll break down--it just might take awhile. Composting this way can also help provide habitat--some insects like bumblebees have been known to make nests in compost heaps. In addition, it provides a robust ecosystem for decomposers like worms and other organisms, and bats and birds will be attracted to open-top piles to eat flying bugs that live off the compost. Amphibians enjoy them for humidity, warmth, and feasting on insects. Do note that sometimes snakes may also rest in and lay eggs in compost heaps, so be careful when turning them.
Do note, though, that if your compost pile looks like that you're getting roaches and rats and raccoons out of your goddamn mind. Bury the food scraps.
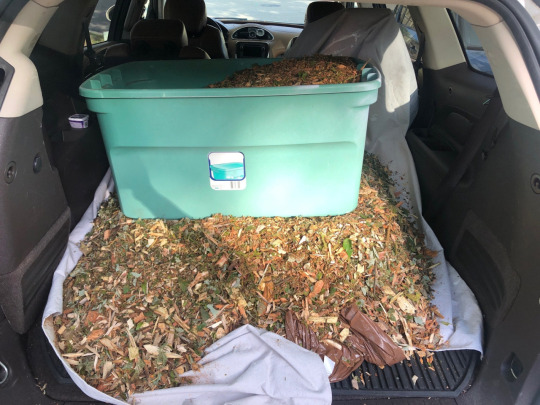
Personally, when I compost, I use a worm bin--they’re a fantastic option for limited space and limiting smells. I keep mine outside in a big rubbermaid tote with holes drilled into the bottom, sides, and lid. I put a layer or two of weed block on the inside, so it’s still able to drain but keeps the worms from trying to escape during rainy days. There is an initial cost of buying the worms, getting enough bedding materials, and getting a new bin if you don’t have an old one suitable for use. But with occasional feeding, it should sustain itself and provide valuable worm castings that can be used in the garden. Please do note, however, that earthworms are considered invasive in some places.

Look at that worm bin-y goodness. This is a pic of my bin, from earlier this month!
Though I’ve never done it, I’ve heard of people having good results with bokashi composting--a method that’s done in a bucket, and is relatively easy to do indoors.

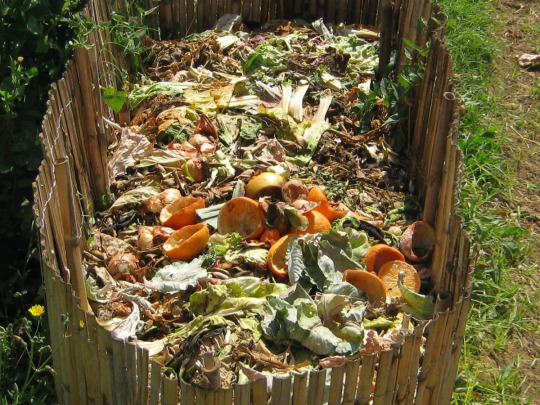
Once you start a composting system, keeping it stockpiled with organic material can become pretty easy for cheap. In general, if it comes from a plant, it’s safe to use. It’s also a good idea to avoid putting already-cooked things in a pile, as salts and sauces can kill beneficial bacteria in the compost while also attracting animals. Adding meat is also generally avoided to not attract animals. But below are some things that I’ve put in my worm bin quick, easy, and cheaply; or things I’ve seen friends put in their compost piles.
Cooking scraps/snack leftovers--things like cut up bell peppers, the ends of tomatoes, strawberry tops, apple cores, watermelon rinds, coffee grounds, and orange peels are amassed somewhat quickly in my house--my dad likes to cook. Around holidays like Thanksgiving and Christmas? Corn husks, potato peels, sweet potato fibers, leftover greens and other trimmings are a feast for compost piles and worm bins.
Vegetables and Stuff that went bad in the fridge/pantry--we’re constantly victims of the ‘forgot it was there’ conundrum. Fridge cleanouts are great times to decide what can be tossed to the compost--moldy bell peppers, spotty celery, questionable carrots, onion halves, old eggs, bagged salads, and stale/moldy bread have all been tossed into the pile before!
Grass clippings--though my worms don’t like grass clippings, they’re still great material for a classic hot compost set-up!
Fallen leaves--another classic addition to a hot compost pile. Some friends keep them stocked up and stored for later use.
Plant trimmings--what is plant clean up if not compost material? I’ve put cleaned-out sunflower heads and stalks in my worm bin, and they decomposed after about two months. If you get blossom end rot on your tomatoes or peppers, they’re still fair game for the bin as well!
Shredded mail--just make sure to not put in the thin plastic that covers the address section on some envelopes. Otherwise? As long as the paper isn’t glossy, it should be great for a bin or pile! Shredded paper or cardboard also makes great bedding for worm bins. Put those Amazon boxes to good use!
Pumpkins! Snag your neighbor’s halloween pumpkins in November and toss them in my compost! Last year my dad went around the cul-de-sac and nabbed all of the post-halloween pumpkins, the worms loved it.
Christmas tree needles--can’t confirm I’ve tried this, but it seems like it would work.
Mulch
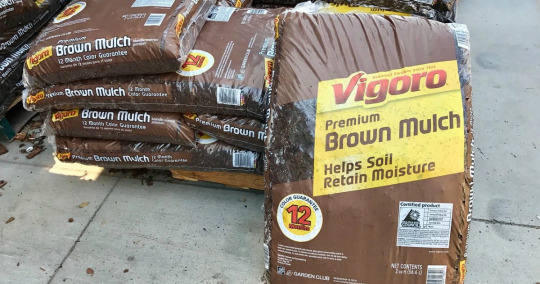
Mulch is an excellent way to keep your soil moist, while also beginning and continuing to improve soil conditions as it breaks down into organic matter. You’ll have to water less, and it’ll prevent/slow down the growth of unwanted weeds (which is always the final straw to gardening for me, I get so overwhelmed I just stop going outside). Win-win situation, right? Except stepping into a Home Depot and finding mulch being sold for five dollars per square foot and knowing you have to cover a whole garden with it all can add up… pretty quickly, to say the least.
Fortunately, there are a few solutions to this, and likely from your own backyard!
Grass clippings are the first that come to mind. If you’re mowing your lawn, or have neighbors who are, collecting the clippings and spreading them over your soil is a cheap and easy option for some quick mulch. It’ll be very nitrogen-heavy, so keep that in mind, but it’ll still prevent weeds, retain moisture, and break down into organic material over the course of a few months. Do try to not use grass clippings you know are treated with pesticides, since the aim is to use this mulch to help increase your biodiversity, and having insects around plays a big role in that.

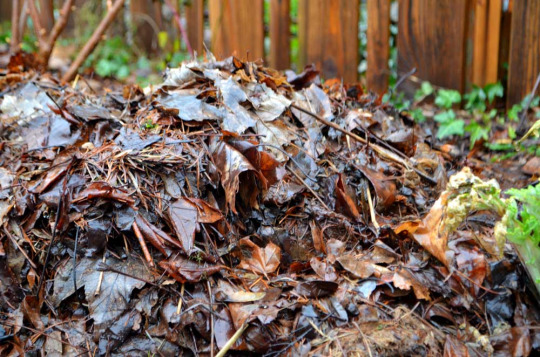
Fallen leaves are the next that comes to mind. If you’ve got a tree in your yard, or in your neighborhood, then you or someone around you knows the neverending avalanche of leaves or pine needles that drop come fall. As mentioned before, they can be used to make brush piles for creatures, or added into compost, but they have a fantastic third use as mulch. Add them on top of your beds!
Want free wood mulch? A program called Chip Drop might be the best solution for you! They team up with arborists to find cheap drop sites for shredded wood, logs, etc. that are produced as they maintain trees! If any local arborists tied to the program are operating in your area, instead of paying to dump the resulting mulch at a landfill or some other dumpside, they’ll simply dump it at your place! Now, you won’t be able to control when the mulch gets dropped--I’ve heard of people coming home from work one day to find a chip drop in their driveway. But… free mulch!
Want wood chips but not a whole truck load? If an arborist is working in your area, and you can muster the courage, its worth a shot to ask! One time someone in my neighborhood was getting a tree removed, so my Dad and I parked near their car with a tarp in the trunk, some shovels, and an old storage bin. We approached nicely and asked if we could have some chips, and they were totally cool with it! At that point, how much you get depends on how big your trunk space is, and how many times you’re willing to ferry mulch back and forth out of your car so you can go back for more. But it is an option! Alternatively, you can ask them to dump the whole load in front of your house, but at least you’ll know when and where it’s happening!
Trellises
Many plants need, or will appreciate, some kind of climbing structure. But trellises aren’t often cheap to find. To that, I say--we’ll create our own!

One popular option is to grow taller plants, and then plant climbing species are few weeks/years later so they’ll climb the taller plants! I’ve planted passion vine near a tree in my garden for it to climb, and I’ve seen people do similar concepts with sunflowers, corn, and other such plants! Sunflower stalks can provide support even after they’ve been cut back.
A combination of wood, some stakes, some nails, and some string can create a great frame trellis that can be used for beans, tomatoes, vines, etc--so I’m sure if could be put to good use for native climbers, especially since my dad’s used this structure for passion vines before. You may have to replace the string every year, but most of the time, the string is compostable anyways!
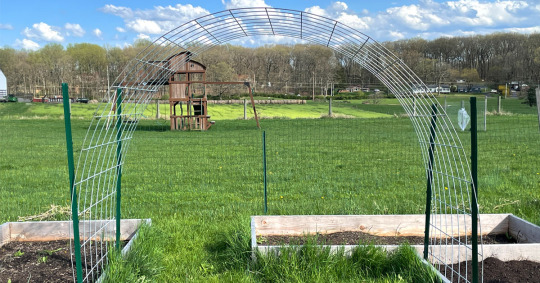
This may take a bit more setup and have a more upfront cost, but creating a trellis out of cattle panels makes a durable structure that can support all kinds of vining plants!
Of course, there’s always the easy alternative of simply letting plants climb along your fence! This is especially easy if you have a chain link fence, but wooden fences are plenty suitable for some species as well! I’ve seen passion vines do great growing along chain link fences as supports, and one of my favorite sights as a kid was always seeing bushels of trumpet vines growing up and over fences on the drive home.
Why are we worrying about trellises? Creatures are attracted to diverse landscapes with a variety of plants within them, so having a few climbers can be a great way to attract more wildlife! I know some plants in my area that pollinators are attracted to, or even rely on as host plants, are climbers that can get upwards of 15 feet tall, and will climb any surface you give them. A trellis provides you a great place to put extremely beneficial plants.
That's the end of this post! My next post is gonna be about how different 'kinds' of plants can all be beneficial in a biodiversity standpoint. Until then, I hope this advice was helpful! Feel free to reply with any questions, your success stories, or anything you think I may have forgotten to add in!
#biodiversity#solarpunk#gardening#outdoor gardening#composting#mulch#trellis#budget gardening#cheap gardening#ani rambles#out of queue#the biodiversity saga#i remember junior year of college me and my friends considered doing a cattle panel trellis#but then we couldn't figure out where to buy cattle panel#apparently the answer is 'tractor/farmer supply companies'#also so anyone reading these tags knows what took me 5+ years to learn#CATTLE PANEL DOESNT COME IN ROLLS IT COMES IN LENGTHS#all this time I was like 'man i wanna make a cattle panel trellis but it comes in like 40 foot lengths and i dont need that much'#and all my gardening homies were confused because theyve been getting it in lengths THIS WHOLE TIME#I WAS LOOKING AT FUCKIN ROLLED FENCING#i actually dont think any of the big box stores by me even fuckin sell cattle panel but thats beside the point#you can get it delivered though#(Delivered to the store for pickup i think)#someday i want a cattle panel trellis with like moonflowers or trumpet vine just a BURST of color and life
290 notes
·
View notes
Note
Hey! Are there any plants you can recommend for an apartment garden intended to produce food? This is my first apartment after living in the country my whole life, and food is very expensive, so I want to plant a little pot garden, but I'd love some suggestions on what to put in it because I have no experience for growing in such limited space. What do you think would be best for producing food, but also looking nice and not needing much space?
Plants that you can grow in a pot that will produce a lot of filler-food really fast (like, you can start harvesting within 2-3 weeks of sprouting [though I'd really reccomend starts/baby plants and not seeds this late in summer]):
Lettuce, kale, swiss chard, brocolini, broccoli, PEAS, Green Beans, radishes, zucchini and other summer squash. Use these to fill in meals/stretch out protiens/feel fuller/get more fiber in your diet. Not a lot of calories but the fiber and vitamins they have are good for you.
Plants you can grow in a pot that will produce a lot of flavors for you: Basil, thyme, rosemary, Parsley, sage, oregano, mint, marojam, bay laurel, and Dill. Nearly every fresh herb can be grown in a pot and while they don't make a lot of filler or calories, they do make what food you have taste a whole lot better.
Plants you can grow in a pot that take a lot longer to mature but will produce a TON of food all at once that can be frozen for later: Patio Tomatoes, winter squash, strawberries, carrots, POTATOES, garlic, onions, beets, beans you dry out for later like pinto and black beans. This will require storage space in your freezer or a cool dark place like a closet.
Not a Plant, but you can get grow kits and get a shitload of them really fast and grow them indoors: Mushrooms. Those mushroom kits WORK and will keep producing for a suprisngly long time.
CAVEATS:
I think all plants are pretty but I can't speak to what your apartment complex will or will not allow.
I also find tending the garden very relaxing so I think all plants are low-effort so don't take my word on what a normal amount of work is.
A lot of what you CAN grow will depend on how much sunlight and space you have, and how much soil you're willing/able to schlep up there, so you'd have to send me more precise specs on your space to get specific advice on what to plant, but think about
A) what you'll actually eat
B) look up the sunlight and space requirements of those crops
C) look into as many vertical growing options as possible tbh. Peas will grow on any trellis even just some sticks or string, herbs can be wall-mounted, and other plants can pe put in pots on risers to get as many plants into the sunlight you have.
If food stability is a concern for you PLEASE look up the location, hours and requirements of your local food bank. It's there for everyone who needs it, including you.
You can also see if your city has a crop share program where you can get produce from local/nearby farmers at a big discount compared to the store. goo for you, your wallet AND the enviornment.
#Tomato advice blog#apartment gardening won't bring you to self-sufficiency#but it CAN help a lot with your nutrition and budget
2K notes
·
View notes
Text
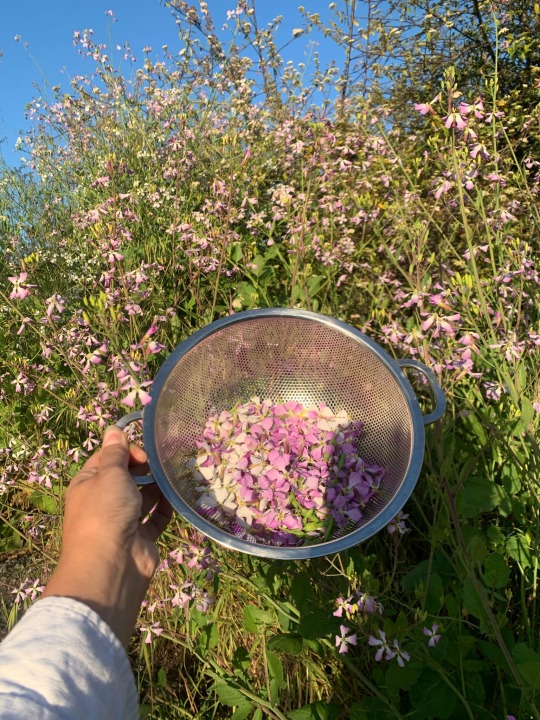
Garden is overrun with pioneering volunteer species and the soil is mostly clay, but I picked these (wild radish) for some backyard salad foraging.
Image description. A lightly tanned left hand in a white linen sleeve holds a metal colander one third full of white and pastel purple four petaled flowers and bright green seed pods. It is golden hour, and tall plants of the the flowers, wild radish, take up the majority of the frame around the colander. The top fifth of frame has cloudless blue sky.
#thefifthacre#gardening#garden#garden witch#witchcraft#green witch#jewish magic#jewitch#jewish homesteading#ecoconscious#environmental#environmentally friendly#budget#cost savings#planet savings#save the planet#save the environment#solar punk#invasive plants#eat your invasives#wild radish#zone 9#zone 9b#forage#foraging#california foraging#ghiblicore#cottagecore#thrifty#not actually cottagecore myself just poor and thrifty
27 notes
·
View notes
Text
No offence to them but I just don't understand "trendy" instagram knitters
#youtube autoplayed a vid from one of those girls and umm#she was knitting everything with the reccomended yarn#and complaining about the price and the like texture of the yarn and I was sitting there like 'does she know#'does she know she can sub yarns???'#like I get not being experienced and scared of all that#but i learned the fun way how to sub because i was a highschooler with no money#idk i guess ive been surrounded by wierdos who grow dye gardens#and knit elaborate cables and lace with handspun cobweb yarn#I also feel kinda bad being judgey because they are almost all beginners#but still I had the yarn brainrot from the beginning and#and the budget of high schooler lol not buying 150$ of alpaca yarn as a highschooler
6 notes
·
View notes
Text
LI detected

#prettiest boy ever#oh my gosh#romance club#rc#rc garden of eden#rc goe#rc seong hwa#seong hwa goe#romance club garden of eden#they spent their whole budget on this#didn't they?
12 notes
·
View notes
Text
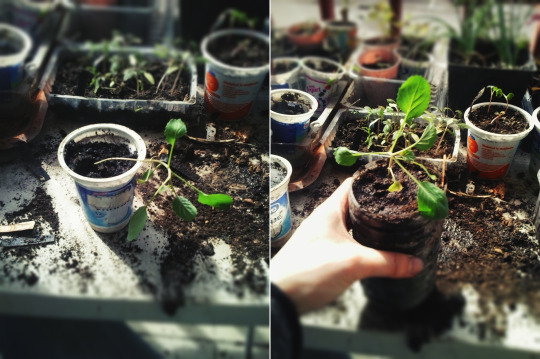
It's time to up-pot, move and save some little seedlings!
Most of my plants haven't grown big enough to out-grow their pots, but I've been noticing some problems caused by me, and caused by weather, so I figured I should fix it. I prepared a big bucket of soil, lots of cups and little pots, and it's a nice day out, so I get to do the messy work on my balcony.

This plant you see on the picture, is a dwarf tomato. They're a balcony variety, she won't ever be planted outside, and, she's just about to outgrow her pot. I don't want her roots to start circling this cup, so I'm moving her before she gets too big. I grew these for several years and the bigger container they have, the more tomatoes they produce. They give produce as early as late May, which I love about them. So! I'm up-potting her to this big plastic bucket:

This plastic cup is very pliable, so I'm taking the plant out by pushing with my finger on the bottom, and flipping it upside down, so the gravity helps me get the plant out. This plant is so small and vulnerable, it would be easy to cause damage if I were to pull on it, this way she is safe. As soon as she's out, I flip her around and place her in the bucket, already half-filled with soil. Then I just bury her roots in more soil, water her, and she's done!

So now I've taken this tomato out, I have a little cup, free for another plant! Next thing to tackle is this problem:
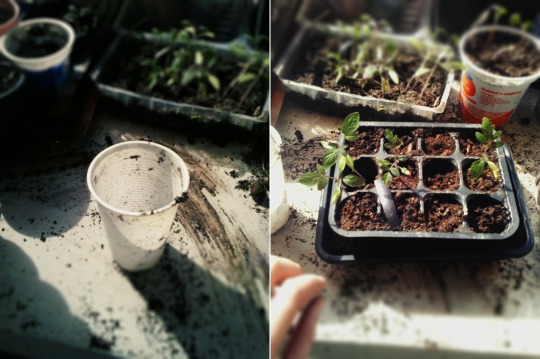
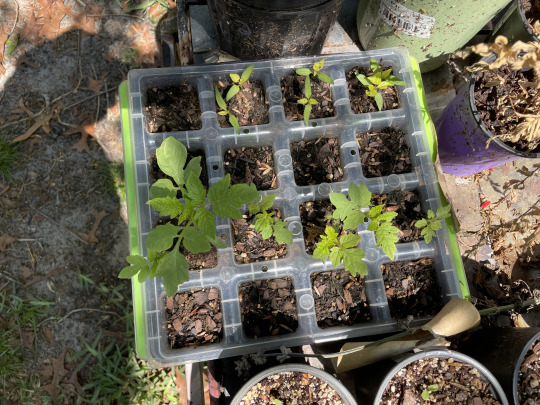
See this little plant container with 12 spaces? That thing is horrible, it was my first time using it, and I'm never gonna do it again. it's atrocious. Since the spaces with the soil are so small, it dries up insanely fast, and it's impossible to keep it watered. I found it completely dry several times, and some of the plants just died in it. The soil inside also gets super packed and plants have trouble pushing their roots in, look at this:

Even though it's such small amount of soil, the plant managed to overtake only half of it. SAD! But, it's going to be all good now, because I'm taking all of these plants out, and putting them in proper cups, where they'll be happy and healthy. You can see on the picture I'm putting these plants on the balcony floor, and the little tomato is now being bottom-watered. Bottom watering means you have a container with holes on the bottom, and you put it in a bigger container, full of water. That plastic food container is filled with water, and the soil and the roots are able to draw this water in, making the plant watered just the correct amount. I'll keep adding plants in there.
The next project is this kale that needs to be saved. What happened to it is this: I planted it early January, and then it was just, very cloudy, rainy and dark outside, for the entire week. This means the poor fella didn't manage to get enough sunlight to grow a good stem, and instead it grew leggy. Leggy plants are those end up arching too much and growing too long in order to get some sunlight, and as the result, the stem is weak, flimsy, breaks easily, and cannot hold the plant. That's exactly what this kale is doing:
See the first picture? Cannot hold the leaves up. I've seen several people save seedlings like that by planting them a little deeper, and having soil hold up the stem. I'm not sure if it will work with kale – it might, it might not, because stem isn't exactly supposed to be underground, it can grow sick. But it's worth trying out, I believe in you kale.
And now, for my own mistake – this container of tomatoes has been planted too shallow! I love shallow planting because it means the plants push their way out of the soil fast, but it can also mean that they can't gather enough purchase with their roots underground, and they end up falling over. This entire container fell over. Luckily, you can transplant a tomato as deep as you want. Tomatoes are special in this way; their stems will grow roots if in the contact with the soil. So If I plant them deeper, I will push them to create a better root system. This isn't applicable to other plants! Only tomato family does this. They're going to have a better time growing with only their leaves over the ground, like in the picture:

If you look at the second picture, you can see that I'm just compiling these plants on the floor, and I kept putting down new ones until I had about 20, at which point I have had to make another bucket of soil to keep going. I also ended up not having enough space in the kitchen for all of them, but I found a solution to it.
I have more light on the balcony currently, and some of these plants can withstand a freeze – kale, broccoli, cabbage. They'll be alright even if I leave them outside overnight. So I did a little moving around, and this is my current kitchen plant situation:

This picture is taken the next day, and all of the up-potted plants here have recovered from the ordeal, and are doing great :).
25 notes
·
View notes
Text


How the gentle wind
Beckons through the leaves
🎃🍂.
#over the garden wall#otgw wirt#otgw greg#autumnal#autumncore#cottagecore#fall#fallcore#fall vibes#Halloween#samhain#budget cosplay#otgw cosplay#over the garden wall cosplay#cosplay girls#cosplay#queer#aesthetic#dark academia#forestcore#woodland#cosy academia#cozy autumn#selfie#selfies#spooky season
7 notes
·
View notes
Text
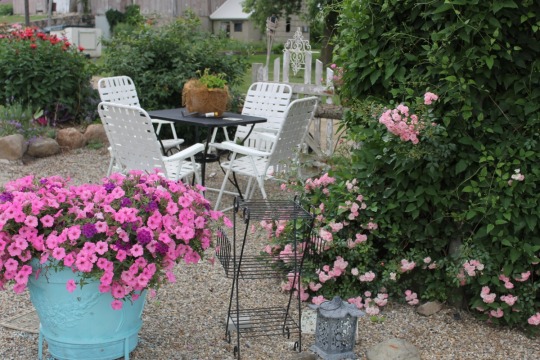
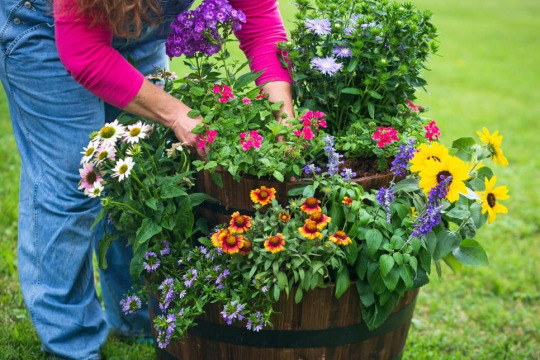
From Vintage Finds to Blooming Delights: Crafting Your Perfect Flea Market Garden
Today’s blog post will be the last, but certainly not the least in this months series on garden design and themes. I’ve saved this one for last, as it is my very favorite. I actually combine elements of both the cottage garden and flea market gardening, as I feel they go hand in hand. I love the free form these gardens offer, along with the whimsical elements I can include. I’m super excited to…
View On WordPress
#best flowers for flea market garden#flowers#garden design#Garden Junque#Gardening#gardening in a budget#How to create a flea market garden#organic gardening#what should I put in my flea market garden#where can I buy stuff for my flea market garden?#where can I find garden junque
2 notes
·
View notes
Text
Cheaply Starting Seeds
This is my fourth post in a series I’ll be making on how to increase biodiversity on a budget! I’m not an expert--just an enthusiast--but I hope something you find here helps!
Having a high-quality seed-starting setup can feel like an ultimate but distant dream. An entire shelf--an entire room, even, filled with grow lights and plant trays in the optimal setup to make tons of plants? Tons of garden tools, each with a diverse and dedicated purpose? That’s just not an option for some of us. But that doesn’t mean we can’t get started at a low cost!
Seed Starting Set-Ups
Speaking from a somewhat biased Floridian perspective, I’ve had great success starting seeds outside! My usual set-up is on a rarely-used outdoor patio table that’s moved to a sunny spot in the yard, but I’ve even grown seeds in solo cups on sidewalks, or directly in the ground, with great results!

Some seeds grow best when they go through a cold period before germinating, while other seeds aren’t affected much by it and just wait for warm weather. As such, a viable option is to sow your seeds in late fall, let winter roll by, and wait until the seeds sprout on their own come spring! I would try and mark off where you planted said seeds, so you don’t lose track of them and accidentally dig them up.

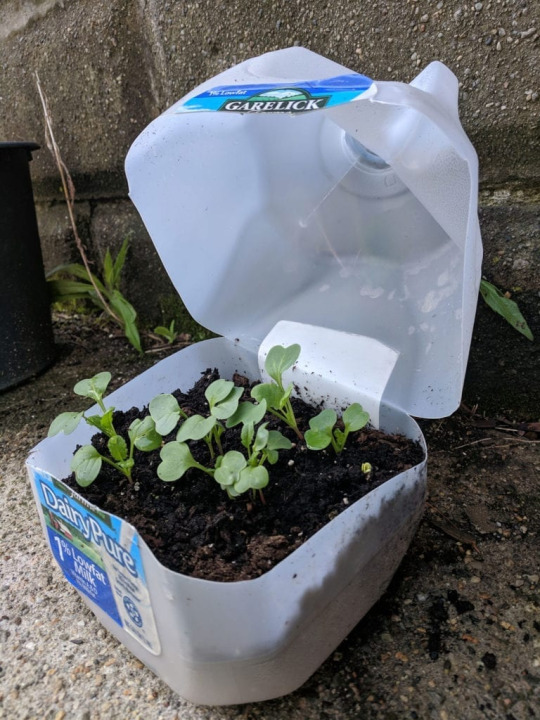
Alternatively, if you want to get started while it's cold outside, a popular option I've seen is to grow in milk jugs! There's a lot of different ways to do it--everyone has their preference--but if you're already drinking things like milk or juice or sweet tea, and you're going to get jugs at some point in time--why not use them for gardening?
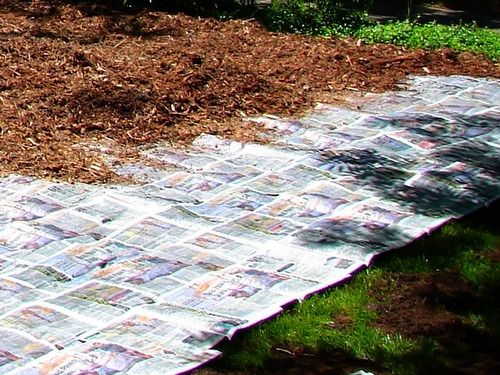
An easy way to clear up a section of lawn to create open gardening space is by using a sheet mulching or lasagna gardening method (though I like to call it the Cardboard Snuff-Out). Place cardboard or newspaper down in fall/winter to mark out where you want to garden. Layer compostable materials like grass clippings and wood chips on top of it, or potting soil/bagged compost. It’ll decompose over Winter into an organically rich bed that’ll have killed the grass and weeds underneath it. You don’t have to break out any tools and sweat over it come spring, and the cardboard itself will slowly decompose as well!
Though it's often recommended to plant things directly into the ground to decrease watering needs and increase nutritional independence, there’s plenty of reasons you may not be able to. Whether you’re renting, living in a place without a yard, or even just can’t or don’t want to break ground in a yard, you can still help biodiversity by growing in pots. Some plants have rather extensive root systems and aren’t well suited for pots, but there are still plenty of options available for plants that’ll boost biodiversity, be beautiful to look at, and grow just fine in pots! A recommendation is to get a larger pot, if you’re able, as it’ll hold onto more water and need watering less often. Not only are potted plants great for providing food for insects, but they can be shelter for other creatures too--there’s been a good few times I’ve moved a pot and found a frog or toad living underneath it.
If you don’t have room for pots on the ground, you could consider using hanging pots or window boxes! These can be great and easily-maintained options to provide food and habitat for insects and birds in an urban living situation like apartments or townhouses, but they can also be a fun way to add even more habitat to an already-robust home garden. You can even make an entire mini habitat in a window box or pot! I can personally say I’ve seen tons of pollinators visit my yearly hanging basket garden that consists of about five to seven plants, and I’ve always loved the idea of having a window box for blooms right out my window. Just make sure that it’s safe--make sure they’re securely fixed, and that whatever they’re hanging from can handle their weight when they’re freshly watered and loaded with plants.

If you want to start indoors, you don’t necessarily need grow lights or heat mats (though it will make things a bit easier.) I’ve successfully grown milkweed, peppers, tomatoes, zucchinis, and even sprouted lemon seeds in college dorm rooms, and kept tomato and pepper plants in a dorm room on a sunny windowsill. For the most part, you need a nice and sunny window, some kind of container, and a source of heat (in my case, I used anything from a space heater to the warmth of my laptop running nearby. If you don’t have any sunny windows, or enough windowsill space to start plants on, its possible to obtain cheaper grow lights. One year, my mom bought me some gooseneck grow lights that could clip onto things for cheap off of Amazon. (Fair warning, though, they did light up my entire room in purple. I lived alone that year (covid year, my roomies bailed), so it was fine, but it was kind of trippy,)

Another year, when I was in an apartment on my own, I bought a grow light modeled like a normal light bulb from the lightbulb aisle in Lowe’s and put it in my desk lamp. Growing seeds indoors can make them grow fast and leggy, so it’ll help if you can keep a desk fan on them so they focus on growing strong instead of tall and fast.
If you’re fortunate enough to have a friend with a nice set up, you could see if they’re willing to let you borrow some of their space to start your own plants as well! My set-up in college was by no means High Class, but I was still more than willing to start seeds for my friends who asked!
Containers for Seed Starting
So now that we’ve talked starting seeds indoors and out, we need to address what to start them in. It’s important that whatever you’re using has drainage holes, and be large enough to support your plant (starting something like milkweed or a squash in a tiny little pot won’t yield great results). Fortunately, there are options here!
If you’re looking to buy pots, Dollar Tree will sell some small plastic pots for cheap in the spring! They’re kind of thin, and won’t last forever, but they’re great for a few uses and don’t cost a lot of money. Something that’s a bit more pricey but are longer-lasting, in my experience, are the Burpee SuperSeed trays. They come in different sizes, but I’m fond of the 16-cell trays--they have silicone bottoms and are made of a nice solid plastic with a tray to hold water, so they hold up for a long time and are easy to clean and reuse!
Burpee seed tray, my beloved.
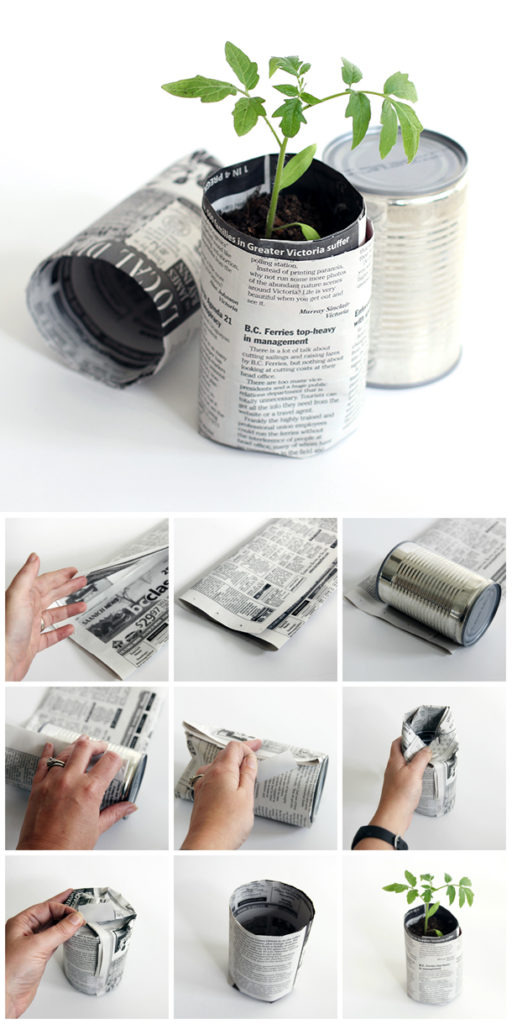
What’s better than a cheap pot? Free ones, and there’s plenty of options there! I’ve seen people use toilet paper or paper towel rolls as pots by folding the bottoms in and have it work well for them! I think this method would work best if you had some kind of tray to keep them moist, because mine dried out fast last time I tried this method. I’ve also seen people make pots out of newspaper with a few different methods, and the people who use this method love it--apparently, the roots pass through the paper easier and it decomposes faster when buried, so you can just transplant the whole pot and avoid any kind of transplanting shock. If you don’t have any newspaper on hand, you can likely ask your friends or neighbors!
I’ve gotten lots of mileage from reusing old containers by poking a few holes in the bottom with knives or scissors--just be careful while you’re doing it! I, personally, am more likely to use an already-used solo cup for it--they’re a nice size, so they hold a good amount of soil and moisture and give the seedling a good amount of root space. I tend to write the plant information on the side of the cup in sharpie marker, or on an index card in pen. I’ve also heard of people making use of egg cartons, fruit containers, yogurt cups, milk cartons, soda bottles--the more you start thinking about what you could easily poke a hole in, the more options start coming around!
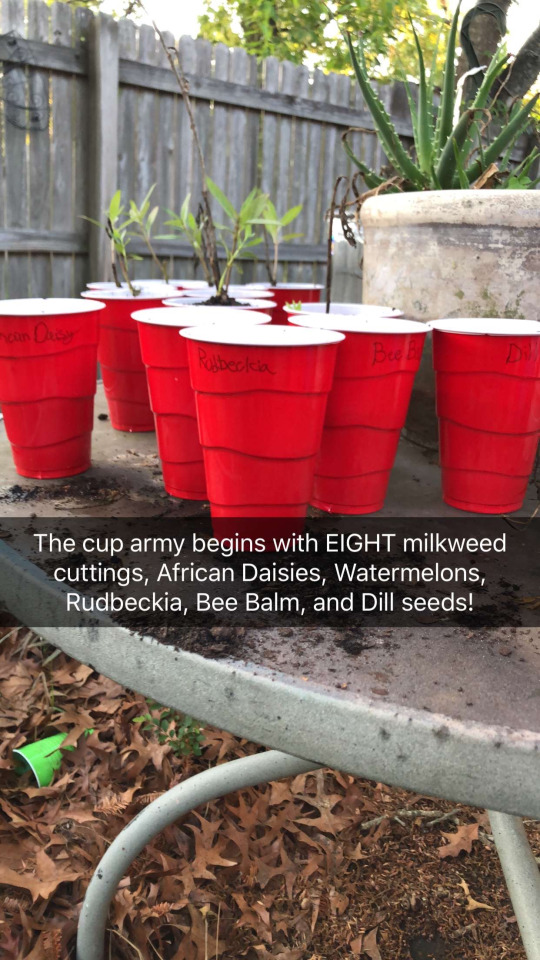
This photo may be from 2018, but I'll still regularly reuse cups like this! They're also great for cuttings!
As you start planning to move your seedlings into the ground and preparing planting sites, you’ll likely need a few tools to do it! How do you get these? You may be able to borrow some tools from a neighbor! As long as you make sure to return them in good condition, depending on how friendly your neighbors are, they might be totally fine with you borrowing their tools for awhile. If you don’t want to take that route, there may be a tool library you can borrow from, or a mutual aid group that can loan you tools for awhile. Either way, borrowing tools is cheaper than buying them--though, if you do have to buy tools, cheap hand-tools from Walmart or the dollar store work just fine. They’ll even last a good while if they’re taken care of when not in use! I've even seen places like Ross sell some tools and pots in spring!
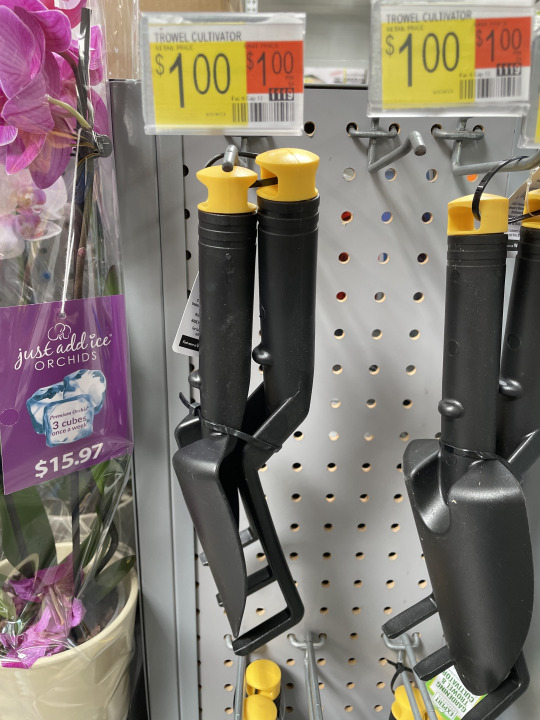
Spotted in a Walmart gardening section by the registers, 2023.
Of course, your mileage may vary with these. I genuinely cannot think of the last time my house got a newspaper, and as I've mentioned I don't have to worry about snow. Similarly, maybe you don't use plastic cups when you can help it, or don't have a particular affinity for eggs and yogurt. Maybe there isn't a tool library in your area--I sure don't know if there is in mine--but it could still be worth poking around and asking a neighbor!
That's the end of this post! My next post is gonna be about ways to support your plants for cheap--we're gonna be talking compost, mulch, and trellises. Until then, I hope this advice was helpful! Feel free to reply with any questions, your success stories, or anything you think I may have forgotten to add in!
#biodiversity#solarpunk#gardening#outdoor gardening#growing from seed#budget gardening#cheap gardening#indoor gardening#ani rambles#out of queue#the biodiversity saga#I can make a post later about how I prepare solo cups for being used as pots if yall want#I've found its safest to just use a nice pair of scissors and keep the cup upside-down on the table while I cut into the bottom#and when i say 'take care of the tools when not in use' i mean 'dont be me and leave a cheap shovel from dollar tree out in the rain'#it had a wooden handle and it basically just like. rotted. fell apart in my hand when I picked it up#generally keeping tools in the garage will also help them not rust as fast too#but if you're gonna leave them outside at least put them in shade#the number of times i have lost feeling in my hands because i picked up a hoe that was laying in the sun and fuckin SCALED my palms#its not fun. dont do it. maybe its a Floridian problem but still#if you read all these tags. uh. shovel emoji. idk. sorry dude.
216 notes
·
View notes
Text
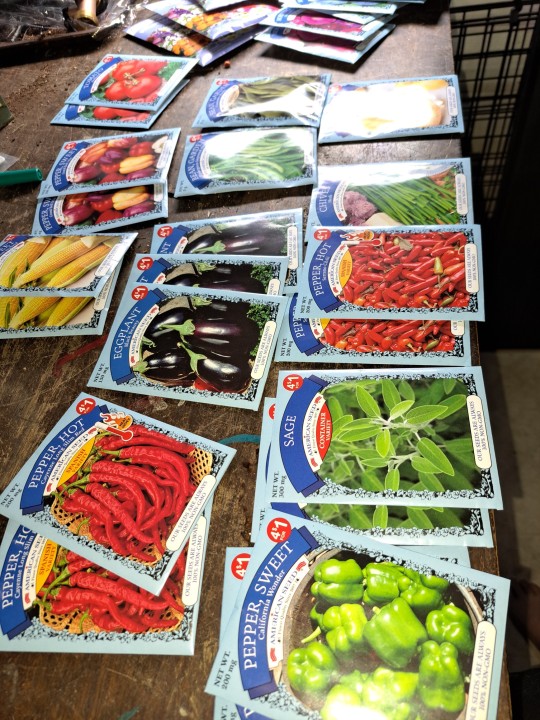
Spent 14$ at the dollar store and got all these seeds. Idk who needs to hear this, but dollarstore seeds grow almost better than the more pricey brands.
#urban gardening#budget#budget gardening#container gardening#urban farming#green thumb#self sustainability#growing stuff#gardenblr#seratonin#gardeners on tumblr#gardencore#dollar store#diy#fresh vegetables#peppers out the ass
9 notes
·
View notes
Text
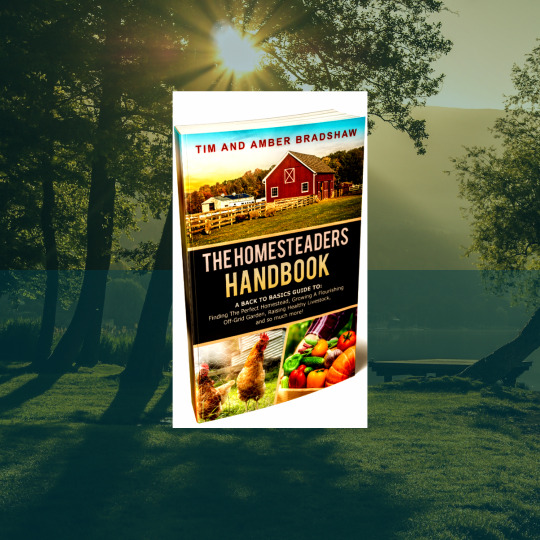
The Homesteaders Handbook by Tim And Amber Bradshaw
DONATE: http://www.cash.app/$internetbizlife
{Affiliate Disclaimer}: This blog post may contain affiliate links. This means that if you click on a link and sign up to a platform, or make a purchase, I may receive an incentive, or commission, at no additional cost to you. However, I only recommend products or services that I believe in and that I think would be valuable to my…
View On WordPress
#ass seen on tv#budgeting tips#building off the grid#diy#gardening#handbook#healthy eatingy#homestead#homesteaders handbook#homesteading#homesteading 101#homesteading documentary#homesteading family#homesteading for beginners#homesteading off the grid#Internet Biz Life#internet biz life online#off grid living#organic gardening#self sufficiency#sustainable living#The Homesteaders Handbook by Tim And Amber Bradshaw#the smoky mountain homestead
2 notes
·
View notes
Text
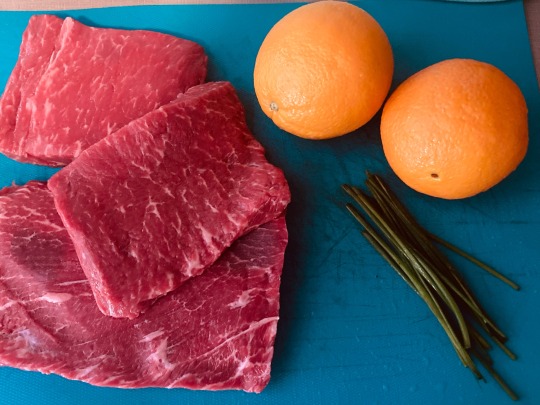
Prepping dinner for tonight, flat iron steaks, fresh chives and orange juice for an experimental marinade. I’ll update with how it ends up!
#steaks#cooking#cooking with moth#plagued moth#gore#recipes#cheap food#budget recipes#cook#shock video#scary#metal#underground#rap#trap#chives#fresh#garden#dinner#meal prep
15 notes
·
View notes
Text
one of the courses i'm taking is one i really feared would turn into a 'you have to actually carry out a community group program in real life'. and my prediction turned out to correct and I now I just don't like it.... but i can't quit due to graduation. so it's like. I have no other choice but to push through.
#shallow rambles#shallow vents#queue awaits you at the garden of madness#i just don't like working with people for projects like this. i'm not a great community person if that makes sense#when literally my WHOLE LIFE is just occupied with school and it just kills any opportunity to be creative#or do something fun#thoughts on queue#OBVIOUSLY community programs MATTER. but like in this context this is more trivial.#i just don't like planning stuff like this especially if later on there will be a budget + other shit
5 notes
·
View notes
Text
Tips for homestead living
Homesteading is a lifestyle focused on self-sufficiency and self-reliance. Some tips for living a homesteading lifestyle include:
Start small and build gradually. You can only overhaul your entire lifestyle on time. Start by growing vegetables in a small garden or keeping a few chickens for eggs.
Learn new skills. Homesteading requires a wide range of skills, from gardening and animal husbandry to carpentry and cooking. Consider taking classes or workshops to learn new skills to help you on your homestead.
Could you develop a plan? Before you start making any major changes to your lifestyle, it's essential to have a plan in place. This should include a budget, a list of goals, and a timeline for achieving them.
Be self-sufficient. Homesteading is all about being self-sufficient and relying on your own resources. This means growing your own food, generating energy, and producing your own goods and services.
I want you to please be prepared for challenges. Homesteading is not always easy, and there will be challenges. Be ready for these challenges by having a backup plan and being willing to adapt and adjust as needed.
Connect with other homesteaders. Homesteading can be a lonely lifestyle if you try to do it all on your own. Consider joining a homesteading community or association to connect with other like-minded individuals who can provide support, advice, and friendship.
#Start small and build gradually. You don't need to overhaul your entire lifestyle all at once. Start by growing a few vegetables in a small#or keeping a few chickens for eggs.#Learn new skills. Homesteading requires a wide range of skills#from gardening and animal husbandry to carpentry and cooking. Consider taking classes or workshops to learn new skills that will help you o#Develop a plan. Before you start making any major changes to your lifestyle#it's important to have a plan in place. This should include a budget#a list of goals#and a timeline for achieving them.#Be self-sufficient. Homesteading is all about being self-sufficient and relying on your own resources. This means growing your own food#generating your own energy#and producing your own goods and services.#Be prepared for challenges. Homesteading is not always easy#and there will be challenges along the way. Be prepared for these challenges by having a backup plan#and by being willing to adapt and adjust as needed.#advice#and friendship.#farm living#gardening#farm aesthetic#homesteading#vegetable garden
21 notes
·
View notes
Text
unrelated to everything but who tha fuck are u
#jazzrejuv#i figured that team xen just had Entire Royal Castle building in the budget but it hink they just like found it#finders keeprs and all that#maybe thats anathea? points at statue?#lived in the castle but her fuckass family was NOT cute.#so she had her little shack hidden in the garden for a moments respite maybe..........#thinking with my brain rn
3 notes
·
View notes
Text
Beautifully happy, healthy and sustainable 🌲🌳🤗
Good evening happy, healthy life seekers 🤗
There's no doubt, here at TOFF, our happy place is always outdoors.....we live in military cargo shorts and T's in Spring/Summer and military cargo pants and wool jumpers in Autumn/Winter merrily working and creating outside; turning our organic botanical day dreams into healthy food, animal shelter, flower power and natural products 😊
Budgets & Life Changes 💷🤔
Throughout the last few very turbulent years many of us have undergone huge, transformational life changes; personal relationships, work, homes, families, continents......and many find themselves in a position of 'starting over', a fresh, a new, in order to create a truly wonderful, happy and healthy new future.
With this in mind, budgets have become very constrained and some stress levels may have risen.
To calm our minds, bodies and to help with our financial pockets lifestyle changes can be made on a budget, always with health and happiness in mind 🤗
Here at TOFF our ethos is organic and this embodies; reuse, mend, recycle, rejuvenate, repurpose, relive!
Millions discard items considered no longer of use, this is great, we should all practice this..... a minimalist, clean, healthy home, man cave, sheshed, workshop which is organised and free of clutter actually helps those stress levels come tumbling down 🤗🎉🙌
It also presents an opportunity to acquire items for free or only very few pounds....... don't be afraid to barter or ask if the seller could gift them to you / reduce their price......you'd be surprised 🎉
Repurpose, Rejuvenate, Relive ,🤗
TOFF tips :-
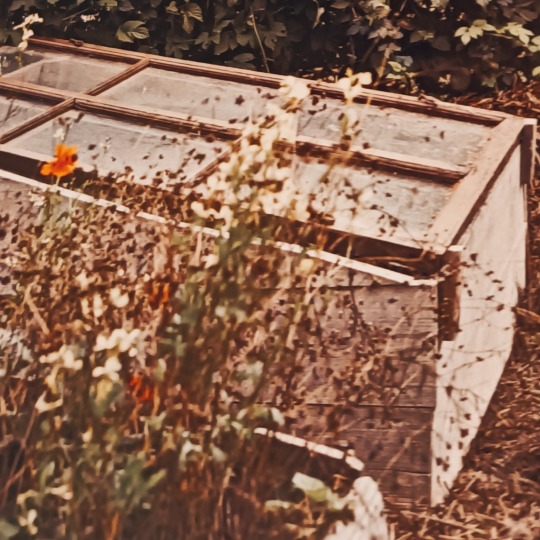
Old timber windows ~ often disused, left in a skip, at the side of the road or advertised on free cycle sites!
These make a great cold frame for growing your lovely organic foods ~ a complimentary mini greenhouse 🎉🥕
Very often soil and timber are also given away for free.
Your only financial outlay maybe a few screws, hinges and organic seeds then hey presto a weekend project will yield a happier you and food too 🥕🌿🎉

Cardboard egg cartons, toilet paper rolls, kitchen paper rolls ~ ideal for growing seeds 🌿
Fill the rolls with compost and place in the egg carton,
Sow the seeds directly into each roll, water and allow to germinate,
Ideally maintain a temperature of 18 degrees Celsius/ 64 degrees Fahrenheit,
As soon as the seedlings have germinated and are ready to plant out, the rolls can be planted directly into the soil and they will biodegrade, the carton can also be either reused or planted into the soil too 🎉🌿🥕🍒🍓
Go natural ~ make your own 🌴🪥😬
TOFF tips:-
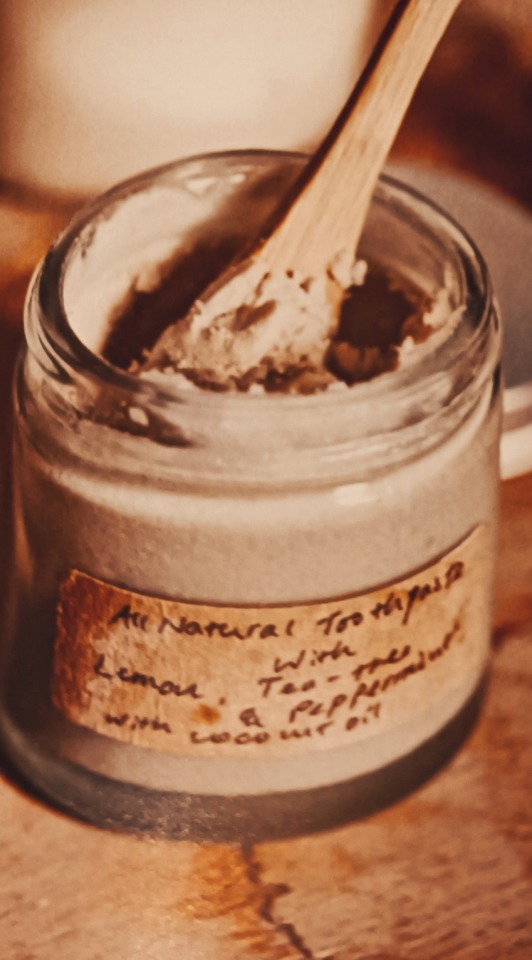
Toothpaste ~
2 tablespoons of coconut oil
1 tablespoon of baking soda
6 drops of peppermint oil
6 drops of lemon oil
6 drops of teatree oil
Mix well, into a paste and place in a recycled, steralised dry jar with a lid 🙌🪥😬
Deodorant ~
500 ml bicarbonate of soda
500 ml potato flour / cornflour
500ml coconut oil
5-10 drops of your favourite essential oil......our favourite is Jasmine 🌸
Mix all the ingredients together, if the coconut oil is hard, melt it over a waterbath. Place in a recycled steralised jar with a lid, apply using a reusable cloth cotton pad or reusable spatula 🥥 🌸
We love sharing our tips and recipes with you, as always, if you have any top tips or questions we would love to hear from you 🤗 feel free to email us :- [email protected]
Take great care of you, don't be to hard on yourself or others, kindness always happy healthy life seekers 🤗
Much love,
TOFF x
🌳🌿🌲🌳🌿🌲🌳🌿🌲🌳🌿🌲🌳🌿🌲🌳🌿
#organic#health#healthy#deodrant#toothpaste#greenhouse#food#vegetable gardening#budget#happiness#natural
2 notes
·
View notes
Last Seen Blogs

elveszett-koltono
néma szavak

dullahanart
Dullahan✎

danversiism
THE STAR.

imageinsanity
Insane Images

rvnclwsews
Just a reading, writing, sewing, renfaire nerd