#1) I'm playing around with photoshop and this looks good now but I'd like to know if the quality is going to die once I post it or not
Photo

THE MITCHELLS vs THE MACHINES (2021) dir. MIKE RIANDA & JEFF ROWE
#The Mitchells vs The Machines#filmedit#filmgifs#animationedit#junkfooddaily#filmtvedit#filmtvdaily#filmtvcentral#cinematv#cinemapix#fyeahmovies#fyeahmotionpictures#tvcinemagifs#mine*#mygifs#movies*#1) I'm playing around with photoshop and this looks good now but I'd like to know if the quality is going to die once I post it or not#2) teacher nation represent; the way I lost it when this happened hahahaha#I'm kind of worried about the quality because these gifs are heavy I wasn't expecting that#I deleted a lot of frames and still#but ok here we go *fingers crossed*
2K notes
·
View notes
Note
Hi, you are more than welcome to ignore especially if you have answered before and I missed it/it's elsewhere on your blog but can I please just ask how you get your CAS photos to look so incredibly clean? Especially around the edges, they're so smooth it's incredible. Thank you in advance, I really appreciate it! You inspire me so much tbh, everything you post is so beautiful. (Also also also the eyebags you released recently are my new gold standard and I use them for everything now tysm for sharing them) 🖤
thank you!
ok so here are a few tips, you don’t need to follow all of them, but if you like exactly my cas style, maybe some of them will help
1. edge smoothing. sorry for being obvious, but use either in-game anti-aliasing, or a smaa shader if you’re a reshade/gshade user, or you’ll get a pixelated staircase for the edges that will be hard to fix. if your PC doesn’t handle high graphics well and you play without edge smoothing, you can toggle it on temporarily just for taking a few good cas pictures and then turn it back off.
2. use MXAO. if you use reshades, use mxao shader for pictures, it's really a life changer. though i don't use it during the regular gameplay and only turn it on when i take pictures, because moving a lot with it is a visual overload for me.
3. but don’t overdo it with MXAO. seriously, don’t go all out with mxao. for a cleaner look shadows need to be delicate, just to overline shapes and give your sim more dimension. every time i tweaked my reshade presets, i made mxao even more thin and gentle and realized that it only got better.
4. background makes a huge difference. solid colors. in my personal opinion, grey gives the "cleanest" look (i said while still using my old dirty yellowish that i'm too lazy to find a replacement for). also, if i want to use black or white background, i make it a little darker than white and a little lighter than black, they look pretty much the same but will attack your eyes less (especially the white one).
5. CAS lighting makes a huge difference. maxis light isn't that bad, but cc lighting definitely give you more clean, crisp image. my personal favorite neutral one that i use by default is v2 by helgatisha. sometimes i use lightings with side highlights for more “rendered” look, but they aren’t always comfortable for everyday use and i only use them for specific pictures and then get back to my default neutral one.
6. shadow overlays. i mean cc that imitates shadows on sim's face, it gives sim's face so much dimension. there are spotlight v1 and v2 by simandy and lighting overlay v1 and v2 by joshseoh. i'd say josh's overlays are for fancy portrait pictures (they imitate a very strong light source from different angles, cool for sim photographers), and simandy's are more neutral. personally, i only use v2 by simandy, it's my holy grail and i don't take sim's pictures without it.
7. SRWE. it's a program that emulates having a bigger display resolution than your monitor can afford, meaning much better screenshot quality and cleanliness for small details. srwe can be a bit of a hassle to use for a lot of pics and most of the time i’m too lazy to use it and just take my regular small pixelated screenshots, but sometimes i want just one, but extra clean picture.
8. Topaz Clean 3 (photoshop). i don't usually edit my pictures and just drop them like whatever, mostly because i can't, but i make them sharper and cleaner with a gentle touch of topaz on very low strength.
36 notes
·
View notes
Note
hii, megan! I hope everything is going well for you. I was wondering if you'd be willing to share how you created the gifs and images overlay effect in this /post/727210103698259968/scott-pilgrim-2010-lgbtqcreators-bingo pretty set? Have a nice day.
I will do my best!
First and foremost shout out to @nelsonnicks Norah whose beautiful gif set here inspired me!
In order to make this as succinct but also thorough as possible, there are some assumptions this tutorial makes:
We are working in photoshop
You know how to make a gif using photoshop
You know how to use the timeline feature to make/edit gifs
Okay let's learn how to make this gif:

(Due to Tumblr's image number limitations, there is a PART TWO linked where I add that "item" and gif, which you can find by clicking this entire sentence.)
STEP ONE: The Image Overlay
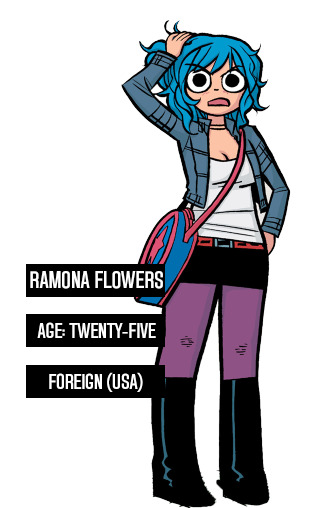
Pick your image! Here's the one I've picked, I cropped a page of the graphic novel:

From there, I'm going to click on that magic wand tool:

And select subject (crudely circled for emphasis)

If it's not perfect, you can either use the quick selection tool to refine the selection before or continue on with these steps and use the eraser later. I do both, but it's up to you.
Now I have a lasso around the subject, and I'll click that "Select and Mask" button next to "Select Subject"
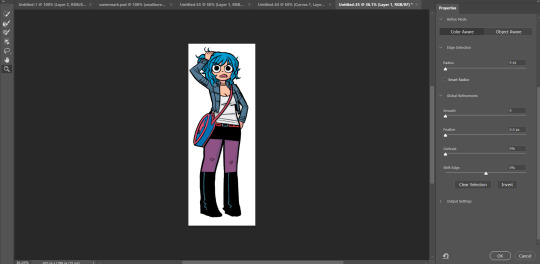
Now I can see what my lasso'd image looks like against a white background, and I see that it's pretty good, nothing I can't fix with an eraser if I really want to later.
If the image looks rougher than you were expecting, use the SMOOTH option and play around with that slider.
If it looks a bit more smooth than you wanted (not clear defined lines where you were aiming for clear defined lines) use the CONTRAST option and play with that.
And if you wanted a little more or less around the edges, you can use the SHIFT EDGE tool to grab like 1px-ish of additional space.
Anyway, I like what I've got, so I am gonna CLICK OK
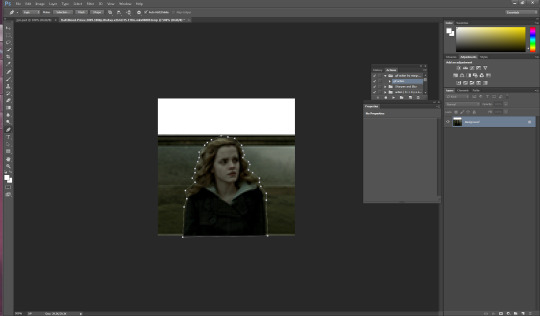
And I'll either cut or copy it onto a new file, and throw away my scraps.
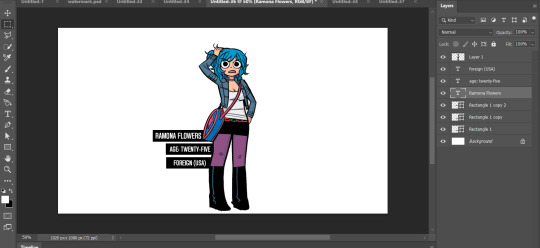
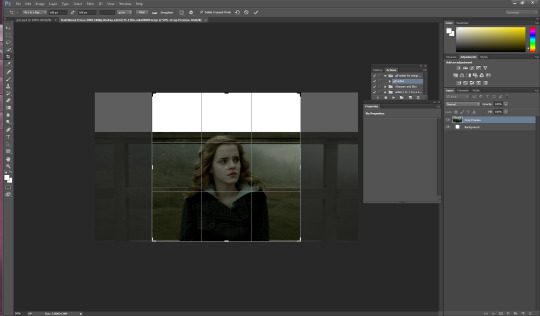
Now it's time to add my character details! I'll use the same format I did for the original set here, and create 3 equal-sized rectangles using this lovely shape tool tool:

So my working file now looks like this:

I move the rectangles closer, I'll want them behind the image of Ramona after but here's just what it looks like while I'm adjusting them.

Then I add the text:
Now, it looks like when I put the bars behind her it'll cut off her name! I don't want that, so I'll adjust the side of the bar for her name and scoot it over....

Nice!
Now I'll adjust those layers to be closer together and behind Ramona...
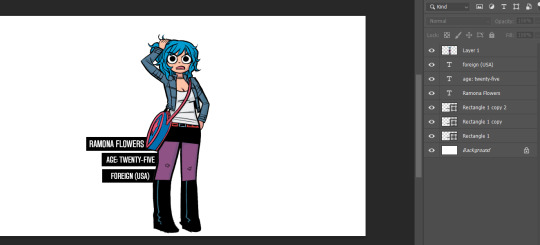
And this is what my screen looks like now!
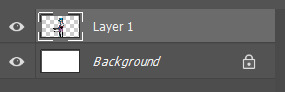
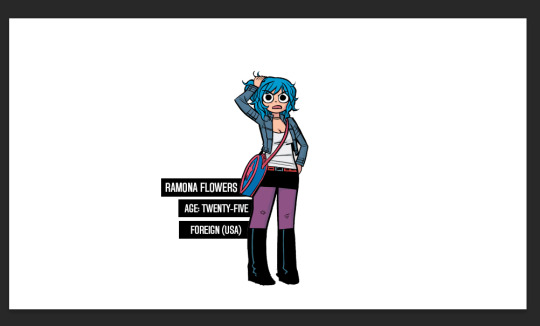
It looks how I want it, so now I'm gonna merge all of the layers EXCEPT the background layer. This makes it so the part that's merged has a transparent background.
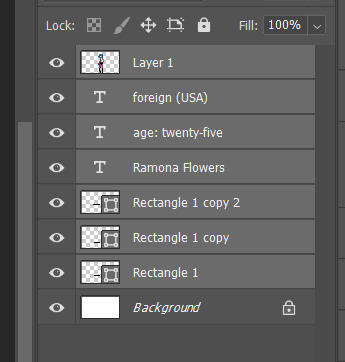
Highlight the layers, right click, and find the "Merge Layers" option
And now it looks like this:
Step one COMPLETE. Great job. Have you been drinking water? It helps you think clearer. Or something.
STEP TWO: Make the gif you want. Sorry I'm not doing this step-by-step it would be so long I'm sorry!!!
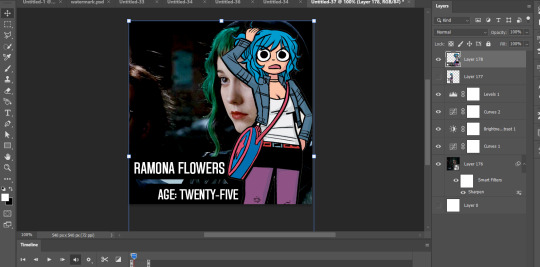
STEP THREE: Put Ramona on the gif!
So I just use the selection tool and make a square around my bestie Ramona here to create this:

And then paste her right on top of my gif here:
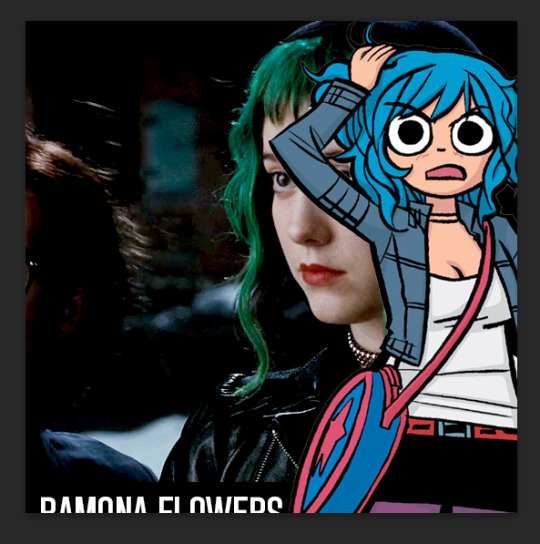
Woah! She's ginormous!
Let's resize her by hitting CTRL+T....
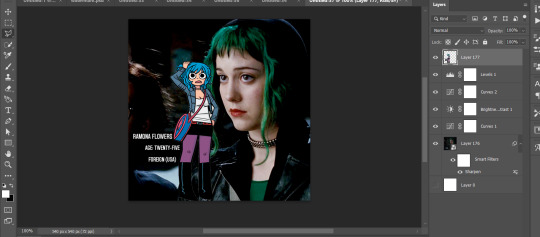
This is where we get a little creative. Personally? I think the font is legible, but doesn't look nice now that I've resized it. So I'm going to back to the original file and UNDO my last action (merging the files):
And hit CTRL + T on the Ramona layer (Layer 1 pictured) and adjust her size:
Time to merge these layers again, and redo the process:
MEGAN SHE'S LARGE AGAIN! I know, I'd rather work with big files I have to make smaller than small files I have to make bigger. Sue me.
Resize the layer, make any adjustments to the gif you have under it in terms of placement/size:
And WHEW we got this part done.
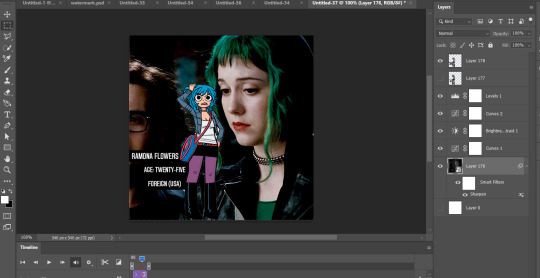
STEP FOUR: Add color overlay
I'm gonna make her color overlay blue like her cartoon hair, so I'll eyedrop tool her hair:
Go to Layer:

Add new, and then using a regular brush at like 5000px just click onto that new layer, and...
Bump that layer under your Ramona cut-out,

Go back to the layer drop-down menu, and select Blending options...
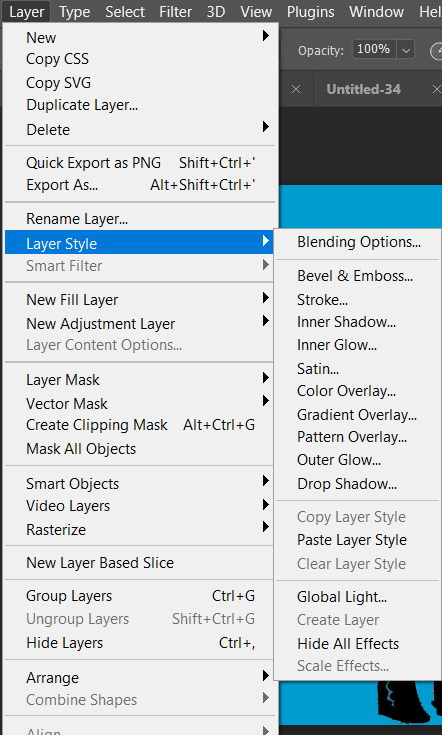
And this little menu will pop up:
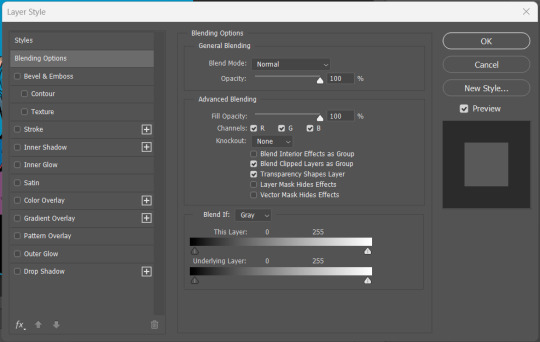
MAKE SURE YOU HAVE THE PROPER LAYER SELECTED FOR THIS. Otherwise you're going to be very confused.
See where it says "Blend Mode" and it has a drop down under normal? For these purposes, I'm gonna use the drop down and select COLOR:
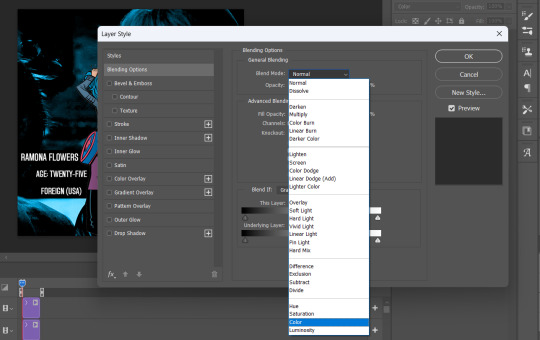
Now you can see that all-blue layer in the background now is showing the original gif behind it, but you know your original gif? "I know of it." It's all blueee. /ref
This is what it should look like:
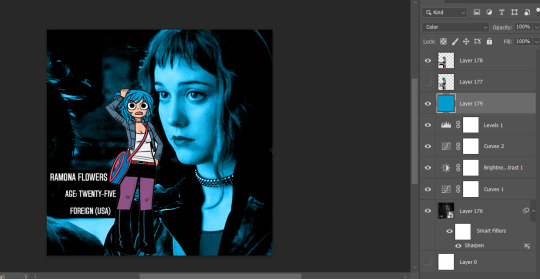
Before I go any further, I'm going to check my timeline to make sure this is covering the WHOLE duration of the gif:

It does, so let's drag that bar on the right to line up with the end of the gif:
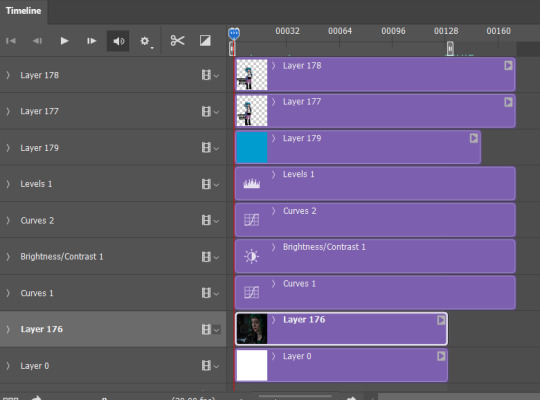
All fixed!
So now we've got this:

Oh man! See those white spaces between her arms? I'm gonna go back and fix those now, fortunately I can edit it directly on the full file itself, by just editing that layer.
Using my magic wand tool, I'm selecting those white spaces between her arms and her jacket and deleting them-
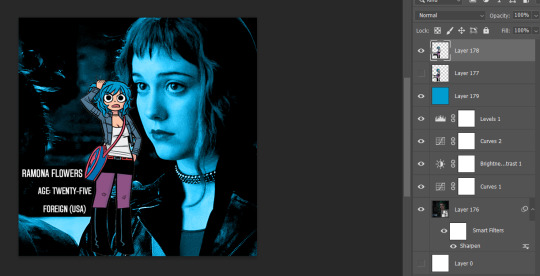
She's not perfect but you can always be nit-picky and zoom in really close and refine with the eraser.
PART TWO
#answered#Anonymous#usergif#userairi#usernorah#userbarrow#userhallie#usercats#tuserheidi#tutorial#gresource#gif tutorial#pscentral
45 notes
·
View notes
Text
Graphics tutorial requested by anonymous
All made with adobe photoshop 2023 (you can find free downloads of cracked versions on here occasionally, photopea.com is also good I've heard) I'm assuming basic knowledge of photoshop/similar editing platforms and their tools, but you can always message me or comment if you are confused about anything!
Also, I used keyboard shortcuts sometimes to change the size of a brush or toggle the brush options, I'm not going to annotate this because it's a lot but here is a resource for basic photoshop keyboard shortcuts
Firstly, the sizing of your edit matters! Max sizing for best quality on Tumblr is 1280 x 1920. If you want to put to put two images next to each other sizing should be 640 x 960.
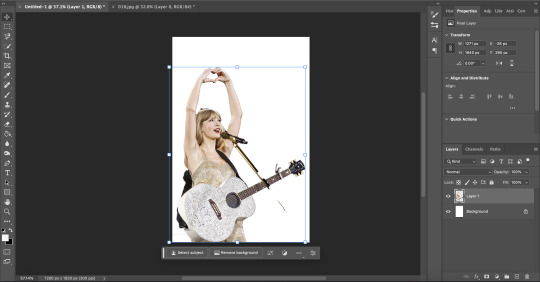
Next, always try to find the highest quality picture of whatever you're using. Good resources include taylorpictures.net, 4k Taylor Swift, and if I can't find them here I do a google image search of my photo to see if any other websites have a bigger/hq file.
This video is a couple clips I screen recorded for you to see my process and demonstrate a few different tools I use regularly. I added timestamps for you to follow along as you read the rest of this.
Here's a photo of my workspace I am working with and what I will do first is cut out Taylor from this photo and move her to my correctly sized canvas. There are multiple ways to cut out an image in photoshop, the easiest I've found is the select subject function and using the quick selection tool (see toolbar beneath the photo). Other tools include the magic wand tool, lasso tool, and quick selection tool which I will show later.
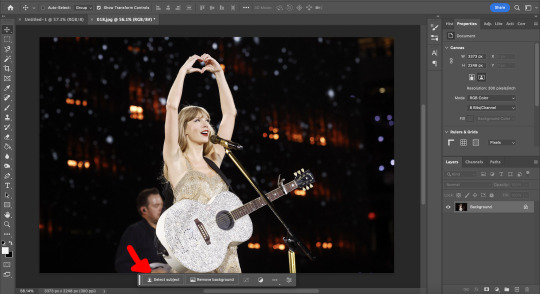
Now you will see that my selection isn't perfect, so I will use the quick selection tool to fix a few areas that I'd like to manually select/correct. This isn't totally necessary at this stage as you can always perfect your cutout in the next few steps, but it does help save some time.
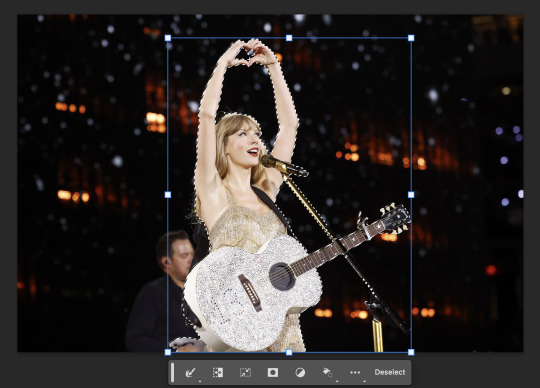
This is where I'll use the quick selection tool to either subtract or add to my selection. There are keyboard shortcuts to toggle between + and - to make this quicker.
See my screen recording of the process from 0:00-1:07
Now that we have our image selected and cut out, I copy and paste it to my canvas I want to work with (size 1280 x 1920) and this is what I've got:
As you can see there's a few spots that need cleaning up in order to make our cutout perfect. You can do this with the eraser tool, magic wand, quick selection, or lasso tool.
See my screen recording of the process from: 1:08-3:50
Now that we're happy with our cutout, we can play around with it in any ways we want! Typically you're gonna do things like change the background color/texture, add elements with the square/circle tool to create what you're looking for, overlay elements and/or textures, and finally recolor it to your preferences.
This part is where you can try new techniques and play around to find what you like. I recorded some of my process of playing with different ideas and elements until I got to something I was happy with! The video explains the tools I was using as well
See my screen recording of the process from: 3:51 - the end
I hope this helps you with creating graphics in the future! The fun thing about photoshop is there are multiple ways to get what you want done. I showed you my way but there's plenty of other techniques and methods out there to try if you're unable to achieve what you want!
Best of luck and feel free to reach out to me if you are struggling/have questions! <3
#Tessa talks#requested#my tutorials#this took forever pls share!!!#photoshop tutorial#graphics tutorial#photoshop
32 notes
·
View notes
Text
lovely anons have been requesting a gif tutorial, and while there's plenty photoshop ones out there I think there's only a couple photopea ones (if you dont know photo pea is like an internet photoshop basically) so I thought I'd make a little tutorial on how I do my gifs!
first you're gonna want to use any gif making platform to actually turn your video clip into a gif. I personally use giphy but I know there's a bunch of other platforms for this. then you're just going to open the gif in photo pea either by clicking "open from computer" on the home page or dragging it in from finder (Mac) or files.
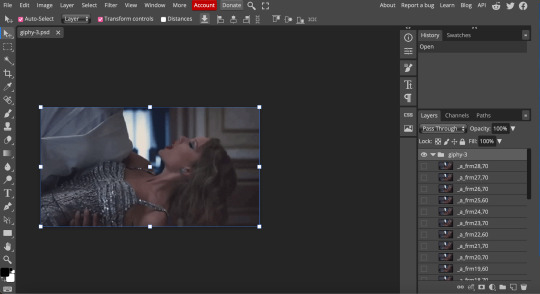
IF YOU'RE MAKING A GIFSET: the first thing I do is make sure all of my gifs are the same number of frames. its important to do this if you want all of your gifs to restart at the same time! to do this I just go to the side where all the frames are listed - this one has 29 frames (note: it says 28 on the top frame, but the very first frame is listed as 0, so always add 1 to the top number to know now many frames there are). what I do is find the gif with the least amount of frames and then make all the gifs the same number - depending on what part of the gif I want to keep/delete I'll delete frames from the beginning, end, or both which usually requires some basic math
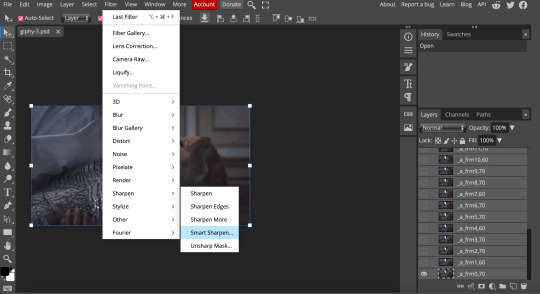
next, I click on the top frame, press shift, and then press on the bottom frame to select all (unfortunately there's no keyboard shortcut for this I don't think). then I'll click filter -> sharpen -> smart sharpen that way I can freely customize the sharpness of each gif depending on it's original quality. usually I do 200% at 0.5 pixels but I'll adjust if necessary.
now comes the actual coloring of the gif! all of these will be adjustment layers (layer -> new adjustment layer).
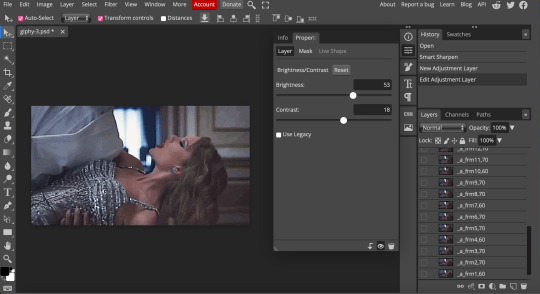
first I'll select the brightness/contrast layer and play around with those settings until it looks good to me.
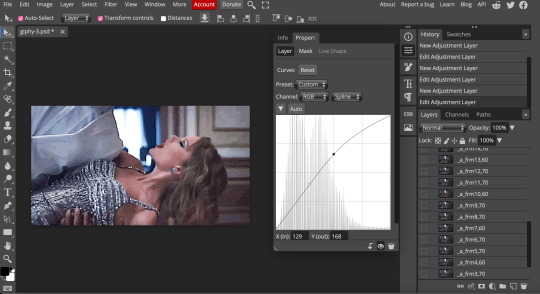
next, I'll play around with the levels and curves layers until it looks how I want it.

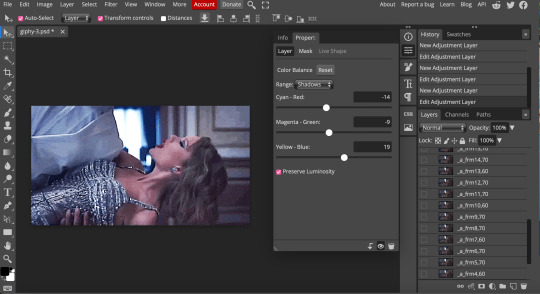
sometimes I'll stop here if it looks good, sometimes I'll play around with the saturation adjustment layer, or in this case I'll edit the color balance to deepen some of the shades that aren't popping out how I want.
IF YOU'RE MAKING A GIFSET: the easiest thing I've figured out for coloring multiple gifs to save time is duplicating these adjustment layers to each gif in the set (layer -> duplicate layer into; it'll prompt you to select the psd you want to add the layers to). when I do this I turn off the visibility for each one and one by one turn them back on (starting with brightness/contrast) and adjust them if necessary.
if I'm not adding text this is where I'll end, but sometimes I like to add texts to more of my creative gifts. usually I'll follow a tutorial (@usergif resource directory has a bunch of good tutorials that can be adapted to photo pea, or I'll just look them up on Tumblr itself). sometimes I like to do things a little simpler, which is what I'll show here.
you're going to click on the T towards the bottom on the left sidebar, type put your text, change your font (photopea has a ton and I'm not too picky but you can download fonts from the internet and upload them), as well as color and size (don't forget to select all of the text when you do this!!) then click on the cursor icon to move the text to your desired placement.
then click on the layer in the right sidebar and select blending options.
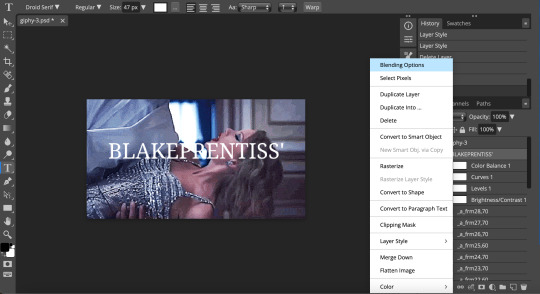
I'm going to add a stroke of 1px in black to my text and position it to the center. I do this on every text I add to gifs (even if the text is black, which I ended up changing this one to) to add some extra size/detail.
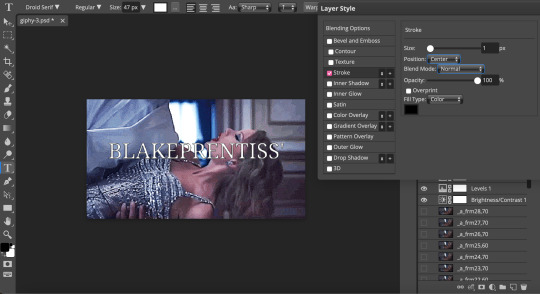
you're more than happy to stop here, but I like to play around with some of the other blending options until I'm satisfied. sometimes I'll lower the fill to 0-30%, or in this case, I changed the blending option to overlay to get the desired effect. (both under blending options)
I followed the same steps with my second row of text, except I changed the font and then warped the text a bit after placing it where I wanted by T -> warp -> arch and changing the settings.

and you're done! file -> export as -> gif to save it! I also like to do this periodically throughout the process to make sure the gif is giffing if you know what I mean

#gif tutorial#photopeablr#photopea#photopea gif tutorial#mine*#tutorial*#tutorial#gif making tutorial#gif making
11 notes
·
View notes
Text
Signalis Doom - 5
Not much today either, it was mostly a mix of overcoming issues with 3d models in doom and figuring out some workflows.

3d models are still considered sprites, so to get models to display properly, it involves a degree of pointing the engine to look at invisible dummy sprites and then swapping those with the model. Odd stuff.
There's better formats than this one and i'm going to look into those. That being said, i'm unsure how much i'm gonna commit to 3d, right now it's just experimentation. what I'll prob end up doing is spending a day banging out a buncha mockup sprites to approximate some chars and start mapping. Just enough to get the idea. tbh i could be doing way more mapping to establish a level language than i am, i'm kinda putting it off to play with textures and i gotta diversify.

I'm considering commissioning some artists for some spritework, either on specific characters or UI elements or such. I know i'll want something done for the opening splash.
Most of my time today, and the next few days, is going to be spent reacquainting myself with a host of tools. I've been doing gamedev for years, i went to school for 3d animation, and i've spent a great deal of time in alot of art tools. However, i tend to forget how they work very easily. I realized i'm not gonna get anything done unless i take the time to remember how the following tools work;
1. Maya for core animation(could be a problem, iqm is the newest doom format and the community pipeline is best setup for blender, but we'll see how it goes)
2,. Blender for import/export/better compability with some aspects of gzdoom
3. Photoshop for photo manipulation of the existing textures and as a means of either creating new textures, or givng more nuance to ones i create elsewhere.
4. Aesperite for core pixel art. Signalis is a mix of low rez painted works and pixel art, and knowing when to deploy each is a good idea.
5. I'll need to get a proper toolkit up for the model to 2d pipeline, i have options but they need to be tested.
6. FL studio for audio manipulation.
7. and imma be real i don't know how spreadsheets work and i'm gonna need a hell of a spritesheet to organize what assets i'll need to recreate.
That sounds like a lot but i've used them all before, and i'd need to more or less do the same thing for any real production anyway.
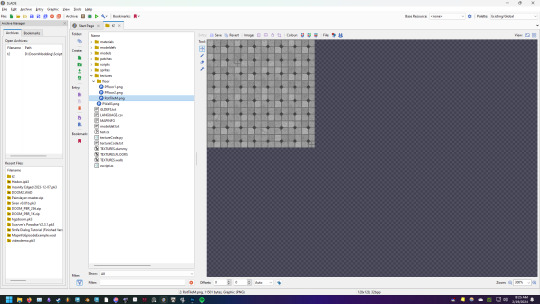
On the plus side, i think i've figured out how to do the floors. i'll just take elements of the original textures, and build a larger one out of them with built-in variation for tiles and color variation. I'll add more variation as needed in-editor.

I'm realizing i'm spending alot of time in odd spots. To be honest, i've never done a fan project like this before, much less one working with OG textures. I'm having a tough time getting my head around not only the unique nature of doom modding (releasing contnet packs taht can slot into any game) with full game production (Og maps, mechanics, story with bespoke stuff) ontop of fanworks (fanfiction, recontexualization of original assets).
part of me wonders if my focus on getting og textures working is a mistake, as it's putting me in a mindset that's not the most useful for my project. But we'll see, I'll get my priorities straightned out, this ain't getting done overnight either way.
10 notes
·
View notes
Text
Bryan and Jons Dyanamic was never explored often so I decided to give them one.
Kinds hyperfixated on this
Part 1:
Jon: You really let me drop out of college for no reason?
Bryan: I was honestly convinced you would cut me if I did.
Jon: I can’t believe how horrible I was to everybody.
Bryan: yeah, and you constantly claim I play the victim.
Jon: Shut up.
Bryan: Make me.
Jon: *chuckles* this is nice. To actually talk like two friends, no yelling at eachother
Bryan: Yeah.
Jon; So..did you actually try to contact me before evil bryan took over?
Bryan: every day, I got hung up on, two fake wrong numbers and one f*ck your mother.
Jon: Damn. Sorry Bryan.
Bryan: Yeah...my mom is a b!tch though.
Jon: Oh good that wasn't my condition, she is the worst, like every hallmark villain rolled into one
Bryan: Hey! That’s my mom you’re talking about!
Jon: B-but you said.
Bryan: Hey only a son can talk bad about his mom.…but yeah she is a hallmark villain
Jon: Hmmm I have an idea
Bryan: Wanna pitch the movie idea to Hallmark and make more money?
Jon: Hell yeah!
Part 2:
Bryan and Jon we're sitting by the pool. Bryan in red trunks and a t-shirt and Jon….
Bryan: Is that a speedo?
Jon: Yeah?
Bryan: You know only athletes and pervs wear those in public right?
Jon: Hey! I’m pretty well built!
Bryan: Well…
Jon: Says the guy who photo shops abs onto himself.
Bryan: I don’t photoshop.
Jon: Prove it
Bryan takes his shirt off revealing abs.
Jon: What the? How!
Bryan: The twisted really made me an active person. I mean I jumped over a ten-foot wall. When have you done that?
Jon:…decent point.
Bryan puts his shirt back on and lays down.
Part 3
Bryan and Jon, we're on a vacation together away from Fazbears. They told the animatronics they were going to a conference so they wouldn't follow.
Jon: So Bryan how did you find this place?
Bryan: Online, said they were having a deal on rooms.
Jon: Uh. Bryan have you noticed how there are only men here
Bryan: Huh? *looks around* Oh didn't notice
Jon: Bryan…show me the website.
Bryan showed the website to Jon on his phone
Jon: Bryan…this is a hotel for gay couples
Bryan: What? *looks at it* Oh that explains the double bed in our room
Jon: You think? We’re not a couple!
Bryan: Well not anymore but maybe *smirks*
Jon:….What does that mean?
Bryan: Well we did used to date. Remember?
Jon; Uhhh?
Bryan: First year of college? We had Friday date nights
Jon: We just hung out together.
Bryan: We shared dessert!
Jon; Because we were broke
Bryan: You were broke. I was a trust fund baby. *puts on sunglasses and smirks* Baby.
Jon: You’ve been waiting for that weren't you?
Bryan: *embarrassed* Very much yeah.
Bryan, throwing his head into Jon's lap: Tell me I'm pretty!
Jon, lovingly stroking his hair: You're pretty f*cking annoying, that's what you are.
Part 4
*Jon and Bryan are in Paris.*
Jon: I'm...moved. I...I don't know what it is I'm feeling right now. I feel...destiny?
Bryan: But...
Jon: I don't know what it is. I feel like... I just never thought I'd see it with my own two eyes. And here it is. It's just there. It's right in front of me, and...
Bryan: This is what you wanted to see? The bridge from Inception?
Jon: Yeah.
Bryan: But the Eiffel Tower is behind us, babe.
Jon: Yeah, but this is the bridge FROM INCEPTION.
Bryan: Okay, alright.
Part 6
Bryan: You’re giving me a sticker?
Jon: Not just a sticker. That is a sticker of a kitty saying “me-wow!”
Bryan: I’m not a preschooler.
Jon: Fine, I’ll take it back-
Bryan: I earned this, back off!
Part 7
Bryan: Jon can you call the Glamrocks they’re not listening to me
Jon: Bryan i’m not their mom.
Bryan: At least try.
Jon: fine…guys! Get over here!
*Immediately the Glamrocks all line up behind Jon like ducklings*
Jon: Uhh.
Bryan: Awwww!
Part 8
Jon: Davis hand me your sewing kit
Davis: I don't have one
Jon: You don't have one in your pocket?
Davis: No because i’m not a 50’s housewife
Later!
Jon: Hey Bryan do you have a sewing kit on you?
Bryan: Yeah i’m not an animal
Jon: Davis I can pick this lock. I need a Bobby pin
Davis: Okay…oh yeah I don't have one i’m not a nine year old girl.
Jon: Bryan?
Bryan: *holding four of them* Which size?
Part 9:
Jon; Vindi.
Vendi: Jonathen.
Bryan:….Bryan!
Jon and Vendi stare at him
Jon and Vendi: *thinking* God why do I love this man?
Part 10:
Vendi: *on his knees with a ring and orchids* Bryan my dear I love you so much, ever since you entered my office and I saw those gorgeous eyes please I beg you. Marry me?
Jon: *on his knees next to him with a ring and roses* Bryan please, i’ve known you for years and I fell in love with you over the years, every action makes you even more adorable in my eyes. Marry me please?
Bryan: *panicking. Can’t break Jons heart but also can’t break Vendis*
Jon: so?
Bryan: Maybe…all three of us could work it out?
Jon:….
Vendi:…..
Later!
Vendi Jon and Bryan were in bed together, Jon on Bryans left and Vindi on his right.
Bryan: *internally* I can’t believe that worked.
(wow I just made Bryan poly….i don’t regret that)
34 notes
·
View notes
Text
how i make gifs using filmora x
(for anon ❤️)
read under the cut!
hey!! thanks for reading this! just a few notes before i explain about my editing process:
filmora x works very differently from photoshop. it's a video-editing software anyways, so treat it like that!
always use high-quality sources!! most of my issues with grainy gifs come from using low-quality sources. so, i always ensure to use sources at 1080p, at least!
if i'm creating multiple gifs from one match, i usually download the entire match (which is a hugeeee file 😵💫 but it's so worth it!!). but if it's only a scene or two, i screen record them! i have an astro supersport subscription and a beinsports account, so i don't have an issue screen recording clips, as their content are always in high-quality! but if you're using other sources or streams, then do ensure the quality is good!!
if the only available source is of low-quality, my trick is to make smaller gifs! for smaller gifs, i usually keep a 1:1 or 4:3 size ratio, and post them side-by-side in a single post - usually two in a row!
general colouring stuff applies here as well, you can check out the photoshop guide i've linked in the ask!
remember, there isn't one "correct" way to gif, you can gif however you like!
and now without further ado:-
step one: adjust video settings, speed and length
after importing the clip into filmora, setting the aspect ratio, resolution and frame rate according to preference, the first thing i'd do is to adjust the speed of the clip. i like to slow them down, so i usually go for a 0.5x speed. you can always adjust the speed to your preference!
i like to keep my gifs within a 3 to 5-second length, depending on the content, so i'll trim the clip or adjust the speed as desired. if the clip is shaky, i usually add stabilization at about 10%, but you can adjust as you like! here's an example of a clip before and after speed reduction:

step two: auto-enhance
once the clip is at your preferred length, size and speed, now it's time to make it look pretty! in filmora, there's an 'auto-enhance' feature, so i usually begin with that, setting it somewhere between 50% to 100%. here's an example of how it looks like before and after auto-enhancing at 100%:
step three: colour correction
head over to 'advanced colour correction', where you can use either the given presets, or manually adjust to your liking. i always manually adjust them!! you can also start off with a preset and make additional manual adjustments as I did below! what i did here was to darken it, then adjust the colour enhancement, white balance (hue and tint), colour (exposure, brightness, contrast, vibrance, saturation), lighting (highlight, shadow, black, white), and hsl (for this example, i adjusted only the red).
you can also save your adjustments as custom presets so that you can use them again in the future!
here's a quick look at how i do the colouring! from the before and after colour correction examples, you can see that this is the important part of the whole process!!

step four: sharpen
once i'm satisfied with my colouring, i sharpen them by adding the 'luma sharp' effect (usually at 50% or 70% alpha and 50% intensity)
here's how it looks like before and after sharpening:
step five: final touches and exporting
before i export, i make some final tweaks to the brightness, contrast and saturation, etc., ... and voila!! there also many other effects available for you to add (grainy effect, blur effect, etc.) so feel free to play around!

once you're satisfied with your result, it's time to export! now, video-editing softwares HATE gifs. you can always just export as gif from filmora directly, but i don't really like the way it turns out 😭 so, i export them as video (.mp4) and use external gifmakers (like ezgif!) to convert them from video to gif!
aaaand that's all!! here's a comparison of the original clip vs the end result!
final note: remember to size your gifs correctly for tumblr (540px for full width, and 268px for half), and keep each gif within the size limit of 10mb!! if you find that your gifs exceed the size limit, try reducing the number of frames or removing duplicate frames, increasing the contrast, or you may also crop the height if necessary.
if you have any questions about making gifs using filmora, feel free to reach out! thank you for reading, mwah mwah!! 💞
11 notes
·
View notes
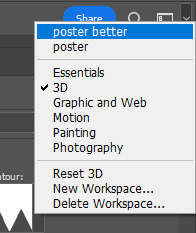
Note
hi, i love all of your recent graphics !! i was just wondering if you could explain how you make the 3d text?? it looks sooo cool
YES!!! I definetely can because its actually super super easy!!
I'm gonna show yall how to do this with any kind of letters/words in photoshop in a 3 easy steps!

for this you're gonna need:
the newest version of photoshop
a computer good enough to run the 3D program in photoshop
step 1: font!
I personally just use Arial black but you can basically use any and all fonts but I recommend using one that's bold and thick more then scipt.
but basically, you just write the word you want to use with the colour you want.
step 2: 3D objects
you go to the '3D' in photoshop, make sure it's available by going to window -> 3D

now you make sure you have your text layer selected and you click on the 3D extrusion and then create! I recommend saving before and after clicking the button bc this slows down ur computer massively.
now your workspace should be changed to the 3D one, your font has changed and should look like this now!

now you can play around with these top buttons to move it around

and these to change the shape, distance and extrusion with these

this is all upto what you like and want to do yourself. personally I like making the shape preset the third option bc it gives the most depth
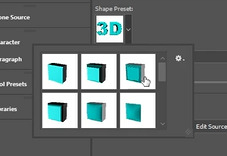
and I recommend playing around with the contour to add more depth

this is what my 3D model looks like after playing around with those settings

step 3: depth and texture
now I go back into my normal workspace by clicking on the top right icon
to which I'm just back in my normal preset workspace. here's im going to move my obect to the middle of my canvas and turn it into a smart object by right clicking
now you could be done here but I like adding some extra depth and texture. I do this by double clicking and going into the layer styles.
here I like adding gradient layers one that is a light yellow with color dodge and a blue or brown with multiply and make sure they're on opposite sides of the text to which you get something like this.

then I personally like adding this same gradient to the background and adding noise to the bg and the object which just gives extra texture!

and that's it!!! have fun, enjoy do with it whatever you like it's a lot of fun to play around with!
please @ me on my tracking tag if you use this tutorial to make smth i'd love to see it!!
12 notes
·
View notes
Note
hey harper!! sorry if this is a little random but i was wondering if you could share what kind of settings you import your gifs from photoshop with (if you use it?). :-) i'm getting into gif making myself but i'm kind of a newbie and since your edits always look rly good, i figured i'd ask. tysm. <3
Sorry this took a little bit to get to - I was really Going Through It yesterday. So I'm really bad at explaining things properly, but I'll try to explain it the best I can. I've pretty much been using the exact same method since 2017 so it might very well be outdated for most people but it works for me. I'm using a cracked version of Adobe 2020.
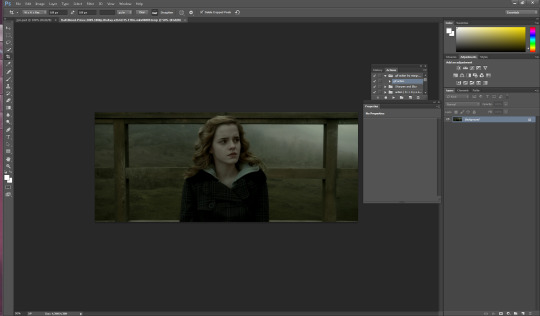
For the purpose of this, I'm making a gif of a Hawke I might potentially play with if I find myself wanting to play DA2 (usually pretty unlikely - a lot of my attempts at DA2 these days die in the prologue or act 1) and finally see Carver content + do the Merrill romance. I'm going to put this under a cut because it includes screenshots.
After importing the video, first thing I do is work on cropping it down to both the dimension I want and what parts of the footage I want to do (that little middle bit in this case on the TL in this case.)
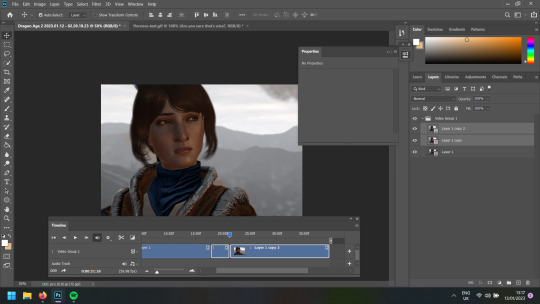
Then once I've done that, I right-click on the bit I want and chop the duration down to 2 seconds (or occasionally 2.25) and slow down the speed of which that part of the video plays to 60% - my ideal speed but I sometimes will go 55% if it ends weirdly at 60% or has a hard cut to another angle. Do this as many times as needed for however many gifs there are going to be in the set.

Delete the bits of the footage from the timeline that you aren't going to use, trim it down to the dimension you want (in my case, I like it to be 540px in width.)

Now I think this might be where I differ from others, because I think this is where people export it - but I prefer to colour it here rather than do each layer individually. I tend to use the same few actions which have turned into my bread and butter: colour balance, selective colour, brightness/contrast, vibrance and curves. Sometimes exposure if it's needed. Colour balance is the real MVP, especially for games like Dragon Age and Mass Effect where lighting is all over the place or very predominantly one colour (e.g. Orzammar being very Yellow). (Don't ask me how to sharpen - I don't know how to do it and at this point I'm too set in my ways to learn how.) Generally speaking with colouring I prefer to keep it as close to the original as possible but Nicer. Just play around with it and see what you think looks nice.
After that, I go to File -> Export -> Save for Web (Legacy). Make sure the looping option is set to forever. Let it run through a few times to make sure it isn't wonky (also, see all those colours you see on the side? I tend to colour pick from those for gradient text so matches the gifset - I use this HTML text colouriser to generate the gradient.)
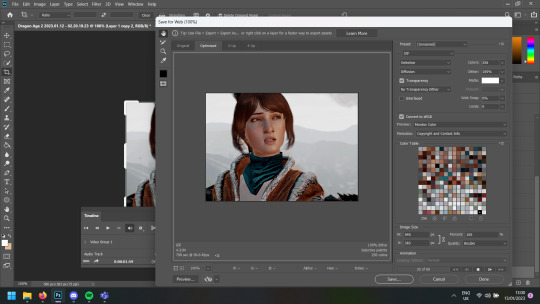
If you're happy with it, hit the save and send it to the appropriate folder.
Generally speaking, I try to keep it under 5MB a gif but certain games really dislike that, especially since I tend to prefer 540px ones as it allows me to use bigger font sizes - I can't do small font any more on gifsets - especially on text heavy ones like my Pathfinder gifs; I'm so prone to missing typos.
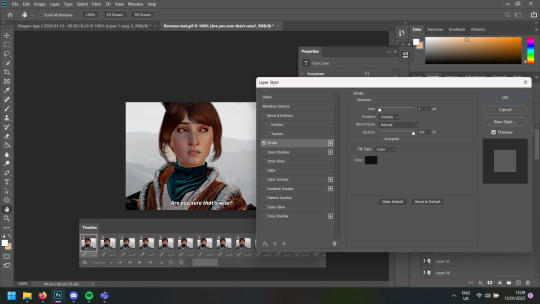
Speaking of subtitles, actually - I then open the gif into Photoshop so I can access each frame individually and then make sure I have the top layer selected on the sidebar, not on the timeline. Then add a new layer with the font option with the dialogue for the gif. My subtitles now tend to be around the 16-20pt, Calibri + bold and italic with outer stroke in black for the outline to make it more visible (to access Stroke: right click on the subtitle itself -> blending options)
Once I'm done with that (including proofread for typos, making sure it's aligned properly), same thing: File -> Export -> Save for Web (legacy). I'm fairly sure this isn't how others do it, but it worked for me and this is how I taught myself back in 2017.
Also - this is Florence (Flora), I guess.
2 notes
·
View notes
Text
Cover Tutorial
Because several people requested it and while I'm a bit reluctant to share my secrets, I'd rather have this knowledge out there because I know how hard it is to make stunning covers. All of this stuff I learned by trial and error and my process differs with each cover, but here you go!
I use Photopea, not photoshop but the process should be the same.
That being said, I'd rather you didn't reblog this post. Feel free to reply and like it, just don't reblog it pls.
The cover I'll be showing you how to make is my most recent one for my Ron Weasley fic Manic (x)
tagging: @akabluekat @booty-boggins @materialkii @kazinejghafa @leviackermannns @a-song-of-quill-and-feather @jewelswrites-ish @randomestfandoms-ocs
1. Go to file and hit "New" to start a new canvas. My preferred dimensions are 512x800 because that's the Wattpad size, but you can change it to whatever you like!

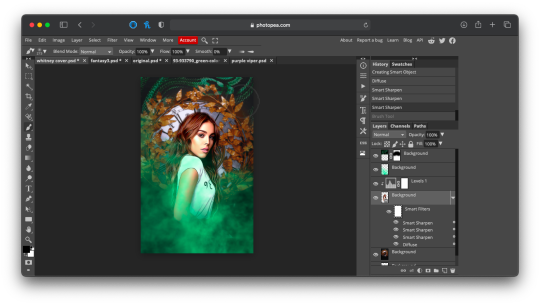
2. Load your background and FC image you want to use. I shop around for good background stock packs and the one I used for Manic is from a fantasy pack I found on deviant art. The image of Danna Paola I just found on google. I prefer to use transparent PNGs cause I don't have to erase around them, but regular photos work too!
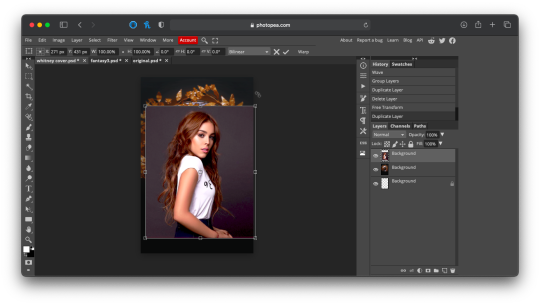
3. The next thing you want to do is hit "Free Transform" and adjust the background and PNG to the position you want. You should see an outline like in the above picture. Now that I have the images where I want them, I'm gonna erase the excess background around Danna so that the clock shows behind her. Load the brush tool and set it anywhere from 40% - 70%. That way the edges aren't too harsh. I add a raster mask and use the black paint tool to erase it. It should look like this when you are done.

4. Now come the fun part, TEXTURES!! Seriously these changed my life. For this one I added some green smoke that I found on google and an image of a green snake that I also found on google.
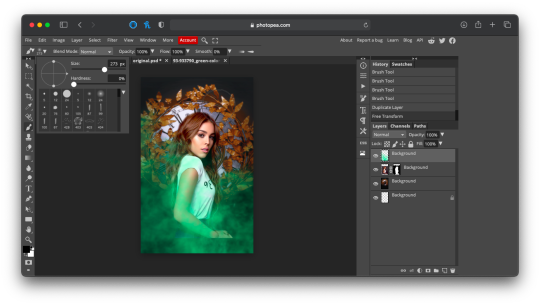
Because I didn't like how the border of Danna's pic was showing through the smoke, I erased the bottom of her picture so it looked more blended in. Then, after adding the snake pic, I went over to the little bar above the layers that says "Normal" and switched it to "Lighten" so it blends in more. Then I took the brush and continued to erase parts of the pic until it looked like how I wanted it!
5. Now if I want to get that shiny sort of waxy look for my OCs, I have four very simple steps. The first is to click on "Image" and go to "Shadow and Highlights" It should look something like this:
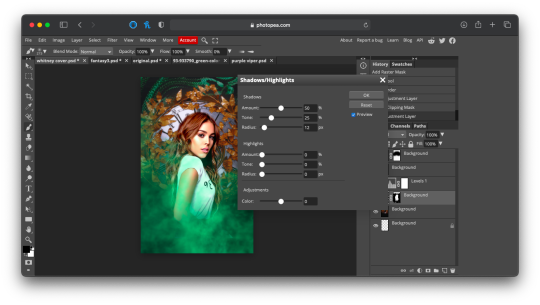
From there I just adjust the top part to my liking. I tend to lower Amount and increase Radius but it differs from picture to picture. When I'm satisfied, I go to "Layer" and hit "Convert to Smart Object" so you should have a tiny little square that indicates it's been converted. Then I just play with the filters Photopea gives me.
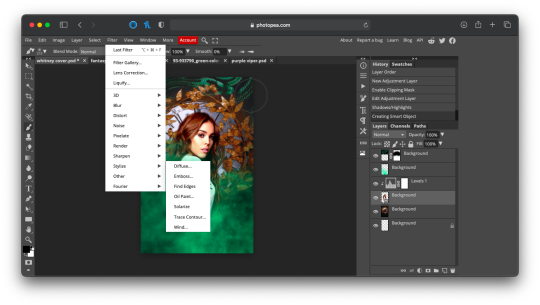
I personally like to use Diffuse, but there are tons of different options you can use. After that, I click Smart Sharpen three times and that's how you get that waxy sort of look. With the Diffuse filter especially the face and hands of your FC can get all wavy and stretchy, so I just take the brush tool and brush it over the wavy and stretchy areas.
Your cover should look like this now!
6. To achieve the sort of highlight and green look, I take a Hue/Saturation layer, hit colorize, and adjust it to my liking like this
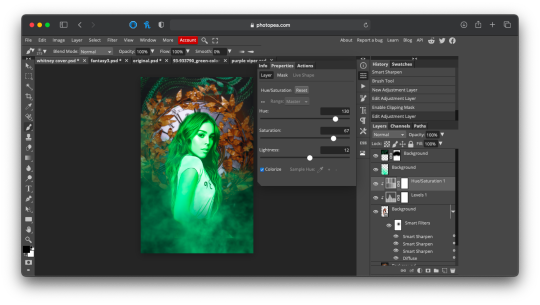
I wanted it to match the green smoke, so I made the layer green. I then hit CTRL + I to invert the raster mask and take the brush layer and just highlight the areas to make it look like it's hitting her naturally. USE WHITE FOR THIS STEP. Also make sure your brush is at 0% otherwise it won't look as good. It should look like this when you're done!
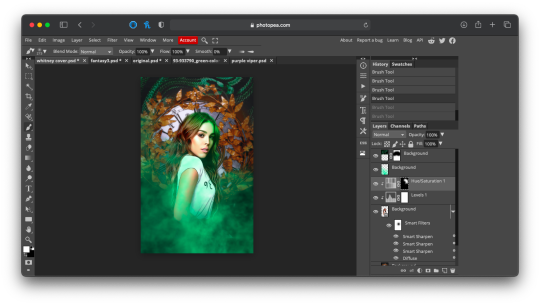
7. Now add your PSDs and text and you're done! If you want something a little extra fun, go to filters and hit "Distort" while on the text layer and play with the different options until you find something you like!
And now you have a cover!!

TADA!!!! Let me know if you guys want more tutorials!
54 notes
·
View notes
Note
Hi! I'm sorry to bother you but I was wondering if you've ever done an icon tutorial? Your icons are really the most beautiful I've seen, and I'd love to know your secrets 😊. But if you aren't interested in posting them I totally understand. I hope you're having a great day!!
EXTENDED ICON TUTORIAL
Hey sorry this took so long to get around to but I finally felt inspired to make this. A couple things first. I want to give a special shout out to argetnallison cuz I learned how to make icons from her tutorials here. I picked up a few tips and tricks that aren’t included in other tutorials so we’re gonna call this an extended icon tutorial. I’ve also been told I explain things well but if there’s anything from this that needs clearing up later just send me a message and i will be happy to help guide you through it. This Is my first time making a tutorial so bare with me if I ramble.
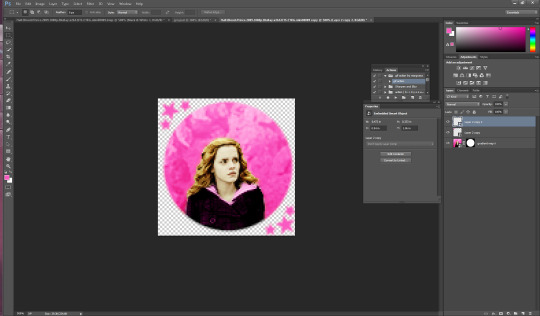
we will be going from this:
to this
to this

Ok so things you willneed..
photoshop (i personally use the 2014 CC version or something like that but that’s just my preference for layout and stuff)
kmplayer (kmplayer is how i get most of my screencaps. Sometimes I go to google or screencapped.net or other sites that have precapped content when i feel lazy)
Alright so we start off with figuring out which screencap to use.
so basically here i open whatever movie/tv show episode file i want to use and skim in kmplayer till i find a scene that works. Then I hit start and play it until i have the scene i want and then stop,

these are my capture settings for kmplayer.
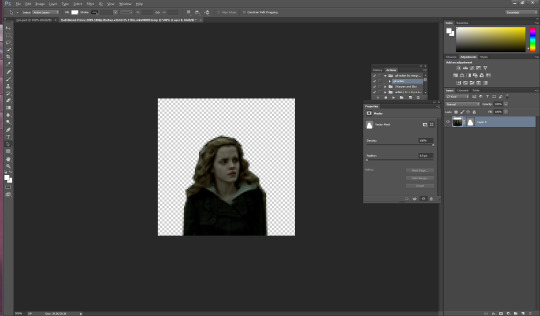
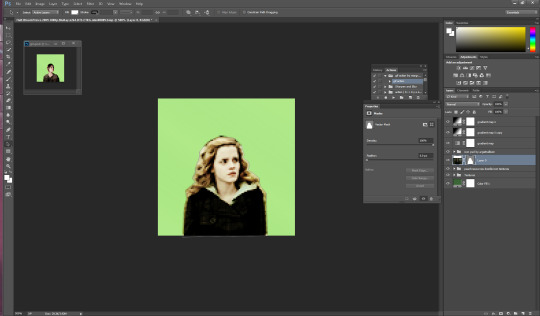
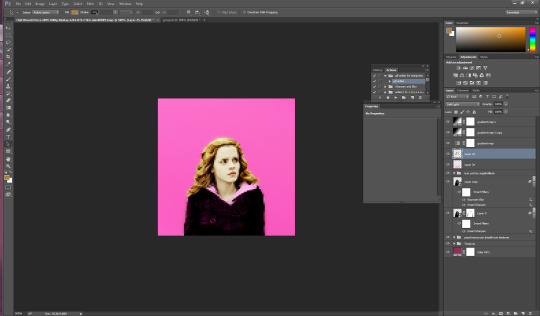
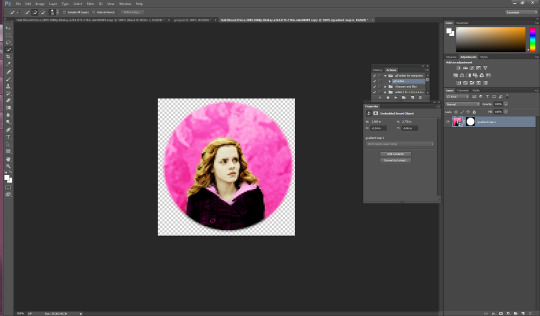
Alright so I picked this scene of Hermione in HBP (aka the hardest movie to color.
Okay disclaimer here, I don’t actually use anything on the left and rely totally on shortcuts on the keyboard so that’ll be how I explain things here.
People do this step differently but what i tend to do is crop my image before i mask it. I hit “c” on my keyboard. I set my w x h at the top to 100 x 100. Then what i do is I take my mouse and click on the top bar of the crop box and extend it till Jyn is a more icon like size.
after she is at a size I think is ok for this icon i hit enter and it looks like this

alright now for the fun part. this is honestly the hardest part of icon making, the rest is simple if you’ve used photoshop before. Its time to mask the image and get rid of the background around Hermione. So we start by pressing “p” on our keyboard, p for pen is how i remember, and then we start at one end of her shoulder and work our way around. Basically how this works is u click around the image of her and keep clicking until u have an outline around her like I have below. this does not need to be perfect because we’re gonna have to use the eraser tool anyways.
you should have something that looks like this. Also tip here is that you can use ctrl + and ctrl - to make the image bigger or smaller when doing this part.
ok so now we have a rough outline of hermione and we wanna create this mask so we right click within the image somewhere and we hit “create vector mask” which should be the first option (i donno what its like in other versions of ps sorry)

ur image should now look like this
be sure your starting dot and your connecting dot come together at the end or it won’t let you do this part.
Alright so here is where i add my psd and my fancy textures and things. I use argetnallison’s psd (no claiming as ur own, give her credit if you use this) and adjust it as needed because i am really bad at making my own (seriously props to everyone who makes their own psds its hard and i salute you).
so how I do this next part is i take my psd file (this also contains my textures and stuff to make it easier and quicker to do stuff) I take the jyn file with the psd and i ctrl/alt/a toselect everything quickly like this and then drag it onto the hermione image.
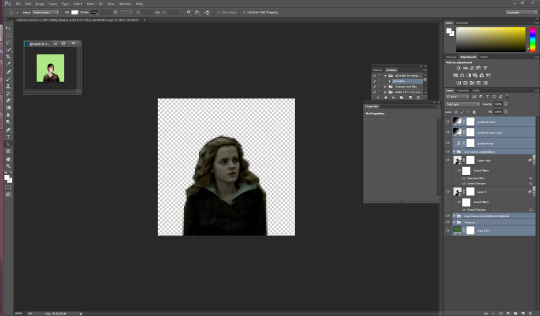
i move some of my layers under the hermione image like the solid color layer and the texture pack so she’s visible again and keep going.
alright so another thing to note is if u click on the mask next to hermione you will get a box that has the vector mask and density and feather
you’re going to want to go to feather and where it says 0.0 make it 0.3 (some people do 2 or 1 just mess with it till it suits you).
so i have set mine to 0.3 and now its time to erase the stuff around hermione that’s still visible. i press e on my keyboard and zoom in on it a little Here it is also really helpful to create another layer mask so that it doesn’t mess with the mask of her you already have (ps weird and it’ll get messy trust me) so i go down to the bottom right and hit add layer mask its the third one from the left

the white square between the hermione picture and the mask is where you’re gonna wanna click and then start erasing.
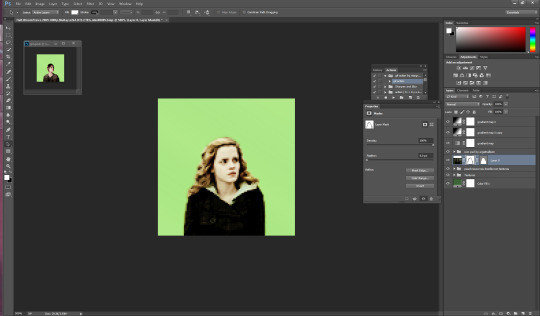
if you mess up along the way and erase too much you can press b on your keyboard for brush and it’ll bring it back.
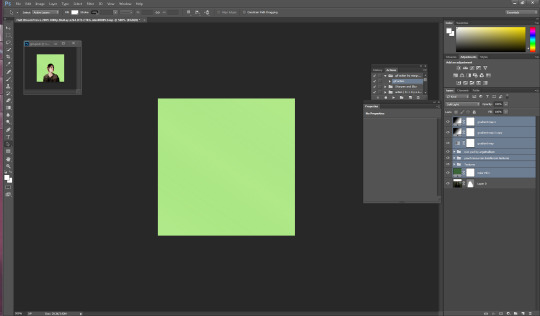
ok now its time to sharpen the image. i have an action i really like but its from a blogger who’s changed user since then and i donno her new one or i’d 100% credit. I will try and find it and add the link here. anyway I convert the hermione picture to a smart object (right click on the hermione picture and its on the left towards the middle) hit play and add the action to the image Mine looks like this now

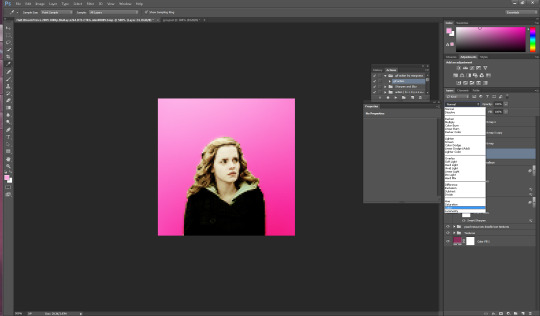
so for this next part i usually have green as my default layer but i wanna change the color so i’m gonna double click on the dark green box

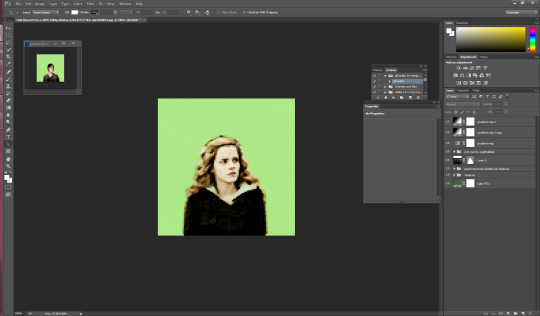
i’ve settled for this pink. Now if you follow my icon making at all you know I like to match my background and clothes together so that’s what i’ll show you next.
so next its time to use the eyedropper tool (which was very confusing for me initially so if you have questions don’t hesitate to ask). We start by hitting “i” on our keyboard and finding a spot in our picture that we want her to match so I’m going to click some of the lighter pink in the top left corner.

as you can see in mine in the top right it now has that pink we just selected so now we get to add it to hermione’s jacket.I usually do it right above the psd so i make sure i have that clicked and then i make a new layer for the jacket by hitting ctrl/shift/n on my keyboard. with that layer selected, I hit ‘b’ for brush on my keyboard and set this new layer to “color” then i hit enter and begin to brush over the jacket (in my ps its the second to last one down). The default name is “normal” and its right next to opacity”)
now my picture looks like this: (you can use the “e” to erase if you brush over her skin by accident as well)

now its time to do the same with her hair so i do ctrl/shift/n again to create another layer but this time we’re going to set it to “soft light” instead of color.
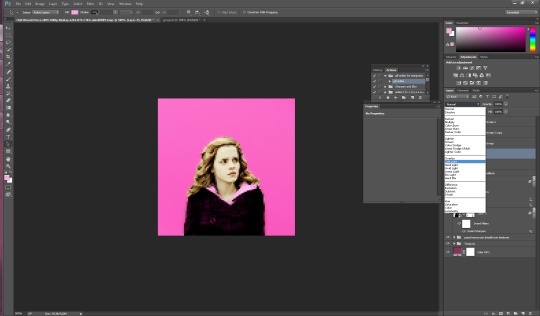
just like with the jacket we are going to use the eyedropper tool again but we’re gonna click on a lighter part of her hair.
you can change the opacity here if you would like but for this image i am going to keep it at 100%.
You could honestly leave this image here and have a perfectly good icon but a lot of people have asked me how i do the circle ones like my current one so I will take this one step further. (i learned from this tutorial here in case that helps you better).
First i’m gonna add a texture by checking one of the boxes in my texture stash (feel free to hunt on yeahps and deviantart for some seriously amazing textures that’s where i get all of mine from).
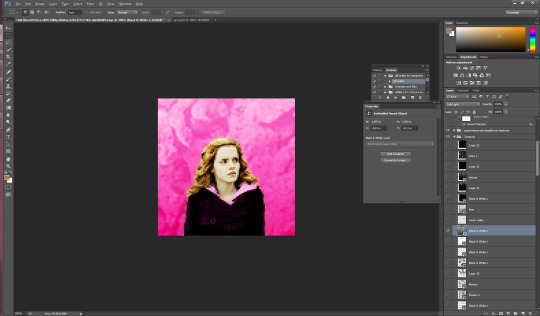
now i’m going to do a duplicate image (so that i can use the original to edit it in different colors). to do this i go to “image” at the top (third option after “file” and “edit” and then i go down to where it says “duplicate”.

i hit ok and then i begin to make my circle icon
What i do here is i convert everything to a smart object so i hit ctrl/alt/a and right click and convert to smart object.

then i hit ctrl/shift/n and create a new layer where we create our circle.i make sure that the circle is white by going to the top right and setting it to white. Then i hit “b” and right click on the hermione picture
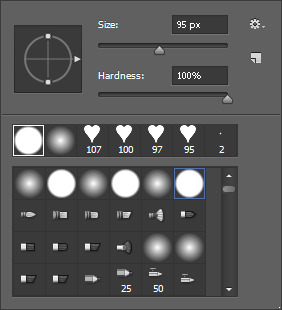
i use the selected brush and have the size at 95 px. Then I click in the middle of the image and it looks like this
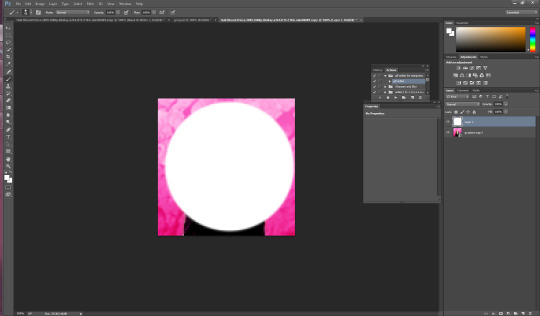
now what I want to do is make sure that the white circle is centered so i’m going to hit “m” on my keyboard Then i wanna right click and hit “free transform” in the middle. you’ll know its in the middle because there’ll be these two purple ish lines that create a plus.

now you hit enter and you have your circle. Now what I do is hit “w” on my keyboard and click your mouse in the circle somewhere (very important to stay clicked on the circle layer here). now that you’ve selected the circle, select the pink hermione image. go to the bottom and click “create layer mask” which again is the third from the left, and you should have a circle next to the hermione picture. You should have something that looks like this

now i just click on the circle layer and delete it and it’ll look like so:
again. you could ctrl/s and save it here and leave as is but i’m a bit on the extra side so we’re gonna take it a step further and add little designs cuz it makes it look more fun.
So what I did in the beginning is I googled a ton of different types of brushes and used search things like “heart brushes for photoshop, deviantart” or “star brushes” or whatever i wanted and i just dug around until ifound what I was looking for. its a fun scavenger hunt but you can deff check out yeahps too or itsphotoshop for resources. Then you go to “edit” and all the way down to “presets” and a drop down will show up and you click “preset manager”. you will see something like this pop up
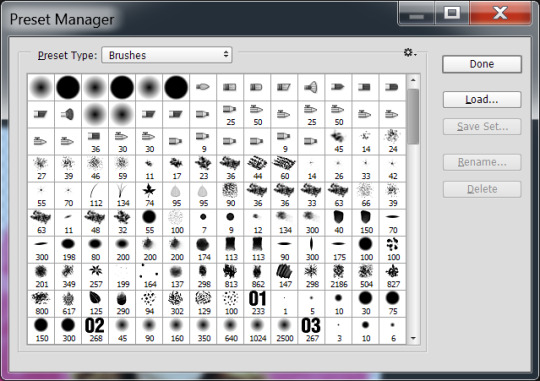
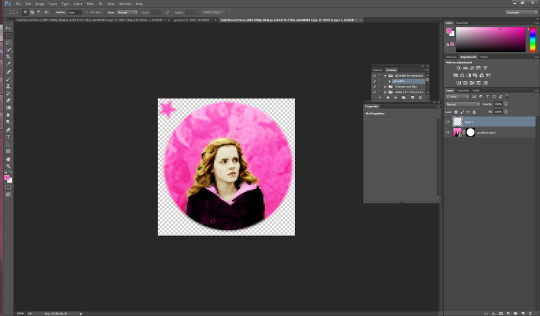
go to the right and hit load and then click on the file you’ve extracted from winrar (if you need help with this part just message me). Ok, once you’ve loaded some brush presets into your ps you can start the next part. once again you have to create a new layer ctrl/shift/n, i then click my star brush and set it to 14 px.

alrighty so before we start clicking and creating stars I want to make them the same color as the background so its time to bring out our “i” for eyedropper again and click somewhere on the pink, then hit “b” again and you should now have pink stars when you click. So Here i go to a transparent corner and i just create my star on the new layer. Sometimes i click it twice so that its more visible ut now i have something like this:

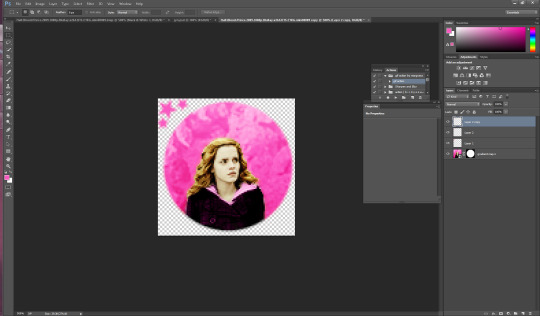
now I’m thinking i want it situated a different way so I use the “m” tool and use “free transform again” to adjust (using the corners like with cropping) to where i want the star to be.
now i have it here and i use the arrows on the keyboard as well sometimes to adjust it. Now what I usually do is create another layer for the smaller stars so i hit ctrl/shift/n again and then i set this new star to 9 px by right clicking on the picture. Then I repeat the steps above and have something like this

Now i just hit ctrl/j and duplicate the little star. then i hit “m” on my keyboard once again and move it to the opposite side of the big star.
now you have this picture:
Now what i do is i select all 3 star layers and right click and convert them to smart object so theyre easier to deal with. Then i hit ctrl/j and duplicate the stars.

now i hit “m” on the duplicate layer and click “free transform once again” now right click and hit “rotate 180″ and the result is like this

move the rotated stars to the opposite side of the picture with the mouse. Now it should look like this
and that’s it! just hit ctrl/s and save as a .png and you have yourself an icon. I hope this helps. If i need to clarify anything please don’t hesitate to ask me. This is my first tutorial so I hope I explained things ok. Feel free to tag me in ur new icons I’d love to see them!
1K notes
·
View notes
Last Seen Blogs
princessdayzed
Daisy's Trash Blog 2020
warabi030
warabi mochi
424sketches
Sketchbook
peter-pan-2
Peter Pan
alexsohphoto
Journey with me