#it is set up to be very user friendly and easy to use and they said they will keep updating it!!! I think it is in early stages now
Text
One of the most reliable and popular instagram accounts covering what has been going on in Gaza @/sbeih.jpg has started a free online crash course about Palestine history and the decolonisation movement to help educate more people and spread awareness. It is on instagram @/palestine.academy and their website is thepalestineacademy.com. It is completely free and has tons of resources on how to get informed, find further information, and how to help Gaza right now. If you have the time I recommend exploring the website and following their instagram!!!
#it is set up to be very user friendly and easy to use and they said they will keep updating it!!! I think it is in early stages now#it is fun to use you get to see your progress as you go through the lessons#please use it!!!!!#palestine#resources#🦢
7K notes
·
View notes
Text
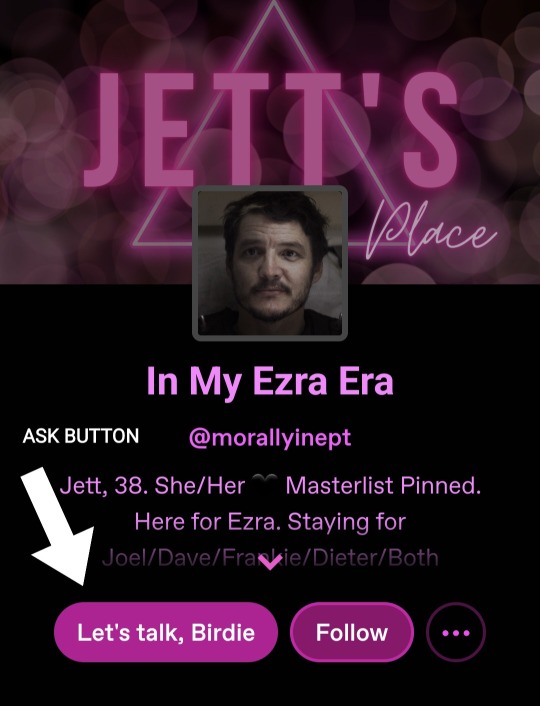
HELLO & WELCOME TO THE PEDRO PASCAL FANDOM! 👋🏻
I'd just like to take a moment to say hello and a big welcome to all my recent followers & mutuals. How wonderful that you're here! So exciting!!
My name's Jett and I'm so happy that you're here in the Pedro fandom, and you're all so welcome here at my place too! 🖤

I'd also like to share with you some hints and tips on navigating this fandom and Tumblr.
Perhaps this is your first time in a fandom, or using a site like Tumblr, and I can appreciate how daunting it can feel. I've been there. Trust me. 🥴
But don't worry - I've got your back. We all have.
I hope you find it helpful, and if you have any questions, or just want to say hello back, please feel free to reach out. 🖤
Fandom is a different experience for everyone. You get out what you put in.
What do I mean by that?
Well, fandom is an inclusive place, for everyone to come together in mutual admiration and respect for, in this case, Pedro Pascal. It's a hub to share, create and get excited about content, and to make new friends.
It's NOT a place for divisiveness, hate or toxicity, although sadly it exists here in small pockets, as it does in any fandom. 😑
The best piece of advice I can give to you, is to be respectful.
Be respectful in the way you conduct yourself. Be respectful to your mutuals and followers, and to the blogs you follow. Be respectful to Pedro. As much as we all write fanfic about his characters (and some choose to write about him; that's their prerogative, although I personally don't), he is a human being, not a piece of meat.
It's perfectly fine to get excited, to fantasize and daydream, we all do it. We all get thirsty, let's face it. That Pedro fountain is flowing. 💦 But be mindful about blurring the lines between fantasy and reality.
Have fun, that's why you're here. I'm not your mom, but always remember to respect each other. (I'm fairly certain your mom would have told you that, however.)
If you are subject to any negativity or toxicity whilst here - and hopefully you never will be as the majority of us in this fandom are friendly, approachable and lovely, if but a bit excitable - but if you do experience it, the best thing to do is to ignore it.
Block, delete and move on. Don't feed into it or be a part of the problem.
If you have an ageless or empty blog, chances are you will be blocked.
Tumblr has a massive bot problem. 🤖 Specifically a porn bot problem.
It's easy for us to spot a fake blog or a bot that follows us. They usually have an empty bio, no icon, or their icon is an AI generated image of a scantily clad female. We all block them. 🚫
Most, if not all, writers in the Pedro fandom (and other fandoms too) write smut. We love it. And we know you do too, it's probably why you're here. But we are responsible writers, or try to be as responsible as we can be, by ensuring that no minors under the age of 18, to our knowledge, are reading our smutty fics.
So, if you have a blog that doesn't have your age on it, chances are you'll be blocked. We're protecting ourselves and we're protecting you.
Unfortunately, Tumblr is working against new users of the site in the fact that they now ask you to follow a few blogs BEFORE your profile bio is able to be set up or edited. I know, counterproductive right? So chances are you're getting blocked even before you start. 😖
I'd urge you to add your age onto your blog at the very least. It's okay to have an anonymous profile if you want to, but please, please tell us your age. Otherwise we will have no choice but to block you.
The RE-BLOG button is the only button you need.
Look at this:

The icon in green is the RE-BLOG button, the two arrows.
You'll find this at the bottom of every single blog post, including your own. Look at the difference in the numbers here. See how they differ from the RE-BLOG to the likes, the heart icon?
Yeeeeah. We don't want that disparity. We want that RE-BLOG icon to be the biggest number on our posts.
And here is where you can help with this:
PRESS THIS RE-BLOG BUTTON. DON'T STOP PRESSING THIS RE-BLOG BUTTON. LOVE THIS BUTTON. RE-BLOG EVERYTHING YOU LIKE!
Tumblr doesn't work like Instagram, Twitter/X or other social media platforms where 'likes' drive content to be seen. Here on Tumblr RE-BLOGGING is what gets our stories onto your home feed for you to see them and enjoy.
If you don't RE-BLOG, our posts get lost and have very little engagement, and that is why your favourite writers then stop writing and leave the site.
RE-BLOG, RE-BLOG, RE-BLOG everything you like and love. I cannot stress that enough.
Likes are nice, but they do absolutely nothing. Zilch. Nada. Bupkis.
Well, that's not technically true. Likes tell me that you've seen my post. That's it.
Annnnd what can I do with that info? Nothing. That's what.
RE-BLOGGING the post tells me however that you've enjoyed it, loved it even. That makes me very happy and inspires me to carry on writing fics that you'll (hopefully) enjoy.
Pressing the heart icon works like a bookmarking feature on Tumblr rather than a liking feature as you're probably used to from other social media sites. And the more things you like here, the more your older likes get pushed to the bottom of your epically long like list, to be forgotten about and will probably never see the light of day again.
Personally, I like to use the like button as a way of bookmarking something to come back to later and then I will RE-BLOG it once I've read it.
There is no limit to the amount of times you can RE-BLOG the same post, but you can only like it once. That should tell you that liking something here on Tumblr has no effect.
Tumblr is all about encouraging engagement through RE-BLOGS, the algorithm does nothing if you press the like button and move on.
By all means, give that heart icon a press, but please also RE-BLOG it at the same time. We will absolutely love you for it!
☝🏻And be mindful of going on a mass liking spree - Tumblr doesn't like that and neither do we. It's a quick way for you - and us - to get shadow-banned and Tumblr will think you're a bot. And being shadow-banned is incredibly annoying for everyone involved. Trust me. 😖
Talk to us. We love it!
We love getting positive/constructive feedback on our work. We love engaging or interacting with you. I certainly love receiving and responding to any comments, DM's or ASKS that I'm lucky enough to get.
But again, ensure you're respectful.
Tumblr has created an ASK feature where you can ask us a question, and you also have the option of asking us that question anonymously if you'd like.
If you do use the anonymous (anon) option on your ASK, be aware that we have the right to ignore or delete your ask if you're being a jerk. Don't be a jerk.
This feature is for someone to interact with us anonymously if they're shy. Not to be abused to send hate or negativity our way.
You'll find the ASK button on the main page of anyone's blog that has it activated, just below their bio.
And Tumblr has made it easy for us now to see if you're a mutual of ours, even if you're asking on anon FYI. So we can narrow it down to finding you if you do happen to be a jerk... just saying.
Be respectful in your comments, DM's, ASKS and RE-BLOGS.
Yes, you can leave comments on your RE-BLOGS too. Another reason for you to press that RE-BLOG button.
If you use something, always give credit to the source/creator where possible.
One way to garner enemies in any social media space is to use something that isn't yours, without crediting the source.
Now, it's impossible to physically ask everyone if you can use their content, however Tumblr makes this very easy for you to do that in most cases.
Yep, RE-BLOG IT.
RE-BLOGGING leaves a clear trail back to the original poster for everyone to see.
Now, if you use something without re-blogging, which you can absolutely do when you create your own blog posts from scratch, you should give credit to anything you use in your post that is not something you have originally created yourself.
Perhaps there is a GIF you like, for example. You can post it, but you should absolutely give credit by tagging the blogger/creator who created that GIF. (Tumblr also has their own selection of GIFS you can use FYI, and when you do they automatically add the original creator's tag at the bottom of it. Easy!)
And this should be respected if you use another's person's art or writing too.
Now, I could quite happily sit here and tell you all about copyright law, but we'd be here forever and frankly it's a boring topic and I'd rather you get out there and read all the awesome fics you're going to discover instead.
But, in a nutshell, any picture of Pedro you post, does not belong to you, no matter how many times you write your user name all over it.
Look, we all do it; we all like to make our edits, our banners, our covers look wizard, and I do it myself. But what we can't do is claim ownership or copyright to it.
Some people will try; they'll get pissy if you use something that they claim they found first or is "theirs" because they plastered their user name all over it... putting your username on something does absolutely nothing FYI.
☝🏻No-one can claim copyright or ownership to any image of Pedro, unless they physically took that photo themselves and can back it up with evidence should they be challenged legally.
My advice here is to always credit the source on anything you want to use, i.e. where you found it and tag or link back to the original content creator where possible.
If you're unsure where it originates from, you can still use it, but just make a note in your post somewhere about not knowing who it belongs to etc... so the original creator can advise you later.
Again, it just all boils down to being respectful.
And if you're ever not sure if you can, or should, use something, reach out to that creator on Tumblr and ask. They'll appreciate it, regardless if they give you permission or not.
Hoo, we sure covered a lot here...

I hope you've found this post useful at the very least. For a more extensive use of Tumblr you can easily use the search function, or via Google if there is a particular setting or something you need help with, or reach out and ask someone. This Pedro community is incredibly welcoming and helpful.
And if they're not, well you let me know and I'll send the Pedro Boys to sort them out. 🫡
If you enjoyed this, and did indeed find it useful, you know what to do:
RE-BLOG IT!
Now, get out there and have some fun exploring and reading!
Stay Kind. Stay Creamy. 🖤

🖤
GIF of Dieter Bravo from @miguelo-hara 🖤
#pedro pascal#pedro pascal fandom#pedro pascal characters#dieter bravo#dieter bravo the bubble#welcome#hints & tips#jett has spoken
212 notes
·
View notes
Text
It's remarkable how easy Linux Mint is to use, compared to Linux's general forbidding reputation. It was really easy to set up for me who has no coding knowledge. I had to fiddle with the boot order in my BIOS a bit but no biggie. Follow the installation guide on the website, and you will be fine. You can boot from an USB too, and test out the OS before installing it and wiping your drive. Transfer data to an external drive before you do.
And you probably won't have much trouble once it is installed either. The default settings are reasonable, and can be changed. It's a very easy to use OS. I have had no problems doing most of the ordinary things I use an OS for. My most used programs on Windows was already things like Firefox, VLC media player and Libreoffice on windows, and they function just as fine on Linux Mint (and are indeed installed by default).
Gaming has given me some trouble, but honestly Lutris has solved most of them. Granted I run mostly so old games on this laptop that Scummvm and dosbox is a solution for many of them. And installing 32 bit libraries has solved others (running the command in this link in the terminal solved so many issues alone). I play very old games, if you can't tell.
Sure, part of how Mint is so user-friendly is that it imitates Windows graphical user interface. But to be honest, it does mean users coming from Windows are already used to the interface. And Mint imitates only the parts of it that work, like the taskbar. And Microsoft has had a bad habit of making the gui look like a phone or a tablet for years now, so Mint does a Windows-like gui better than Windows at this point.
Mint is better than Windows in being a user-friendly operating system in general. Windows being spyware and full of bloatware is well-known and LInux gets away from that bullshit. And just how polite MInt is about updates is a massive improvement. No forced reboots here while an update takes ages to install.
Mint is a long-term support distro, which means it focuses on stability over the latest updates to packages and programs, introducing updates not when they are first released, but after a while when any bugs have been ironed out. And that improves the OS's stability a lot, which I value over getting bleeding edge updates. If you want updates as soon as they happen, and are willing to tinker a bit to fix things, there are other distros which use a rolling-release model.
It is less demanding on the hardware without compromising functionality. Like the majority of Linux distros takes up way less space on the drive and less memory compared to Windows, you can get more life out of an old computer this way.
There are so many older computers that still function fine hardware-wise, but since the specs on that hardware are too weak to switch to a newer more-resource hungry version of Windows, the machines are abandoned because the OS ends up unsupported and unsafe to use. Windows 10 support is going to end in 2025, it might be extended, but the end of w10 support is going to be a blood bath for this very reason. So many computers can't meet the specs for Windows 11 that the switch will be painful. And I would urge you if you are affected by this to upgrade to a LInux distro instead of getting a new computer just for windows 11.
197 notes
·
View notes
Note
Hello! I'm interested in learning how to make gifs but idrk what you need or how to get started... I think I need photoshop? + I don't have a desktop computer, is it ok to just use a laptop? Sorry, I'm super clueless, idk where to begin 😭 I hope you have an awesome day!!
Before we started with this unexpectedly long ass guide,
WELCOME TO THE WORLD OF GIF MAKING 👏🎉🎊 TAKE THIS CROWN 👑 I HOPE YOUR DAY IS SUPER AWESOME TOO
Disclaimer: this is the process of how I usually make gifsets, very general instruction. Every gif maker has their own preferred method, esp coloring [!!!], and tools. You just keep doing trial & error and mix & matching various methods from different gifmakers until you find your own preference.
For more detailed tutorial from beginner to advance gif making tricks, you can always rely on @usergif and @studiocarat. I also add some links for more detailed tutorial in each step.
Beginning with, your question. "Is it ok to just use a laptop?" surprise, im typing this on my old ass laptop, struggling from the weight of premiere pro, illustrator, photoshop, figma, and gigabytes of videos and project files. the bios function is screwed and it wont last for 15min without the adapter being plugged in. so, yes. you still can absolutely slay without PC 👍
p.s. the last paragraph down there is pretty important
Step 1: Downloading video
The most popular tool for downloading HD videos from Youtube is 4kdownloader.
Pros: it's free, easy to download, user-friendly interface, and provides until 1080p quality
Cons: 4k videos aren't supported with the free subscription
Alternatively, I use yt-dlp because I
Pros: all resolutions and formats are supported, multiple platforms like Twitter are supported
Cons: it's a command-line downloader aka you need syntax to operate it, not user-friendly for average users
For music shows, I download the stage from kpop24hrs.com. This is a different case since you have to register to get an access to their directory. They provide .ts files which is different from usual Youtube format.
Further reading on .ts files and resources for other tools: [x]
Step 2: Pre-giffing Resizing & Denoising
Before I process my gifs in ps (or other software/website), I use VapourSynth to resize the gif and denoise them to create "smoother" gif base. Here's Lee's (((extremely))) comprehensive guide on VS installation and its setting fuckarounds + basic giffing.
This is my basic script for vs. You can attempt different values for sizing, denoising, and sharpening on the left red rectangle.
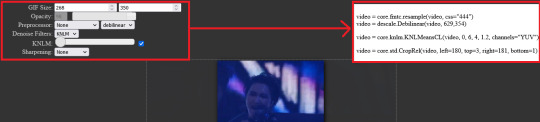
For the gif size, I usually fix the width at 540px for larger, more dramatic gifs. For 2-row gifset, I usually use 268px or 350px. The denoising value is standard and I don't sharpen from vs. Just from ps.
You can also trim the gif length (usually represented with frames) on vs. I always try to limit the # of frames to 20-40. Maximum at 70, very rarely 100. Cus the greater the number of the frames, the louder my laptop's scream and cry 👍
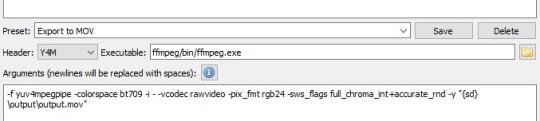
I export the script to MOV. Keep the setting like this and start the encoding process. Don't forget to change the file name in the "output" folder because VS will save the new mov file with the same name and it will overwrite the previous export.
Step 3: Making your gifs
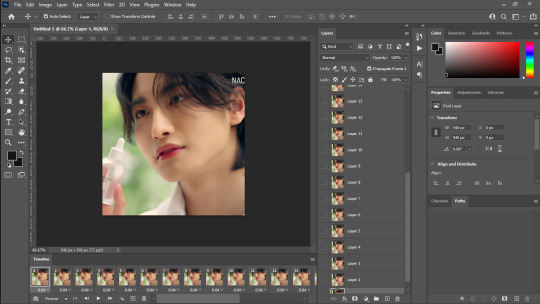
You can choose your gif making software depending on your laptop's condition (RAM, overall health, age, OS, etc.). The software I use is Photoshop CC 2021. It's free btw because adobe is absolutely not a capitalist 😄👍 However, the entire adobe pack is a huge load and so does Ps. Alternatively, you can use Photopea. Here's a tutorial for making gifs on Photopea [x]
3.1 Importing Video Frames
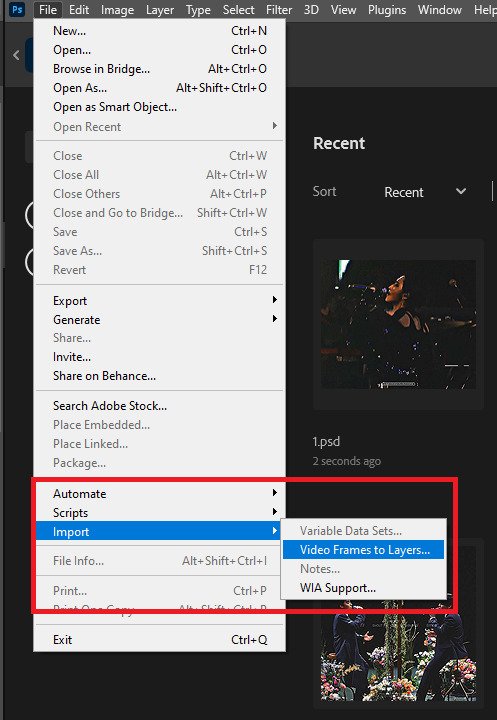
First, you have import the mov file to Ps by navigating to File -> Import -> Video Frames to Layers
Then, you set the length of the gif. But since we've trimmed it on vs (if you decide to use vs), you can just continue.

You'll end up with this layout after successfully importing the video frames. This hwa gif is 540x540px.
3.2 Creating Timeline
Actually I made a .atn (action) file for making timeline to save my time. However, I'll let you learn the step-by-step first.
First, click the burger button and click Select All Frames

Then, click the frame delay (as shown) and click Other...
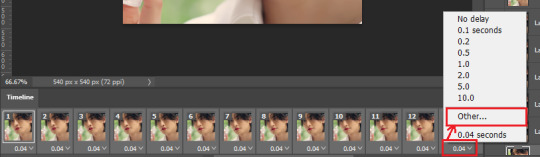
Set the delay to whatever you amount you wish. My go-to setting is 0.05 that's similar to "normal" irl speed.

While still selecting all the frames, click the burger button again and choose Reverse Frames. Your video timeline is by default reversed (end -> start) when you import it, so you have to re-reversed. After that, check if your gif has been correctly reordered.

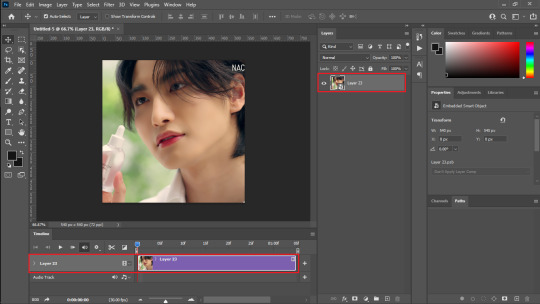
Now, some gif makers do the coloring before turning the gif to video timeline. However, I do the opposite akjdalsd, just because. So, we'll turn the frame to video timeline by clicking the Convert to video timeline button

3.3 Converting for Smart Filters
Because we're going to touch up the gif, we'll convert it for Smart Filters. After changing to Video Timeline, you'll see your layout as shown below. You want to select all the video layers by pressing Ctrl + Alt + A

Navigate to Filter and choose Convert to Smart Filters

And bam! Now those layers are compiled and you can do the coloring for the entire set of layers.
Here's the link to the timeline .atn files (+ the tutorial too!) by spinebuster.
3.4 Sharpening
Now, the main part. This is the part where you can, freestyle. Also, some cases where different size affects the sharpening result. I suggest you refer to usergif's tutorial.
Personally, I like slight noises (the little critters) on my gif to enhance the sharper and crispier illusion. The sharpening steps are flexible, meaning every gif maker can have their own preference. So, just play around those settings and you'll be fine!
Some sharpening tutorials that I adapt from:
⁕ booskwan (theo's) + coloring!
⁕ userdramas
⁕ wonwooriduls
Sharpening action (.atn files) you can use:
⁕ brainwasheds (zaynab's)
These are examples of unsharpened and sharpened gifs:

3.5 Coloring
The next big step is coloring. I don't have a go-to coloring steps but usually my main goals are 1) returning the human skin color, 2) making the lips red/vibrant. Coloring will also depend on the type of clip that you gif e.g variety show vs music stage vs movies/series. Usually, i found them requiring different methods. Music stage usually requires more blue correction (from the stage lights).
Some basic adjustments that you can use are: curve, level, exposure, selective color, hue/saturation, color balance, channel mixer, photo filter, color lookups, and gradients (especially for skin color).
I'll provide you some tutorials from different absolutely amazing users' coloring techniques. One way to find out your coloring style is to try to spot/list these gif makers' "unique" method from their outputs and put them into application until you find yours.
⁕ bejeweleds (very comprehensive and complete guide)
⁕ wonwooriduls (simple coloring guide)
⁕ snug-gyu
⁕ booskwan
⁕ jeonghan-yoons
This is an example of my own coloring. i usually give an even warmer skin tone but as i was giffing, i was trying new method to compare. Always learn, always improve 👍 (see the lip color and you will understand what I mean by "making it red")

3.6 Exporting
Last step, is exporting. This part can be quite tricky too but I don't recommend thinking too much about it asjdjf. To export your gif, you can go to File -> Export -> Save for Web (Legacy) or simply press Ctrl + Shift + Alt + S altogether. This is my setting for export:
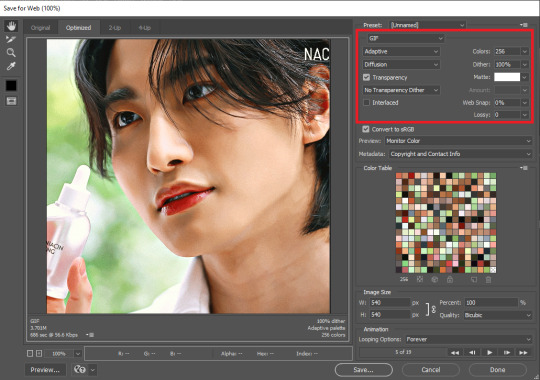
You can play around with the dither setting, changing from diffusion to pattern to noise. It's basically the way the many colors on your gif are gonna be "weaved" together. Having too many colors in a gif can result in "jaggy", lq looking gif so be mindful with the dithering choice.
Unfortunately, I didn't find a separate tutorial focusing on gif exporting. Afaik, the more gradient of color in your gif, you better use "diffusion" for a smoother blending. "Pattern" dithering is better on, for instance, anime that has less gradient.
And while we're at it, I must tell you that making gifs is a time consuming hobby. Look at these much learning and constant improvement that you might "crave for" amidst your endeavor. Sometimes, just doing it for the sake of our little recreation might not work as a boost. Sometimes, we still need reblogs and people's feedbacks on the tags as our little "snickers" to keep going on but they're also pretty expensive nowadays.
So, have fun, keep this as a little recreation. If this process begins to feel exhausting, I suggest you to pause it and take a rest. You can continue again at any other time :)
#ask inc.#from: anon#<3#MY FIRST GUIDE DAMN#i hope it'll be helpful somehow 😭#right anon if u make your own first gif can u tag me maybe? 🫠
41 notes
·
View notes
Text
Getting Linux-y (for Windows refugees)
a casual users' GUIDE to the basics
Linux ? isn't that for nerds ??
yes. no. we're breaking down stereotypes here !! this post is aimed at casual users who care about freedom + privacy, are sick of the direction Windows is heading, or just curious c:
i'm talking social media, email, web browsing, online shopping, pdfs, document writing, funny meme edits, youtube/netflix/plex, spotify, dvds + cds + mp3s etc.
i'll mention gaming and running specific Windows-only software briefly, but that's outside the casual scope i'm going for d:
Arm thyself ! and decipher !! arcane secrets be upon ye !!
it's key knowledge time !! ^w^
Linux isn't Windows, but it's not completely alien :o
much like Tumblr, one curates their Linux experience. there are flavours of Linux (terminology: distribution/distro) aimed at power users who like to DIY, and there's ones aimed at normal folk that are ready to go. for the sake of this GUIDE i'm recommending Linux Mint:
its interface is similar to Windows,
it's popular as a user-friendly choice
and it has both excellent support and software
(note: i ran Mint for years, and when coming back to Linux i chose it for my gaming pc because it's easy to set up and well-supported)
key information:
Linux doesn't use drive letters :o
your C: drive is / (terminology: root directory)
your personal files (C:\Users\Username) live under /home/username (terminology: home directory)
other drives (internal and USB drives) live under /mnt/drive-label or /media/username/drive-label (terminology: mount point)
Technical Note: all hard drives and SSDs, before they get a mount point, are referred to as /dev/sdX (eg /dev/sda, /dev/sdb etc.) for HDDs and SATA SSDs (partitions are /dev/sda1, /dev/sda2 etc.), and /dev/nvmeXn1 (/dev/nvme0n1, /dev/nvme1n1 etc.) for NVMe drives (partitions are /dev/nvme0n1p1, /dev/nvme0n1p2)
however, Mint manages all this for us and stuff just shows up in your File Manager much like they do in Windows Explorer c:
Software is typically managed similar to the way App Stores work; Mint has Software Manager that lets you install common programs
the only wrinkle here is Mint supports both Mint-specific sources and a thing called Flatpak, which is like a universal App Store for all Linux distros
the Update Manager keeps both your core system and your programs up-to-date. unlike Windows, by default it will only update when you tell it to ! no more rebooting into Windows Update and waiting 10 years ^w^
it's possible to have both Linux and Windows on the same laptop (terminology: dual-booting); you choose which one each time you turn your laptop on
the Linux Mint Forums are a good place to ask questions, seek advice, and maybe even offer your own !!
additional places: Official Community Website, community-maintained subreddit, community-maintained Discord Server, Official Troubleshooting Guide
i think that's the basic info taken care of.
Let's start with the preparation, or PRE-paration
for this GUIDE you'll need:
a USB drive (4GB+)
Linux Mint ISO file
Balena Etcher (to put the ISO file on the USB drive)
i recommend reading through the info on the Mint homepage and following their installation guide for good step-by-step guide w/ screenshots ^^'
we're gonna make a 'Live Image' on our USB drive - this means we can testdrive the system before we install it. try before you buy !! wait, it's free -- uhh.. walk before you run ??
Download the ISO file using the above link. i recommend the Cinnamon Edition, unless you have a very old PC, in which case pick XFCE
Download Balena Etcher
Plug in your USB drive and open Etcher
Follow the onscreen prompts to select the ISO file and your USB drive
Alright, let's fire her up ! ^u^
now we have our USB drive it's time to boot it. because Windows is, well, Windows, you may need to disable Fast Boot in order to access the BIOS/UEFI. :c you may also have to disable Secure Boot in the BIOS/UEFI depending on your computer. this is usually found in the Boot, Security, or Authentication tab.
now we're ready !!
Power on your computer and press F1/F2/F6/F10/F12/DEL to access your BIOS or Boot Menu
Select your USB drive
A screen will come up where you can select Linux Mint (or will say Automatic Boot in X seconds)
You shall be greeted by a desktop that looks something like this

have a look around !! there's a menu in the bottom left that has programs and system settings and logout/reboot/shutdown options. the taskbar at the bottom displays icons of running apps (and pinned ones). the bottom right has your clock and system tray w/ network, audio etc.
this is a great time to get a feel for how everything works ! open some programs !! investigate the System Settings. connect to your WiFi (in the system tray next to the sound and clock).
when you're ready, double-click the "Install Linux Mint" icon on the desktop. the installer will walk you through setting everything up. i recommend following the official installation guide's walkthrough as it explains everything from setting your timezone to installing Mint by itself or alongside Windows, with screenshots showing each step. it also has an important section on installing drivers. the slideshow during installation also does a good job at showcasing the available software.
Welcome Screen
after installing and rebooting, a Welcome Screen pops up that offers a nice interface for picking a system theme/colour, installing drivers, and setting up backups etc.
Let's talk software !! :D
Mint comes with some software pre-installed. these are probably the main ones:
Archive Manager (like 7-Zip or WinRAR)
Celluloid (a video player; VLC is available to install if you prefer)
Drawing (an image editor similar to Paint)
Document Viewer (PDF viewer)
Firefox (Tumblr's favourite web browser)
LibreOffice (like MS Office - it even supports MS Office file format !)
Rhythmbox (like Windows Media Player or iTunes)
Software Manager (like the Microsoft Store/App Store; GET OTHER PROGRAMS HERE !)
System Monitor (like Task Manager)
System Settings (like Control Panel)
Terminal (like Powershell/Command Prompt; outside the scope of this post but good to have)
Text Editor (like Notepad)
Timeshift (like System Restore points, or macOS Time Machine)
Web Apps (similar to an old iOS feature - make Netflix.com into an app etc.)
Update Manager (manages updates)
Available in Software Manager:
Audacity
Discord
DOSbox
Dropbox
OBS
Spotify
Transmission (torrent client)
VLC
and much more !
these are all official apps !
How's that checklist ?
i mentioned some casual tasks at the start of this post. let's work through them !
Social Media, Online Shopping, Youtube/Netflix/Plex and general Web Browsing
Difficulty: easy
Windows Similarity: identical
Method: open Firefox. browse to your_site.com.
note: i recommend the web version of Plex as the app can be buggy
Email
Difficulty: easy (webmail), medium (mail client)
Windows Similarity: identical (webmail) or similar (mail client)
Method: webmail - open Firefox. browse to your_email_site.com. sign in
client - open Software Manager. search for Geary (similar to Mac Mail), Evolution (similar to Outlook), or Thunderbird (same as on Windows). click Install. open Geary/Evolution/Thunderbird, follow the first-time setup.
PDFs
Difficulty: easy
Windows Similarity: similar
Method: open Document Viewer from the application menu. File -> Open, browse for your PDF. OR, open File Browser, browse for your PDF, double-click to open
Document Writing
Difficulty: easy
Windows Similarity: similar
Method: open LibreOffice Writer from the application menu. on first launch it may ask if you want a traditional (Office 2003) or Ribbon (Office 2007 onwards) layout. use it as you would MS Word. there's also Calc (Excel), Impress (Powerpoint), Draw (Publisher) and Base (Access)
Funny Meme Edits (aka MS Paint level of image editing)
Difficulty: medium
Windows Similarity: similar
Method: open Drawing from the application menu. File -> Open for your image. the left toolbar provides options to resize, add text, crop etc. pro tip: remember to click the tick button on the bottom right when you do anything !
Spotify
Difficulty: easy
Windows Similarity: identical
Method: open Software Manager, search for Spotify, click Install. then open it from the application menu.
DVDs
Difficulty: easy
Windows Similarity: similar
Method: insert your DVD. Mint may ask what you want to do (choose play/open with Celluloid). if it doesn't, then open Celluloid from the application menu, click the + icon in the top left, click "Open Disc" and choose the DVD you inserted.
CDs and MP3s
Difficulty: easy
Windows Similarity: similar
Method: CDs - insert your CD. Mint may ask what you want to do (choose play/open with Rhythmbox). if it doesn't, then open Rhythmbox from the application menu. it should automatically see your CD.
MP3s - double-click your MP3 file.
Gaming and Windows-only programs
i said i'd briefly mention this (probably good bc the post is getting loonnggggggg), so here we go.
gaming on Linux has come a long way. Steam can be installed from Software Manager and supports a few titles natively, as well as the option to run some Windows-only games using compatibility software called Proton. the website ProtonDB is very handy for looking up compatibility for specific games. i'll drop a proper GUIDE on Linux gaming another time.
Windows-only programs. sometimes you need specific software and it only has a Windows version. it happens. there's similar compatibility software that allows eg Photoshop to run, called WINE (Proton is actually based on this). again, this is outside the casual scope of this post, but i'll drop a GUIDE on this too (as i use the same software to manage both my Windows-only programs and my Windows-only games).
Finale !! FINI !! Fuck me that's a lotta words !!
okay, we got to the end ! you should have Linux Mint installed, you should have your basic programs ready to rock (and know where to get more !!), and know where to get help from official Linux Mint sources as well as community-run ones <3
please drop any questions in the notes, or as an ask. i shall tag those asks #DATA_REQUESTS/GUIDES/LINUX in addition to my usual #DATA_REQUEST tag
i'll also provide the following GUIDEs/REPOs as i have time:
Flatpak (that universal App Store i mentioned earlier)
Gaming (including using Proton + Bottles for Windows games)
Windows software (using WINE + Bottles)
and if there are any specific GUIDEs (eg terminal basics, how to configure xyz in System Settings etc.) or REPOs (eg links to other people's GUIDEs, software recs, screenshot galleries etc.) i'm happy to provide those as and when i have the time !! have fun !!~
#daemon.md#GUIDES#GUIDES/LINUX#linux mint#linux#free software#foss#open source#this post is like 5x the length i expected it to be bc brevity ain't my style#oopsie#i know i should provide more screenshots but i'm tired after writing this#so i'll include some in a reblog ??
833 notes
·
View notes
Text

Magma event details!
Please check the rules below if you plan on joining our events!
A few words about Magma for newcomers:
Magma is a free browser based art program where participants can collaborate and draw on the same canvas at the same time!
Magma works on both PC and mobile devices!
Magma has most useful art program tools! But some are a little difficult to find, like layer opacity lock.
You can export the images as PNGs and PSDs so you can save and keep all your layers etc.!
Hosting a session is easy! Set up a new canvas and share the link and that's it, you can start drawing. You can do public sessions like mine, or private sessions just with your close group.
Update!! Previously you were able to use Magma anonymously without making an account, but this option does not exist anymore.
Our Magma event rules
Have fun! These events are meant to get you inspired, get to know other artists and create awesome art and ideas together!
Everyone is welcome to join my sessions! Doesn't matter where or when you join. You don't need to draw anything there, you can also just come and chat with us and watch others do their magic! Lurking is totally fine too!
Avoid drawing too big! Make sure to leave enough space for other people's drawings! Mind that there are 40-80 people partaking in these weekend events! (Max. 1/6th of the canvas per drawing is ideal!) We recommend to zoom in at 100-150% before you start drawing to avoid this. However! If you have an idea that others can contribute to, I'd be excited to hear it!! Those are highly appreciated!
Avoid drawing over the canvas frames!This is for possible future use in i.e. collages & personal aesthetics. They are there for a reason.
Keep it PG!
You are allowed to paste reference images in the session to use as a base etc.! Please remove them when you don't need them anymore and make sure not to cover areas where others are currently drawing!
When you are finished with your piece, please flatten your layers! The Magma total layer limit is 60 layers per canvas and it gets full rather fast. We have set a 8 layer limit per user/canvas. (If you have used layer effects in your piece, start flattening from bottom to top so they get preserved correctly!)
If you want to post/share Magma art that features other artists' works, you must ask for their permission first! This is very important!! Simple blur/solid color to hide them is ok, otherwise editing other people's art is not!
If you need more time to finish your piece, please let me know as soon as possible! If you know you aren't going to finish yours, please release the space for others to use!
Don't hesitate to ask anything! We are very happy to help out make the most of your session! Our regulars are all friendly and helpful, and my co-admin and mods are able to assist with i.e. getting your layers back!
Other tips!
Some users have experienced disasters losing layers for good by pressing CTRL + X, we recommend avoiding that for now!
Save regularly! Magma is a server based program so it's not as stable as your usual art programs, and also when the program refreshes you might lose some of your progress. Better saved than sorry! You can export the whole canvas as PNG, JPG & PSD!
You can have up to two Magma sessions open in your browser at once!
If you log out of the session you might lose rights to your layers. Please ask either the admin or approved users to give your layers back to you!
If Magma is going slow for you, it may be fixed by turning off the graphics accelerator. Go to Edit > Settings > Turn off Graphics Accelerator.
Merge layers with layer effects starting from bottom to top! For some reason Magma messes them up easily otherwise and the results will not look like you want.
Magma has a text chat we love to hang out in, it's of course optional but we would be happy to have you there!
You can send private messages to others by being on the same canvas with the receiver and clicking their icon!
Magma also has a voice call option. We prefer not to use it, but it's easy to misclick the button! Don't be alarmed!
We're continually figuring out new features and bugs in each session, I want to note down all of them to make the sessions as smooth and fun for you as possible! Let us know if you have any issues!
Also something notable: it's always well appreciated if you draw official Pokémon characters! Most of my followers are into submas or Pokémon in general so as the host I'd like to offer content most would enjoy! Some events welcome OCs but the free doodle session will always stay open for your characters!
After everyone is done I start post-processing the images. It may take a while until they are ready to be posted, please be patient! I will post the art on both my Twitter and Tumblr. You can use #jun's magma events for tagging your posts!
See you in our next event!! All aboard! <3

81 notes
·
View notes
Text
A primer on Linux for non computer nerds
What is Linux?
Linux is an operating system, like Microsoft Windows or Mac OS. Specifically, Linux is free open source software, as opposed to private software sold and developed by a corporation like Microsoft or Apple.
Why would I want to use Linux?

Windows and Mac OS (but especially Windows) are including more and more bloatware as of late - software that takes up space on your computer and may use computing resources that can't easily be turned off or deleted.
In addition to being free of the anti-user practices that have become the norm on Windows and Mac OS, Linux has other advantages, like not requiring antivirus software (as a consequence of its design decisions and its relatively low usage, comparatively).
As a result, lightweight Linux distributions are often used to resuscitate old computers that have become too slow to use on other operating systems.
It should be noted here that for any aspiring computer nerds reading this, Linux has a lot of other advantages in terms of the customization it offers and the tools it encourages you to use, but that's not as relevant to your average user.
Why shouldn't I use Linux?
There are two main drawbacks. First, the smaller userbase means software companies are less likely to develop with Linux in mind. This is especially notable for gaming, which is generally considered better on Windows than any other OS.
If you have specific software you want or need to run, you should check in advance if it can run on Linux, or if an equally good open source alternative exists. Linux developers are working hard on this and have made great strides in recent years, and personally I've been running games on max settings (4k display) with high FPS and no issues on Linux.
Second, Linux is more work to install and run. On a user-friendly distribution, it should be pretty easy for anyone who is comfortable using google to look up solutions to computer problems, but if computer problems are especially anxiety-provoking or stressful for you, you may be better off sticking with your current OS.
What's a distribution?
Linux is an umbrella term for free open source operating systems that use the same "core" (the Linux kernel). Each Linux distribution has different features.
Which distribution should I use?
Linux Mint. Specifically, the Cinnamon edition, unless you're trying to revive an old computer, in which case you may prefer the more stripped-down MATE or Xfce editions.
For computer nerds, this is a hard decision, and there are lots of arguments on the internet about it. But if you're looking for a distro that prioritizes easy, intuitive installation and use, reliability, stability, and community troubleshooting resources, the consensus pick seems to be Linux Mint by a mile.
To make the switch, you'll need a USB drive with at least 4 GB of space and another device to search for troubleshooting advice/view a guide. After that, follow the advice on the Mint website, or look up any of the myriad tutorials online (there are plenty of video tutorials on Youtube, for ex).
Advice for the switch
If you're switching your OS on a machine you've used for a long time, be sure to back up your files beforehand, and don't switch on a machine that you need to be perfectly functional in the near future, like a work computer. Odds are very good that everything will go smoothly, but you shouldn't count on that.
Make sure that you have another device with internet access (I used my phone) to google troubleshooting advice in case anything goes wrong.
WiFi in Linux Mint doesn't work always work out of the box - the driver manager will get it working for you, but it often needs to be connected to the internet to do so. There are two main ways to connect without WiFi - connecting directly to your router (ethernet) or sharing your smartphone's WiFi (USB tethering). If these are unfamiliar concepts, there are plenty of online resources easily found on google that explain both.
Fellow computer nerds: if there's anything you think I should add or change, let me know in the replies/reblogs.
I also had a weird issue where the driver manager told me I had no updates left, despite my drivers clearly not working. The solution to this was restarting not once but twice - after that everything worked like a charm. Remember the golden rule of computer troubleshooting: try turning it off and on again.
EDIT: Did this again with a friend, the actual solution that works here is updating the kernel to the latest version. Open the update manager, go to View -> Linux Kernels, and install the latest one.
723 notes
·
View notes
Note
actually can you post more vibrators if you have any recs? so here for this 🙌🏻
I do have recs! I have one main rec really because since I got this baby like 5-6 years ago I have genuinely not required any other toys.
I present for your consideration, the Lelo Sona!

It comes in cute colours, it’s very quiet, it’s very user friendly for those of us with mobility challenges, it’s just as delightful on the anus as the clitoris, and it looks very unassuming so if you’ve left it on your bed accidentally and your mother comes over and wanders into your room and spots it next to your Clarisonic and your shaver and your electric thing that gets the dead skin off your heels, she doesn’t even realise it’s not some sort of personal grooming device!
Important note for clitoris havers: I’d recommend you void your bladder before using or lay down a towel because BOY HOWDY you might just squirt even if you’ve literally never squirted before!
Easy to recharge and mine is still going strong even after five-ish years. Silicone skin. Multiple settings. Easy to clean. Love the bitch. Bought one for a pal as her divorce present. 25/10!
They are on the more expensive end but SO worth saving up for.
If you’re really lucky and you have two then I say attach one to the clit and the other right on your arsehole and zap yourself into an alternate dimension!
19 notes
·
View notes
Text
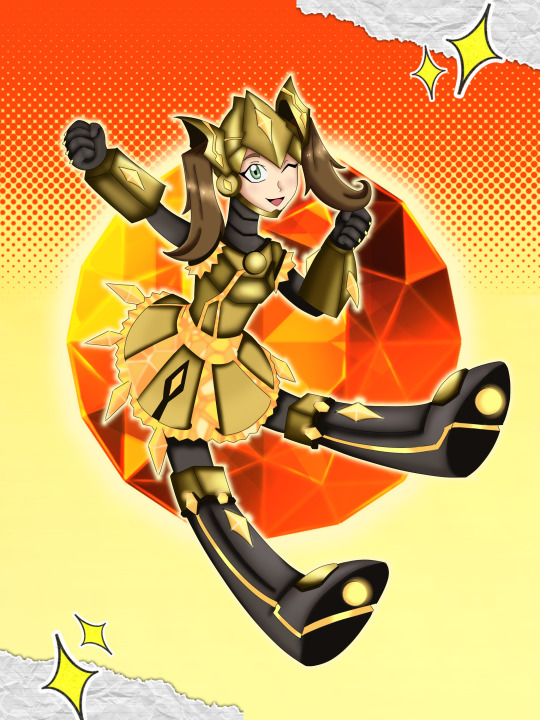
YGO OC Week Day 1: Introduction!

Hi all! This is my favorite YGO blorbo, Penelope Smith! She's designed for the VRAINS setting, though there are a few instances where she gets thrown in other settings for fun.
More info on her below the break! (Also, all of the art here is commissioned; credit is in the alt-text.)
Appearance
Penelope Smith is young woman with mostly-straight light brown hair that falls to her upper back, who stands around 5'8" in height. She can often be seen in the Den City High uniform, coupled with a pink, heart-shaped hairpin above her left eye. In addition to the uniform, she often wears white leggings that go to the lower part of her thigh. She has green eyes and almost always has a cheery expression.

She also has a VRAINS avatar, Transcendence, but details of that will come at a later day!
Personality
Penelope is helpful and excitable to a fault. She will always do her best to help out others, often to her own detriment in terms of time commitment. As a result, she is often pulled in many directions to the point of tiring herself out, but she manages to keep up a cheery demeanor all the time. Any stress that she does encounter gets bottled up, lest she show signs of weakness or cracks in her personality to others.
Her outlook could be described as "pragmatically optimistic". She is always hopeful that things will work out, but she believes things will get better because she (and others) will make them better.
If she were asked why she has that worldview and demeanor, she'd say that she wants to be the person she needed a few years ago. She needed positivity, so she brings it. She needed hope and a friend, so she brings it. She needed honesty and security, so she brings it.

Of course, the drawback to wanting to be so friendly, open, and generous is that she can often be extremely naive and manipulable. She often forgets that people can lie and is very easy to take advantage of; she often gives the benefit of the doubt to others when she really shouldn't.
Her name, Penelope, was chosen because she was reforging herself. She kept her prior last name. (Out of character, that was chosen because she's a machine user.)
Biography
Penelope was born [REDACTED] to loving parents. She partook in many standard activities for her age, and her father helped to instill in her a love of robotics. He also taught her how to play Duel Monsters.
However, when she transitioned near the start of puberty, she was the subject of much bullying, and many of her friends turned on her. Conveniently, around the same time, her family had to move away, so she never really got to have closure on her former friends would have treated her; her new classmates only knew her as Penelope.
She spent the next several years of her life in Den City, continuing her research and schooling. She remained near the top of her class academically.
During the events of VRAINS, she wanted to help, but didn't know how, and was risk-averse enough to avoid being caught in the crossfire of many of the incidents.
Deck
Penelope uses a Crystron deck. The cards allow her to adapt to the situation as needed, keeping herself flexible, while also being defensive.
She has a deep appreciation for Crystron Citree and sees it as a parallel to herself; she likes to find people who are in their darkest hour and drag them out to become something better than they ever were.
(There are also other canons of her which have used other decks, including Machina, Geargia, and the custom archetype of Reclamatron, but they aren't relevant here.)
@ygoc-week
29 notes
·
View notes
Text
cryptpad review !
in depth review of cryptpad as someone who is using it as a replacement for google docs because i don't trust google and i dipped the moment i heard "fully integrated ai" 🤭
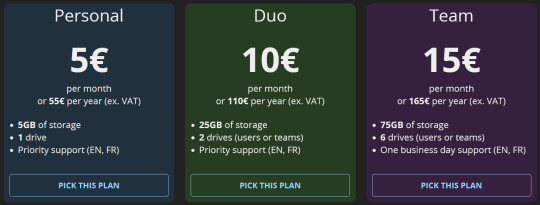
we're scoring cryptpad on a scale of 1-10 based on its interface, features, accessibility, ease of access, and storage.
scoring criteria:
usability 10/10 : has a lot of formatting options, while also being easy on the eyes. offers features that allow the software to be easily customizable to each user's needs and preferences, or features that make writing easier, without being overwhelming.
accessibility 10/10 : includes accessibility options for eye strain/dyslexia/etc like a proper dark mode and dyslexia friendly fonts, while also having an easy-to-navigate layout, and a mobile app that is equally easy to use without losing its features. doesn't take a long time to load, and is easy to adapt to as a new user.
storage 10/10 : provides a free account with very high or unlimited storage. the documents and files you create don't take up a ton of space, and you have options for upgrading storage if applicable.
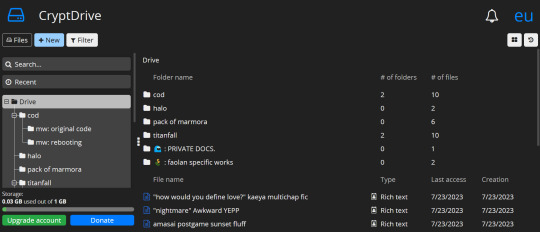
what is cryptpad?
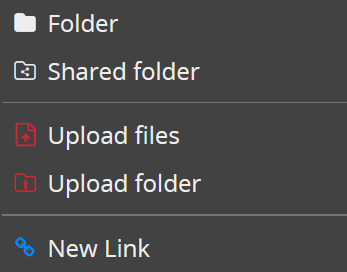
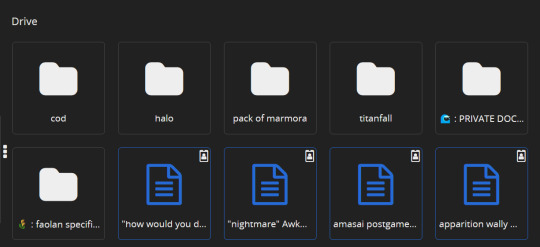
similar to how docs operates on desktop, cryptpad is a website-based file drive and software. it's free to create an account, and offers a selection of different kinds of files you can make. here's a list of features i think are notable, first:
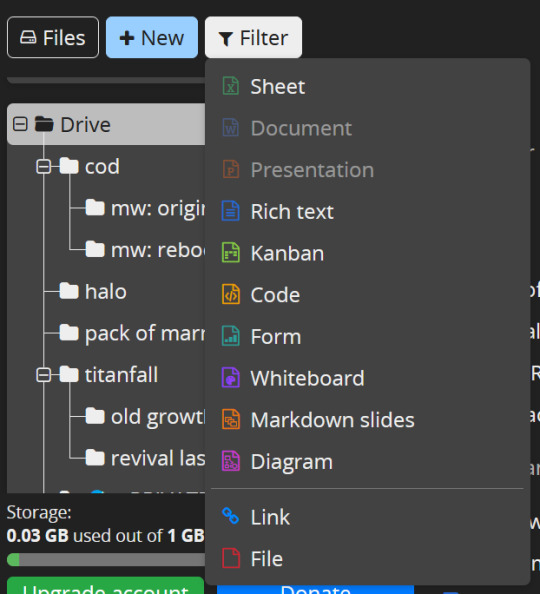
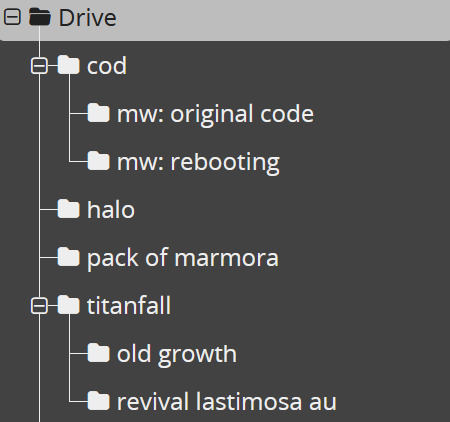
there's 10 different of kinds of files you can create, including even code documents! cryptpad also allows you to create as many folders as you like, upload pre-existing files or folders, and even allows you to add links to your drive if you have links you want to save.
cryptpad always will open a new document or a pre-existing one in a new tab! when making a new document it automatically gives you the options to name it, password-lock it, set a destruction date.

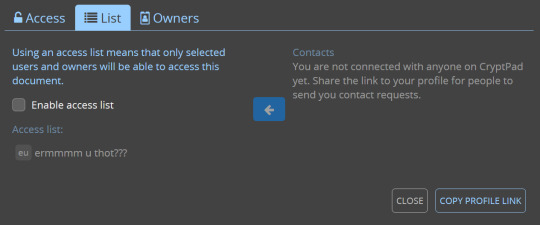
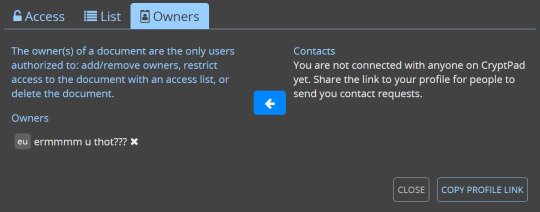
there's diversity in your sharing options: you can toggle and change the rules for the kinds of access people get to your shared documents!
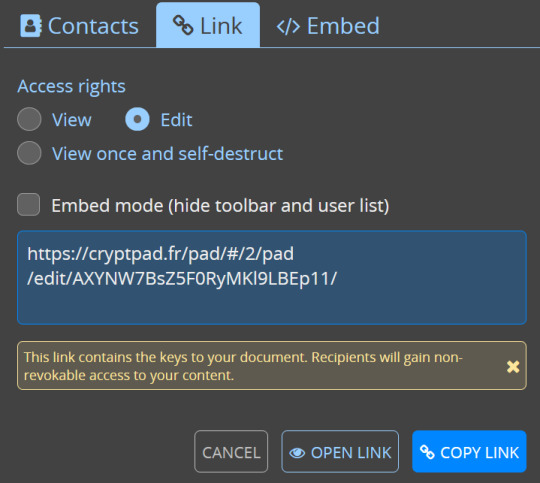

somewhat on the same topic, there's access settings and details you can review and tweak at any time.
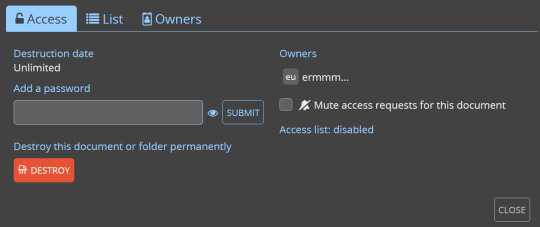
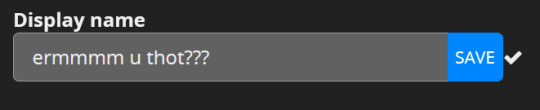
also you can change your account's display name in your settings LMAO
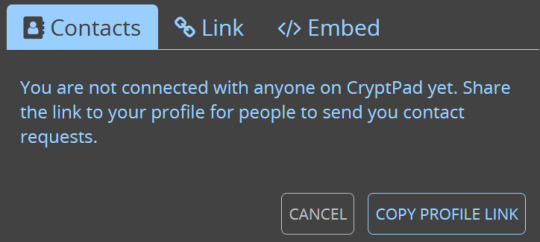
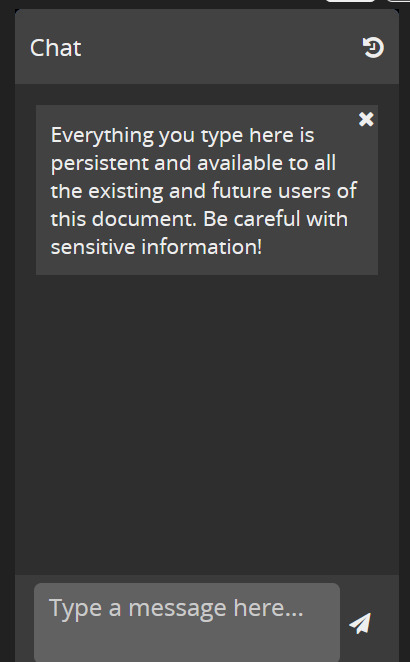
there's a chat option on documents for when you're working on something with other people in the upper right corner of your screen!
the actual scoring:
usability: 7/10
formatting your documents isn't terribly versatile on cryptpad, but it offers to you that you can make as many folders and nest as many of them as you want, while also making its layout and navigation simple. there isn't a ton of super fancy features in the rich text documents, but i enjoy that, to be honest! keeps it simple.

accessibility: 7.5/10
tragically, you cannot change the background of cryptpad files, and there's no mobile app :( if i could i would. they do, at least, offer a light or dark mode? i have dark mode selected of course, but it um... yeah the background is always just that white 😬 unfortunately. they do have basic font options, but personally, my love for cryptpad's accessibility lies in the fact you can make as many folders and nested folders as you damn well please, and the drive screen is SO easy to navigate.

storage: 10/10
1GB for free, to start with? sir, i have 52 files in this drive (all rich text) and i have used 0.03 of that !! which, if i did my math correctly (debatable), that means i'll need over 5 thousand files to fill up that 1GB. AND it's upgradable, without the upgrade price being my soul? you can even donate just for funsies!

overall rating: 8/10
personally, i love cryptpad! i do wish you could change the document background color, and i wish that i had more formatting option like line spacing, but it's a good iteration of what i want in a writing program! i'd definitely recommend if you like supporting freelance guys doin their own thing while also not struggling to figure out how the fuck a writing software works.
42 notes
·
View notes
Text
Madness Made Sane
Part One (REWRITE)
For @deafeningsharkslimeempath @jacelion
I’ve seen universes collapse. I’ve seen heroes fall and robot overlords rise. A fortune teller told me that my powers lined up with an old prophecy.
The Scarlet King, a nexus being. A king would rise to fight a witch clothed in scarlet. It was never said who would win in the end. I was destined to be a champion to protect worlds from Chthon, the destroyer. Some protector I turned out to be.
My world fell to the might of Ultron. I was only saved by the Watcher right as my world was destroyed. He told me my fate was bigger than one world. Whatever that meant.
I lost track over the countless worlds that I traversed. I barely found a place to lay my head before I had some monster tracking me. Not exactly easy living.
With time I met up with another multiversal traveler. America Chavez, AC as I grew to call her. It felt like I had a sister in her, and to her, I was her protector her guardian. We looked out for one another. We ate together, fought together, told each other terrible jokes. It was a blast.
Eventually we met up with some sorcerer who called himself Defender Strange. Apparently he was part of a team called the Defenders.
And so that leads us to right now in my tale. Strange, Chavez and I were running. A mummified looking being of pure destruction on our tails.
"Keep going!" Strange yells to Chavez as him and I worked to hold the monster at bay. The monster's reddish pupils stared daggers into mine.
I hurled a slab of sharpened concrete into it. The monster lost its footing but only momentarily.
"Y/N!!" America called out to me. The monster slammed its linen tentacle into a chest, knocking all the air out of my lungs and off the edge of the precipice Strange and I had found ourselves on.
Strange tried to catch me but it was too late. I fell further and further into the void. The last thing I heard was America's screams as it all faded to black.
Or so I thought.
"I think he's dead" a young voice called out in the darkened void.
"So are we going to poke him with a stick or not?" another similar voice asked.
I opened my eyes to find two twin boys standing over me, their attention was on one another, arguing. I was in the backyard of a two story suburban home. Did I fall into Pleasantville?!?
"I'm not gonna poke a dead body, Tommy!" the one in red and blue argued, "Mom would kill us if she found out we poked a dead-"
His brother, clothed in a green track jacket, screamed, "Billy!!! He's not dead!"
The boys screamed. I couldn't help but scream too. I tried to get up but I ended tripping on a metal slide.
"Where am I?" I tried to get my bearings. "Who are you?"
"You fell from space" Billy answered, pointing up to the sky.
"Spaceman. We. mean you. no harm" Tommy tried to pronounce each word to me.
"It's okay guys, I speak English" I tried to pacify them. "All I remember is-"
I was cut off by a burst of red magic. Chaos magic. It picked me up and lifted me a couple feet in the air.
"Who are you?" A female voice called out from the nearby house. And out walked her. Five foot six, long reddish hair, dazzling green eyes. Red hoodie and yoga pants that fit her just right. She was gorgeous. The most beautiful woman I've ever seen.
I wasn't one to believe in love at first sight. But seeing her, I could start believing in it.
"Mom! Don't!" Billy shouted to the woman. "He's friendly."
I could feel her. Her essence probed my very being.
"I can hear your thoughts of me" her ethereal self giggle and blushed. "I'm Wanda. Wanda Maximoff"
"(Y/N)" I answer back as she set me down gently.
"I haven't met another magic user in a long time" she walks up to me and shakes my hand. "Where did you come from?"
"Earth 96. It no longer exists." I answer back. "Do you know of anyone who might be able to help?"
"I think I might know someone" Wanda answers back. "Would you like to stay for supper? I have paprikesh on the stove."
"Paprikesh sounds wonderful" I answer back with a smile.
Dinner was nice. The first real meal I had around a table since I lost home. The boys relegated me with tales of their lives, their powers, and even their dreams of someday joining their Earth's Mightiest Heroes: the Illuminati.
"On my world we had Avengers. Iron Man, Cap, Hulk, Thor, the Black Widow. They were great" I sadly reflected on the team I lost.
Wanda reached across the table and gave my hand a gentle squeeze. Her eyes told me of immense pain and yet there was a resolve there, stronger than my own.
Wanda put the boys down for bed in their rooms. I quietly sat on the couch as she tossed me a pillow and a blanket.
"I can write down the directions for you and you can head out after breakfast tomorrow. If you want." She smiles at me.
"Thank you Wanda." I flash a small smile at her. "you know Billy and Tommy are amazing."
"well they had me for a mother" she jokes. We couldn't help but share a laugh. "Is it true?"
"Is what true?" I looked at her confused
"That you think I'm the most beautiful woman you've ever seen?" I was left dry mouthed. She giggles, "I read your mind when we met."
"well I mean...uh...um" this woman left me speechless.
"Good night Y/N" she walks up to her room, a saunter in her step. A lesser man would've followed her right up those steps. If I could stay on this world, I would've.
But Chavez needed me. The Scarlet Witch was still hunting her.
I set out the next morning. Giving the Maximoff clan a hug before I left. I flew to the coordinates Wanda gave me.
A large stone building in the middle of Central Park. No markings no signs. Just a large slab of concrete.
I approach the only door in to the building. I didn't even knock and the door opens on its own.
"Welcome to the Illuminati" a polite English voice calls out to me.
"Thank you, Mister..."
"Xavier. Charles Xavier" the voice answered as a hover chair bound man floated out to greet me.
This should be interesting.
To Be Continued...

#marvel#madness made sane#multiverse of madness spoilers#wanda maximoff x male reader#wanda my beloved#wanda maximoff#wanda maximoff imagine#wanda maximoff x reader#scarlet witch imagine#scarlet witch x reader#scarlet witch#doctor strange in the multiverse of madness#doctor strange#america chavez
101 notes
·
View notes
Text
ok so now that it's july and starcatcher shows are coming up (scary) i wanted to just share this bc i know people are going to want to recreate or emulate the makeup the guys have had whether that be from music videos or on stage at the end of DIG.
makeup recs and info below the cut!
as you can see, the palette that was used on josh for this eye look is $99. these are cream products and yes you get 12 shades but $100 is a lot and not everyone can drop that kind of money.

so i wanted to give y'all a few alternatives that would allow you to create the same look or something similar of your own creation!


1- makeup by mario master metals eyeshadow palette paired with the mehron mixing liquid. these together are considerably less than the make up forever palette. while this metal palette is a pressed powder, you can scrape some off, mix it with a bit of the mixing liquid and create a super easy to use liquid that dries down. these shades are super pigmented and very user friendly. and ~$55 (before fees) is way less than dropping $100 for two or 3 particular shades. this metals palette also seems better for starcatcher imo

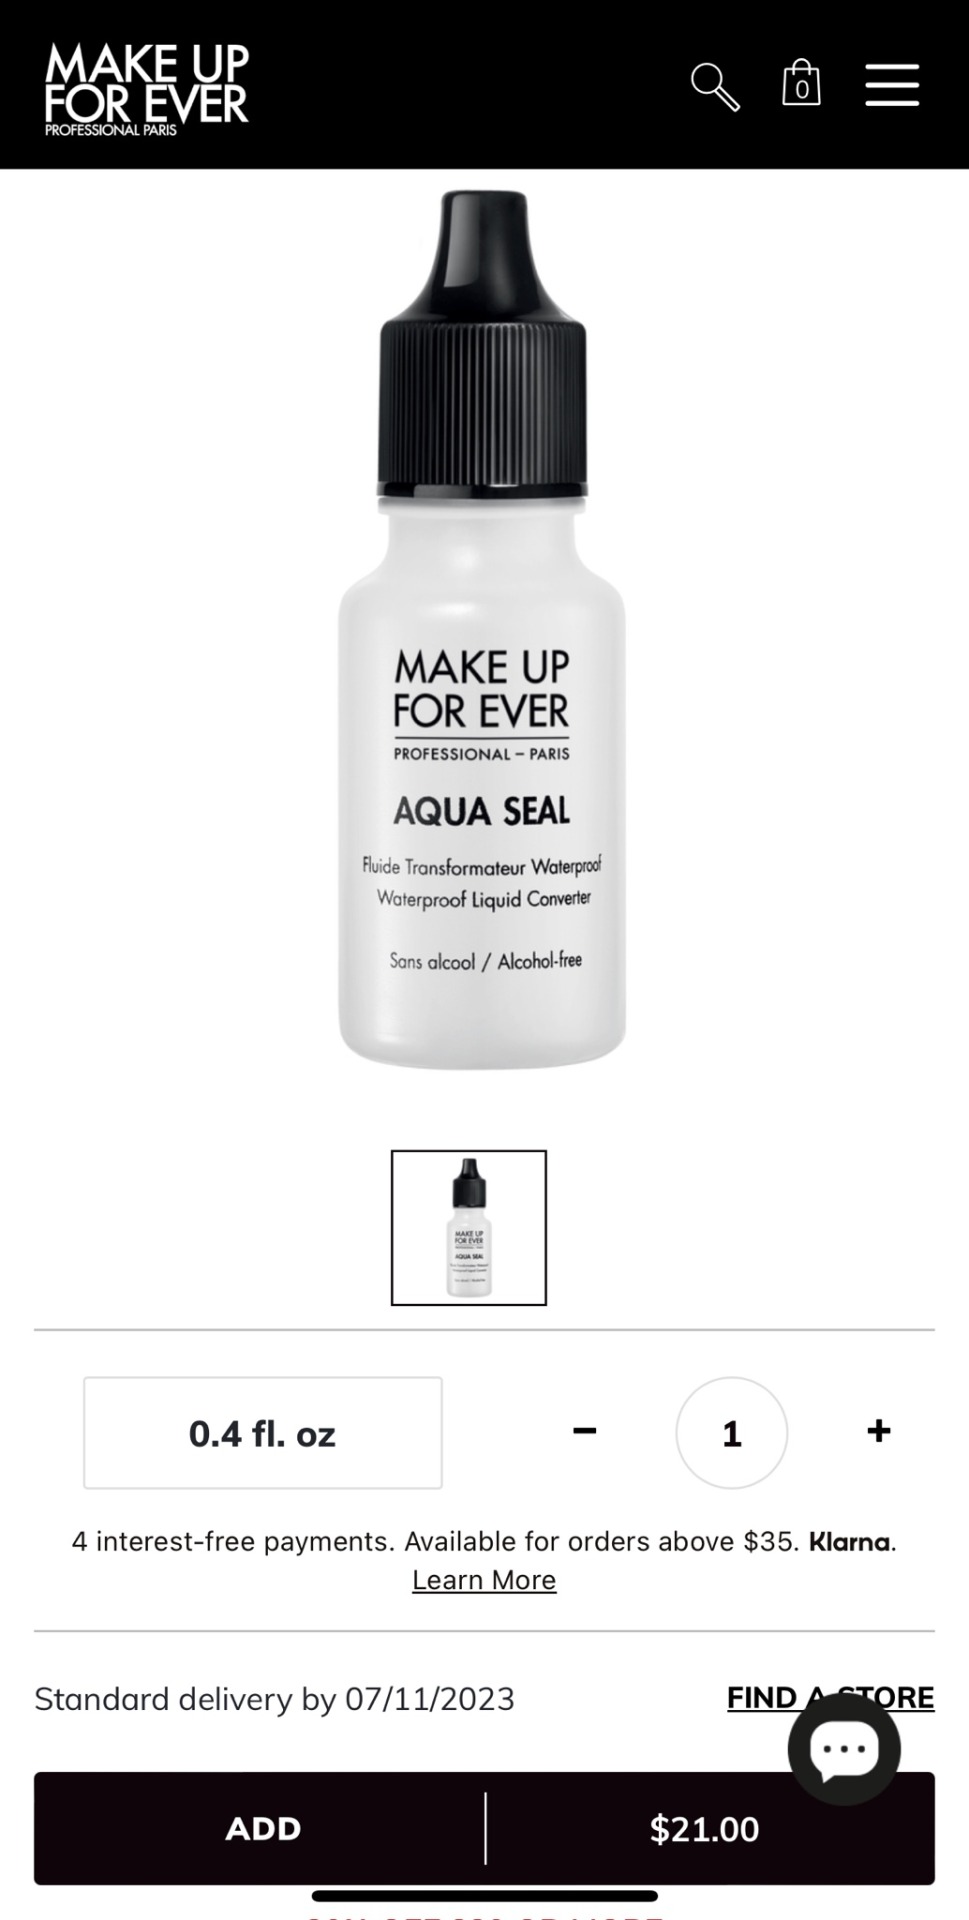
2- make up forever star lit powder and make up forever aqua seal. this is still pricey imo. and given that you'd be spending $21 for one individual pigment on top of $21 for .4 fl oz for their mixing medium, i personally wouldn't be able to justify this one, but it is an option. it doesn't look like this brand sells the pigments in sets from what i can see, but i'd assume the sets would be pricier than the palette from makeup by mario. again an option, but perhaps not the most financially logical one.

3- mehron metallic powder & mixing medium. this is the same mixing medium i suggested in option one. as you can see the price varies here. the entire set including the mixing medium and 6 loose pigments is just under $66. this set is a bit pricier than option one, but if you just want one loose pigment, each is about $10 and then a small bottle of the mixing medium is around $5. again, $15 is considerably less than $100 and you can still make the same look.

4- nyx loose metallic pigment and the mehron mixing medium. this one is the cheapest so far at only $6.50 for the individual pigment and again, $4.95 for the small bottle from mehron. here you're spending around $12 (before fees) to get the same look. unfortunately, they don't appear to have a gold pigment, but silver is looking like the go to vibe for starcatcher.
43 notes
·
View notes
Text
One of the annoying things about Windows that I noticed before my switch to Linux is that there are two settings applications. There is the Control Panel, which has hung around since Windows 1.0 in 1985. But since Windows 8 there is also a Settings app.
The idea behind "Settings" is entirely about aesthetics instead of functionality. It's too look more modern and slick than Control Panel, which hasn't changed much since the 90s to my memory.
But to look more slick and less complicated, and because Windows has increasingly assumed its users are incompetent, "Settings" is also massively simplified. It lacks many of the functions that the control panel has. I think the idea is that too many options would be overwhelming and confusing to non-technical users. But many of the options in Control Panel that is not in Settings are very much necessary. So Control Panel sticks around. It's just that it is hidden and harder to find, while Settings is made easily accessible to the user.
And this is a very stupid way to do it. Having system settings for the same thing split across two different programs is neither user-friendly or intuitive. If you wanted to or needed to change a setting, you have to first go to the easily available Settings App and 90% of the time find that that the setting is not there. And then you have to know that there is a second settings applications, that you aren't told about nor is it easy to find where you hopefully find what you need. I had to read an online guide for a Windows bug to be informed that Control Panel is still there in WIn8 and 10, and that it has options that aren't in settings. It's so hidden that I found it most easy to literally use Windows search for Control Panel whenever I needed it.
This is a case where simplicity is mistaken for user-friendliness. Having it split like this is far less accessible than having a single and fully-featured settings app. This is a case where practically every Linux desktop environments have Windows beat in terms of intuitive design, none of them do this.
Windows has had good UI ideas, I do use a Win95 like taskbar/start menu set-up right now, because it works. But damn, ever since Windows 8 they have completely lost the plot on this front.
18 notes
·
View notes
Text
Materials just atoms in thickness, known as two-dimensional (2D) materials, are set to revolutionize future technology, including in the electronics industry. However, commercialization of devices that contain 2D materials has faced challenges due to the difficulty in transferring these extremely thin materials from where they are made onto the device.
Now, a research team from Kyushu University, in collaboration with Japanese company Nitto Denko, have developed a tape that can be used to stick 2D materials to many different surfaces, in an easy and user-friendly way. Their findings were published in Nature Electronics on February 9, 2024.
"Transferring 2D materials is typically a very technical and complex process; the material can easily tear, or become contaminated, which significantly degrades its unique properties," says lead author, Professor Hiroki Ago of Kyushu University's Global Innovation Center. "Our tape offers a quick and simple alternative, and reduces damage."
Read more.
8 notes
·
View notes
Text
My work in progress of the "Crab Nebula"
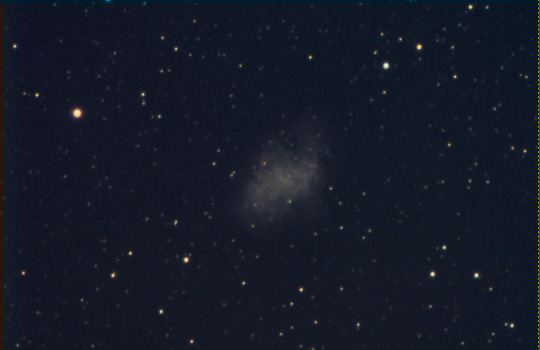
The attached image is my work in progress of colorizing a photo of the "Crab Nebula". This attempt is not my first, nor my second. This attempt is my third, and is the only one to show variety in colors in the surrounding stars.
However, im getting ahead of myself here- you may be asking, "How do you colorize an image of space?" (Or something similar, I can't read your mind.). What is needed to colorize a photo successfully are three photos of the object, but taken with different filters on. These filters include the Red, Blue, and Green ones. These may not seem very helpful, and they really aren't, until you get a program that can put them all together and can also edit them individually.
The program I use is called "GIMP" and it is a user-friendly version of astrophotography editors. When you get all the images into Gimp, you have to change the properties of the individual colors. This is the most tedious part, since if you mess up one time (Over-exposing it, making it too dark, etc.), it can kill your project. And can be very hard to undo without the blackness of space looking like tv-static, or "grainy".
This is the problem that I ran into, multiple times. I even had to scrap one attempt because the program itself was not working correctly, so you have to factor in the program not being "Top-tier" levels of reliable. This W.I.P took a lot of patience and trial-and-error to make the nebula in the middle of the image visible, as my attempts in the past did not make this easy. Since the image would either come out very bright, or too dark, it would make it extremely difficult to adjust and line up correctly.
After getting to a point where I was happy with the image quality, I was able to finally call it a "work in progress". Keep in mind- this is NOT a finished product! I still have many more filters, effects, and settings to apply to this before I can make this once black-and-white photo into color again.
6 notes
·
View notes
Note
tuna tuna tuna I'm workshopping some yandere ideas in the ol notes app which one fo you wanna hear about more (or first)
1. bsd yans pretending to be interested in darling for information, discarding them, and then realizing they have feelings for them and desperately trying to get them back (our talks about eelzai made me remember how much I like this trope so I've been thinking about it soooooo hard </3)
2. this one is short and sweet: yandere demons. like, the demon fyodor and the demon prodigy of the port mafia but literal. they find darling to be such an interesting little human, how rare! they can't help but want to torment and haunt them juuuust a little bit... ok maybe a lot... seeing them scared is just soooo cuuuuute <3 its hard to resist! darlings just a standard mark, at first, but the more they fight, the more they draw them in, until their demonic desires start to go a bit BEYOND just wanting to see darlings face twist up in terror, theyre much more interested in... other expressions, as of late. dont be afraid, darling, just let them hold you <3 and when you die, they'll even set up a nice comfy spot in hell just for you riiiight next to them where you can be together for all eternity! isn't that thoughtful of them?
good shit or what
- 🩹
good shit? top class 100/10 shit as always when it's from you
cw: yandere characters, possessive behavior, jealousy, manipulation, trickery, murder, isolation, abuse of power
the first one. tell me it's not akutagawa TELL ME (dazai can fit the mold too) gooood fooood like akutagawa's tasked with gathering intelligence on an opposing ability user group and knows darling is one of the members. he starts hanging around them and kind of becoming friendly but he really cannot be bothered to care more than he has to. Until. maybe they're ambushed and darling immediately jumps up to protect him and he's like.....woah okay. and he's touched by their concern but he still has a job to do!! gets to the point where it all blows up and darling learns akutagawa used them and is the reason everything they worked for is gone but now akutagawa is ready to take them under his wing except they are very very mad. well obviously they don't have a choice! they must know they have a target on their back, right? and who else is better equipped to protect them if not akutagawa, who destroyed the ability group that would only take advantage of darling and take them away from yokohama when the job's done?
i misread the second one as demon fyodor and his demon babies which threw me off for a moment @.@ BUT anyways this would be so perfect for fyodor do you realize him and nikolai maybe. you know his obsession with sinners and ability users and all that? a) darling's an ability user so obviously he must torment them as is his job oh but they are so cute and oh they are way too fun to poke and twist around. darling's pretty adamant that being an ability user isn't being evil and over time, yeah, they've convinced him that they aren't evil, but human minds are so fickle, aren't they? what if someone else uses darling as a puppet to wreck havoc? stay with him, and they wouldn't have to worry about such a thing. he'll keep them pure.
or b) it doesn't matter if darling has an ability they just have a poor little soul that fyodor thinks is interesting (and nikolai thinks it's an easy meal). it's fun for him to mess around with them and terrify them but then when other demons start catching wind of this strange little person, he decides he's just not ready to share :(
#yandere bungo stray dogs x reader#yandere bungou stray dogs x reader#yandere bsd#yandere bungou stray dogs#yandere bungo stray dogs#yandere akutagawa x reader#yandere x reader#yandere akutagawa#yandere fyodor#yandere fyodor x reader#fyodor x reader#yandere fyodor dostoevsky#yandere nikolai x reader#nikolai x reader#ask 🐟#anon 🐟#bsd 🐟#akutagawa 🐟#gogol 🐟#fyodor 🐟#dazai 🩹 🐟
110 notes
·
View notes
Last Seen Blogs

magicalbunbun
𝓂𝐚м𝕀

priipharmaedmedicine-blog
Best Generic Medicine Pharmacy

bunnulentbabies-blog
Welcome to the fluffy world of Bunnulents!

lizstwllar
beep beep 👩🏻🌾🥽〇

charlottexxlifestyle-blog
Fashionxx