#im still not good at resizing photos
Text

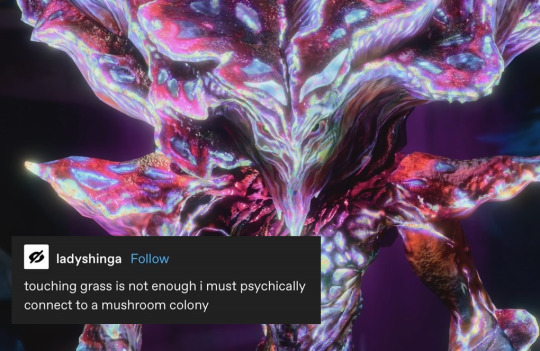
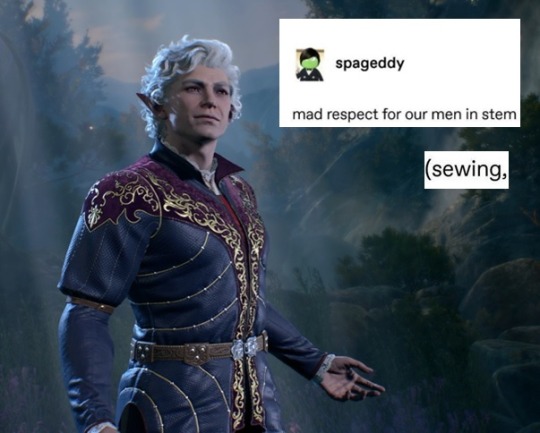
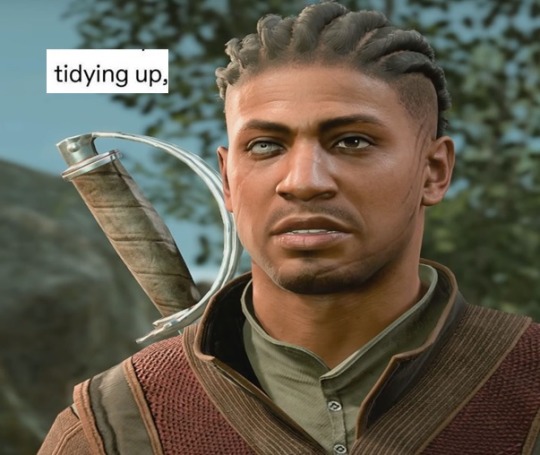

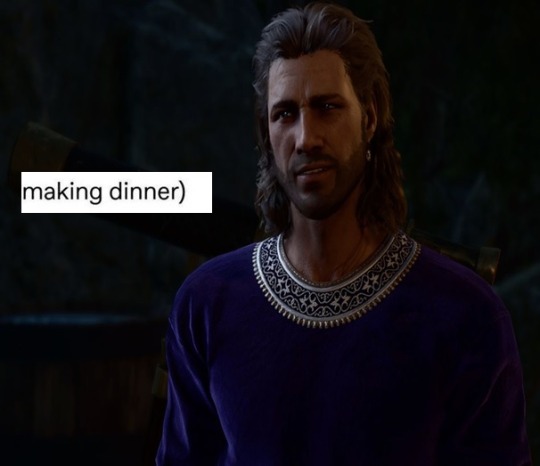


I don't know how to stop making these someone help D:
#baldur's gate 3#bg3#the dark urge#astarion#halsin#shadowheart#wyll#gale#jaheira#shrooms#im still not good at resizing photos#pls forgive me#karlach#oc
362 notes
·
View notes
Text
Since I’ve been cosplaying for so many years, Ive been trying to think of a way I’d like to archive my OLD ASS cosplay photos. Even if my and my photographers’ skills are’t what they are today, I still have a fondness for all those goofy and weeby pics! They’re snapshots of fun times in a very dark time of my life, and I think its important to look back and appreciate where I’ve come from on my cosplay journey.
Cosplaydotcom wiped all the past comments I used to have on photos with their new formatting, and tbh I don’t trust their photo resizing issues have been resolved lol. ACP also has limitations in how/what I can post even though I do like it’s date/details/contest list features. Deviantart I completely ghosted, but I DID like to have it to showcase the works I’m more proud of. Not really a good archive choice imo. Tumblr seems to be the most unchanging, retains better photo quality than others, and has less restrictions (since I didn’t start many lewd cosplays till recenly.) Also the tagging system is wonderfully customizable.
So to my few gem of followers here! I’ll probably be posting some old ass shit in the near future! Have fun riding along memory lane!
I just need to figure out how i want to format them? individual posts would be FAR too many! this is...damn, 18 fucking years of cosplay??? LOL. And before I was a worker member of society I was sometimes churning out 100 half-assed cosplays a year lol.
I also am undecided on making emotional blurbs about each event/cosplay. there were a lot of good times, but i can be overly-sentimental and I dont want to come off as bitter or hung-up at the ending of old flames and friendships in group pics and such. thats something that probably belongs on my personal, password-locked blog lol.
I thought itd be fun to have on a personal site where Im in TOTAL control. but taht usually costs $$ and more time than I currently have. Plus if it were a site, Id rather have it be more of a portfolio than an archive.
3 notes
·
View notes
Text
a gif tutorial!
welcome back to this episode of nobody asked for this but im doing it anyway! just kidding. like three people asked for this. so here’s how i make gifs!:
edit as of 20 august 2022: i don’t make gifs like this anymore and tbh this old tutorial makes me cringe! sure, it’ll work just fine, but there’s a few things i’d tweak in this post even for beginner gifmakers. if anybody out there wants an updated gif tutorial, send me an ask! <3

note: this post is for someone who’s just starting to use photoshop for gifs! i hope i can help someone who was just as lost as i was when i first started lol. if you’re experienced already, please bear with me! use photoshop cc. there's definitely other ways to make gifs! before i used photoshop, i used this site or gifski and a bunch of different photo editing apps to play with the coloring. also, gimp is a good gif making app thats a bit like photoshop (and free!) but i believe you have to edit each single frame. nobody wants to do that.
ok. so you need a video of the shot you want to gif. as HD as you can possibly get! you can download the movies if you really search, but all i do is search for scene packs on youtube or something. most people have a link in the description where you can download the packs. if not, i just screen record. i find most of my scene packs here. if there's something i cant find, all the movies are here. some movies are better quality, but this is the best i’ve got tbh. LOL.
making the basic gif:
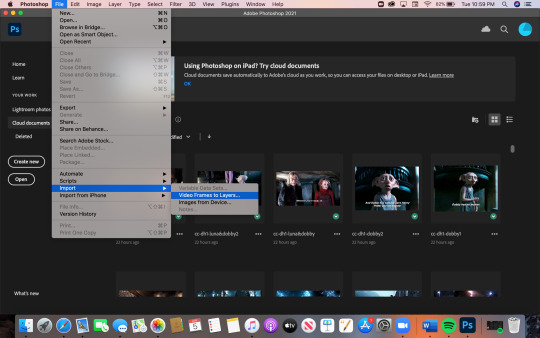
now say i have the shot i need! i need to convert the video to layers. i go to file > import > video frames to layers
the window that comes up gives you the option to limit to every 2 frames. i like to check that box just because it compresses the file. click ok!
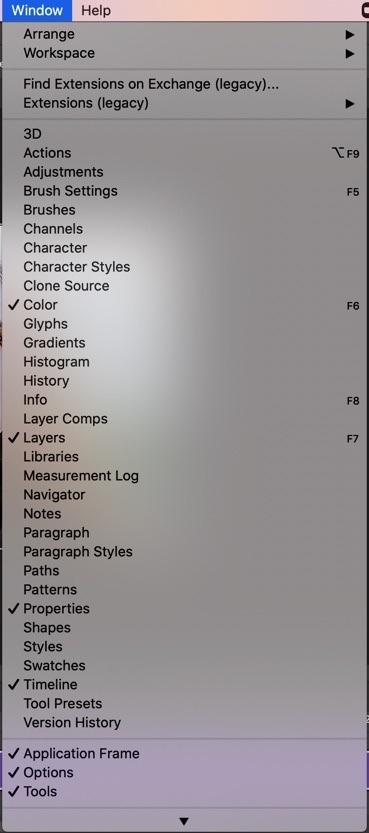
when i’m in, i click window and check that each of these are checked. (color, layers, properties, timeline, application frame, options, tools)
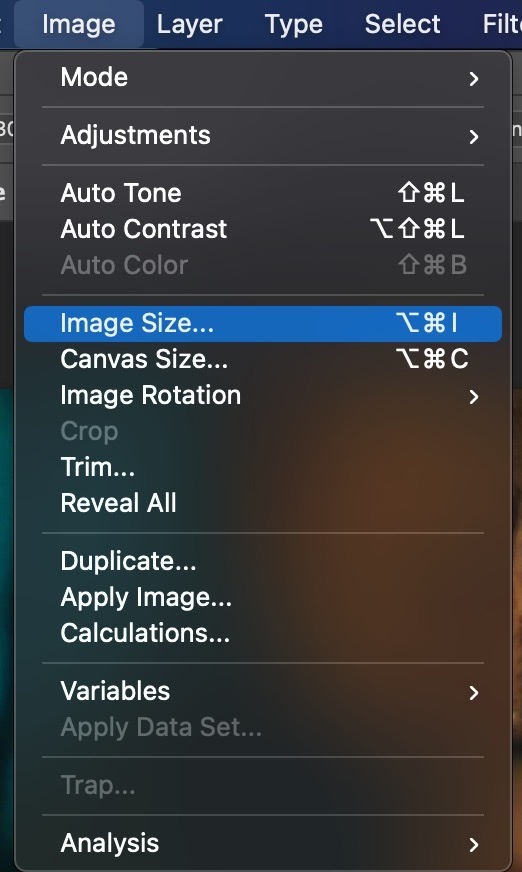
now i resize the image so the file is small enough for tumblr! go to image > image size > width >780. you can go even smaller, but it ruins the quality a lil bit.
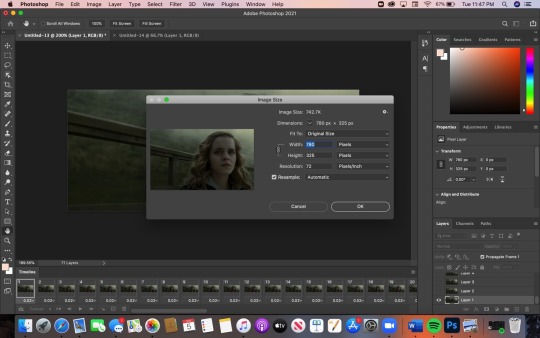
click ok! then i take the crop tool (the 5th down on the toolbar on the left of the screen) and crop to the size i want.
now you could go to file > export > save for web (legacy) > preview and just take it like that! this is the basic gif that we have:
isn't she cute!
coloring!
she is cute, but she’d be cuter in better lighting and if i neutralized that god-awful green tint that just comes with the hbp movie, but that’s a different conversation. so here's how i color my gifs!
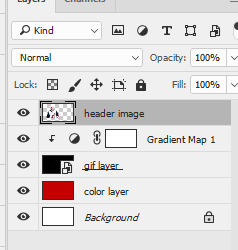
note: before we start, make sure all your coloring layers are ABOVE YOUR TOP LAYER. or else you wanna have to color each layer individually. but omg you don’t wanna do that. all you need to do is click the top layer (on the right!) for me, i have 71 layers, so i just click the 71st layer. then all your layers should automatically go to the top.
i click the adjustments tab (still on the right!) first go to the curves feature. (i actually learned this trick from a coloring tutorial from @astoria-malfoy!) i click the white point dropper

and click on one of the lightest points on the image. here, i clicked on the whites of the sky in the top right. you can play around with whatever you think is best. the lighting and color will neutralize significantly!
then go balance it out even more, i create another layer of curves (by going to the adjustments tab again > curves), select the black point dropper (two icons above the white point dropper that i just used!) and click on one of the darkest points of the image. here, i clicked on the shadows in hermione’s hair.
from there, i add more layers that adjust the color. i usually add brightness, vibrance, saturation. i use the selective color feature a lot. this one takes some getting used to, but my goodness, it’s a life saver for coloring.
sharpening!
once satisfied with the coloring, i like to sharpen! there are a few different ways to do this, but this is how i like to do it:
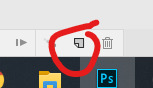
click this lil guy in the corner: convert to video timeline
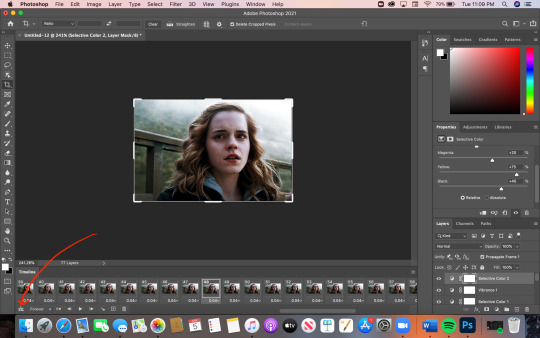
then select all your layers on the right (click the very top layer [mine is vibrance] > shift and hold > click layer 1)
then click filter (at the very top of your screen) > convert for smart filters
then click filter again > sharpen > smart sharpen

and this window should pop up. i like my settings this way. i like to sharpen my gifs like a mf knife
amount: 500
i’ve found that i like my radius around 0.4 — 0.7, depending on the quality of the video that i downloaded. if it’s not really good quality, i usually leave the sharpness low so that it doesn’t highlight the crazy pixels 😭
reduce noise: 10
remove: gaussian blur
then click ok!
the sharpness might look funky in photoshop but i promise it’ll look better once you have it in your browser and all.
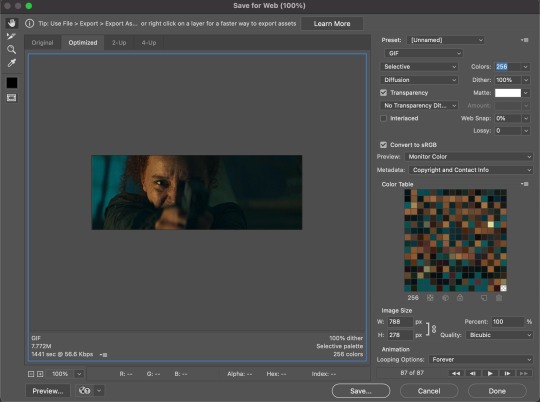
now all i need to do is go to file > export > save to web (legacy) and check that the file size is under 10MB. tumblr doesn’t support files bigger than 10MB!
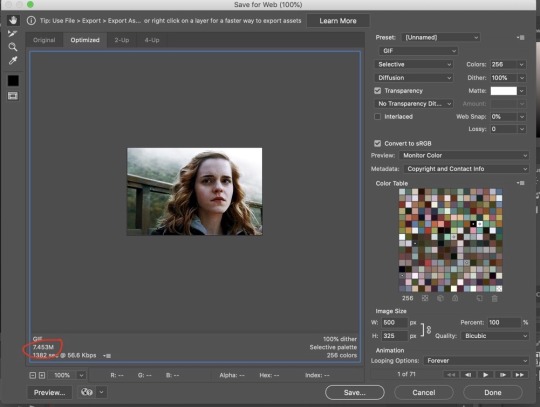
mine is only 7.453MB, so i’m good!
time to see it in all its glory! i just click preview (right there under the file size!) and bam. look at you. you just made a gif! here’s another cute lil before & after just bc wow! you did that! look at that!
you did it and im so proud of you!
if anyone tries my way and has questions, feel free to send an ask or message me! cause i might have missed something along the way 😭 i really hope this helps someone! if you learned how to make a gif (or learned anything at all tbh) from this post, tag me in your edits! i track #andromedaa-tonks! or send me an ask and link me to your gifs :D
love u mwah
110 notes
·
View notes
Note
hey! i had a question, how do you make your gifs/edits ? love ur blog, thank you !!
ahhh thank u !!!! this is probably not what you asked for but i over explain a lot AHJSJDHD so i kinda made this very long rip
ok so for my edits i usually do it on my phone 🤡🤡 i would use picsart, polarr and phonto. sometimes i’d go into photoshop and add some finishing touches but usually not ahakkaks
i’ll be using this as an example because it has pretty much everything i use !!
finding photos
so. first you’re gonna find some screencaps !! sometimes i’ll go and take them myself if there’s not the specific one i want but usually i go here / here / here. i personally like better the first one because they’re more hd but the last two are good for shows/new stuff
here’s the link to tfatws screencaps. i click on ep. 1 and i chose this bad boi (but you can choose whatever you want !! i’m just using It example to guide y’all ahajsj)
cropping
this can be done in any app lmao but i go in picsart because it’s easier for me. the dimensions are 1920 x 805 but you can crop it however!! here’s a step by step if you’re unfamiliar with picsart
effects!!!
here’s the fun part. you can really do whatever you want a few of my favourites are: b/w contrast, noise, motion blur, radial blur, colour pop and more !!! here’s a step by step on what i did
text
i personally love this part. i use phonto because it’s easiest for me !! the fonts i used are poppins and prima demo. here is how to download fonts to phonto and here is how i did the text

now for gifs !!! im still very new to photoshop and trying to get the hang of it but here is my process !! i'll be using my header gif as an example:
getting the scenes
there are a few ways to get the scenes you want, i personally screen record (🤡🤡) which is kind of why my gifs are a bit low quality. you could download movies/tv shows and screencap (which is how most gifmakers would do it) but this way works for me so its what i stick with !! here is a good tutoral using screencaps.
photoshop
so yes photoshop my biggest friend but also my biggest enemy. this shit is very complex at first but from looking at tutorials on tumblr and youtube ive managed to figure it out here / here / here / here are some good ones !!! (note: the last link is more for photoshop in general and not really gifing ahakjsjdjd its long but super helpful!!)
bringing in the video
just go file -> open and click the video you want !!
cropping
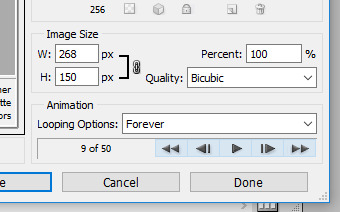
im gonna crop it to tumblr header dimensions which are: 3000 px x 1055 px and you get this:

now im gonna resize it to 540 x 190. go image -> image size
make sure it’s on pixels !! make the width 540 (the height should automatically change with it but if not make it 190)

colouring
here’s how did it !!
sharpening
this is very much influenced from this tutorial. making an action for this part is very handy because you’ll do this every time. click here
saving/exporting
the final part !! go file -> export -> save for web (legacy) this will take a minute
here are my settings. i still don’t exactly *get* the save for web options lmao i use what’s recommended but feel free to fiddle with them !! here is a good tutorial explaining the options.
that’s all !!!! ik this was long and a bit confusing so feel free to ask me anything you’re not clear with !!
#lmk if the links don’t work im dumb hakskdkf#gif help#editing help#clubgif#photoshop resources#ps help#tutorial*
40 notes
·
View notes
Note
idk if you’ve answered this already but how do you edit your teaser pics to be so high quality?? they’re absolutely gorgeous 🙀 i’m so hyped to see what’s going to happen next!!
aaaaaaaaaa 🥺🥺🥺🥺🥺 thank you so much for saying that!! i hope part 2 lives up to your expectations 🥺👉👈 i accidentally typed a lot so i’ll put all details on how i edit my screenies and the character posters under the cut!


lets gooooo
about my teaser pics, im assuming you mean the characters posters! i take the screenies in-game and my settings are ALL on ultra. my screensize is also 1920x1080! i use simemi’s v2 reshade ingame too.
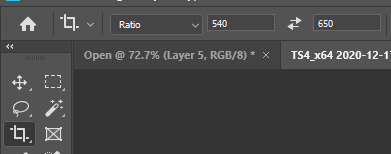
for posting, tumblr has a 540px size for individual photos. i don’t resize my photos at all, but instead i crop them into dimensions that if downscaled (seen from mobile or an ipad) they fit the 540px aspect ratio criteria. in the cropping settings in photoshop for example i put “540px x 650 px” but i don’t actually resize them, if that makes sense. they still have 1080px as width.
for sharpening settings, i usually have these for all my screenies:
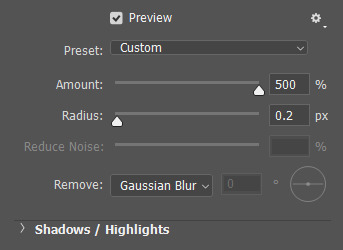
ALSO!! i noticed around a week ago that my screenies, even if 1080px, get decreased in quality. i’ve recently discovered that my banner, this being my crest, was actually NOT the same width, which caused my screenies to downscale in quality to fit the banner size. i’ve since increased the size and I can 100% recommend doing the same if you have a banner. (this is said banner that is now 1080px width to match with my screenies)

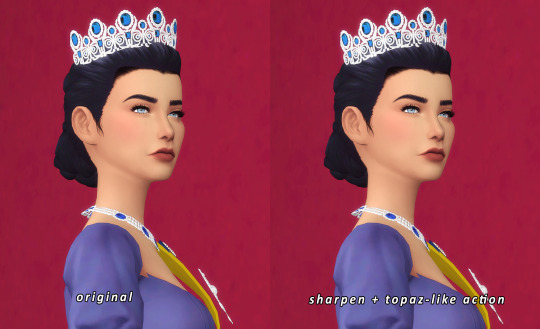
anyways !! lets keep going. there’s other story simblrs i’ve seen that use topaz clean and i personally don’t like how blurry and liquified-like (?) they can make sims look if very strong, so instead I use a topaz-like action by troianbelles, i use v3, lower the opacity layer to 40% and its good to go!
i don’t use the COMPLETE action though, so I just select the steps I want and then press the “play” button as usual:

for my actual character posters, they are VERY edited. just like my other portraits i’ve posted, i drew in the shadows and highlights in the face, neck and clothes. for this I use ‘overlay’ and ‘soft light’ layers with just a soft, very low opacity brush with the color black. for the highlights, i’ve really liked using the ‘dodge’ tool! I use it to bring some shine to the eyes, nosetip, cupid’s bow and even jewelry!
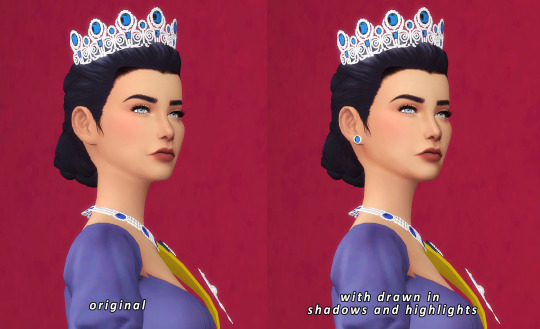
I use a modified version of my psd (this psd I made it myself for my simblr!) here’s all my layers: (ignore layer 3 sjflksjf its just the highlight color and I ALWAYS LOSE IT, also name your layers what they are dont be like me)
AND...there you have it. for my regular ol’ screenies, i do the sharpening + topaz action and then add my regular psd. just a bunch of adjustment layers to get your desired effect!
if you made this far and think ‘this post deserves to be on the /r/restofthefuckingowl subreddit, IM SORRY but if you have any more questions please ask me! i’ll answer them happily <3
#the anon: DAM THIS MA WROTE 10 PARAGRAPHS???????#ask#Anonymous#howto#just in case i need 2 come back to this
74 notes
·
View notes
Note
I really wouldn't mind you aiding me with some tutorials love
giffing tutorial/resources
hi anon! sorry it took me so long to answer. i figured this might be helpful for others out there who have asked me similar questions, so i’ve compiled a pretty comprehensive list of tutorials/resources. idk about others but when i was new to giffing, it took me a lot of painful effort to go around and look for resources, so i’m putting it all here to make it a little easier!
i download videos using 4k video downloader. it will download very good quality 1080p videos in .mp4 format. if you’re downloading a 4k video, make sure to change the setting option to .mkv so that you get 4k and not 1080p—for obvious reasons since you want the highest quality.
i rely on kpopexciting to get .ts files — which are basically raw, very high quality video files for live performances. they are much less grainy than .mp4 versions of live performances—which are the ones you’ll see uploaded to youtube. i’ve found that 4k videos (in .mkv) are just as good quality as .ts, but obviously you will rarely see live performances in 4k, so get .ts when you can!! you can also try to find .ts files on twitter, but you may have to do a lot of digging. i wish i could recommend you twitter accounts, but the ones i used to go to have been very inactive/taken down all their drives :( but this website is really nice and updated frequently so i would recommend it!
vapoursynth links + download. the reason you would use vapoursynth is to resize your gif, while maintaining the optimal quality of the gif. if you gif without vapoursynth (.ie only using photoshop), it will still be fine, but the image quality may be grainier. also, you will definitely need vapoursynth to gif .ts files —more will be explained in the tutorial i’ve linked below. i would recommend that you have a high processing/lots of ram/newer desktop or laptop to use vapoursynth so that 1, your computer isn’t fried and 2, your vapoursynth process will go a lot faster. i am using a 2017 macbook pro for all my work, and it runs pretty well, but my laptop still gets pretty hot so just make sure you’re not running a million things in the background while using adobe products and vapoursynth lol. i used a pretty old and beat up 2011 model macbook air back then, and i will say that yes vapoursynth worked and ran on it, but it took much longer, and basically fried the laptop’s battery (aka i had to get the battery changed twice and the laptop would die randomly) but issok it was a school borrowed laptop so i didn’t feel too bad lol. im just saying this as a precaution, to preserve the health of your electronic devices!! but don’t be afraid to use vapoursynth! you should still try it at least once.
thank you to @realstraykids for this super detailed, really nice tutorial! it includes how and where to download videos, how to gif using vapoursynth, using photoshop, comparisons, coloring, and pretty much all you need to know. 10/10 would recommend
thank you to @dreamcolouring for this lifesaver!!! the best and easiest way to blur out unwanted captions/objects in your gifs. i recommend doing this step after converting your frames to video timeline and before you do sharpening and coloring. another tip i’ll add is to feather the selection you’ve made right before you click on “add vector mask” —this will make sense once you’ve read through the tutorial. feathering it will make the blurred spot less noticeable and more subtle.
i use this generator to create gradient colored captions! copy and paste your text, then select the colors you want. generate the code, and copy it. change the settings of the text editor on your post to HTML. paste the code, preview, and voila! add elements <blockquote>,<b>,<i>, etc as needed. see more on colored captions in this tutorial by @kylos --i believe op mentioned a different and better color generator but for some reason it won’t work for me :( hopefully it works for u! basically same idea as the previous generator i mentioned.
my own mini tutorial/workflow process of making gifs. this includes working with a .ts file, vapoursynth, photoshop, coloring, watermarking, etc. and a few of my own tips below:
if you are working with an .mp4, you do not have to make any changes to the preprocessor/denoise filters/sharpening in the resizing part of vapoursynth—it doesn’t make that big of a difference if you do. but if you are working with a .ts file, definitely do make those changes,, that’s the whole reason you have vapoursynth. with an .mp4, i like to use vapoursynth to just resize, but i don’t add any additional settings. i use smart sharpen in photoshop to sharpen it, which is pretty good on it’s own (at least in photoshop 2020!).
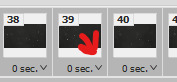
my rule of thumb is to do add .02 seconds when i am setting frame delay. so if when you first import the frames, they are at 0.04 seconds, i usually change them to 0.06. of course, this is my personal taste—you can make all your gifs faster or slower depending on how you want em to look.
if you are on a mac, you can screen record by pressing Command+Shift+5 (it’s a shortcut to quicktime screen recording). I only screen record for things like the beyond live concert or other live streamed events. the image quality of the screen recording, in my experience, is actually pretty good. when you gif the screen recording however, you may notice that it adds extra frames that you don’t need. by that i mean duplicate frames. you could keep the duplicate frames but that just means the size of your gif is going to be much bigger (keep in mind the limit is 8mb). in order to remove those duplicates, my only solution has been to remove them manually (by holding Command while selecting), or when you are importing the video to frames, select the option to “limit to every 2 frames”—but this method will be less precise and still not as good as manually removing frames. if you remove the duplicate frames, this means you will need to set the frame delay even slower, to make up for lost frames. in my experience, fps(frames per second) and frame delay work in conjunction. so for example, if i delete every other frame because they are duplicates, but the starting frame delay is 0.02, i am now going to change it to something like 0.05 (so i added 0.03 seconds rather than my usual 0.02). if the duration length and the image dimensions of the gif are short/small, feel free to keep the duplicate frames in—i only delete duplicate frames in order to keep my gif under the 8mb limit. then, if you keep the duplicate frames in, continue with your standard frame delay preferences. now that i’m writing this im realizing this might not make a lot of sense lol.. but don’t worry about it for now and if you run into trouble w screen recorded gifs then you can come back to this for reference. again, this is only my experience recording on a mac—it may be a lot different if you use a screen recording program or are on a pc.
i don’t really use .psd templates because i like to give every gif/gifset it’s own unique coloring—so i remake the coloring every time, but if you get into a rhythm it’s pretty easy. there are a lot of nice coloring tutorials out there, too! my personal coloring adjustments in order: levels, exposure, color balance, selective color (if needed), vibrance, photo filter (if needed), color lookup (i use 2strip most often and i put it on ‘color’ blending mode). don’t forget to adjust the opacities and fills of the ‘color lookup’ adjustment layer in case it’s too strong. go back to correct each adjustment layer as needed. then, when you’re done and satisfied, group all those layers, copy the group (you can do an easy command+c), and paste it onto the next gif you’re working on for easy workflow.
if for some reason you can’t see the frames when you import your layers/video, it’s likely because your ‘timeline’ window isn’t showing up. just go to the window menu on photoshop, go to the bottom and you’ll see ‘timeline.’ make sure it has a check next to it.
i recommend watermarking your gifs because a lot of people like to repost tings these days 😠 - so make sure u got your brand on it! i keep my watermark saved to my ‘libraries’ in photoshop so it’s ready when i need it. i use the blending mode ‘overlay’ and adjust the opacity, but if you don’t want to do that you can also add a stroke/shadow to your watermark/do all sorts.
tag #nctinc for your nct creations and #jenonet for your jeno creations!!
here’s my own mini tutorial (well not much of a tutorial ig more like a work process vid?): took about ten minutes including the time to search and download the video (but i didn’t record that part i trust yall know how to do that), vapoursynth, and exporting. i hope this helps somewhat! feel free to ask more questions whenever :)
youtube
keep in mind that giffing takes a lot of patience, energy, and experience—so don’t worry if it takes you a bit to figure things out or if your gifs don’t turn out the way you want them to the first time around. we all start at the same place and all run into problems. i know giffing can sound intimidating and seem like a lot of work, but i promise, once you get into a routine, giffing is going to happen in minutes—and you’ll get beautiful gifs. have fun! 😊
#anon#answered#tut#tuts#giffing tutorial#should i make a tut/resources post on gfx? not rly sure if gfx can be taught.. it's like a lottt about personal style imo lol#hope this helps!#not just for anon but for anyone
117 notes
·
View notes
Text
resources that i use for my userboxes and other things that are free (with links lol) and applicable examples:

Userbox Maker: Since we’re talking about userboxes, this one is indeed a no-brainer. The interface is easy and simple: You type the message, you change the colors, and then voila. The site doesn’t have images to add to the userbox ID square, thats up to you to put something there later.
What does it offer me?/Pros:
well, it offers you a way to make really easy userboxes with a color scheme (some are premade, others you can choose the colors) and resizeable text.
Cons:
The whole ‘Use this code in the English Wikipedia’ to get the box is LOST on me completely. im savvy but im not that savvy! What i normally do is enlarge and cut it, make the background transparent, then make the edit from there for what I need. Is that illegal? Who knows.
The colors of the premade color schemes are very dull and kinda washed out/ muted. You can change the color scheme of you box manually in the hex boxes, but even then they’re not as bright as you would hope. But hey, its free, what can you do? Here’s the color hex site that I use: X and here’s a pixel art maker bc I know the kids love that: P

LunaPic: Allows you to make transparents, flags, and other little photo edits like crop and filters. Con is that you have to have the thing you want to edit saved on your computer already, thus if you wanna do a quick edit of something in your clipboard you have to save it first aka, a hassle if you’re trying to meme
What does it offer me?/Pros:
See all those tabs right there? each one has a bunch of effects and things that go with them, so you’re bound to find something useful on the site no matter what you’re looking for, complete with sliders for easy adjustments. There’s color tinting, watermarking, transparency, pixelations, and the list goes on. You can also draw but its no PTS if you catch my drift.
There’s a editing history at the bottom of the page for you to see what you’ve done to your image. The site automatically carries your image over to the next tool you click on (if the tool is applicable to it, such as Draw from Color Tint). This is also a con if you accidentally edit your picture to something else entirely, but the history allows you to jump back an edit.
No flash needed for a lot of them!
Cons:
The site it massive in your browser, and because of the automatic drop down when you hover, you end up getting this overlap over the category and may end up clicking what you didn’t mean to. Easy fix is zooming out to about 80% to combat the overlaps. Because of this, if you’re going to use your phone, do it in landscape mode. wont be the best experience but it gets shit done.
site has ads but not pervasive ones. if you really dont like them, use an adblock.
For flag editing, the colors are a little rough, and require pretty damn good memory of what the right colors you want are called if you want a richer or more specific look. there is a color wheel though, which i believe is new.

Bloggif: another photo editing site, but its hella retro kinda. I believe the site is originally french so hey. lets you make old internet type gifs and icons, complete with glitter effects,fx effects, and even little smileys to add to your stuff.
What does it offer me/Pros:
Truth be told: not very much! There are only 20 editing tools on the site to use at your leisure, a significant downgrade from LunaPic’s 200+, but what it lacks in editing it makes up for the lovely retro feel it has. There is gif support, including deconstructing gifs if that’s your flavor, and the infamous glitter tools kids love these days!
some of the tools actually have lots of options with them, for example, the ‘Animated smiley’ tool, which offers 16 smiley shapes, numerous little add ons, and the ability to upload your own image to edit into this ‘smiley’. There are options at the bottom for the blink speed (Rapide, Moyen, Lent, Aucun which in layman translation is Fast, Slow, Slower, Stopped).
can support small images and larger images, but i wouldn’t recommend trying to over power the site. Here’s an example of the smiley tool in effect:

It’s fast! And really easy. You can do it from your phone as well!There are photo collages, animated text with effects on the letters and a few other things.
Flash not needed for all of them!
Cons:
‘Swiss army knife of photo editing’ is a bit of a stretch since there are so few tools.
For smilies, there is no free placement of the little effects. They pick a spot and stay there. To layer, you have to reupload the smiley and drop another effect.
Just not a lot to offer, tbh...but retro! and cute!

Blingee: ye olde blingee.com, lets you make blingees for that really early 2000s feel. TRES IMPORTANTE: to make blingees you need to set up an account (its free). You also need to use firefox (if DDG works im not sure i havent used it with that browser) and update your flash to actually make them after setting up an account. IDKY but it does not work with chrome whether you fixed your flash or not. the site gives you options to share your blingees as well, and you can also see shit from like ...2006 sksk
What does it offer me?
The ability to make blingees. What more can you want? If you’ve been online and a little tech savvy for a lot of your childhood, you may even have a blingee account still. the site is still active hasn’t updated its look for a WHILE, but it’s a pleasing site to look at.
Variety is of the essence here, as there are more than just blingees to create. There are internet postcards and stamps as well, with lots of little effects to add like sparkles and glitter and backgrounds of your problematic kins.
it’s cute ahaha <3
Cons:
G-D FORBID YOU LOSE YOUR PASSWORD!! I believe there is a bug right now that won’t let you sign up, even though the FAQ claims that you don’t need an account to make blingees (you very much do!!). I have emailed about the process of logging in after you reset your password and if there is a wait period until you can log in again, and I’m still waiting for a response. I also told them about the signing up part. I’ll update later...
You need flash. Flash is leaving soon :(
Pretty damn confusing to use actually. So much so you wonder if it’s worth the trouble...
Honestly its a very archaic site, would recommend using Bloggif frfr

Glitterfly: it’s glitter. its a lot of glitter. Theres 50 cent glitter images on this site. It’s legit.
What does it offer me?/Pros:
Glitter. And lots of things to put glitter on. And i mean A LOT!
Allows you to upload a picture to throw glitter on.
The jonas brothers are here. and camp rock.
Make glitter words, change their color, and roll that sucker in some sparkles!
askjhdjasf theres a tab to make??? a fucking PIMP CXARD/???JKHFSK (its just an american express black card stock image with a fake number on it)
Cons:
my G-d is it ugly. So much purple....
use an adblock
Not a lot of glitter effect options or color options for the words
No way to get rid of the watermark at the bottom, but what’s a little credit?

FOR NOW that’s about it! For some artwork, I use either my own drawings or images that I just...have on my phone or free cliparts that fit the topic. Uh...that’s all, goodbye!
#not a userbox#not obscure#refrence#tools#if anyone has any others they'd like to share i am here for it#long post
44 notes
·
View notes
Note
hi! how did you make you banner i love it!! :)
thank you! i’ll give a detailed rundown under the cut! i was actually in the middle of making a new header when you sent this, so good timing!
a quick explanation is that i cut out an image, paste it onto a fresh canvas, edit to my desire, and then use a gif overlay on top to give that snow effect!
so i’m going to explain this in as much detail as possible to try and make it as clear as possible, so hopefully this will be useful no matter how much PS experience one has! i used photoshop cc 2017 to make this! i’ve learned ps pretty much through just trial and error so if i do things weird, im sorry sdklfjdslk
start:
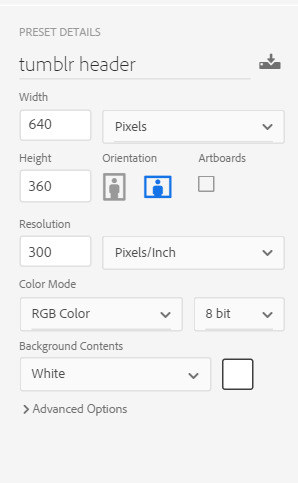
the first thing i do is open a blank document in PS sized to the tumblr header size which is 640x360 on mobile, you can size up if you want, but just keep the ratio the same!
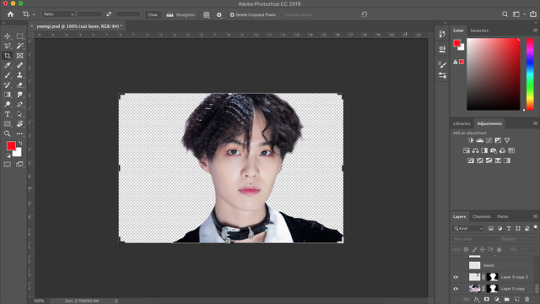
player image:
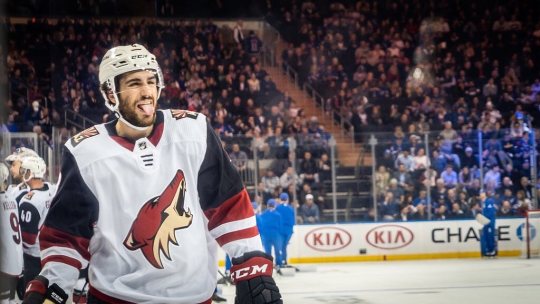
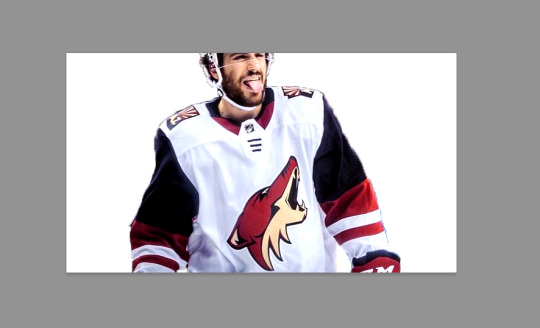
so first i grabbed a picture, and for this i prefer pictures where the player(s) is(/are) isolated, and it’s even better when there’s not much going on behind them because it makes it much easier to cut out the part you want!
the picture i used for this is from this post on the yotes instagram!
next, i open this up into PS, so i have both the photo and the blank canvas (red arrow) open. the blue arrow points to where you can change workspace presets to allow different tools onto your workspace. i’m currently using the photography preset, but will eventually switch to motion later on.
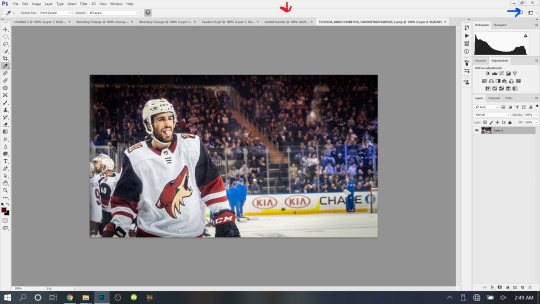
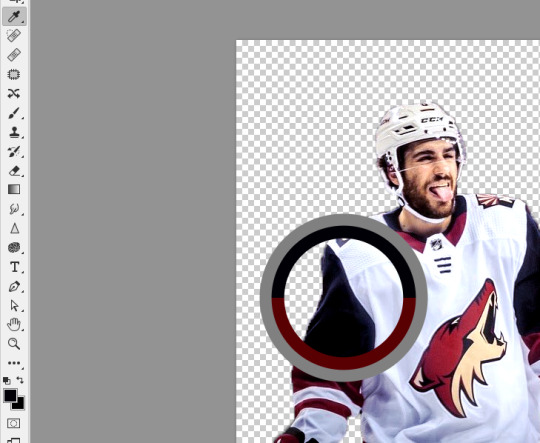
now i begin cutting out my player. there’s multiple methods to do this and each once has it’s pros and cons. the quickest way for me is not necessarily the best way, but it does what i need it to do, especially when the item to be cut out is isolated in front of a quiet background. i use the quick selection tool to quickly select the area i want with a larger brush, and then i go in with a smaller brush size to clean up the edges and details.

when the option with the plus is selected you are grabbing more area, and when the option with the minus is selected you are are deselecting area. the 22 highlighted above references the brush size, the appropriate brush size, or what is “big” or “small” will depend on the size of picture you’re working on so just play around with what you’re comfortable with!
nick is selected, as you can see below, with the line around his body. this is not quite as careful as i would be if i was actually making this for someone to use, but for demonstration purposes it works. you can zoom in further and use the smallest brush size possible and really be careful cutting things out. you can zoom in but uping the number at the bottom left handside of the screen!

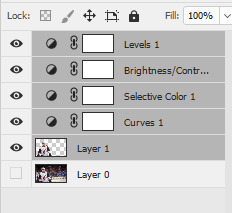
once you have everything selected, right click and choose layer from copy which will create a new layer with just the area you have selected.

now i turn off the layer with the full picture, leaving only the layer i just created. to do this, click the little eye next to the bottom layer on the right hand of the screen, as seen below.

now you’re left with a transparent player to work with! this is where i do any coloring i want to do as well, so i will quickly do that. i am not great at this part so i will just recommend looking up coloring tutorials if you want more specific help here, or just mess around with different adjustment layers which is what i do lol. once it’s colored to my liking, i merge the layers together, making them into one layer, which means the coloring won’t impact any layers below it once i move it to the canvas where we’re actually going to create the header. you do this by selecting all the layers (ctrl + click all the layers or shift + click the top and bottom layers to select them all), and then right clicking and selecting merge layers from the options.
assembling the image:
now im going to work on the base of the header, or basically the rest of it except for the moving bits! what i want to do here is move the player image over the header canvas, resize the image, decide on the color of the background, whether i’ll use any other images or textures, etc.
first i’ll think about my background color of choice. a lot of people use the color that they use for their mobile blog on here, or something complimentary or matching their accent color, etc. i really like a simple clean look so i used a white background for this header because i think it makes the image itself pop and allows the accent colors on my blog to also pop because i use white as my main color on my blog.
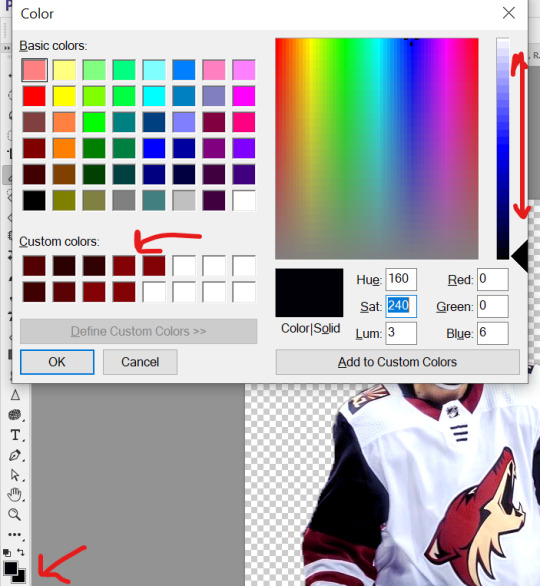
if i wanted to use another color, i normally pull from some part of the image i’ll be bringing over. for this i’d use the color dropper tool (see below), clicking on color on my image i want to use.
then i’ll pull up the color boxes in order to create a custom color from that color (click define custom colors), and then you can mess around with by clicking different boxes on the color scale along the right side of the panel below, or if you want an unrelated color, click on parts of the entire rainbow scale thing. once you have a color you like, selected add to custom colors and you can work with it. i create a new blank layer and then use the paint bucket tool to color it in. this is where you could also use gradients to jazz up the background a little too.
now i’ll drag my player over into the header canvas. i do this by click + dragging the layer from the right side over to the tab of the header canvas until the screen changes over to that workspace and then i drop the layer onto the canvas.

and
now nick is over on the blank canvas but as you can see, he needs to be resized. so i ctrl + t, which allows me to transform his layer (make sure you only have the layer w the image selected on the right hand side layers panel). i hold down the shift key (this keeps the ratio true) and begin to make him small by dragging the arrows. make sure you do not let go of the shift key too early or it will fuck up the image and make him too long or too wide, etc. then i hit enter, and it completes the transformation. i then drag him to wherever i want him.
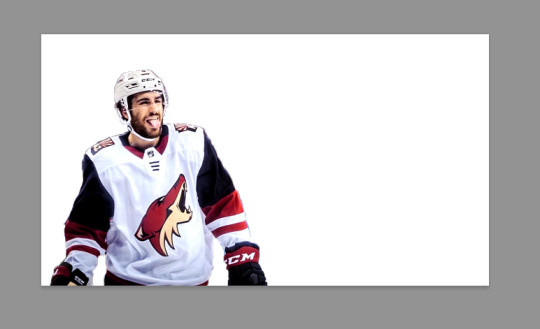
now that he’s resized and where i want him, i mess with the blending options to blend him into the background more pleasingly. now this really isn’t gonna look good since i was so sloppy cutting him out earlier, but just mess around with it until you get something you like. you do this by right clicking on the layer you want to blend and then selecting blending options. i normally do a drop shadow and maybe some other stuff, but i find this changes depending on the image, background, colors, etc.

there’s a lot of stuff you can do here, with the different options and the different settings for each one!
gif overlays:
now it’s time to add a gif overlay which i how get the snow falling effect. there’s multiple posts with these kinds of gifs out there, i’ll be using one from this post (method one) and one from this post (method two). neither are the one i used when i first made this header but i cannot find the one i used then; the principles still apply. now is the time to either add the timeline to your workspace, or change it to the motion preset.
on the timeline section at the bottom of the page, there should be a create timeline animation button, click that.

as with gifs from videos, there’s multiple ways of making these gifs. i’ll run through two here.
method 1: this is the method i used when i first made this header!
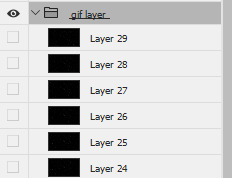
if you use a gif overlay, and it comes with frames, create as many frames as that gif comes with to then copy those frames onto. open your gif and see how many frames/layers. this one has 29 as you can see below.
now click the little button with lines at the top right corner of the timeline. it looks like this.
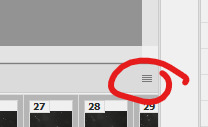
next click select all frames from the menu that pops up, and then select that menu again and click copy frames. now go back to your header and create the frames i talked about earlier, you need 29 (or whatever it may be for your gif). do this by selecting the button below, located along the bottom of the timeline. do this as many times as needed until you have enough frames.
now select all the header frames once again and go back to the menu where you copied the frames and select paste frames this time. a menu will pop up, and choose paste over selection. this will match up the frames/layers so frame one of your header will match with frame one of the gif. adjust the gif size if you need to, once again using ctrl + t, and make sure you still have all the layers selected and that you are still on frame 1. also make sure you move these layers under nick in the layer order.

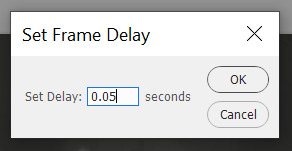
now adjust the frame rate. this will depend on your tastes entirely so test it out. my go to frame rate is 0.05 for everything i do pretty much, as a baseline, and then i adjust from there. to do this, once again select all your frames. next, click on one of these little carots, select other, and input your frame rate in the box that pops up.
method two:
this method is when your overlay comes in timeline form (idr what it’s called) instead of frames, looking like this.

drag the layer from the layer panel onto the header canvas, just like we did with nick earlier. make sure it goes under nick in the layer order. adjust the size if necessary, still using ctrl + f to keep the shape. make sure to click this button at the bottom left corner of the timeline to convert the frame into a timeline.
now, make sure to drag each layer to the same length, aka whatever length the gif layer is. make them match!

changing the color of the overlay:
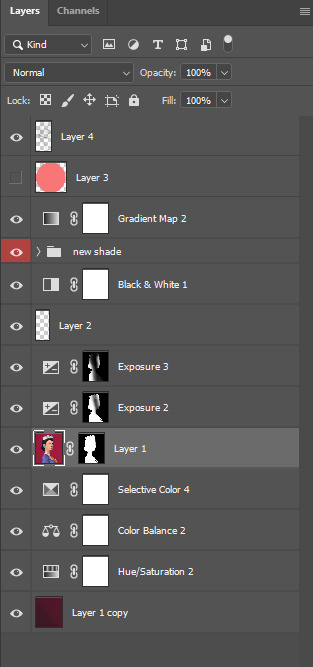
this works with either method above! create a new layer and fill it with the color you want the snow to be. place it below everything except the background layer. add a gradient layer on top of the gif layer. right click on this layer and click create clipping mask. this is what my layers look like, i don’t normally label them but hopefully this is clear.
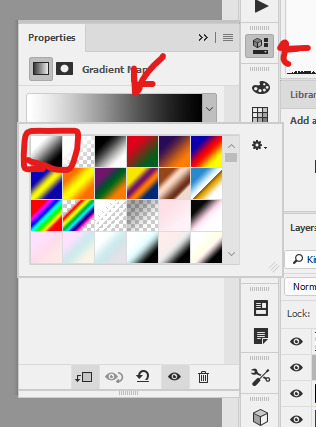
open the properties panel for the gradient map and make sure this gradient is selected and is black and white.
finally, change the blending to lighten on the gif layer! this should do the trick!

final touches:
i like to kind of have my header melt into my blog color, so i like to kind of transition the bottom of my header into whatever color my blog is. to do this, i use a multitude of methods. for this header in particular i used the eraser tool + a textured kind of fan brush to swipe back and forth creating the half erased look at the bottom. the setting seen below are probably similar to what i did when i originally did this header!


again, this is something that you can play with a lot yourself, especially by downloading brush packs and seeing what cool textures you can create.
saving:
to save, file > export > save for web
make sure you select “forever” and not “once” so that the gif loops!
original:
gif method 1:
gif method 2:

(ignore how this is also different i had to remake it once again bc i didn’t save it lmaoooooo)
5 notes
·
View notes
Note
Hey I sent an ask before but I guess it got swallowed? I was wondering if you had any advice on editing headers for fics? I’ve loved the ones you’ve done in the past and I’d really like to do something like that for my own fics too! Hopefully this one gets to you💓—🦋 anon
Hi!!!
I actually design things and work in printing for my main job so I have access to things like Adobe photoshop and Adobe illustrator (I do my painting/retouching in photoshop and everything else in illustrator). But it’s hella expensive so I try to look at free alternatives.
I have a bunch of asset/resource sites I use for photos and fonts. Sorry I tend to ramble so here we go.
Firstly I have a lot of free resource sites that I can get high-res assets from. I often am using things for commercial purposes because I get paid to do what I do. But for most people, they don’t have to worry so much about it bc they’re making it for themselves, but it’s always nice to have high-res assets still.
When I get a concept, I look for imagery that inspires me from sites like these and I can usually find what I’m looking for. The amount of beautiful, free, high-res images out there is amazing.
Good rule of thumb is that you can always make a big image smaller, but never make a small image bigger, so always download the biggest size you can and size to your needs. -holding SHIFT when resizing keeps things in proportion when scaling-
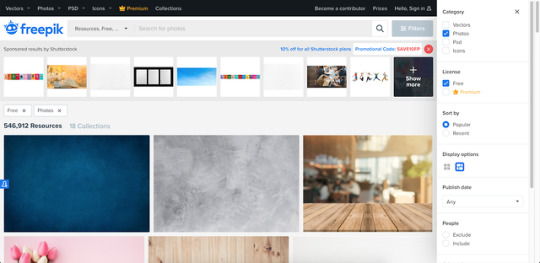
I usually use pexels and freepik as my default. There are sooo many image sites I could list but here are the ones I use.
https://www.pexels.com/
https://www.freepik.com/search?dates=any&format=search&page=1&selection=1&sort=popular&type=photo
https://pixabay.com/
https://unsplash.com/
https://www.rawpixel.com/free-images (There’s free and premium images, but you can download 5 images per day are labeled free)
https://lostandtaken.com (textures that you can tile!)
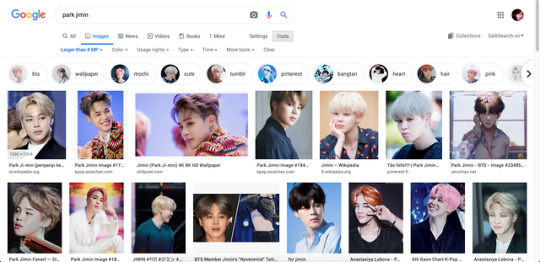
For BTS photos I look via google for images over 4MP (usually dispatch or official photos are my go-to).
I use photoshop to cut them out and retouch, but there is another editing tool I’ve been experimenting with called Photopea, which is a FREE online editing tool that’s just as powerful. It even looks like photoshop so it’s pretty comfortable to use.
https://www.photopea.com/
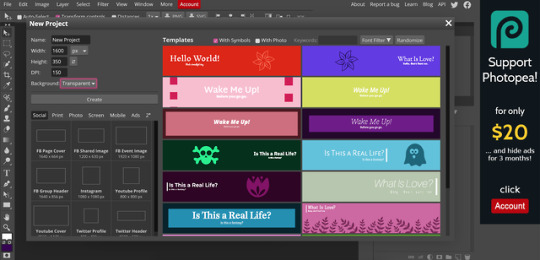
I make my banners at 1600px x 350px, but i realized tumblr auto resizes anyway [LIKE A BITCHASS PUNK IM MAD ABT IT AND FOUND A WORKAROUND thats for another post tho]. I keep my DPI higher in case I want to use it for printing at some point, but that’s optional -72 is perfect for what you’re doing.
Reference:
300DPI= GREAT PRINT QUALITY - (work brain loves this but it’s useless for what we’re doing)150DPI=GOOD PRINT QUALITY 72=OPTIMIZED FOR DIGITAL USE ONLY (standard screen resolution)
_
Custom fonts can be your friend or the enemy. If you’re using a scripty one, try to make sure it’s legible with your title (there are some really terrible ones out there, but there are so many good ones too).
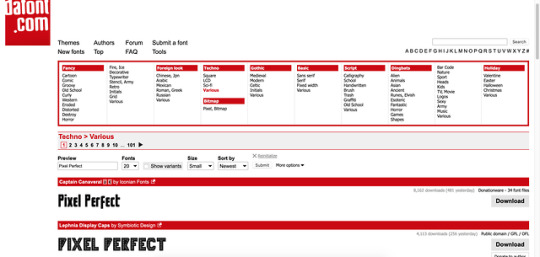
The easiest and quickest font place I use is dafont bc you can choose fonts based on the style you’re going for and you can test your text before you decide to download. They can be loaded into photopea! Also they’re free:
https://www.dafont.com/

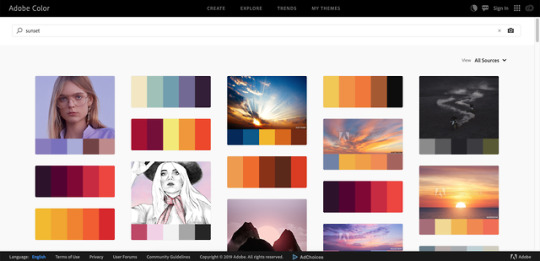
As far as editing goes, I tend to choose a color theme based on feelings and adobe has a site that can help you by showing you palettes based on search terms. ( you can even search for things like happy, sad, angry, etc)
https://color.adobe.com/explore
I tend to use fuzzy edge brushes on everything to make it look soft, especially in lighting. The trick is just layers upon layers with different blending modes
I use “Color”, “Saturation” and “Overlay” modes a lot.

Ignore my layer names: I’m a mess.

This is what it looks like in reality. I just blob brush everything.


So in steps you can see 1)original cutout
2) adding effects like busted lip (a brush i downloaded for PS–I don’t think these import to photopea unfortunately), bruising (textures set to overlay/multiply using different colors), earrings (hand-painted over the originals for a cleaner edge), and EYES (eyes i tend to cut from the main layer, copy above, lighten/contrast the shit out of them and change the color using “replace color” or “hue/sat” or blob color on a new layer and set it to “color” blending mode and then paint over –there’s a lot of ways to do it– but then blend them back into the photo in a natural-ish way)

3) lighting overlays give color to the skin and you can use colors from your background to create interesting pop effects (in this case i used purple)

I hope this helps??? But if you want more like in depth help with editing and stuff, let me know!!! It can get overwhelming, but it can also be really fun!
3 notes
·
View notes
Note
oh okay i'll send my ask again!! so this might make me sound rly dumb but basically i was looking through ur ps help tag and i kept seeing people asking for the psd you use and i was wondering what that means exactly?? like i know psd is the file extension for photoshop files but what exactly does it mean when you use a psd for gifmaking?? i hope that wasn't worded too confusingly jfkljsld
yay okay so!!! (if you view this on desktop i think my theme cuts off the large pics so i recommend checking this post out on mobile haha)
idk how proficient you are already so i tried to be as descriptive as possible + a lot of visual aid!
the first step of giffing is importing a scene from a video, resizing it to tumblrs format and setting it’s timing right? (if u need help with any of these too hmu im always glad to help u can even do it off anon in pms)
but the thing is that even though the video itself might look good and have nice color grading etc, in gif form it looks kinda boring and bland..
maybe it doesnt Look like that but since ppl edit their gifs so much on here it’s now considered bad taste to gif without any PSDS on top. so it has become a custom in the gifmaker community to add a lot of Adjustment Layers to the gif, which in total are called a PSD.
so you click this button

and it gives u a list of various things you can do to change the look of a gif. The most simple to understand is i guess Brightness/Contrast, where moving the handles adjusts the brightness and contrast of the gif:


so for my first step i slightly raised the brightness and lowered the contrast (it doesnt mean you always have to do that it’s just whatever the gif is, or the look you want to go for!)

and this is the result

Hmm.. Now let’s say that i feel like i want the purples in this gif to me muuuuuch more vibrant, so i make a layer of Vibrance and raise it a bit to make the colors pop more
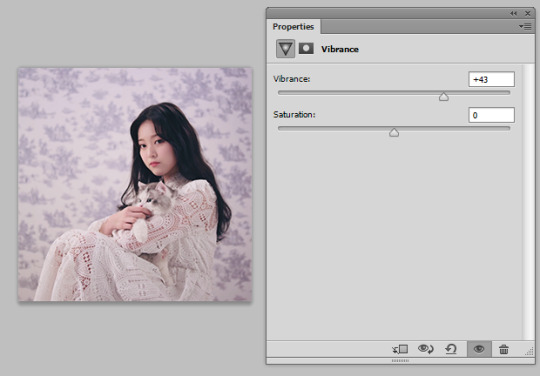
and maybe raise the saturation just a liiiiiitle bit
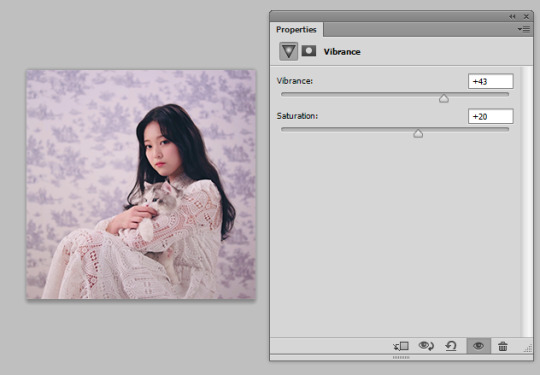
I still feel like it doesnt look cool enough.. Like i dont want a subtle soft purple from the original i want it PURPLE with a capital P and capital every other letter lol. There’s a bunch of fun ways to get that effect that you’ll get after playing around with those Adjustment Layers.
I went into Hue/Saturation aka my fav tab, and made the settings for Blue and Magenta just a bit to the right of the spectrum and more saturated (it might not seem like a big diff but those little changes pile up to give the gif a distinct look)

then i went to color balance and changed it towards slightly more red and magenta
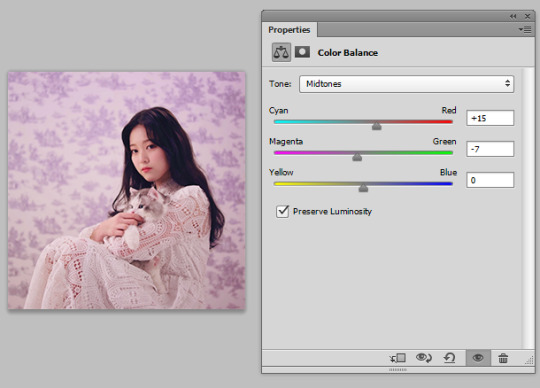
this is all the work we have done so far, it’s pretty visible already i would say
Now what i showed so far is i guess the more like bare simple ways of color manipulating ur gif. It’s nothing crazy but it already gives it a distinct and more pleasant look!
There’s so many of them that tbh there is no One tutorial, it’s just about experimenting with each of these options and seeing what kind of results you get! Because there’s sooo many possibilities in adjustment layers that i haven’t even started describing the tip of the iceberg. some examples:
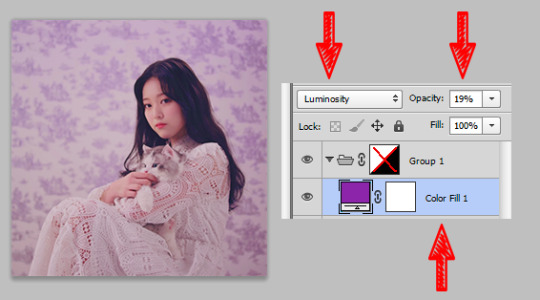
I made a Solid Color layer in a darker purple shade ur seeing in the little box, set its Blending Mode (the lil box next to opacity) to Luminosity and changed the Opacity to a lower one bc it looks crazy on 100%, and achieved this nice toned down effect to the gif if you’re going for this kinda look! i also like it cos it returns some color to her skin shade
another cool feature with like .. endless possibilities is the Gradient Map. With this one you also gotta use Blending Modes and lowering the opacity of that layer so that your gif doesnt end up looking crazy... ooh also play around with Photo Filters, those are really easy to grasp and have already st presets that can make the photo colder/warmer/etc!
after playing around some more this is my final result lol...
before

after
(i also sharpened the final gif)
So if you take all these adjustment layers and group them in a folder, it’s called a PSD! A lot of people share their psds online as do I! Not every psd works for every video, but some might be more universal than others, and you might just have to tweak it a little bit to look nicer! So to use someone else’s PSD on your gif you just open them in Ps side by side and drag the folder with the PSD on top of your gif!
22 notes
·
View notes
Text
kmplayer gif tutorial
hello all! i’m gonna show you how i make my gifs! I use kmplayer and avisynth to make gifs, but I’m going to focus on kmplayer for this one. This tutorial is long and quite in depth so if you’re a beginner, this should be good for you!
also! this is purely just a gif tutorial and not a coloring tutorial lol
what you will need:
photoshop (im using cs5)
kmplayer
any video downloader (I use 4k download or savieo)
Screencapping
Okay first find a video and/or a scene that you want to gif. You’ll want to get the highest quality video possible. Don’t download anything under 720p or else your gif will look grainy. Try to get 1080p as much as possible.
Once you get that downloaded, open your video in kmplayer and go to the scene you want. I like to go a few seconds beforehand to make sure i don’t miss any frames. Now on your keyboard press Ctrl + G to open up the screen cap menu.
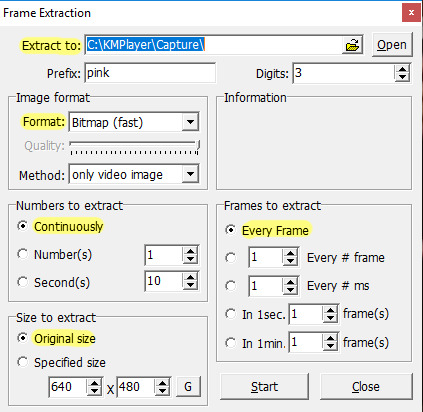
I don’t remember the default settings but here are the settings you’ll want:
Extract to: you’ll want to create a folder to hold your screen caps and then direct that folder here
Format: JPEG and Bitmap are both good options. Bitmap (i believe) is going to be a higher quality image
Numbers to extract: continuously
Size to extract: original size. You want the full size image
Frames to extract: every frame. This ensures that you’re getting every frame and helps your gif look smoother
also the “prefix” is just going to be the first part of the image name, so put whatever you want for this! :)
Once this is done, press Start in the menu and play the video. When the scene is done, press pause on the video. Open the menu again (Ctrl + G) and stop that as well. Now all you want to do is go into the folder with your screen caps and delete the ones you don’t want.
Frame timing and converting to smart objects
Open photoshop: we are now going to start the giffing process! Before you start, make sure you have the animation window and the layers window open. To do this, go to Window > Animation and Layers, if it’s not already showing.
Now, click on File > Scripts > Load multiple DICOM files. Find your screen caps folder and load them in. You’ll see in your animation bar that it only has one image showing.

In order to pull your screen caps from this, go to the top right hand corner of the animation bar and click this button. Click “Make frames from layers”.

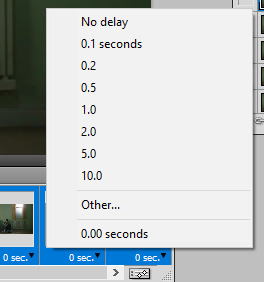
This is so your gif actually plays all the frames and not just the one showing. Next, change the timing of the gif. Personal preference is a big thing in giffing so you’ll want to play around with what works for you. The average timing used by a lot of people is either 0.04 or 0.05 (for screencaps i should say). I find that 0.04 can be a little fast for my liking, so 0.05 is good. To do this, click the “0 sec” and then “Other...” and type in your timing. Make sure you select all the frames before doing this, unless you want to change each frame individually ^.^
P.S. if you ever want to delete a frame in your gif, you can delete the layer in the layer window but in the animation bar, you’ll have to click on the frame and click the tiny trash can next to the bottom scroll bar.
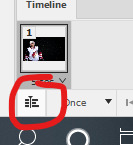
The next step is to click the button in the bottom right hand corner of the animation bar. It looks like it has two sliders on it. It will change your animation from frames to timeline.
Next, right click on a frame in your layers window and select “similar layers”. Then right click again and select “convert to smart object”. This may take a moment btw.

If you see that your animation timeline shortened into one line instead of multiple lines, you’re on the right track! Next thing to do is to crop the part of the scene you want.
Image size, sharpening and canvas size.

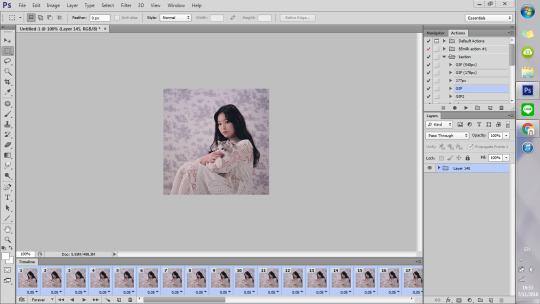
Image size will change the photo size without cropping anything out. Canvas size will change the size without transforming the image. What I like to do is to change the image size to about 5 or so pixels larger than what I actually want for either the width or height. In this case, I want my gif to be 268 x 150. So my cropped photo is going to make my height much larger than I’m going to want it, if that makes sense.
P.S. For sizing, make sure your width is either 177px for 3 panel gifs, 268px for 2 panels, or 540px for a single panel. If you want a 3 panel gifset, make the middle gifs 178 px (i know, it’s a little dumb but if you don’t, it’ll make the middle gif slightly blurry)
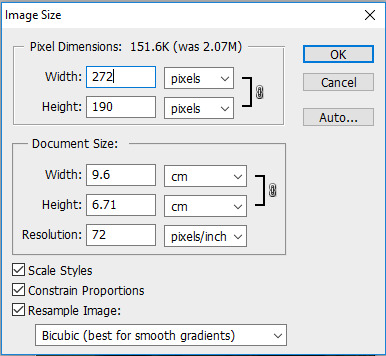
(This is what I’m going to resize my cropped image to)
You can just make the width or height automatically what you want (268 in the width for my case), but I find that after sharpening, a line can form around your image. I prevent this by making the image slightly larger than what I want and then cutting that part out later.
Now I want to sharpen my gif! Again, this is about personal preference, but I think this is what a lot of people use as well. Right click on your smart object in the layers window and select “New Smart Object via Copy”. I’ve seen people select “Duplicate layer” instead but I honestly don’t know what the difference is lkasndfllanslk.
Set the top layer’s opacity to 50% and leave the bottom layer at 100%. To actually sharpen the gif, go to Filter > Sharpen > Smart Sharpen.
For the top layer:
1. Smart sharpen: Amount 500%, Radius 0.4
2. Gaussian blur: 0.3 (its also under filter)
For the bottom layer:
1. Smart sharpen: Amount 500%, Radius 0.4, no gaussian blur

After this, go to canvas size and change it to your actual gif size. For my gif, it will take my 272 x 190 to my desired 268 x 150. Then combine your two smart objects by selecting both of them and clicking “Convert to Smart Object”.
Gif without sharpening vs gif with sharpening
Now you’ll want to edit it to your liking, just make it sure it’s under 3mb for tumblr’s image limits.
I’m not going to get too much into coloring bc it can be a real pain sometimes but! I will say that selective coloring is your best friend, just don’t saturate/over color or the gif will look more grainy.
After coloring and such, this is what I get:
We’re almost there! Save your new gif under “Save for web & devices” and not for “Save as”. When it opens, it’ll look really confusing, but all you need to worry about is that the “Looping options” says forever and not once, or else your gif will stop after it plays the first time.
The last step that I didn’t even learn until recently is that you’ll have to open up your gif again in photoshop. When you do this, you’ll find that the timing has changed from 0.05 to 0.07. Idk why it does this, but your gif will look smoother if you change it back. (It might only be for screencap gifs but idk)
Here’s a comparison of the gif as is vs the gif when i changed the timing again:

And then you go through the process again if you’re making other gifs! I wrote a lot but it really isn’t that hard once you practice a couple times. I’m still learning too! (as you can see since my gifs are still grainy and such) but i hope this was helpful for people who don’t know where to start! Happy giffing!
#text#im not the end all be all but i will say that I know i've improved ever since learning some of these things#if anyone wants to share their knowledge i would lvoe that
13 notes
·
View notes
Text
LESSON 3
IMAGING AND DESIGN FOR THE ONLINE ENVIRONMENT
PRINCIPLES OF GRAPHICS AND DESIGN
Balance in design is similar to balance in physics. A large shape close to the center can be balanced by a small shape close to the edge. Balance provides stability and structure to a design. It’s the weight distributed in the design by the placement of your elements.

Movement principle in graphic design refers on how the human eye interact with your design, and the most important element in your design must be the first thing people see, and after seeing it your design needs to lead viewer to the next most important element.

Unity the sense of oneness of the elements that creates balance and harmony
The principle of repetition simply means the reusing of the same or similar elements throughout your design. Repetition of certain design elements in a design will bring a clear sense of unity, consistency, and cohesiveness. REPETITION can be regular or irregular and even or uneven.

proximity is a principle of design that refers to the spatial relationship between the elements of the design. The rules of proximity are pretty simple: things that are related should be nearer to each other, and things that are unrelated should be placed further from each other.
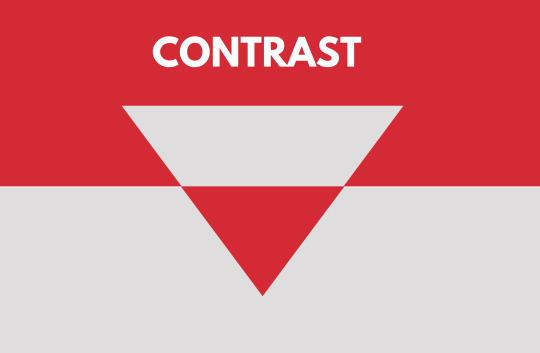
principle of art, contrast refers to the arrangement of opposite elements and effects. For example, light and dark colors, smooth and rough textures, large and small shapes. Contrast can be used to create variety, visual interest, and drama in an artwork.
White space is the area between design elements. It is also the space within individual design elements, including the space between typography glyphs (readable characters). Despite its name, white space does not need to be white. It can be any color, texture, pattern, or even a background image.

infographic visualises the six guiding principles of Unity/Harmony, Balance, Hierarchy, Scale/Proportion, Dominance/Emphasis, Similarity & Contrast. ... The footer should include the URL directly to the infographic landing page to make it easier for readers to find the original.

THESIS/STORY isthe subject and the main idea of your infographic must be clear.
Data must be well- organized and supports the main idea.
Simplicity Style must be able to attract your readers so as not to make your infographic full of text

Sources-You must cite your resources so as to give credibility to your data.
Branding/Shareability -Your infographic must be creative and innovative
IMAGE FILE FORMATS
JPEG stands for “Joint Photographic Experts Group”. It's a standard image format for containing lossy and compressed image data. Despite the huge reduction in file size JPEG images maintain reasonable image quality.

The Graphics Interchange Format (GIF; /dʒɪf/ JIF or /ɡɪf/ GHIF) is a bitmap image format that was developed by a team at the online services provider CompuServe led by American computer scientist Steve Wilhite on 15 June 1987.
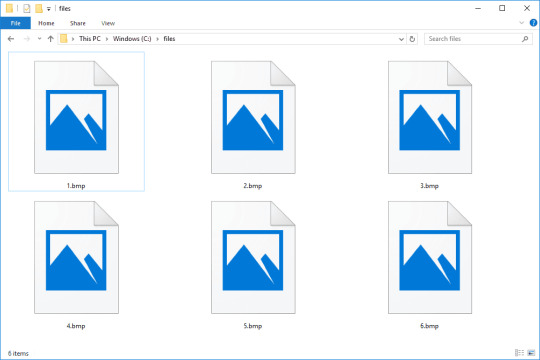
The BMP file format, also known as bitmap image file, device independent bitmap (DIB) file format and bitmap, is a raster graphics image file format used to store bitmap digital images, independently of the display device (such as a graphics adapter), especially on Microsoft Windows and OS/2 operating systems.
TIFF - IS A FILE FORMAT CREATED ORIGINALLY BY ALDUS CORPORATION FOR DESKTOP PUBLISHING.CONSIDERED AS A HIGH QUALITY IMAGE FORMAT
Portable Network Graphics and is another raster image type. The main difference between a PNG and a JPG is that a PNG file can have a transparent background and is generally larger and of higher quality. PNGs are great for interactive documents such as web pages but are not suitable for print.

PRINCIPLES AND BASIC TECHNIQUE IN IMAGE MANIPULATION
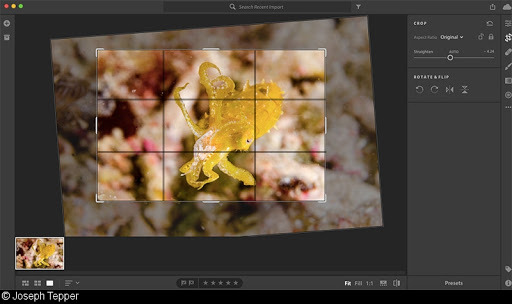
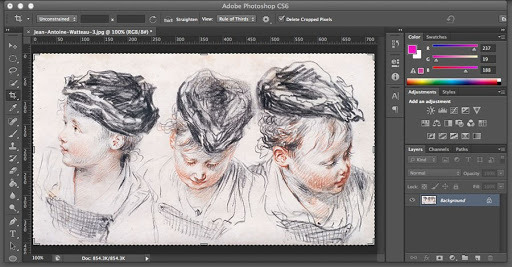
Cropping is the removal of unwanted outer areas from a photographic or illustrated image. ... Depending on the application, this can be performed on a physical photograph, artwork, or film footage, or it can be achieved digitally by using image editing software.
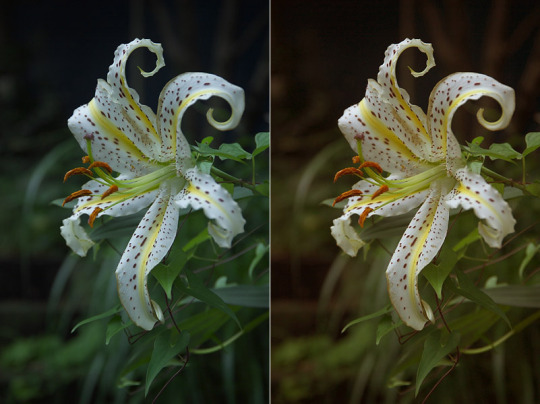
color balance is the global adjustment of the intensities of the colors (typically red, green, and blue primary colors). An important goal of this adjustment is to render specific colors – particularly neutral colors – correctly. Hence, the general method is sometimes called gray balance, neutral balance, or white balance. Color balance changes the overall mixture of colors in an image and is used for color correction. Generalized versions of color balance are used to correct colors other than neutrals or to deliberately change them for effect.
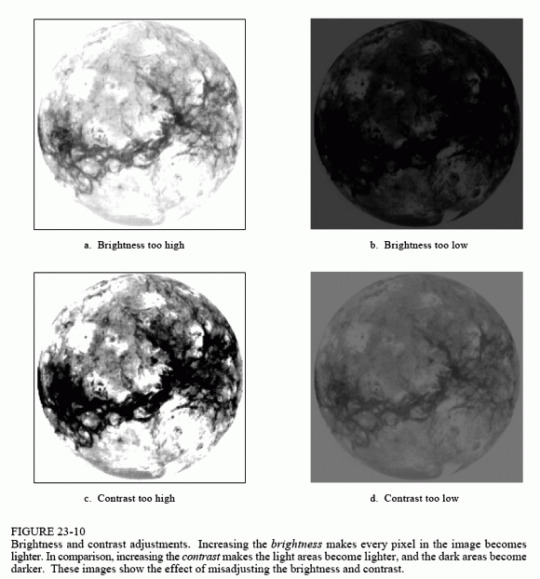
Brightness is the easiest of the three functions. It is simply a linear conversion of the measured image intensity to display intensity. Adjusting the slider affects each pixel the same way in a linear fashion. Contrast is the ratio of the brightest spot to the darkest spot in the image.
Resizing is making the picture smaller (or bigger). If you resize and don't compress, you can still get a picture that has lots of KB's. Compressing is a means of reducing file size and retaining most of the information in the picture (or file). JPEG (there are many other formats as well) is a form of compression.
Blending is a painting technique where two different colors are slightly mixed together when wet, giving a smooth transition from one color to the next. The transition color will be a product of the two blended colors (i.e if you are blending blue into a yellow, the transition color will be a green)
Combining multiple image -composition must be planned and conceptualized first so that you will be able to render the best image and message possible

Picasa is a discontinued, cross-platform image organizer and image viewer for organizing and editing digital photos, integrated with a now defunct photo-sharing website, originally created by a company named Lifescape in 2002.

Fotor is a photo editing platform, utilizing exclusive technology to bring an unprecedented level of editing control to everyone. Fotor's softwares are available on every major mobile device, desktop computer and online.
PIXLR-T IS ALSO A PLATFORM IMAGE EDITING PROGRAM. YOU CAN CHOOSE BETWEEN THE EDITOR FOR EDITING IMAGES OR CREATING AN ORIGINAL IMAGE RIGHT THROGH THE BROWSER.
IMAGE HOSTING SITES
Imgur (/ˈɪmɪdʒər/ IM-ij-ər,[2] stylized as imgur) is an American online image sharing community and image host founded by Alan Schaaf in 2009. The service has been popular with hosting viral images and memes, particularly those posted on Reddit.

Flickr is an American image hosting and video hosting service, as well as an online community. It was created by Ludicorp in 2004 and is a popular way for amateur and professional photographers to host high-resolution photos. It has changed ownership several times and has been owned by SmugMug since April 20, 2018.

Photobucket is an American image hosting and video hosting website, web services suite, and online community. Photobucket hosts more than 10 billion images from 100 million registered members. Photobucket's headquarters are in Denver, CO.


SlickPic is a photo sharing site offering unlimited uploads, but it's limited in features, interface, and community.
Zenfolio is a hosting service for photo galleries where the user can upload and elegantly share an unlimited number of photos using simple and intuitive tools. Zenfolio allows users to create and customize professional-looking galleries using an advanced Web interface.


WHAT I’VE LEARNED
In this lesson ive learned how to know some apps or websites that i can use in posting some pictures or what do i want to post and also ive learned that its good if we know what is the type of editing we should use in our picture so that it will have a nice and good outcome. Also it is helpful for me and for them that it is useful for us if what we want use in editing,the brightness and contrast of the picture should be nice also the cropping if you want to get the good shot only and etc.
0 notes
Note
How do you make your flags? Like,, for the Cookie Run icons- I wanna make my own.;;
oh! im really bad at explaining so bear with me
i use firealpaca to start off with, it’s free but u can make these on any photo editor really
i don’t always make flags - i’ve only recently gotten into making them! they’re very fun to make, so if it’s smth that brings you joy you should definitely give it a shot. but usually, i don’t make flags, i just use ‘em for the icons. i find most of my flags through @/wuvsbian and @/noodle, or @/lgbtpnflags.
the how-tos are under the cut
making icons is super simple honestly, i always start out with a 250x250 icon, paste + resize the lesbian flag so it fits into the icon. then i take the sprite, artwork, etc, and crop it so it fits in the icon. i usually try not to obsess over quality bc it’s an icon and it’ll be zoomed out anyway, but i still make an effort to make it look good. (my advice here is to just not. obsess over the quality too much)
however, making flags can be tedious and harder to explain, so it might be easier one on one, but i’ll try to explain anyway
i take the flag and put it into firealpaca
then i create a layer and choose a blending over lay - i usually go for color or hue
if you just want a simple color palette, just color the whole flag. but usually i have a whole color palette planned out so i have to color the stripes individually
i usually color the whole flag tbh and just cut out the rest of the color thats not on the stripe with the marquee tool
make sure ur layers r all like. under each other and when youre done theyre turned back to normal if youre going the complicated color palette route
then i save it. u can also put another overlay on it to make it lighter/softer, which was what i did with the fruit lesbian flags. i think i chose soft lighting?
if you need more help u should pm me or ask help from another user because im so bad at explaining im sorry anon skdskldlask
1 note
·
View note
Text
Chaotic Interfaces @ Babycastles
The Babycastles gallery is only open on Saturdays from 12 PM -6 PM and Mondays from 6 PM -12 AM. Already very chaotic of them. On Friday night, I texted one of my friends:
wanna go to babycastles tmrw? theyre a video game gallery and have an exhibit rn called chaotic interfaces
I have never been more intrigued by the name of a gallery in my life omg. is it expensive bc im poor
my ta from last semester cofounded it and theyre strongly anti establishment and read a lot of communist theory so i think its free
AMAZING
We met in front of Babycastles at around 3, or as in front of it as we could, considering it was in the basement of an apartment building. It took us a minute to figure out how to ring the basement, but we eventually got in. We were greeted by a volunteer who had the misfortune of having to set up all the pieces and make sure they worked. He offered to help if weren’t sure how to play any of the games, but admitted that he wasn’t too sure how some of them worked either. Not all of them came with clear instructions, and they were meant to be chaotic, after all.
We didn’t get to play a few games, sadly, because they were out of order. It gave me IMA show flashbacks. Of the ones we did play, though, I have some opinions. We started from the back and worked our way back to the entrance, so the first game we played was this:
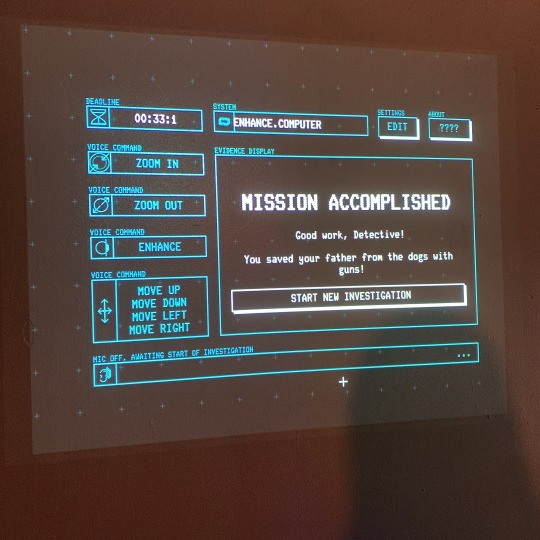
I forgot to get a picture of the staging, which is unfortunate because even though they were mostly just props, they added a lot to the feel of the game. There was a little table with an ashtray filled with cigarettes, an old radio, and the other trappings of an old-fashioned detective. You controlled this game with only your voice, so you had to speak into a microphone. The voice recognition was pretty good, and it caught what we were saying even if we weren’t speaking super clearly. The objective of the game was to find a 4-letter code hidden in a photo. It took us a few rounds before we were able to figure out the best strategy to win, which was to tell it to “enhance” before moving around or resizing the picture. After that, it was pretty easy. I quite liked this game – the visuals were appealing, and it made me feel pretty smart each time I found the code. The fact that it eliminated physical interaction was also interesting. It’s kind of comparable to the Nintendo DS microphone that some games made you speak or blow into. It was impressive on a technical level, but I think the fact that it relied on just voice recognition meant that it was pretty restricted in terms of play. It’s fun until you get the gist of it and rounds start to last about half a minute. I feel like this could be taken a step further if it were made into something like “Keep Talking and Nobody Explodes”, where it’s multiplayer and everyone has a little bit of information that they need to communicate to each other in order to win the game.
The next game we played was a bit like QWOP, but much much worse and also very good, and the volunteer said that the file for it was just called “butt game”:
youtube
You had to sit on a big box that you could kind of rock around on, and that’s how you controlled the torso-less body onscreen. It was agonizing, and I was very bad at it. Neither of us got past 2 meters. Still, we kept coming back to it. It was fun! Even if we kept failing, which was kind of frustrating but still fun, probably because of the visual of a butt and legs rolling around on screen after you fell. It had to be recalibrated at some point, so I caught a glimpse of a Wii Fitness Board at the bottom. Revolutionary. I thought they’d used a tilt sensor or a 6DOF or something, but it was a Wii Fitness Board, and it just made it so much better. It was like I was witnessing a rebirth since it’s essentially a technological relic at this point that I thought no one really thought about anymore. But here it was, and someone had made a game with it. You could argue that the play was even more restricted than the last game, so why did I seem to like this one more? Part of it might have been the weird visuals, and the Wii Fit Board definitely captured my attention. But it was mostly just fun in how ridiculous it was. It’s great to watch your friends shake around furiously on a big box, and we did come up with a few different ways of playing it: rocking side to side or back and forth, or getting up and holding the sides of the box instead. None of them worked super well. I assume you can “win” the game by reaching 100 meters or something, but there was something freeing about playing a game that’s almost impossible to win.
I wasn’t able to get a good photo in the dark, but this game was pretty great too:
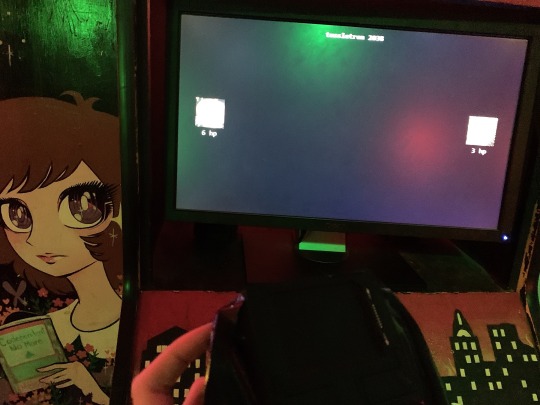
This one had a name: “tussletron 2038″. The controller is just an old PC trackpad duct-taped to the back of a controller that had been ripped apart. The game is played in Chrome between two people. It is an abomination. And it was great! You won by clicking the other player’s icon until their HP hit 0. Why is it so much fun to fight over a cursor with someone else? Since it was in Chrome, you could also resize the screen/images so you could get to the other person quicker or keep the other player away from you. I’m not sure if this was an intended part of the gameplay or something that was emergent, but it added a layer of strategy? to a game that was just about clicking?? and fighting over a cursor??? the whole thing was strangely mesmerizing and strategic. Something my friend and I both ended up doing to thwart the other person’s attempts to click was to move the cursor around erratically so they couldn’t keep track of their own movements until we could steal it back. Video game developers keep trying to make games more and more complex, but humans just like to click things and mess around. This game is really low-fidelity and looks kind of dumb, but it’s a good demonstration of the engineering fallacy in games, the idea that once we’ve reached the height of technology, games will be perfect and high art.
Overall, I really enjoyed the exhibit. While I wish we could have gotten to play more of the games, I had fun with the ones we did play, and I got to experience some unexpected forms of alternative controllers and physical computing that reminded me of the importance of elegance in creative endeavors. I guess it’s oxymoronic to describe an exhibition called “chaotic interfaces” as “elegant”, but I think that for the most part it’s the aesthetic that’s chaotic. At their core, a lot of the games relied on simple controls that led to interesting experiences. In my own projects, I tend to be pretty extra and put a lot of “stuff” into it, which isn’t necessarily a bad thing; however, it does mean I have trouble conveying messages with subtlety. I want to work on taking some of that fluff out and putting my efforts towards figuring out what would make an interaction really meaningful instead.
0 notes
Note
Ahh thank you for your last post! I don’t know if they’ve asked but I would love to know what you use to make your edits! Especially your gifs- do you make them or do you find them? Thank you so much im advance you’re truly amazing!
No problem!! I’ll give you a list of websites/apps and tell you what I normally use them for. You don’t have to use these just for whatever I list them for, of course; I’m probably not using these websites and apps to their full potential so I bet you’ll be able to figure out that these resources are good for making other things too!
I make all my gifs once I learned that it isn’t respectful to take someone else’s gifs and edit them a little and call it my own. They went through the work to find a video, shorten it, crop it, adjust the color, etc. You shouldn’t just google “gifs of xxx” and use whatever is up there. However, if you get explicit permission from the creators, you can use their gifs!
Anyways, all the tools I can think of right now are under the cut. If you’d like me to explain more (tutorial?) on how to do something on any of these resources, let me know!
Pinterest (site) - Pinterest is a really useful website to find pictures that you can use in your edits. Many of my stills that are not images from the movies come from here. Here is my account if you want to look at what images I have pinned!
FireAlpaca (app) - This free app is similar to photoshop in some ways, so I really like using it. Lots of my still edits and all my icons are made on here since it has drawing tools that I can easily use to erase backgrounds and rearrange pictures or text to form my final edit.
Canva (site) - It requires you to make an account, but I enjoy using this website a lot! Many of the basic uses are free. This can help make collages or picspams, as well as moodboards and other edits. I like Canva because it has orientation lines, while FireAlpaca does not so you kind of have to eyeball it. Canva has nice filters that you can apply to screencaps.
Pixlr Editor (site) - The photo editor on this is pretty simple but effective! I use this mostly to tweak image colors, but there are other tools on there that can be useful!
1001 Fonts (site) - If I don’t find the fonts I like on the resources, I go to this website. After finding the font I like for the text I want, I copy the text to my edit, or save it to my computer and upload it into Canva. It’s really neat because it has a wide range of font options!
Ezgif (site) - This is where I make most of my gifs! I first find a clip or make a small video myself of the scene I want to gif. Once I trim it down to the scenes I want, I import the movie into Ezgif.
Online Image Editor (site) - Once I have the gif cropped to the size I want it to be on Ezgif, I download it. Then I upload it into this website if I want to add text to it. This website is best for adding text, such as subtitles, but is not very good at resizing gifs while keeping it at a good quality.
1 note
·
View note
Text
26 Marketing Tools for Non-Tech-Savvy Marketers
Marketing tools are essential for streamlining and automating the more arduous aspects of the process.
The only issue is that you’ve got to actually learn how to use them.
You have to learn their capabilities, their limitations as well as their nuances.
It’s no biggie if you’re tech-inclined.
But what if you’re not so tech-savvy?
Using marketing tools can nearly negate the purpose if it’s a struggle just to figure them out.
That’s why I compiled a list of 26 marketing tools for non-tech-savvy marketers.
Each one is practical and user-friendly and requires a minimal learning curve. Many are even free.
Content creation
1. WordPress
Let’s start with the absolute basics: WordPress.
You could consider it to be the “OG” of content management systems.
As of late 2015, it powered 25% of the world’s websites.
And it’s very likely that number is even bigger today.
A large part of WordPress’ appeal is its utter simplicity and non-technical nature.
You can create and maintain a beautiful website with literally zero knowledge of coding.
And if you happen to understand HTML, you can completely crush it.
If you want to create a site for your business or blog, I highly recommend WordPress.
You can learn how to do it from scratch with this video from Quick Sprout.
2. Google Drive
When it comes to cloud storage, I think of Google Drive as being the universal platform.
I can’t count the number of times I’ve worked with clients or business partners who’ve made Google Drive their platform of choice.
Like most Google products, it’s super intuitive and easy to use.
I use it for writing and backing up content as well as for sharing content with others.
It’s perfect if you have multiple people working on a project because sharing and editing is a cinch.
Besides docs, you can create slideshows, drawings, spreadsheets, and more.
3. Grammarly
I don’t care if you’re Mark Twain, everyone is bound to make mistakes when writing.
Whether it’s a silly spelling error or poor grammar, it’s impossible to catch everything.
But Grammarly will do just that (or pretty darn close to it).
Add it to Chrome, and Grammarly will monitor everything you write, point out any issues, and offer advice on how to resolve them.
It goes above and beyond Word and will make you look like an expert even if your writing skills are lackluster:
The cool thing is that it will also scan your emails before sending them out so you don’t look like an idiot when corresponding to customers or clients.
I highly recommend it!
4. Word Counter
Word count is kind of a big deal, especially if you’re writing long-form content and need to reach a specific number of words.
But not all online writing platforms display word count.
I love this tool because I can quickly copy and paste a body of text, and Word Counter will let me know how many words I’ve written.
It’s super quick, and I’ve never experienced any sort of glitch.
Content ideas
5. Google Trends
Coming up with new ideas for content can be a major struggle.
Even if you’re an expert, it’s not always easy to come up with stellar ideas.
I’ve found Google Trends to be a great place for getting a sense of what’s popular at the moment.
Often, it will point me in the right direction, and I can then use it to gauge the exact interest in a particular topic.
For instance, here’s how the interest in content marketing has grown over the past five years:
6. Alltop
Using Alltop is a breeze.
Simply type in a search phrase, and hundreds of popular blog posts on that topic will pop up:
I use this for brainstorming all the time, and Alltop has helped me come up with some epic ideas for blog posts.
7. BuzzSumo
Words cannot express how much I love BuzzSumo.
Pretty much anyone can figure it out within minutes, and it’s the perfect tool for generating an arsenal of content ideas.
But what separates it from other tools is the fact that it provides you with key info such as:
how much engagement content receives
who is sharing it
links pointing back to the content
The only caveat is that you must purchase the Pro version to unlock all the features.
But you can still do a basic search with the free version.
8. Ubersuggest
This one is a bit like the Google Keyword Tool, only simpler.
Enter a search term, and Ubersuggest will spit out dozens or even hundreds of ideas:
It’s really easy to use, and it’ll keep supplying you with topics whenever you need them.
Communication and collaboration
9. Basecamp
If WordPress is the OG CMS, Basecamp is the OG of project management and team collaboration.
Countless other products have been developed, many of which are cooler and sexier.
But Basecamp still retains its status and continues to be one of the big dogs.
I love its clean interface and how intuitive it is.
It’s very non-intimidating even for the most non-tech-savvy of marketers.
10. Trello
At this point, you probably know I’m big on visuals.
Images make it easier for me to absorb information and stay on top of my game.
That’s why I love Trello.
It involves a system of boards where you can communicate with colleagues and keep tabs on project progress.
It can easily be scaled up or down as necessary and can really boost productivity.
I know many people who swear by it.
11. Asana
This is another visual-oriented platform that I’ve used on several occasions.
I prefer Basecamp over Asana, but it’s the number one team-collaboration platform for many marketers.
In fact, some companies that use it include TED, The New Yorker, and Uber.
My favorite aspect of Asana is the ease with which I can track a project from start to finish.
I’m a stickler for deadlines, so this helps me ensure they’re always met without a lot of stress.
12. Slack
When I think of Slack, I think of hipsters. But in a very good way.
It’s perhaps the coolest, sleekest, sexiest collaboration app in existence.
And it’s dead simple to use.
Slack revolves around creating “channels” where you communicate with team members either publicly or privately.
Drag and drop your files to share with others, and search your archive any time you need specific information.
Slack makes it easy.
Task management
13. Wunderlist
I stay busy, so it’s easy to feel overwhelmed when I’m bombarded with a barrage of tasks on a daily basis.
One of my favorite weapons to counter that is Wunderlist.
I place it on my desktop so I can see exactly what’s going on and what I need to take care of on any given day.
And, of course, I can also access it from my smartphone or tablet.
I can easily save links, photos, and other media I want to keep.
I also use it to set reminders of specific tasks’ deadlines and make note of any business/project ideas that pop into my head.
In other words, Wunderlist helps me keep my you-know-what together.
14. WordPress Editorial Calendar Plugin
If you use WordPress (like I recommend), you’ll want to take advantage of this plugin.
It’s a little like Google Calendar, but specifically for scheduling your blog posts.
You can:
Manage drafts
See what’s been posted
See what needs to be posted
Manage posts from different authors
Like most things on WordPress, it’s user-friendly, and it doesn’t take a rocket scientist to figure out its features.
15. Todoist
The tagline of this platform is “Accomplish more, every day.”
And that’s fitting because I’ve found Todoist to be a major catalyst for productivity.
You simply record tasks, prioritize them as needed, collaborate with others, and get stuff done.
I love its no-nonsense interface and minimalist vibe.
SEO
16. Yoast SEO
This is another WordPress plugin and one that I highly recommend if you’re fairly new to the SEO game.
Here’s a screenshot of its features:
In other words, it handles nearly every major aspect of SEO.
The best part is its simplicity.
I love Yoast SEO because it’s very hands off and automates many of the more arduous SEO tasks like creating optimized URLs, keeping track of keyword density, and so on.
Before you publish your content, Yoast SEO will rate its readability and your keyword usage by giving it a color: red for poor, orange for okay, and green for good.
If you loathe the technical nature of SEO, this is a great plugin to use.
17. Google Keyword Planner
If you were to use only one tool for performing keyword research, this is it.
Even the biggest SEO nerd will agree that it’s useful because you’re gathering data right from the horse’s mouth—Google itself.
The cool thing is that you don’t need to be technically adept to figure it out. Most of the features are pretty self-explanatory.
18. MozBar
In my opinion, Moz is perhaps the Internet’s number one resource for all things SEO.
I especially love its Whiteboard Fridays, offering in-depth analysis and insight.
If you’re looking for a quick and easy way to determine key SEO metrics like links, page authority, and domain authority, I highly recommend MozBar.
Simply add it to your Chrome toolbar, and you’re good to go.
19. SEMrush
This is another great SEO tool that’s amazingly easy to use.
Just enter a URL or keyword, and you instantly get a boatload of useful information such as:
Organic search volume
Backlinks
Top organic keywords
Main organic competitors
Branded search
If you’re looking to perform competitive analysis for keyword or content opportunities, look no further than SEMrush.
Images
20. Canva
If you’re creating content, you’ll need plenty of beautiful visuals.
In my opinion, Canva is hands down one of the best platforms for creating your own images and documents from scratch.
It’s really easy, and Canva offers a wide array of images that are totally free.
You can modify them as needed for your content or for branding purposes.
The best part is that you can do this with virtually no design experience.
21. PicMonkey
PicMonkey is a photo editor that allows you to design, resize, do touch-ups, create collages, and a lot more.
Using it is no sweat even if you have no clue what you’re doing in terms of design.
It’s perfect if you have your own images you want to customize, and PicMonkey helps you make them look like a million bucks.
22. Pixabay
Here’s my take on stock photos.
I prefer to pay for them and get the best of the best.
But if you’re just starting out or are on a budget, Pixabay is one of my top picks.
Everything is royalty-free and available for the public to download, modify, and distribute.
They have a massive archive of pictures that covers most topics, and the quality of their images has really improved over the past couple of years.
Here are just a few samples:
23. Creative Commons
Creative Commons is basically an aggregator of images free to use for commercial purposes. These images can be modified, adapted, or built upon.
You enter a search query, and choose from multiple platforms like Flickr, Wikimedia Commons, Open Clip Art Library, and even Google.
It’s a great tool for streamlining your image search.
Metrics
24. Google Analytics
There are countless metrics platforms out there for measuring your website’s performance, traffic numbers, and so on.
But I think it’s safe to say that Google Analytics is the be-all and end-all tool.
The free version is more than sufficient for diagnosing your website and, in my opinion, quite easy to use.
I’ll admit there is a bit of a learning curve, but most people can figure out the basics in a day or two.
25. Bitly
Bitly is perhaps best known for being a URL shortener.
In fact, I use it all the time for condensing URLs on my Twitter page:
But it’s useful for way more than that.
Here’s the deal.
Bitly allows you to track individual links and gather key information about their performance.
You can tell what your audience is responding to (or not) and tweak your marketing efforts accordingly.
26. Clicky
Finally, there’s Clicky.
Despite its comprehensiveness and level of detail, I consider it to be one of the most user-friendly analytics tools.
You can see what’s happening on your website in real time, monitor the actions of visitors, and even look at heat maps, which I love.
I know some marketers who actually choose Clicky over Google Analytics.
Conclusion
I totally understand the frustration that many non-tech-savvy marketers feel.
There are many tools that are great but require serious knowledge to be utilized properly.
These can really cramp your style and drive you crazy.
But the marketing tools I’ve listed are ones that will get the job done without being overly complex.
With most, the core features can be learned within just a few minutes.
This way, you can spend less time trying to figure out your marketing tools and more time reaching your audience.
Can you suggest any other easy-to-use marketing tools?
from Social Media Marketing http://ift.tt/2odm1Me via Social Media Marketing
17 notes
·
View notes
Last Seen Blogs
aangel222
🪽🩹🍸🔪
shayaaann
Smile, life goes on.
daydreamingqueen1
⚠️BEWARE⚠️: user has no clue what they're doing

challaang
Untitled