#drawing in grey and then using layers modes
Text

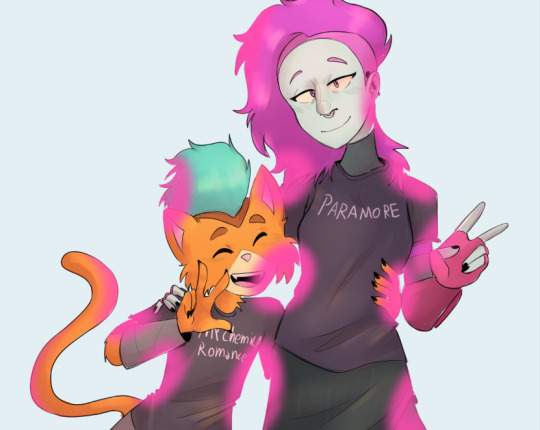
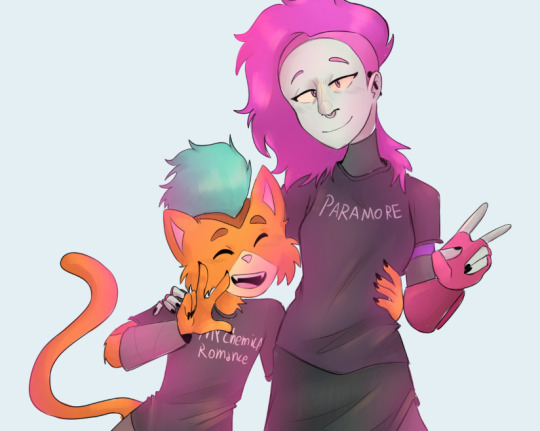
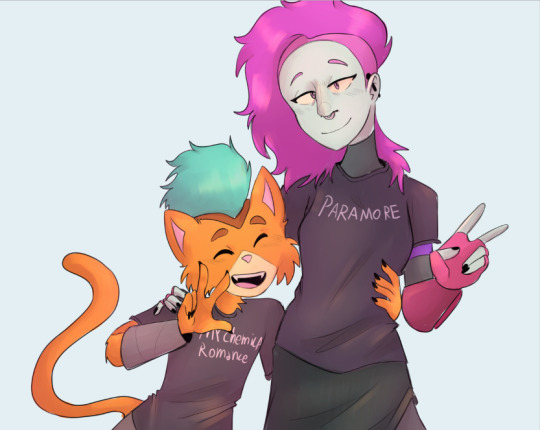
wip that will probably forever stay a wip but I want to prove that I know how to paint
#you'd THINK this is a bunch of layers :)#no it's just one layer#and I actually switch from color to color#instead of like#drawing in grey and then using layers modes#bc I like to be in pain and waste my time#vtm#lorenzo vtm#team deathwish#art
13 notes
·
View notes
Text
Tutorial: How I Render Accents
PART 2: COLORS
I usually do not recommend 'pixel hunting' aka going over your work with a fine tooth comb and picking out stray pixels to erase. However, for setting up a proper base layer for accents it is imperative to do so.
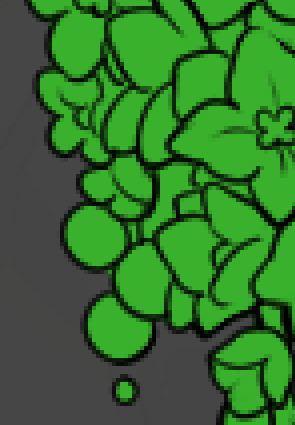
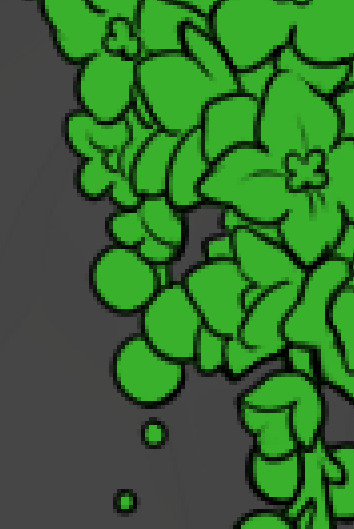
To explain my method of color blocking: I select everything outside of the lines, invert that selection, then fill in. This does a more accurate job than going into each and every section and filling them all in individually, and is also significantly faster. Only downside is small sections like above where you can see bits of the green (which I use bright green against a dark grey background to contrast the base color, lines, and background) poking out, as well as the inner section where it filled in a spot I did not want filled in. Getting all of this right in this stage will make your life easier as you go. (It's also the method I use to color block all my work, even beyond accents)
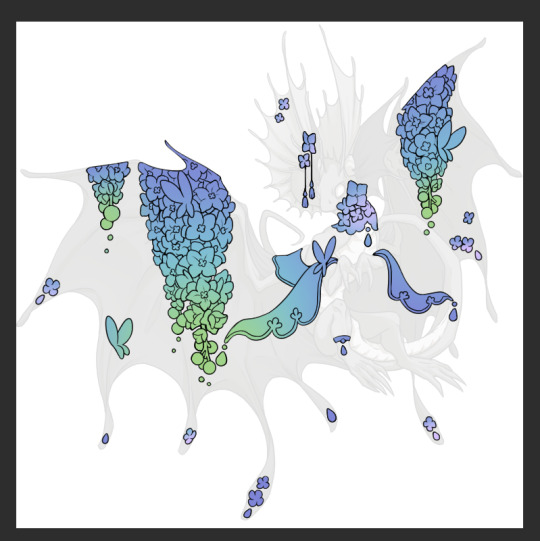
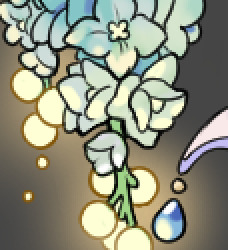
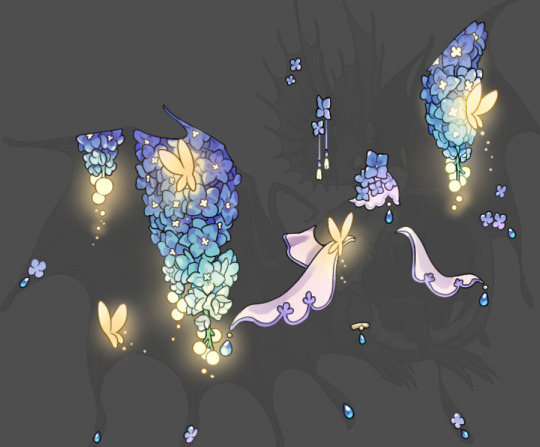
Now this where my style of rendering color may come off intimidating and, tbh it might be. I do gradients first and then I color over them with "normal" blend layers. I typically don't use multiply layers unless I'm shading something that has a lot of textures. If this scares you, it's okay I'll keep walking you through it. Here, my gradient goes from a pastel but deep periwinkle, to a soft more cyan blue, then to a lighter pastel green. Skipping steps and going from the periwinkle to green will give it a different look. There's also hints of a pinkish tone as an accent color.
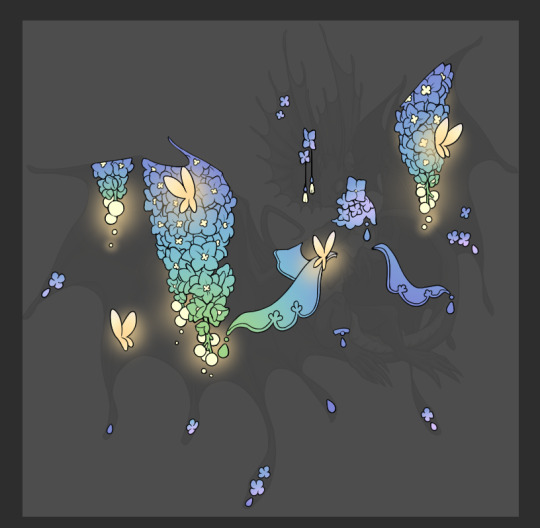
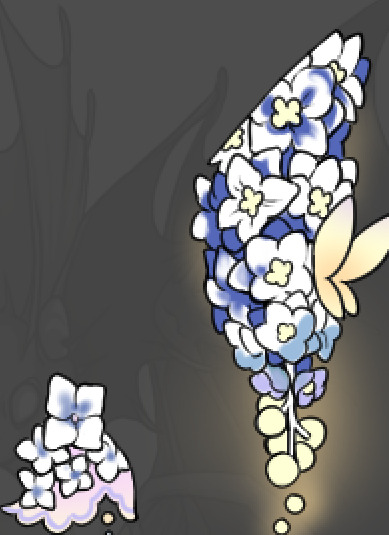
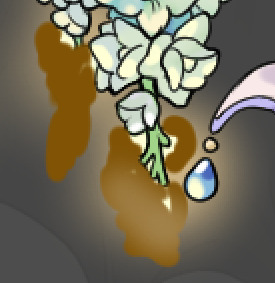
So as I said, these additional layers are done with regular "normal" blend mode layers. I've placed one in between the butterfly line art and the line art for the rest of the flowers, and then an additional layer under everything else. This allows me to create a glow effect specifically around the butterflies, and then specifically under the flowers. Going back and forth with the proper amount of opacity (by using the airbrush transparently) helps to make it glow but not be Too Loud. Also checking it against a dark background can help to check for spots where it spills past the borders, as well as really gauge how Bright it is. I've also color matched the butterflies with the flower pits and the bulbs. This adds extra cohesion and makes them all look uniform but different enough with the gradients.

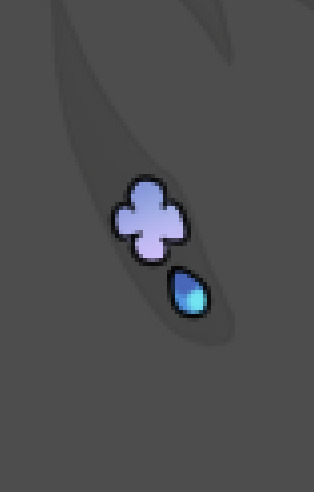

The stages of how I render gems/dew drops. Take the base color, make it a bit darker and less saturated (as well as changing the hue a bit depending on what the default color is. For yellows I go more orange/red, for blues I go more purple or even pink. It depends), add a small drop light at the bottom thats a fairly saturated version of the base color, and then a stark white/ near white highlight. That's it. Don't over complicate it, it will not matter when it gets shrunk down. Note that I do not use multiply/overlay/screen layers for these types of things as it adds too much bulk to the files and doing it manually helps to strengthen your color theory skills.
For shading and rendering, again, I create a "normal" layer and simply. Draw over what exists. Color picking and hand blending allow me to create the exact shades and effects that I want that multiply/screen/overlay layers may not be able to achieve. (which isn't to say I dont use them! i just don't use them for the main meat and potato part of my coloring) All of what is shown here is also achieved with the CSP asset SOIPEN (which can be found for free in the asset store)

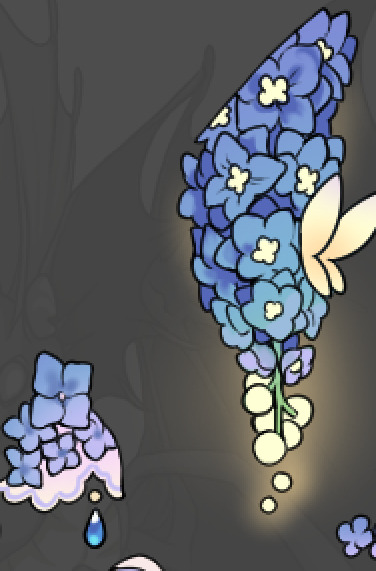
another example. The one on the right is showing how the layer looks without the gradient base layer under it. All of this is rendered by hand. I also specifically put a highlight color around where the butterfly is sitting to give a better illusion that it is properly sitting on the flowers rather than just in front of them.
Next is changing the color of the lines, if needed. A method i'll use is I color just the sections I want (on a separate clipping layer) then lock that layer's alpha setting to them add in a gradient. It's a small and subtle effect that adds more depth without doing a lot of effort. (work smarter not harder)
Now we get to the Polish Layers!
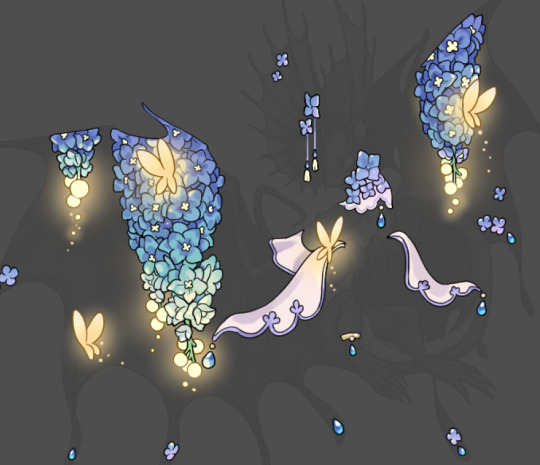
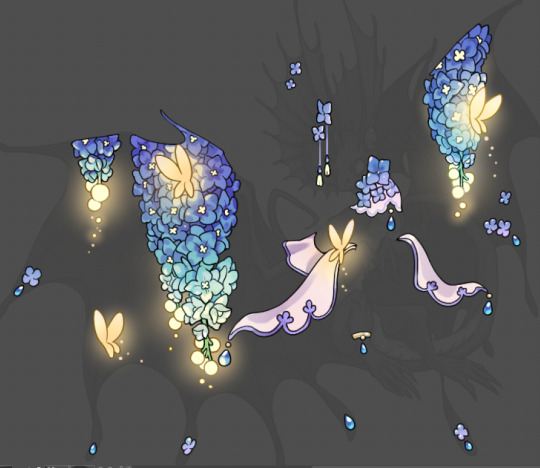
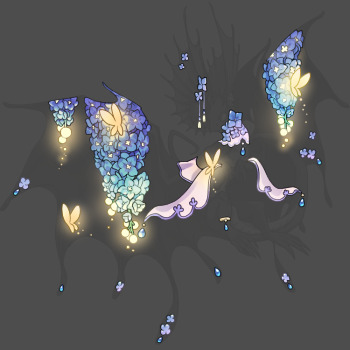
first image is how it looks as a base. second image is with an overlay layer applied. I've used some dark purples and mid tone desaturated greens to push the values a bit further (especially evident on the top left wing) Third image is with a screen layer applied, highlighting the inner most part of the flowers and adding some additional bounce light.
An important thing to note about making accents vs making full coverage skins: OPACITY AND LAYER TYPES MATTER OVER TRANSPARENT SPOTS. What I mean by this is that if you use a soft, light grey to shade with a multiply layer, don't clip it to anything, and have it go outside the lines - that will no longer appear as a 'shadow' when it comes to the final result. Instead you will have a section of soft light grey that is simply laid on top of whatever the image under it is. The same applies for overlay/screen/add layers and so on. If i use a very dark color on a screen layer (to give a soft highlight) and airbrush it over a bunch of stuff and don't clip it, it will end up with this horrible dark splotch over everything that isn't opaque. To this end, mastering normal layers is imperative to having well rendered and convincing accents.
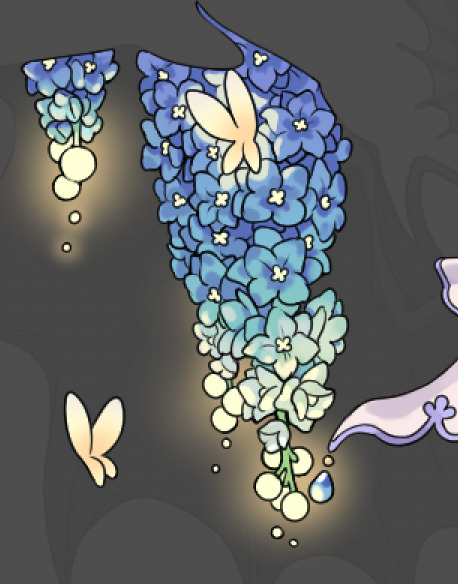
Another thing of note: when it comes to sparkles/small details, note how 'large' the sparkles behind the butterflies are. They seem a bit chunky, yeah?
this is what they look like at proper size. If anything, I could have gone larger on the small metal beads connecting the dew drop jewels to the lace.
Another trick I also like to do is this:

a slight hint of transparency! It's just enough to let the dragon's lines underneath show through but not enough to be super noticable. I like to do this a lot when it comes to sparkly and magical effects.
Next is the worst part of all: destroying all that beautiful hard work with the shadow and line art layers! (sobbing)
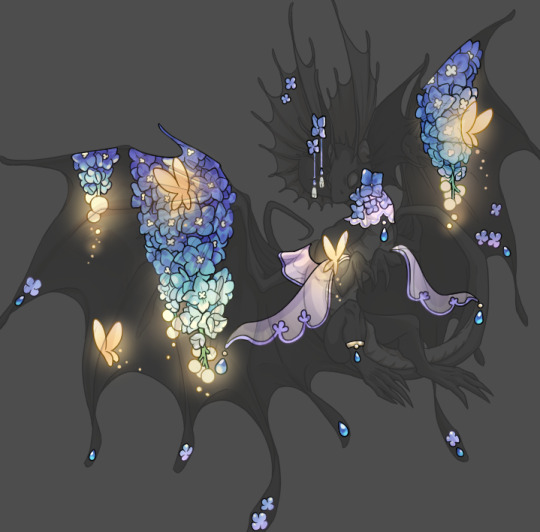
This stage always agonizes me. This is my first pass of the shadow/line layers and let's hope it's dark enough.
But yeah that's a start to finish look at how I create my accents. Unfortunately a lot it devolves into needing to know, yknow, line weight and silhouette importance, color theory and the ways that drawing applications actually apply color to a png vs how its rendered in app. All of these things impact the finesse of the accent, and are things you do have to learn gradually over time, but hopefully this has given yall some additional insight and perhaps some helpful tips.
And this should also explain why I get so mad when people go 'hey can I get this accent in another color' no! no you literally can't!
132 notes
·
View notes
Note
Hello!
Sorry to bother but do you have any digital art tips? I’m quite new to it and any tips, tricks or advice would be helpful! Your coloring style is very beautiful and I love it a lot!
thank you! 💚💚💚 sorry this is a bit late, hopefully there's still something helpful in it!
(also, it got pretty long, sorry!)
I think the biggest thing is to just take things slow -- digital art feels different than drawing traditionally, and it's SUPER easy to get overwhelmed by the billions of cool features that the digital world offers. (I say, as someone who spends a lot of time downloading cool brushes and textures...and then never using them ever.) there is a ton of really cool stuff you can do digitally, but because there's so much, I think it's really important to take time to figure out what is and isn't working for you. spend some time doodling without any intent to do a finished piece, figure out how you like to hold (or not hold) your tablet, what keyboard shortcuts you end up using a lot (and therefore might want to map to your pen/tablet buttons for quicker use)...that kind of thing!
everyone's workflow and preferred program and style are different, so it's hard to give hard-and-fast general advice. but the things that I think of as the essentials for learning digital art programs, and what I think of as a good order to focus on learning them in (although YMMV, especially depending on what kind of art you're doing):
brush customization (e.g. flow, opacity, softness)
layers and layer masks
selections and transformations (e.g. scale, rotate, flip horizontal/vertical, skew) (skew is underrated and I will die on that hill)
blending modes (e.g. multiply, screen)
adjustments/adjustment layers (e.g. hue/saturation, curves)
and I think most stuff after that is gravy! often very good gravy though! but yeah, as overall advice I recommend just taking things one little bit at a time, spending some time just drawing and messing around with each feature and what you can do with it. whether or not you end up incorporating any of it into your workflow, it's always good to try things out and just see how they feel! :D
and just so there is at least a little more concrete helpfulness in here, here's a few more specific things that I think are super important to keep in mind!
use! your! tablet/pen buttons! I mentioned this earlier, but they are extremely useful for keyboard shortcuts that you use often! most programs will also let you create new shortcuts for other things -- personally, I use the magic wand tool to fill in big color blocks a lot, so I made shortcuts for 'expand selection' and 'fill' and then mapped them to my tablet buttons.
flop your work horizontally often! when you're working on something, you get used to the way it looks, so seeing it mirrored is a quick way to see it with fresh eyes! in my experience, it often feels like this:
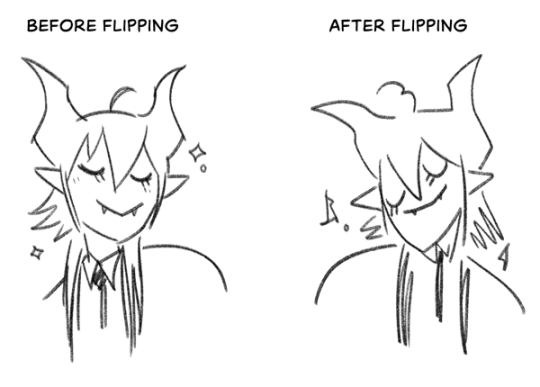
(a common thing is to find that everything is sort of 'leaning' too much one way, which is where skew really comes in handy!) (seriously, I love skew, it is my savior)

if you're working with color, keep a hue/saturation adjustment layer (or a layer filled with black or white and set to Color) on top and toggle it on occasionally to check your values! a lot of people who know a lot more about color than me (and are better at putting it into words) have written about why values are so important, so all I'll say is that the rule of thumb is that your image should still be readable in greyscale:

there are some exceptions and grey areas (do ho ho), but it's a good general rule to keep in mind! (some programs also have a colorblind mode, so you can check to see how your work will look to someone with colorblindness!)
and finally, here's some digital art programs I recommend, if you're still looking for a good one!
free: krita, FireAlpaca
paid: ClipStudio, Procreate (iOS/iPad only)
#art#...sort of#horizontally flipped mal isn't my favorite drawing i've ever done of him#but it's up there#anyway i do personally use photoshop#but i absolutely do not recommend it when there are better and free-er art programs out there#it is the equivalent of texting with a giant 90s-block phone that has been jury-rigged to somehow install whatsapp#because i don't NEED a new phone i KNOW how to use this one it's FINE#(oh god i've become my dad)#someday i will have to actually switch to clipstudio and learn new keyboard shortcuts :(
393 notes
·
View notes
Text
House of Finwë + Gender Presentation In Valinor HCs
Disclaimer: I have not been able to find any actual canon on what is considered masculine or feminine dress for the Noldor. It might exist, and I might be blatantly contradicting it.
I think I have some grounding in seeing associations between gold/yellow/Laurelin colors and femininity and silver/grey/Telperion colors and masculinity, but it seems elves of any gender will wear/be associated with/named after/etc either color, so I assume this association is somewhat loose, a little as red and blue to us.
Finwë and Míriel, during their reign: They had set the fashion for all of the Noldor courts, and, unlike the Vanyar, there had been to be a contrast between the sorts of fashions they wear; Finwë in well-fitted, sometimes almost figure-hugging dress in bold, bright colors, decorated with gems and embroidery along the collar, sleeves, and hem, while Míriel leaned towards loose, many-layered outfits with quite a lot of visual noise, often covered in embroidery head-to-toe but eschewing quite as many jewels (in part because she found the weight exhausting). She would also wear one or two rings only, to keep her hands freer, while Finwë's hands were heavily ornamented.
Finwë's hair was usually done in a half-up half-down style and ornamented, while Míriel's was bound in many twisting plaits, often with colorful strings (or sometimes light dye!) worked into it.
These differences were so influential that the associations between masculinity and tight-fitting clothes + freer hair, and feminine styles and looser-cut dress + ornamented braids remained long after Míriel's death, following the Noldor into middle earth.
Finwë and Indis, during their reign: Gender differences in court dress notably decreased during Indis' reign, though some remained present. Indis, fond of sport and horseback riding, preferred tighter-fitting, simpler clothes than her predecessor, and notably wanted to avoid associations with embroidery. Indis was also similar in height to her husband; when, once or twice, she was seen wearing his robes (pinned and styled to better suit her figure) it caused quite a stir in the courts -- whether it was seen as improper conduct or a touching display of devotion varied heavily on who you asked.
Indis was, however, very precise with her hair, which was never seen loose; she braided it closely to her head, bound with jewels and pearls. She introduced hair-wrapping to Noldor courts, binding her hair with thick bright silks. This was always considered a highly feminine style, with men at most using a ribbon or two in their braids.
Findis and Lalwen: Findis styled herself often after her mother, but subconsciously favored styles which would garner the least attention; she tended towards looser, more flowering dress, with sleeves so long she could comfortably fidget without drawing too much attention to herself, and tended to keep her hair bound.
Lalwen, on the other hand, was at times scandalously masculine in her forms of dress. She was one of the first noble women to wear parts of her hair unbound, and wore bright, simple styles, tailored close to her with a few statement-piece ornaments, a little as early-reign Finwë. She preferred heavily silver jewelry and sought out an association with Telperion. Upon meeting her for the first time, especially in riding-garb that hid her figure and before hearing her speak, strangers sometimes mistook her for her brother Fingolfin, which secretly pleased her.
Feanor, Fingolfin, Finarfin: Feanor often found himself caught between his desire to harken back to his mother in his modes of dress and the fact that his mother had, more or less, set the standards for what was considered feminine in his society (and his desire to appear masculine as the crown prince). He embraced the same visual noise that Míriel did, wearing tightly-tailored vests and corsets covered in embroidery, but in cuts of cloth tended to imitate Finwë's style. He too kept his hands relatively unadorned, for practicality's sake.
Fingolfin was one of the first elves to embrace simplicity in dress, wearing darker or subtler robes broken up by a single splash of color; usually in the form of brooches. His long dark hair was sometimes left entirely loose except for one thin braid holding his hair from his eyes, bound with a few silver beads or sapphires, very distinct and masculine styles.
Finarfin leaned rather neutral in his dress in his youth, mostly imitating Finwë by default, though he favored bright sunset oranges and pinks, yellows. However, after spending much of his time with the Teleri, he found he enjoyed their modes of dress, often wearing simpler, looser garments, often off-one-shoulder, rarely worn in Noldor courts. This preference was seen by some as feminine, and by some as simply somewhat foreign.
House of Feanor: From his youth Maedhros tended to heavily imitate his father in dress, often wearing ornate and heavily-embroidered robes. He was also often the first model for some of his father's jewelry pieces, and gained something of a reputation for being garish and loud in his dress. The cuts of his robes, however, tended to be firmly masculine, as appropriate to the first-born son of a crown prince. His hair he often wore down, in the single-braid-in-the-back style popularized by Fingolfin (though he would not admit to that inspiration).
Maglor tended to wear tight-fitting riding-clothes, often in greys, blacks, and dark-blues, ornamented only by silver jewelry. His dark hair he cut unusually short (just below his shoulders) and wore in a top-knot, half-up half-down, a working man's style popular among Telerin sailors. All in all his style read as very masculine to the Noldor, with just a touch of androgyny provided by the the loose-fitting silver-and-black cloak he wore often to formal events.
Celegorm dressed most often in imitation of courtly trends for young men, favoring hunting-styles. His most infamous moment was coming to court with his hair entirely unbraided, scandalous for elves of any gender-- a little as coming to court shirtless. Caranthir dressed in looser robes, though largely out of comfort rather than style. His jewelry tended towards large and chunky, without much visual noise. Curufin heavily imitated Feanor in his manner of dress, albeit often wearing even more jewels; he popularized five ear-piercings rather than the previously fashionable three.
Amrod and Amras, not particularly invested in the fashions of the court, tended to dress similarly to Celegorm, usually falling a few seasons behind the trends currently in court.
House of Fingolfin: Anaire was fond of a matching her husband, sharp and purposeful in her dress. She had particularly beautiful dark hair, which she wore in many braids as a crown upon her head, and of long, simply-decorated cloaks. Very distinctly feminine, but in a sharp, unapproachable sort of way.
Fingon's tendency towards feminine modes of dress was noticeable enough to get him pulled aside and talked to several times during his youth; he preferred layered and loose, dress-like robes, wore bright gold-lip stain usually associated with young women (men favored red and orange lip stain) and did entirely too much with his hair, always wearing it in great plaits. After a specific incident in court during his adolescence he was forbidden from binding his hair with headscarves for court-wear, but wove gold into it. His one touch of masculine saving grace were his many rings. The androgyny suited him well; his appeal to women was offset only by his utter lack of interest in them.
Turgon tended to imitate Fingolfin's manner of dress, albeit with brighter base-colors, favoring deep browns, golds, and reds. Gondolin would eventually grow to have very different gender-norms for its residents, and then Turgon would begin to favor almost toga-like dress during his reign. That, however, is a matter for another post.
He was known for many ornate rings, and collar-like necklaces.
Aredhel leaned sporty/practical feminine, often imitating Indis, whom she was particularly close to. She wore her dark hair plaits bound with white, often decorated with diamonds, and favored white riding-clothes and golden jewelry, matching sometimes with Turgon.
House of Finarfin: [the ones I have headcanons for] Earwen embraced hyper-feminine modes of dress, both to the Teleri and the Noldor. She wore intricate gowns and cloaks with many layers as feathers, most often in silver, white, or blue. Her hair was incredibly long, and always woven into several long braids.
Finrod favored greens and blues, usually in adventuring, hunting, riding sorts of styles -- distinctly sporty. His long hair matched his mother's, and he wore parts of is down, threaded with lily flowers and jewels. His hands were covered in many rings, and generally he made the appearance of being a well-ornamented young man. In Middle Earth he would experiment with androgyny, but that is a story for another post.
Orodreth: Dressed in soft, simple colors, notably pale greens and grays. Not wanting to draw attention, he would usually imitate whatever masculine style was popular in court, but he did not seem particularly confident in them.
Angrod: Embraced his Telerin side often, and dressed similarly to his father. His hair he kept strangely short, just around his shoulders, and wore a top-knot as often as a braid.
Aegnor: Simple in his dress, usually modeling himself after Fingolfin but with rather less splash. He did not much like the weight of jewelry, and wore the minimum he could get away with. Most people considered him quite unfashionable.
Galadriel: Mingled feminine styles of dress freely with masculine ones. Wore her long hair completely unbound on several occasions despite many talking-tos. Decorated her hands with many rings, pairing this with riding styles, but was just as likely to wear a long flowing cloak or gown; often styled her hair with rubies and sapphires. Quite controversial in her style of dress.
#my headcanons#finwe#miriel#feanor#findis#lalwen#fingolfin#finarfin#sons of feanor#fingon#aredhel#turgon#i will make a separate post for makeup if u guys are interested i have a lot of thoughts
54 notes
·
View notes
Note
How do you get your drawings to be high quality? Whenever I post art the quality is SO bad 💔
uhm... sorry this is got long. for some reason you activated my work mode. i don't have a constumer service voice but i have like an explenation mode for clients so... uhm. here is way more information that you asked for. my apologies...
Resolution is what determines the sharpness of the artwork. The low-resolution illustration will appear pixelated when scaled in large sizes. this is why it is recommended to work on a digital canvas with a resolution of at least 300 dpi when you work. (i prefer 400dpi)
dpi are Dots Per Inch. dots just being a different name for pixels. the more pixels are contained in an inch the smoother lines and gradients are. an indication of higher quality. but, the device you are working on has to use up most of its ram/power to calculate the preview on the screen. so higher quality demands more capacity from your device but also from websites that display your artwork. Soo...
I have two files.
One on 400 dpi is way larger for me for smooth comfortable drawing.
and the second drawing is sized down to 150dpi to accommodate the recommended resolution of the website I want to post the image.
luckily for us, most social media sites have a similar resolution.
Tumblr's Dashboard images have a minimum size of 500 x 750 pixels, a maximum expanded the size of 2048 x 3072 pixels, and a recommended size of 1280 x 1920 pixels for a 2:3 aspect ratio.
I use a with of 1280. the high depends on the drawing
It's way easier and recommended to size images down rather than up.
sizing artwork up would put them through an interlacing process, which means that the graphics program of your choice would calculate the average between two pixes and add it in between them. It adds pixels to make the image larger. easy answer it blurs your image.
it isn't the end of the world if you have to size up the image a tiny bit.
I kind of have to do a bit all the time for work. and most of the time it's fine! it depends on your art style and how forgiving it can be.
It's also a difference if you post images in a JEPG or PNG.
uhm... without going into much detail... take PNG just trust me.
now... a tiny little last trick out of my sleeve.
if you... use photoshop. and you want some extra sharpness.
you can sharpen your images with the high pass filter.
Duplicate your artwork
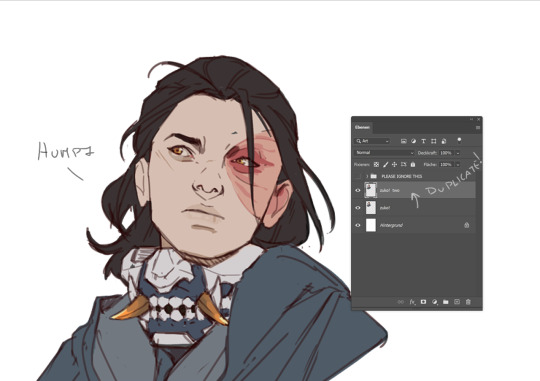
Filter > other >highpass

As soon you select High Pass, your image will turn grey

It works by filling the entire image with flat, neutral grey. It then looks for edges in the image and highlights them by making the light side of the edge lighter and the dark side darker.
Don't overdo it. keep the contrast low. a radius of 1,5px is enough most of the time!
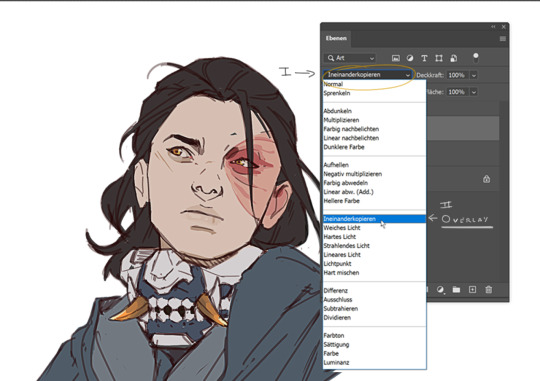
Click okay to exit the menu and set the layer on overlay.
ta-da! it is sharp and crisp!!!
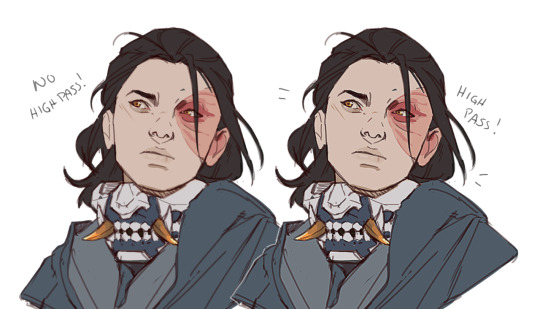
It's all a trick!!! vary subtle... i know but ehh i like it
I am sorry I don't know if other programs also have this option. I know CSP has a sharpening filter. but... you can keep images crisp by keeping resolution and dpi in mind too.
uhm... well so... -hides-
#chip!ask#chip!talks#i maybe overdid it here#but i ended wrtiting it and now i just... eh. i don't want to delate it... sorry!#zuko
996 notes
·
View notes
Text
Another little batch of scifi au doodles
Featuring a couple redesigns! The species itself got a redesign but also I changed Scar’s species
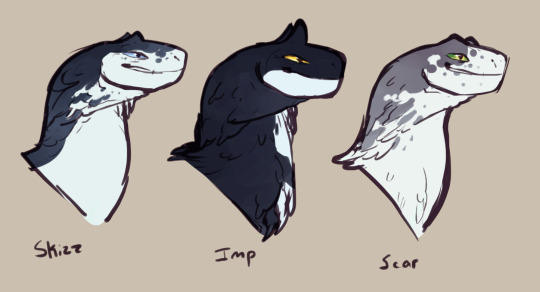
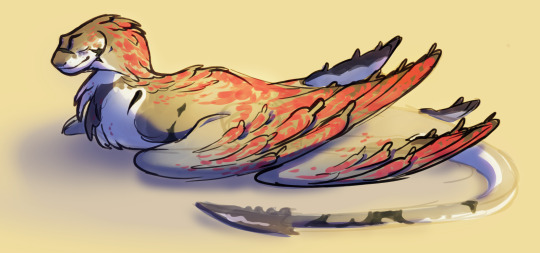

If you’re confused about why Scar’s all red here’s a little worldbuilding dump for you:
This species (Sunseekers) is kind of like a reverse carnivorous plant. Carnivorous plants started as phototrophs and evolved to be carnivorous later. Sunseekers were carnivorous first, then evolved phototropism to supplement their energy intake.
However, camouflage was very important for their hunting methods (originally they were pretty much pure white with occasional light grey markings, it’s only since their lifestyle changed due to technological advancement that their skin/scale colors diversified), so being covered in bright red chloroplasts is not ideal. So - and take this with a grain of salt because I haven’t figured out the exact mechanism yet - their chloroplasts are underneath the pigment layer, which makes them invisible. The pigments move out of the way to reveal the chloroplasts when photosynthesizing, hence why the skin appears red! This is called “blooming” - at least for now. I may find a better word to describe it, but I do like the term “bloom” currently.
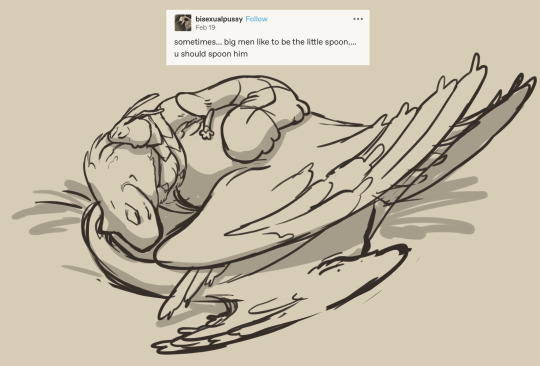
I made an animation of this process a while back, if you want to see it in motion:
I made it 6 months ago though so it’s pretty out of date lol. Here are the corrections I’d make now:
The wing and scale designs are completely outdated.
The red bloom should go all the way to the edge of the scales, but probably wouldn’t cover the entire wing at once.
It would happen MUCH slower than this. A single scale wouldn’t fully bloom this fast, let alone the whole wing.
I do like how it’s stylized though! The spots are more realistic than the sorta scratchy texture in the drawing I did of Scar (tbh I was just being lazy when I rendered it because I completely forgot to add the blooming until the end).
In modern times blooming isn’t as common of a behavior because food is easier to come by, and migration is very rare (other similar lifestyles where energy expenditure is consistently rather high do exist, but aren’t as common anyway). So, it’s just not as useful to be doing it all the time. Modern Sunseekers pretty much only bloom as a response to high exposure to sunlight, or when dealing with persistent physical and/or mental stress.
So basically when the body is like: put this bitch back in survival mode we need the ENERGY NOW
#art#no id#puddle scifi au#skizzleman fanart#skizzleman#impulsesv fanart#impulsesv#goodtimewithscar fanart#goodtimeswithscar#grian#<- from the scar doodle page#bdoubleo#<- from the impdubs meme#he is trying his best to spoon that dragon but he is just So Small and his husband is. not#life series#life series au#life series fanart
35 notes
·
View notes
Note
Magz the color in your art is always so good. how did you learn color theory?
Magz read science sites n papers about color perception n how eyes+brains work,
Because am have vision issues (like high degenerative myopia, n others) n was morbidly curious n get nervous when not know. Was more thorough when nervous.
How structure eye work, what parts color spectrum, what colors visible in darkness and in light, contextual color, the limits of color perception, blah blah.
Took note of interesting stuff, for later. Both for contradict and for reinforce in art depictions, on purpose.
Read parts of "Color and Light: A Guide for the Realist Painter" by James Gurney - not all of it cuz got bored or too overwhelmed or too excited. Some other books n articles n videos did finish, but not give as big impression / not remember which.
Later on when color habits was more established was watch marco bucci, draftsmen podcast (by proko), césar córdova, and Florent Farges.
Took note of that.
Also learned the limitations n quirks of digital, of LCD monitors, RGB, layer modes logics, and how misleading digotal color wheels are - become familiar the medium are use n how is different of traditional.
Watched speedpaints and timelapses of artists Magz liked (traditional art, digital art, animation, mixed media, art installations). Usually black n brown artists and admire.
And observation real life, just staring stuff long time trying figure out what look like n chilling -
Tried replicate parts of how color look like to Magz
Especially purple.
And how edges of things are messed up, but make it artistic version.
And using neutral value color like grey as background for practice n arts.
So like combo:
1. Actual scientific explanations on vision and color, in medical.
2. Artist guides on color theory - books n videos n articles
3. Looking at how other artists did things, art process. Different mediums.
4. Familiarizing with digital medium.
5. Observation at mundane life, without draw. Just observe.
6. Trying replicate the quirks of own vision, but artistic.
7. Grey is friend.
8. Drawing intuitively bc it become habit so end up like, *shrug* little idea what am doing, even tho is intentional action.
8.5. Take break, come back, n Edit it later if it not look like want. As eye start become too use to what are see, n skew peeception of own art. Include colors.
34 notes
·
View notes
Text
Personal QSMP design hcs and interpretations (PART 1)
1. q!Quackity
ducktaur. predominantly golden yellow feathers and bright orange duck legs
partial heterochromia (dark brown with bits of bluish-grey)
his wear is different depending on which language he is maining at the moment
Eng!Q has an eyebrow scar, calloused hands, and some browning feathers. Wears religious jewelry and warm-colored clothes.
ESP!Q has ear piercings and blue-dyed feathers. Always has a clip-on tie and cool colored clothes.
Post-Tilin death, he either has their ribbon as a necktie (ESP) or belt (ENG)
has a pin of the QSMP logo always on his person
Brushes his feathers before teaching class
2. q!Jaiden
she is the cartoon character reflected by the mc skin, though is nonetheless perceived as human
she magical girl transforms into the vtuber fit whenever she wants to. Most of the time, it's to fight or to protect Bobby
she transforms using a magical brooch that resembles the emblem on her vtuber fit. she can add stuff on the brooch to alter her transformed appearance (like changing the bird wings to butterfly ones, or having a shiny rainbow mode)
she made a smaller, less powerful replica of her brooch for Bobby so he can get into armor much faster
she "draws" things out of her inventory with her fingers in the air (think the spellcasting of the witches in The Owl House, but with different symbols)
When Bobby died, her transformed look takes on a more dark and brooding appearance
3. q!Roier
he's not a spider hybrid but like, an actual Spiderman—literally got bit by a radioactive spider and everything
alternates between his superhero suit and a civilian fit. like jaiden, he transforms between fits superhero style
can fire webs from his hands, has slight spider sense, and also venomous saliva (so i beg of you, do not get head from this man)
wears natural makeup bc he likes to. he darkens it a little when he feels particularly vengeful (this is canon but yk)
the spiderman traits also apply to Melissa, whose dyed lingerie is literally weaved from spider webs
Post-Bobby death, he wears more blacks (both in civilian and superhero fits) and a lot more eyeliner
4. q!Bad
humanoid looking demon. resembles a void-like shadow in extreme emotional states
distinctly has a glowing halo. it has long horns growing out of it + a shadowy demon tail
has his mc skin's hoodie but sleeveless. collared shirts of any color is usually under that + beige khakis, white socks and various sneakers!
His hoodie has a small embroidered symbol of the Order Theoritas, hidden near the collar of the hood
his hair is long and usually tied loosely. wears glasses as well
sharp canines make him look a bit catty
his reaper get-up is well-sewn cursed cloth. wearing the fit makes his halo and tail larger, darker, and more shadowy
there's a block of diamond + an image of skeppy always on his person
He lets Dapper wear the ghost chat bell as a tail accessory
5. q!Spreen
werebear. He turns into a human during sunny daytimes, and is otherwise an anthromorphic bear-man.
black bear, like the mc skin
fashion sense however matches the CC; generally street-looking even with the bulk of armor
canines and claws glow when he's fighting someone in bear mode. he grows them out fighting during his human state
smells like cigarettes
6. q!Slime
a player equivalent to minecraft slime
prefers taking on a humanoid appearance, and has taken it long enough to master recolorization of said state. feels uncomfortable taking any other form as well
experiences pain when shifting (i mean that's also canon but yk)
behaves like a magma cube in extreme negative emotional states. will resemble one if you piss him off enough
he has no actual clothes, he shapeshifts the appearance of clothing. (q!Mariana has noticed, and he doesn't like to think too hard about it) his most external layer is armor and glasses.
he and q!Mariana have each a piece of Juanaflippa's shell on their person
7. q!Cellbit
human. well, not completely according to genetics but is more or less perceived as one.
The CC but wearing the blockman-cubito's fits
wears eyeliner to hide the eyebags. This doesnt work and only makes his eyes more expressive
a shadow looms the upper half of his face whenever he's being super weird and mysterious. It darkens when he's consciously about to do something really bad in a dramatic anime way; this is much more emphasized if he puts on his goggles
he paints his nails and the paint always trails. these glow sailor moon style when he comes into contact with the blood of any living creature
has a caffeine addiction
The chainsaw scars are deep enough that Cellbit doesn't like looking at himself when changing; he forces it though to remember why he's doing anything at all
Taught Richas how to draw the symbol for the Ordo Theoritas. He also has the symbol pressed into the leather of his gloves
8. q!Wilbur
humanoid man of unidentified species. perceived as human.
really is human looking, minus the pointy ears and prismatic irises
wears clear glasses. yellow sweater + sleeveless brown longcoat + grey jeans + black boots
has a black scarf and red beanie both made of wool and embroidered with gold threaded flowers.
always has a guitar on his person. since tallulah entered his life, he's let her put stickers and draw all over it.
They jam together when they can
may or may not have an enchanted singing voice
part 2
140 notes
·
View notes
Text
life advice: if you are drawing a character with a five o clock shadow or whatever use some form of blue or purple (depends on skin tone and lighting, mess with it) on very light opacity instead of grey. looks so awesome. its what i do every time.
note: also mess with the layer modes like Multiply and such. depends again on lighting and stuff
35 notes
·
View notes
Note
hey whats ur coloring process? just asking bc ur coloring is amazing to me n im rlly curious bc i cant seem to make anything similar to it
really late to answer this (been a month,, i just finished 1st term exams, my department's week, and im barely breathing fr) but honestly i have no idea myself— mostly i just go for what looks like would work?

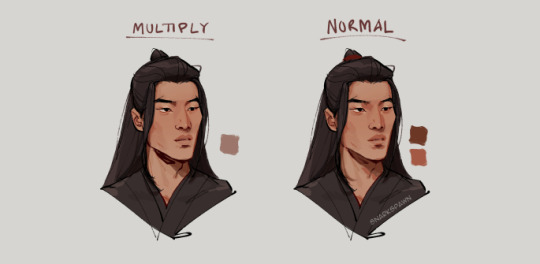
for the main pallet or color scheme of a piece, i really prefer using warmer tones. so i often run my flat colors through orange and red on multiply and use yellows on overlay. i also use a ton of greys and "dark but not enough to be #000000" for lineart or rendering.
with rendering a colored and shaded piece, i really like merging everything visible on a single layer and painting on it. it's a little harder this way especially if you want to adjust your colors on a specific part of a drawing or a separate layer, but i do it for the added detail of going off the lineart and trying to go from there.
also! i have been trying to shade and without any layer modes and just pick colors by eye. practicing and getting a hand of color theory really helps with it! there's a ton of references on YouTube and a lot of places where you can find material on the subject.
here's a sped up process of my groom!ace art:

i re-used the blue on the ribbon to render the hair and lightly used grays in between his coat and waist coat since they were both very dark. you'll see me do this a lot with my work: using grey or a de-saturated color to highlight and separate dark ones.
and here are also some step-by-step ones of OC arts!

despite the fact that they all follow the same process, they aren't that consistent which is alright for me, cause i rather build on style better than the uniformity of my work. all of this was done with Clip Studio Paint Ex! hope it helps!
372 notes
·
View notes
Text
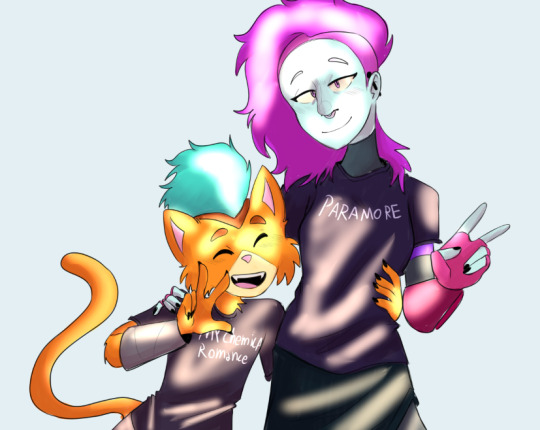
Sunny's unnofficial rendering tutorial because idk why but people say they like how I color
Hey kid. So you got your drawing, right? And you have your flat colors, now you gotta render 'em, right? Then you find that BAM, you have no idea how to make it look cool? Neither do I! But here's what I do (I've been told that my coloring is cool)
1. Place your flat colors
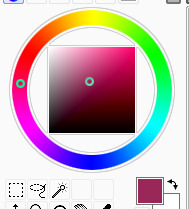
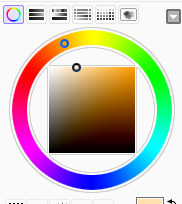
Imagine these are your flats. A few things: you want your base colors to be all around the same hue, that way they look better together. See how all the blacks, greys and whites are purple/blue-ish? That's on purpose babey! But how do you acheive this? idfk. jk, you have to stay on one (or two) areas of a hue wheel.
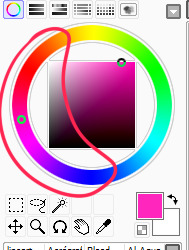
This way, all the colors look like, nicer around each other. You're not FORBIDDEN from going outside an area you picked, but you should still try to make sure everything is in the same hue so you have to do less overlay layers later.
(FYI: I do this because it saves me time on rendering. I don't think it's mandatory, there's no rules to art. Go crazy!)
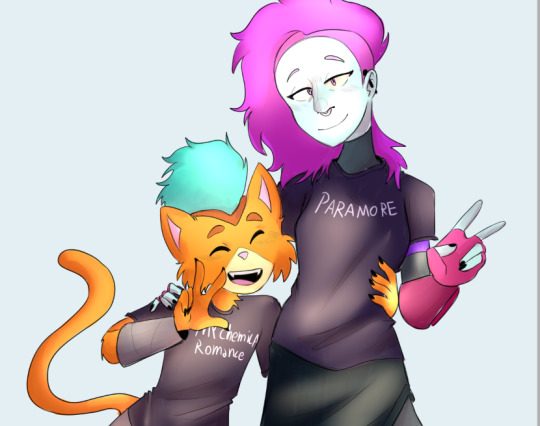
2. Shading
I think shading makes or breaks a drawing. Personally I don't have a lot of rules about it, but there are still tips I can give.
So here's what you gonna do. You're gonna pick a color that's somewhere on the opposite of your main hue, alright? Here, my hue is mostly cold colors, so I'm going to pick a warm tone. You're gonna make sure it's dark enough so it's like, a shade, but not enough so it becomes black when you set the shading layer to multiply.
(Note: I never get this right on the first try)
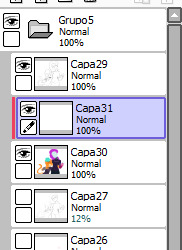
(Another note: as you can see, I have the entire drawing, including the lines, inside a group. Don't worry! I'll explain this later)
Personally I like to use a paintbrush-esque brush because I like the look of it being hand-painted that it gives my art. Mine is the default paint tool sai brush, but I'll leave the settings down here just in case.
I don't. Really know how to explain the way I shade, I mostly follow the lines I already placed in the lineart phase, and give them depth. I guess my biggest tip would be to FOLLOW THE CLOTHING FOLDS!!!

Idk how to explain this. But people always tell me that they like how I shade the clothes, it's because I follow the fold lines I place on the lineart phase! Not only does this give the clothes depth, it also makes shading a lot easier. Follow your lineart, idk what else to tell ya.
Now you're gonna set the layer to multiply...
And lower the opacity as much as you want until it looks good. No real rules to this, it's kind of depending on the vibe you want your piece to have.

Now, and stay with me here, grab a blending tool, okay? This is the one I use, I have a textured version for when I'm feeling brave, and a regular, flat version (the one I use the most) Here I'll use the flat version.
And. Stay with me here. I want you to blend the FUCK out of this. Just absolutely destroy those borders. Okay? Trust me. If it looks messy you're doing it right. You're gonna want to follow the shape of the shadows tho, this way you don't lose the shape of the objects you're shading.
Woah! Suddenly everything has depth! Let me go back to the clothing folds, because holy shit, the clothing folds.
See how I'm adding depth to the shadows I placed by kinda. Following the line I drew and blending the outside? Idk how to explain this. You blend whatever isn't touching the line, okay? Trust me.
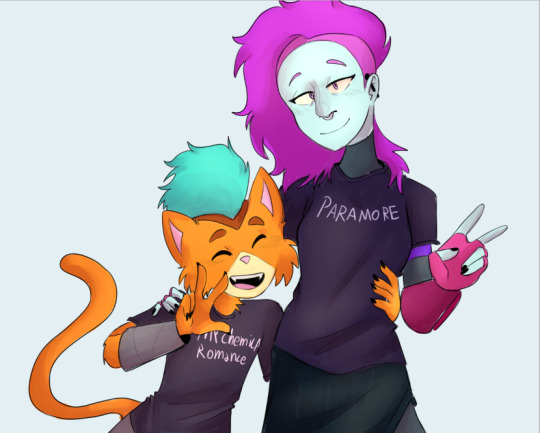
3. Lighting
Ok. I'm holding your hand gently. You have to do lighting on your art, okay? You have to. It adds depth to the shapes and also is sososoososo easy. Here's how. It's so easy.
Grab your airbrush tool. Yes, that one. Hear me out okay?
Pick a light, warm color between yellow and orange.
Stay with me. Make a new layer, set it to whatever lighting mode you prefer. I use luminosity because I live dangerously.
Now.
Airbrush everything that the shadows aren't touching. Yes. I'm serious.
It's gonna look ugly as shit. DON'T BE ALARMED. This is part of the process. I want you to take the blur tool. And blur the ever loving fuck out of this. Just go fucking ham.
Good. You're doing so well. You're being so brave. Now lower the opacity as much as you want, until you like the way it looks.
Like so. I also like to add a few brush strokes and blend them on an up-and-down motion for the hair and certain details, but this is optional. Same as before, you're gonna take a (slightly warmer, but still bright color) and make a new layer on luminosity mode.
Take the blending tool and make it small, only slightly bigger than the brush strokes, and blend these lines until they look nice. Adjust the opacity, and voila!

Now, I could stop here. But I'm extra so I keep going.
4. The pizzazz
AKA, "Ah fuck the colors don't look the way I wanted them to!"
Do not worry! I have a solution that's almost never failed me.
Overlays. Just a whole fuckton of them. I don't really have a method to this, I just kinda try colors and layer modes until something looks good.
For this one, I felt like I wanted the colors to be warmer, so I picked a warm color and overlayed it on multiply. Then, I noticed that the darker colors came out darker than planned, and you couldn't really tell them apart, so I picked a light warm color and overlayed it on screen.
Voila! We're not done! There's one more thing I like to do, and here's where the layer folder comes in!
Remember how I said I keep everything, including the lines in a folder? This is why!
Make a layer that's on top of everything, like this. Pick whatever color you want, make sure it's bright. (Personally I like using pink). Take the airbrush tool again and airbrush whatever edges you want to give a little more pizzazz to.
Blur it as much as you'd like...
And adjust the opacity and layer mode however you like!
5. And done!
Sometimes I add white highlights. Sometimes I add more shading, or more lighting. It depends! But this is the method I use in a nutshell.
Hope you enjoyed it, or at the very least realized idk what the fuck I'm doing!
21 notes
·
View notes
Note
Hey! I read your tutorial about coloring and I have a question if you don't mind. Do you mostly use the overlay layer? Or other layer modes? I love the overlay but I always struggle to find the color that I want as it alters the color, any tips?
Hey, I don't mind at all, thank you for the ask!
I do use overlay layers a lot to kind of ... carve out the structure of whatever I'm drawing. But you're right that it changes the colours and that can be tricky so - and please keep in mind that I'm not saying that this is how you use the overlay mode, it's just how I personally do it - I mostly use greys because I feel like they don't add any colours themselves, they just sort of elevate the colours that I already put down underneath.
So I very quickly drew this example to show you what I mean
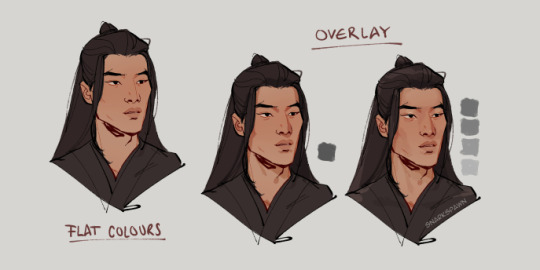
We start with the flat colours on the left; I added an overlay layer with a darker gray to add some shadows, and then started adding lighter greys to add more depth. Depending on the drawing and the effect I'm going for I sometimes use a little more saturated greys as well, so you can play around with that
You could stop there but I sometimes like to add a multiply layer to deepen the shadows a bit, like so:
This is at ~80% opacity but that's not a rule, I always adjust it to whatever I think looks okay in the moment. And then I sometimes go in with the eyedropper tool and draw on a normal layer on top without any blending modes, just to kind of bring it all together.
I hope that helped!
#art tutorial#art asks#stuff and things#rockleese#replies#ok I have to run to work now lmao#feel free to ask any follow up questions if you have them
157 notes
·
View notes
Note
hello!! i love your art sm😭
i wanted to ask how you painted the first illustration( https://www.tumblr.com/happy10thousandyears/739288930605793280) , i have been admiring it for a few days now, i cant stop looking at it its so… wispy? like a dream! and if you can or want to i would love to learn about your process on that coloring/shading style!
Omg thank you!!! I wish I can show you a screen recording but I deleted it for that file because the whole file size got too big (100+ mbs) and the lag was insane… but I do have process!
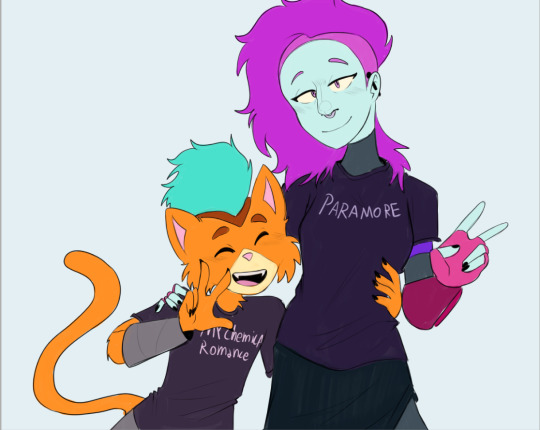
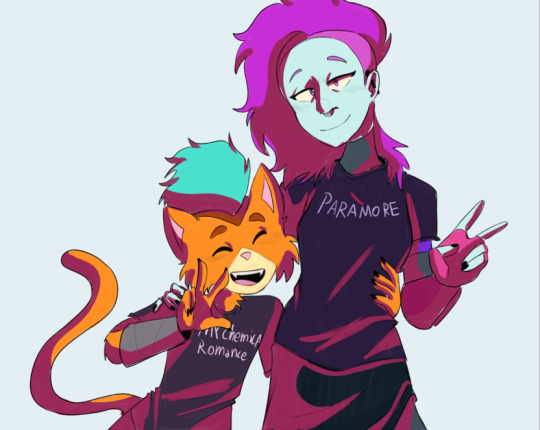
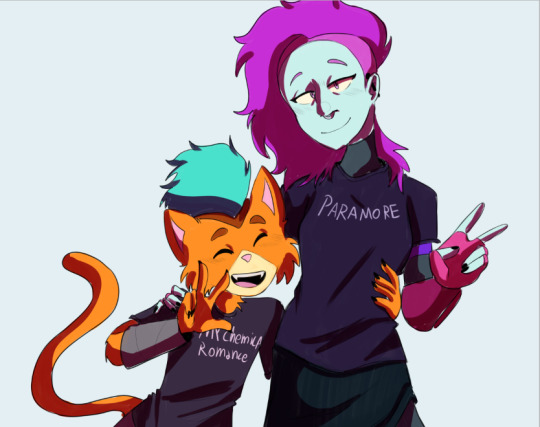
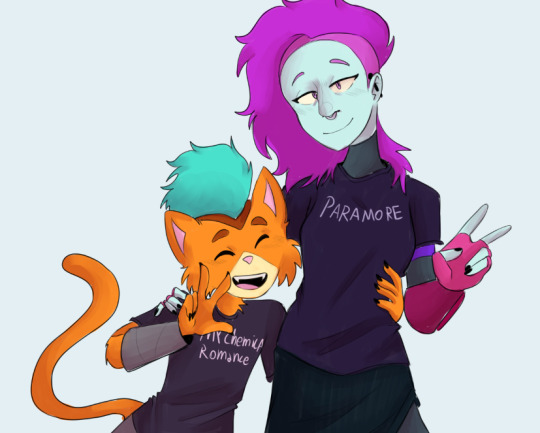
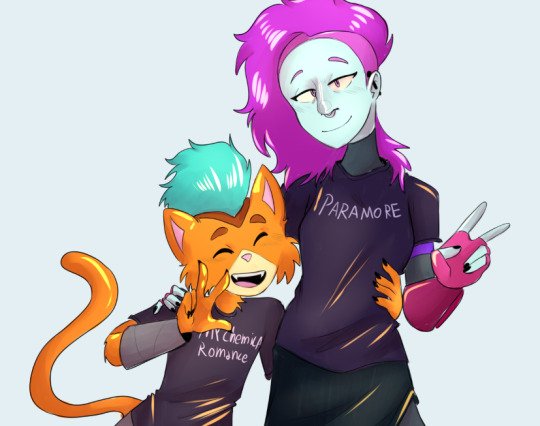
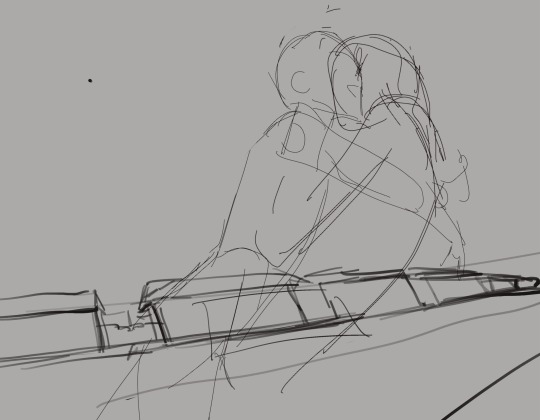
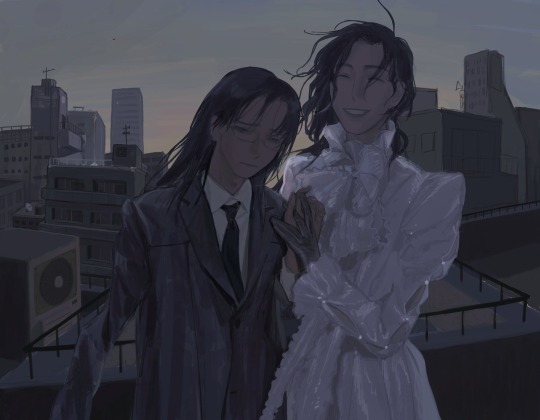
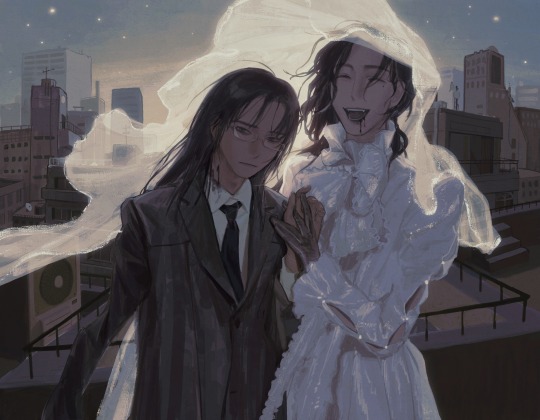
1. Brainstorming composition. I initially wanted to draw a city wedding scene moments before they are swallowed by a tsunami so my initial draft is towards that direction.. But then I also wanted the environment to be a bit darker (cloudy skies or hanging onto the embers of sunset) and since the main component of this picture is the couple (there are very little space left to fit the tsunami/sunset/cityscape), I just scrapped the tsunami part…
I really want to convey a conflict in feelings in the couple, 🔥/girl in the suit is melancholy and leaning into 🚬/the girl in the wedding dress for support, while 🚬 does not care about the end of the world! She lives in the moment in a nonchalant nihilistic way. Also I like the idea of the ‘groom’ finding support in the ‘bride’ … it’s another way to reflect 🔥 and 🚬’s younger stoic, active but doubtful protagonist/older jaded passive mentor figure (whose also dead but not really) dynamic 👍👍

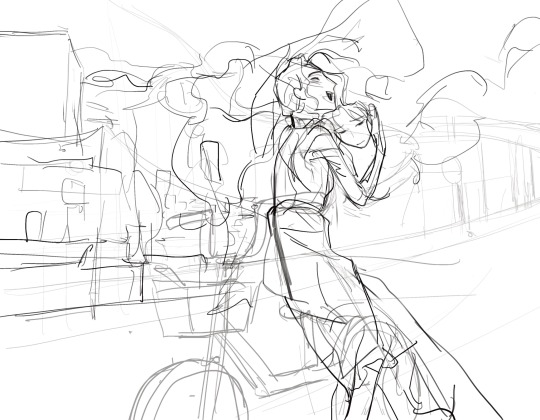

2. Color draft and more finalized sketch. After I got the composition down I began figuring out the colors and finalizing the sketch especially for the buildings. I gathered a lot of references of photos and illustrations and put them on VizRef (iPad app) into a reference board to have it beside my canvas while I draw. (My face ref for 🚬/Salome/wedding dress girl is Elysia Crampton, I like her face a lot)

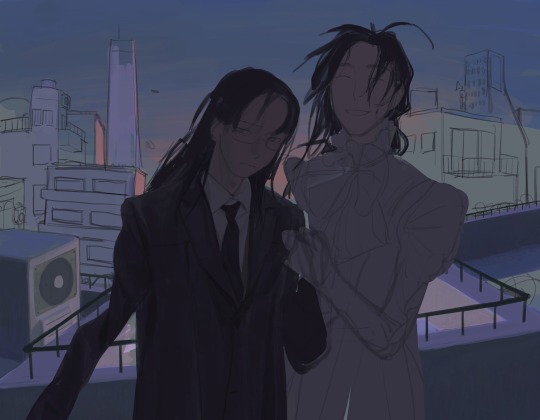

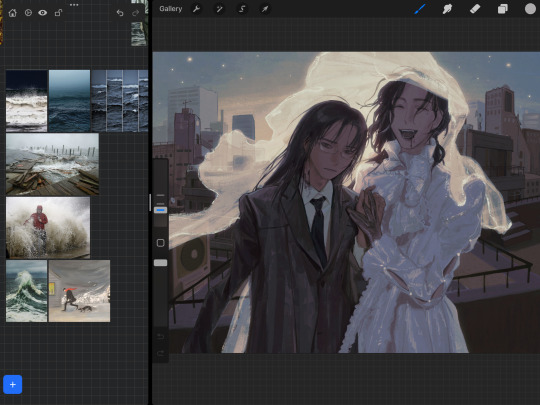
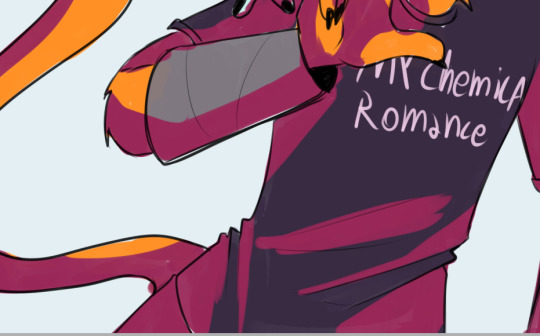
3. Rendering on top of the finalized sketch… just fuckin do it man… I mainly used a hard round brush for this piece and used the side sliders to control size and opacity (I like it to have size/opacity-pen pressure variations but NOT A LOT!! My hands will hurt 🤕) I switch up brushes a lot but these are the brushes I use most often for rendering in the style of this piece…
🔥 looks way more miserable than after I changed her expression …she’s like the crying cat meme 😭😭

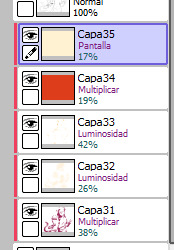
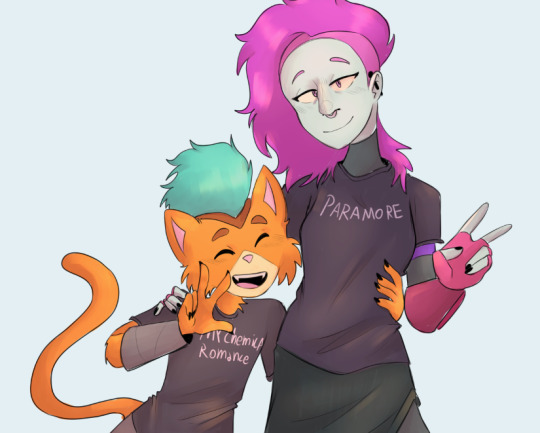
4. Curves and gradient maps!!! Filters!! Wahoo.. After I rendered 95% of it I thought the colors are kinda too boring to look at .. so I fucked around in gradient maps layer modes and curves to try to introduce more hues to the picture… I also check the colors with a grey layer ( as u can see instead of being just monochrome on the purple/blue hues there’s yellow in the sunset/veil and pink in the faces!! Just put a grey layer on top and set the layer mode to Luminosity so every color appear at the same brightness and u can see their hue and saturation more clearly . I am very allergic to saturated colors 👴☠️. For the fourth pic I turned the saturation of the third pic way up so u can see the hue change)
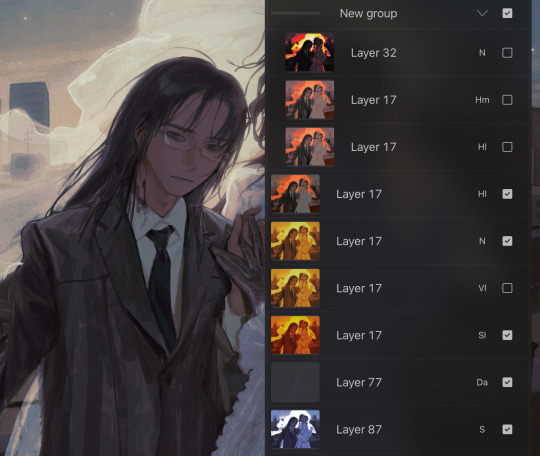
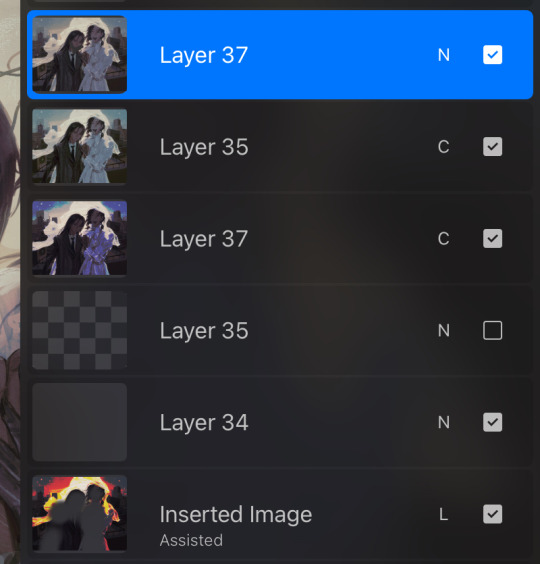

and voila 🎆🎆 hope that clarifies things!!!
10 notes
·
View notes
Note
Not an ask for your AU but your drawing process. I have a few questions on how you do art and I would like to take notes as I would like to improve my art.
-how do you make your art so soft? I feel like every time I attempt it, it looks blurry.
-usually what dimensions are your images? I feel like, again, some of my art is blurry and I know part of the reason why is some of my art is blurry.
-usually what color background do you draw with? In your WIP of the Grimm art it seemed like you drew with a grey background while with some of the other arts you drew with a warmer background. Is it simply based on the mood.
That's all of the drawing questions I can think off the top of my mind now.
i'll be more than glad to talk about this! though forgive me if the explanation is a bit over the place, i'm not the best at describing my process since to me it kind of just happens haha
to answer the first question, i think it's a combination of the right kinds of shapes (rounder shapes tend to look more soft, even if the linework itself isn't) and the brush i use for my lines. it's the default mechanical pencil brush in clip studio paint, one that has a pretty low density and requires me to draw over a line multiple times if i want it to be thick. that definitely helps with making the overall picture softer, since the less "important" or inner lines aren't as pronounced. i also color the inner parts of the lineart to make it blend in a bit nicer (which also gives the whole thing a paper cutout kind of vibe, i think)
since you mentioned that your art often ends up being blurry, i'll touch up on the canvas dimensions since from my experience it impacts this aspect quite a lot. i draw on very big canvases, the default one is often 4000px in either dimension. it's definitely a bit overkill, but i'm used to drawing with a large brush size. i often end up downscaling it later to save up on storage (and whenever tumblr cries about the file size being too big), and i always make sure to use the "hard edges" interpolation method, as it keeps the lineart crispy and pencil like
as for the background, i start with a gray one since i find it to be very easy on the eyes. sometimes i leave it as it is, especially if it fits the overall color palette, but recently i started changing the tone to a warmer one, most often a muted brown. plus it adds a little bit of color to the whole piece
lastly, it's not part of the question, but a big part of the final piece is the paper texture i overlay on top. to get the best result, i put it on a linear burn layer mode with low opacity. it gives the whole drawing a more pencil or canvas like appearance, and it adds some texture to help it appear less flat. another thing i started doing recently, which i think is the most noticeable on the tone of color i use for grimm's neck fluff, is that i color it with a modified mechanical pencil brush with randomized color hues per stroke. i quite like the effect even if it's very subtle most of the time
18 notes
·
View notes
Note
hi! how long does it take you to do your illustrations aprox? it seems you have a lot of patience rendering! any tricks / advices to other artists? :)
Oh, hello, anon!
First of all, thank you for your interest! I really appreciate your time for writing it (。・//ε//・。)
Answering your question, I guess, I'm quite patient person indeed, since I work on my arts several days, for a few hours, my rendering process, to be honest, distract me a lot and I totally concentrate on the process (and music/lectures I listen to while working on it).
And for the time, it all depends on the art! This recent art took me around 20 hours in total, for example.

As for advices, oh... Thank you for asking, and I don't know if I'm qualified enough to give someone advices + I'm self-taught and a lot I learn by myself with mistakes and a lot of experiments, but I'll try for you anon!
(I use Photoshop, so some of my advices are based on it)
1. Don't be afraid to experiment with angles and facial features. It's honestly very easy to fall into the infinite cycle of the "same face syndrome". Embrace the diversity of human beauty! It's definitely a challenge, but it would allow you to go further with other methods;
2. Take a look at the Layer Blending Modes - try all of them to see how it affect your drawing. I would also note that using Blending modes on separate layers and changing your brush setting with Bleeding mode give you two different effects, that can be used both! All you need just to find what works for you, but I adore Blending modes and I use it a lot, especially for the lightning and glowing effects;
3. Textures! I love using a lot of textures to give my arts some sharpness, some surface you can feel by looking at it - I usually use a lot of texture with Blending modes, above all the layers! Scratches, grains, some frames, brush strokes etc - everything may work for your art to make it more alive and breathing, the way you want to touch it and to feel under your finger tips. And, in my personal opinion, it gives the illustrationsl the additional volumes and it can highlit some nuances in your art;
4. Don't forget to flip your art and zoom out during your drawing process! Such a simple advice but it's honestly a saver to spot mistakes/some details needed to be adjusted;
5. Liqify tool is the best friend. If you have something to change the form but redrawing it also not option (too late, too much to adjust, will ruin the whole art) - Liqify is the true friend. I often use it to adjust some small details when I already further into the process, and it saves a lot of grey hair.
Well, that's not much but I hope it was a bit useful!
Thank you so much for asking and for the interest once again, I honestly appreciate it ( ◜‿◝ )♡
Have a nice timezone c:
7 notes
·
View notes
Note
Hi sara! do you have any tips on how to transition from traditional art to digital? I’ve downloaded procreate and have been using it for a few months but i feel like my progress has stunted :,DD any tips or advice would be super helpful if your comfortable!
heya! i'm no expert, but!
be patient with yourself!
try out different brushes! all of them! procreate comes with so many (one of the defaults is my favorite~). if there are artists online you like, see if they mention/link to the brushes they use
(also you can create your own group for brushes, so if you have favorites or brushes you use often, group them together! it makes finding them so much more convenient)
blend modes! one of the great things about layers is being able to use the blend modes to play with color
speaking of color - since this is digital, whatever color you lay down can be changed, so play with colors. fool around with the saturations, either by pumping them up or dimming them down or just move the hue all over the place and see what new color scheme excites you~
if you're using a lot of layers, try minimizing the amount you use, force yourself to commit to your lines/colors/the direction you're going in
make sure your canvas is big enough! if you're drawing in too small a canvas, brushes can look blurry
if you draw only people, maybe try out drawing landscapes or animals - and if you don't draw people, draw people! the point is to draw something different than what you're used to
textures! you can apply texture images onto your art with the blend modes
fuck around!
digital art is great because you can mess up and control-z your way out of a mistake or you can change your colors and completely alter the vibe of your art. if you do line art, you can try out painting without having to spend a bunch of money on paints - lay down those colors on top of your lines. and if you do painting, why not try out some cool inking brushes and see what line-art can offer.
there's so so much you can do with digital art. if you feel like you're in a rut, try something different. a new style. a new brush. pick a bright color scheme. do grey scale! i know that's the go-to advice, but just like draw more, it's true.
i hope this was helpful! if you want anything more specific, i'm here for you~~
8 notes
·
View notes
Last Seen Blogs
notesofmyself
Записки меня.

princesspinkstars
Ishqwala Love
edelstein-art
Edelst.Arts
pinkmused
PINK.