#3D effect
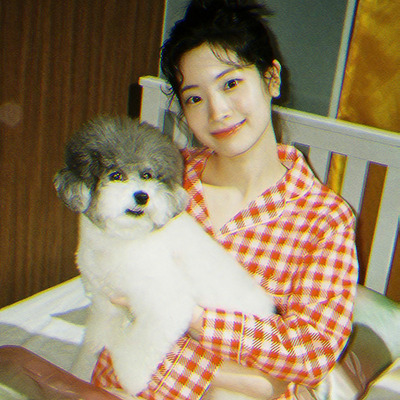
Photo

Generational curse
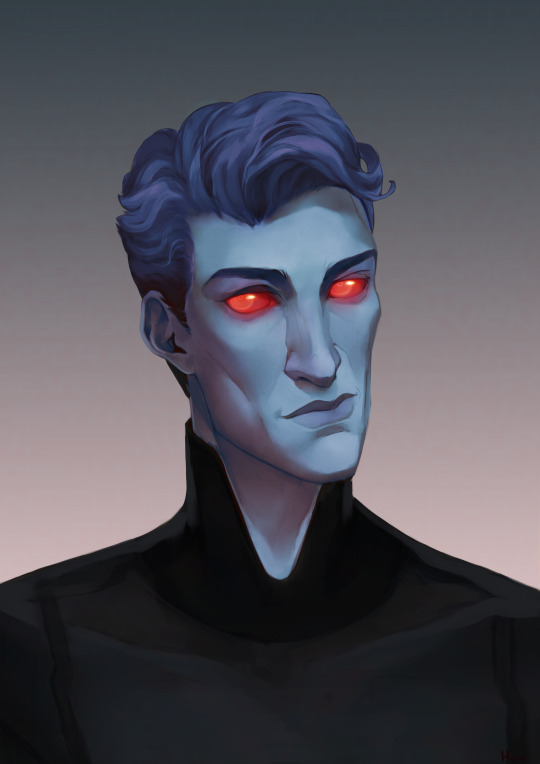
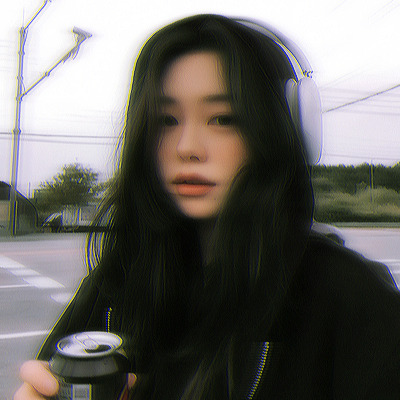
[Image description: A digital illustration of Azami, Shion and Mary from Kagerou Project. The characters are aligned one behind the other, with Azami obscured in the background with her hands hovering around Shion's face. Shion is immediately behind Mary, trying to cover Mary's eyes, who cries. They all look at the viewer with bright red eyes. End description]
#no i did not forget kagepro day i just have another art for then i just dont like posting more than one art a day#kagepro#kagerou day#mekakucity actors#kagerou project#scopophobia#eye contact#eye horror#ISH#3d effect#eye strain#mary kozakura#shion kozakura#azami#red#fanart#digital art#medusa#gorgon#star of the show#kagepro but make it horror-esque#made this one while working on a horror related zine and the vibes were on#if kagepro ever gets a new anime i think it should lean more into horror#as a treat#to me#my beloveds
2K notes
·
View notes
Photo

"I am assigning you a rank and designation that suits your new position. You no longer have a name. You will answer only to Cipher Nine. “
---
Both Text and Textless version
#Chiss#Cipher 9#SWTOR#I FORGOT HIS GLASSES#lets pretend hes holding them off screen#like one of those id photos where they like 'take off your glasses you need to see'#Empire#couldent decide which one so I made two#one without the effects that wont slap the senses#3D effect#??maybe is that a tag?#either wat ITS HIM#celizar
295 notes
·
View notes
Text
MY PSYCHIATRIST CALLS ME A BEAUTIFUL PRINCESS BUT DID SHE HAVE TO TACT ON DISORDER AT THE END
#my art#digital art#tsp#the stanley parable#tspud#tsp timekeeper#time keeper#the stanley parable timekeeper#timekeeper fanart#employee 432#tsp employee 432#the stanley parable ultra deluxe#3d effect#eyestrain
58 notes
·
View notes
Text
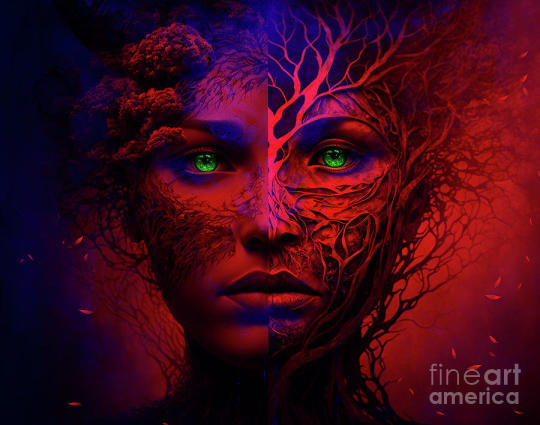
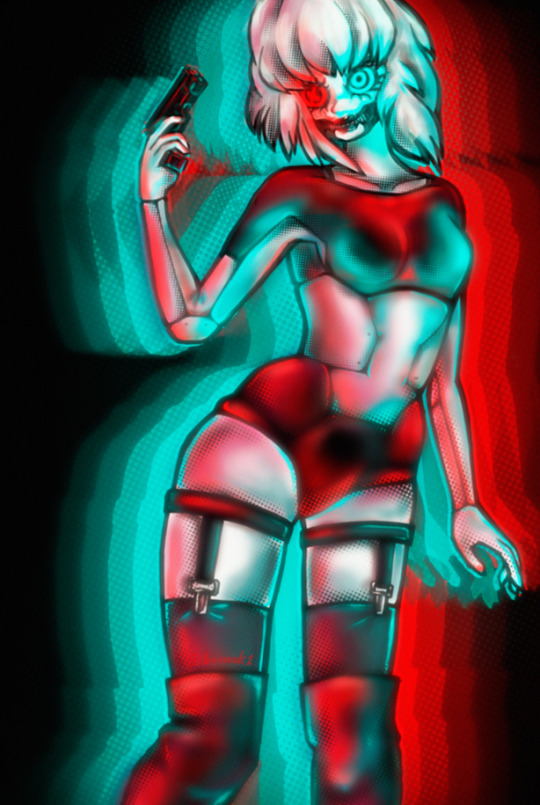
Don't look her in the eyes! She's the Devil himself…
Warning, this picture may impress you! Use the following instructions at your own risk!
Wear 3D glasses with blue and red lenses and close your left eye. The devil himself will immediately appear, giving to you a unique and unforgettable experience. By closing the right eye instead, the woman appears with black eyes, suggesting her evil duality.
An example of which glasses you need can be found here: https://www.google.com/search?q=red+and+blue+glasses
“Duality” is a work of art that will leave you speechless. This piece of art uses an old visual “trick” to create a new visual experience that takes full advantage of the digital age. This image has been created exclusively for this project.
https://fineartamerica.com/featured/duality-chris-bee.html
#woman#demon#satan#hell#devil#evil#girl#chris bee#sick#3d effect#digital art#art#digital arwork#wallart#artists on tumblr#trick#beautiful eyes#portrait#porträt
25 notes
·
View notes
Text
The recursion effect is achieved through reflective surfaces and LED lighting.
260 notes
·
View notes
Text


dahyun icons.
like or reblog, please. actions (rock ntz - serena atn - catwalk 3d) made by rockjealous in deviantart. follow @kiwy and @rocksource-s on tumblr. (icons 400x400)
#icons#girls icons#gg icons#kim dahyun#twice dahyun#dahyun#dahyun icons#dahyun twice#icons dahyun#twice icons#twice#random icons#400x400#400x#sprklls#3d effect
63 notes
·
View notes
Text

#black background#infinite#gif#never stop#black space#beautiful#3d effect#4d#mandala#visualart#hypnotic#sacred geometry#geometric#circle#flower of life#perfect loop#never ending#energy#chakras#genetics#gods code#source
94 notes
·
View notes
Text
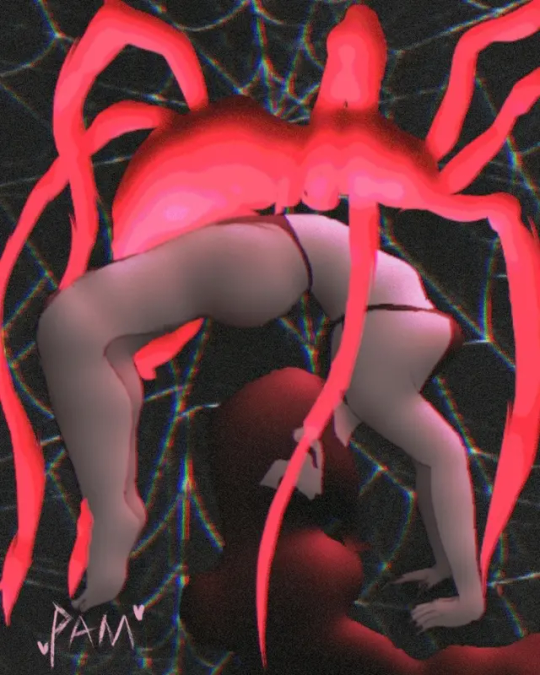
The Spider Lady ♡
Made by: Pamela Lima
#trans girl#transgender#spider woman#spider web#lgbtqia#artists on tumblr#trans woman#sketch#3d art#3d effect#ibispaintx#ibispaint art#illustration#digital art#artwork#woman#black widow#tumblr draw#digital artist#lesbian
6 notes
·
View notes
Text

He’s here !!!
#my art stuff#peppino spaghetti#pizza tower#garfield#cat#I will literally never be able to give enough context for this to make any sense to anybody outside of sushi gang#but you MIGHT see more of him so prepare yourselves.#god he looks so stupid making this pose I love him so much 💖🧡💖🧡💖#digital art#halftones#3D effect#idk what other gunk I put in here#i might post another version later without all the effects and shit to show his actual colours#idk#aLSO#THAT IS HIS TAIL#HE DOESN’T JUST HAVE A REALLY LUMPY LEG
36 notes
·
View notes
Text

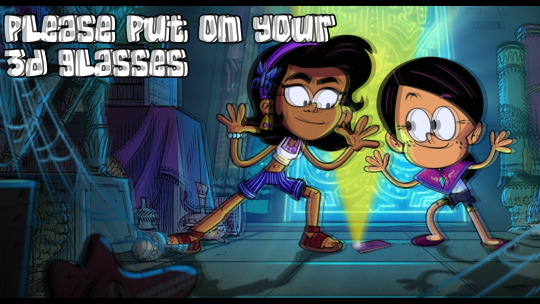
"The Casagrandes Movie" is now playing in theaters in 2D and 3D. It's also available to rent on Digital and stream on Paramount+ and Max. To celebrate the occasion, here's my 3D glasses title card that I think should be/should've been used. I'm planning on seeing it later for myself.
#the loud house#loud house#the loud house fan art#the casagrandes#the casagrandes movie#Please Put on Your 3D Glasses#“Please Put on Your 3D Glasses” title card#3D effect#cover art#cover art design#title card art#title card#title cards#recreation art
5 notes
·
View notes
Text
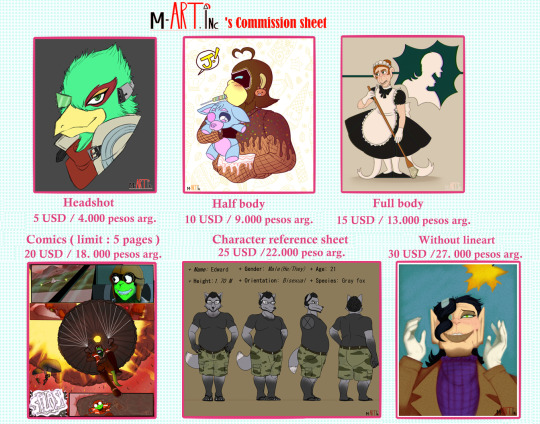
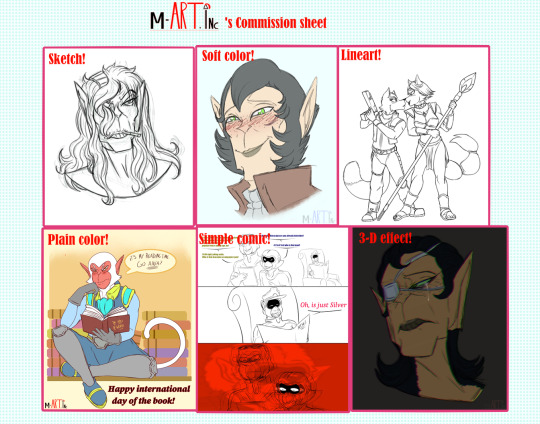
COMMISSION SHEET 2024
#m-art.inc#comisiones abiertas#comisiones argentina#commission open#commission sheet#furry commission#star fox#anime#manga#headshot#full body#half body#lineartless#comic#character reference sheet#3D effect#artitst on tumblr#digital commissions open#digital art
7 notes
·
View notes
Text
youtube
Hey everyone, I've created a video that shows how I make a shifting 3D effect animation from my 2D artworks using Gimp!
✦ Written guide below the break ✦
I'm using Gimp 2.10 on Pop!_OS
Open your image in Gimp.
Create a new layer over the art, color to black, and lower the opacity.
Starting with a dark to medium gray color fill in each element, working from back to front, visualizing the figures in a 3D space. Black is the background, white is closest to the front.
When your gradient map is complete, move the layer underneath the artwork and go to Filters➺ Map➺ Displace.
In Aux Input double click on the gradient map.
I personally prefer to work in Horizonal Displacement only, so I have to click the little chain link icon to the right to “break” the chain and allow only one axis to be displaced.
It doesn’t take a big shift to make an interesting effect, in this video I only move the artwork 2 degrees in each direction.
Here I displace two images total to create a perfectly looping four frame animation. Frame 1 shifts slightly to the left. Frame 2 is the original unedited painting. Frame 3 is shifting slightly to the right. The final frame is just a duplicate of frame 2, to create a perfect loop that goes: 1 2 3 2 … 1 2 3 2 … etc.
Make your animation! You can open all frames in Gimp to export as a GIF. Note that with your animation layers in Gimp, frame 1 is the bottom-most layer, going up from there.
For this video I simply opened the image files with my video editor Kdenlive, shortened each frame to 00:00;05 seconds, and made the loop that way.
Thanks for watching, let me know if you try this with your own work!
✿ Anka
#click through to youtube if you need captions -- i manually edit them so theyre correct#tutorial#art tutorial#stereograph#stereogram#3d effect#gimp art#gimp#Youtube#psychedelic art#trippy#figure painting#flowers#colorful art#audio commentary
7 notes
·
View notes
Text

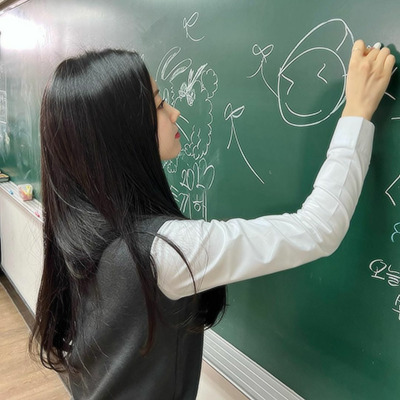
Chalk art
Washington, D.C.
Wish I knew who made this but there was no name or tag
4 notes
·
View notes
Text
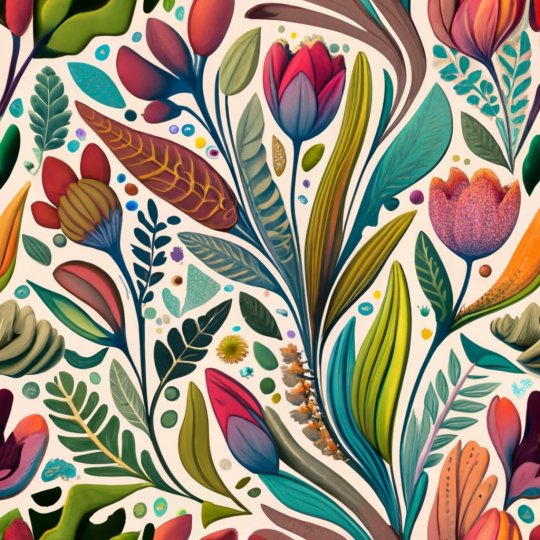
#Seamless Pattern#Vector Illustrations#Floral Clipart#Daisy Motifs#Multicolored Flowers#A4 Paper Texture#Continuous Design#Bright Color Palette#Wildlife Elements#Butterflies#Bees#3D Effect#Photorealistic Creatures#Fantasy Elements#Infinite Expansion#Delicate Shadows#Art Gallery Quality#Stephanie Law Inspired#Nature and Imagination#Watercolor Touches#Conceptual Art#Wall Tapestry Design#Fashion Poster Artwork#Vivid Garden Scene#Hand-Painted Details
4 notes
·
View notes
Text


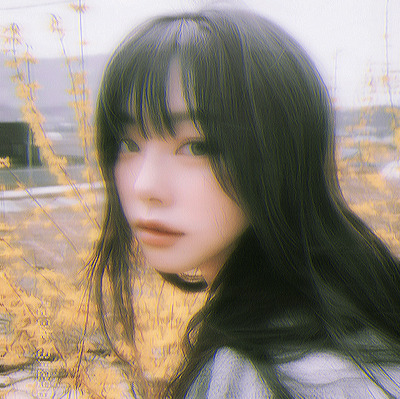


ulzzang girl icons.
like or reblog, please. actions (alexia atn - princess 3d) psd (simpleromantic) made by rockjealous in deviantart. follow @kiwy and @rocksource-s on tumblr. (icons 400x400)
#icons#girls icons#random icons#400x400#sprklls#ulzzang#ulzzang girls#ulzzang icons#girls#girls ulzzang#vintage#vintage icons#messy icons#3d effect#icons 3d
27 notes
·
View notes
Text
new oc 🤖💥
#digital art#original character#character design#digital illustration#cybercore#illustration#digital artist#small artist#3d effect
2 notes
·
View notes
Last Seen Blogs

lupinthehowlingwerewolf
nevertheless, she persisted.
blueanxiete
Anxious B

portfolioutboy
portfolioutboy
strickerike
strickerike

parasolpaper
Parasol Paper