#victory gardens
Text
Uncle Sam had a green thumb? Digging into the history of victory gardens 🍅🌽🥕

Victory Gardens emerged during World War I as a way to ease the strain on the nation's food supply and foster solidarity among citizens.

Citizens were encouraged to grow their own fruits and vegetables to ensure a steady food supply for both the home front and the troops fighting overseas.
The movement continued during World War II, when the United States faced severe food shortages due to rationing and the need to support a growing military force.

Victory Gardens became a symbol of community, patriotism and self-sufficiency, and by 1944, an estimated 20 million gardens were cultivated across the nation.
The U.S. government heavily promoted the Victory Garden movement through various initiatives and campaigns. The Department of Agriculture's Extension Service provided guidance and resources, such as instructional pamphlets on gardening techniques, to help citizens establish and maintain their gardens and plots.
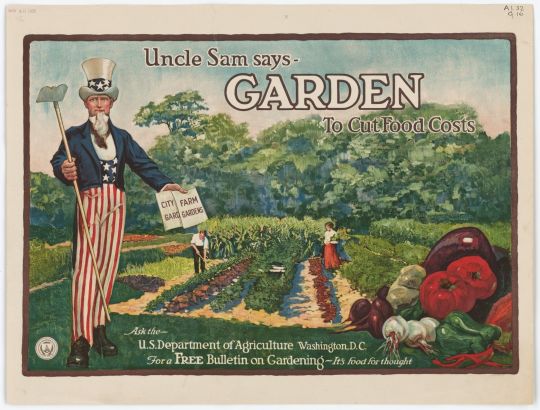
The government also created a range of promotional materials, including posters, films, and radio programs, to encourage citizens to participate in the effort.
Further Reading:
3K notes
·
View notes
Text

Victory Garden at Emerson Elementary
Students at Minneapolis's Emerson Elementary School joined forces on a collaborative garden plot in the summer of 1946. It was the only school in the city where children were cultivating their peace gardens together. Each student bought their own seeds and garden implements and paid 25 cents to have their plots plowed. They would spend the summer planting, weeding, tending, and harvesting from the 60 by 200 foot victory garden, supervised by a rotation of volunteer garden committee members from the PTA. 41 Emerson students participated, but a record 2,287 junior gardeners planted victory gardens that summer throughout Minneapolis, to help beat the world food shortage.
Photo from the Minneapolis Newspaper Photograph Collection in the Hennepin County Library Digital Collections.
24 notes
·
View notes
Text
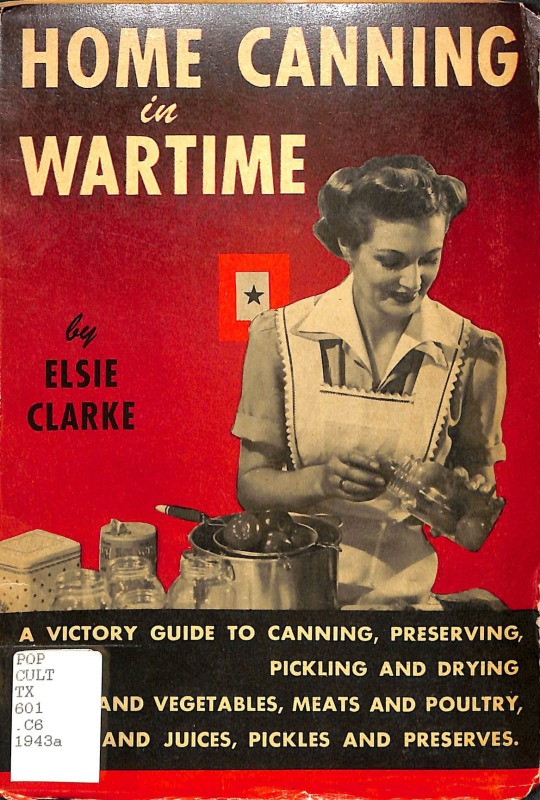


Another book on canning and victory gardens is Home Canning in Wartime: A Victory Guide to Canning, Preserving, Pickling, and Drying (1943) by Elsie Clark. Notice the phrasing in chapter one that likens a woman's effort in the kitchen to a soldier serving in the war. It was part of wartime propaganda encouraging every American to participate in the war effort and military-industrial complex even if they were not enlisted.
Included here is a page of recipes for canning grapefruit, peaches, pears, and pineapple, as well as a time table for processing fruits and vegetables. Image transcripts are below the cut.
The Browne Popular Culture Library (BPCL), founded in 1969, is the most comprehensive archive of its kind in the United States. Our focus and mission is to acquire and preserve research materials on American Popular Culture (post 1876) for curricular and research use. Visit our website at https://www.bgsu.edu/library/pcl.html.
1. Canning in Wartime
"LADY," says Uncle Sam, "it's your war. Win it."
You are the top sergeant in your own kitchen, and that's one of the most important battlegrounds in the war on the Home Front. Solving the food problem is in your hands—and it's a job that takes a good deal of skill, and thought, and hard work. You've been baking delicious cakes without sugar and preparing miraculous meat dishes without meat. You're spreading the butter thinner, and using margarine. You've budgeted your ration points so that they supply the family with the greatest nourishment and food value. And those freckles on your nose, and that crick in your back prove that you've been doing your share of hoeing in the Victory Garden.
Now here's another job that you can tackle just as important as anything you've done yet—and that's canning a supply of fruits and vegetables for your family.
Can What You Can
After you've taken what you need for your table out of your garden, can every surplus for future use. There are just as many vitamins and minerals in canned foods as in fresh cooked foods, and you will be storing up health and energy for your family. Your ancestors preserved and pickled and brined and salted food to last them through the winter, because they couldn't go down to the corner grocery to replenish their supply. Now that [page ends]
Grapefruit
(yield: 1 1/2 medium size = 1 pint)
Wash and dry firm, ripe grapefruit. Peel off thick skin, along with white membrane. With a sharp knife remove sections of grapefruit. Pack firmly into sterilized jars. Cover to within Y2 inch of the top with grapefruit juice. (Sugar may be added when used.) Seal according to lids used (see page 25). Process pints and quarts in boiling-water bath for 10 minutes.
Peaches
(yield: 2 to 2 1/2 pounds = 1 quart; 1 bushel = 18 to 24 quarts)
Use freshly picked, firm, ripe peaches. Grade for uniformity and degree of ripeness. Put enough for 1 quart into a wire basket. Plunge into boiling water for about 1 minute until skins slip off easily. Then plunge into cold water. Remove from water. Quickly slip skins from peaches, cut in half, and pit. Clingstone peaches may be canned whole if you wish. Drop pieces as you cut them in a salt solution to prevent discoloration. (Use 1 tablespoon salt to 1 quart of water.)
Make a syrup of 1 cup of sugar to 2. cups of water; or 1/2 cup of sugar plus 1/2 cup of honey or syrup to 2 cups of water. Bring to boil. Simmer peaches in the hot syrup for 4 or 5 minutes to shrink them. Pack tightly into hot sterile jars, cut side down, to 1/2 inch of the top. Bring syrup to a boil. Pour boiling hot over peaches to within 1/2 inch of the top. Seal according to lids used (see page 25). Process in boiling-water bath for 15 minutes.
WITHOUT SUGAR. Can peaches in their own juice. Crush soft or imperfect fruit, add a small amount of water to start juice, and a few cracked pits for flavor. Cook, covered, for about 5 minutes until fruit is soft. Strain. Bring to a boil. Simmer prepared peaches in this juice for 4 or 5 minutes, pack and process as above.
Pears
(yield: 2 to 2 1/2 pounds = 1 quart; 1 bushel = 25 to 28 quarts)
Can pears when they are very slightly under-ripe. Grade for uniformity. Work with enough fruit for 1 quart. Wash. Peel with a stainless steel knife. If pears are small, can whole, removing core with an apple corer. If they are large, cut in half and core. Drop them into a salt solution to prevent discoloring (1 table-spoon salt to 1 quart of water). Prepare a medium syrup of 1 cup of sugar to 2 cups of water; or 1/2 cup of sugar plus 1/2 cup of honey or syrup to 2 cups of water. Bring to boil. Allow 1 to 1 1/2 cups syrup for 1 quart. Simmer pears in the syrup 4 to 8 minutes, according to ripeness and size. Pack into hot sterile containers, cut side down, to within 1/2 inch from the top. Cover with boiling syrup. Seal according to lids used (see page 25). Process in the boiling-water bath for 20 minutes.
VARIATIONS: Add a few drops of mint extract and a little green coloring for minted pears; a piece of ginger root for a gingery flavor; or a few red cinnamon candies for spiciness.
Pineapple
(yield: 2, medium sized = 1 quart; 1 crate of 30 pineapples = 12 to 16 quarts)
COLD PACK. Select pineapples that are ripe, but not soft. Twist off top. Scrub. Cut crosswise into slices about 1/2 inch wide. Peel slices, removing eyes carefully. Trim and cut out core with a doughnut cutter if you wish to leave slices whole. Otherwise core and cut into convenient pieces. (Use peelings and cores for juice.) Pack into sterile jars. Cover to within I/2 inch from the top with a boiling hot thin or medium syrup of I cup of sugar to 2 or 3 cups of water; or 1/2cup sugar plus 1/2 cup corn syrup; or 1/2 cup sugar plus 1/2 cup honey to 2 cups of water. Allow about 1 cup of syrup to 1 quart jar. Seal according to lids used (see page 25). Process in boiling-water bath for 30 minutes.
#bgsu#food canning#food preservation#victory gardens#can it forward#grapefruit#peaches#pears#pineapple#recipes
12 notes
·
View notes
Text

Uncle Sam, gardener-in-chief.
#vintage illustration#life during wartime#propaganda#wwii history#wwii era#wwii#ww2#ww2 history#the 40s#victory gardens#american war production
3 notes
·
View notes
Text
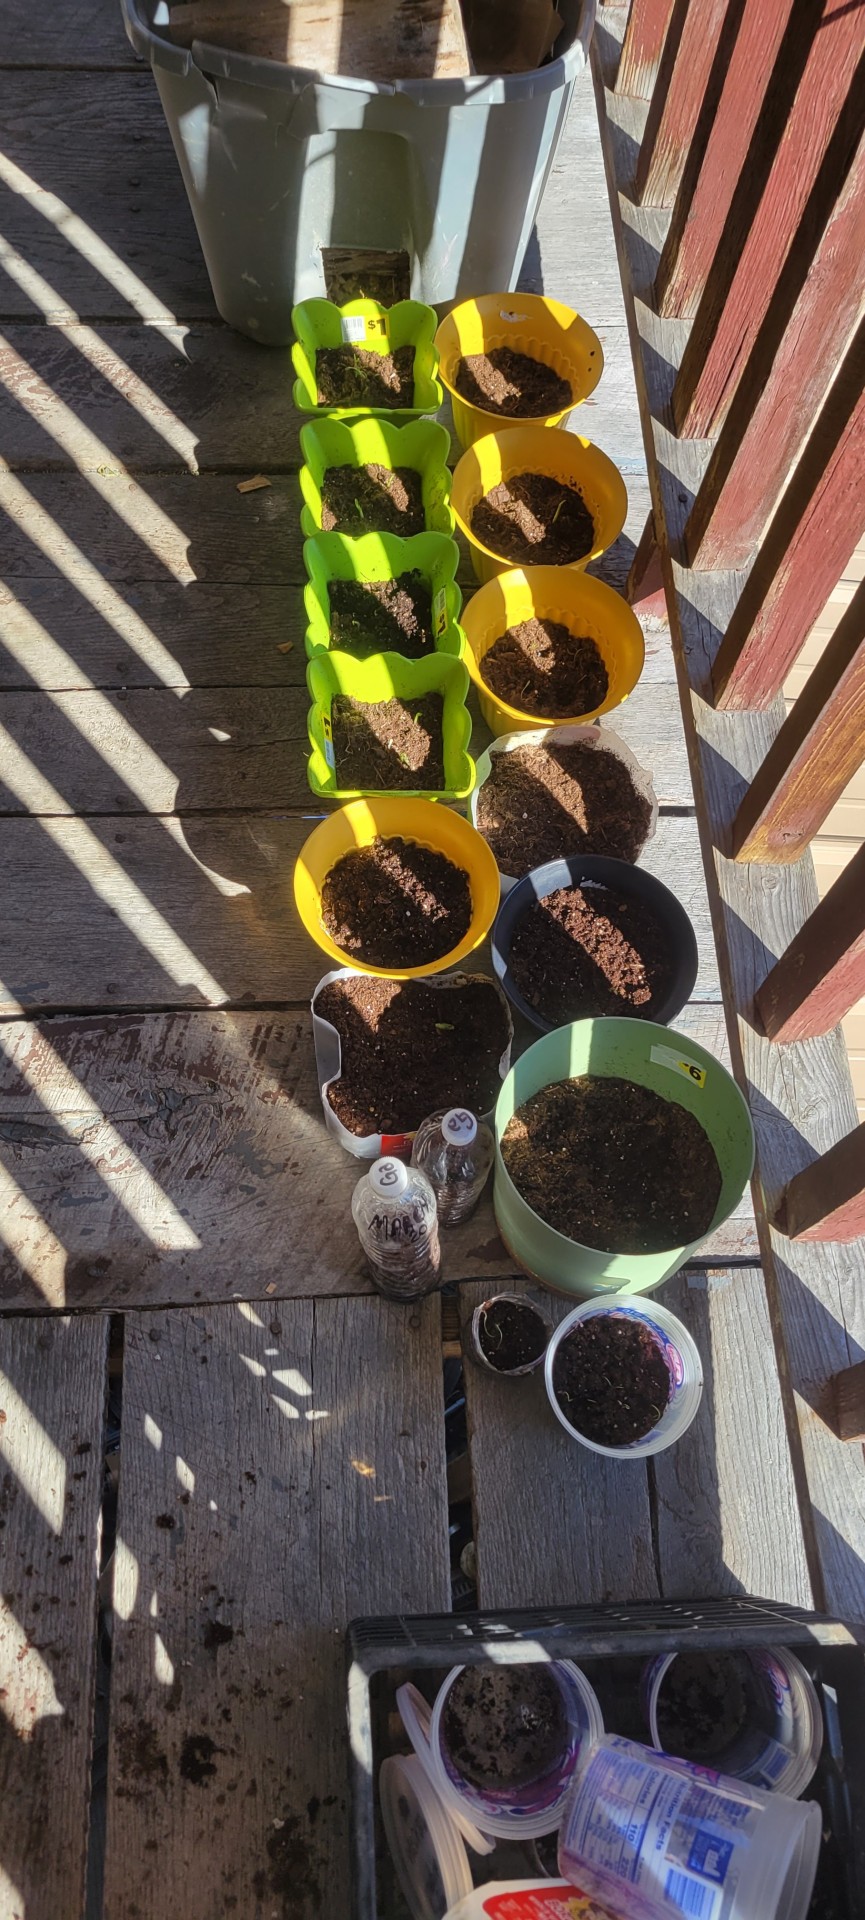
I got my sprouted plants repotted yesterday! I have a strawberry plant, many sugar pumpkins, peas, tomatoes, and garlic.
I'm looking at planting corn, cucumbers, carrots, and retrying beans next. I think I overwatered the last batch which is why I only have a few plants to show for it.
#personal#my garden#gardening#victory gardens#vegetable garden#fruit garden#i also am looking for some medicinal herbs that i can keep in planters on the porch too#but im not sure what i want to grow yet
3 notes
·
View notes
Text
Victory Gardens

The Bristol Garden Club assisted newcomers with their vegetable gardens. The newspaper also answered questions about gardening.
On February 16, 1943 the Phoenix reports that 11-year-old Gilbert Costa, a 5th grader at Reynold School and son of Mr. and Mrs. Anthony E. Costa, won a gold medal for Victory Gardening from the Providence and Bristol County 4-H Clubs! A 2-year veteran of 4-H, young Gilbert did all the work on a small plot. With his money, he purchased a War Bond. Gilbert's sister Eileen ha won a medal for canning the year before.
On July, 27 John Ferri, of the Cup Defenders' Association, had a garden with the most complete assortment of vegetables which showed unusual care and effort towards its growth. Club members toured various gardens and a panel of judges awarded John Ferri the winning prize. Benni Mansi was runner up.
On November 2, another boy, 14-year-old Norman Kerr, son of Mr. and Mrs. Walter Kerr of Hope Street, won a $25 bond for his garden! Like Gilbert Costa, Norman was also into 4-H. After Norman won two blue ribbons, he wrote a 700-word theme about the garden and was awarded the $25 bond by Kenneth R. Pickett, assistant county director of 4-H. Seven other Rhode Island children won bonds.
0 notes
Text


i think you guys are onto smth..


i unironically got invested in this HELP
#WHERES THE FIC AT IF SOMEONE WRITES THIS I WILL PAY THEM A HUNDRED DOLLARS😭😭#kunikida serving the country while dazai's serving cunt😔#dazai was born to malewife but forced to manipulate and i think that's the greatest tragedy of bsd#anyway some facts i would like to share abt this au thay i came up w while drawing!!#takes place in 1939 (start of wwii) and there was a mandatory draft that required one male over eighteen from each house to serve#both of them are still twenty two and had been engaged for abt two years before getting married that year#newlyweds! unfortunately kuni had to go fight and they were seperated :(#before the war kunikida was a math teacher at the local high school and dazai obviously managed the household and didn't work#he's hopeless at cooking and meal prep even w recipie books so they either get those prepackaged meals or kuni makes dinner when he gets ba#so like when he's making lunch for kunikida he normally just packs a basic sandwich w raw fruit#kunikida always appreciates the effort even tho hes probably sick of having the same thing everyday but he won't complain abt it#when kunikida joined the army he was relieved that the mess hall had better food than dazai#he was the only one in his platoon that never complained abt the food so his fellow soldiers assumed it was bc he came from a tough bg#when in reality he was just used to being poisoned on a daily basis from his dumbass husbands cooking and was hardly fazed from army ration#they write to each other although its more dazai sending and kuni receiving bc hes off fighting and doesnt have time to write back#dazai talks abt life on the homefront and how he has to grow a victory garden (everything is DYING HE CANT EVEN RAISE TOMATOES)#and kuni writes abt his fellow soldiers and how the war is going and when he thinks he'll be home and how he misses sleeping in a bed#ANYWAY yea thought i'd share sry for infodumping in the tags again#this post is for like the four ppl that care abt this specific flavor of knkdz so hopefully this gets four notes at least#bungou stray dogs#bungo stray dogs#dazai osamu#osamu dazai#kunikida doppo#doppo kunikida#kunikidazai#knkdz#lotus draws#bro sry for posting at two in the morning i couldnt sleep until i got this out of my head they have infested my brain
1K notes
·
View notes
Text
Bring back the victory gardens ✌️
#victory garden#garden#self sustinable#self sufficiency#urban homesteading#homesteading#gardening#vegetable gardening
942 notes
·
View notes
Text

ولا غالب إلا الله
And there is no victor except Allāh.
400 notes
·
View notes
Text
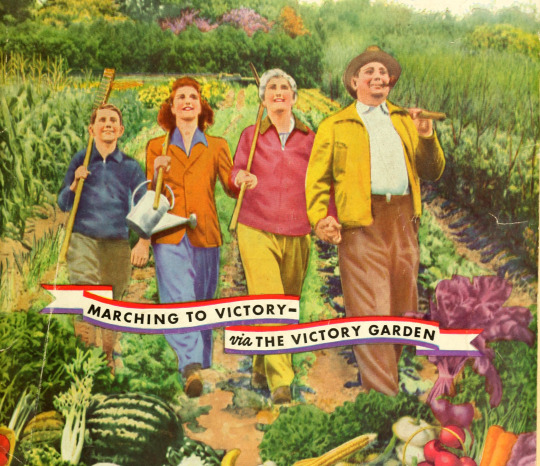
Marching to victory via the victory garden. Henderson's everything for the garden. 1943. Garden catalog cover detail.
Internet Archive
#ww ii#second world war#victory garden#garden catalogue#family#grandparents#war effort#home front#color photography#nemfrog#1943#1940s
121 notes
·
View notes
Text
So I'm working on a presentation for my history class and I had to pick a event or something that happened during WW2 in American. Me being the cottage core loving being am i, I picked victory gardens and rationing.
See, that would be a normal topic to go over. However, I am not normal. I know that there are comics and cartoon panels of Disney characters -mostly Mickey Mouse and Donald Duck, however I learned of a new comic character.
Fucking. Batman.
It was the cover of comic from the world's finest comics, which were war time comics of Batman, Robin, and Superman. This one, number 11 in the comic line, depicts the three in a war time Victory Garden.
I expected this from Superman, him being a farm boy and all, and possibly Robin cause he's a child. However Batman was not who I was expecting to be harvesting fucking cabbage.
The things you discovered in a search for posters.
22 notes
·
View notes
Text


#prepping#survival#food storage#cooking#food preservation#nuclear#self sufficiency#war garden#victory garden#vegetables#planting#spring
17 notes
·
View notes
Photo
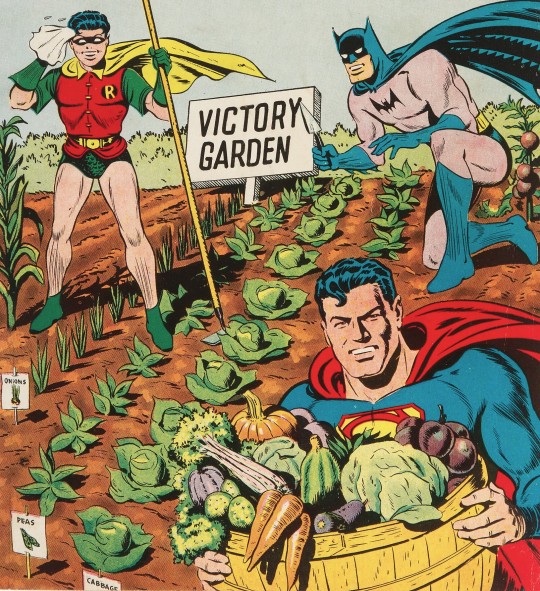
Victory Garden - art by Jack Burnley and Jerry Robinson (1943)
#jerry robinson#jack burnley#world's finest comics#superman#batman#robin#victory garden#dc comics#comic art#wwii#1940s#1943
242 notes
·
View notes
Text


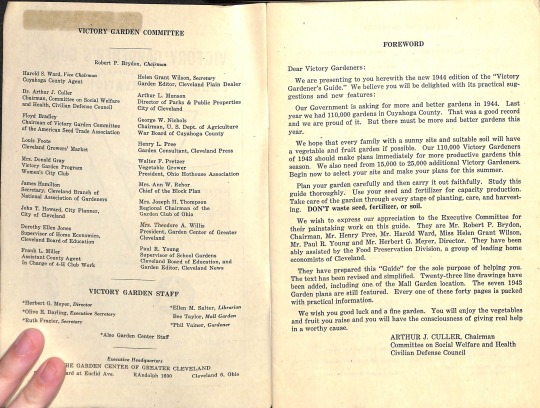
Victory gardens were popular during World War I and II as a way for families on the "home front" to produce their own food and boost morale during food rationing war efforts. This Victory Gardener's Guide, Including Food Preservation Guide (1944), came from the Victory Garden Committee of the Cuyahoga County Council for Civilian Defense and the Garden Center of Greater Cleveland, in Ohio, as a practical guide to making victory gardens at home. Read below for more information on victory gardens and a sample garden plot.
The Browne Popular Culture Library (BPCL), founded in 1969, is the most comprehensive archive of its kind in the United States. Our focus and mission is to acquire and preserve research materials on American Popular Culture (post 1876) for curricular and research use. Visit our website at https://www.bgsu.edu/library/pcl.html.
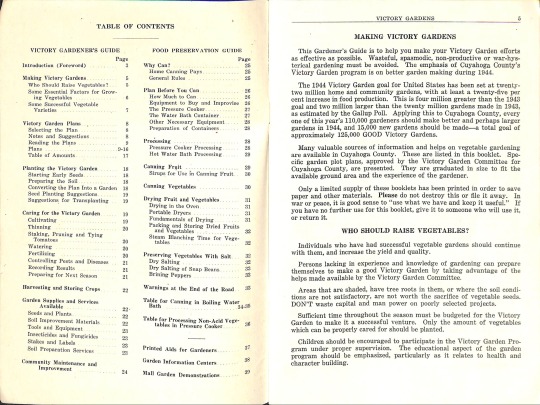


Image transcripts:
Foreword
Dear Victory Gardeners:
We are presenting to you herewith the new 1944 edition of the "Victory Gardener's Guide." We believe you will be delighted with its practical sug-gestions and new features:
Our Government is asking for more and better gardens in 1944. Last year we had 110,000 gardens in Cuyahoga County. That was a good record and we are proud of it. But there must be more and better gardens this year.
We hope that every family with a sunny site and suitable soil will have a vegetable and fruit garden if possible. Our 110,000 Victory Gardeners of 1943 should make plans immediately for more productive gardens this season. We also need from 15,000 to 25,000 additional Victory Gardeners. Begin now to select your site and make your plans for this summer.
Plan your garden carefully and then carry it out faithfully. Study this guide thoroughly. Use your seed and fertilizer for capacity production. Take care of the garden through every stage of planting, care, and harvesting. DON'T waste seed, fertilizer, or soil.
We wish to express our appreciation to the Executive Committee for their painstaking work on this guide. They are Mr. Robert P. Brydon, Chairman, Mr. Henry Pree, Mr. Harold Ward, Miss Helen Grant Wilson, Mr. Paul R. Young and Mr. Herbert G. Meyer, Director. They have been ably assisted by the Food Preservation Division, a group of leading home economists of Cleveland.
They have prepared this "Guide" for the sole purpose of helping you. The text has been revised and simplified. Twenty-three line drawings have been added, including one of the Mall Garden location. The seven 1943 Garden plans are still featured. Every one of these forty pages is packed with practical information.
We wish you good luck and a fine garden. You will enjoy the vegetables and fruit you raise and you will have the consciousness of giving real help in a worthy cause.
ARTHUR J. CULLER, Chairman Committee on Social Welfare and Health Civilian Defense Council
Making Victory Gardens
This Gardener's Guide is to help you make your Victory Garden efforts as effective as possible. Wasteful, spasmodic, non-productive or war-hysterical gardening must be avoided. The emphasis of Cuyahoga County's Victory Garden program is on better garden making during 1944.
The 1944 Victory Garden goal for United States has been set at twenty-two million home and community gardens, with at least a twenty-five per cent increase in food production. This is four million greater than the 1943 goal and two million larger than the twenty million gardens made in 1943, as estimated by the Gallup Poll. Applying this to Cuyahoga County, every one of this year's 110,000 gardeners should make better and perhaps larger gardens in 1944, and 15,000 new gardens should be made—a total goal of approximately 125,000 GOOD Victory Gardens.
Many valuable sources of information and helps on vegetable gardening are available in Cuyahoga County. These are listed in this booklet. Spe-cific garden plot plans, approved by the Victory Garden Committee for Cuyahoga County, are presented. They are graduated in size to fit the available ground area and the experience of the gardener.
Only a limited supply of these booklets has been printed in order to save paper and other materials. Please do not destroy this or file it away. In war or peace, it is good sense to "use what we have and keep it useful." If you have no further use for this booklet, give it to someone who will use it, or return it.
Who Should Raise Vegetables?
Individuals who have had successful vegetable gardens should continue with them, and increase the yield and quality.
Persons lacking in experience and knowledge of gardening can prepare themselves to make a good Victory Garden by taking advantage of the helps made available by the Victory Garden Committee.
Areas that are shaded, have tree roots in them, or where the soil conditions are not satisfactory, are not worth the sacrifice of vegetable seeds. DON'T waste capital and man power on poorly selected projects.
Sufficient time throughout the season must be budgeted for the Victory Garden to make it a successful venture. Only the amount of vegetables which can be properly cared for should be planted.
Children should be encouraged to participate in the Victory Garden Program under proper supervision. The educational aspect of the garden program should be emphasized, particularly as it relates to health and character building.
Community Maintenance and Improvement
The care of your Victory Garden will lead you into the care of your :lot and house. This is no time for disorder; we must have efficiency. This is no time for waste we must conserve. This is no time to let things run down; we must maintain what we have. War time is clean-up, fix-up time. We must use what we have, and keep it useful ; we will not get new tools, or furniture, or houses, for a long time. If you practice conservation on your own house and yard, you will contribute to the war effort as well as to the values of your home and your community.
You and your neighbors can use your work on Victory Gardens as a spring-board into an effective consciousness of other community problems. By working together on conserving your whole neighborhood as well as your own houses, you will build civic assets for this emergency and for long after. You will be doing real city planning, and building the better communities for which we fight.
As you work in your Victory Garden, you will realize more and more how much time and effort go into all gardening and building. We cannot afford to waste any of our assets. You will want to join in the movement to protect the parks, playgrounds, schools and public buildings that were built with your money for your use. You will feel the need for conservation and wise use of all resources—manpower, food, gardens; homes, neighborhoods, public properties—to win the war, and to enjoy the benefits of pace. And you will do your part.
Why Can?
WHY CAN? Home canning helps to supplement commercial supplies and saves transportation. It provides greater variety in meals by helping to equalize the seasonal food supply, and if properly done, home canning helps to supply food elements which are essential to health. It provides a means of pre-serving the surplus of your Victory Garden.
Home Canning Pays
If you grow supplies in sufficient quantities for your daily use and pro-vide an inexpensive surplus for canning—
If you can as quickly as possible when produce is sound, ripe, and fresh —two hours from plant to can is a good rule—
If you buy direct from a farmer or home gardener at a low cost to justify home canning—
If you have suitable equipment and suitable storage space.
If you will can products efficiently and according to the best canning techniques—
If you can proper amounts of the various food products—not too much nor too little, but just enough to last the family through the coming year
General Rules
There is no such thing as luck in canning. It is a science requiring Care and Precision. The sooner the food is canned after picking, the better the result. The product will be no better than the material that goes into the can. Select foods with care, using only sound perfect produce in prime condition. Canning does not improve the product, it only preserves it.
Use the right method for the food to be preserved. Tomatoes are the easiest vegetable to can. All other vegetables are non-acid and should be canned in a pressure cooker, dried, or put down in salt. The safer method is to sterilize the food packed in the can. The two recommended methods of sterilizing in the can are processing by hot water bath—or by pressure cooker.
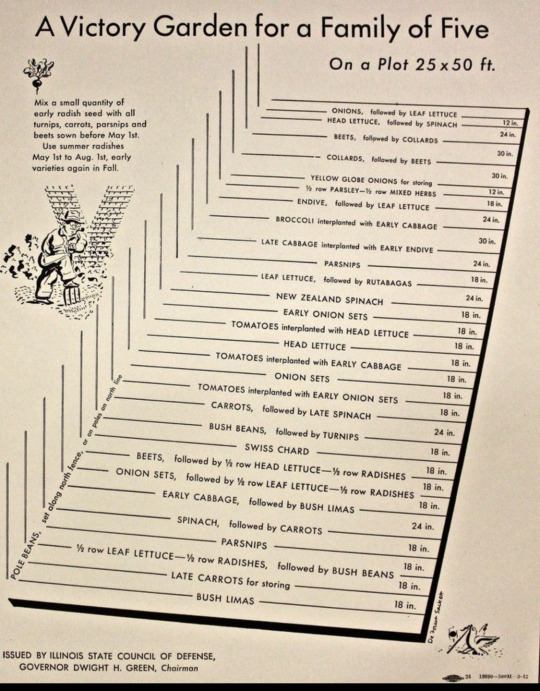
Victory Garden Plans
Seven plans for adult Victory Gardens are presented on pages 9 to 15. They range in size from 150 square feet to 5,000 square feet. Two additional plans designed especially for children are shown on page 16. These gardens have all been carefully planned to make full use of soil area for the entire season. The Victory Gardener should select the plan which best fits his conditions.
The smaller sized plots are limited to vegetables economic of space and with high food value. Crops such as corn, pumpkins, squash, cucumbers and perennial crops such as asparagus and rhubarb are included in the larger plots.
The four major vegetables--judged on ease of culture, maximum yield, high vitamin content, general use, and facility of canning or storing—are tomatoes, carrots, beans and vegetable greens. These have been included in the largest amounts consistent with a well balanced vegetable garden plan. All other crops are secondary, yet worthy of inclusion to vary the wartime menu.
Selecting the Plan
The size of the garden should be determined by the site, space and time available, and the needs of the family. Approximately 1,000 square feet of land will produce enough vegetables for a family of four during the summer. A larger plot will be needed to provide for canning and storage. Even the smaller gardens, 1 to 3, yield surprising quantities of vegetables. You can expect to spend at least one hour a day in the 1,000 square foot garden. It is better to take good care of a small garden than to have one so large it is neglected.
These suggested plans may be used for individual home garden plots or as units of a community garden.
Notes and Suggestions
The tomato plants, as shown in the plans, are spaced for staking and tying. If grown on the ground, space 3 to 4 feet apart.
As noted earlier the major crops are tomatoes, beans, carrots and such greens as lettuce, spinach, Swiss chard, endive, beets for tops, mustard and others. If more of these major crops are wanted, substitutions may be made, as for example, carrots in the parsnip row, tomatoes where asparagus and rhubarb are shown. It is better, however, to follow the plans.
Potatoes should only be grown in garden areas larger than 5,000 square feet, and only where the soil is suitable. A fairly acid soil is recommended for this crop. Check other cultural information on potato raising before attempting to grow them.
Harvesting of vegetables from the garden is greatly increased by succession planting. As soon as one crop is harvested, fertilize and plant with a crop which will mature before the end of the season. The harvesting period for many vegetables may be extended considerably by planting at one time varieties having different maturity dates. Succession planting is provided for in the plans given in this booklet.
In Plan Number 7, the area on the right side may be planted with early, quick-maturing crops such as lettuce, peas, spinach, onion sets, radishes, etc. This may be done also in Plans 5 and 6 where early crops are not indicated in the areas devoted to late crops. This will result in a still more intensive utilization of the soil area.
READING THE PLANS
The following guide serves for plans 1 to 7.
The rectangles represent the outlines of the plots. The letters A, B, C and D mark the corner stakes.
Lines across the plots mark the vegetable crop rows. Solid lines are for full season rows and broken lines - - - - are for partial season rows. The latter, except where succession crops are marked, indicate "companion" crops.
Names of the crops are shown in the rows. Parentheses ( ) around a crop name indicate a succession crop to be planted after the first crop is harvested.
The small circles indicate transplanted plants; the large circles indicate hills of squash and cucumbers. Short perpendicular lines divide rows between various crops shown.
The inch measure (6", 12", etc.) indicates distances between the rows. These are shown at the left of the plans. The foot measure (2', 4', etc.) indicates distances in the rows, as for example, the spacing distances between transplanted plants, or sections of crop rows.
The asterisks * on the left mark the rows which can be planted as early as soil conditions and season will permit after April 1. Broken lines so marked should be planted first. All rows not so marked should be planted after May 25. Succession crops ( ) are planted immediately after the crops which they follow are harvested. Pepper plants are usually transplanted on or after June 1.
10 notes
·
View notes
Text

Hey! Watch it! Don’t step on my house you big lummox!
Parents Magazine - 1945
#1945#gardening#victory garden#wwii#vintage ads#vintage ad#advertising#advertisement#1940s#1940s ad#1940's#1940's ad#funny#humor#humour
19 notes
·
View notes
Text
Gardening and landscaping is crazy. I'm relentlessly sawing off limbs, cutting off extremities, and ripping living beings out of the environment that keeps them alive. On the other hand, blackberries are total pricks
#naturecore#cottage garden#gardening#victory garden#victory gardening#landscape#landscaping#pruning#dead branches#i will master this garden#with the power of God and Anime on my side#herbal medicine#herbalist#romanticism#blackberry#blackberries#the bane of my existence
10 notes
·
View notes
Last Seen Blogs

smitheryns
Smitheryns

juliabandion
Julia Bandion

woodchipp
Wooden Chips

goalarabhd64
goal arab online

fasbytesreality
FasbytesReality