#these are handcrafted
Text


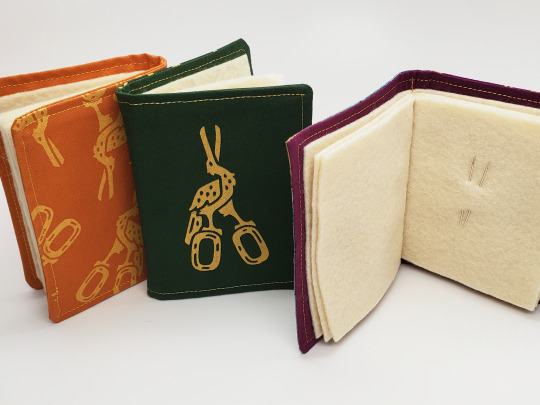


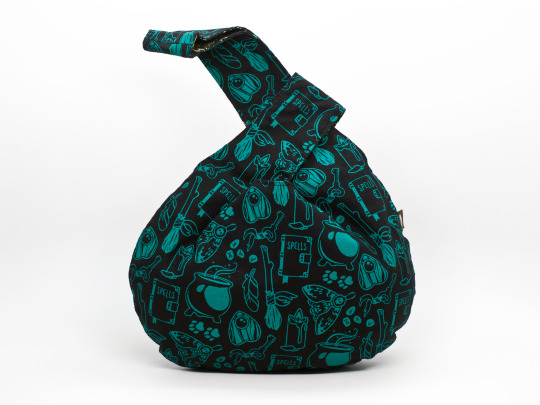
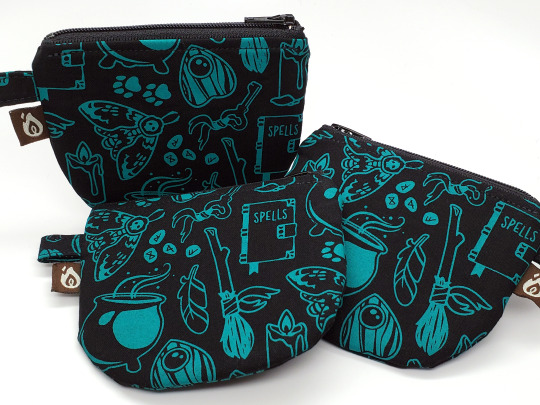
Here’s some of the items over at fireside textiles. Image descriptions in alt.
86 notes
·
View notes
Text
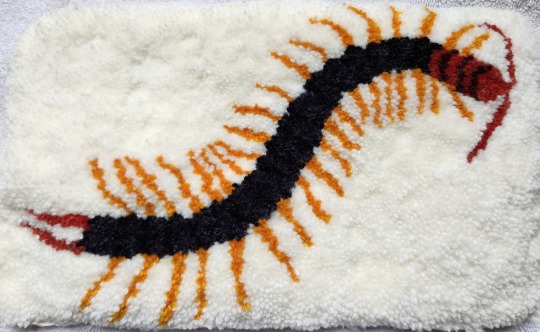
giant red-headed centipede, handmade rug, 2023,
11" x 7"
#original art#insects#bugs#bug#centipede#insect#red headed centipede#giant centipede#needlework#handcrafted#handmade#rug making#rug punching#rug art#nature#centipedes#yarn art#craft#crafts#fiber art#yarn crafts#yarn#legs#diy#diy art#diy craft#art#textile art#artists on tumblr
9K notes
·
View notes
Text
Had a few folks interested in how I made the patches I posted for Solarpunk Aesthetic Week, so I thought I'd give y'all my step-by-step process for making hand-embroidered patches!

First, choose your fabric and draw on your design. You can use basically any fabric for this - for this project I'm using some felt I've had lying around in my stash for ages.

Next, choose your embroidery floss. For my patches I split my embroidery floss into two threads with 3 strands each, as pictured. You can use as many strands in your thread as you prefer, but for the main body of my patches I prefer 3 strands.
Next you're going to start filling your design using a back stitch.

First, put in a single stitch where you want your row to start.

Poke your needle up through the fabric 1 stitch-length away from your first stitch.

Poke your needle back down the same hole your last stitch went into so they line up end-to-end.
Repeat until you have a row of your desired length (usually the length of that colour section from one end to the other). Once you have your first row, you're going to do your next row slightly offset from your first row so that your stitches lay together in a brick pattern like this:

Make sure your rows of stitches are tight together, or you'll get gaps where the fabric shows through.
Rinse and repeat with rows of back stitch to fill in your patch design.

When you're almost to the end of your thread, poke your needle through to the back of the fabric and pull the thread under the back part of the stitching to tuck in the end. Don't worry if it looks messy - no one's gonna see the back anyway.
This next step is fully optional, but I think it makes the patch design really pop. Once your patch is filled in, you can use black embroidery floss to outline your design (or whatever colour you want to outline with - it's your patch, do what you want). I use the full thread (6 strands, not split) of embroidery floss to make a thicker outline.

I use the same back stitch I used to fill the piece to make an outline that adds some separation and detail. You could use most any 'outlining' stitch for this, but I just use back stitch because it's just easier for me to do.
Once you're finished embroidering your patch, it's time to cut it out!

Make sure to leave a little border around the edge to use for sewing your patch on your jacket/bag/blanket/whatever, and be careful not to accidentally cut through the stitches on the back of the patch.
If you have a sturdy enough fabric that isn't going to fray, you can just leave it like this. If not, I recommend using a whip stitch/satin stitch to seal in the exposed edges (I find that splitting your embroidery floss into 3-strand threads works best for this).

And then you're done! At this point you can put on iron-on backing if you want, or just sew it on whatever you wanna put it on. Making patches this way does take a long time, but I feel that the results are worth it.
Thanks for reading this tutorial! I hope it was helpful. If anyone makes patches using this method, I'd love to see them! 😁
#solarpunk aesthetic week#sewing#tutorial#sew on patch#punk diy#diy punk#punk aesthetic#handmade#solarpunk#handcrafted#embroidery#embroidered patch#how to#how to make a patch
17K notes
·
View notes
Text

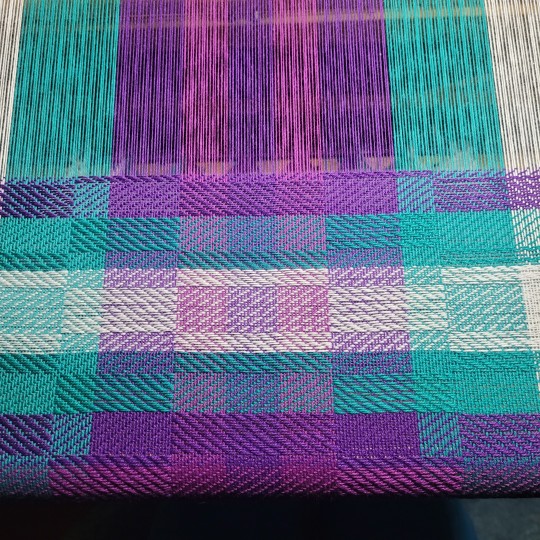

I LIVE I SWEAR. Have this 90's soda cup inspired warp as a proof of life lol.
#its been crazy!!!!#i moved states and finally am settling in#fibercraft#weaving#handcraft#loom weaving#weaving loom#weaving asmr#asmr
10K notes
·
View notes
Video
folding paper airplane by 嘉骐手工
22K notes
·
View notes
Text
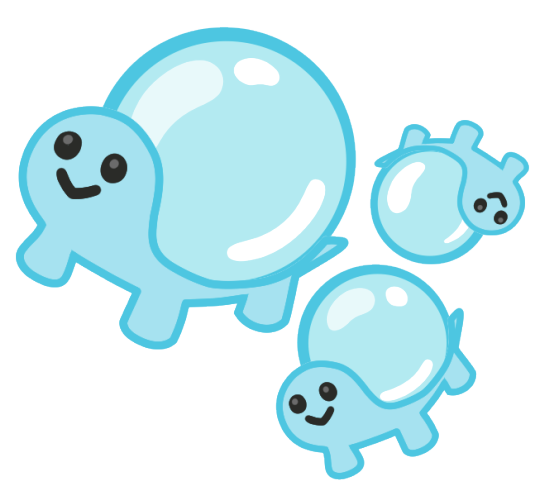
Day 875: 🐢 & 🫧
Ko-Fi | Patreon
7K notes
·
View notes
Text
Barbara: What did you get Dick for his birthday?
Jason: I got him a Glutemaster
Barbara: Really? Me too!
Stephanie: I also got him a Glutemaster.
Duke, gesturing to himself and Tim: Looks like we had the same idea.
Jason, sighing: Kill me. Please tell me you didn’t get Dick a Glutemaster as well.
Cass: I got him… a Glutemaster 🥰
Later-
Dick, surrounded by Glutemasters: THIS IS THE BEST BIRTHDAY EVER!!
#Damian got Dick 100 boxes of a special limited edition cereal#Damian removed all of dicks pantry items while he was sleeping the night before his bday#dick wakes up and open his kitchen cabinet and like 20 boxes just topple on top of him#Bruce got dick something expensive like a jet or a new identity#Alfred got dick fancy handcrafted cereal bowls#Wally got dick a coupon book for 10 free ‘cardio sessions’#Kori made the birthday cake… it was vanilla and anchovie flavoured#batfamily#batman#jason todd#red hood#batfam#tim drake#bruce wayne#stephanie brown#cassandra cain#dick grayson#nightwing#duke thomas#wally west#koriand'r#damian wayne#alfred pennyworth#barbara gordon#batgirl
2K notes
·
View notes
Text
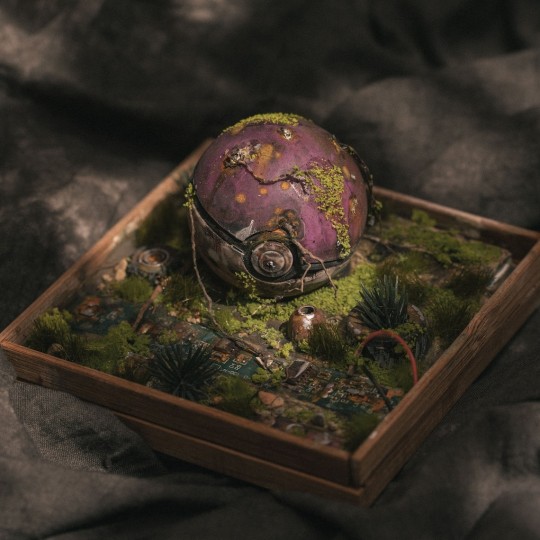

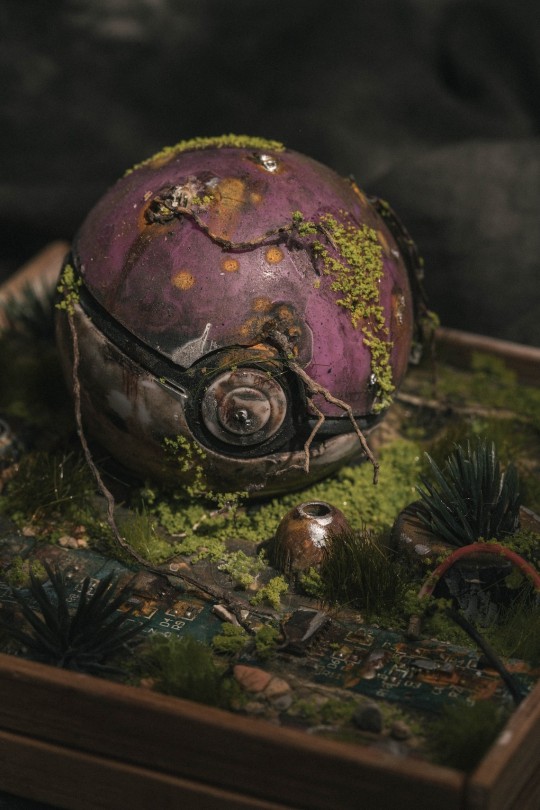
Pokeball Landscape Terrariums made by AndrewsCollections
#pokemon#nintendo#art#crafts#gaming#video games#anime#gameboy#pokeball#terrarium#retro#90s#gba#ds#3ds#switch#nintendo switch#artists#handmade#handcrafted#nostalgia#90's#nineties#retrogaming
4K notes
·
View notes
Video
drawing chinese shanshui on porcelain
#china#crafts#crafting#handmade#handcrafts#craftsmanship#art#paintings#guohua#shanshui#can't find who the artist is only know that she is from jiangxi province
17K notes
·
View notes
Text
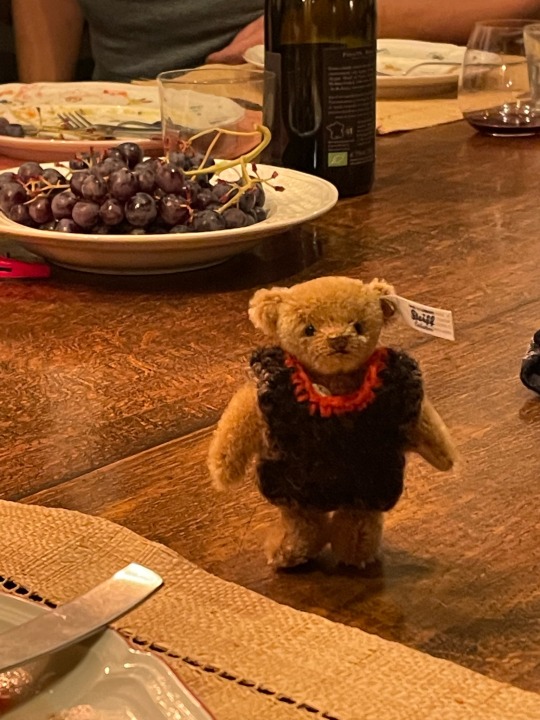
teeny tiny bear in a crocheted vest
11K notes
·
View notes
Text

Persian Carpet/ Lilian pattern/ Iran
#iran#carpet#art#luxury#luxury carpet#persian#persian carpet#persian rugs#rug#handcrafted#arak#winter#snow
804 notes
·
View notes
Text
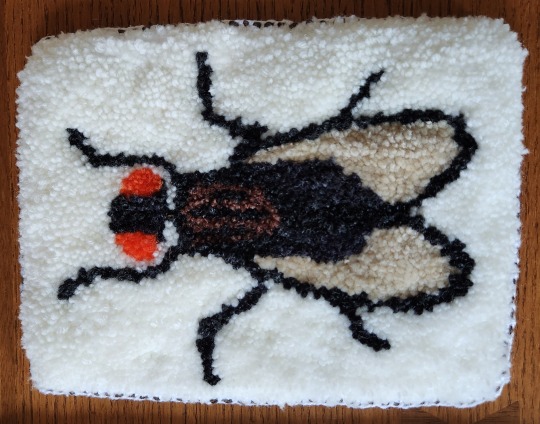
"little schemer", hand-punched, 2023
7.5" x 5.5"
#original art#rug punching#rug tufting#handcrafted#diy#handmade#fly#insect#art#needlework#needlecraft#bug#bugs#insects
6K notes
·
View notes
Text
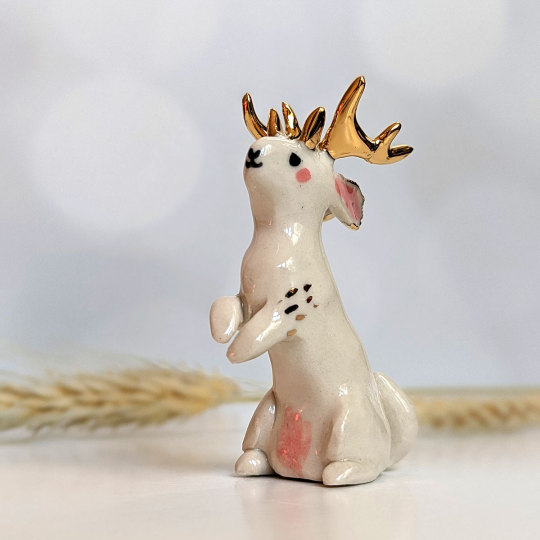
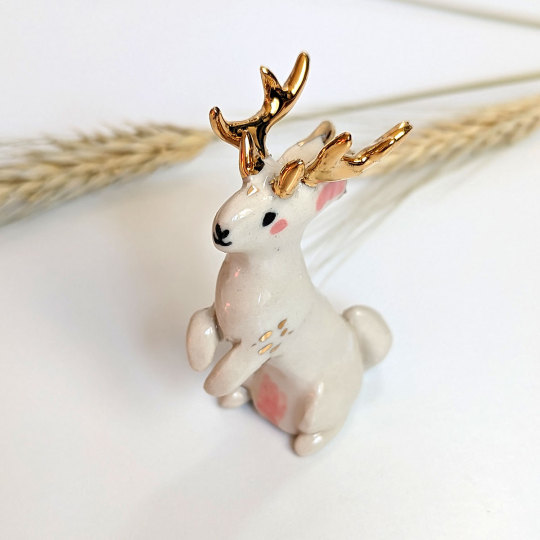


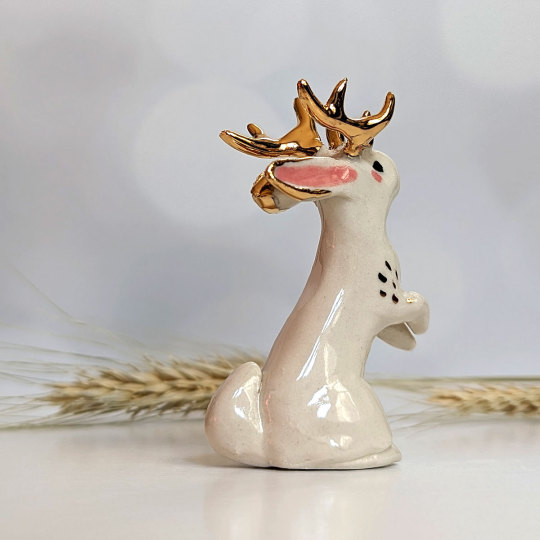
Tiny gold antlered jackalope 💖
#bunnybunny#ceramics#cute#artoftheday#handmade#art#porcelain#clay art#clay#clay sculpting#halloween#handmade pottery#handcrafted#jackalope#jackalopes#wolpertinger#rabbits#antlers#cryptid#kawaii#figure collecting#figurine
1K notes
·
View notes
Text
Getting another batch of the rainbow fabric worked on as of 1/5/24, going to use this batch to make a bunch more of the little zipper bags and some new *experiments* I'm hoping turn out cool!
Have some loom ASMR!
If you have weaving questions, leave them on this post and I'll do a video at the loom answering the best I can!
#the puppy was being a lil fussy in the background of this one#but shes 8 weeks old that is expected lol#weaving loom#weaving#fibercraft#handcraft#handweaving#handwoven#loom weaving#rainbow fabric#loom asmr#weaving asmr
3K notes
·
View notes
Text
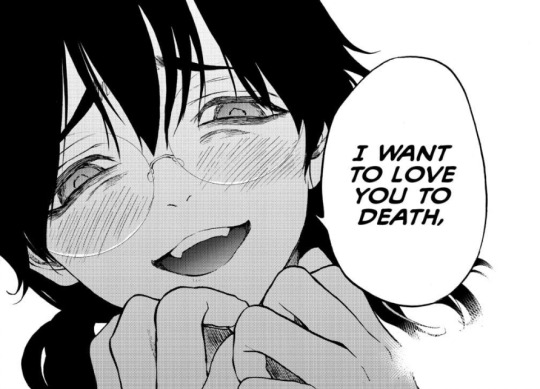
#(🗝️) —— handcrafted heart.#yancore#yanderecore#yanblr#yan blog#irl yandere#yandere manga#can you just die my darling#yandere
664 notes
·
View notes
Text

Day 829: 🐢 & 🤌
Ko-Fi | Patreon
4K notes
·
View notes
Last Seen Blogs

miikhydeafening
Bleeding.
gumpboom
As me Like

giormatsis
giormatsis

puppysiscon
( ^ , ^ )/

freakwiththeknifecollection
you were the sunshine of my lifetime