#step6
Photo

Just for Today: I'm ready to have my defects removed. I will let go and allow a loving Higher Power to care for me. . #humility #charecterdefects #step6 #step7 #faith #recovery #justfortoday #justfortodaymeditation #recoveryispossible #recoverywarrior #wedorecover #recoveroutloud (at Kitchener, Ontario) https://www.instagram.com/p/ClPTamDv_sn/?igshid=NGJjMDIxMWI=
#humility#charecterdefects#step6#step7#faith#recovery#justfortoday#justfortodaymeditation#recoveryispossible#recoverywarrior#wedorecover#recoveroutloud
0 notes
Photo

Rad moment today working a steps 6-7 exercise with my good friend and sponsor today! ☀️ #recovery #step6 #step7 #tothineownselfbetrue https://www.instagram.com/p/CfxFHDrPuyW/?igshid=NGJjMDIxMWI=
0 notes
Text
Random Real Thoroughbred: ONE STEP
ONE STEP is a brown horse born in Chile in 1919. Out of FINE ROSE.
Link to their pedigreequery page: https://www.pedigreequery.com/one+step6
0 notes
Text
Warning ⚠️ long post ahead
So it's a void method I tried...nd successfully entered the void though I didn't manifest anything coz I was so lost in the relaxation..
I'm gonna name this method as
TEM aka third eye method
So I've made this method and pls don't attack me if my method is similar coz this one I have came up on my own...
Step 1: lie down in the position you want.
Step 2: next imagine yourself surrounded by the light (any colour your can imagine that gives you peace)
Step 3: after you are done imagining yourself surrounded by light just think how would you feel when you wake up with your results (to boost your confidence)
Step 4: imagine you a gate that looks like an eye in front of your eyes.
Step 5: imagine yourself walk-in through the gate when you enter it COMPLETELY RELAX YOURSELF YOU ARE IN VOID...even if you can feel your body surrounding don't give a damn about it
Step6: the moment you enter the enter you enter void there is no going back even if you feel ur body surrounding just trick your mind to think it's an illusion and you are in void.
Step7: ignore all the symptoms you feel coz you are void you're calling the void from "within" so you cannot fail.
Step8: when you reach void affirm for your desires
Step 9: remember there is no failure even if you can feel your surroundings just have faith that when you open your eyes you've your desires.
And I'd recommend you to do some meditation or clear your thoughts just focus on your end goals .
Pls- I'd like to thank @rosellesworkshop @viol3tlavender @voidsuccess @cyberfeeelings for thier motivation it did really helped me a lot.
Remainder!!!
Pls you u can hv your desires without void too don't be desparate just think you are entering void for your own calmness. Because that's what actually matter.
MOTIVATION!!!¡¡¡
The moment you wake up from void you have your desires...so what's more big motivation than this......
Tysm for reading this~
Happy manifesting 🫧
-Iya ✨
#law of god#manifestation#law of assumption#success stories#void state#affirm#self concept#success story#manifestingmindset#self confidence#luxury lifestyle#manifestyourreality#law of manifestation#law of desire
2K notes
·
View notes
Text
Updated: How I edit my sims 4 screenshots (night-time edition)

A more detailed editing tut so you can understand my process as it may help you, i edited this relatively quickly and usually spend about 1-2hrs editing something...so let's goo.....
Before taking screenshots:
Help yourself as much as you can in-game, I always make sure there is some sort of light source in my pictures or something interesting that I can add to enhance something already there
Understand good/bad composition and add variety by using different angles
I take LOTS of photos just to end up with 1 or 2 good ones

I'll just be using photoshop for this, but i also like to use the procreate app as i'm more confident w it.
step1: I check if there are any major glitches or hard areas e.g, fingers elbows etc.. that have sharp points and pull them in liquify so they are smooth. Then use curves to change the contrast.

step2: *duplicates image* using the dodge and burn tools (keyboard shortcut: o ) i'll add emphasis to highlights and shadows (be careful with these as the dodge tool can ruin the image if used in excess) *merges image* (i duplicate and merge as i go, utilise using lots of layers so you can go back if you mess up/ want to change the opacity of an effect.)


step3: making light sources POP. *new layer* change blending mode to overlay or soft light and choose a colour you like.

step4: *new layer* draw hair strands. i just use a basic round brush in photoshop and change the hardness or i'll use a sharp caligraphy type brush depending on my sims hair type. (i try not to overdo it as i like maxis hair and don't want it to look too realistic)

step5: i would then add a new layer and set the blending mode to multiply to add more shadows, but i don't feel like i need to at this point.
step6: *duplicates image* go to filter > camera raw filter, i change the "light" and "curve" panels, i like green tints in my screenshots especially the night ones. (this is where all the magic happens really so just adjust all the channels to your liking, lightroom is also really good to use)

step7: *create new layer* blending mode: screen or linear dodge (add) / makeup and finishing touches! - for this look i'll get stars and glitter pngs off google or unsplash same for the smoke, though if i'm using procreate they have free brushes for that :')

step8: add light leaks as they add some fun dynamic lighting and textures to your screenshots. (i also flip my image horizantally [image > image rotation > flip canvas horizontally] whilst editing as it's like a "fresh pair of eyes" when you've been editing for a while so you can see what looks off)

final step: merge all the layers (though i do merge along the way once i'm happy with something) go to filter > sharpen > smart sharpen. I leave it as the default setting.
extra step if u want: for party pics i might add chromic abberation here is a 60 second tutorial on youtube it makes the pic look cool and trippy.
And you're done!! congrats on surviving. if you have any questions please send them in my ask box so others can see and get help too.
140 notes
·
View notes
Text
Pizzettes
Not to be confused with wafer-thin waffled pizzelles, these brownie-esque pizzettes are just the opposite: rich and fudge-like with a heady undertone of cinnamon and clove.

Makes about 20
COOKIES
¾ cup raw skin-on almonds
1½ cups (188 g) all-purpose flour
1 tsp. baking powder
½ tsp. Diamond Crystal or ¼ tsp. Morton kosher salt
½ cup (1 stick) unsalted butter
¾ tsp. ground cinnamon
½ tsp. ground cloves
½ tsp. ground nutmeg
½ cup (100 g) granulated sugar
¼ cup Dutch-process cocoa powder
1 large egg
1 large egg yolk
4 oz. bittersweet chocolate chips (about 1 heaping cup)
1 tsp. finely grated lemon zest
1 tsp. finely grated orange zest
GLAZE AND ASSEMBLY
2 oz. bittersweet chocolate
2 tsp. unsalted butter
⅔ cup (75 g) powdered sugar
Pinch of kosher salt
⏩Get a FREE EBOOK With 200 Recipes Authentic Italian Food HERE⏪
Preparation
COOKIES
Step1
Place racks in upper and lower thirds of oven; preheat to 350°. Toast almonds on a rimmed baking sheet, tossing once, until slightly darkened in color and fragrant, 7–10 minutes. Let cool, then finely chop. Set aside. Increase oven temperature to 375°.Step
Step2
Meanwhile, whisk flour, baking powder, and salt in a medium bowl. Melt butter in a medium saucepan over medium heat. Stir in cinnamon, cloves, and nutmeg. Remove from heat and let sit 5 minutes to infuse. Step
Step3
Whisk granulated sugar and cocoa powder in a large bowl. Pour in spiced butter, scraping pan so you don’t leave any spices behind, and whisk vigorously to combine. Add egg and egg yolk; whisk vigorously to combine. Mix in dry ingredients, then almonds, chocolate chips, lemon zest, and orange zest. Turn out onto a clean surface. Divide in half, then roll each half into a log about 1½" wide. Flatten logs to 2" wide and slice on a diagonal into 1"-wide cookies. Divide between 2 parchment-lined baking sheets, spacing at least 1" apart.
Step4
Bake cookies, rotating baking sheets top to bottom and front to back halfway through, until firm around edges but still soft in the middle, 8–10 minutes. Let cool.
GLAZE AND ASSEMBLY
Step5
Melt chocolate and butter in a small heatproof bowl set over a small saucepan of barely simmering water (do not let bowl touch water), stirring occasionally, or melt in a small microwave-safe bowl in a microwave in 20-second bursts, stirring between bursts. Add powdered sugar, salt, and 2 Tbsp. boiling water and whisk until glaze is smooth and glossy.
Step6
Dip tops of cookies into glaze and let sit, glaze side up, on a wire rack until glaze is set, about 2 hours.
Step7
Do ahead: Pizzettes can be made 5 days ahead. Store airtight at room temperature, or freeze up to 1 month.
...............................................Keep Reading.............................................
4 notes
·
View notes
Text
step1: make a karma system in your story
step2: create a hospital in that story that helps you in order of karma rating
step3: force the main character to make horrible choices in an attempt to save their friends
step4: have the mc horribly injured and refused treatment by the hospital due to her past choices
step5: make the mc go completely bad in a vain attempt to change the world's narrow view, unexpectedly making the common people have more trust in the world's pre-existent view due to their current actions reflecting poorly upon their goals and ideals
step6: make the mc furious at the world wanting to destroy it as everything goes to shit
step7: create a second story in which the mc fights an unknown evil trying to destroy the world
step8: flesh out the second story
step9: connect the two stories using a direct quote from the first story as the villain's last words
step10: reflect on why you are the way you are, and making yourself go through this
3 notes
·
View notes
Note
How do you fall down the stairs? simple.
step 1
step2
step3
step6
step12.
Thank you for coming to my tedtalk.
-Rabbit
Sorry i didnt get to read past line 2 because as i opened my phone i fell down the stairs
5 notes
·
View notes
Text
Step-by-Step Guide to Kitchen Faucet Installation in Spring Lake Homes
Installing a new kitchen faucet can be a quick and satisfying DIY project that refreshes your space and improves functionality. Whether you're in Spring Lake or anywhere else, this guide is designed for homeowners and DIY enthusiasts ready to tackle kitchen faucet installation spring lake.
By following these straightforward steps, you can ensure a successful kitchen sink repair in Spring Lake or anywhere your cozy home might be.
Preparing for Installation
Before you begin, gather all the necessary tools and materials. You'll need an adjustable wrench, plumber's tape, a basin wrench, and of course, your new kitchen faucet.
Ensure the faucet you’ve chosen is compatible with your sink's layout – be it a single hole or a multi-hole configuration.
Step 1: Turn Off the Water Supply
Locate the valves under the sink that control the water supply to the faucet. These are typically chrome or plastic knobs. Turn them clockwise to shut off the water. Once off, turn on the old faucet to release any remaining water and pressure from the lines.
Step 2: Disconnect Water Lines
Place a bucket underneath to catch any dripping water. Use the adjustable wrench to disconnect the water supply lines from the faucet. Keep a towel handy for any excess water that spills out.
Step 3: Remove the Old Faucet
With the basin wrench, loosen the nuts securing the old faucet under the sink. These may be tight and difficult to reach, but patience and the right tool will get the job done. Once loosened, remove the faucet from above the sink.
Installing the New Faucet
Step 1: Clean the Mounting Surface
Before installing your new faucet, clean the area where the old faucet sat. Remove any grime, sealant, or rust to ensure a smooth installation of your new kitchen fixture.
Step 2: Position the New Faucet
Thread the lines of your new faucet through the mounting holes in your sink. Most kitchen faucets come with a built-in gasket to seal the base. If yours does not, apply plumber’s tape or silicone under the deck plate for a water-tight seal.
Step 3: Secure the Faucet
From under the sink, screw on the washers and mounting nuts that came with your new faucet. Tighten them by hand and then with the basin wrench, being careful not to overtighten and damage the fittings. Ensure the faucet is aligned correctly above the sink before final tightening.
Step 4: Connect the Water Supply Lines
Wrap plumber's tape around the threads of the water supply valves for a leak-free connection. Reconnect the supply lines to the faucet, matching hot to hot and cold to cold. Use the adjustable wrench to tighten these connections securely.
Step 5: Turn the Water Supply On
Slowly turn the water supply valves counterclockwise to restore the water. Check both the top of the sink and the connections underneath for any signs of leaks. Adjust as necessary.
Step6: Remove the Aerator and Test
Before using your new faucet at full flow, remove the aerator (if your model has one). This is usually the piece where the water comes out.
Turning on the faucet without the aerator allows any debris trapped in the lines to flush out without clogging. After a few minutes, turn off the faucet, reattach the aerator, and you’re done!
Final Thoughts
Congratulations, you’ve successfully completed a kitchen faucet installation in your Spring Lake home! Not only have you added a fresh element to your kitchen's appearance, but you've also increased the value and functionality of your space. DIY home improvement projects like kitchen sink repair in Spring Lake don’t just save money; they offer a rewarding sense of achievement.
Are you ready for more DIY repairs and installations? Remember, every project you undertake enhances your skills and confidence in home maintenance. If you encounter any difficulties or prefer professional assistance for your kitchen faucet installation, don't hesitate to reach out to a local Spring Lake plumber. Your home is your sanctuary; keeping it in top condition is always worth the effort.
Share this guide with fellow Spring Lake residents or anyone eager to learn about DIY kitchen faucet installation. It’s rewarding, fun, and an excellent way to understand and appreciate the workings of your home better. Happy DIY-ing.
#DIY repairs and installations#Kitchen Faucet Installation#Kitchen Faucet Installation Nj#Kitchen Faucet Installation Spring lake
0 notes
Text
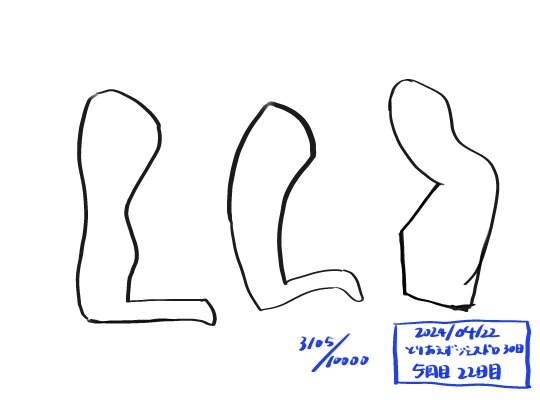
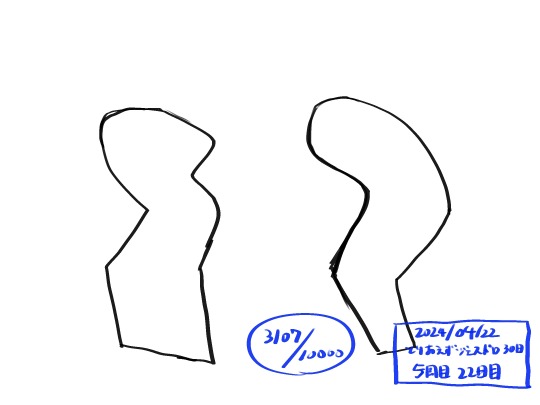
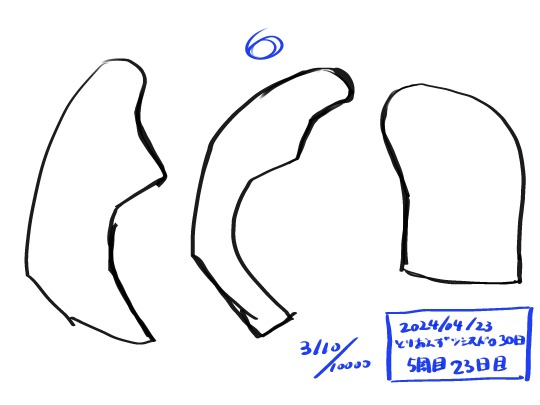
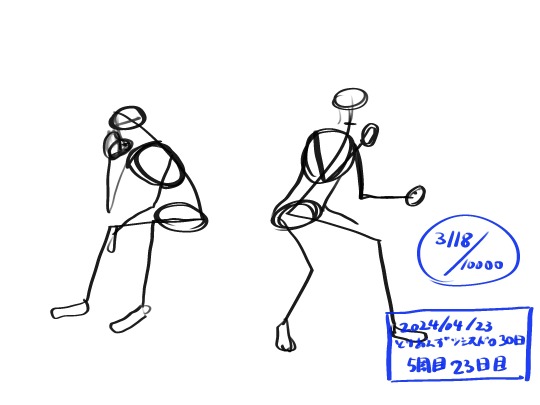
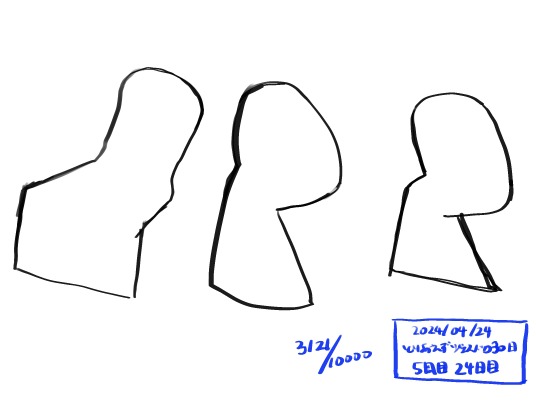
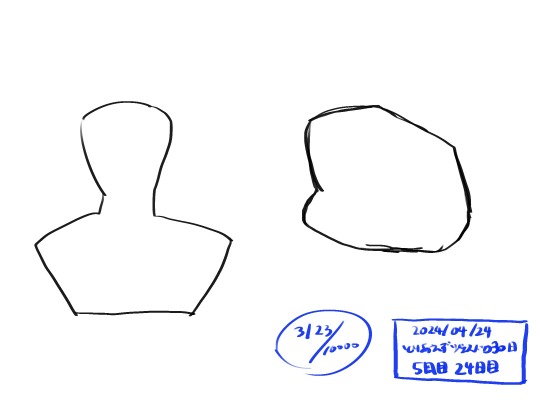
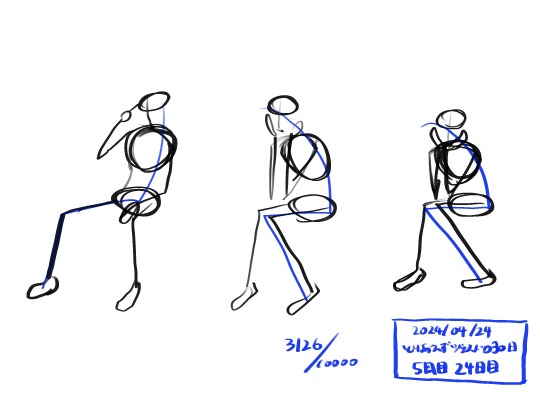
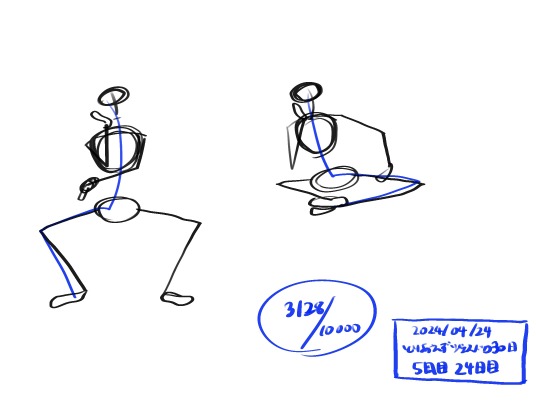
20240421-0424 とりあえずジェスドロ30日5周目 Step6 ビッグシェイプ(3128/10000)
ビッグシェイプの周
3日目と4日目はビッグシェイプを描いたあと、同じリファレンスで豆もやしを描いてみる試みをしました


0 notes
Text

How to Draw an Apricot Flower ? Step1: Laying the Foundation, Step2: Add apricot flower, Step3: Add Detail, Step4: Add Stamens, Step5: Add Stems, Step6: Color!
#HowtoDrawanApricotFlower
#ApricotFlower
#coloringonlinefree
https://coloringonlinefree.com/how-to-draw-an-apricot-flower/
0 notes
Text
Banana Bread Recipe for High Altitude
Introduction to High Altitude Baking
Hey there, fellow baker! If you're soaring high in the mountains and craving some delicious banana bread, I've got just the recipe for you. Living at a high altitude means adjustments in your baking game, but don't worry, I've got you covered.
Baking at high altitudes presents unique challenges due to changes in air pressure and humidity, affecting the outcome of baked goods. Among the recipes that require adjustments, banana bread stands out for its popularity and adaptability.

Understanding Banana Bread
Importance of Banana Bread
Banana bread holds a special place in many households as a comforting treat that repurposes overripe bananas into a delicious snack or dessert.
Challenges of High Altitude Baking
At higher elevations, reduced air pressure and moisture levels can lead to unpredictable results in baking, including overly dense or dry banana bread.
Ingredients for High-Altitude Banana Bread
Flour and Leavening Agents
Choosing the right flour and adjusting leavening agents are crucial for achieving the desired texture and rise in high-altitude baking.
Bananas and Moisture Content
Ripe bananas not only provide sweetness but also contribute to the moisture content of the bread, which is vital for preventing dryness at altitude.
Sugar and Sweeteners
Balancing sugar and other sweeteners ensures the perfect level of sweetness while enhancing the overall flavor profile.
Fats and Flavor Enhancers
Incorporating fats like butter or oil adds richness to the bread, while flavor enhancers such as vanilla extract or spices elevate its taste.
Adapting the Recipe for High Altitude
Adjusting Flour Ratios
Reducing the amount of flour helps counteract the dryness typically experienced at higher altitudes, resulting in a moister loaf.
Altering Leavening Agents
Increasing the amount of baking soda helps compensate for the reduced effectiveness of leavening agents in thin air, promoting proper rise and texture.
Managing Moisture Content
Adding an extra banana or a splash of buttermilk helps maintain the necessary moisture level, preventing the bread from becoming too dry during baking.
Ingredient
Sure, here is the ingredient table with quantity, quality, and the making process step by step for the high altitude banana bread recipe:
Ingredient
All-purpose flour
Baking soda
Salt
Ripe bananas
Unsalted butter
Granulated sugar
Large eggs
Vanilla extract
Buttermilk
Chopped nuts (optional)
Chocolate chips
Ground cinnamon
Steps to Make Banana Bread Recipe for High Altitude:
Step1. Preparation:
First, warm up the oven to 350°F (175°C).
Then, coat a 9x5 inch loaf pan with butter or cooking spray.
Step2. Mix Dry Ingredients:
In a big bowl, mix the all-purpose flour, baking soda, and salt until they're all combined well.
Step3. Prepare Bananas:
Peel the ripe bananas and place them in a separate bowl.
Mash the bananas using a fork until smooth and no large chunks remain.
Step4. Cream Butter and Sugar:
In another mixing bowl, cream together the softened unsalted butter and granulated sugar until light and fluffy.
Step5. Incorporate Wet Ingredients:
Could you put the eggs, one at a time, into the butter-sugar mix, and make sure to beat well after adding each one?
Stir in the mashed bananas and vanilla extract until evenly combined.
Step6. Combine Wet and Dry Ingredients: Gradually add the dry ingredients to the wet mixture, alternating with the buttermilk, beginning and...Continue. Click here
1 note
·
View note
Text
How to Install Dazn on Smart TV?
Make your sports streaming more exciting with our guide to install the DAZN app on your Smart TV.
Usually, the little ones and youngsters spend a lot of time on sports and gaming. As technology grown-up, we can watch live sports via streaming devices. And also, you can connect the streaming device to your Smart TV.
Is there any app you know to get OTT sports like OTT movies? If yes, you might have aware of Dazn. If not, look at this article to explore more about the Dazn application.
Here, you can stream all the sports matters under one roof. Just explore the Dazn with dozens of sports content. Here we start to explore.
How to Watch Dazn on Smart TV?
Check out your Smart TV brand listed on the above-mentioned devices. If yes, you can access the residential Dazn service on your Smart TV. Following that, proceed with the steps below.
Step1:
Initially, Turn On your Smart TV and connect it to an active internet source.
Step2:
Move to the Apps section and launch the App Store on your TV.
Step3:
Use the Search icon to find the DAZN app.
Step4:
Choose the desired app from the Search results and go to the app installation screen.
Step5:
Click the Install button and wait until the app gets installed on your TV.
Step6:
Launch the DAZN app, sign in with your credentials, and start watching your favorites.
Furthermore, you can check our detailed article for alternative methods to watch DAZN on Smart TV.
0 notes
Link
0 notes
Text
Understanding Round Manhole Covers and the Step-by-Step Benefits of Their Usage
Introduction:
Beneath the surface of our city streets lies a concealed world of essential utilities, accessed through unassuming circular lids known as round manhole covers. These structures, designed with purpose and precision, play a critical role in urban infrastructure. In this exploration, we unveil the essence of round manhole covers, elucidating what they are and detailing the step-by-step benefits derived from their usage in maintaining and managing underground networks.
Understanding Round Manhole Covers:
A round manhole cover is a protective lid placed over an opening in the ground, providing access to the underground infrastructure that includes sewer systems, water mains, telecommunication lines, and gas pipelines. This cover, typically made from materials such as cast iron or concrete, is characterized by its circular shape – a design choice rooted in centuries of engineering wisdom, ensuring the cover cannot accidentally fall into the opening, irrespective of its orientation.
Step-by-Step Benefits of Using Round Manhole Covers:
Step1: Access and Inspection:
Round manhole covers serve as entry points for maintenance crews and inspectors. The circular lids are designed for easy lifting, granting authorized personnel access to the utilities below. This facilitates routine inspections and timely identification of any issues within the infrastructure.
Step2: Protection Against External Elements:
One of the primary benefits is the protection these covers provide against external elements. The round shape, combined with secure fitting, acts as a barrier, preventing debris, water, and unauthorized access from entering the utility spaces below. This safeguarding ensures the longevity and optimal functioning of the underground infrastructure.
Step3: Ease of Installation:
Installing round manhole covers is a straightforward process. The circular design allows for easy alignment with the opening, simplifying the installation procedure. This ease of installation contributes to the efficiency of urban infrastructure projects.
Step4: Durability and Load-Bearing Capacity:
Round manhole covers are engineered to endure the weight and stresses imposed by vehicular traffic. The materials used, such as cast iron, are chosen for their durability and load-bearing capacity. This ensures that the covers can withstand the rigors of daily urban life without compromising their integrity.
Step5: Safety Measures:
The usage of round manhole covers is accompanied by stringent safety measures. Proper training and adherence to safety protocols are essential for workers involved in handling these covers. Additionally, municipalities implement safety measures to protect pedestrians and drivers, including secure markings around areas undergoing maintenance.
Step6: Innovation for Smart Infrastructure:
Technological advancements have ushered in a new era for round manhole covers. Some covers now come equipped with smart sensors to monitor the condition of utilities. This innovation enables real-time data collection, aiding in predictive maintenance and contributing to the overall resilience of urban infrastructure.
Conclusion:
In conclusion, round manhole covers are more than mere lids; they are gateways to the vital infrastructure that powers our cities. Understanding their purpose and appreciating the step-by-step benefits derived from their usage unveils their significance in maintaining a resilient and efficient urban environment. These circular sentinels silently contribute to the seamless functioning of our cities, embodying a harmonious balance between engineering ingenuity and practical functionality.

0 notes
Last Seen Blogs

beutiful00ankara-blog
Best TV

chez-beruthiel
Chez beruthiel

herbanic-india
Herbanic India

coisiar
Adequada

rupicjp
Rupic