#fermenting
Text
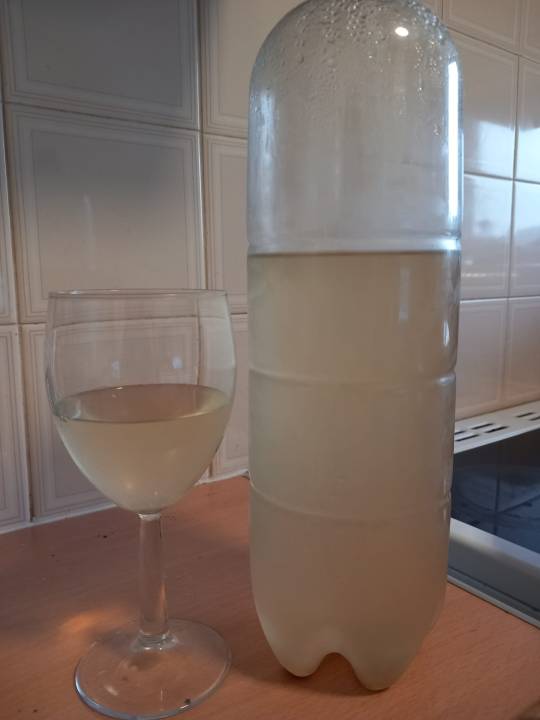
Elderflower champagne!
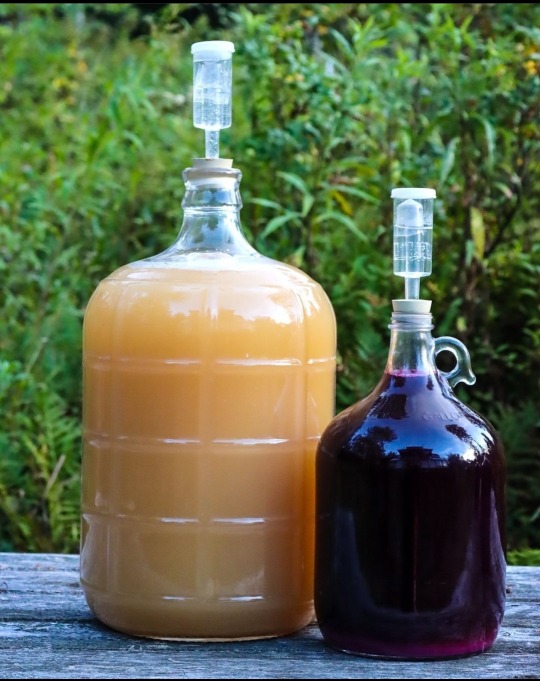
Three weeks of fermenting later, this is finally ready to taste and it's delicious - light, floral, carbonated, and only slightly alcoholic (you can taste that it's not strong, and elderflower champagne tends to cap out at about 4% if you don't add extra yeast).
This recipe is super simple - you add heads of elderflower to cold water, sugar and lemon and let the tea sit for 24 hours. It can then be strained into clean, plastic bottles and left to ferment for a few weeks, depending on how warm it is. You can add extra yeast if you want a more alcoholic beverage, but the natural yeasts on the elderflowers are enough to ferment for a fizzy, low-alcohol drink.
You do need to 'burp' the bottles (release the cap slightly to let some air out) every so often, to avoid the pressure splitting the plastic - this is why it shouldn't be done in glass bottles, unless you have an airlock to let out the gas, or you'll get explosions!
Some sediment will gather at the bottom - this is a normal byproduct of the yeasts and is harmless, but unpleasant if you shake the bottle too much and get it in your glass. I had one out of the three bottles actually go mouldy, which was a shame, but the other two have worker perfectly.
I cooled it in the fridge for a few hours before tasting it, and I'm so glad I put the time into it!
150 notes
·
View notes
Text
Here's your reminder to burp your fermentation projects if they're the kind that needs that sort of thing.
13 notes
·
View notes
Text

Made some Kimchi!
#kitchen witch#cottage witch#baby witch#green witch#witchblr#witchcraft#witch#beginner witch#kitchen#fermenting#kimchi#first try#made a couple jars to eat currently and I have more in a fermenting bin that will sit longer
9 notes
·
View notes
Text
Hot sauce is pretty fun to make!
You can blend peppers, onion, garlic, and some spices together for a simple base. Then add some live whey, and put it all in a jar in a lukewarm and dark space in your kitchen away from a window works well, it just shouldn’t get too cold).
Every day “burp” the jar (open the lid to let excess gas out) then every 3-ish days give it a stir. If everything goes well, there should be bubbles forming in your mash. That’s a good thing! Keep an eye out for any mold that grows on the surface, the stirring should prevent it, but if you see any spots forming then toss it and try again! You’re building a biome of living creatures, so it’s not uncommon to end up with more than one thing growing.
After about a week and a half to two weeks, you should have a nice hot sauce! Take the hot sauce and either strain it from the mash, mixing it with vinegar to make an un-aged Tabasco alternative (Tabasco hot sauce is aged at the least 3 years). Or blend it again to make a smooth creamy sauce like sriracha!
After that if you save some of the hot sauce you can use it as a starter for later batches. Add your starter to a bowl of salted shredded cabbage to make a spicy sauerkraut. Experiment with different flavors, if you do everything but use tomatoes instead of peppers you’ll end up with a good base for ketchup (you’ll have to reduce it after in a slow cooker though for the final product).
You can also dry the leftover mash if you strain it and use it as a seasoning! There’s so much that can be done!
7 notes
·
View notes
Text

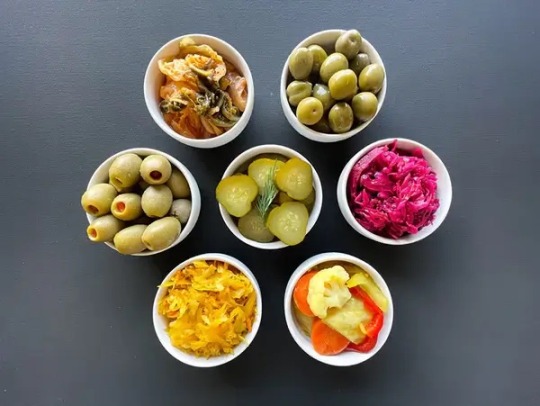


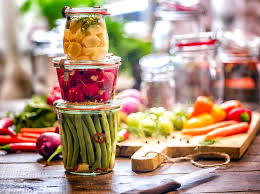
Here’s our ultimate guide to the healthy hobby of fermenting foods.
One of the things we love to do at the off grid cabin with a fresh veggie haul is create some incredibly delicious and healthy preserved foods. The best part of this style of fermenting is that you probably already have the supplies to get started and it’s so easy. No power, special equipment or skills required.
#fermentedhotsauce#fermented vegetables#fermented foods#fermentation#fermenting#fermenteddrinks#canning
3 notes
·
View notes
Text


Still making stuff just been so busy making stuff (and studying)
But I'm on Fall break now <3
On the left, a fermenting crock. On the right, a vase. Both were wood fired to cone 10, with some reduction.
The fermenting crock was dipped into a glaze called Wu's Blue. The handles on the vase have the same glaze. The base of it is a glaze called Green Easter Jasper. The part that's peeling is from Wonderglaze Lime Green
6 notes
·
View notes
Text

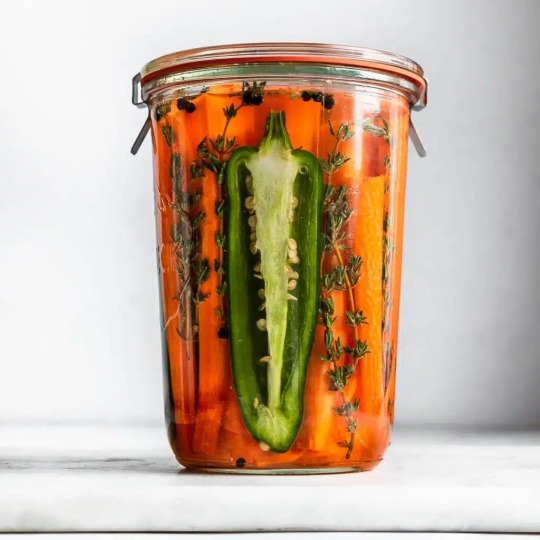
New batch of pickles just dropped!
I had one big zucchini left that I didn't know if I'd get eaten up soon enough, so why not. It still feels very strange turning out a jar or two of pickles at a time, but that's apartment living for you. May as well work with what you've got.
Today that also included a big carrot, because why not.
The direction I decided to go in was pretty close to this:
Only, I also threw in one pretty generic pickling spice blend, hillbilly style. Mustard seed, peppercorns, a few allspice berries, red pepper flakes (before I remembered we have some whole chiles stashed in the freezer), bay leaf. That got sliced ginger and chopped frozen garlic, since I forgot we were out of fresh bulbs.
The turmeric is still sitting on the bottom there and hasn't colored the brine yet, btw.
A few green tea leaves have worked really well in the past for a touch of tannins to help keep things crispy, without adding any strange flavors. Here's hoping the leaf Assam black tea--which was the best option we had today outside of bags--won't get overpowering. I thought these pickles might be spiced enough for the tea not to overwhelm, but I guess we'll see.
Considering I am still not so used to working with the coarse salt we have, this time I did actually go ahead and get the weight of the combined veggies and water, to add 3% of that in salt. Weight to volume can vary an awful lot depending on the crystal size you're using, and may as well play it safe. IME summer squash can also be touchier than some other vegetables, so yeah.
I cut part of the carrot into sticks, to help hold those sliced vegetables down better under the Kilner pickling weight meant for a narrower mouthed jar. Wedged-in carrot can work pretty well to keep everything else from floating up to the surface of the brine and molding, even if you don't use a weight. One minor lifehack I figured out through some kitchen MacGyvering years ago.
Originally, I was planning to use one of those Kilner jars with an airlock lid--which won't fit anything else in the house 🙄--but the one I had out to use escaped to the floor and broke. (Leading to some fun cleanup last night, since it happened to be mostly full of some old dill pickles Mr. C made last year and promptly forgot about in a cabinet. I took it to dump the contents down a toilet, so thankfully the jar did meet its end on the tiled bathroom floor rather than wood. I am still getting whiffs of Swamp Pickle in there, though.)
Anyway, I said fuck it, and just grabbed one of my old trusty saved jars today. This one is actually from some Polish brine dills. An airlock provides some extra insurance against anything you don't want getting in, but basically any jar will work fine for fermented pickling. Just make sure everything is well covered with brine, leave the lid a little loose to avoid jarsplosions from the CO2, and you should be good to go.

And, going! Banished to one of the pantry cabinets for probably a couple of weeks. Definitely in a container to catch any brine overflow once it starts bubbling away, especially with no more headspace than I left in the jar. 😒
I am planning to check it periodically for the first few days, and also scoop out any floating bits of seasonings or anything else. Pieces of the sliced onion are already wanting to bob up around the edges of the weight, because of course they are.
#food#pickling#fermenting#clatterbane's pickle factory#slapstick edition#as usual#zucchini#carrots#zucchini pickles
11 notes
·
View notes
Text

It’s now a weekly habit for me to make my own plant milk as it takes about 5 minutes with the aid of a good blender. I’d never made chickpea milk before let alone a curd/yogurt though.
I found a very easy to follow along recipe video on YT by Priyan Kan Jain but me being me I couldn’t just make it, I had to get an Indian Curd Pot, literally from India. Why do I do this to myself (I blame the ASD).
I will say this it was worth the investment, practically got it for free in the end (long story) and it makes all the difference to getting the desired results.
The recipe is simple, easy and overnight it does all the magic so you have a curd or yogurt by morning.
You can keep a little of the curd liquid back as a starter for every batch you do after your first. I feel like I could do with a mini fridge for all my different starters 😂 a lack of space saves me from all my special interests taking over entirely.
youtube
#vegan#food#organic#fermenting#plant based#crueltyfree#govegan#healthy#fermentation#curd recipe#vegan yogurt#indian curd pot#No nuts#No soya#Only 1 ingredient#Priyan Kan Jain#chickpeas#chickpea curd#Youtube
3 notes
·
View notes
Text
the art of metaphor is the art of synesthetic collocation
#still getting a hang of it#sometimes it takes a bit of ruminating#fermenting#to build a sentence#that scratches your brain#just so
2 notes
·
View notes
Text
"I run from the liars, the fuel on the fire"
["I run from the liars, the fuel on the fire"]

"I know I created myself"
Links:
DNI/BYF(link) - Wills/Wonts(link) - Taglist(link) - Replycons(link)
"I know I can't fight the sad days and bad nights"
Theme Lyrics:
Cure For Me - AURORA
"But I never asked for your help"

10 notes
·
View notes
Text
14 notes
·
View notes
Text
A bunch of people just started following me, so I just want you to know- I don't just post politics. My blog is an amalgamation of weird ass eclectic shit. I mean, to me it seems like there's a central theme, probably, but I think from the outside that's pretty opaque.
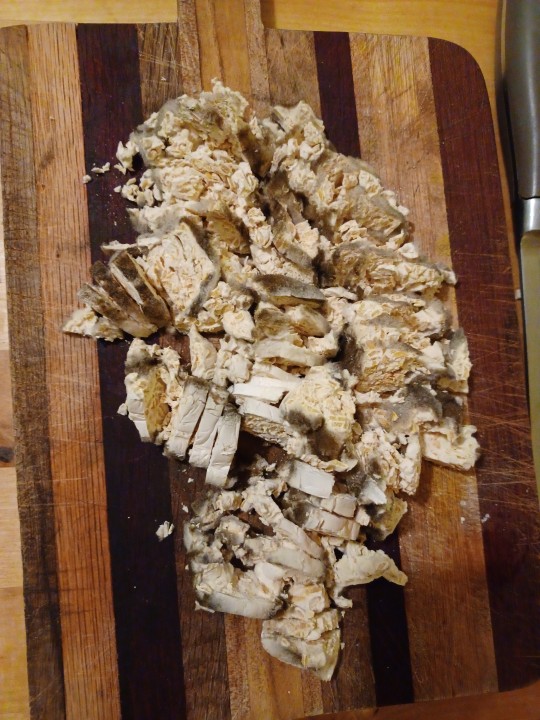
Anyway, here's how to make tempeh starter, in case like me there's someone out there who wants to get started, but saw the price of starter online and was like, that's not economical! I did start by buying some, but now I just keep it going myself, which is very economical.
1. Slice off a couple strips from a fresh batch of fresh tempeh, let them fully mature until you see the black stuff. The black stuff is the mature, sporulating fungi. At this point, I stick it in my dehydrator, because I live in a very moist climate. If you live somewhere where towels dry on their own, you might not need a dehydrator.
2. Weigh and then chop up the slices once they're very dry and feel light:

3. Either use a mortar and pestle or a food processor to grind it up as small as you can. Then, add double the weight of the tempeh of white rice flour (that acts as fungi's first food when you start a batch):
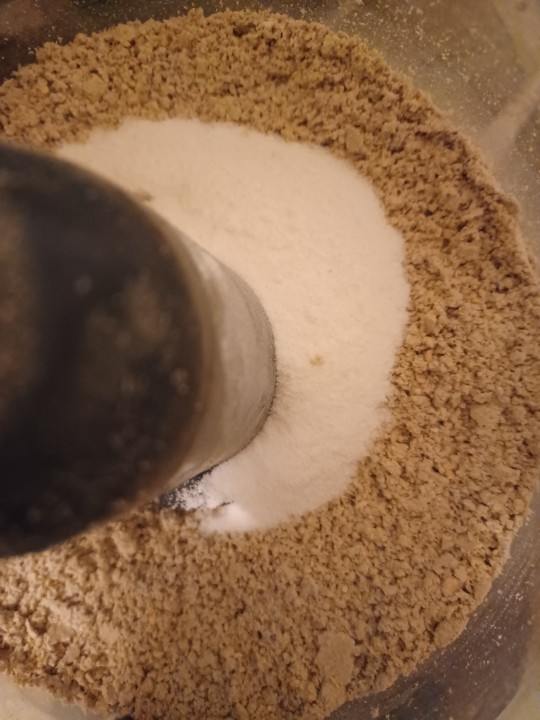

4. Sift out the chunks & put in a jar for later use:

Seeing as you need a teaspoon for each 500g batch, that's pretty economical.
#tempeh#diy tempeh starter#frugal vegan#fermenting#it's waaaaaaaay better tasting than what i can buy in the store
30 notes
·
View notes


Text
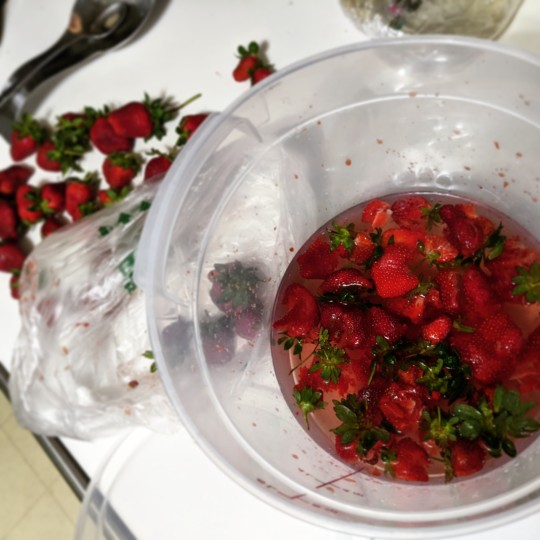
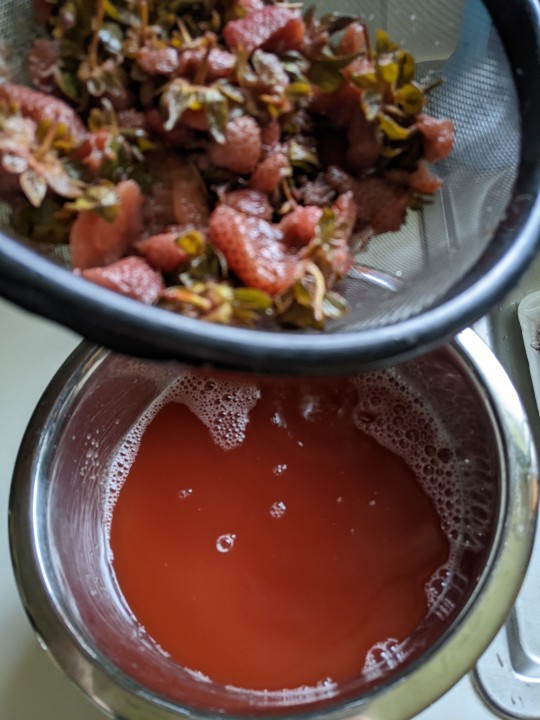
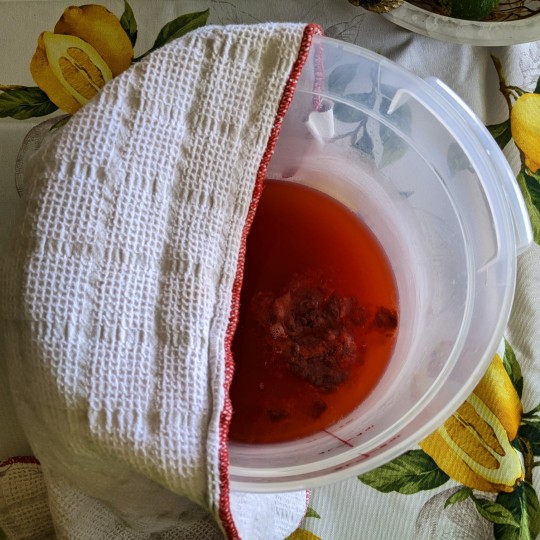

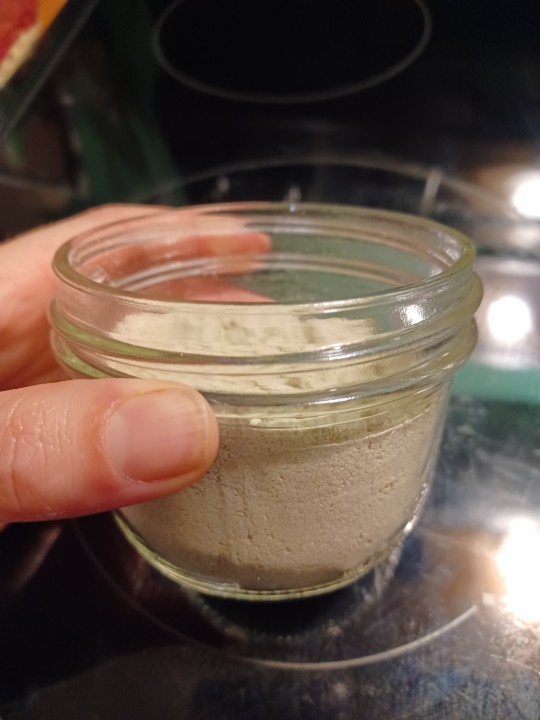
Here she is! Homemade Strawberry Vinegar 🍓
Smells slightly of strawberries, and has a very mild taste. It could get more tangy over time, but I'm happy with it either way. Now to make some fancy summer salads lol.
#personal fitblr#fitblr#health & fitness#healthblr#fitspo#fermenting#fermentation#homemade#made from scratch#strawberry vinegar#preserving#canning#jarring#self sustainability#self sufficient living#sustainability#urban homesteading#homesteading#cottagecore#farmcore
62 notes
·
View notes
Text
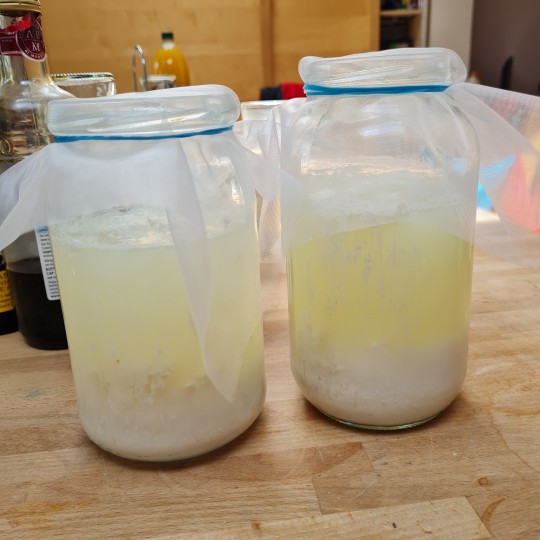
[Image description in alt text]
OK, so
I have started doing bokashi composting to handle food waste from the restaurant I work at. In my first week I collected 20kg over 4 days! This form of composting starts with fermentation, using bacteria that's typically stored in a bran format. That stuff gets pricey fast! So I am making my own effective bacteria mix.
The first stage was fermenting rice water. Second stage is adding that water to milk and making it separate. This is where we are now. The time has come to filter the curds from the whey and take the whey to the next stage by adding brown sugar or molasses. I have treacle so I'm gonna use that.
The curd can be formed into cheese! So that's another thing to do today.
42 notes
·
View notes
Text

Let this day stand as a reminder that when you tell yourself to go slow because you're feeling bad, you actually accomplish a lot!
Apple Cider Vinegar allready to sit and continue to ferment.

Actually made whey properly!

Did a tiny bit of upscaling in my kitchen by putting a lamp on my refrigerator. Just made things cozy.


I took a big break while my bread was rising, took a nice long lunch break, enjoyed folding fresh laundry warm from the dryer, and got a bunch of budget work done. I also got a rough outline hammered out for a new HearthKeepers article.
All in all, it was a productive day that didn't swamp me. Hopefully I'll feel stronger tomorrow and won't have to be quite so careful.
#homemaking#domestic artist#hearthkeeper#tending hearth and home#lighting the way back home#homemaking productivity#going slow#slow but steady#fermenting#kitchen stuff#a lamp on the fridge
4 notes
·
View notes
Last Seen Blogs

autohondarumors-blog
Untitled

laceylon-tours-blog
Untitled

angel-status
♡︎𝖕𝖎𝖘𝖈𝖊𝖘 𝖛𝖊𝖓𝖚𝖘♡︎

pennylaneicons-blog-blog
blue suburban skies

lavender-void
how do i function .?