#PS asks
Note
How do you make your gifs?
Hello hello! I love talking about gifmaking, so thank you for giving me the chance to ramble.
Instead of a detailed step-by-step walkthrough, I will link tutorials and resources written by the wonderful Tumblr creators on here along the way. Everyone has their method and preferences, and there’s no right or wrong way to make gifs. I’m going to share techniques and resources I picked up along the way that work best for me—they may or may not be suited to your preferences, but I hope you’ll find some helpful things here.
(Warning: screenshot/image heavy)
USEFUL TUTORIALS AND RESOURCES
Here are some tutorials and resources that I found very useful when I got back into gifmaking:
Gifmaking tutorial using video timeline by @hope-mikaelson is identical to my own process
Gifmaking and coloring tutorial by @kitty-forman, whose process is very similar to my own
Giffing 101 by @cillianmurphy, an incredibly detailed tutorial that covers everything you need, including a step-by-step guide to using HandBrake
Gifmaking and coloring tutorial with 4K HDR footage by @sith-maul, another incredibly detailed tutorial with many useful tips
Gifmaking tutorial by @jeonwonwoo, incredibly comprehensive and covers so many aspects of gifmaking from basics, sharpening, captioning, and text effects
Gifmaking/PS tips and tricks by @payidaresque
Action pack by @anyataylorjoy, the Save action is especially a true life-saver
@usergif and @clubgif are amazing source blogs with many tutorials on gifmaking, color grading, and gif effects, can’t be thankful enough for the members for their work curating and creating for these blog!
TOOLS
Adobe Photoshop CS6 or higher, any version that supports video timeline. @completeresources has many links to download Photoshop, have a look!
Photopea is a free alternative to Photoshop, but it has a slightly different UI, check out these tutorials for gifmaking with Photopea
HandBrake or any other video encoder, especially if you’re working with .MKV formats
4Kvideodownloader for downloading from YouTube, Vimeo, Instagram, etc.
OBS Studio or any other similar screen capturing software. To prevent duplicate frames in gifs that prevents your gifs from looking smooth, try to match the recording frame rate (FPS) with the source.
IMPORTING FOOTAGE AND WORKING IN VIDEO TIMELINE
I work exclusively in video timeline instead of importing video frames to layers or loading files into stack. For videos that don’t require converting/encoding using HandBrake, especially ones that are already in .MP4 format, I tend to open the video directly on Photoshop, and trim the videos around directly.
As mentioned above, this gifmaking tutorial using video timeline is exactly how I make gifs. I find it more efficient, especially if you’re making multiple gifs from the same video/the same scene with little to no change in lighting conditions You can simply slide around sections of gifs you want to save, and they will all be the same length.
Another thing also covered in the tutorial linked is the ability to change video speed in video timeline mode. Right click on the video and set the speed before proceeding with cropping/resizing. This is also very useful when you’re making blended gifs where you need the footage to have the same length.
Slowing footage down.
As mentioned in this post, changing the FPS before slowing down the gif results in smoother gifs. Doubling the frame rate before slowing down your gifs usually yields the best result.
Speeding footage up.
I love using this to speed up slow motion B-rolls to make the speed slightly more natural. It will result in nice, smooth gifs:

(B-roll footage, normal broadcast speed)
(200% speed)
Subject won’t stay in frame?
Another feature of the video timeline mode. Keyframes are your best friend. This tutorial by @kangyeosaang covers everything you need to know about panning gifs. I use this technique regularly, it’s a life-saver.
COLORING
Here are some coloring tutorials I found very useful:
Coloring tutorial by @brawn-gp beloved, their coloring style is second to none
Mega coloring tutorial by @yenvengerberg, for stylized /vibrant coloring
Understanding Channel Mixer by @zoyanazyalensky
Coloring rainbow gifs by @steveroger, which delves deep into Channel Mixer
I tend to go for neutral-saturated coloring in general, especially for minimalist gifsets with no effects (blending/isolated coloring/overlays etc.), but the possibility is endless for stylized coloring. Here’s what my adjustment layers look like for the example gifs above.
The base footage for this Charles gifset is incredibly desaturated. I started with a Curves layer to bring contrast to the gif, as well as do some color-correcting to bring the base footage to a more neutral tone. To bump contrast, I also like to add a black and white Gradient Map layer with a Soft Light blending mode at 10%-30% opacity:
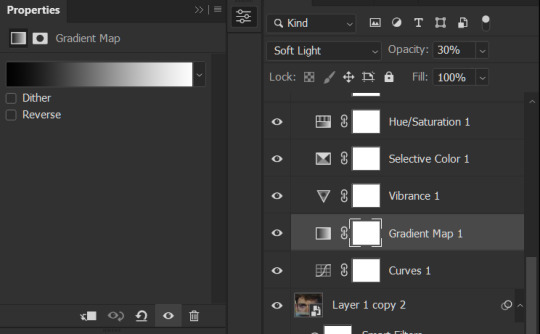
The Vibrance layer is then used to lift the saturation of the base footage, with the Selective Color, Hue/Saturation, and Channel Mixer layers to help remove the green/yellow tint to his skintone.
An underrated adjustment layer/preset in my opinion is the Color Lookup. You can layer in pre-loaded .LUT color grading presets to help speed up your process. For this gif, it’s simply a base preset Soft Warming Look to achieve a warm, pink-tinted tone.
In hindsight I feel like this gifset is too saturated, his skintone is skewing very red/pink, I could’ve bumped down the lightness of the reds with a Selective Color layer or a Hue/Saturation layer. Try to err on the side of neutral for skintones. Experiment with layer orders—there’s no right or wrong! Remember that each layer build up on the one before it.
The base footage of the Jalen gif is already quite nicely color-graded, but it’s still muddy and underexposed. As with the Charles gif, I started with a Curves layer to bring the gif to a better baseline contrast. Then I focus on brightening the gif with the Brightness/Contrast and Exposure layers.
The Hue/Saturation and Selective Color layers are to color-correct Jalen’s skin tone—it’s something I spend most of my time coloring gifs and focus a lot on, especially when color grading BIPOC skintones. Putting a Vibrance layer, upping the Vibrance and Saturation, and calling it a day would make his skintone skew very, very yellow/orange.
Focus on the reds and yellow for skintone, play around with the Saturation and Lightness sliders, use the Hue slider with caution.
It can be tricky to achieve the right skin tone when working with sports footage vs the higher quality, higher dynamic range footage of films or TV shows, but I try to keep it as close to the subject’s natural skintone as possible.
Here are some of tutorials with tips and tricks on coloring BIPOC:
How to fix orange-washed characters by @zoyanazyalensky
How to prevent pink-washing and yellow-washing by @jeonwonwoo
Coloring tutorial by @captain-hen
Changing lighting conditions?
Fret not—this is why I love working in video timeline. I’ll take this gifset as an example: it’s a deceptively difficult one to color. The footage is 720p and the sunlight shifts throughout the video, so matching across gifs was tricky.
My solution was to split the clips in sections with consistent lighting, and apply adjustment layers to the individual sections before applying general color grading layers on top of everything.
We can make use of the Fade Transition effect for sections where the lighting changes within the gif section we want to color.

(without vs with Fade on the Brightness/Contrast layer)
The difference is subtle in this example, but the brightness in the right gif is noticeably more consistent throughout. You can also add the Fade Transition effect to the beginning for a fade in, of course.
SHARPENING AND OPTIMIZING GIF QUALITY
This tutorial by @anya-chalotra covers everything you need to know about optimizing gifs for Tumblr.
Sharpening.
Sharpening is essential to making crisp gif images. Here’s another ask I answered re: my own sharpening settings and maximizing gif quality.
(base footage, unsharpened)

(color graded, unsharpened)
(color graded, sharpened)
The final gif is sharpened with Smart Sharpen, 500% at 0.3px and 10% at 10px (my standard sharpening settings).
Here are some tutorials and resources on sharpening:
Sharpening process by @anya-chalotra
Sharpening tutorial with added gaussian blur by @haleths
Sharpening action by @daenerys-stormborn
Size your gifs for Tumblr correctly.
This is essential: full width gifs are 540px wide.Two side-by-side gifs should be 268px wide. Here’s a handy post on gif size guide for Tumblr.
Incorrectly sizing your gifs will take away the quality of your gifs: undersizing your gifs will especially make them grainy, blurry, and /or pixelated, and won’t display correctly on many people’s desktop theme. Oversizing usually isn't as dramatic as undersizing, but it will make the gifset glitch when displayed, and the file size will be unnecessarily bloated.
Work with HD footage if possible.
Media fandoms (films/TV shows) are luckier than us in the sports trenches—we have to work with what we have. Broadcast footage is usually subpar: lacks contrast, pixelated, very desaturated, the list goes on. But it’s possible to still make high quality gifs from subpar footage. Here are a couple of tutorials to mask low source footage quality:
low quality video ➜ “HD” gifs tutorial by @nickoffermen
Sharpening low quality footage by @everglow-ing
(This gifset I made is from a 480p footage with horrendous lighting conditions and colors, and the end result is decent I’d say)
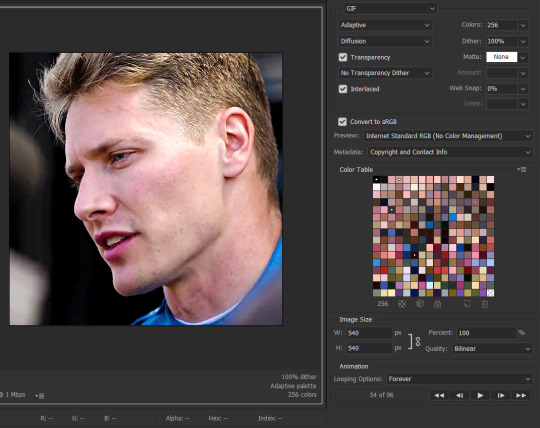
Save for Web (File > Export > Save for Web (Legacy) or Ctrl + Alt + Shift + S) settings.
I default to Adaptive + Diffusion but also use Adaptive + Pattern from time to time. Any combination of Adaptive or Selective + Diffusion or Pattern will give you a good result. In my experience some gifs will need the Selective color table for the colors to display correctly.
Here are my default settings:
SAVING AND EXPORTING FOR TUMBLR
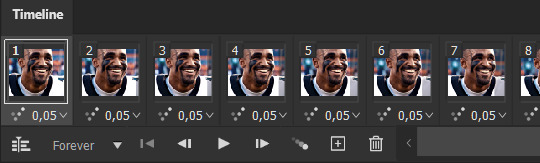
Converting to frames and adjusting the gif speed.
If possible, avoid exporting your gif and reopening it to adjust the frame speed. I used to do this sometimes when I’m lazy, I have to admit, but this is where this Action as mentioned at the beginning comes in very handy. It converts all visible layer into smart object, then converts it back to frame animation.
Step-by-step:
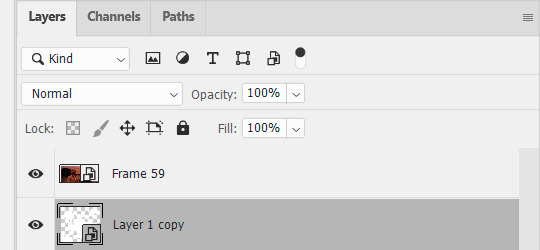
1. Select all layers
2. Right click > Convert to Smart Object
3. Go to the Timeline menu (≡) > Convert Frames > Flatten Frames into Clips
4. Go to the Timeline menu again (≡) > Convert Frames > Convert to Frame Animation
5. In the same menu (≡), select Make Frames from Layers
6. Delete the first frame (it’s a duplicate) then set your frame speed

Now you can adjust the frame speed before exporting it (Save for Web).
Pay attention to the source framerate.
The frame delay of 0.05 s is usually the default to make gifs for TV shows and films, and it is preferred by most gifmakers. This stems from the fact that most movies and TV shows are 24 or 25 FPS. This may not be the case for all source videos: you might get 30 FPS footage, and sports or gaming footage can be 50 or 60 FPS. Gif speed also depends on the FPS of your original file. Play around with gif speed and see what feels most natural to you.
My rule of thumb is the frame delay Photoshop gives you + 0.01 s. For example, 50 FPS footage will give you 0.02 s frame delay (25 FPS gives you 0.04, 30 FPS gives you 0.03, etc.), so set it to 0.03 s. I usually err on the side of a faster frame delay for smoothness in in-game sports footage, anything else (interviews, press conferences, B-rolls) can get away with being slowed down. Again, experiment and see what you think looks best!
Keep gifs under the Tumblr file size limit (10 MB).
Cut down the number of frames. My gifs are usually around 60-70 frames for 540px full-width gifs, but depending on the coloring, sometimes you can get away with more. 268px gifs can go up to 200+ frames.
Crop your gifs. Remember to keep full-width gifs at 540px wide, but if necessary, you can crop the height. My go-to sizes are 540x540, 540x500, 540x450, and 540x400.
Amp up the contrast of your gifs. Flat colors like black cut down gif size.
The Grain filter or Noise filter, though beautiful for aesthetics or simply necessary sometimes to mask low source footage quality/pixelating, may bloat your gif size.
Play your gifs back before exporting.
Pay attention to duplicate frames or glitches, you might need to get rid of them!
Hope this is helpful! Don’t hesitate to send an Ask or DM if you need any help, I will happily answer all your questions and send over PSDs. (I’m also on Discord—just shoot me a message if you need my tag!) Happy creating :]
#tutorial#PS asks#gif tutorial#Photoshop tutorial#I guess this is more of a resource link dump than tutorial but. Hey. Why reinvent the wheel...#Sorry for the late answer I hope you see this Anon :]#completeresources#allresources#userxoames#userbarbi#usernrzr
1K notes
·
View notes
Note
hi hi hi <33 what fonts did u use on ur barbie gifsets i'm truly in love and i'm SO inspired
Hi, lovely! In descending order:
Multicolore (8pt, 6pt)
Sherlock (120pt, 24pt)
Tw Cen MT (10pt) set to Regular

Those out of the way, I’ll add that I am extremely finicky when it comes to typography, which mostly means that I go through a multitude of different fonts and font combos. I think I had roughly a dozen or so other fonts picked out for the title and annotations alike, so I’ll go ahead and list some of those as well. Great fonts to have even if you don’t end up using them for a Barbie-themed set.
Aaleyah — for “Barbie” title
Avenir (set to 35 Light) — for annotations
Barbie (one of the actual OG Barbie fonts)
Baroneys — for “Barbie” title
Buryland Script — for “Barbie” title
Daylight & Moonlight (set to Light) — for “Barbie” title
DK Sensory Overload — for date
Journey to Thailand — for “Barbie” title
Karla — for annotations
Lobster Two — for “Barbie” title
Montserrat — for date and annotations
Roboto — for annotations
Telegrafico — for annotations
TrashHand — for date
Wired Pop — for “Barbie” title

You can find more examples for a bunch of these fonts here and here.
#resources#fonts#uncleroys#ask ava: an organizational tag and not an advice column (unless it needs to be)#ps asks#completeresources#allresources#usergif
336 notes
·
View notes
Text
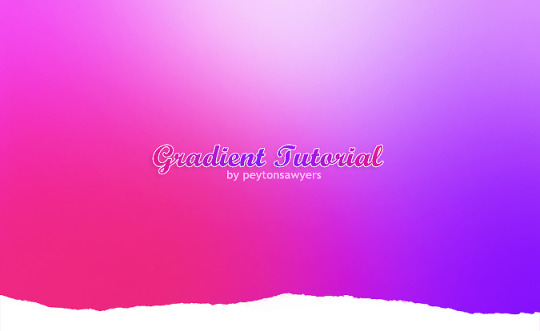
This quick tutorial will go over how to make gradients, from simple gradients to multicolor ones.
give this tutorial a like/reblog if it helped you out
end result & tutorial under the cut
if questions should arise, feel free to send a message!
Chapters:
how to make a basic gradient
adding colors with brushes
softening & adjustments
What you´ll need:
any version of photoshop (I use CS6, mine is in german because I bought it years ago in germany)
very basic photoshop knowledge
i. how to make a basic gradient
Open a new document in your desired size.
There are several ways to make gradients. I always use the new fill layer option, right next to the new layer or new group buttons on the right side.
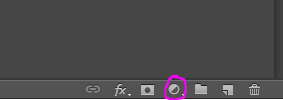
Click on it and select the second option.

Adjust the angle however you wish, and then click on the gradient to bring up the next window
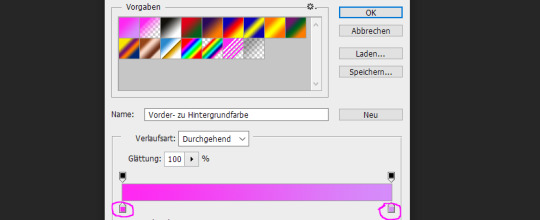
Select any colors you want by clicking on the little droppers highlighted above. I used #ff27f2 on the left and #d58dfa on the right. Once you´re done click OK until your new gradient is on your document.
ii. add colors with brushes
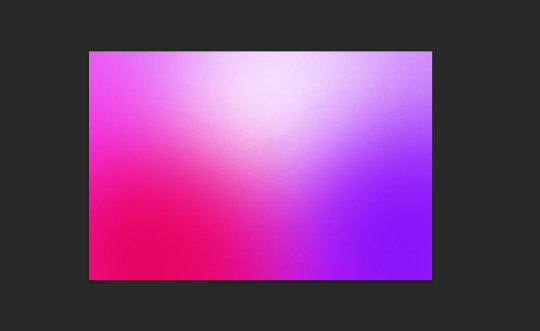
add a new layer & select a big brush with no hardness and low opacity.
select any color to paint with, I´ll be using #e50051 & #770dfa & plain white. Start painting on that new layer in slow strokes. You can add as many colors as you want. Mine now looks like this:
Now we merge our layers by selecting them, then righ click and selecting merge

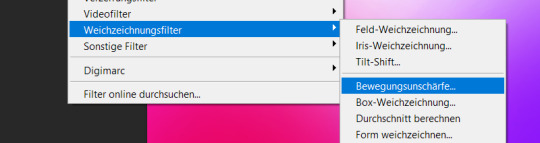
iii. softening & adjustments
Go to filters -> blur > motion blur
Depending on the gradient you´ll have to select different variables, but for this one I used the numbers below:
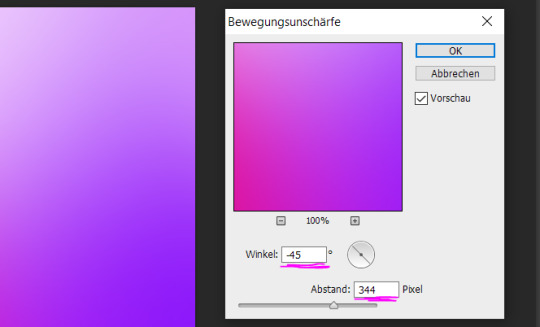
Sometimes I add Gaussian Blur too to blend it even more, but didn´t do that for this gradient.
Now for the adjustments I only added a brightness and vibrance layer. This is the finished gradient:

#completeresources#dailyresources#photoshop tutorial#gradient tutorial#photoshop help#usernelly#userireland#ps asks#mine: tutorial#my tutorials#my resources
143 notes
·
View notes
Note
what font do you use for your gifs? thanks in advance !
hi! I use Arial Rounded Mt font, with bold and itallics on. I normally use size 14-16 depending on the Gif size, but for bigger gifs I use size 18.

9 notes
·
View notes
Text

hi anon thank you for the ask! i’m gonna start with links to some blending tutorials that i have found really helpful (especially when first starting): tutorial by @yenvengerberg, tutorial by @jackarthurdavenport, tutorial by @sith-maul, tutorial by @nelsonnicks
also there is a high change this might not make sense, writing and like making sense in general are ummm not my best skills sdfjsdlfkj so if anything really doesn’t make sense or is confusing just let me know and i will do my best to clarify!
I. PICKING SCENE
so i think one of the most important parts of blending (at least for me) is not actually the making of the gif but picking scenes. there are a few things i keep in my when i’m starting to pick scenes to gif:
first is the overall brightness of the scene. it can be really hard to blend a bright scene such as an outdoor scene with a dark scene like a nighttime scene (it’s not always impossible but take a lot more work with the coloring)
and it helps if each scene has i guess the best way to put it is little contrast?? like if it’s a dark scene that does have any little part it’s just not gonna show and the same with a light scene that has little to no darker spots

you can see this with this blending. you only really see the green gif and the other gif is really hard to see

here is another example that could work better. you can’t really see the overlay gif of lito and hernando at first but does show up really well when the other gif is darker
II. CROPPING AND PLACEMENT
once you have the scene you can go through your typical process to load your gif and then crop. sometimes i won’t crop right away and will just change the gif size to the height i want so i can place around with the placement of each gif a little more
but whatever you decided to do once you have finished you will copy and paste one of the scenes onto the other one. i usually do with frames because that’s how learning but some of the tutorials i listed show how to do this on timeline
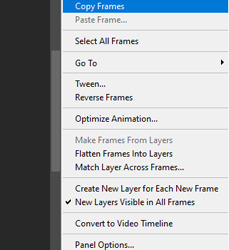
if you are using frames, you will select all of your frames and then go to the menu on the top right of the timeline and choose copy frames

once you have it copied go to the other scene, select all frames and go to the same menu then hit paste and choose the option below
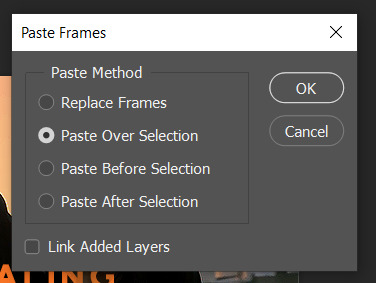
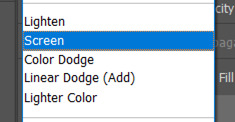
then change one of the groups to screen (you can also try lighten but i normally use screen)
this is normally where I place around with placement if i’m not sure. to do this you select one of the gif groups and hit ctrl + t to be able to move the gif around. Once i’m happy with the placement i will crop and go on to coloring.
III. COLORING
i normally make only one scene visible when coloring and check how it looks with the other gif throughout my coloring process.
and for some gif instead of doing my normally coloring i will use a black and white gradient map and then a color fill set to color


you can an example of this in the gif below
when i am done with coloring both gifs i will do a final check to see if i need to change anything. if i’m okay with how everything looks i will just add a final brightness/contrast layer over both gifs
if i’m not happy i have a few thing that i will do:
sometimes if one gif is showing more than the other, i will reduce the opacity of the brighter on
you could also place around with the coloring of each gif to help the blending by increasing brightness or contrast. i would be careful with this (especially brightness) because it could affect skin tone
if there are certain spot that needs to be dark, i will make a new layer set it to soft light, and paint with black until you are happy. when doing this i normally use a soft brush set to 25% opacity. you can also change the opacity of this layer as well!
without layer
with layer

once you are done playing you can add any final touches (like typography and whatnot) and then save as you normally would.
if you get discouraged or frustrated know that it definitely gets easier! the more gifs the better idea you get a scene of what will and won’t work. also, i have definitely had times where i’ve scraped the scenes i’m working with because they just aren’t working. a lot of blending if it is trial and error. it helps once you find your favorite types of blending and whatnot. like i really like to have at least one of the gifs i’m working with have some movement. i don’t know why exactly, but i just know those gifs end up being some of my favorites!
here is example and some of my favorite blending! (also i didn’t psds save for the calliette love trope set which is why it still has the text)

if you want some additional resources on blending or gifing in general you can check out my resource blog @oblivionresource i would recommend looking at the resources on @usergif they have a lot of good resources and tutorials!
#ps asks#*tutorial#uservivaldi#uservalentina#userrobin#usernanda#useremi#tuserabbie#userelio#tuserlucie#usershreyu#usersalty#tuserrex#tuserbea#userrsun#tuserheidi#usermarsy#userrainbow#userkosmos#userk8
232 notes
·
View notes
Note
hi! sorry if you've already answered that but, i saw your good omens (the unstoppable bastard/immovable dumbass one) and i really loved it, i found it so artistically and aesthetically beautiful. frankly i am in awe with it and i was wondering if you'd be willing to share some tutorials on the effects you used for the gifset (like the puzzle piece and heart for example)? do you maybe already have a tutorial tag that i could go through? thank you so much!
hi! first of all, thank you!
to do a similar effect like i did in this post or something like the transition in the last gif of this lovely edit firstly you will need to either find (on stock sites) or make yourself (from a youtube video or using shapes in photoshop) a gif that has a simple shape and a transparent background.
a little tutorial under the cut (assuming you know the basics of gifmaking) (this may not be the best/most efficient way to do it but it's the way i'm used to).
for example, i made the heart gif using photoshop's custom shape tool, repeatedly pasting it on different layers, resizing so it would look like a beating heart and making frames from it (you could probably find something better on the internet):
the puzle was something i found on some stock, deleted the frames i didn't need, removed white background and painted with black brush (not really necessary since we'll be dealing with shapes, just easier to work with) so i got this:
i made the rest of the small gifs in the same way: floating cloud moving the base photoshop cloud shape up and down, moving the strip (also found in the custom shape tool) like in this youtube tutorial and manually rotating the shape of a star shape i found on some stock.
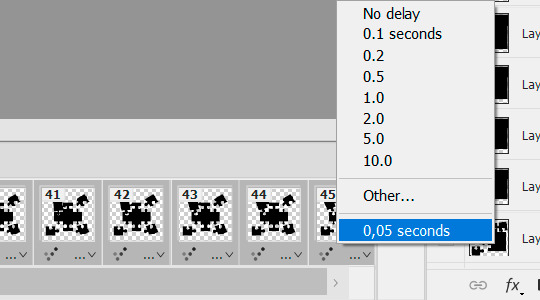
now that you have you desired shape gif, select all the frames and make sure they have the same delay time:
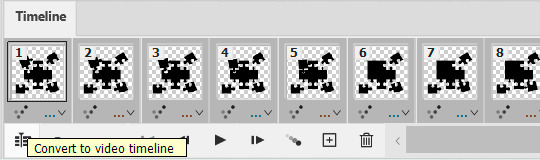
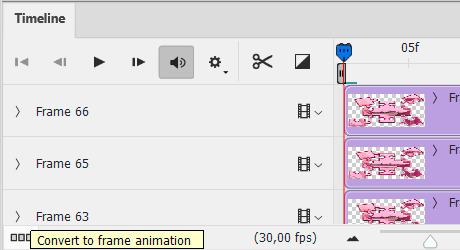
press convert to the video timeline:
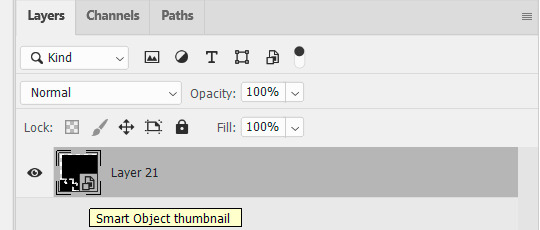
select all the layers:
filter > convert to smart filters:
upload the exact same amount of frames for your scene gif (i'm using 45 frames here), resize, set delay time exactly the same as you did for your shape gif (i set 0,05 but it doesn't really matter, they just need to match) & convert frames to smart filters as you did for the shape gif. this is where i usually do my sharpening (not on the sceenshot because i reused another gif, but that's not relevant here).
now put the shape gif on top of the scene gif, resize it and position it to your liking (i switched the colors for better visibility):
your timeline shoud look like this & the duration of both sets should match because you used the same amount of frames and set the same time delay:

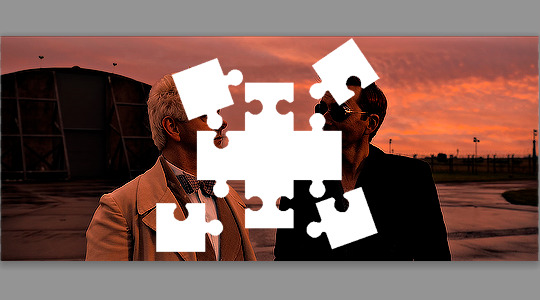
the gif currently looks like this:

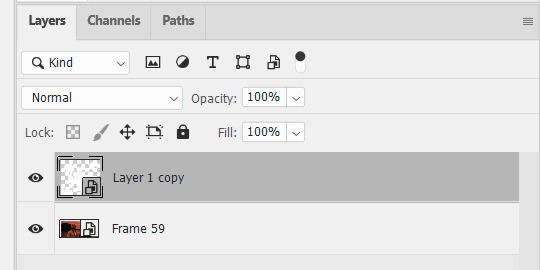
after you're more or less satisfied with the position of the shape gif (you can change the opacity back and forth to figure it out), put the shape gif under the scene gif:
right click on the scene gif > create clipping mask. now you have this:
color it to your liking:
optionally. to make a border like i did make 2 copies of the shape gif and put them on top of the colored gif:
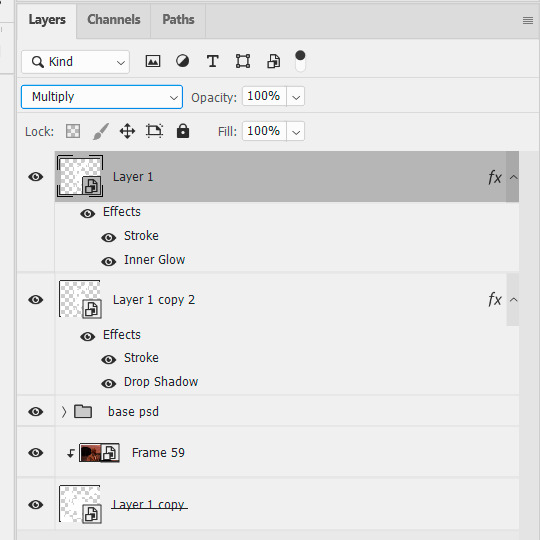
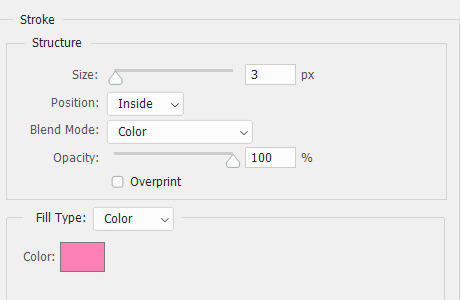
change blending mode for both: multiply if your shape gif is white, screen if your shape gif is black. set layer style for the first one:

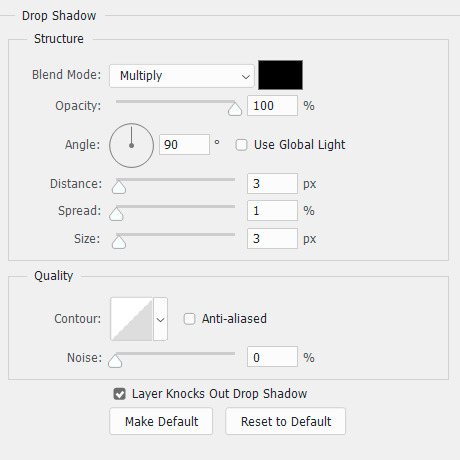
and for the second one:
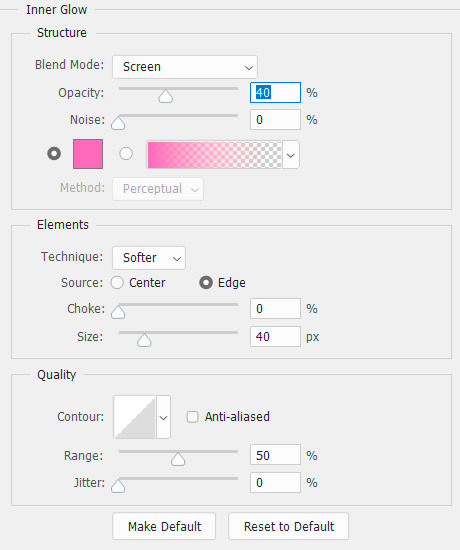
(use any color you want and/or skip inner glow alltogether).
currently we're still in video timeline and our gif looks like this:
time to put it on top of a bigger gif. click here:

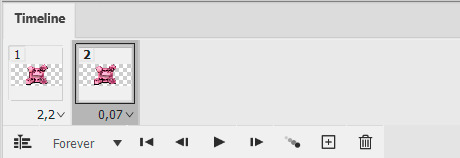
convert frames > flatten frames into clips. now convert to frame animation:
delete the frame that has the least amount of delay (0,07 in this case):
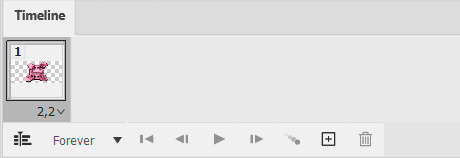
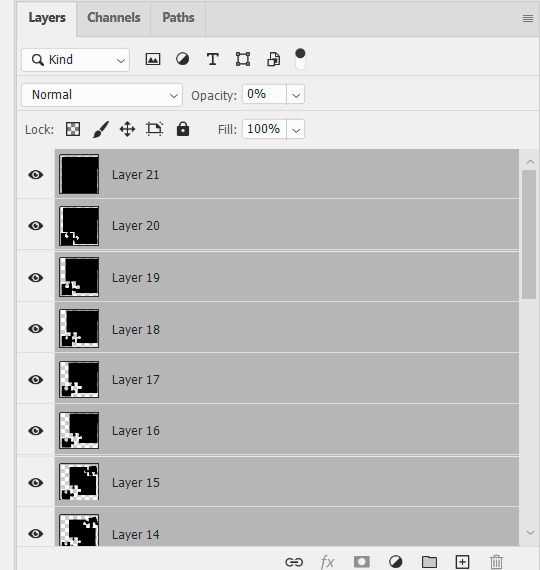
make frames from layers (in the timeline menu on the right) and you get a variety number of junk frames before the actual gif starts that you also need to delete (i have 28 in this case):

make sure there's no junk after the gif, set your delay time and delete unnecessary layers if you want (or not, it doesn't really matter):

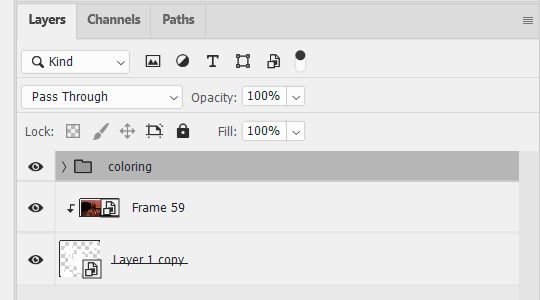
select all the remaining layers and group them (easier to work with later):
now select all the frames, go to the timelines menu > copy frames. open the gif you want to paste them on top of, select all of its frames, go to the timeline menu > paste frames > paste over selection > ok.
postion it how you want to and that's finally it.
#it really is much easier to do than it might look like from my explanation#replies#ps asks#ps tutorial#cowboycoven2
18 notes
·
View notes
Note
hi. can you tell me the name of the font from here post/696133788008382464 "destroy", post/694016158045782016 "soft", post/691767228127985664 "Targaryens", pls
Hi! The first one from this post is Jellyka Delicious Cake.

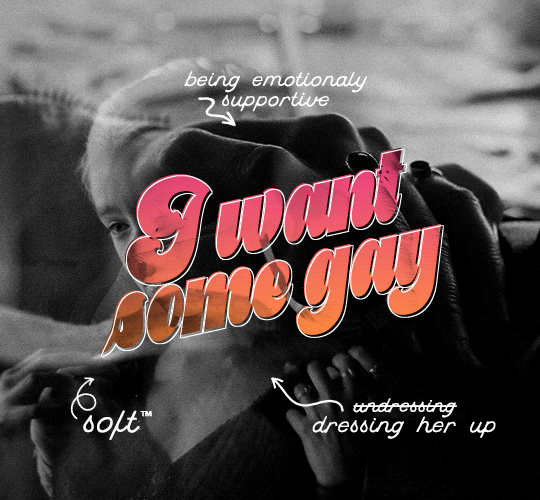
The second one from this post is Buffalo Script.
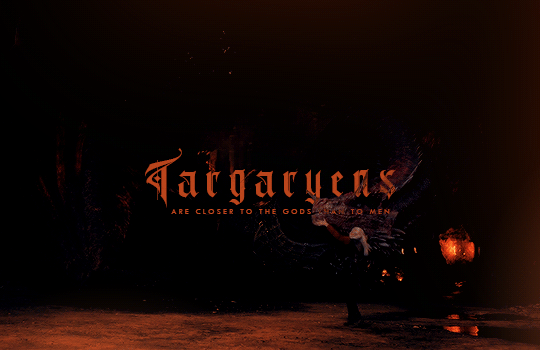
And the last one from this post is Lordish.
7 notes
·
View notes
Note
Hi the coloring on this stranger things set of yours is amazingg. if you don't mind, can you please share how you colored the second gif (with robin and steve) where there's purple lighting from one side and yellow lighting from the other (does this make sense?)?
https://www.tumblr.com/blog/view/meliorn/688872201261301760?source=share
(gifset link)
hi, i'm so glad you like it!

that shot already has some dual lighting in it as the orange comes from the neon sign behind robin and the blue daylight comes from steve's side. aside from a basic coloring to brighten and add depth to the shadows, all i really did was boost the yellows and blues with selective color layers and then turn them orange and purple with some more selective color and hue/saturation layers. when working with yellows especially, layer masks are your best friend to avoid messing up the skin tones! hope that helps a bit <3
7 notes
·
View notes
Note
Also, can you pls tell me how do you make GIFs, I love ur gifs uwu!! I wanna get into making gifs lol😅
(P.S I'm sorry if this has been asked already. See ya<3)
So I use vapoursynth and photoshop to make gifs. Vapoursynth is a bit more complex, but not necessary to learn how to make gifs. I have an old tutorial on my old svt blog here that is how i made gifs before vapoursynth! if you cant find or fit photoshop on your computer photopea is a free option. I have never used it but this is a really popular tutorial on how to use it to make gifs! I have more links and tutorials on my faqs page here for other things for making gifs like where to download videos, and things <3
5 notes
·
View notes
Note
omg I love love love your most recent edit so much!🖤 do you think you'd consider doing a short tutorial on how you made it? specifically the last gif where the background sort of fades in and the words also fade in.
omg thank you so much this means a lot :’))), i’m really not good at doing tutorials because i suck at explaining myself, but i’ll try telling you the way i did it and hope it helps! (also english isn't my first language so i'm sorry if i make any mistake)
so i like to first do the text effect before doing the gif behind
open photoshop, file > new, these are my settings:

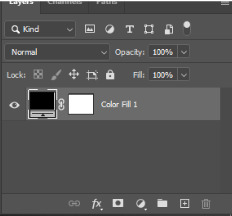
2. i like to add a color fill layer next, use black color
3. i’m gonna write the text first. I used Helvetica (I don’t exactly remember the settings i used, since i didn’t save it) so hope this helps:
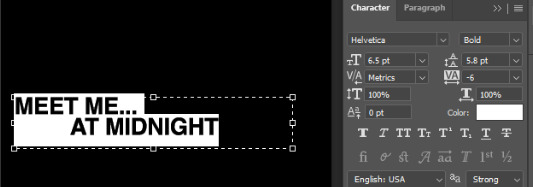
BY THE WAY, i have to mention that my photoshop and in general my laptop sometimes suck. So 6.5 is big for me, but it’s possible that might be too little for you. Just adjust it the way you like it.
4.
anyways, now that you have your text i like to do a copy of the text > Control + J.
then, rasterize the layer. (right click on your mouse)


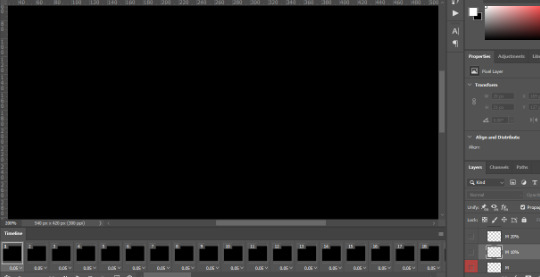
5. at this point you should have your timeline opened, then click create video timeline, you should click right here on the three dots (convert to frame animation)

OK SO BEFORE YOU DO ANYTHING ELSE, i forgot to mention but you need to cut each letter, just like this:
now that everything is in order, go to your timeline and click

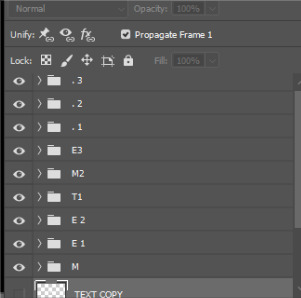
when i first made the original gif there were around 253 layers (it was long asf) but had to cut it because it was over 10mb. once you duplicated the original frame, it's gonna look like this:
Select the first layer and then lower the opacity to 10%

second layer - 20%

3rd - 20% (start with the 2nd letter, first layer 10%)
4th - 40% (2nd letter, first layer 20%) (third letter, 10%)
5 - 60% (second letter, 40%) (third letter, 20%) (4th letter 10%)
6 - 80% (second letter, 60%) (third letter, 40%) (4th letter 20%) (5th letter 10%)
7 - 100% (second letter, 80%) (third letter, 60%) (4th letter 40%) (5th letter 20%)
8. (second letter, 100%) (third letter, 80%) (4th letter 60%) (5th letter 40%)
9. (third letter, 100%) (4th letter 80%) (5th letter 60%)
it's gonna look like this:

i know its confusing so i'm sorry if i'm not explaining myself well:(
and you will have to do the same process with the whole text.
for the background fading i used this gif overlay:

open it, then on each layer apply this settings:
filter > blur > motion blur

duplicate each layer until it matches the ones of your original gif. let's say, you have 180 layers, make 180 layers.

to copy and paste on your original gif just do this:

Control + G > layer mode- screen
and that's all i did!
sorry if i made this more confusing than i should've, it's almost midnight hfdsjakdh if you want me to explain it more let me know and i will try to make instead a video doing step by step!
5 notes
·
View notes
Text
because sometimes there are invisible tests and invisible rules and you're just supposed to ... know the rule. someone you thought of as a friend asks you for book recommendations, so you give her a list of like 30 books, each with a brief blurb and why you like it. later, you find out she screenshotted the list and send it out to a group chat with the note: what an absolute freak can you believe this. you saw the responses: emojis where people are rolling over laughing. too much and obsessive and actually kind of creepy in the comments. you thought you'd been doing the right thing. she'd asked, right? an invisible rule: this is what happens when you get too excited.
you aren't supposed to laugh at your own jokes, so you don't, but then you're too serious. you're not supposed to be too loud, but then people say you're too quiet. you aren't supposed to get passionate about things, but then you're shy, boring. you aren't supposed to talk too much, but then people are mad when you're not good at replying.
you fold yourself into a prettier paper crane. since you never know what is "selfish" and what is "charity," you give yourself over, fully. you'd rather be empty and over-generous - you'd rather eat your own boundaries than have even one person believe that you're mean. since you don't know what the thing is that will make them hate you, you simply scrub yourself clean of any form of roughness. if you are perfect and smiling and funny, they can love you. if you are always there for them and never admit what's happening and never mention your past and never make them uncomfortable - you can make up for it. you can earn it.
don't fuck up. they're all testing you, always. they're tolerating you. whatever secret club happened, over a summer somewhere - during some activity you didn't get to attend - everyone else just... figured it out. like they got some kind of award or examination that allowed them to know how-to-be-normal. how to fit. and for the rest of your life, you've been playing catch-up. you've been trying to prove that - haha! you get it! that the joke they're telling, the people they are, the manual they got- yeah, you've totally read it.
if you can just divide yourself in two - the lovable one, and the one that is you - you can do this. you can walk the line. they can laugh and accept you. if you are always-balanced, never burdensome, a delight to have in class, champagne and glittering and never gawky or florescent or god-forbid cringe: you can get away with it.
you stare at your therapist, whom you can make jokes with, and who laughs at your jokes, because you are so fucking good at people-pleasing. you smile at her, and she asks you how you're doing, and you automatically say i'm good, thanks, how are you? while the answer swims somewhere in your little lizard brain:
how long have you been doing this now? mastering the art of your body and mind like you're piloting a puppet. has it worked? what do you mean that all you feel is... just exhausted. pick yourself up, the tightrope has no net. after all, you're cheating, somehow, but nobody seems to know you actually flunked the test. it's working!
aren't you happy yet?
#almost wrote the champagne line as ''effervescent'' but legit could not write it without saying ''effervescent like a snail''#ah tumblr...#writeblr#warm up#idk . having trouble writing rn#ps i don't like to talk about it . it is my medical information. but before you ask. yes this is about being on the spectrum#i really don't like when ppl make my writing about how im [whatever ID]. i want it to ring true for the people who it rings true for#i don't want it to be like ''awwwww look at this person!!! she's the EXCEPTION!!! :)" .....#no.... not really.....#idk something gross happens whenever i admit to certain conditions and i turn into like inspiration p*rnography#like yes they actually let us use keyboards these days#furthermore i just... dont feel comfortable talking about this part of me. i had too bad of a childhood. adhd is one thing...#this one im like. still coming to terms with. which is like. my own journey.#idk. just please be kind. some things are more private than others. this one feels private to me.#i do not know how to help others w/this . and i do not know how to help myself. i will talk about it if im ever ready. idk if that will#actually ever happen#ty in advance i love u im kissing you we are kissing somewhere on the spectrum
46K notes
·
View notes
Note
your gifs are so crisp and delicious do you use a specific sharpening method?
Thank you, Dear Anon! Motorsports can be tricky to GIF, especially live broadcast footage. Here's a detailed post about GIF quality that might be helpful, but essentially here are some things I picked up along the way:
Size your GIFs correctly. This is very important: full width GIFs are 540px. Two side-by-side GIFs should be 268px wide each. Incorrectly sizing your GIF images will take away from the quality of the GIF images. Undersizing your GIFs will especially make them grainy, blurry, and /or pixelated. Oversizing usually isn't as dramatic as undersizing, but it will make the gifset glitch when displayed.
Sharpening is the most important element to crisp GIF images. I alternate between these settings depending on the footage, here they are for comparison.


What's also important but often overlooked is that sometimes your GIFs can be oversharpened, so I like to soften it up a bit with either a duplicated layer with Gaussian Blur applied, or I bump down the filter blending opacity. 50-75% is what I tend to go for.


Note that this is a well-lit, professionally shot footage. Depending on the footage, you may need more or less sharpening.
Always work with HD footage. 1080p is almost a necessity, sometimes I make GIFs from 4K footage too but when it's available, but it's not necessary. If the source is 720p or lower, I would try to make a side-by-side gifset instead of the full-width 540px ones and use the grain filter to help improve the quality. Here's a tutorial to make GIFs from lower quality source videos.
Save for Web settings. I default to Adaptive + Diffusion but also use Adaptive + Pattern sometimes, but any combination of Adaptive or Selective + Diffusion or Pattern will give you a good result. In my experience some GIFs will need the Selective color table for the colors to display correctly.
I hope this is useful, Dear Anon! Feel free to send an Ask or message me if you have further questions :]
#.asks#anonymous#gifmaking#PS asks#'Fir is there any particular reason why you used Josef as an example' Mind your own business.#Down Bad Detention
68 notes
·
View notes
Note
hi! first of all i wanted to say i'm obsessed with your shadow and bone gifsets (all your gifsets tbh, you're super talented!), i was wondering how you were able to get the glitches on this gifset to be green & yellow like that? i just can't figure out how to change the colors like that using my normal method of using the rgb channels and i love the way the green and yellow works: /post/712882007539171328/and-yet-they-hesitated-the-knowledge-that-they
Gosh, thank you so much. You'd think after years of doing this, I'd be a little more equipped to handle compliments, but I still get flustered like it's the one of the first times all over again.
The set in question for anyone else wondering or trying to mess around with 3D/glitch effects and changing up the colors. And here is another example.
Hopefully this makes sense (and feel free to reach back out if it doesn't!) but I don't actually touch the RGB channels at all—or, at least, not later on in the process to actually shift the colors around. First, I do the default setting for the basic 3D effect, which is just the channel for reds activated:
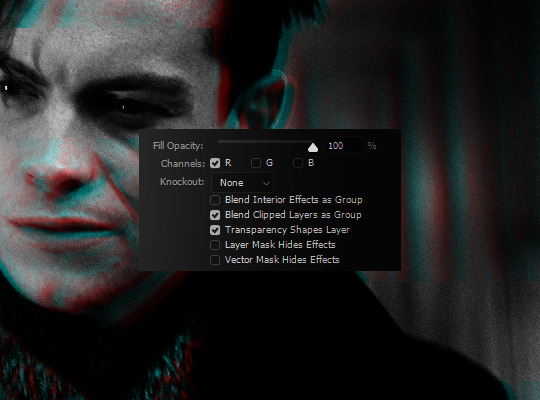
And then this is where the Hue/Saturation adjustment comes in handy. Because red and cyan are already such isolated color points, it means it's a piece of cake to shift both around as you see fit. I knew the final products (with the film and light leak overlays) were going to be orange-yellow and green, so I shifted my Reds to the right to be more yellow and my Cyans to the left to be more green.

As another example, here's pink and purple:
Keep in mind that working with a B&W base also makes things exponentially easier and that won't always be the case. Obviously, when your base gif isn't black and white, there are going to be reds and/or cyans (or greens and purples, if you tick off the G channel; or blues and yellows, if you tick off the B channel) so it requires a bit more effort and work in making sure that only your glitch layers are affected.
#aridante#ask ava: an organizational tag and not an advice column (unless it needs to be)#ps asks#usergif
113 notes
·
View notes
Note
hii i love your editing so much!! what advice would you give to someone who wants to start editing? i hope you have a wonderful day ♡
hi, hi, hi!
thank you so much!
i think you need to be patient, look at lots of tutorials, download lots of resources ... and mostly just be willing to do what feels right for you, experiment with a bunch of stuff until it looks right. the more textures the better.
i hope that helps!
#anon#ps asks#answered#sorry if this sucked way too general#mostly i am surprised people like my stuff#its just random barf of textures lol
0 notes
Note
Hey, thank you for the gradient tutorial! It was really helpful.
I was wondering if you could do a follow up tutorial showing you make those gradient headers and images with the torn paper effect?
Glad it helped!!
There's nothing really to it, I just add a ripped paper stripe image over it. My background color on my blog is white so I don't have to adjust anything. If you have any other colors you'd just have to change the stripe accordingly.
0 notes
Note
How do you make your gifs look mostly purple and pink like that?
hey! i assuming you're talking about this set purely based off the fact that it's the most recent thing getting notes in my very dead activity feed lmfao. i have some very old tutorials talking about this type of coloring here and here. i also have a video of me coloring gifs that i made for reasons i now don't remember, i think it may have been part of a tag game. anyways it's now kind of outdated but i'm pretty sure it was from around the time that set was made so if it interests you that's here. hopefully those help but if you want to try to find more i would use the terms "selective color" "color palette" "hue/saturation" and/or "blending mode" to try to find tutorials, i know that can be hard if you don't know where to start.
1 note
·
View note
Last Seen Blogs
sybill-the-seer
Hufflepuff Stuff
mirakris
Colors of Life polymer clay design

sugar-comrades
i-furnitures.com
minxinq
lesbian who draws lesbians

fifthgencoffeeae
Untitled