#Nvidia
Text
Would you date me? I'm not in a relationship 😪
16 notes
·
View notes
Text
mutt's guide to using dsr on ts4, with pictures!!!
ok so, dsr is a thing available for nvidia gpus that allows you to take veeery high resolution screenshots of games without much trouble, like this

it's an alternative to srwe, as it plays nicer with a lot of reshade shaders and is just, generally more nice to use! let me teach you how to use it - full tutorial with pictures for every step under the cut (im sorry its too long without the cut)
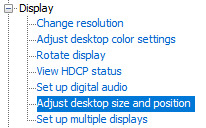
step 1: right click your desktop and open the nvidia control panel
step 2: go here (adjust desktop size and position)
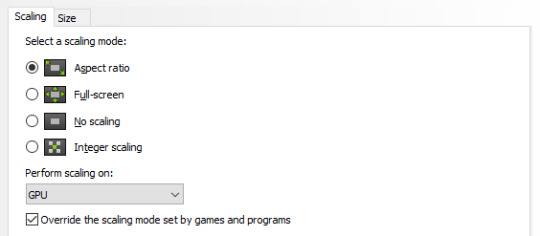
step 3: make sure your settings are set as follows! this is important
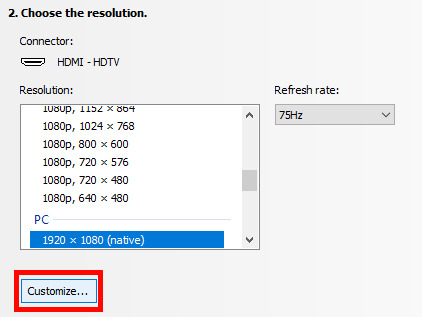
step 4: now, go here (change resolution)

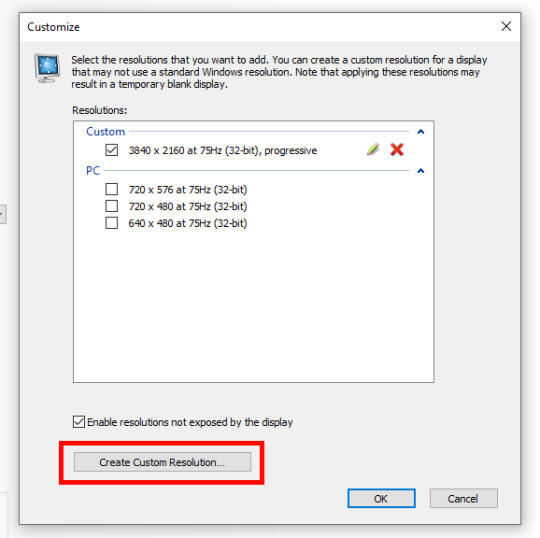
step 5: under change resolution, click on this button (highlighted with a red square)
step 6: in the windows that appears, make sure that "enable resolutions not exposed by display" is ticked! this is very important! (again, highlighted in red - it should look like this)
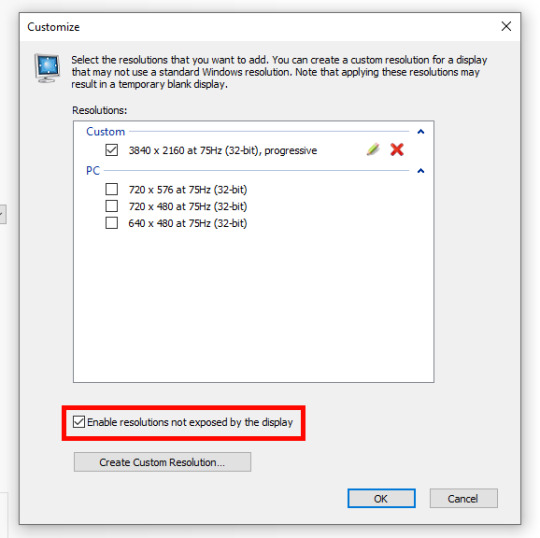
step 7: now, click on "create custom resolution"
step 8: this is where you set your desired resolution, and where i get a bit rambly; so, in my opinion, there is ZERO reason to go above normal 4K for TS4, as it's generally not a really high-poly game and it has rather simple graphics. you can fuck around a lot here, but if you don't feel like it, here are my settings - this will give you 4K screenshots. NOTE: THE REFRESH RATE DOESN'T NEED TO BE 75! SET IT TO WHATEVER THE REFRESH RATE OF YOUR MONITOR IS!
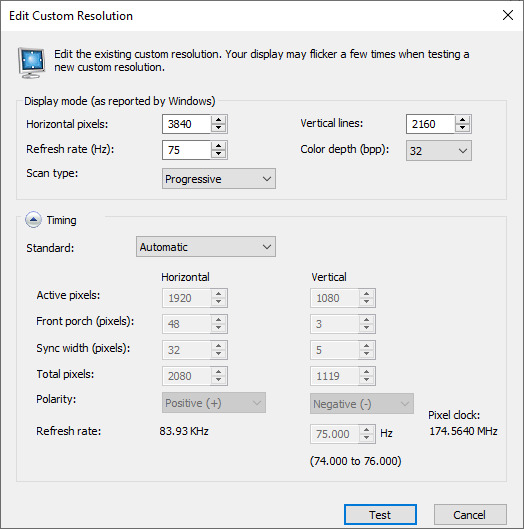
step 9: now, click on test
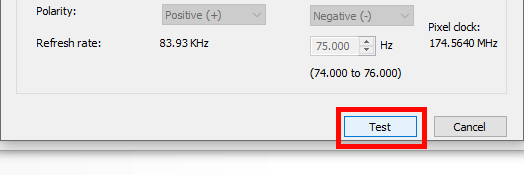
step 10: let the thing load, and after it's done, a window like this should pop up.. but yknow, in your language. click on "yes" (or accept or ok!! idk mine's in russian; basically, the button highlighted here!)
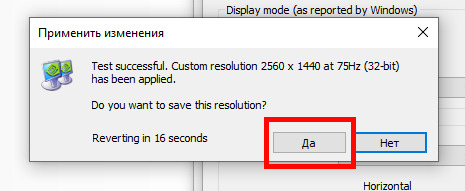
step 11: click "ok" in the window that pops up! like this! afterwards, close the nvidia panel

step 12: open the sims 4 and go into game options, then into graphics
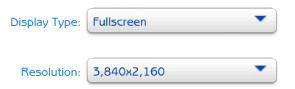
step 13: set your "display type" as "fullscreen", like this

step 14: under "resolution", select whatever resolution you setup earlier; in my case it's 4K, so if you used the same resolution, your settings should look like this
step 15: click on apply changes!
AND UR DONEE!! WAHOOIEE!! now, take your screenshot using reshade, and then go back into sims settings and set it back to what you usually play at, then apply changes!
every time you need to take an HD screenshot, simply open game settings and use your custom resolution! that's it, have fun :3
#sims 4 tutorial#ts4 tutorial#sims 4 screenshots#ts4 screenshots#sims 4 screenshot tutorial#ts4 screenshot tutorial#sims 4 hotsampling#ts4 hotsampling#srwe#nvidia#dsr#tutorials
604 notes
·
View notes
Text

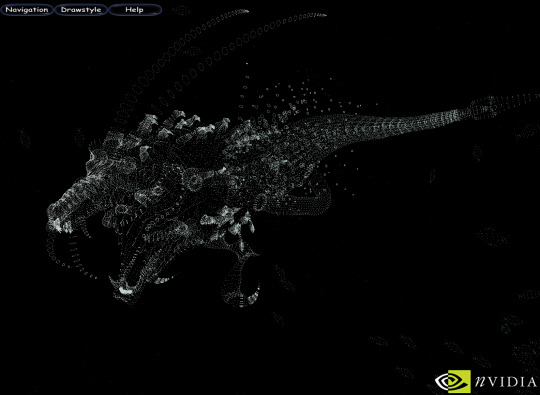
NVIDIA Creature demo for GeForce2 (2000)
332 notes
·
View notes
Video
This is beautiful
This is a new technique called NERF...Read more
2K notes
·
View notes
Text
Rentabilidad comparada entre NVIDIA, Bitcoin y el oro:
55 notes
·
View notes
Text
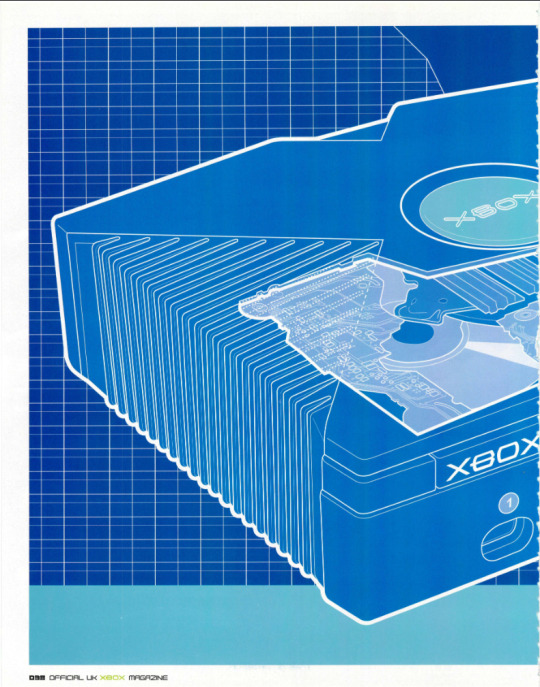
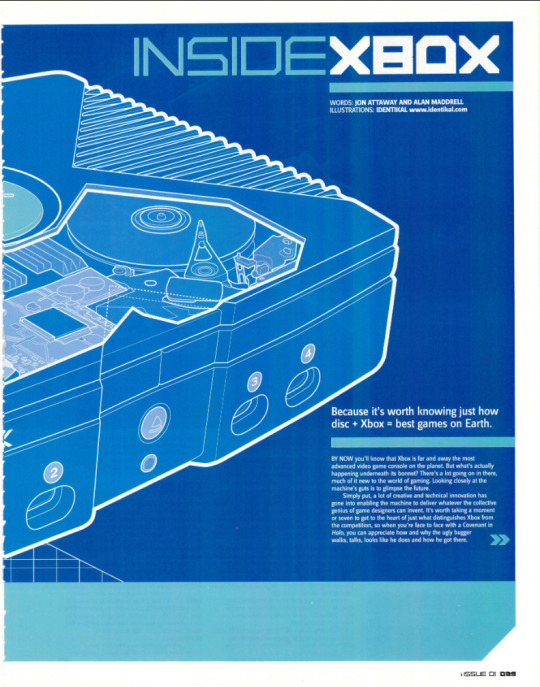
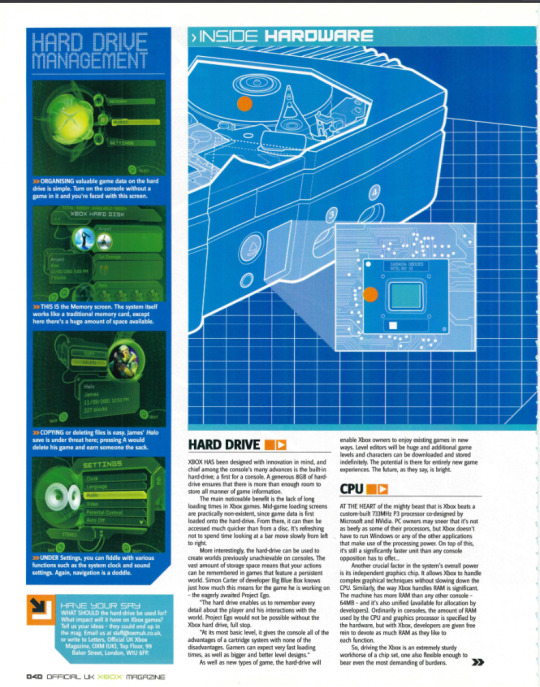


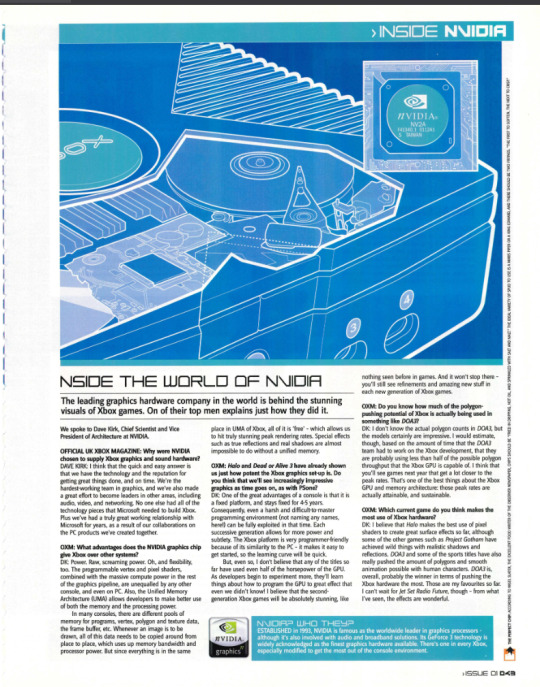


" Because it's worth knowing just how disc + Xbox = best games on Earth! "
Official Xbox Magazine (UK) n01 - November, 2001. - Pg. 38 -> Pg.45
#Microsoft#Microsoft Xbox#Xbox#OG Xbox#Xbox Live#NVIDIA#NVIDIA Graphics#NV2A#Hardware#Hardware Specs
67 notes
·
View notes
Text

#star trek#faceapp#happy#la forge#geordi la forge#next generation#the next generation#star trek the next generation#tng#star trek tng#time's arrow#nvidia
433 notes
·
View notes
Text
continuing my Ominis week


84 notes
·
View notes
Text

45 notes
·
View notes
Text


#i present this with absolutely no context. enjoy#sonic#sonic the hedgehog#amy rose#tails#miles tails prower#super sonic#knuckles#knuckles the echidna#zephyr#ames#nvidia#HELIOS#knux#we cannot stop laughong at this im so sorry. he/him#🌪
181 notes
·
View notes
Text

We open to the pubic y'all! You ain't cool, unless you play with AI
www.voxAIo.com/fx
👨💻🤖👾🎨☕️
43 notes
·
View notes
Text
47 notes
·
View notes
Text
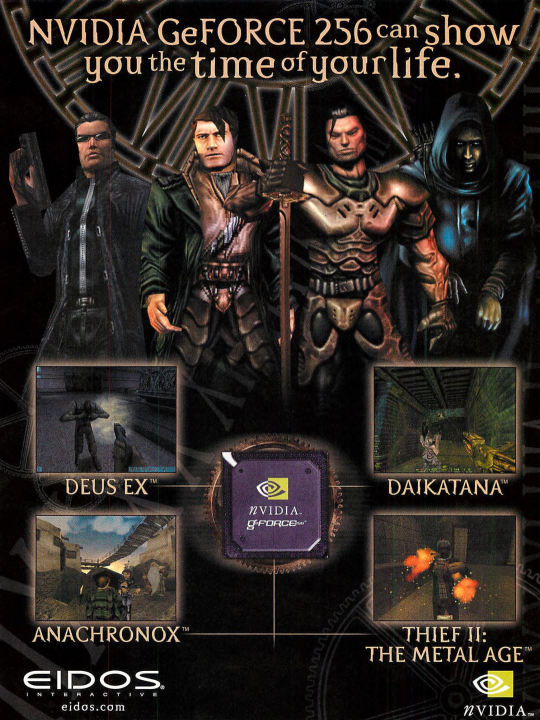
Computer Gaming World - February 2000
NVIDIA GeForce 256
338 notes
·
View notes
Text
#nvidia#bitcoin#gold#stockmarket#wall street#investment#money#street#World#economy#business#day trading#trader#crypto#NFT#NFT art#NFT artist
24 notes
·
View notes
Text
120kW of Nvidia AI compute
This one rack has 120kW of Nvidia AI compute power requirements. Google, Meta, Apple, OpenAI AND others are buying these like candy for their shity AI applications. In fact, there is a waiting list to get your hands on it. Each compute is super expensive too. All liquid cooled. Crazy tech. Crazy energy requirements too 🔥🤬 All such massive energy requirements so that AI companies can sell LLM from stolen content from writers, video creators, artists and ALL humans and put everyone else out of the job while heating our planet.
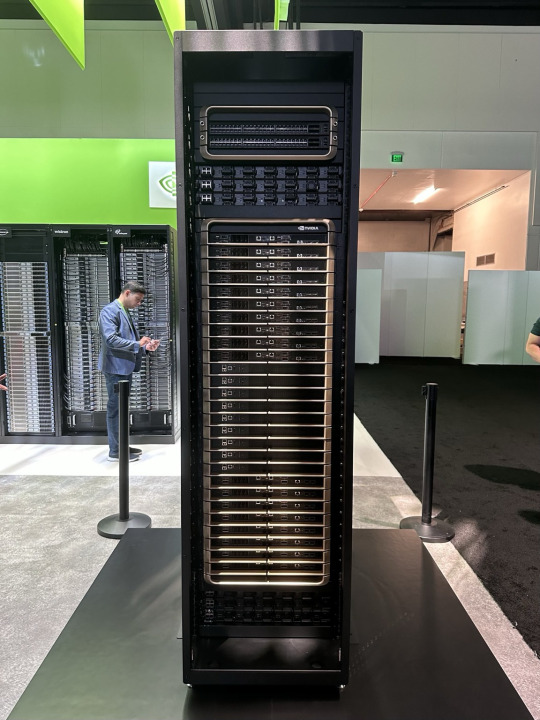

To add some context for people on what 120kW means…
An average US home uses 10,500kWh per year, or an average of 29kWh per day. This averages out at 1.2kW.
In other words, if that server rack runs its PSU at 100%, it’s using as much power as 100 homes. In about 6sqft of floor space. Not including power used to cool it. The average US electricity rate is around $0.15/kWh. 120kW running 24/7 would cost $13,000 per month. Compare that to the electricity bill for your house. (Thanks, Matt)
48 notes
·
View notes
Text
Abusing my Linux kernel by installing an Nvidia driver.
53 notes
·
View notes
Last Seen Blogs