#the amount of hp enemies have in dungeons in that game is
Text
Another random mechanics thought: I think d&d combat feels the best around levels 3-8 because it threads the needle between characters having juuuuust enough health that they don't go down in one or two hits in the early game, and being completely untouchable by mundane enemies when they reach higher level. In the 3-8 zone health is still a finite resource but the party can mitigate the loss of it by playing well.
Imagine a system where hitpoints/Hitdie were based off proficiency bonus rather than level (so 2xMax class HD+con for levels 1-4, 3xMax class HD+con for levels 5-8). It would mean that low level threats (wolves, bandits, minor dungeon traps) stay mechanically relevant as the party goes on, meaning that you're not forced to jump ahead to monsters with CR twice the party's level just to make combat consequential. It also might save boss battles against big solo monsters (giants, casters and the like) as the ability for an enemy to do large amounts of single target damage risks putting one of the party temporarily out of the fight and saving the boss from its usual fate of dogpiling.
Obviously you'd have to tinker with how damage numbers worked (only rolling damage once for an AOE and distributing it evenly across targets) , but I think it's workable.
This system would put a spotlight on temporary hitpoints, which would be far easier to get by staying in taverns, using limited supplies, playing into a survival element that's sadly lacking in the exploration side of gameplay. To draw from a bit of dungeon meshi/monster hunter influence, I could even imagine saying that the flesh of certain magical beasts when properly prepared and consumed could permanently boost a character's max HP, creating a natural questhook as the heroes go out of their way to track dangerous targets for the hope of tasting the literal breakfast of champions.
I might try this in a minicampaign in the future and see how it goes, but I'd be interested to hear what y'all think in the comments before that.
105 notes
·
View notes
Text
Octopath II gameplay tips!
I'd been thinking about this for a while, but since I have mutuals who are playing 8path2, here's a list of advice and things the game doesn't explain!
Incorrect/vague skill descriptions:
The Warrior skill "Enervating Slash": The description is flat-out wrong. This will remove all positive status effects from the USER, rather than the targeted enemy!
"Increased intensity spells" courtesy of the Scholar job: So wtf does this even mean? It gives you a counter that causes the next x number of AREA TARGET SPELLS to be "intensified". For instance, the Cleric's "Heal Wounds" skill can be intensified, but NOT the Apothecary's "Healing Touch" skill. For elemental-based spells, such as Fireball, this causes it to trigger twice (or three times if using Alephan's Wisdom).
Throné's EX skill "Disguise": When used on an ally, Throné takes on their job(s) and learned skills. Sadly, because she doesn't also take on their equipment stats (to my knowledge; I haven't actually verified this), it means she's usually not optimized for their fighting style.
Partitio's EX skill "Share SP": This also has a flat-out wrong description. He gives a percentage of his SP to EACH party member, not just one. For instance, without boosting, he will lose 25% of his max SP and every other party member will gain whatever that amount is. And yes, they'll get it even if it puts them above their normal max SP! Partito rocks!
The Apothecary job’s “Preventative Measures” support skill: Rather than nullifying status ailments for the first 3 turns of battle (as the description says), it nullifies the first three status effects to target the user. So if the user isn’t hit with a status effect until turn 4, it will still be nullified, but if they’re hit with 4 status effects within the first three turns, the 4th will still take effect.
Battle interface:
"Status ailments" include Poison (take damage each turn), Sleep (unable to act until hit), Unconsciousness (unable to act, period), Blindness (greatly reduced accuracy), Terror (unable to boost), Silence (unable to use skills) and Confusion (target a random ally until hit).
"Positive status effects" and "negative status effects" include buffs/penalties to stats, as well effects like temporary HP regen, Sidestep/Vengeful Blade charges, etc. Note that the Cleric skill "Sacred Shield" does NOT appear next to the character's name, and therefore does not count as a "positive status effect"
The order of enemy weaknesses is something you'll see mentioned in any guide/trivia about the game, and it's incredibly helpful. Weaknesses are always listed in the same order: Sword, Polearm, Dagger, Axe, Bow, Staff, Fire, Ice, Thunder, Wind, Light, and Dark (SPD ABS FIT WLD). So for instance, if I determine that an enemy is weak to daggers and the dagger icon is in the first square, I know that enemy CANNOT be weak to swords or polearms, because those would be listed first.
Traveler talents:
Don't forget that Osvald's Study Foe talent reveals more weaknesses each time he encounters the same enemy!
Remember to have Partitio in your party in order to take advantage of his Business Partners talent! For instance, if Parti's follower gives a discount when buying things, this applies not only to NPCs he Purchases from but also shops if he happens to be in the party. Similarly, you may want to pick up a follower that earns more from sales before you sell off a bunch of junk. And if his follower gives a refund at the inn, you can refill your whole party's meters for free as long as you keep Partitio in your party.
Dancer skills that will activate Agnea's Dance Session talent include: Lion Dance (Dance Session targets the ally), Peacock Strut (Dance Session targets the ally), Dagger Dance (Dance Session targets Agnea), and Bewildering Grace (Dance Session targets a random party member). Ruinous Kick, Stimulate, and Sweeping Gale will NOT trigger a Dance Session.
If you want to go into a dungeon you're just under-leveled for, try taking both Throné and Temenos and clearing it at night. Blessing of Darkness and Moonlight Judgement together can give a huge advantage, especially once you're higher-level.
Miscellaneous:
Caits and Octopuffs have absurdly high evasion and elemental defense, but give you massive rewards if defeated. They will often flee the battlefield if ANY enemy has taken damage by the time their turn comes around. Usually the best way to defeat them is to hammer them will all your strongest magic, as spells can't miss and have a minimum damage of 1. Use of Stimulate, Leghold Trap, and the A Step Ahead support skill can come in handy to push their turns back. As @limayde mentioned, Medium and Large Soulstones can also defeat most of them instantly!
Healing (via skills) is based on the caster’s elemental defense. Therefore, it’s a good idea to give your healers equipment with high Elem. Def!
60 notes
·
View notes
Text
devlog #8 let's talk about potions and systems
there's been a lot of good brainstorming being done in the brainstorming discord (anyone is free to join, you'll get credit in the final game and i might buy you a pizza every now and then assuming i have the money for it). so let me go over some of the systems in GO INTO THE FUCKING DUNGEON that i feel confident talking about because i know i will implement them, in one way or the other.
1) exhaustion & camping
GITFD is a game about resource management - as i have phrased it, it's an "immersive sim survival game with light jrpg elements" (it is a first person dungeon crawler jrpg). you will likely not be able to survive the game using only basic attacks, and there are many meters that can be attacked - not just your HP, but your lamplight, your hunger, and your EP (Exhaustion Points). Spells are cast from a static EP meter that does not go up in most cases - everyone starts the game and ends the game with 5 EP. anything beyond basic attacks, throwing stuff, and talking uses up some EP. if you reach 0 EP, you gain a level of exhaustion and your EP re-fills. exhaustion lowers your stats and makes you get hungrier faster. if you run out of hunger meter you starve to death. so don't do that.
if you get enough exhaustion that it would drop your max HP to 0, you just die and can't be resurrected. so managing that is important.
anyway, there are *very* limited ways to restore EP and remove exhaustion. the primary way is via camping. it's sort of like darkest dungeon and sort of like D&D. each character gets two timeslots to do stuff. you can rest (each resting period removes xyz amount of exhaustion stacks). you can craft items. you can cook and eat meals. you can keep watch (and someone better or you'll get ambushed lol).
this is not the kind of rpg that lets you just make a bunch of bread rolls standing around in a hallway and then eat them all in one turn. that stuff takes time and a fire and tools. you can't just do that.
2) corpses
enemies do not drop pre-butchered chunks of meat for you. in fact they don't drop anything unless it would make sense for them to do so. what they do drop is corpses. and if you do not loot the corpses and take them back to camp, the corpses will attract other monsters (mostly scavengers). you can also drop corpses to do that on purpose, or throw corpses at things for shenanigans.
but anyway, yeah, corpses weigh a ton usually and you need to bring them with you to camp to butcher them to actually get meat, hide, animal parts, etc. if your inventory is too heavy then you don't get *visually* slowed down (which is a miserable experience), but instead you take fewer steps to count as an encounter tick, which means your lamplight and hunger decrease faster, because you're traveling slower.
3) potions & alchemy
in the game's alchemy system, players can create potions by combining two monster parts that share a matching effect and one chemical which you mine from the walls, find in chests, etc.. the monster parts are obtained from defeating creatures throughout the game and each part is associated with a specific effect, such as invisibility, healing, or strength enhancement. The chemicals, which are based on the non-courtly minor arcana (Ace through Ten), modify the potion's effect in various ways. for example, the Ace chemical always produces the basic "potion of xyz" effect, while other chemicals can split the effect, make it a group potion, increase its duration, turn it into a poison, and so on.
so, for example;
ace + invisibility = potion of invisibility (which also makes you take a penalty to hitting because you can no longer see yourself or aim)
two + invisibility = potion of half invisibility (makes you translucent)
three + invisibility = potion of group invisibility
four + invisibility = potion of long invisibility (lasts until you next make camp)
five + invisibility = poison of invisibility (apply to weapon, apply weapon to enemy, enemy becomes invisible)
six + invisibility = potion of duo invisibility (invisibility for you and the target)
seven + invisibility = potion of visibility (makes you or something you throw it at extremely visible)
eight + invisibility = potion of total invisibility (works on truesight!)
nine + invisibility = potion of permanent invisibility (permanently makes you invisible)
ten + invisibility = potion of perfect invisibility (gives you invisibility but without any of the downsides)
because i'm an asshole and i hate people having fun, potions are not given a name until the first time you experience their effects, only described as, for example, "green fizzy potion", and the colors and adjectives are randomized every run. so. you can and probably will quaff a Potion of Permanent Petrification or a Potion of Permanent Burning at least once, and it'll be really funny.
11 notes
·
View notes
Text
RPG Role Analysis Series #2 - Dragon Quest II
Dragon Quest II introduces a party of three, and the simplest way to describe them is one purely physical fighter, one strong mage, and a third somewhere in the middle. But, by looking at how magic was assigned to the Prince of Cannock and the Princess of Moonbrooke specifically, I think the members of this party are designed to have specific responsibilities to each other as a group, and it's not as simple as Moonbrooke being the party healer.

Prince of Midenhall - The strongest and sturdiest of all party members, but unable to cast any spells (barring magic items), the Prince of Midenhall is the most basic warrior type. Able to equip nearly all of the equipment (including exclusive rights to the strongest ones) in the game. Most reliable damage dealer, the other characters will be focused on giving him an opening to attack. Of note is that Midenhall has the Flee action instead of a Spells menu in combat, making him the only one that can pull his comrades out of a fight going badly. If the other party members are allowed to die, Midenhall might be the most likely to finish a fight on his own, but has to walk back out of the dungeon alone if he's missing a revival item, making him the rescuer of the party.
Prince of Cannock - An archetypical magic knight, extremely close to the DQ1 Hero, but with additional spells Squelch (single target poison antidote), Kabuff (mass defence buff), Thwack (low chance instakill), Kazing (revival spell), and Kamikazee (self-sacrifice to destroy all enemies), and lacking Snooze and Glow. Cannock is not as strong or hardy as Midenhall, and has less MP than Moonbrooke, emphasizing a jack of all trades style magic knight. In DQ1, the Hero's MP pool couldn't be compared to any other character, but having another mage on the party makes clear that, despite essentially being the same character transplanted here, Cannock's magic is meant to be mid-range.
Princess of Moonbrooke - The Princess starts at level 1 with Midheal and the largest MP pool, while also getting Squelch at level 2 (poison antidote) and multi-target healing midgame, which seems to set her up as the main party healer, though she notably lacks revival, which is uncommon in a white mage type. She also has Whoosh and Kaboom, powerful multi-target damaging spells, and Kasap (multi-target defense debuff), so fits as a red mage analogue. Offensively, Princess can only spend large amounts of MP to do multi-target damaging spells, but has a large MP pool to accommodate this. She also has Snooze (sleep spell), Dazzle (multi-target accuracy debuff), Holy Protection (repel), Evac (dungeon escape), Safe Passage (floor hazard null) and click (door unlocking), so her utility spells all in some way, including her battle crowd control spells tend to avoid or mitigate damage or enemy encounters/attacks. She also gets Hocus Pocus at high level, a random effect wild magic sort of spell. In addition to having somewhat higher agility than the other party members, she could be read as a bit roguish, being rewarded not just for healing, but for avoiding fights/damage by conserving healing MP for occasional large magical attacks, and punished for allowing the party to be knocked out, as she herself cannot revive them.
Things I find interesting about this party: Midenhall is the only party member who can escape a battle, either of the others can escape the dungeon, but only Cannock can cast Zoom to bring you all the way back to town. The game was really close to having you need all three alive to make the entire trip, but you can pull off a full escape with just Midenhall and Cannock. Midenhall and Moonbrooke would have to walk back to town from the dungeon. There isn't a clear cleric of white mage analogue in the Final Fantasy sense. Moonbrooke heals, but has enemy debuffs and can't recover her failure to keep HP up with a revive spell. Cannock can bring the others back and has defensive buffs, but misses the strongest heal spells. Combined, they have to keep each other alive to keep Midenhall alive to put through the most damage. I like also how Cannock can only reliably do single target offensive magic, and has to either roll the dice on an instant death spell, or sacrifice himself to hit more (really a panic button on the only character with reliable revival), and Moonbrooke can only reliably do multi-target spells at the risk of blowing through MP. Moonbrooke also lacks buffing or revival options, but can get those effects with a random chance through Hocus Pocus.
8 notes
·
View notes
Text
A Newbie Guide to Healing
HALO~
I make this guide in the hopes that it will make new players less scared of healing, or at the very least, more mentally prepared for it. Also because the in game tutorial makes me do this (ಠ ∩ಠ)
SO! Suggestions encouraged, just remember this is meant to be a general beginners guide, so I won't be including anything specific to a single dungeon/raid/trial.
Everything under the cut!
Healing is understandably the job the player base finds the most intimidating. The Tank is sturdy, and the DPS nimble, but they depend on you to keep them alive, as none of them can compete with the sheer healing and resurrection powers you have! And that can be a lot of pressure, but we can break this down so its slightly less pressure!
Healing in its most basic form is all about multitasking and prioritizing your moves. Think of it like playing Invaders, you have to make sure you are taking out the closest threats before you can worry about the next - get rid of the first row, then the next row, and so on. In this case the threat is your party members health bars depleting XD
How to Heal
Know Your Skills
Let's start with getting familiar with your skills! The Healer classes all have pretty unique styles to each other, so I advise you READ YOUR TOOL TIPS. For the most part you will have two types of healing spells:
Regular Heal-this heals the player/party for a certain amount of points. Some will heal a little bit, some heal a good amount, and a couple will heal for a lot/all the targets HP. These come in both single target and Area of Effect [AOE] form.
Regenerating Heal-also known as regen. These are spells that initially heal a small amount of points, and then heal a small amount over time, for a few seconds or so. These also come in single target and AOE forms.
The Healer classes also all have unique class specific Heal spells that will have certain effects, or play with class specific mechanics. That is for you to learn as you get more familiar with the classes, as most of them are beyond Lv50 and at that point we're no longer in newbie territory. SO, from this point on I will refer to a "regular heal" as simply a Heal, and a "regenerating heal" as a Regen.
All Healers also have a Role skill called Esuna, a status or debuff clearing heal. These are also called DOTs or Damage Over Time. Keep in mind this will not heal any status, only the ones with a progress bar over them will be cured. You also will not be able to choose which status is healed if your target has multiple. Esuna is a single target skill.
Two of the Healer jobs [SCH & SGE] also have shielding or barrier granting skills. These skills do not heal the party, but instead negate damage for a certain amount of points. This will appear as a yellow section of a player's HP bar capping before their health points. If they have full health it will roll over to an extra line. Any damage taken will first have to go through the barrier before it can get through to the health points. These also can be single target or AoE.
Finally, every Healer has the ability to revive a fallen player, usually referred to as a "res". This will be elaborated on later, but know that you all get this skill very early, and that this has a pretty long cast time normally.
Learning to Cast
Yes I said cast time! All Healing jobs are also casting types! Meaning that for a majority of your skills are spells, and most of them require you to stand still until the cast finishes for it to work! This requires you to position yourself out of danger, but still close enough to heal.
Most of the time a good place to be is a short distance off to the side of the Tank. That way you have a good view of everyone, while being out of harm's way. This applies to both groups of enemies and Bosses.
Single target spells will have a longer range than the AoE ones, and most AoE heals/regens/barriers treat you as the center of the circle. So if you're planning to do a party-wide skill, you need to position yourself so others are in your range!
There is also a helpful tactic called slide-casting, that can assist you if you find yourself in harm's way. There is perhaps a half-second before your spell is done casting, that you can move, but the spell will still finish! It will take some practice to get a feel for it.
You and Your Tank
As the Healer you are responsible for your parties health, but most of all you are also the Tanks partner. They are going to depend on you to keep them alive as they do their best to soak up all the damage to keep the party out of harm's way.
This means you must keep up with the Tank for every pull. If they are running, you are running. If they pull the group around a corner, you have to run around that corner to target them for healing. If they fall, you bring them back up!
But also, if they are taking on too much for you to handle or going too fast, tell them! Very few Tanks will warn or ask if big pulls are ok, because it tends to be assumed. If you're nervous, let them know you are new/new to healing a particular encounter. Most Tanks will ease up and at that point you can tell them if you're comfortable taking on more. They might lead the charge, but you're the one keeping them standing!
The Tank in turn is supposed to be keeping everyone safe, especially you. They do this by generating the most enmity. Enmity is the in game stat that tells the enemies who to attack first, also known as Aggro in most other games. All enemies are drawn to who is creating the most enmity and who is doing the most damage. All Tanks have a Stance that will help them generate enmity, if they have it on, it will look like a little buff by their name called either Iron Will, Defiance, Royal Guard, or Grit. If your Tank is pulling and you don't see this by their name, tell them!
This is important because you as the Healer are also capable of generating enmity, because big heals also tend to grab the enemies attention. Especially regen.
The Pull
OK, let's try to put all that together!
1. The Buddy System
If you are a SGE, immediately put Kardia on your Tank. If you are a SCH, summon your Carbuncle/Fairy if they're not out!
The Tank is the front liner so they will run in first so that they can grab the enemies attention. Always stay behind the Tank, not just because you need to be there to heal them, but because you don't want the enemies to spot you first! You are mighty of mending but squishy of body!
Generally you have two options on your approach: if you are some distance away from an enemy group you can safely throw a regen/barrier on to the Tank without drawing enemy attention. OR you can wait until the Tank have picked up the Boss/all the enemies before starting up any skills.
2. Stay Alive
This is going to sound counterintuitive to your Role, but remember: you are the only Healer! The party might be able to take a few mobs and be okay until you return, but if you die in the boss fight, the rest of the party is often soon to follow.
Make sure you are out of harm's way and your own health is fine, before you start throwing out heals to the others! You can't heal anyone if you are face-planting the earth.
3. Keep the Others Alive
Once you're in a good spot and your own HP bar is okay, it's time to watch everyone else's! When you're the Healer you're going to spend most of the time watching these bars, so it might be helpful to change the size in the HUD to make them bigger. This will make it easier to select the player you want for individual heals.
SCH, your Fairy will also move independently of your commands to heal and shield other players. This is normal, and your game is not tweaking out. It also will not interfere with any of your spells, so don't worry about it!
Generally the Tank will be your priority and the one taking all damage if things are going well. Depending on the amount they are taking, you can heal them every so often, give them a big heal, or if it looks like they are doing fine, a regen may suffice!
Something to watch here also: make sure your Tank is using their mitigations! These are skills the Tanks have to lessen the amount of damage they take, and the skills will have many different names, but all of them will appear as a buff by their name and say they reduce damage. This is important because you are not expected to, and in some cases straight up cannot, heal through all the damage the Tank will take. This is a balancing act between you and the Tank and you both have to contribute for it to work! If you notice the Tank is not using mitigations, politely ask if they are/know about them.
4. Attack Whenever Possible
Remember, you also have attacks! FF14 wants all the players to be actively damaging foes. In fact they generally want the healer to be 30% of the DPS! If your party looks good and the Tank is not in immediate danger, be attacking as much as you can!
SGE this is why you pick the Tank to put Kardion on, for every attack you make it gives the Tank a bit of healing!
Again you are a caster class so most of your attacks will also require you to stand still! When you are fighting groups of enemies, stick to AoE attacks, when you are fighting single targets, use single target spells.
When you are using AoE attacks, some of them will also treat you as the center of the circle, forcing you to get close to your enemies. DO NOT stand next to the Tank. The Tank is only directing damage, they cannot actually shield you with their body. Attacks will go through them and hit you. This is called Cleave. A fair strategy is to follow the lead of the DPS who is experienced, as they also prefer not to die lol
Your DOTs or Damage over Time skills are instant cast! Which can come in handy, as sometimes you won't have time for much else. These are best saved for Bosses, but if you have time to throw them on a random enemy, don't hesitate! For bosses you want to try and reapply DOTs as often as possible.
AST, your Tarot Cards and Divination are specifically for buffing the attack power of yourself and other players, so keep whipping those out!
And remember, the slide-casting trick works on attack spells too!
5. Pick Up the Fallen
Despite your best efforts, someone has died. Don't panic! Even if it's the Tank, don't panic. Now is the time we learn how to play god!
All Healers have the ability to res: Raise for WHM, Resurrection for SCH, Ascend for AST, and Egeiro for SGE. Despite the different names these spell all function exactly the same and they have the same casting time. Which is long.
So when you need to raise someone in a pinch, you want to use the Role skill Swiftcast first! This skill makes it so the next spell you cast is instantaneous. Your priority if everyone else is dead will always be Tank first. If there is a need to raise more, you can use the res move again, but you will have to do it for the full cast time, until you are able to use Swiftcast again. So it's best to wait for a moment where everything is back under control, and you are out of harm's way so you won't be interrupted.
Keep in mind also, when you res someone, they will revive in the last place you were standing when you cast that spell, not where their body is. Also, players first have to accept the res in order to be revived, meaning there may be a delay between when you cast it, and when they actually get up.
6. Tank Busters
Every so often a Boss will think "well shit, if I just take care of this one mother fucker, the rest will fall like leaves!" and try to take out your Tank in one attack. This is the Tank Buster and you need to keep your eye on the Tank when this is happening!
You can tell when this is happening when the Tank suddenly has both a circular marker around their body, and an arrow over their head pointed directly down at them. This is usually coupled with a progress bar indicating a strong move is charging up.
Generally these moves cannot be stopped, your Tank will take damage. So do your best to make sure your Tank's health is at max before the attack hits, and once the damage is done, assess the amount needed to be healed after. Sometimes it's going to be a lot, sometimes they might just need a regen.
Making Good Choices!
As the Healer, you will in the end have to prioritize some Roles over others depending on your situation. There isn't any favoritism involved in these lists, it's purely from a "how do I get us back on track the fastest" standpoint. If it helps, think of it like you're a battlefield medic, they have to make choices based on the conditions!
For Light Parties
This will be most Dungeons and the early Trials. For the majority of in game content this will be the set up you will work with:
1 Tank, 1 Healer, and 2 DPS.
Heal Priority-
1. Yourself
2. The Tank
3. DPS
Res Priority-
1. The Tank
2. The DPS
For Full Parties
These will be Normal Raids and most trials after ARR.
2 Tanks, 2 Healers, and 4 DPS.
Heal Priority-
1. Yourself
2. The Main Tank
3. Off Tank/DPS
Res Priority-
1. One of the Tanks
2. Other Healer
3. DPS- Summoner [can help res at Lv12] or Red Mage [can help res at Lv64]
4. Other Tank/All other DPS
For Alliance Raids
These are Alliance Raid only. You will be part of an 8 player team, and there will be two other 8 player teams on the field. When you pick Healer in Alliance Raid, keep in mind that your skills will typically only affect those in your immediate party. For instance if you use an AoE skill. You can help players from the other parties, but only if you specifically select them, and only with single target skills.
Your Party-1 Tank, 2 Healers, and 5 DPS.
The Alliance- 3 Tanks, 6 Healers, and 15 DPS.
Heal Priority-
1. Yourself
2. The Main Tank [may not be your Tank!]
3. Your Tank [if not the main tank] and DPS
Resurrection Priority-
1. One Tank
2. Your other Healer
3. Healers from other parties
4. Any Summoner [can help res at Lv12] or Red Mage [can help res at Lv64]
5. Other Tanks/Your other DPS
6. DPS from other parties
General Tips and Etiquette
You will never need Repose. At this time, this skill is useful maybe in a few story instances, and if you're out in the field alone. But in any general dungeon/trial/raid run it has no use.
You can use the Role skill Surecast to ensure your next spell will not be interrupted by attacks, and it will also prevent most knock-back effects!
If you are having trouble managing MP consumption, you can use the Role skill Lucid Dreaming to steadily regain MP for a short amount of time. Likewise you can also use it after just having been revived to get your MP back quickly so you can use your stronger spells faster! Because your MP will be extremely low when you regain control.
Speaking of that, WHM and AST, once you guys get level up high enough to learn Cure II and Benefic II, stop using the first versions of these skills. Yes, there is a neat little bonus action combo that they do, but I'm telling you that is inconsequential. It is simply more time and cost effective to use the stronger Heal move, then to keep pumping out a tiny heal for a chance at something bigger. If you're having trouble just use Lucid Dreaming, or Presence of Mind/Lightspeed to help you out, it will be quicker I promise!
Don't forget about Esuna! Yes you could just heal through the DOT on your Tank, but that takes more time and MP than just cleansing them! Especially if the DOT is going to last more than 5 seconds. However, if the target has more than 2 status effects on them and they have short timers, it may be more cost effective to cleanse one and then heal. If ALL the DOTs have long timers, heal between cleanses.
On that note, let's talk about Doom [the in game debuff]. Cleansing Doom is not optional, as it can kill a player that has full HP instantly. Doom is not so much a DOT as a countdown to player death. On top of that, the way you must cure Doom is not always the same. Most of the time you can cleanse Doom by healing a player up to full HP before the timer runs out. Sometimes it has a bar over it, which means you can use Esuna to clear it. And then there's the ones that are completely out of your control, because it's a boss specific mechanic that required the afflicted player to do something [there's only one of these in main game content]. So yes when it comes to Doom, pay attention and do your best :')
For the Healers the use of the Limit Break is not common, but when it's time, it is crucial. For main game content with a 4 player party you will never need it, but in the Trials and Raiding content this is a potential tool to save your team if you need it. Because for the Healers the Level 3 Limit Break [LB3] results in a full party 100% heal and res. Meaning if you are the last man standing in the raid you have the power to turn the whole thing around! Keep in mind: You will still have a cast time for this move, and this move has a limited range. Make sure you are safe when casting, and be close to the party members you intend to res.
If a player has died and you didn't have time to res them before all the enemies/boss are dead, whatever the reason may be, it is better for them to teleport and run back. This might seem rude, but it's because when you res someone, they don't come back at full strength! They have a minute long debuff called Weakness that lowers their attack by 25%. If you've already ressed them in that time frame, doing it a second time will make it Brink of Death and then their attack is lowered by 50%. Some players don't know this and will just lay there. Politely explain it to them. If they stay there, then they can stay there :)
Rescue is a Role skill that you need to be the most careful with in its use. Yes, a timely rescue from the jaws of death is great and you love to see it! But this is also a move that can easily be used to cause grief in the wrong hands. Unless the player in question is actively in danger and they are aware of it, they are more often than not going to be a little bit terse with being literally pulled away from whatever they were trying to accomplish. Especially if they were in the right place and they just got pulled into death. You must be 100% sure when you use this move, that you are moving someone out of danger when you do it.
DO NOT pull for the Tank. Remember you and the Tank are a team! That means you both have to be comfortable with a big pull. Because you might be an awesome healer, but if they're still not familiar with all their mitigations, or even not familiar with the encounter, then they might die anyways. If you're feeling good about it, you can simply tell the Tank that they can grab more enemies. If they're not, then please continue to move at the pace they set. If the Tank wants to make a big pull they will either ask, or most just do it and see if you're able to keep up with their stride.
On that note, DO NOT use Rescue to make the Tank move forward faster. Do not use it to pull the Tank into mobs. The only thing this will accomplish is make the Tank mad at you. Again, this is a partnership, be considerate of the Tank!
NOW GO! PROTEC YOUR FRANDS FROM DANGAR ;3
#Final Fantasy XIV#Final Fantasy 14#FFXIV#FF14#FF14 Guide#FF14 Healer#FF14 Healing#FF14 Beginners Guide
14 notes
·
View notes
Text
Ragnaros - CR22 Elemental
BY FIRE BE PURGED!
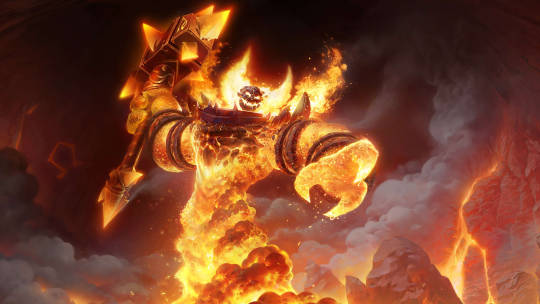
Artwork by NightcoreGang on DeviantArt.
In Warcraft, Ragnaros the Firelord is the elemental lord of fire, leader of the Warcraft equivalent of the Plane of Fire. At the original launch of World of Warcraft, he was the final boss of the hardest dungeon in the game, and it took 40 players to take him down.
I assume your Pathfinder game probably doesn't have 40 players, although if it does, and half of them die while fighting this boss, please email me and tell me about it.
I often give generic names to my Pathfinder adaptations of specific named characters, and I considered just naming this enemy "Firelord," but this isn't a species of monster. There isn't more than one of these. No matter what universe your game is set in, this is a demigod. He has a specific name. It doesn't have to be Ragnaros, but it's definitely not Firelord C.
The equivalent elemental lord of fire in Paizo's official setting for Pathfinder is Ymeri. This stat block for Ragnaros is CR 22, while Ymeri is CR 28. That's because this stat block for Ragnaros is based on his appearance in Molten Core, when he was only partially able to manifest and was significantly weakened, due to being on the material plane. And I imagine that's how it would be used in a Pathfinder game as well. The downside, however, is that if you defeat him on the material plane, he isn't dead; he just gets sent home.
Ragnaros - CR 22
Standing tall enough to make an army of humans look like toy dolls, the elemental lord of fire's malevolent face grins viciously at you within the scorching flames that make up his body. A vortex of lava spins around the base of his figure.
XP 4,915,200
NE Colossal outsider (elemental, extraplanar, fire)
Init +11
Senses darkvision 60 ft., flamesense, true seeing; Perception +50
Aura feel the flame (300 ft.)
DEFENSE
AC 28, touch 8, flat-footed 22 (+5 Dex, +1 dodge, +20 natural, -8 size)
hp 496 (30d10+330)
Fort +27, Ref +22, Will +19
DR 15/—
Defensive Abilities elemental revival, melt weapons
Immune ability damage and drain, charm, compulsion, death effects, elemental traits, fire, petrification, polymorph
SR 33
Weaknesses cold hardening
OFFENSE
Speed 50 ft., swim 50 ft. (lava only)
Melee sulfuras, hand of ragnaros +35/+30/+25/+20 (6d6+17/19-20/x3 plus 1d6 fire plus burn plus fire splash) or 2 slams +30 (4d8+8 plus burn)
Space 30 ft., Reach 30 ft.
Special Attacks burn (4d8, DC 35), constant fire, fire splash, submerge, wrath of ragnaros
Spell-Like Abilities (CL 22nd; concentration +32)
Constant—clarion call, freedom of movement, tongues, true seeing
At will—controlled fireball (DC 27)
3/day—summon and submerge (level 9, 8 greater fire elementals 100%, see text)
Additional Spell-Like Abilities (CL 4th; concentration +14)
At will—walls of lava (DC 30, see text)
STATISTICS
Str 27, Dex 21, Con 30, Int 14, Wis 24, Cha 30
Base Atk +30; CMB +46; CMD 62
Feats Combat Expertise, Combat Reflexes, Critical Focus, Dodge, Elemental Focus (fire), Greater Elemental Focus (fire), Improved Critical (slam), Improved Initiative, Improved Iron Will, Iron Will, Mobility, Spell Focus (evocation), Spring Attack, Toughness, Whirlwind Attack
Skills Acrobatics +20, Climb +43, Intimidate +43, Knowledge (arcana, dungeoneering, local, history, religion) +12, Knowledge (planes) +35, Perception +40, Sense Motive +20, Spellcraft +32, Use Magic Device +25
Languages Aquan, Auran, Draconic, Ignan, Terran, tongues
SQ firelord
Gear sulfuras, hand of ragnaros
SPECIAL ABILITIES
Cold Hardening (Ex)
Whenever Ragnaros takes cold damage, his damage reduction is temporarily reduced by an amount equal to 1/2 of the cold damage he takes. Multiple applications of cold damage stack to further reduce his DR, although this cannot reduce his DR below 0. This reduction lasts until the next time he takes damage that would otherwise be reduced by his damage reduction, after which his DR returns to normal.
Constant Fire (Ex)
As a free action at the start of his turn, Ragnaros can choose a target within his reach that is currently affected by his burn ability, and strengthen the fire to burn hotter. The burn damage dealt to that target increases by 2d8, and the duration of the burn increases by 1 round. Multiple applications of this effect can stack on the same target.
Elemental Revival (Ex)
If Ragnaros is slain, his body crumbles to ash (leaving behind any gear he held or carried), his soul returns to a hidden location within his realm, and he is immediately restored to life (as per true resurrection) at that location. If slain within his own realm, he cannot use this ability, and he is slain forever.
Feel the Flame (Su)
Enemies of Ragnaros with fire resistance within 300 ft. of Ragnaros have their fire resistance reduced to 1/3 of its normal value. Creatures with fire immunity within 300 ft. of Ragnaros lose their immunity and instead gain 20 points of fire resistance (this resistance does not get reduced). A creature that leaves the radius of this aura regains its fire resistance or immunity.
Firelord (Ex)
Ragnaros's servants bow to his will and instinctively follow his commands. As a free action, Ragnaros can grant all of his allies with the fire subtype within 300 feet, except for himself, a +10 sacred bonus to Constitution. Each creature retains this bonus until it moves out of range or until Ragnaros falls unconscious or dies.
Fire Splash (Su)
When Ragnaros hits with Sulfuras, Hand of Ragnaros, and deals 6 or more fire damage with the flaming burst effect (including both the normal fire damage and the bonus critical fire damage), the fire damage is dealt to all creatures and objects in a 20-ft.-radius burst centered on the target of the attack. Targets other than the primary target of the attack can make a DC 33 Reflex save to halve the damage. The save DC is Strength-based.
Flamesense (Ex)
Ragnaros can sense the presence and movement of any fire—including creatures with the fire subtype, creatures on fire, and any creature touching the surface of the Plane of Fire—within 300 feet as if using blindsight. In addition, he can see through fire, fog, and smoke without penalty.
Melt Weapons (Ex)
A metal or wooden weapon that strikes Ragnaros takes 3d8 fire damage unless the weapon's wielder succeeds on a DC 35 Reflex save. The save DC is Constitution-based.
Summon and Submerge (Sp)
As a spell-like ability, Ragnaros can collapse into a pool of lava as a free action, functioning like his Submerge ability, and then immediately begin summoning 8 greater fire elementals as if with summon monster ix as a one-round action (despite the fact that he cannot normally take most actions while submerged). Emerging dismisses the summoned elementals, and Ragnaros immediately emerges if all summoned elementals are killed or banished, or after 1 minute. This counts as one of Ragnaros's three daily uses of Submerge.
Submerge (Ex)
As a move action, Ragnaros can collapse into a pool of lava or reform back into his normal form. He can collapse into a pool of lava three times per day. The pool of lava takes up Ragnaros's space and an area on the ground within 20 feet of it, and deals twice Ragnaros's normal burn damage to any creature that touches it. While Ragnaros is collapsed into a pool of lava, he has DR 30/—, gains 30 points of resistance to all energy damage except cold, gains 15 points of cold resistance, and gains fast healing 20. Additionally, if he is affected by any harmful effect that initially allowed for a saving throw, he can make a new saving throw against the effect each round at the start of his turn. However, while submerged, he loses his natural armor bonus and can take no actions except to reform or use his Firelord ability.
If Ragnaros is prevented from taking an action for any reason, he can instead submerge at the start of his turn without spending an action, but loses the rest of his turn. Doing so expends two uses of Submerge.
Walls of Lava (Sp)
As a swift action, as a spell-like ability, Ragnaros can create a wall of lava that functions as the wall of lava spell at caster level 4, except that the spell's casting time is a swift action, the action required to cause the wall to erupt is a free action, and when it erupts it can only fire a plume of lava at a target within 15 ft. of itself instead of 60 ft.
Wrath of Ragnaros (Ex)
When Ragnaros uses his Whirlwind Attack feat, he can perform a free bull rush maneuver with a +10 circumstance bonus (typically for a total of +61) against each target he hits with a melee attack. This combat maneuver does not provoke an attack of opportunity.
3 notes
·
View notes
Text



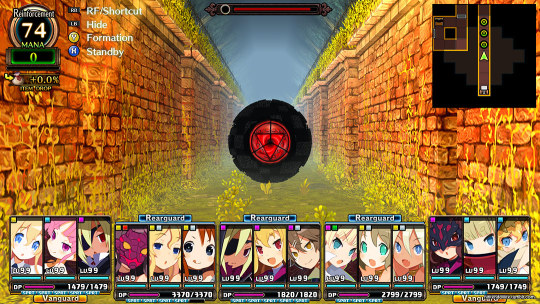
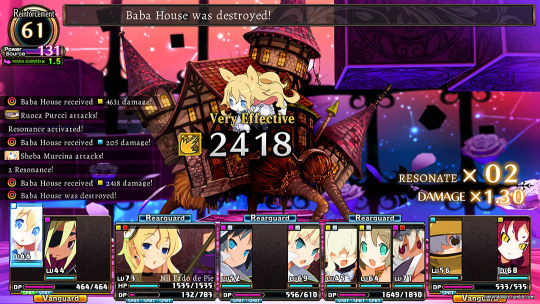
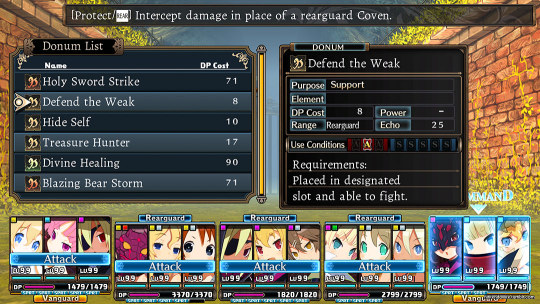

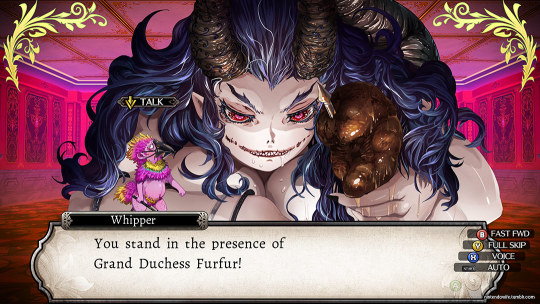


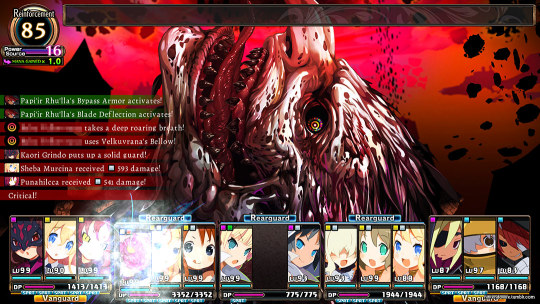

I recently finished Labyrinth of Refrain: Coven of Dusk on PC. The main story playthrough took me 100 hours and then I proceeded to the post-game dungeon to get the true ending, adding up to a total playtime of 132 hours.
At first my feelings towards the game were ambiguous. I very much liked the visual style but the dialogue and story seemed boring. Also the game systems were too complicated for their own good. I appreciated the game tried to come up with some new unconventional systems but they were pretty difficult to understand. The terms the game uses were unfamiliar and for a long time I didn't know how the covens and such work.
The turn-based dungeon crawling RPG gameplay didn't completely convince me at first. Battles were boring as in the beginning you don't get active skills to use, so it was just whacking monsters with normal attacks. Characters gain passive skills but all active skills are tied to the different covens you assign the characters to. As you advance in the game you start getting better covens with more skills and battles get more interesting.
There are underlying combat mechanics though, like "critical gore" hits that destroy a limb of either the enemy or your own team members, leading to lowered max HP and decreased attack or defence. In case the head gets destroyed, it's one-hit KO for the character. This added a surprising amount of tension to battles.
Advancing in the game wasn't always clear as there were all kinds of roadblocks preventing smooth progress which was a bit frustrating. For example to progress in a dungeon you needed to complete some kind of an arbitrary task or event, then return to base where you needed to report. Only after that you either gained a new ability to progress or another main story event triggered somewhere in the dungeon.
Slowly the game started unfolding its brilliance. The game mechanics clicked with me and I understood how to utilize covens, formations, etc. to my advantage. The story got a lot more interesting too. The first-person dungeon crawling and mapping of areas felt satisfying to me right from the beginning. Dungeons became visually more enticing and the boss fights and story events made me want to push further to see what else is on offer.
I have to say Labyrinth of Refrain is not a feel-good game despite what you may think based on the cute looking characters. I actually felt uncomfortable about some events and dialogue in the game. There's verbal and physical abuse, unconsented sex and cruel treatment of others. Some of the monster designs are downright grotesque and repulsive.
What the game excels in is character customization. You can create dozens of characters into your roster. You select a class, gender and you have 4 different character portraits to choose from. You choose a voice, personality, stance, stat growth type and lucky number. You can name the characters and even get to input a flavor text for each of your "puppets".
I had lots of fun getting creative, coming up with all kinds of silly or fancy names and flavor text describing their backstory. For example I had a chubby female mage Plyyshi de Devaan who was the cousin of my dancer character Velour van Schohva. One of my masked female mages I named Naamio Campbell (naamio means mask in Finnish) as a word play of Naomi Campbell, the former supermodel.
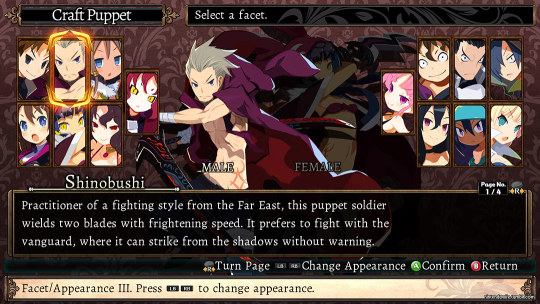
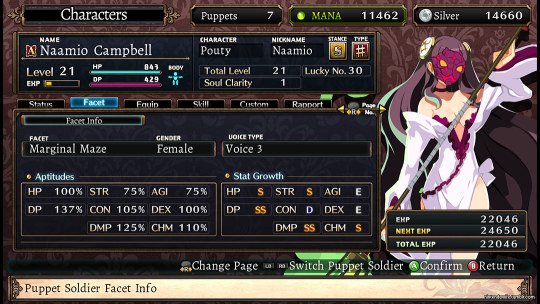
In addition to characters' normal portrait illustrations you get to see fun chibi versions of them during battle when they occasionally do a so-called resonance attack.
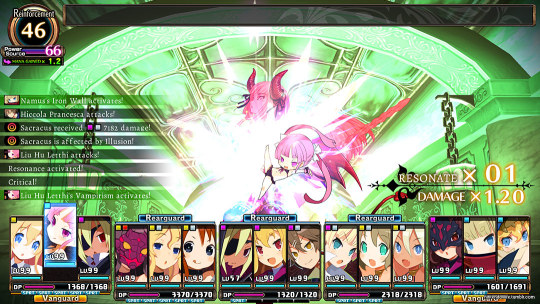
You can equip your characters freely (no class restrictions on weapons/gear). Your characters gain stats and passive skills when they level up and there's the possibility to do a "soul transfer" to move existing characters' growth to a new puppet with another class. This allows you to transfer class-specific skills to other classes and create truly powerful and efficient characters. Soul transfer is key mechanic to tackling some of the post-game content.
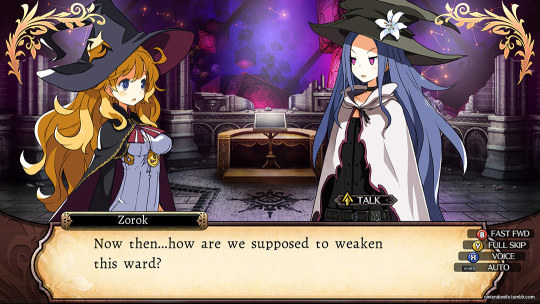
In the end I truly enjoyed the game despite my indifferent feel towards the early-game content. I grew attached to the characters. Music was great especially in boss encounters and voice acting in Japanese was very good. The mechanics allowed for building an efficient team and I saw the pros of the skill system I was initially disappointed with. The battles offered a good challenge, even so much that before entering the post-game I decided to lower the difficulty to avoid grinding. I was a fan of the visuals and I especially adored one key character's design that appears in the post-game.
I've already added the sequel, Labyrinth of Galleria, to my wishlist.

3 notes
·
View notes
Text
totk rambling
despite the initial wow factor, breath of the wild hollowed out pretty quickly in terms of depth of mechanics and what you could actually do with them
it's very refreshing to see that tears of the kingdom's design seems to have a central focus on making the mechanical sandbox deep and robust, instead of just pretty environments and surface level interactions
a complete 180 from botw's dungeons trying to actively prevent players from resolving situations in unintended ways. only the castle gave a beautiful taste of what couldve been
it is a letdown to see the combat is still hp based and very basic, despite the introduction of fused weapons. the robot guys seem to basically be reskinned bokoblins. imo they need to do away with hp and replace it with effect-triggered guard breaks/environmental vulnerability instead, so you have to come up with ideas for taking down enemies rather than just spamming dodge->y. if you really wanna revolutionize action games, just give the robot enenmies impenetrable parries and do away with dps weapons altogether. hp/dps as a combat system's baseline currency is a surefire way to make all other effects superficial, as all combat has to ultimately be resolved by the equivalent of a Y-press. make creative solutions the core of combat dammit! ah well, maybe in another 6 years.
i do have genuine hope bosses at least will be puzzle based affairs, maybe even with no single solution, though thats a bit of a reach for aonuma's team. im just let down about it not coming to general combat though
but on the positive side, the glorious return of ultima-style phasing through ceilings/floors to video game dungeoneering is not what i had on the bingo sheet for 2023 but I am 100% here for it
also, weapon fusion is tasty but just hardcoded, the real accomplishment is that dynamic glue mechanic. top tier stuff🤌 place your bets: are they brave enough to make it unlimited so people can make mile long trains? 🚂🚃🚃🚃🚃🚃
now... what would really sell me is dynamic thrust generation... not just "this component moves you X amount" I saw the balloon but i fear it's just a 1-size-fits-all plug-n-play component
make the game Nuts n Bolts 2 Hylian Boogaloo
put in Banjo Kazooie amiibo costumes and replace the Ultra Hand with the wrench
4 notes
·
View notes
Text
New Palworld Update Includes First Raid Boss, Pal And Base Changes, And More
New Post has been published on https://thedigitalinsider.com/new-palworld-update-includes-first-raid-boss-pal-and-base-changes-and-more/
New Palworld Update Includes First Raid Boss, Pal And Base Changes, And More
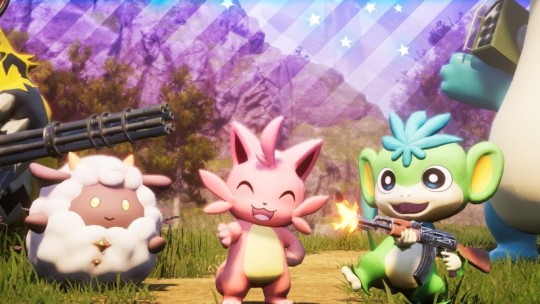
Developer Pocketpair has released a new Palworld update that introduces the game’s first raid boss, makes changes to pals, U.I., and bases, and more. Dubbed v0.2.0.6, the Steam version of this update for PC players is already live; the Xbox version will be released when it’s ready, according to Pocketpair.
As for what to expect, today’s update is one of Palworld’s biggest. But chief among the additions is the game’s first raid boss, a heavily anticipated aspect of the survival game’s endgame. Let’s break it all down:
Raid Boss

The first Palworld raid boss is now live
You can summon raid boss pals by using slabs at new Summoning Altars
These pals are extremely powerful and cannot be captured.
Pal eggs can drop after defeating raid boss pals.
There is an “extreme” version of the first raid boss that Pocketpair says “is incredibly powerful and difficult to defeat.”
Other New Content
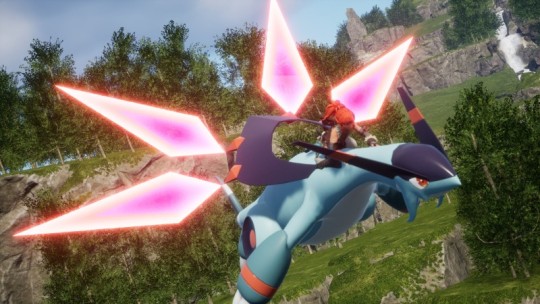
New “Training Manual” items have been added. These manuals allow you to give experience points to Pals.
New item “Ancient Technical Manual” has been added. This manual gives you ancient technology points and can be randomly found inside dungeon chests.
New “Recovery Meds” items have been added. Using these meds will slowly recover your HP over time.
New item “Homeward Thundercloud” has been added. When used, this item will instantly move you to your nearest base.
New item “Ability Glasses” has been added. When equipped, you can see Pal’s stats.
New stat boosting items have been added: “Power Fruit, Life Fruit, Stout Fruit”. These items will boost Pal’s stats when used.
Added a new passive “Mercy Hit”. Pals with this passive cannot reduce enemy HP below 1 when attacking.
New item “Ring of Mercy” has been added. When wearing this ring, you cannot reduce enemy HP below 1 when attacking.
New armour “Multiclimate Undershirt” has been added. Protect yourself against both the heat and the cold with just one slot!
New building “Electric Egg Incubator” has been added. This incubator consumes electricity to automatically adjust the temperature to the optimum temperature for each egg.
New building “Ore Mining Site” has been added. This mining site allows you to produce ores from the comfort of your base!
Pals

Kelpsea can now produce Pal Fluids at the ranch
Dumud can now produce High-Quality Pal Oil at the ranch
You can now reduce the weight of metal ore while riding Surfent Terra
Increased the amount of ore dropped while riding Astegon
You can now raise Pal’s rank to the maximum with a single synthesis using the Pal Essence Condenser (Condensation progress is now accumulated in the individual Pal)
Negative Pal status will now be resolved after spending some time in the Pal Box
UI
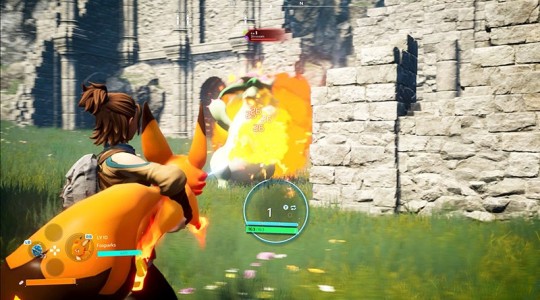
While aiming a sphere, it will now display how many of the target Pal has already been captured
You can now check the cooldowns on partner skills for all your Pals on the main screen
Equipment and item stats are now visible on the technology screen, even if you have not unlocked them first
The tutorial has been improved and renamed to “Journey”
You can now show/hide the “Journey” in the game options
Damage number display size can be changed in the game options. (In Raid Boss battles, the damage numbers tend to overlap a lot and it may be difficult to see, so we recommend adjusting the size)
Player

Items dropped by players after death on a dedicated server can now be picked up by anyone after 24 hours of real-time have passed
Added a new “sleeping” player emote (edited)
Bases

You can now allow/disallow certain work for base Pals at the Monitoring Stand
Chest filters have been added. Select item types to allow or disallow inside chests
Crafted items are now transported from crafting facilities. Selecting “allow transport” when crafting will result in Pals transporting those items to chests when finished
You can now edit your character’s appearance at any time by using the “Antique Dresser”
Building and building piece placement rules have been relaxed (you can now connect stairs facing upward; roof pieces can now directly connect to foundations; triangular walls can now be connected to stairs)
You can now force a Pal to work and cancel their break by picking them up and throwing them towards a facility (Pals recover their SAN while taking a break, so be careful!)
Fixed assignments remain fixed, even after bad events occur. Previously, some assignments would change due to certain conditions, but now they will remain fixed unless the Pal is placed inside the Pal Box
Balance Adjustments

Minimum heat and cold resistance have been added to various armour. You will no longer need to take off your heat-resistance armour when it is cold at night in the starting areas!
Reduce the button press time in the egg incubator
Change the pattern for Jormuntide Ignis to something more unique
Added legendary blueprints for some firearms (Dropped from specific enemies)
Corrected the selling price of diamonds
In single-player, it is no longer possible to select the initial spawn point for multiplayer
Blocked the back of the starting area with rocks to prevent players from getting lost or stuck
The increased attack power multiplier of partner skills that increase the player’s attack power while riding has been uniformly reduced from 2.0 to 1.2
Eggs now have a small chance to produce Alpha Pals
Flying and floating Pals are now immune to falling damage
Shop price adjustments
Elsewhere in today’s update, Pocketpair has listed a handful of bugs it fixed alongside other changes like improved Pal models and textures, and more. For the full breakdown of those changes, head here.
For more about the game, head to Game Informer’s Palworld tag to watch trailers, gameplay, and read in-depth features.
Are you still playing Palworld? Let us know what you think of it in the comments below!
#bases#box#bugs#Building#change#content#Developer#diamonds#display#electricity#equipment#Events#Facilities#Features#Filters#fluids#Full#game#Heat#how#hp#it#life#metal#mining#monitoring#oil#One#Other#PC
0 notes
Text
Maximum Rouge-like time :)
Edit: I fucked up the title of this thing but "Maximum Rouge" sounds like a good name for this
a couple of people wanted me to elaborate so uhhhh here :) (copied directly from my notes, kind of basic because i was brain-storming)
I think the basic premise would be the flock just flying from place to place (idk the reason why maybe they're on a mission to rescue all the mutants and experiments or something), while also trying to prevent the end of the world scenario that Itex is planning.
Freeing mutants has a chance of unlocking a playable character.
You can only have a maximum of four members in your flock. During exploration, the gameplay is free-roam, and you can play as a member of your flock, which you can switch on a whim. When a battle occurs, the rest of your flock will appear, and gameplay will switch to a top-down, turn based gameplay.
The outside world would probably act like a sort of hubworld/in between travel sections, while places such as labs, underground tunnels, government/shady buildings, maybe even forests would act as the dungeons you traverse through.
Starting characters
Max
Well rounded, with high speed
Fang
Well rounded, might have a “resistant to death ability”
Nudge
Can lower suspicion with a “makeover” ability
Good at finding things, can produce random items
Gazzy
Has a chance of producing an explosive item
Relatively low in damage category
Iggy
Possible low accuracy
Has a chance of producing an explosive item
Angel
Can “scout” for enemy locations
Focuses on putting status conditions on characters
Recruitable
Ari
Randomly available after defeating ari at least once
Flock stability will drop a large amount upon recruitment
Slow-moving, but deals high damage
Dylan
Flock stability will drop a considerable amount upon recruitment
High accuracy, can self-heal
Maya
Practically has the same skillset as max, basically allows for two max’s on one team
Flock stability will drop a considerable amount upon recruitment
Star
Very high speed, low stats on everything else
Kate
Very high damage output, low stats on everything else
Ratchet
Very high accuracy, low stats on everything else
Holden
Can self heal in high amounts, can heal others
Things to keep track of
Hunger
A high hunger count results in poor performance in characters (low hp, low damage, low speed, etc)
Flock stability
Instability in the flock can cause members to straight-up leave. If instability is brought down however, those members may come back.
Suspicion
Letting the suspicion meter get too high increases chances of being ambushed. These surprise attacks are hard to beat, and if your flock is defeated, you will be captured.
Escape: if captured, the flock have a chance to escape, at the cost of items being stolen upon capture, increased suspicion and endgame for the rest of the run, and whatever damage you take during the escape. If your flock is defeated during an escape attempt, its game over.
Itex Endgame
Over time, the endgame meter will increase. Things such as getting captured will make it increase even more. Ways to decrease the endgame meter include things such as defeating bosses, completing dungeons, and freeing mutants.
Collectables and items
Explosive
Item that can be used during battle to deal large amounts of damage (be careful: it has a small chance of malfunctioning, either missing completely or dealing damage to your flock instead)
Foodstuffs
Decreases hunger, heals a small amount
Keycard
Used to get into locked areas
Password
Used to unlock certain terminals that can drop lore and story details, and also acts as the end goal of a dungeon
Medicine
Standard healing item
Possible Enemies
Eraser (of course)
Often encountered in groups
Deal high damage, but are slow
Flyboy
Stronger versions of erasers that are encountered later in runs
White coat
Capable of summoning and healing reinforcements
May drop medicine
Specific white coats may drops passwords and keycards
Soldier
Goomba enemy, but too many can get difficult to manage
M-Geek
Stronger versions of Soldiers, encountered later in runs
Very fast, with high dodge chance
GoBots
Encountered very later in runs
“Ambush enemies”: these enemies are completely invisible at first, the only tell being a small whistling sound (angel or ari has a chance of making a comment about it: “There’s a weird whistling sound…”)
When triggered, they will start firing laser beams. Keeping track of where the lasers are firing from can help in finding the invisible Gobots. When hit once, they will become visible, and start using shields. The player will need to wait until the moment one stops using a shield to deal damage.
Bosses?
Uber director
Stationary boss
High health pool (i know hes just a bunch of organs in boxes, but i gotta make him difficult to fight somehow, the boxes are probably durable as shit or something)
The flock will need to destroy the organ boxes first before moving on to the director himself
GoBot reinforcements
Uses dodgeable attacks that can stun the flock for a short time
Omega
Will deal very high damage every few turns
Has a high stun chance against him
Ari (maybe even ari clones)
Like erasers, deals high damage but slow moving
Can summon eraser reinforcements
Game over conditions
Letting Itex Endgame get too high, thus resulting in the end of the world
Letting suspicion get too high, and failing the escape attempt
Flock becoming defeated
0 notes
Text
Atelier Marie Remake: The Alchemist of Salburg Review (PlayStation 5)

For this Atelier Marie Remake: The Alchemist of Salburg Review, where It's not about saving the world. In this "leisure adventure RPG," failing student Marie pursues alchemy, adventures, and quests while aiming to graduate in five years. "Atelier Marie," the origin of the Atelier series, has been remade with new elements!
Atelier Marie Remake: The Alchemist of Salburg Review Pros:
- Beautiful graphics.
- 10.24GB download size.
- Platinum trophy.
- You get the PlayStation 4 and the PlayStation 5 versions of the game.
- Two free DLC packs in the store.
- Three difficulties - Easy, normal, and hard.
- Can set how to fast forward works for interactions (toggle/hold down the button).
- Text scroll speed - 1 to 10.
- Cursor speed.
- Invert axis.
- Sprinting can be set to the toggle or hold button.
- Two soundtrack options - Remake or original.
- Autosave on/off.
- Two play mode choices - normal and unlimited.
- Tutorial pop-ups as you play.
- A mini-map can be brought up, leave it solid or press again to have it faded but visible.
- The Sky Tavern is where you go to get additional quests from villagers.
- Quests are called agendas and you can set how many progress boxes you see for them. All agenda are time-based and finishing them late lowers the reward.
- The academy shop is where you visit to buy and sell items.
- Party members can be hired (you pay a wage) and increase your friendship with them to lower wages.
- World map locations that show party members' wages, recommended level, and what resources and enemies may be encountered.
- Turn-based combat.
- After exploring an area you get bonus exp based on the trip's length.
- Synthesize is crafting and combining items.
- Synthesize success is based on your level and the level needed for it.
- Fatigue is a mechanic that is used in many parts from traveling to crafting and affects your performance/success rates.
- The Town map locations are all fast-travel.
- The simple gathering allows you to just press a button and get random materials. For a more direct gathering of materials, you do it all manually.
- Combat can be manual or you set it to auto.
- Earn EXP and level up to increase your stats.
- Play how you want.
- The whole game is time-based in that overtime you use up a day and you have X amount of years.
- Members you recruit can have different levels and even be super strong.,
- You see the enemies walking around.
- The desk allows you to have/load, change the soundtrack, and edit costumes.
- Resting in bed refills all mp and HP.
- You have no control over the world map, only in the destination but you can get random encounters on the way.
- Fairies can be hired to go on scavenging missions for you and do all the crafting/mixing.
- Hit the enemy first in the open and you get to attack first.
- New areas uncover as you play and fill in the world.
- Play how you want.
- A very satisfying gameplay loop.
- Boss/dungeon-like encounters.
Atelier Marie Remake: The Alchemist of Salburg Review Cons:
- So much information to take in.
- Cannot rebind controls.
- Slow starter as you go through each task to show how it's all done.
- Unlocks (usually from real DLC) are available in every game.
- The auto-battle has to be turned on every session.
- Takes a while to get going as you can only hold such a small amount of items so getting bag upgrades is a must but also a tad slow.
- Triggering battles is not always easily done.
- Lost a load of progress as it kept saying I had insufficient funds for wages but I couldn't move anywhere or do anything.
Related Post: Stack Stones Review (Steam)
Atelier Marie Remake: The Alchemist of Salburg:
Official website.
Developer: KOEI TECMO EUROPE
Publisher: KOEI TECMO EUROPE
Store Links -
PlayStation
Read the full article
0 notes
Text
Minecraft Legends
Developed by Mojang Studios, Blackbird Interactive
Published by Xbox Game Studios
Release Date 2023
Tested on Xbox Series X
MSRP 39,99 USD
youtube
Minecraft has been a household brand since 2011, the game is still being updated with events and whatnot, and everybody in gaming has heard the name ‘Minecraft’ one way or another, regardless of being interested in it or not. Legends is a second attempt to establish a successful spin-off experience founded in Minecraft universe, first one being Minecraft Dungeons, a dungeon crawler.
youtube
The game builds on already-existing Minecraft world as a spin-off, and the gameplay feels like it’s intended for younger-audience who is invested in Minecraft but not keen on or never had the chance to try RTS games.
It is always a constant challenge when it comes to adapting a controller for strategy games, simply because of importance of precision, accuracy and speed. In case of numerous sections, pages, buttons on the screen, the player’s navigation should feel fluid and user-friendly. Minecraft Legends is successful at creating a smooth experience for controllers, button-layout and controls don’t feel over-complicated and you can get used to it within half an hour with no problem. The major hiccup arises when you are commanding your troops during fights.
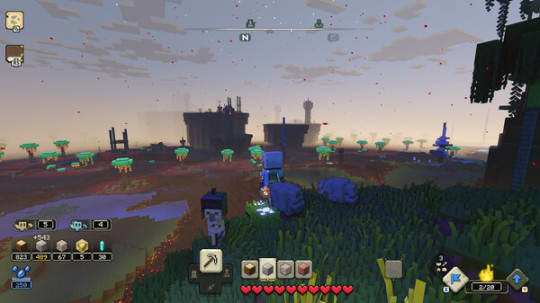
Even though the only button you get to press is RT (R2) and select the unit(s) you wish to move, more than often the units did charge to the location I marked but did not attack the enemy I specifically picked. Another notable missing feature I detected is that you cannot see Health of enemy troops or enemy buildings, I am not sure if this was intended but it is absurd not being able to see HP of your enemies during an intense fight, the player would decide whether to retrieve or push further and this would mean victory or defeat. So, the most basic element is absent from the game and this is one thing a player with RTS past cannot just disregard. Due to this issue, the fights I got involved in lasted longer than they should have and made me lose interest a bit.
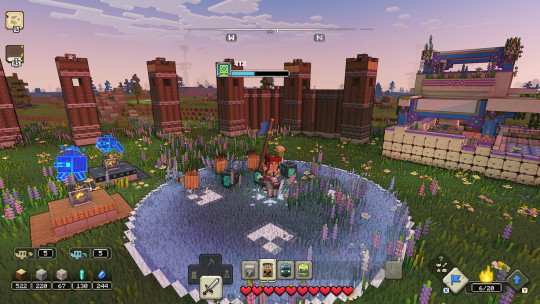
The experience with this game made me acknowledge that top-down camera angle (for instance Age of Empires) is more intuitive than third-person camera for strategy games, considering that you’re strategizing your approach, overseeing your units, observing enemy troops and movement.

We have a hub area, where we construct buildings, towers, walls, gates, unit spawn locations etc by collected essential material such as iron, wood and stone. In contrast to Minecraft, you are not manually collecting material in this game. There are creatures who look like kind of fairies, who are called Allays, you call give command them to collect iron, wood, stone in a specific location and they collect them one by one automatically, and on the screen it informs you when there are material to be collected and the amount of it. You will know how many irons you will collect before you spawn Allay. This is a welcome change for me, not spending time to get resources. The map also needs a bit of improvement, it contains all the locations you need to be aware of and you can fast travel them once you visit there, but when you are travelling to a place you have never been before, you will be riding your horse and I had encounter this issue at least 3-4 times in one and half an hour: When I was journeying to the location, I end up stuck between canyons and when they are too steep you cannot climb them, you need to find the end or beginning of it get out of the canyon there. The map does not include any info about this, there should be some sort of visual warnings that let the player know that it is a mountainous area and such. This looks like an oversight and you never know if you are running into a canyon or not, if yes, you need to go around it to avoid it.

There are two factors in play for recommending this game or not. First, are you mainly looking for an RTS game? If yes, there are much better and polished game, such as Total War and Age of Empire franchises. If that is not your priority and you are generally interested in Minecraft and want to experience this universe in a new game with a unique gameplay and mechanics and you can ignore small shortcomings then you would be satisfied with it. As I mentioned, this game positions itself friendly for younger players first and foremost, considering narrative, mechanics, complexity of the game, not trying to be the next big title in RTS genre. From this point of view, the Minecraft brand will be able to draw passionate and invested player base.
0 notes
Text
Genshin Impact Solo Ganyu Beats Spiral Abyss’s Biggest Damage Sponge

As impressive as they come, this Genshin Impact solo Ganyu run of the brand-new Spiral Abyss version 3.5. The anime game's current abyss cycle's last enemy now has more than two million HP, making it one of the greatest damage sponges ever seen in the finale dungeon. But, Ken Rurouni's Genshin Impact Ganyu build and player skill rendered that irrelevant.
Setekh Wenut is the final boss for this abyss cycle, and anyone who has played this game long enough knows that serpent-type enemies like this are the most annoying bosses to fight while under a time limit in the Spiral Abyss. This includes the Ruin Serpent, Golden Wolflord, and possibly even the upcoming Apep.
So far, all of the serpent bosses have phases where they become invulnerable to all types of damage, making it difficult to beat them within the given time limit unless you’re able to produce a crazy amount of burst damage during small openings.
In this case, the Setekh Wenut constantly dives underground, often allowing it to avoid getting hit. So, it’s remarkable that Ken Rurouni was able to pull out a win with just a C0 Ganyu, while finishing under the time limit to earn 36 stars.
Ken Rurouni is known for doing challenging abyss runs on YouTube, but that doesn’t make this one any less impressive. Their dodges and skill timing are still top-tier.
https://www.youtube.com/watch?v=iMAfw9PWZy0
Their first-half team consists of just Hu Tao and Xingqiu – which is also notable – and their second-half team is Ganyu by herself. You can have a look at the video above to see the full Floor 12 run with the characters’ stats at the end.
Ganyu isn’t currently available to pull for, but the second half of Genshin Impact version 3.5 brings Ayaka and Shenhe – another powerful Cryo DPS and a solid Cryo support.
Read the full article
0 notes
Text
Shattered pixel dungeon mod apk unlimited health

#SHATTERED PIXEL DUNGEON MOD APK UNLIMITED HEALTH MOD#
#SHATTERED PIXEL DUNGEON MOD APK UNLIMITED HEALTH UPDATE#
#SHATTERED PIXEL DUNGEON MOD APK UNLIMITED HEALTH FULL#
The Dried Rose can’t equip weapons and armors.The Cloak of Shadows starts with 5 max charges.The Cape of Thorns is still available as mostly a drop from DM-300.The Alchemist’s Toolkit exists with its old function of just making less seeds needed for brewing potions when it is upgraded, and it gets upgraded by solving a potion puzzle.No items are lost by using a blessed Ankh, except the Ankh itself.Īrtifacts are very similar with those of version 0.3.0 of Shattered PD, so there are some differences from current artifacts of Shattered PD: A blessed Ankh, upon reaching 0 HP, will be used and will give an unknown amount (appr. In Unleashed PD, a non-blessed Ankh will lose all non-equipped items, with a prompt asking if the hero wants to continue.
#SHATTERED PIXEL DUNGEON MOD APK UNLIMITED HEALTH FULL#
If the hero hasn't found yet a tier 4 or 5 weapon until the Dwarven Metropolis, offering items to altars has a good chance to spawn one.Ī Blessed Ankh is obtained by using a full dew container to bless a plain Ankh. Altars also sometimes generate cursed items, even when the hero has offered them uncursed items (they always punish the hero and never generate items, when he/she offers cursed items). Nevertheless, when the hero offers a cursed item to them, they cause Vertigo, Ignite, and Paralyze the hero at the same time. When the hero offers uncursed melee weapons, armors, rings, wands or artifacts to them, they eventually generate an enchanted weapon or artifact / grant a level-up / show all the loot of the depth (when the items are of low level, many offerings are needed, but with an item upgraded to +2 or higher, even one item can be enough).
#SHATTERED PIXEL DUNGEON MOD APK UNLIMITED HEALTH MOD#
This mod contains a number of unique changes:Īltars are added, that spawn randomly and infrequently on game depths, and give to the hero the option to seek divine intervention. Unleashed PD is attempting to make the game more accessible to a wider audience by including Difficulty Levels, a Tutorial as well as new features to round out the game. It is a creative remake of early Shattered PD with many new features added or changed from that version. For details about the additions and changes in Shattered PD up to version 0.3.0 you can visit this link. No specific version of Shattered PD that the mod was based on is mentioned, but judging from the in-game evidence, it is most probably based on version 0.3.0 of May 2015, as it includes all the new wands that were added in Shattered PD in that version, but not the new traps of the immediately next version.
#SHATTERED PIXEL DUNGEON MOD APK UNLIMITED HEALTH UPDATE#
It was first released in July 26th, 2015 and it can be considered abandoned/completed, as its last update was released in February 2016. Unleashed Pixel Dungeon is a fork of Shattered Pixel Dungeon created by reddit user Father Nature / David Mitchell.
11 Map generation - New chapters - New rooms - New terrain types.
Controls of the game are very simple and easy to use. There is a powerful collection of weapons in this game that you can use to fight. The levels in the game are very challenging and you will have to create different strategies to win the game. There are 4 different classes of heroes from which you can choose. With stunning graphics and high-quality animations, this game has many unique features. You can also craft items yourself to survive in the game and win difficult levels. Use your special powers to fight the evil forces in the dungeons. Earn rewards and rich treasures by successfully infiltrating the dungeons. Face different monsters and powerful enemies in your journey. But not only the rewards you will also face dangerous enemies in the game. These dungeons are full of treasures and powerful weapons that you can collect. Each dungeon will have masse-type paths for you in which you can easily get lost. In this game, you will get to explore the scariest hidden dungeons. If you love to play dark action games and mystery solvers then this game is the best choice for you. Shattered Pixel Dungeon is an awesome action dungeon crawling game app.

0 notes
Text
1.5 Update Stream Summary
Spoiler warning for the upcoming update; watched and taken from KeqingMains Twitch stream of the CN Genshin Impact stream.
S T O R Y
Eula Story Quest
Zhongli Story Quest Part 2
N E W C H A R A C T E R S
Eula, 5* Cryo Claymore User
Yanfei, 4* Pyro Catalyst User
N E W W E A P O N
Song of Broken Pines, 5* Claymore (Eula’s main weapon)
B A N N E R
Zhongli banner, Yanfei included
Eula banner
E V E N T S
Energy Amplifier Event
Find Irminsul Fruit Fragments around the map.
Activating an Irminsul Fruit Fragment will spawn enemies, beginning a challenge
Activating Fractured Fruit Fragments requires energy which scales based on characters’ LV, and there is a max limit to how much energy you can use. You are able to borrow your friends’ characters to increase the energy max limit, maximum of 3 characters.
Finishing the challenge will award you with Fractured Fruit Fragments of three rarity: 2-4 stars.
Can equip these fractures to gain buffs for the Geovishap symphony.
Only a maximum of 11 Fractured Fruit Fragments can be activated: 6 2*, 4 3*, 1 4*.
4 stages, can choose buffs and debuffs just like Hypostasis Symphony
Rewards include The Crown
You can also obtain Diona as a reward.
Mimi Tomo
Locate and defeat the Unusual Hilichurl to obtain various rewards, including furniture
Windtrace (Hide and Seek/Prop Hunt)
A prop-hunt game where players split into two teams: Rebels and Hunters.
Rebels need to hide from the Hunters and avoid getting caught, while the Hunters needs to catch them all within a time limit.
Rebels can turn into various objects within the current map, place baits or temporarily go into a hidden state.
Hunters can detect the location of the Rebels
“Favors” will descend randomly upon the area, picking up this “Favor”can be decisive in determining victory or defeat.
Take part in Windtrace to obtain Windtrace coins, which you can use to unlock various rewards. Forming your own party to take part in the game or when the current amount of Windtrace coins have reached its maximum will not give any additional coins.
5 different maps (Qingce Village, Springvale, etc.)
Gives special name card
Overflowing Mastery
Similar to Leyline Overflow Event
Talent books drops increased, 3 times a day
Misty Dungeon (Dungeon Crawler)
No elemental resonance, no food buffs
Can only use certain characters
Turrets in your way
Getting buffs after completing challenges (Rejuvenation revive, plunge? attack increase, movement speed increase?)
G A M E C O N T E N T
Housing System/Homeworld
Enter via Serenitea Pot gadget (gifted by Madame Ping)
Three different background maps to unlock and choose from
Materials used to create items can be gathered in the overworld
Obtain Realm Currency which can be used to buy various items
Hangouts
Diona added to Hangout Event!
Noelle Part 2 added to Hangout Event!
New Artifact Domain
Located at the top right of Sal Terrae (at the foot of Dragonspine)
Pale Flame Set (Physical Damage Set)
Tenacity of the Millelith Set (HP/Shield Set)
Azhdaha Trounce Domain
New weekly boss; Azhdaha, the ancient dragon
Eula and Yanfei Talent LV Materials
Might require you to finish Zhongli story quest to access
Changes elements midfight multiple times (Electro, Hydro, Cryo, Geo)
Domain stage changes too
Cryo Hypostasis
Located in Dragonspine
Eh, not much to say other than I hope yall suffer
Abyss Lector: Violet Lightning
Enemy attacks drain Elemental Burst Energy
S Y S T E M C H A N G E S
Weekly bosses resin cost change
- From 60 resins per boss, it will reduce to 30 resins for the first three rewards you collect from weekly bosses, goes back to normal cost after that.
Friendship EXP
- Receive more friendship experience in Co-op
Warning before ending of limited events
- Players will now receive in-game mail with 1k mora to notify them before an event ends
Better management of voice packs
- You can now download and remove voice packs of your choice (for storage!)
C O D E S (Global)
FS6SU367M279
4BNSD3675J8D
ATPTUJPP53QH
D E V E L O P E R D I S C U S S I O N
There’s a developer note published in the Mihoyo page, questions and answers are usually about the security and other stuff.
P I N K H A I R E D G I R L
Please know that the identity of this person was not confirmed at all, only that she is a (good, old?) friend of Zhongli and Baal. But she is definitely not the electro archon. She is nicknamed Miss Fox, Yae.

294 notes
·
View notes
Text
Honestly like, I know a lot of people bitch about blood vials being limited and how they should just restock automatically like estus flasks, but I've been thinking about it and they actually fit kind of perfectly in a game design sense. After all, you tend to find a lot of blood vials while exploring an area, so the game encourages the player to keep going forward and not turn around. This in turn also encourages taking risks and playing aggressively. It's not just okay if you overextend and take a few hits, it's how you're meant to engage with fights in the first place. First because you can recover by committing even harder to your gambit through the rally system, but only if you, again, act quickly and aggressively, but even if you don't completely recover that way you're likely to find some vials so it's okay if you have to use up a few to top up after getting hit during an encounter. The fact that blood vials always recover the same amount also means that leveling up vitality is less valuable than it is in the souls games. It means you can soak up a few more hits, but if you do you'll have to account for quite a long time injecting multiple vials to get back up to full health. With how aggressive enemies and especially bosses and npc hunters are, that is often time that you don't have, and it makes you very vulnerable. In this way, it's more valuable to level up your damage stats to end fights more quickly, and be forced to get better at learning attack patterns and dodge windows more carefully.
By comparison the estus flasks encourage playing much more conservatively. Each hit you take represents a very limited resource being whittled down. So it's a constant process of assessing whether to press on with 3/4 health and wait to get more hurt before healing so you get the most "value" out of a flask, top yourself up to full and risk running out before reaching the next bonfire, or just turning around and trying the area again. When fighting a boss that latter option comes most into play. I know many people, if they get hit even once on the way to a boss will turn around and try again to make sure they have the most health and flasks for a boss possible. Because flasks can be upgraded to heal a huge amount of HP by the end, and because they're so limited, it is more valuable to focus on getting a big hefty health bar. That way even at 3/4 health you have plenty left to tank hits safely without wasting that resource, and when you do use it you can do so safely knowing that no matter how much hp you have it will recover quite a lot of it.
Furthermore, buying blood vials acts as a sink for echoes in the late game. By midway through the game enemies drop fewer vials, so you're more likely to start running low as you use up 10 or so every time you die to a boss. This is usually where the grumbling comes from. However, I think this is because people are trying to hold onto every echo they get to use for leveling up. But once you get into level 70-80, many areas won't yield enough echoes to level up. There are many instances you'll be left 10-20k echoes short after running through. This large pool of remaining echoes combined with the lack of blood vials are connected! If you spend that big chunk of echoes on blood vials you can easily get 30-40+, plenty to fight the boss even if you die a few times. This provides something to spend those echoes on so they're not just sitting in inventory making you stressed about dying and losing them. If you're worried about losing all those echoes you're more likely to try and play conservatively, and From is trying to discourage that. This has the added benefit of reducing the rate at which players level up, which helps maintain a well balanced difficulty curve.
At a certain level you'll typically only get enough echoes to level up by choosing to grind, by fighting a boss, or going into the chalice dungeons. The latter two options encourage engagement with forward progression and exploring more of the game content. But even grinding has the benefit of reinforcing the act of learning timing, distance, attack patterns, and parrying. After all, many of the spots that are best for grinding for echoes or stones (such as hypogean gaol and upper cathedral ward) require the player to fight enemies that do a lot of damage and have tricky attack to parry, and gives them an opportunity to get smart about using the environment to their advantage and juggle multiple strong enemies.
Anyway hot take: bloodborne was designed good
75 notes
·
View notes