#pentel 8 color pencil
Text
Sketchbook Supply Recs!
Hi y’all, Since I’ve been posting more sketchbook pages recently, I thought I would share some of my favorite supplies. My recommendations are tailored to creating a user-friendly, portable kit mainly focused on ink and markers. I’ve found that having a kit like this makes me more likely to regularly develop my sketchbook, which I view as one of the most important parts of keeping one. None of these recommendations are sponsored or affiliated, I just hope that by sharing what supplies I enjoy, others can find new things to try. Keep reading under the cut!
I often find that products marketed towards the stationary and note-taking/organization niches perform better at lower prices for frequent sketchbook use than products targeted specifically towards the art and illustration community. Don’t shy away from products in office-supply stores just because it doesn’t say ‘for art’ on it.
I also recommend refillable pens whenever possible. They usually offer more customization in ink color and nib size. Refillable options produce less plastic waste than disposable options. Refillable designs tend to have more ergonomic designs, with larger barrels and better weight balance that minimize hand discomfort. If you draw frequently, this is something worth considering to avoid damaging your hand joints in the long term. In addition, they’re built with durability in mind, allowing them to be thrown in your bag or pencil case without worry.
Darker ink drawing pens make up the core of my kit, so I’ve tried a variety of options and usually have at least a few of these in my bag. Currently, the Pilot Kakuno Pocket Fountain Pen (around $10-19 depending where you purchase from) is my favorite. I love the line quality this pen can produce– the barrel is a bit larger than most pens and the body and cap give it a good balance in the hand. This pen also takes cartridge refills, allowing you to easily switch colors between refills without the mess. There are a wide range of colors available for this pen, and the thinner water-based ink formula is easy to work with. The ink dries down matte, so it scans accurately without digital manipulation. It also comes in a few different nib sizes with different cosmetic options/color ways for the pen body. Though fountain pens typically have a slight learning curve in learning how to draw with them, I found this one especially easy to work with since the nib has an etched design that shows when you’re holding it properly.
The Pilot EnerGel Alloy Body Ballpoint Pen (around $8-10) is another of my favorites. The metal body of the pen is a slightly larger barrel size with a nice weight balance which allows smooth lines without hand discomfort. They’re also refilled with cartridges, which come in a few different colors and point sizes; I enjoy the 1.0 mm the most for this pen. The water-based gel ink formula for this pen is one of the best I’ve tried, as it’s very smooth, dries fast which minimizes smudging, and scans well. The V5/V7 Ballpoint Pen from Pilot (available in multi-packs for around $1-2 per pen) has a similar ink formula in varied nib sizes. They aren’t refillable, but they last a long time. I think they’re worthwhile, especially as a beginner friendly, widely available option.
Muji Pens (available online for about $2 per pen) are another great ballpoint gel option. They come in an impressive range of colors, thicknesses, and cap types. They can also be refilled with cartridges. I think the finer 0.38 and 0.5 nib sizes are my favorites from this line.
If you prefer a brush-tip style pen to ballpoint or fountain pens, I really enjoy the Tombow Fudenosuke or Pentel Pocket Brush. The Fudenosuke (around $3-4) is a felt-tip brush pen. The nib is a perfect firmness to get a variety of line weights with ease. I find that this makes it well-suited to thumbnails and other fast sketching. They come in a smaller range of well-formulated, pigmented colors, which consistently scan well. They aren’t refillable, but last a long time, which I think makes them worth it.
The Pentel Pocket Brush (around $7 with two refills included) is a bristle brush pen. The fibers are very smooth and can achieve a wide variety of textures and line weights. It has a bit more of a learning curve than some of my other recommendations, but that’s mostly if you haven’t inked with a brush previously– it’s relatively easy to get comfortable with. It’s also refillable with cartridges and has a few different color options. This pen is one of my favorites for figure drawing.
Though it’s not a pen, I also think the Rotring Mechanical Drafting Pencil (around $20-30) deserves a mention for folks who prefer sketching in pencil. The metal body and textured grip create a good weight balance that makes it write exceptionally smooth. It also takes standard graphite and other colorful options which give an equivalent level of customization to the previously described pens.
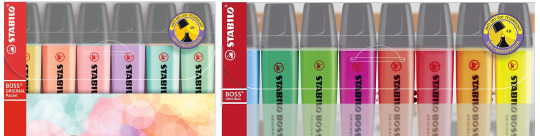
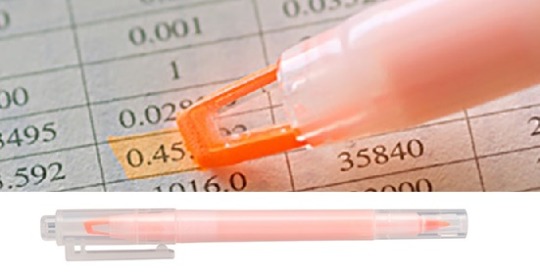
Markers and colorful supplies are another important element of your kit. At the top of the list for me is a couple of different highlighters and felt tip pens. I love Zebra Mildliners, especially the double-ended ones with the super fine/brush tip combo (usually less than $1/pen when purchased in packs of 5 or more). They’re easy to draw with and can be a great choice for adding value or colors. The color range (mostly pastel and creamy colors) is also impressive. Stabilo makes a similar style of pen called the pointMax (M 0.8) (usually about $2 a pen, but also comes in packs) that comes in some darker, more vibrant colors. I prefer the thicker size since they tend to last longer, but they make some thinner liner versions of this pen (called point88) with the same ink formula that are also good. If you like a thicker marker, Chunky highlighters are the way to go. Stabilo Boss (about $1.50 in a multi-pack) and Staedtler Textsurfer (about $1.70) are great options that come in a variety of colors, with Stabilo coming in creamy pastels and Staedtler coming in more bright and neon colors.
Within this category, novelty supplies can also be a good colorful addition. Mixed color pencils can be really fun for line drawing. Koh-i-Noor makes some of my favorites (about $4 but they last a long time) with earth tones, primaries, and neons. Gelly Roll pens (about $1.50 /pen) also are a nice novelty pen while still being high quality. They have a good color range with metallic, neon, glitter, and other finishes.
On top of drawing supplies, some washi tape, stickers, double-stick tape, and cool paper also make fun additions. It’s harder to make specific recommendations for specific washi tape and stickers, however, supporting your local stationery/craft/paper good stores and favorite artists and designers who make and sell it is always a good move! I have some from Natalie Andrewson, Alex Tomlinson of Pigeon Post, and Starmint Art that I use all the time. The best ones complement the imagery and colors you use. Be curious, collect, and repurpose things that make you excited!
Hopefully these recommendations help you find something new and exciting. Let me know if there are other topics you’d be interested in! Thanks for reading :^)
#l-coleart#l-coleart's bulletin#art#artists on tumblr#illustration#illustrator#figuredrawing#sketchbook inspo#traditional art#sketchbook art#markers#pens#fountain pens#art advice#pencil case#drawing#ink drawing#art thoughts#sketchbook drawing#drawing practice
17 notes
·
View notes
Note
can you do a stationary/drafting tool tour some time? I love your posts! :)
stationary, i can do !
drafting is a little more questionable because, well.. we don’t do a TON of drafting in violin making? the most i’ve done so far is use squares/protractors/compasses to make templates, but once i finish this instrument i can probably do an update of all the templates and drafting tools used to make them!
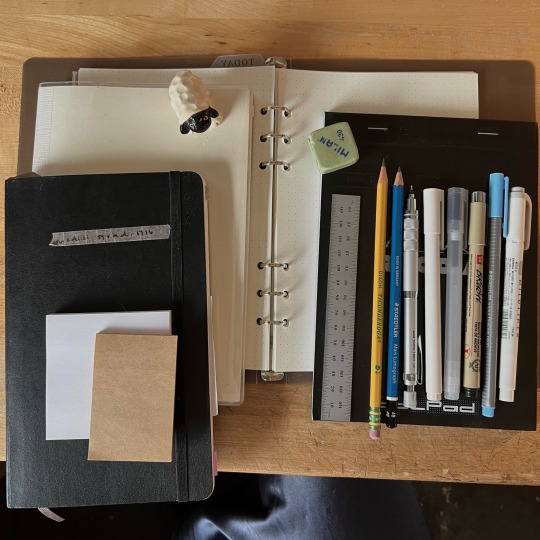
anyways, here’s my current stationary lineup:
i have a moleskine notebook (black leather), a midori md notebook (cream), and a rhodia notepad (black staplebound pad). they’re all a5 and 5x5 dot grids, which means there are 5 grid squares per inch or 2 grid squares per cm
the moleskine, i use as a formal lab book/diary for violin making. i hate the paper, but i like that the outside is durable and it can take a little throwing around the bench
the midori md is my personal notebook. i don’t like using it around my bench just because of how quickly it starts to look worn on the outside even with the plastic cover, but the paper is great and it’s lovely for journaling/drawing/keeping an agenda
the rhodia dot pad, i use for taking rough notes. the paper quality is great, so i don’t have to be as careful about smearing when i’m jotting stuff down quickly in pen, and it’s perforated at the top. i dont love how bright white the paper is—the moleskine and midori are both a creamy off-white color—but everything else about it serves my purposes to a tee
i have an a5 6 ring binder that i fill with that same 5x5 size dot grid loose leaf sheets, which is where i like to keep my notes on tool making/maintenance, since i’ll probably update them over time as i learn what works for me. the binder is from a 3 pack on amazon, same with the loose leaf paper, but i think muji has the same stuff.
the lovely white, almost lavender post it notes are my all time favorite color for stickies !!!! i bought an 8 pack in high school and have not been able to find them since. it’s pretty tragic. the brown ones are from muji though, and i like the size even if they aren’t super sticky.
the eraser i use is a milan 430 (??) it’s green and i like green and it erases, so ¯\_(ツ)_/¯
the ruler is a starrett c635 tempered steel w the cm/mm on one side and cm/0.5mm on the other. i didn’t pick this one out, but my teacher did and i’ve gotta agree w him, the weight and size of it really helps get accurate lines and distances.
the writing utensils from left to right are:
dixon ticonderoga pencil hb no. 2
staedler pencil 4b
uni kura toga mechanical pencil 0.5mm (the lead rotates as you write, so you get a really nice, consistent nib that breaks less !!)
muji white pen body with black 0.38mm ink refill
muji pen dark blue 0.38mm
sakura pigma brush tip archival ink pen
staedler triplus fineliner from the neon set (yes, i have tried the stabilo fineliners, no i do not like them. the tips are like.. cylindrical? so if you write at an angle, like most people, you’ll get inconsistent lines as you change direction. they’re cute to look at but not great to write with)
mildliner light grey highlighter
that about covers it? i do have a pilot .38mm pen [edit: pentel energel 0.3mm needle tip] that doesn’t smear as much as the muji pens, [but i don't like how the shape of the pen affects my handwriting] which i’ll add an edit for when i get home since i don’t carry them w me.. but yeah ! thanks for asking me, i love talking about stationary lolol
88 notes
·
View notes
Note
Ooh, where are you getting black leads from??? I hate using ink on my sketches but want darker lines so my camera will actually pick them up lol Black lead sounds like heaven??? Is it just fancy colored pencil, or??
I use a couple! Prismacolor's premier black is still the darkest/smoothest black out there, but since it's so soft it's a pain to line with. I use some cheaper black leads for lining, but they're not a satisfying deep black sadly.
Zensations is a 2mm mechanical colored pencil series with a decent-ish black (I used a combo of zens and pilot eno on the inuyasha page). The key is to build layers and layers and layers of sooooooft color lay down to get a good black. Zensations are wax-based so they get clumpy with pressure.
I also recently got the Pentel Multi-8, which is just a multi-lead 2mm mechanical pencil. The black is oil-based, but I was a little disappointed with its coverage. Pairing it with the zens black helped a little, but I think I'll be using the Multi-8 for drafting instead of final lining.
My mission for a kick-ass black lead continues 😔
#Creepy chatter#I can't just use dark graphite either bc it doesn't play nice with the blending techniques I use#Ntm it's not really the black color I need
7 notes
·
View notes
Photo
好方便的一隻筆 一隻就有8種色 #pentel 8 colors automatic pencil https://www.instagram.com/p/CpRmlAHBaTP68yx71bVGFN7IYhsLg96yQriNoA0/?igshid=NGJjMDIxMWI=
0 notes
Photo


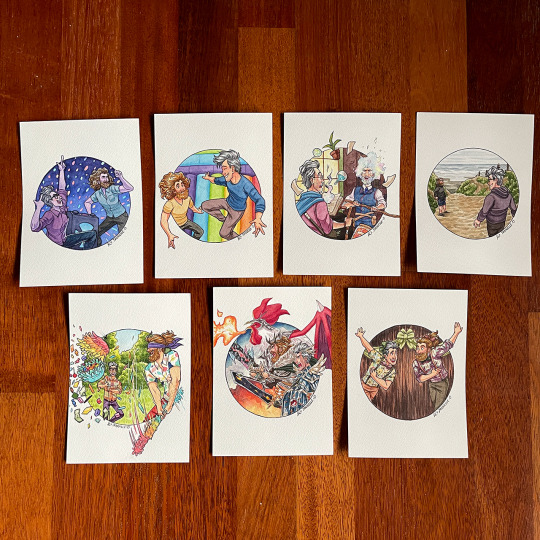

✨~RhettandLinktober 2021 wooo~✨
Here’s all of them together and in 6/7 groups~ (ノ◕ヮ◕)ノ*:・゚✧
You can also check out the individual posts here.
I felt like adding a circle frame thing this time around? haha
I also thought it would help these not take too much time, but it didn’t really help for most of these lol. There were times I felt very stressed, but I also had a lot of fun and some paintings came out better than I thought they would! :D
I was initially thinking of not doing it this year, but I'm happy that I decided to try anyway. c’: 💖
It was my first time working with the masquepen and I did buy two Daniel Smith watercolors recently to try out ( Quinacridone Coral and Cobalt Blue Violet ). I enjoyed all of them, I hope to use the masquepen for a wip painting soon haha c:
I hope you enjoyed seeing these and coming along on this adventure ;w; Feel free to let me know which ones were your favorites~ 💙
Also thank you so much for the kind words, it really warmed my heart that some people said this is one of their favorite parts of October. Lots of love to y’all~ 🥺🥰💕
Here’s the list of tools I used this time around, for anyone interested:
sketch tools:
kneaded erasers
stick erasers
block eraser
Zebra DelGuard mechanical pencil 0.5mm
Uni Kuru Toga mechanical pencil 0.5mm
-tools to help draw the circle frame thing haha:
ruler
drafting compass
triangle
inking tools:
Deleter Black 4 Manga Ink
Raphael Kolinsky Sable 8408 Pointed Round size 3
Pentel Pocket Brush Pen
Sakura Pigma Micron PN pen
painting tools:
Strathmore Ready Cut Watercolor Paper Cold Press ( 5 x 7 in. )
Silver Black Velvet brushes ( size 4, 8 )
Silver Black Velvet travel brushes ( size 2,4,6,8 )
Princeton Aqua Elite brush ( size 4 )
Utrecht synthetic sablette rigger size 1
Denise’s Earth Friendly Da Vinci Watercolor Palette
Small paint palette: M. Graham, Daniel Smith, Da Vinci, and QoR
Daniel Smith watercolor ground ( titanium white )
M. Graham gouache ( titanium white )
Masquepen art masking fluid supernib fine tip ( used on a few paintings )
Kuretake Gansai Tambi Starry Colors set ( used on one painting )
Winsor & Newton Designer’s gouache ( used on one painting )
79 notes
·
View notes
Text
Traditional art supplies I like: ✨Cheap Edition✨
❤️🧡💛💚💙💜🤎🖤
I noticed my last post had a lot of more expensive materials, which are great if you save up or are able to get them more easily, but I figured I’d make another post about more affordable materials for my friends out there who don’t have access to an employee discount at a craft store like I do, or family members who like to give gift cards and such!
Pens:
1. I mentioned this in my last post, but ballpoint pens will never fail you. I recommend BIC if at all possible. You can get a pack of 60 in red, blue, and black for around 6 bucks, as well as just a 60 pack of one of those colors for the same price. You can get some really nice shading out of these, surprisingly, and a pack that big will last you years!
2. Paper mate flair felt tip pens. I used to love these growing up!! They still hold up pretty well, and have the same basic effect as, say, a tombow brush pen, which is my favorite. A pack of 3 in black is around $3-4, which is half the price for a pack of tombows! You can also get them in a lot of different colors. A 12 pack in rainbow is about 12 bucks. If a dollar per pen seems a little much, trust me- if you’re able at all to save up for these guys, they’ll last forever and won’t let you down!
3. I also mentioned pentel sign pens in my last post, and they are just slightly more expensive than the paper mate flair. You can get a box of 12 for $14, which is still more on the expensive side, but if you’re able to then these guys are really fun to use and really reliable!
Pencils:
1. In the school supply section of walmart, you can get a pack of generic HB pencils. They usually have either stars, pastel or neon colors, or are holographic on the barrel. Especially in the back to school season, go and get you a pack of these; any sharpener will do. They are surprisingly soft and lay down pretty dark! I get a pack every year and they never fail me. A pack of 20 is only a couple dollars. (Dixon and ticonderoga I do NOT recommend. Ticonderoga has great colored pencils, but their regular pencils are WACK. They’re way too hard so their lines are way too weak for my taste. As for dixon, they don’t erase cleanly, and splinter when they sharpen. No bueno.)
2. BIC mechanical pencils. These are probably the best mechanical pencils on the cheaper side. They write nice and dark, and you can get a pack of 40 for about 8 bucks, which will last you literally years!! Just like their ballpoint pens! If you really want a good cheap sketching set, I’d get a pack of their ballpoint pens and pencils. Basic as basic gets, but it’ll get you far.
3. For colored pencils: I swear, you can never go wrong with crayola. They’re not the softest or most pigmented, but when you’re balling on a budget they’re perfectly fine! I also love crayola crayons. They are my #1 most favorite affordable art material!
Markers:
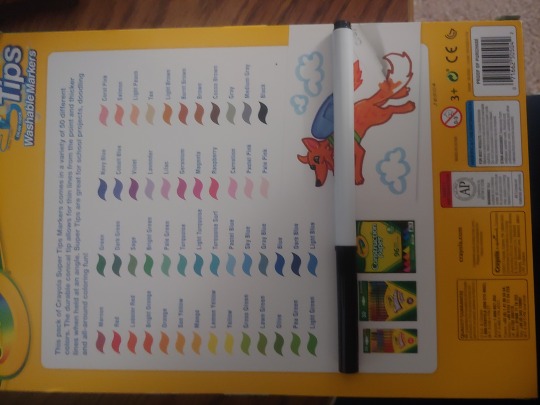
1. Back to crayola: crayola super tips markers. These are PERFECT for sketching. You can layer the colors pretty nicely with these, and they start out nice and transparent, almost like watercolor. With the shape of the nib, which is almost cone shaped, you can get some pretty nice line variation! I recommend a pack of 50, which is around 7 bucks, and if you’re feeling really fancy, a pack of 100 is about 14 bucks.
2. Artist’s loft fundamentals triangle markers. When I was in high school, I had a pack of these that I wore absolutely ragged. They are pretty much always worth it, and also perfect for sketching. I even still have a set today, along with the super tips! They’re just that good! These babies are skinner than the super tips, so they’re more like the width of a pen, but not exactly like the penmate flair, which you can press down like a brush. With these you can also take a brush with water and use them like watercolor pencils and get some beautiful results! A pack of 36 is about $5 at michael’s. Probably one of the best purchases you could ever make at that price and I cannot recommend them enough, no matter how experienced you are.
3. For alcohol markers: Ohuhu is fantastic. They’re a bit on the pricier side, but that’s mostly because alcohol markers usually are compared to water based markers. A pack of 60 is usually around $20 on amazon, which is how much I got mine for, but I just checked and they’re about $25. Don’t panic though- prices change all the time! The colors on these are absolutely lovely, and it comes with a nice carrying case with a handle, and a plastic sheet you can place underneath the paper you’re working on so it doesn’t bleed through to your desk or the next page of your sketchbook. Absolutely worth the price tag. Ohuhu also has water based markers for slightly cheaper, but I can’t speak for those since I haven’t tried ‘em.
4. Sharpie is a household name, and there’s a reason why! I don’t always prefer them since at times they CAN be overpriced, but depending on which set you get, the price tag becomes more reasonable. For regular black, I recommend getting a pack of 6 with 2 chisel tips, two fine (regular) tips, and two ultra fine tips for around $7. They last forever, and that way you’re getting a pretty wide range of lines you can get! As for their colored markers, I honestly can’t recommend them as much since I find their colors to be a little darker than I’d personally prefer as compared to the ohuhu markers, but if you so choose you can get a pack of 12 for about $9 on amazon! My favorite color has to be the fuchsia. No matter what they’re fun to color with and easy to obtain just about anywhere!
Sketchbooks:
What’s this? A sketchbooks section? (You didn’t have that in your previous post, Cricket! Well, no, I did not, but I’ll have to fix that soon!)
1. Artist’s loft hardbound sketchbooks. You can get these at michael’s for about $6, and they pretty frequently go on sale for bogo or bogo 50%. The paper is actually super nice, a little on the smoother side, and just thick enough where you’ll feel pretty fancy using it, and also not guilty if you need to tear out a page. They’ve got classic black, and also currently they have a lovely pink, blue, and green. The inner cover page is the same color as the cover, and it gives for a more professional, almost published feel. They come in 6x9 and 9x12 sizes. Artist’s loft is generally a pretty reliable, affordable brand!
2. Pacon sketch diary. If you prefer spiral bound, these guys are also pretty nice! They’re about $5, and there are other similar generic brand sketch diaries you can get that will never lead you astray. Walmart has some pretty good ones too for around the same price, and some even have a clear plastic pocket on the front where you can insert whatever you like!
3. Spiral bound notebooks are easily accessible, and during back to school season in certain places you can get them for a dollar or less. There’s no shame in needing to use lined paper! It works just as good as other paper when it comes to needing to draw something, and no matter what your art is your art, no matter what materials you use! I love getting lisa frank notebooks or notebooks with puppies or kittens on them during the back to school season. (Walmart back to school season SLAPS for cheap art supplies if you can’t tell already.)
4. Daler-rowney simply soft cover sketchbook, 3.5x5.5 in. I list this one because it’s the nicest cheapest sketchbook you can get at Walmart for about 2 bucks. It’s a much smaller size and very flat so you can keep it in your pocket or bag and take it with you. The hardbound 5x7 is also super nice, and it used to be my ultimate top choice. It’s about $4-5. I would get one like once every 3 months, and if you’re able to afford it, they’re great for stocking up and great to take with you anywhere. The paper is a pretty unusual texture that I haven’t seen anywhere else, and in my experience there’s very little transference from one page to another if you’re using pencil, which is always pretty annoying and great to avoid when you can.
5. Royal and langnickel essentials hardbound sketchbook. I came across this one when I was shopping at Ross. Yeah, Ross!! A good tip for cheap art supplies is to check Ross! I’ve gotten some pretty great things from the art section there for very cheap. Since it’s a discount store though, it’s usually a crap shoot regarding what you might find. These sketchbooks have pretty similar paper to the daler and rowney, and you can get a 4x6 for about $3 at Walmart. A larger one, depending on where you look, has pretty inconsistent pricing, but when I was at Ross I found some 9x12’s for 2.99. Although I can’t promise you’ll have the same luck as I did!
Paints:
Watercolor:
1. Jerry Q watercolor palette. I had one of these right before I first tried gansai watercolors, which are my favorite and a little more expensive, but the set I had I kept for around 2 years with almost constant use. They can be a little light and not super pigmented, but if you’re able to get something like a spray bottle and wet them before hand, let the water soak in a little bit, they’re much easier to activate and you’ll get brighter colors out of them. They just need time to soften. You can get a 24 color set for $14, and a 36 set for $18. If you’re able to, I recommend the 36 set since that’s what I had, but 24 works just fine and it’ll be better for learning color mixing!
2. Rule of thumb is crayola is usually the way to go if you can’t afford much else. I will say the older formula for their watercolor paints was much better. Brand new is still good though, and you can’t go wrong with a regular 12 set. (I do NOT recommend prang, which is their similar competitor. Their paints are sticky as hell if you use too much.)
Acrylic:
Craftsmart or apple barrel craft paints. These guys were my first acrylics I ever used, and I still have some older pieces that I made with them that still hold up in my eyes today. They have a much different formula than most acrylics, and are powder based, so you’ll notice they sort of have a different texture. Careful not to glob it on too thickly, however! If you do the paint will form huge cracks in it when it dries. I’m pretty sure it’s because of the formula and that it shrinks when it dries, which can also make thinner paper buckle. Also, if you’re painting on paper, if the paper is on the smoother side, areas where the paint is thicker might crack and flake off. It’s still good reliable paint just as long as you’re able to avoid this! You can get a set of 16 colors for $11, or if you’re able to, a set of 36 for $25 at michael’s. You can also buy them individually if you’re only able to afford the primaries like red yellow and blue, or cyan magenta yellow and black (CMYK.) The individuals sell for about $1 each, and the craftsmart paints in particular come in a few different finishes like matte, satin, and metallic. I recommend just the matte to start with though.
Paper/canvas:
1. Canson XL watercolor paper. You can get a pad of 30 sheets in 9x12 at walmart for about $5. The 11x15, if you’re able to afford it, fluctuates from $10-18 depending on where you shop, but michael’s often has a sale on this particular brand of paper pads for bogo or bogo 50% off. They also now have spiral bound books of the same paper that you could tear the pages out of and display, or use as a watercolor sketchbook. Canson also has mixed media paper for about the same price, and the spiral bound book is a very popular choice for a sketchbook, although I’ve used it and I personally prefer the watercolor paper texture much more. If you like your paper on the smoother side though, the mixed media is probably the way to go!
2. Creatology is, I think, a michael’s brand of kids’ art supplies, and they honestly make some pretty nice paper. If you like to draw on thicker paper, they’ve got a paint pad that you could use as just mixed media or regular drawing paper. It’s nice and thick and smooth. Their watercolor paper is also pretty nice! The 9x12 pad is around $3, and has 40 sheets. It’s slightly thinner than the canson watercolor paper, but you get 10 sheets more and it’s cheaper! Also, most regular price items at michael’s (there are a few exclusions, such as their artist’s loft value canvas packs, and their sets of rolling shelves, and cricut products) can be discounted with a coupon! Pretty much every single day the site has a 20% off regular price items coupon, for in store and online (the online code is usually 20MADEBYYOU), so you can always get basically anything for a discount! If you have a rewards account, which you can access through the site or on the app, you’ll get points with the more you buy, and you’ll eventually get $5-10 vouchers! If you’re still trying to be frugal, it’s great for getting basically free items. But I digress.
3. Canvas is expensive as hell, I know. I barely buy it myself, and only started getting it recently, since I mostly worked on paper beforehand. But if you’d like to hang your work easily and are able to put pins/nails in your wall or use command strips, you could get a value pack of canvas from michael’s. I mentioned these before, and they’re one of the items that can’t be discounted with coupons, but they work great and you can get a pack of several at a time. Each pack is the same exact price- $12.99- so it’s easy to remember since it’s consistent. The smaller the size of the canvas, the more canvases you’ll get. For example, in a pack of 8x10, you get 10! If you want the best value and want to create more pieces for less, that’ll be what I recommend! You can also get canvas panels, which lay flat and are easier to store if you’re low on space. The best value there is a pack of 5, size 9x10, for $10. So, it’s not as much material for the price, but if you need the canvas to be smaller, that’ll work just fine!
4. Copy paper!!!!!!!!!!!!! Get a pack of copy paper!!!!!!!!!! It’s literally hundreds of sheets for very cheap, like $5 or less!! Walmart has a pack of 500 for $5. That’s 100 sheets for a dollar. While it won’t work well with paints, it’s great for drawing with basically any drawing material. It’s thin and more fragile than most art paper, but if you need to discard it you won’t feel bad, and there’s literally another sheet right there if you gotta start again. I had a period where I would only basically draw on copy paper when I lost access to free art materials from art school, and it’s fantastic for sketching. Just get a cheap paper folder for about 50 cents to keep your drawings safe, and you’re golden. It’s also great if you don’t wanna use lined paper but can’t afford a sketchbook.
As for digital art; digital is often the most affordable option for a lot of folks, since it requires only, at the minimum, a computer or phone and a drawing program. I’m not as experienced with digital art, but I highly recommend the XP pen tablet. It’s a 4x7 inch little usb tablet, and you can get one on amazon for $20. One purchase that will last you a long time! I’ve had mine for 2 years now, and I haven’t even had to replace the nib yet! For a drawing program, I recommend Krita, which is the only art program I’ve ever used other than microsoft paint 3D. It’s completely free, and has some really lovely brushes. My absolute favorite is the 4B pencil tool, which I use for basically every single digital drawing I make, no joke.
I’d like to also mention that if you’re not able to buy art supplies at all, recycling is a great way to gain materials! Go dumpster diving! Cut open a cereal box and draw on the inside! Draw on old envelopes! Paint on cut open cardboard boxes! Borrow a pencil or pen from a friend! There is sooooo much waste in this country (USA), and even if you’re not on a budget, if you’re able to reduce and reuse, you’ll feel better about reducing your carbon footprint and giving back to the planet.
Lastly, I just wanna say that you don’t need fancy materials to make wonderful art. Nice art materials are good to have, but they’re absolutely not a requirement. You don’t need to pay thousands upon thousands of dollars to go to art school, most often just to get torn down by instructors who don’t care about you or your well being. YOU know what’s best for yourself. Do what feels right. Make art however and whenever you like. Make it for yourself. Learn from yourself and which materials you prefer. I’ve been making art for a long time so I’ve tried a lot of things and a lot of materials, hence why I can make these recommendations, but you might discover something completely different that you really love! Materials do not make the artist, full stop. The art you make will always be valuable and important, no matter what. If you’re still in school, live at home, don’t have a job, or are just not able to buy art supplies for whatever reason, there’s always, always a way to make art. You might have to get a little creative in finding out ways to make art, but I promise you there’s always a way. If later in life you’re able to afford having art as a hobby or a career, you’ll look back on the time you could only access these cheaper materials, and cherish the work you made then. Especially if you’re just starting out, and by the time you’re able to afford higher quality materials, you’re a more experienced artist. I personally think it’s so important to remember where you’ve come from, so you can feel proud of yourself as you grow. There’s nothing more fulfilling than looking back on everything you’ve done and the improvements you’ve made throughout your journey. And like I said, you don’t need to spend thousands on art school to learn. The internet is an amazing resource for tutorials, and there’s no shame at all in using any resource you can to learn and expand your skillset. You deserve to create. You deserve to learn. You deserve to feel proud of yourself and what you make.
❤️🧡💛💚💙💜🤎🖤Art is for everyone.🖤🤎💜💙💚💛🧡❤️
30 notes
·
View notes
Note
what materials do you use for your drawings?
Hi anon! It’s been a while I think since I’ve answered this type of question, but I don’t think much has changed. I’ll ramble about art supplies here under the cut. Disclaimer that these are probably not the absolute best supplies available, but they’re what I’m comfortable with or what I can easily find. Sometimes inexpensive to moderately priced art supplies are better for me mentally because I feel less anxious about using them up. Please don’t let that hold you back from using Nice Things if your brain isn’t Like That.
I like Strathmore Toned Tan paper (but when I started using toned paper in... 2013?ish? I was drawing on pieces of brown paper shopping bags). Brown or grey cardstock can also work, but I don’t think it erases quite as cleanly as the Strathmore paper and can tend to pick up oil from your hands more. I also like the portability of the wire-bound Strathmore sketchbook, and it lays nicely flat in the scanner (most of the time).
I draw with 2HB graphite pencils (Dixon Ticonderoga, but I doubt the specific kind makes that much of a difference). Really nothing fancy, I just find them with office/school supplies in packs of many. I like an electric sharpener to get a nice sharp point. (There are different levels of soft/hard graphite drawing pencils you might prefer though!)
For highlights, I use Prismacolor white pencils (PC938). I use a small manual sharpener for these for a blunter point and to use up less pencil when I sharpen. The one downside of these is that the lead (I know it’s not actually lead, like, Pb, but I can’t think of what else to call the inside of a colored pencil) can tend to break when sharpening, but I don’t think that’s entirely to do with how one sharpens and just relates to how they’ve been handled - being dropped on a hard surface might crack the lead inside?. I have also used General’s white charcoal, which is softer, but the Prismacolor smudges less.
I like high-polymer eraser caps. I’m sure people swear by other erasers (like a kneaded rubber), but I like having something I can shove on the end of my pencil so I don’t lose track of it. I also like the shape and the stiffness of the caps. I’m pretty sure I have an erasing shield somewhere but I literally never use it - lines that get erased as collateral damage evidently just deserved it? Regardless of eraser type, the white pencils do not erase very well.
Spray fixative helps keep your drawings from smudging, especially if you’re using a sketchbook or otherwise storing them in a stack (though I still just use one side of the page, but that’s also so I can remove drawings if I want to). A can of fixative should last you a good while, 2+ years at the rate that I draw. I have a can of Krylon workable fixative at the moment which is working out okay. I like the Prismacolor product but it’s been tough to find lately. I object to the Grumbacher fixative because it smells AWFUL, though it works fine too. Definitely put down scrap paper (newspaper, etc.) before you spray so you can get any edges of the drawing without coating the surrounding surface in fixative (RIP my desk).
It can be helpful to have a ruler and/or a T-square around.
For watercolors, I use a variety of cold-press watercolor paper (the Canson XL pads have a nice texture, and I like the Artist’s Loft Level 2 watercolor pad from Michael’s). I know serious watercolor artists often swear by Arches paper, but I find it intimidating and stick with more inexpensive paper so I don’t get too nervous to use it.
You’ll want a plastic palette for mixing colors, up to you if you prefer the rounded depressions or the shallow rectangular ones, or a combo.
I’m in a watercolor pan phase, rather than tube paints. I have a cheap set (I think also Artist’s Loft brand) that is my current go-to because it has a portrait pink pan (and I can just use the lid as the mixing palette). I do get frustrated with the limits to how saturated I can get certain colors with it, though. I bought a Sakura sketch box which I think is better quality and has more vivid tones, but I have to mix way more colors to get skintones, which I haven’t fully gotten the hang of yet.
I used to use dilute Liquitex acrylics for painting, and they did probably saturate more because of the way the paint binds to the paper, but that’s a mixed blessing - they’re less forgiving if you make a mistake. With watercolor you can blot and rinse off with a clean wet brush (to a certain extent) if paint gets somewhere that you don’t want it on the paper, but acrylic stains way more. Also, when your watercolor paint dries on your palette, you can just add more water and continue to paint with your customized color. Acrylics dry on your palette as a film which does not redissolve well (thanks to the plastic medium) and is a certified pain in the ass to scrape off the palette. They also stain your clothes, like, forever. I swear I have a shirt with a spot of blue acrylic paint on it from the 90′s.
My favorite watercolor brush is an angled shader, 1/4″ or 3/8″. In theory I have a liner and a spotter for detail work but in practice I just use the sharp tip of the shader like a goblin. I have experimented a little with water brushes; mostly I like the Pentel Aquash for monochromatic ink washes.
That’s probably already way more words than you wanted to read, so I’m going to stop myself here. Good luck and happy drawing and painting!
17 notes
·
View notes
Note
Hello! May I ask how you draw? I'm currently learning how to myself and would be highly interested into a step to step process by you! Like from sketch to the done thing (no color necessary)
Hello there!
I dunno how I feel about showing how I work/giving advice to someone who’s learning (and I say it as a pro artist who went through years of traditional art education) because when I do the illustrations you see here on my tumblr I BREAK THE RULES you’d learn though life drawing routine, and give in to bad habits, and my methods are rather unplanned and chaotic which makes it difficult to pinpoint significant stages. But I used my portable potato to take some photos during working on my last piece, so I’ll throw it here with a bit of an explanation of what’s going on.
Before I begin - and because you’re about to look at a mess of a WIP - I’d like to give you some general advice that generally makes life easier when you draw (again, things that I learned in traditional arts education - another artist might advise you the complete opposite, dunno!)
Work holistically. Forget them satisfying-to-look-at clips on instagram showing someone produce a hyperrealistic portrait starting from an eye, with each and every element emerging being finished before they proceed to another part. It takes a lot of talent, yes, but these are ppl redrawing a photo in a kind of a mechanical manner. Most artists don’t work this way. Especially if you’re working without a reference, or if you’re doing a life drawing - your process will be layering and changing and finding what works best to give an impression of what you’re drawing rather than reproduce the exact image, and your artwork is likely to look messy most of the time.That said: don’t start with the details. Don’t spend too much time on a particular part while neglecting others. Your goal is to keep the whole piece at the same level of ‘finished’ (even though it’s unfinished - do I make sense?) before you’re confident that everything is where it should be and proceed to the details. So sketch out the composition first. See how things fit, what’s the dynamics. You’ll save yourself from limbs sticking out from the frame, odd proportions etc etc.
Because it’s a game of relationships between different parts of the picture/scene. I ask you not to worry about finishing a single element before laying out the rest because you’ll find that said element will look different once the other part appears! For instance - you might think that the colour you picked for a character’s hair is already very dark. But once you’re done with the night sky background, you’ll find that it’s in fact too light, and doesn’t work well with the cold palette. You’ll have to revisit different parts of the image as you go to balance these relationships and make the picture work as a whole.
Give an impression of something being there without actually drawing it ‘properly’- because details are hard, mate. You’ll see that my lineart usually has hardly any, and my colouring is large unrefined stains, but the finished thing looks convincing. Like, fuck, I can never focus on how Crowley’s eyes are really shaped. So I just turn them into large glowing yellow ellipses crossed by a line, and heard no protests so far.
Don’t panic if you messed up (you probably didn’t anyway). It might turn out to be a completely unnoticeable mistake - because, remember, things work together to balance each other, so another finished off prominent element will probably drown that badly placed line that looked so visible and out of place a second ago.
It might not look good before it’s finished. I’m mostly immune to it after years of drawing, and my recent illustrations all follow a specific method (ykno, my sunset glow effects and all that) so I can kinda predict the next stage. But I do my linearts on a specially picked crap paper, I don’t bother erasing the smudged graphite, and it looks messy af until I make the background white in Photoshop. Conclusion: you might have a moment of doubt as you work through a piece, but try to break through it - I often suddenly start to like what I cursed a minute before! - and try to finish it even if it’s meant to be bad. This way, looking through your past pieces, you’ll see the progress. And trust me, I can’t even look at my art from literally three months ago. It’s normal.
Now, pics! The sketches are paler in real life, but I increased the contrast a little so you can see something.
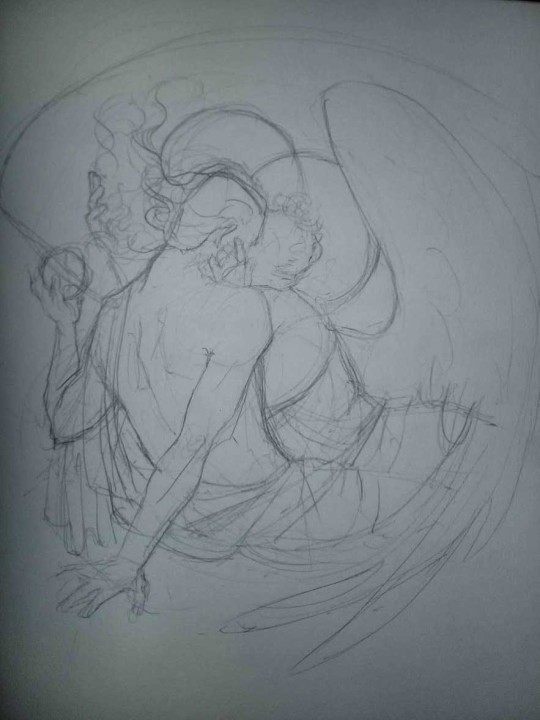
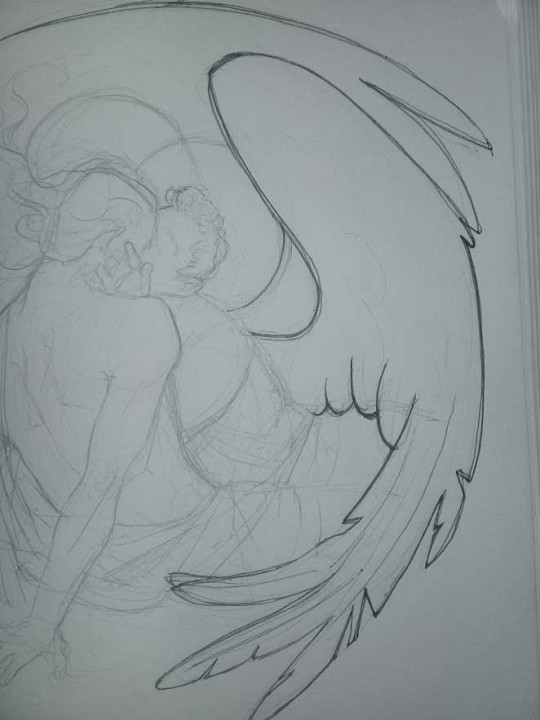
1. Laying out the composition!
I wanted to just show them kissing, but I got carried away due to some Art Nouveau inspiration. As you might have noticed, most of my illustrations are quite self-contained (ykno - they look like a sticker on a plain background). So I wanted a tight swirl bordered by Aziraphale’s wings creating a sort of rounded, yin-yang like bubble around them. Consequently I made the whole composition revolve around their heads.

2. Adding more details to the sketch. It’s messy af. It will be messy until I’m done. It’s fine.
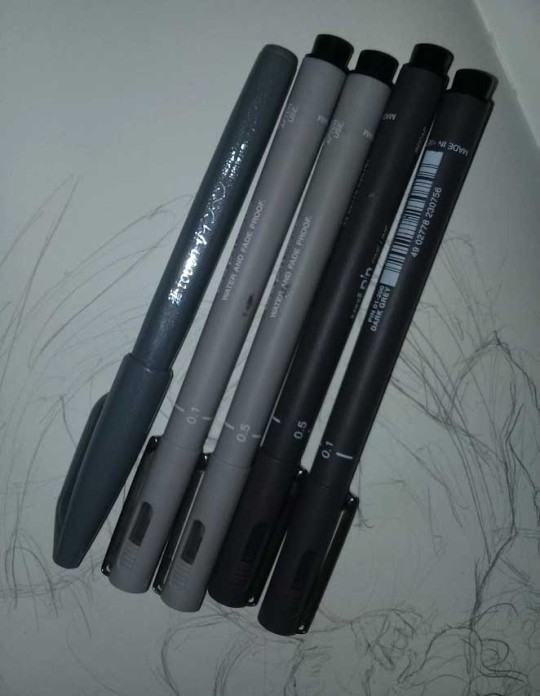
3. These are the fineliners I use for the linearts! They are made by Uni-ball and come in light and dark grey. I also sometimes use the guy on the left - ‘Touch’ sign pen by Pentel, when I want more brush-like, wider strokes. I work in grey because when I scan it and do my usual boring trick with sunlight highlights - which is an Overlay mode layer in Photoshop - the highlights ‘burn out’ the lines too and make them vanish a little, and the lighting effect gets more striking. I also like to use the light grey ones to make something look pencil-y without actually using pencil, because pencil fucking smudges.
4. It smudges! So because I am right handed, I start inking from the right hand side, no matter how tempted I am to do their faces first.
5. You can see the composition directions here. I made it intuitively, but ofc some ppl actually use grids etc to lay out their drawings.

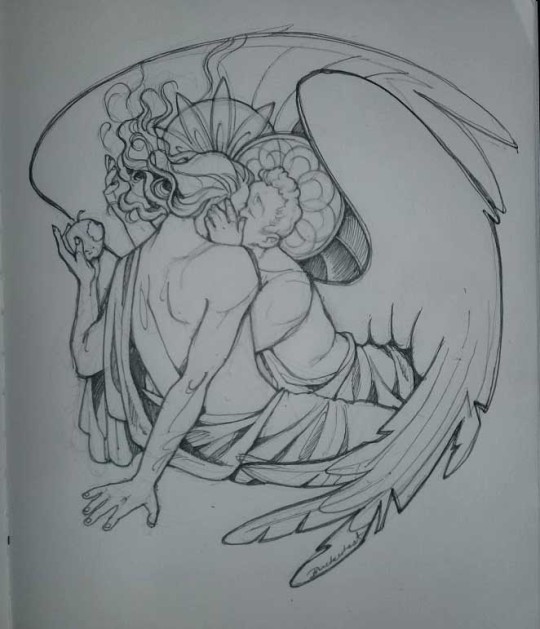
6. See how pale ans thin the lineart was at first? I kept adjusting it as new inked parts were appearing. It starts to look nice and consistent now!

7. Finished lineart? There are some mistakes which I later corrected in PS. Notice that Aziraphale’s face has hardly any details on it - I tried to make the drawing suggest his expression rather than risk overdoing it.
8. Photoshop time!! You can totally do what I did here even if you don’t have a graphic tablet. I used Curves tool to enhance the lineart, then Quick Selection Tool to select the background around around my sticker-like piece and filled it white (on a new layer ofc). I keep this white layer on top of the layer order so it works as a mask as I colour. I decided I did not like the hatching shading underneath Aziraphale’s halo, so I erased it with a Stamp tool (because I wanna keep the textured grey fill my crap paper naturally gives me!). It’s done roughly but won’t be visible once the thing is coloured.
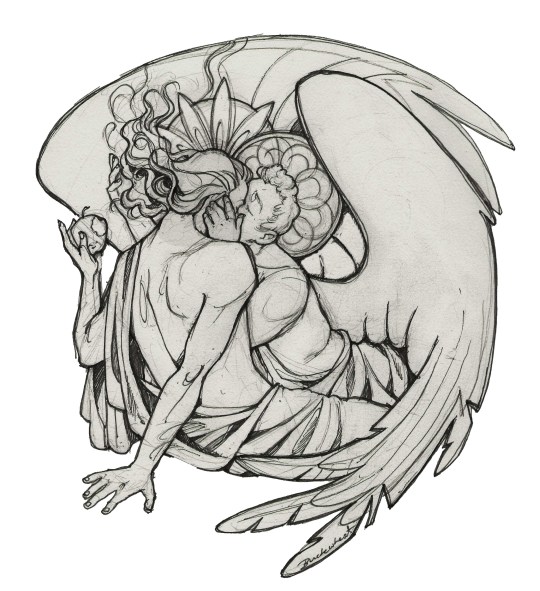
9. And the reason why I keep the grey shade instead of easily getting rid of it by using Curves/Levels is because when I set this layer to Multiply mode and colour underneath, it gives me this nice desaturated look like from an old cheap paper comic page. It works as a natural filter! But of course I can’t do bright colours this way, so all my glowing highlights happen ABOVE the lineart layer - on a separate layer in Overlay mode!
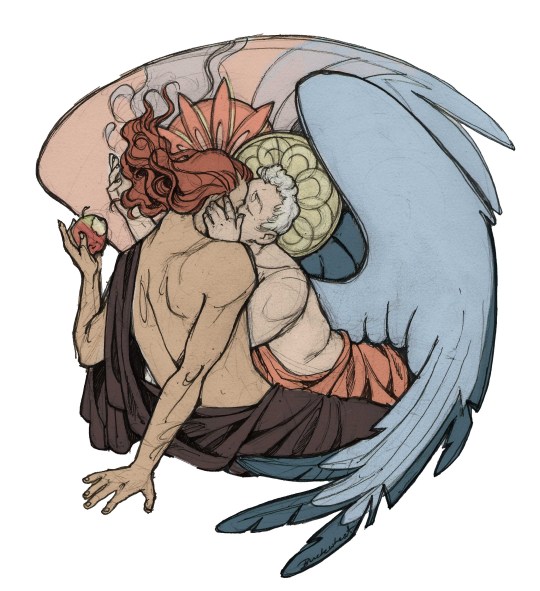
Finished thing here!
_____
Commission infoBuy Me a Coffee - help me with my transitioning expenses!Prints and stickers and things on my Redbubble!
#ask the buckwheat#long post#tutorial#drawing advice#drawing tutorial#good omens#ineffable husbands#good omens fanart#good omens art#my illustrations#doodles#toastedbuckwheat
1K notes
·
View notes
Text
Tools I use for Traditional Art, Digital Art and Livestreaming
✦ Traditional Art ✦
Paint:
Holbein Gouache: https://www.jacksonsart.com/holbein-artist-gouache-paint-5ml-set-of-18
Winsor & Newton Gouache: https://www.jacksonsart.com/winsor-newton-designer-gouache-paint-introductory-set-10x14ml
Sennelier Watercolor Tubes: https://www.jacksonsart.com/sennelier-watercolour
My current custom palette colors:
Rose Madder Lake, French Vermillion, Yellow Sophie, Quinacridone Gold, Caput Mortum, Transparent Brown, Pthalo Green Light, Forest Green, Phthalocyanmine Turquoise, Cinereous Blue, Sennelier Blue, Dioxazine Purple, Light Grey, Payne’s Grey
Van Gogh Wateroclor Pans (travel set): https://amzn.to/2AyZBB4
Paper:
Arches Hot Pressed Watercolor Paper: https://amzn.to/2ZFtGHp
Strathmore Mixed Media Paper: https://amzn.to/2VKGAmD
Moleskine Watercolor Notebook (large): https://amzn.to/2NUAM5z
Hahnemuhle Watercolor Book (smaller): https://amzn.to/2VNdOl5
Tape:
ProTapes Artist Tape 1in: https://amzn.to/3gstPVD
Brushes:
1″ Flat Brush: https://www.jacksonsart.com/handover-series-2107-synthetic-flat-one-stroke-brush-green-handle-1-in
Rosemary&Co Series 310 Brushes in Assorted Sizes: https://www.rosemaryandco.com/acrylic-brushes/golden-synthetic-acrylic/golden-synthetic-angular?filter_name=310
Rosemary&Co Series 336 Extended Needle Point Sizes 2 & 4: https://www.rosemaryandco.com/series-336-extended-point?filter_name=series%20336
Rosemary&Co Series 22 Kolinsky Size 8: https://www.rosemaryandco.com/oil-brushes/pure-kolinsky-designer
Rosemary&Co R2 Pocket Pure Kolinsky Sable Pointed Size 8: https://www.rosemaryandco.com/pocket-kolinsky-pointed-8
Large Watercolor Mop Size 12: https://www.rosemaryandco.com/pure-squirrel-mop
W&N Cotman round brush Size 0: https://amzn.to/2ZBvDoy
W&N Cotman round brush Size 2: https://www.jacksonsart.com/w-n-cotman-brush-series-222-designers-no-2
Paint Palettes:
Airtight Container Palette for Gouache: https://amzn.to/2Atk3Dd
Plastic Folding Palette for Watercolor: https://www.jacksonsart.com/studio-essentials-watertight-folding-plastic-palette-18-well
Pens:
Sakura Micron Pens: https://amzn.to/3gtc9t2
Pentel Refillable Brush Pen: https://amzn.to/2Z3CGaB
Pencils & Erasers:
Derwent Pencil Set: https://amzn.to/3iuU1Rk
Faber-Castell Kneaded Eraser: https://amzn.to/38sJDos
Staedtler Mars Eraser: https://amzn.to/2YWDRs5
Scanner:
Canon CanoScan LiDE220: https://amzn.to/2VGX2En
Desk and Studio Setup:
Kallax Shelving Unit/Desk support: https://www.ikea.com/nl/en/p/kallax-shelving-unit-white-20275814/
Gerton Desktop: https://www.ikea.com/us/en/p/gerton-tabletop-beech-50106773/
Finnvard Desk Support: https://www.ikea.com/nl/nl/p/finnvard-schraag-met-plank-wit-80150095/
Alex Drawer Unit Paper Storage: https://www.ikea.com/us/en/p/alex-drawer-unit-on-casters-white-40196241/
Daylight Lamp: Daylight Professional Artist’s Easel Lamp 33900 (Discontinued)
✦ Digital Art ✦
Painting Tablet:
Wacom Cintiq 22: https://amzn.to/3gr2GSR
Secondary monitor:
HP Monitor 24ea 23.8-inch IPS Display: https://amzn.to/2ZFGA8i
Monitor arm for tablet:
AmazonBasics Monitor Arm: https://amzn.to/3eZBmLn
✦ Streaming and Video Recording ✦
Streaming webcam:
Logitech C920 HD Webcam: https://amzn.to/3gqg49L
Streaming/Recording camera for art:
Logitech BRIO Ultra HD Webcam: https://amzn.to/3gvbpnh
Camera arm:
Neewer Desktop Scissor Arm Stand: https://amzn.to/2BwPw8i
Microphone:
Blue Yeti USB Mic: https://amzn.to/2NXUgq6
Foam Pop Filter:
https://amzn.to/3iuDPzj
Ring Light:
Neewer LED Ring Light 6-inch: https://amzn.to/3dWhrvv
Chair:
Noblechairs Epic Gaming Chair: https://www.noblechairs.co.uk/epic-series/gaming-chair-pu-leather
✦ For art tutorials & other resources, check out my Resources page:https://madeleineink.tumblr.com/post/160308431416/art-tutorials-resources-recommendations-maddys
*All amazon links are affiliate links
14 notes
·
View notes
Text
Just a disclaimer, you do not need these supplies to make art. You can use what ever you want and don’t need what I use. Also I have been collecting art supplies for years so I’m not sure how much this all has cost me over time and some of these are gifts.
These are my
Art Supplies


With that being said these are some of the tools I use to do my traditional art and in the last slide my computer
First image- Art Supplies
Brushes:
•KMM Brushes from Target
•Transon Art &BrushCo. Brushes from Amazon
•Random angle brush my friend gave me
•Brush cleaner
Paints:
•Royal Talons Ecoline liquid watercolor, •Pink390, Burgundy422
•MIYA/ Himi Jelly Gouache 18colours
•Caran d’Ache 8 color pan set
•M.Graham &Co. 5colours + 59mL titanium white large tube (I don’t use the black in the set)
•Winsor & Newton dried tube watercolor in a random plastic pallet (I didn’t add china white to the watercolor pallet cuz I don’t think it’s necessary to have a white cuz it makes it opaque and watercolor is transparent... it makes no SENCE)
Second Image- Stationaries
Plastic Clip
Paper Clips
Pens
•White Uní-ball Signo 1.0mm gel-pen
•Sakura Pigma Micron 05/0.45mm pen in Navy blue, Burgundy, Brown
•Pilot Precise V5 Extra Fine pen in Blue and black
•Pilot Frixion ball pen (erasable) 07 Black, Blue, Red, Pink
•Random fancy all point pen I don’t remember where I got it from? Target? Maybe?
Pencils
•(Mechanical) Pentel Graphgear 500 0.3
•(Mechanical) Hello Kitty 0.5
•(Mechanical) Pentel Graphgear 800 0.7
•(Pencil)Ticonderoga HB2
•(Pencil) Sanford Col-erase 20044 Blue
•(Pencil) Prismacolor Col-erase 20053 TerraCotta
•(Lead) Paper Mate Color Lead 0.7mm in Orange, Pink, Purple
•(Lead) Pentel HB 0.5
•(Lead) Pacific Arc Hi-Polymer/ Resin 0.3
3 half erasers in dodge ya stages of life
Zebra Mildliner Brush Pen & Marker 10ct
Scott Tape
Third image- Paper
Papers I like using
Leuchtturm1917 red dotted notebook 80gsm
Canson Montvol 300 gsm
Strathmore Art Journal 400 series 300gsm
Moleskin Art Sketchbook 165gsm
Bee Paper Company 100% cotton watercolor paper 300gsm
Fourth Image- Digital
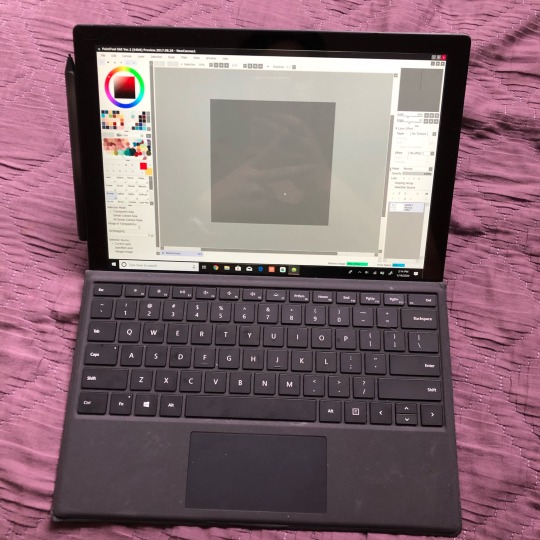
Computer/Tablet: Windows Surface Pro Gen 6 {added and didn’t come with +pen +key board}
Art Program: Pant Tool Sai V.2
#art supplies#traditional art#digital art#art tools#gouache#watercolor#stationary#art post#my tools#traditional media#digital media
13 notes
·
View notes
Photo

Akshaya
I really wasn't planning to have another mandala up this quickly, but I was feeling pretty unmotivated while trying to work on other projects, so since today is Saint Patrick's day and I'm trying to do more holiday/special day pieces this year, I decided I'd take the opportunity and bust out another one of these. They're a bit like the watercolor sunset/sky pieces I was into making a while ago; The end result looks really nice but there's a lot less work involved than other types of art I make, so it feels very rewarding to sit down for an hour or so and come out with a low effort art piece that doesn't necessarily look low effort.
Anyway. I think it's fairly obvious the theme/inspiration I pulled from for this one: Luck/Shamrocks/Clovers. I picked out a few various shades of green gel pens, all of which you can see in the photo. Mostly various Gelly Rolls, but also one Inkjoy and one Pentel Sparkle Pop. Hopefully, you can see a little bit of the sparkle/shine from the glitter and metallic pens, too.
I tried to use shapes that reminded me of the shamrock/cloverleaf shapes, and I also tried to work in 3's, since those plants typically have three leaves. Though you will notice the shape in the center is technically a four-leaf, and that was completely intentional.
Also, I used the less-than-stellar mixed media paper that I first used on Covered in All the Colored Lights, which despite not working well for markers, pencils, or watercolor thankfully works just fine with gel pens--almost too well, in fact, on account of how smooth it is.
Normally, I scan things in unless it's for a WIP shot, but since I used the shiny gel pens I thought I'd try a photo instead, especially since I have a slightly better camera now (still a phone camera, but 12 mp is better than 8 mp regardless). And I figured I'd try making the photo a little more "aesthetically pleasing" with the gel pens and, surprise, real clovers! Freshly picked from my yard, where there is no shortage of them but I didn't have the patience to hunt down any four-leafed ones that might be there.
This brings me to the title, as it's the only thing I've yet to explain. "Akshaya," per Google, means "the never diminishing" in Sanskirt and is used as an omen of good luck. I picked a Sanskrit word since "mandala" is also Sanskirtish, and I think it's obvious why I picked a word tied to luck. Although, it's not just for today. It's also for the state of the world right now. I'm not going to get specific, because if you're anything like me you've been hearing the specifics more than enough and it's driving you crazy at this point, so it's very likely you can guess exactly what I'm talking about without me ever having to say specific words.
Anyway. My point is I think the world over could use a little luck right about now. We could use a little never diminishing in the hope department. Wouldn't you agree?
It isn't much, but this is my little beacon of hope and good faith I'm putting out into the world for those reasons. If nothing else, it looks nice. Perhaps we can just pause for a moment and acknowledge that, be distracted by the niceness for an instance. It's only an instant, but that's better than nothing and ceaseless despair, at least in my book.
____
Artwork © me, MysticSparkleWings
____
Where to find me & my artwork:
My Website | Commission Info + Prices | Ko-Fi | dA Print Shop | RedBubble | Twitter | Tumblr | Instagram
2 notes
·
View notes
Text
My most used writing supplies with swatches:
Pens and sharpies:
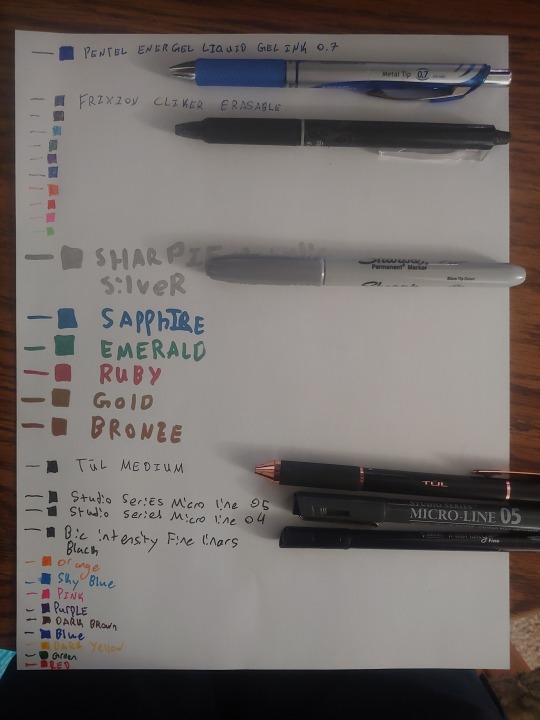
The Pentel Energel is one of the best writing experiences I've ever had with a pen! Its super smooth and nice to write with. I bought a three pack of these at Barn and Nobels, but I don't remeber the cost.
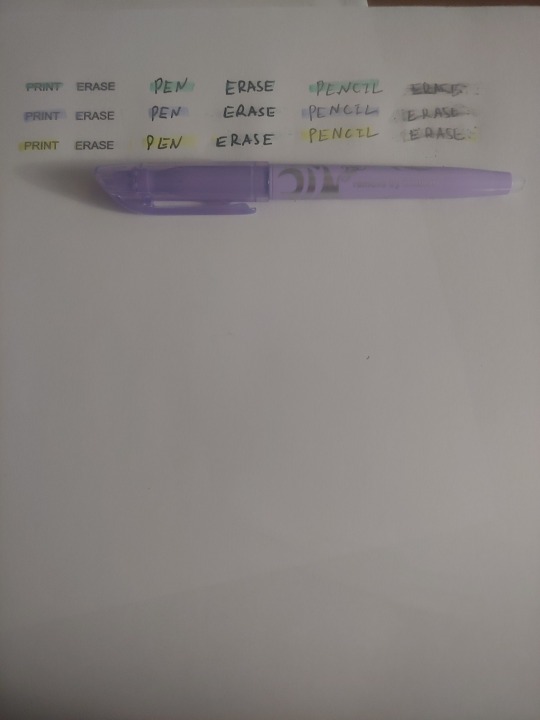
The Frixion pens are a good writing experiance as well. They aren't as smooth, but have a nice feel. The eraser works great and the click is satisfying and I would recomend these for something like notetaking where you might need to erase. I was gifted these, but you can buy them online (http://pilotpen.us/brands/frixion/frixion-ball-clicker/) they are on the expensive end for pens, but its not too rare to find them on sale in store or on Amazon.
I love the metallic sharpies! They don't bleed like normal sharpies and feel good to write with. The writing of the diffrent colours is completely diffrent because the colours have very diffrent formulas. The silver comes out thicker, the green ghosts while the others don't and the bronze smells a little odd. I got these at a local drug store on sale for 4 dollars. However they are normally around $8 (Sharpie Metallic Permanent Markers, Fine Point, Assorted Colors, 6-Count Permanent Marker (2029678) https://www.amazon.com/dp/B07DPLQJVN/ref=cm_sw_r_cp_apa_i_7TXBDb91P75EX)
The Tul medium is one I found in my house and never remebered buying. It is an adorable pen and writes amazingly and very smoothly. If you know anything about this brand please tell me!
The studio one pens are ones I got from an inking set when I was much younger. I don't know where the rest are, but these are very nice pens that I appreciate.
The bic intensity fineliners were at my local Fred Myers for $6 today and I picked them up. They are wonderful to write with and I would totally picking them up, espically if you find them on sale like I did. They make larger sets and sell smaller colour sets, but this collection was good for me, espically at the price. The red and green seem to have a diffrent formula and are more runny. (BIC Color Collection by Intensity Fineliner https://www.amazon.com/dp/B0793KHKTR/ref=cm_sw_r_cp_apa_i_XUXBDb7G3S48F)
Brush Pens
I use the crayola Singature brush pens that were fairly recently released. One end is a brush pen and the other is a detail marker. The brush and detail are not the same colour, which can be a good thing or a bad thing. I got the decorative tin box of them. They are normally about $13, but I got them on sale for closer to $8 on Amazon. (And that sale is still going on when I post this!) I do have some issues with them. They write really well out of box, but I have found that my red and black have already started to become less pigmented. I tried storing them brush tip down to see if that would help, but it did not. The labels of the colours on the pen also rub off very easily and to label the colours in my swatches I had to look at the swatches already in my bullet journal. However, if you are not using these constantly and or are a beginner they are really easy to work with and feel good. They ghost on thinner paper, but don't bleed and they didn't ghost on my thicker journal paper. In addition they come in a beautiful range of colours. (Crayola Brush Markers, Dual-Tip with Ultra Fine Marker, 32 Colors, 16Count https://www.amazon.com/dp/B0722YLZTY/ref=cm_sw_r_cp_apa_i_3LWBDbZQ0FS51)
Markers
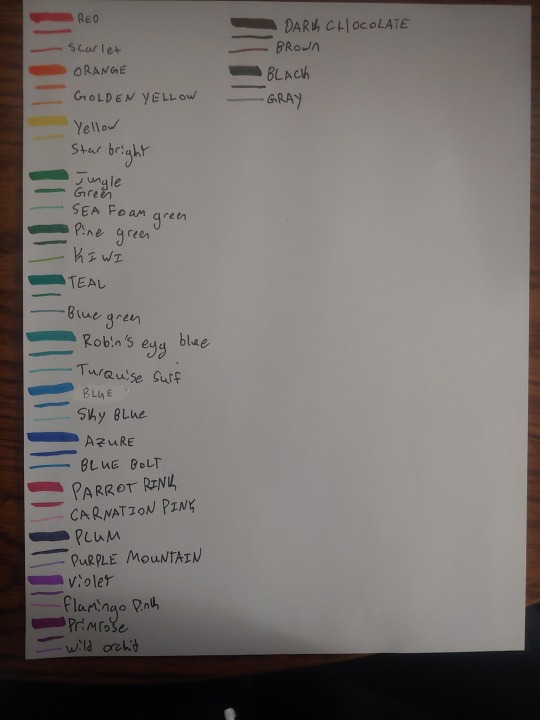
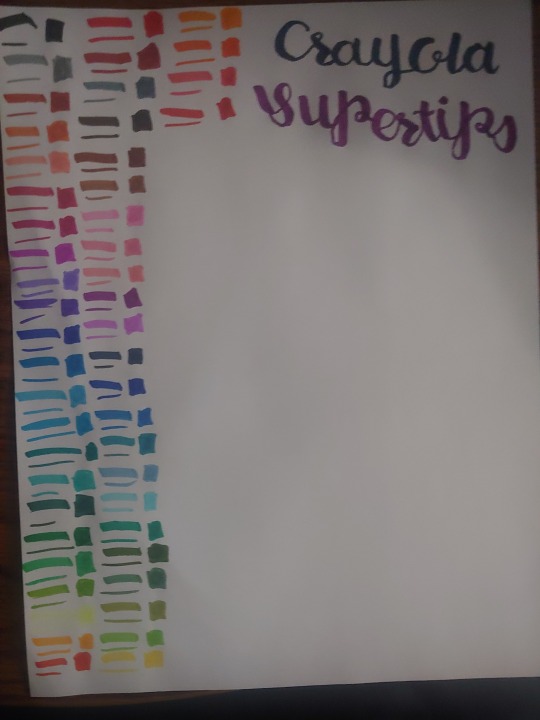
Super tips
I use crayola supertips for colouring and fake calligraphy. These are very fun to play with and come in an amazing range of colours. I got lucky and found this 50 pack on sale at Fred Myers for $5. I have heard of these being used for faking calligraphy for a while and I decided to pick them up to try and I've been having a lot of fun with it! I would 100% recomend picking them up if you get the chance. They are afordable even at full price (plus you totally don't need a 50 pack, but this was about the same price as the 20 pack at the store.) I didn't label the colours on the swatches because they aren't labeled on the markers and I had tried to match the colours to the back of the box but that was too hard and I gave up. Anyways they are currently on sale for $7 on Amazon (Crayola Super Tips Washable Markers 50 Count https://www.amazon.com/dp/B00004UFOO/ref=cm_sw_r_cp_apa_i_Y6WBDbZJWSPGV)
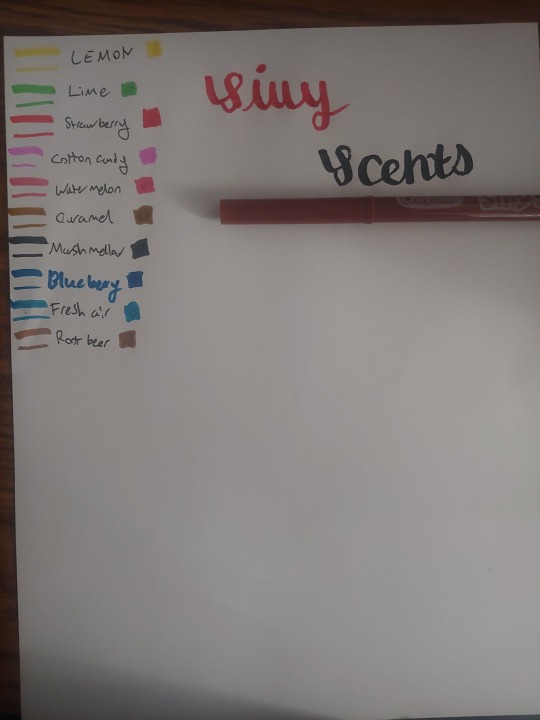
Crayola Silly Scents
These are very similar to the Crayola Supertips both in shape and formula. However, the cone comes to less of a sharp tip, which makes fake calligraphy slightly harder to do with these. The smells are enjoyable and fairly long lasting on the page. It fades, but it lasts strongly even after it drys and will be there very faintly for even longer. The markers themselves don't lose the smell either. These are really fun for colouring with and even when the scents get mixed together it doesnt get overwhelming or gross, which I find pretty common with most other scented products. I was unable to find the smaller markers on amazon, but Im sure they still exist if you dig slightly harder than me. However I did find the wide ones. These are more expensive than the normal markers, at $7.78, but still adorable. (Crayola Silly Scents Scented Markers, 12Count https://www.amazon.com/dp/B0727KVNGV/ref=cm_sw_r_cp_apa_i_wfXBDb2B2NM65)
Crayola erasable coloured pencils
As you can tell I really love Crayola and these coloured pencils are no exception. These come out lighter than other coloured pencils, but I kind of like that. The lead is also softer than creates a diffrent writing experiance. They erase about the same as a regular pencil. I admitiedly dont need the erasing aspect of it very often, but its a cool thing to have. I have the 10 count for $4.20, but they have 24 and 50 counts as well. (Crayola Erasable Colored Pencils, 10 https://www.amazon.com/dp/B002IXJYNQ/ref=cm_sw_r_cp_apa_i_ioXBDbPNCYWM6)

Highlighters
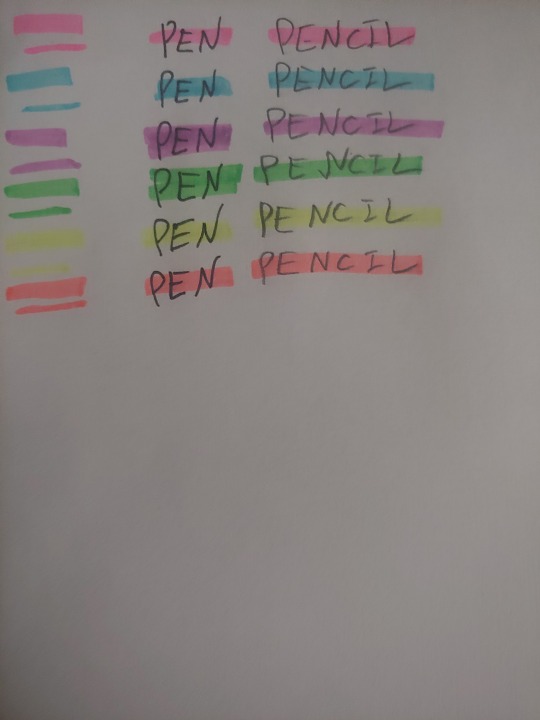
Sharpie
I love these! Both on pen and pencil most colours don't smear as the smear guard label on it promises. The yellow does minorly smear on top of pencil as you can tell though. However it's much better than many other highlighters. These also have these windows so you can actually see what you are highlighting while using it. The window doesn't affect the ink flow through the highlighter and they are very bright and highly pigmented. The tip also allows for both thin underlines and thick underlines. I like it much better than traditional chisel tips. I couldn't find the exact colour selection I got at Wallgreens nor do I remeber what I payed, but this three pack on amazon is $4 (which is a bit expensive, but they are wonderful) (Sharpie Clear View Highlighter Stick, Assorted, 3/Pack (1950748) https://www.amazon.com/dp/B019PGLR9M/ref=cm_sw_r_cp_apa_i_dDXBDbKVQRF2V)
Frixion erasable highlighters
These are alright. I use them sometimes, but unlike everything else on this page I wouldn't recomend them for most people. They should not be used on top of pencil because erasing off top of pencil is pretty much imposible. Erasing off top of pen is ussually okay and erasing off top of print is fairly good. Oddly enough the yellow also smears while the other colours do not once again. I would only recomend these if you are highlighting on top of text that you own. It leaves small traces even on top of text so I would not recomened it for barrowed items. They are also fairly pricy for highlighters. (At $9.24 for 3, I got them on sale for $5 and I woipd only recomend it if you are able to get them at that price or lower.) Hopefully Poilt will make a better formula and I will be able to change my mind. However, if you just want these for on top of text and the ability to erase highlights is important for you these work well enough and have very nice colours.
(Pilot FriXion Light Pastel Collection Erasable Highlighters Chisel Tip 3-pk) https://www.amazon.com/dp/B0102OODZ6/ref=cm_sw_r_cp_apa_i_YRXBDbMXD61ME)
What are your favourites? Do you have any writing utensils you would like me to review? Tell me! I'm always looking for new supplies.
#studyblr#studyblur#organization#frixion#pilot#pilot pens#pilot frixion pen#frixion pen#frixion highlighter#stationary#stationary review#writing#colouring#crayola#crayola signature#crayola signature brush pens#crayoligraphy#calligraphy#hand lettering#notes#notetaking#long post#silly scents#markers#review#my favourites#back to school#college#highschool#school
2 notes
·
View notes
Video
youtube
Hey Artnerds! We have reached the peak of our Summer 2019 Dollar Tree review series- today we're doing our Dollar Tree Fieldtest! Almost everything used today came from one of two Dollar Trees in Louisiana
Materials Used: 🤑Dollar Tree Posterboard, cut to 8"x10": https://www.dollartree.com/11x14in-wh... 🤑Pentel Eraser: https://www.dollartree.com/pentel-hi-... 🤑Inc Colorpoint Pencils- 2 Packs: https://www.dollartree.com/inc-color-... 🤑Jot Permanent Markers- 2 Packs: Normal: https://www.dollartree.com/jot-perman... Brights: https://www.dollartree.com/jot-bright... Artist Loft Alcohol Markers- Neutral Pearl Cherry Blossom Honeydew 🤑Artist 6 Pack watercolor pencils: https://www.dollartree.com/paper-craf... 🤑Jot 8 Color Watercolor Set: https://www.dollartree.com/crafters-s... 🤑Jot watercolor Brushes 🤑Dollar Tree ceramic plate: https://www.dollartree.com/royal-norf... 🤑Crayola Supertip 5 Pack: https://www.dollartree.com/crayola-su... 🤑Jot Pastel Highlighters: https://www.dollartree.com/jot-pastel... 🤑Crayola Crayons 24 pack: https://www.dollartree.com/crayola-cr... 🤑Crayola Neon Crayons: https://www.dollartree.com/crayola-ne... 🤑Crayola Color Pencils 8 pack- Pastels: https://www.dollartree.com/crayola-sh... 🤑Promarx Extra Fine .5 Pen: https://www.dollartree.com/promarx-ul... 🤑Jot Correctional Fluid: https://www.dollartree.com/correction... 🤑= purchased at Dollar Tree
Click through for more information! If you enjoy my videos, make sure you subscribe to my channel!
2 notes
·
View notes
Photo


Pilot V5 Hi-Tecpoint Rollerball 0.5mm (blue | black | red | colour set)
Pilot G2 Retractable Rollerball 0.7mm (blue | black | red | colour set)
BiC Cristal Ballpoint Pen 1.0 mm (blue | black | red | colour set)
MUJI Gel Ink Ballpoint 0.38mm (blue | black | red | colour set)
Staedtler Triplus Fineliner 0.3mm (blue | black | red | colour set)
Stabilo Point 88 Fineliner 0.4 mm (blue | black | red | colour)

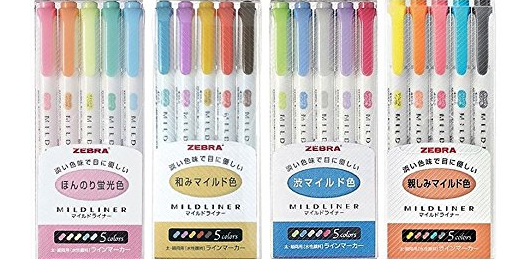
Zebra Midliners:
WKT7-5C Fluorescent (set of 5)
WKT7-5C-RC Mild Color (set of 5)
WKT7-5C-NC Pastel Color (set of 5)
Set of 20
Stabilo Boss highlighter
Pastel (set of 6)
Original (set of 8)
MUJI Twin-Tip Highlighters (set of 5)

Sharpie Permanent Markers (set of 8 | set of 12 | set of 24)

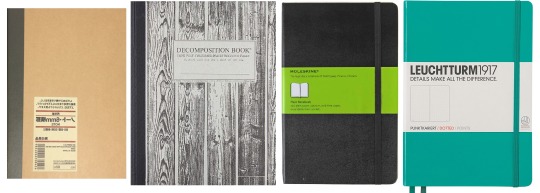
MUJI Notebook 30 Sheets Lined Paper: A5 | B5
Decomposition Book 80 Sheets Lined Paper
Moleskine Notebooks (various sizes, lined, squared, and plain pages)
LEUCHTTURM1917 (various sizes, lined, squared, and plain pages)

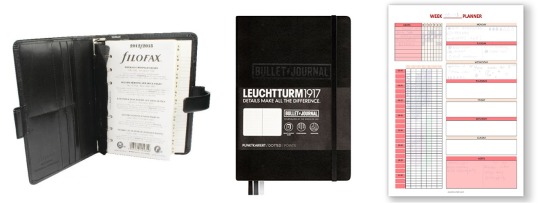
Filofax organise (various sizes, can buy your own inserts)
LEUCHTTURM1917 A5 Bullet Journal
Free printables

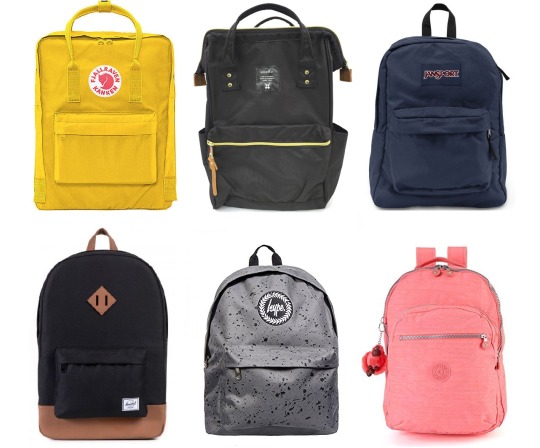
Fjällräven Kanken backpac (comes in various sizes and colours)
Anello backpacks (fits 14″ laptop)
JanSport backpacks (comes in various colours)
Herschel backpacks (comes in various designs, sizes, and colours)
Design 1: Casual | Design 2: Little America | Design 3: Classic
Hype backpack (comes in over 40 colours)
Kipling backpacks (comes in various designs, sizes, and colours)

Popular stationery shops: MUJI | Staples | WHSmith | Ryman
Popular brands: Staedtler | Faber Castell | BiC | Stabilo | Pentel | Moleskine | kikki.K | MUJI
Other popular items: Washi tape | Pencil cases | Binders | Pomodoro timer | Desk Organiser | Post In notes
ULTIMATE STUDYBLR GUIDE:
PART I: TAGS
PART II: MOBILE APPS
PART III: EDUCATION SYSTEMS
Before reblogging, click here first to check for the latest update of this post.
#studyblr#studyspo#stationery#notes#notebook#study#studying#stemblr#planner#plan#planning#organisation#ultimate studyblr guide#backpack#kanken backpack#fjällräven#moleskine#excelli
173 notes
·
View notes
Photo
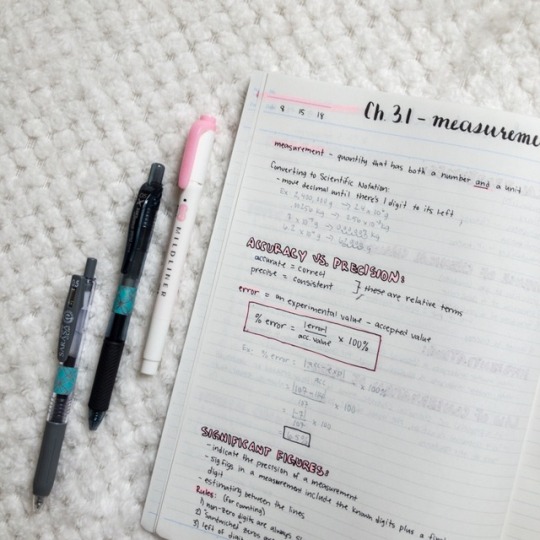
8/19/18
every chapter i’m changing the color for my notes and so right now i’m using a super bright pink. expect to see more of this color and a darker pink i was using because those are the ones that are in my pencil case at the moment.
these are some notes from chemistry! using the zebra mildliner, pentel energel in .5mm, and the zebra sarasa clip gel pen in gray!
xo- gg
#ggsstudies#mine#studyblr#studyspo#study motivation#studygram#studyspiration#study#chem notes#chemistry#zebra sarasa#zebra sarasa clip pen#zebra mildliner#mildliner#pentel energel .5mm#pentel energel#kokuyo campus notebook#kokuyo campus#notes#bright pink#significant figures#sig figs#measurement#chem
15 notes
·
View notes
Text
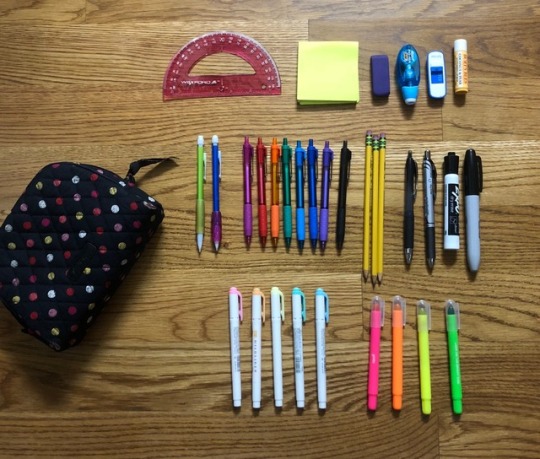
What's in my Pencil Case 2018! (junior year)
[8/11/18]
Hey everyone! since school starts on Monday I thought i would do this fun little 2-part series to help me get my shit together and actually pack my stuff so here we go! (this is kinda long so if you don’t really care just appreciate the picture and scroll)
Pencil Case- it’s actually a Vera Bradley makeup bag lmao, but I like it cause it’s black (which matches my backpack) but also has some nice polka dots
(top row left to right)
Protractor- has a ruler, useful for math, physics and making straight lines, plus its the bendy kind so it won't break
Post-it notes- again, generally useful for doodles, scrap paper, things you want to add in to notes but don't have room to, also mine are the accordion style ones so I just play with them during class oops.
Eraser, White Out, Flash Drive, Chapstick- more necessary items that are generally useful in a classroom
(middle row)
Pencils- the ones that I actually actually use are the mechanical ones with the pencil grips because I get blisters easily. I generally try to keep 2 in there at all times just in case
Pens! of the color variety- this year I'm trying out the PaperMate Inkjoy ballpoints, for notes, other fun things, when the tell you to make corrections in a different color, etc.
Number 2 Pencils- these are the ones I give when people ask me for a pencil, also for testing purposes
Black Pens- necessary. I like the Pentel Liquid Gel Ink in 0.7, it’w what I use in my planner and in my journal, and the uniball Signo
Expo Marker and big black sharpie- useful items for a high school student
(bottom row)
Mildliners pastel pack- my one indulgence, for note taking only, I really don't tend to use these a lot because they run out quickly
Yoobi Gel Highliters- these are the ones I use for annotating because annotating takes up so much ink from a regular highlighter so I decided this year to go gel.
There you have it! My pencil case for junior year! If you made it this far you are my hero I love you thanks.
#pencil case#junior year#junior#high school#school#student#pencil#pen#highliters#pens#pencils#post it notes#protractor#chapstick#flashdrive#eraser#white out#workday#productive#productivity#study#studyblr#ib programme#full ib#ib diploma#ibdp#studying#studyinspo#studyspo#studivation
13 notes
·
View notes
Last Seen Blogs
allithevu
Allison Vu

carsitattoo
İsimsiz

otsanda
ots is hiding from the impending collapse of twt

littlebosleepmusings
celebrity dreams is now little bo sleep.

leafyduckwebs
time to go home.