#garb
Text

instagram
Its armor and weapons or massive bling - there's no in between with this kid. She finally approves of the dress.
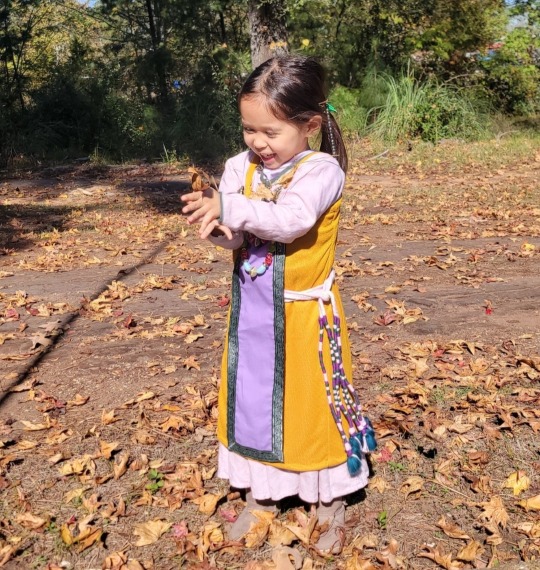

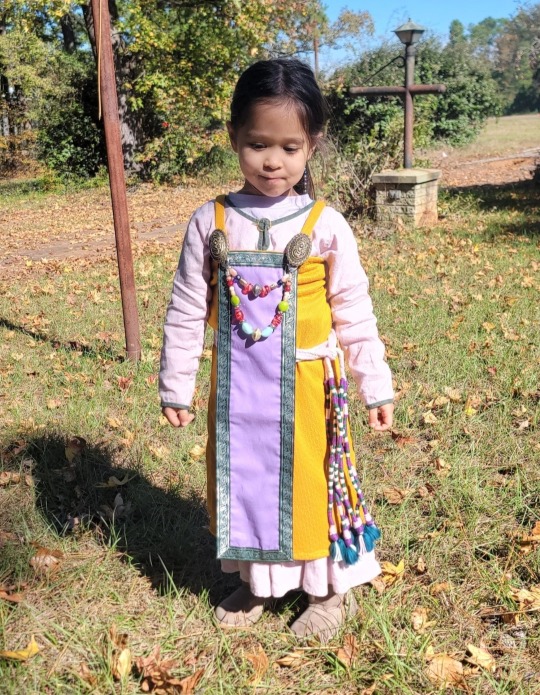
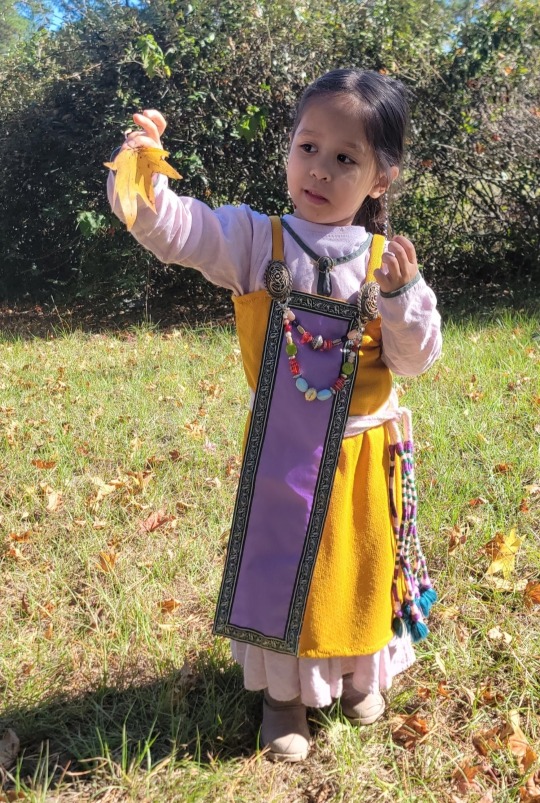
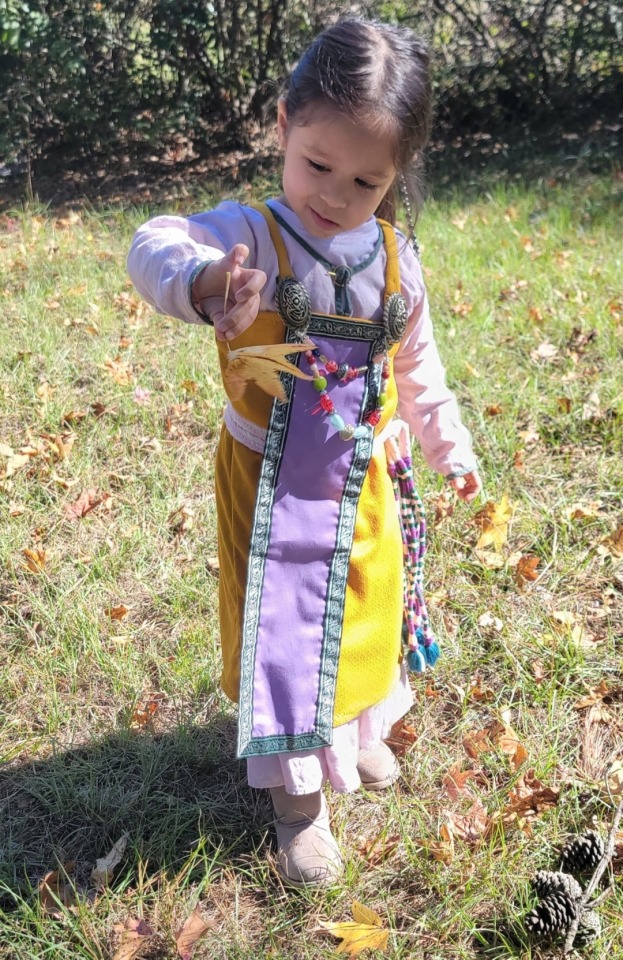

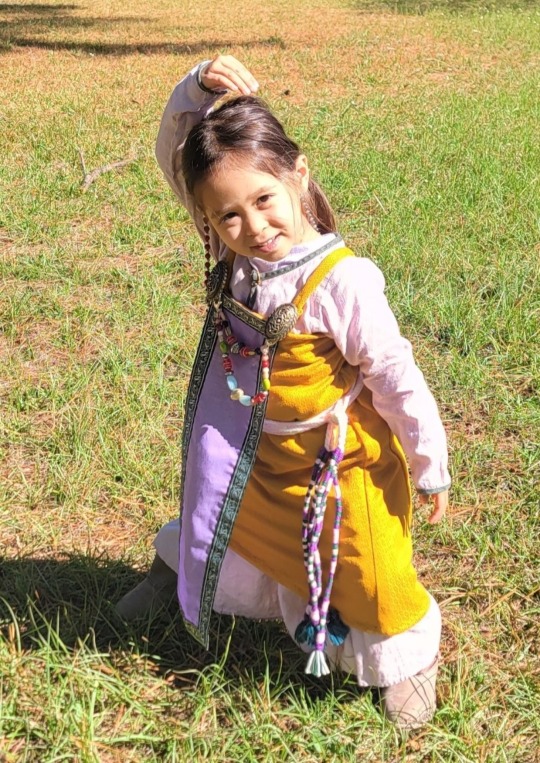
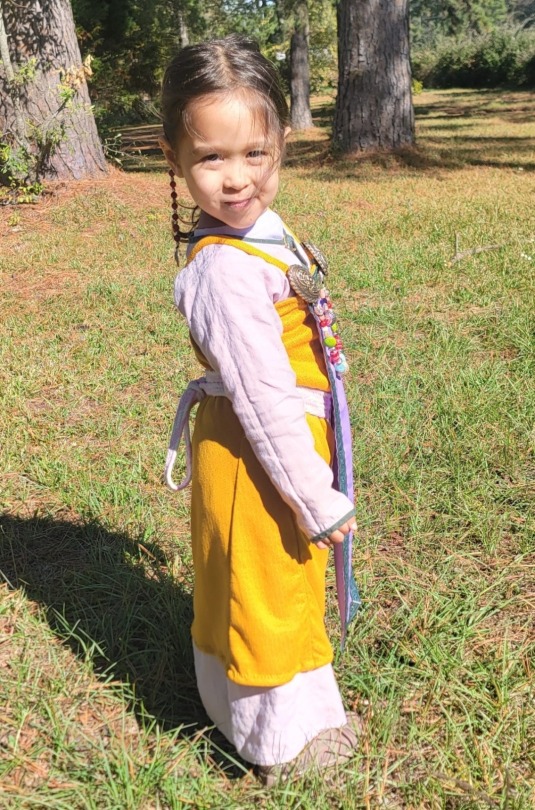
Tunic is linen from armstreet. Dress is made from bargain bin knit fabic with a fulled appearance to conceal the weave. Panel is cotton with brocaded trim, and beads are plastic so I won't regret if they break. Is it a bit overboard? Yeah, but if it gets her to play then cool beans. Now I need to make something for the wife to complete a full family outfit in norse theme. I look forward to being finished so we can maybe pay a visit to to the land of liripipes next
#garb#child garb#vikingstyle#viking aesthetic#norse aesthetic#smokkr#hangeroc#apron dress#my garb#costuming#my crafts
503 notes
·
View notes
Text


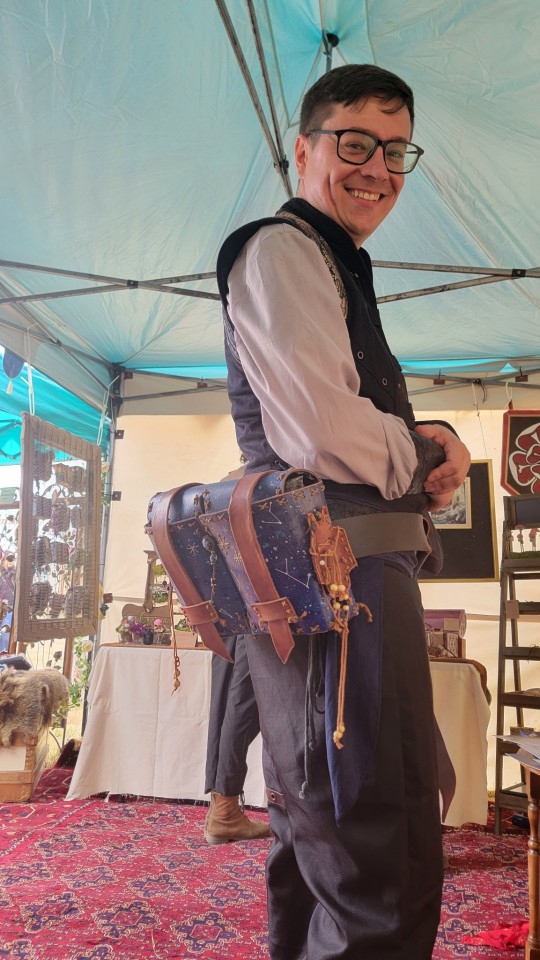

Happy Wednesday all!!
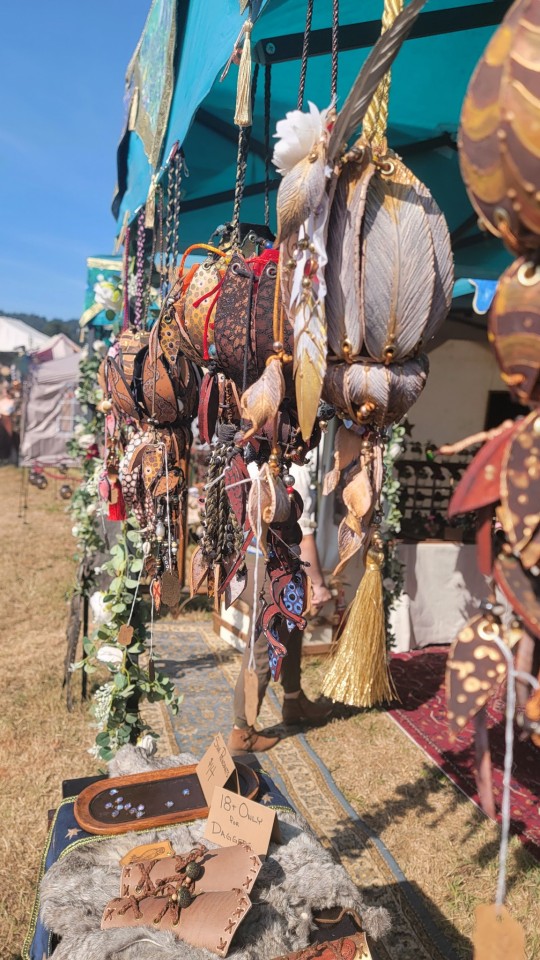
As I dive back into the worshop after a full faire season, I just wanted to say thank you to everyone who came out and visited the booth this year. Getting to see everyone is always a highlight of any event and makes all the hard work well worth it.
As an artist, I believe that every piece I make is made for someone, even if I don't know exactly who in the moment of creation, but I'm always so pleased when a piece finds it's adventurer.
It's even more special when I get to witness the moment in person.
So thank you all again! ❤️
And to those who were not able to find us this year, you can find the online shop at https://www.etsy.com/shop/ArcherInventive or again in person next year at a few different events. :)
558 notes
·
View notes
Text
Make A Quick and Cheap Circle Cloak
PART 1: JUST THE CLOAK
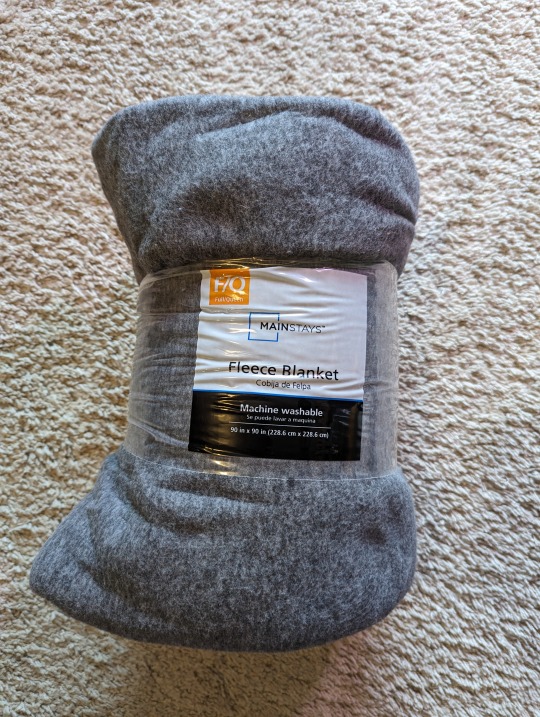
Step 1. Invite some friends to their first ever event. Make sure it's a cold weather event so that you have to make them cloaks. Then have your Scadian friends ask if you can make them one, as well, because they can't seem to find theirs or found that it wasn't warm enough last year. You have now agreed to make four cloaks.
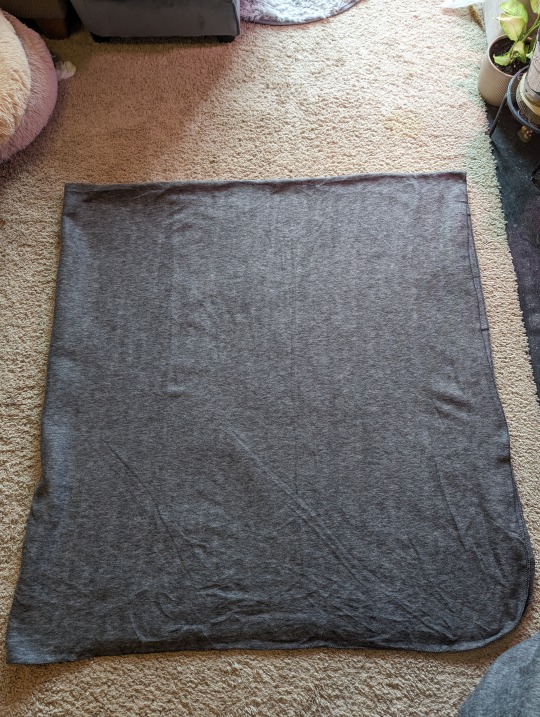
Step 2. Go to Walmart. Get one (or four) of the $10 fleece blankets in Full/Queen size. If you want a shorter cloak (about waist length) Twin works. But these are all tall mfer's, so I went with the bigger blanket. These blanket don't fray, so there's no need to hem. The edges WILL roll, though, so if you want them to stay flat you'll need to blanket stitch or serge the edges. Or just leave it be, because this is a quick and cheap cloak.
Please note: these ARE polyester so be careful around open flames.
Step 3. Move everything out of the way in your living room, because you don't have any other space big enough to spread this thing out to mark it for cutting. You will probably upset the dogs, but they'll get over it because they're old and still have the couch to sleep on.
Step 4. Fold your blanket in quarters. This means you fold it in half one way, then in half the other way. The material is a bit stretchy, but do your best to make sure that you have your edges matching. Do better than me.
Step 5. Find your scissors and grab either a measuring tape or a long enough piece of string, and a sharpie. Tailors chalk won't mark on this stuff so I usually just use a sharpie instead.
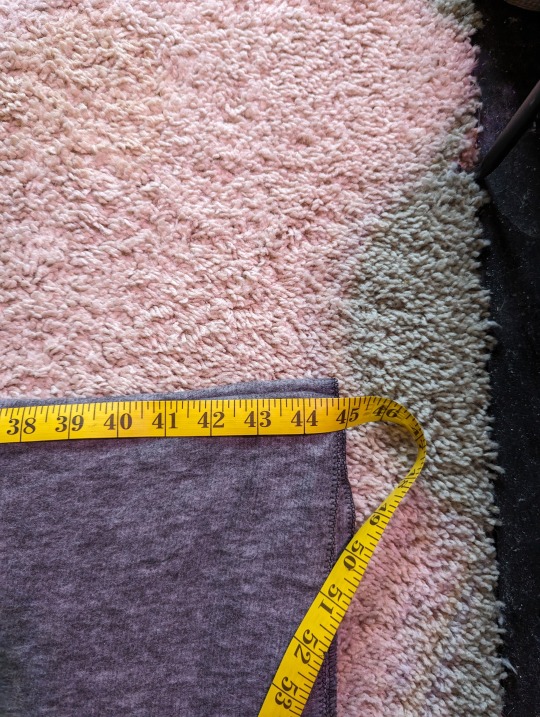
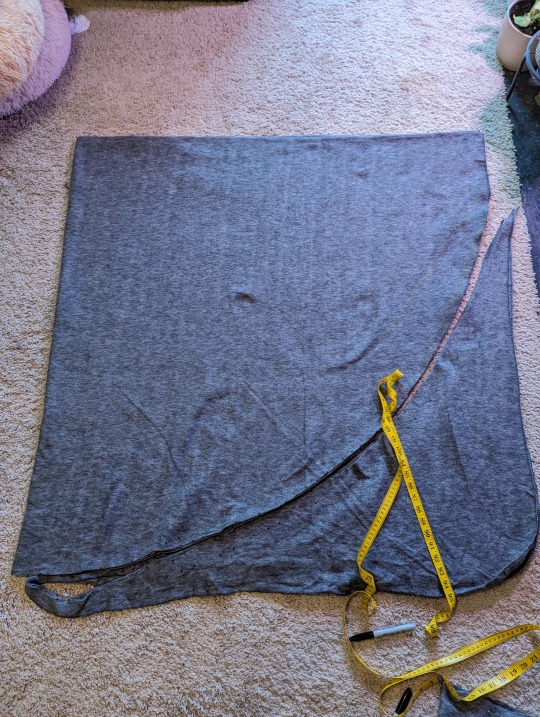
Step 6. Measure the shortest length of the blanket. We already know that it says it is 90x90, but that is a lie. It's actually 90x94 or something like that. Anyway. Measure the shortest length to determine the widest you can make your circle. In this case, we're at 45.
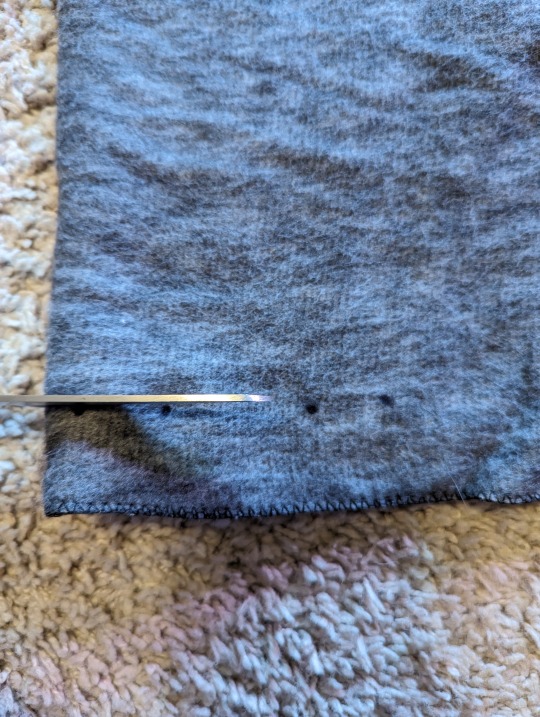
Step 7. Use your tape measure or string like a compass, and mark your cloak. You do this by anchoring one end of the tape measure at the corner of the fold, stretching it out, and marking the fabric at the appropriate length every inch or so. This will create the curve of the circle.
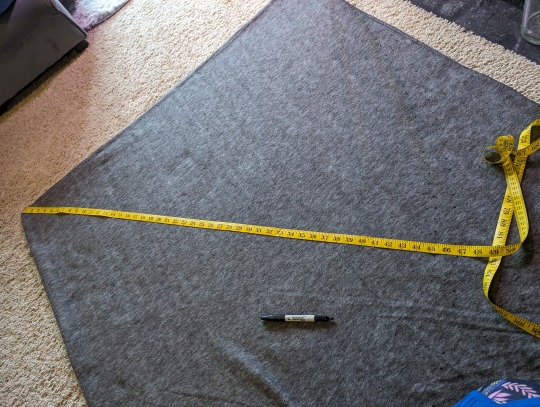
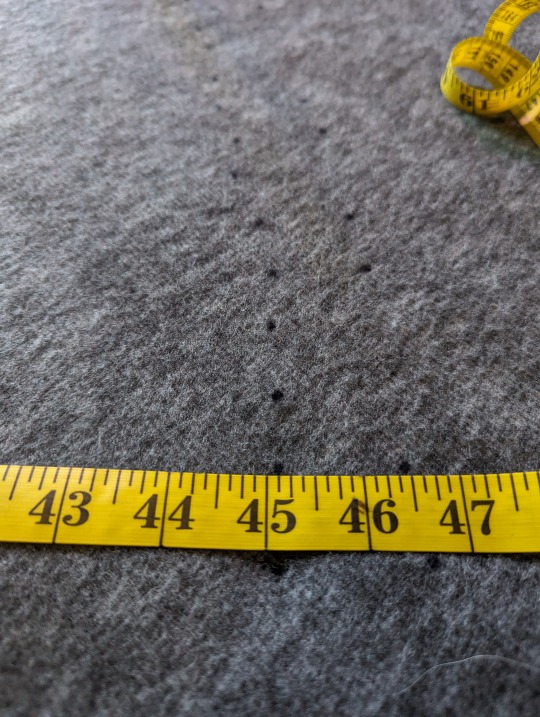
Ignore the fact that I marked this twice. My anchor had come loose and so I had accidentally marked it wrong for a little bit. Anyway. Do this from one edge all the way to the other. Will this be a perfect circle? No. Will anyone be able to tell? Also no.
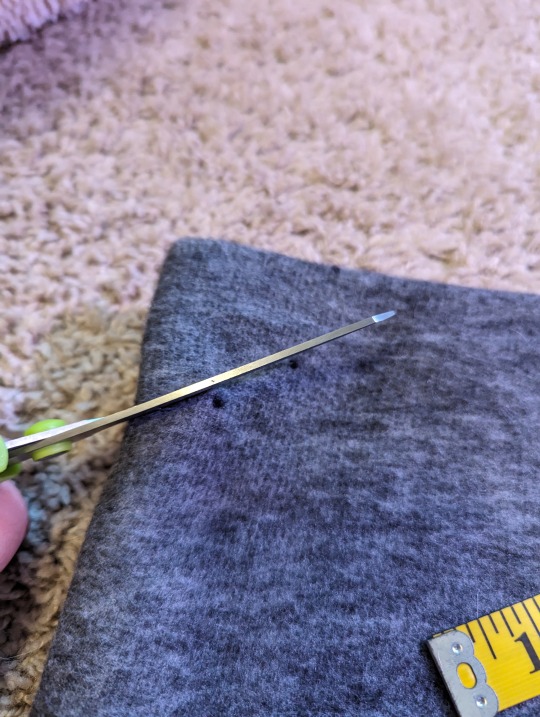
Step 8. Connect the dots, or find your scissors and just start cutting.
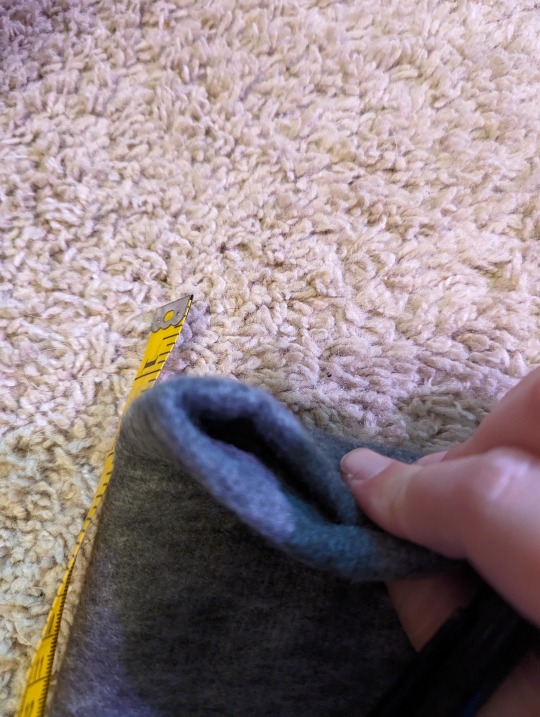
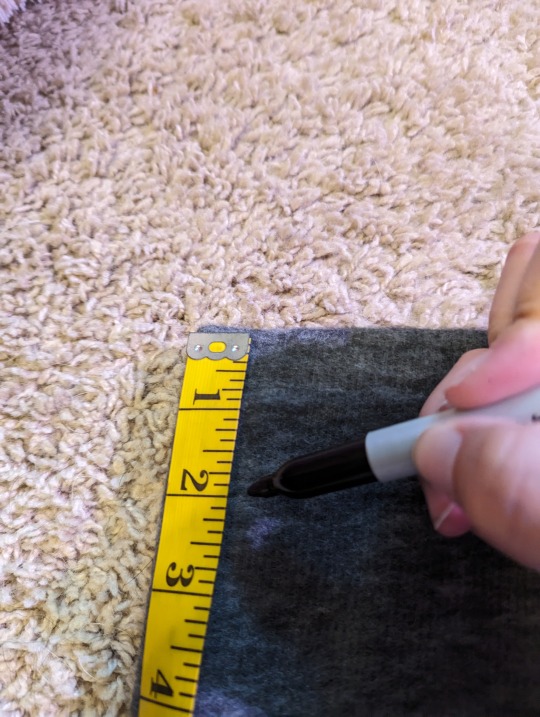
Step 9. Congratulations you have a circle. Now you need a place for your head to go. You do this by measuring two inches from the corner fold, and marking it the same way you did for the body of the cloak. Yes, two inches. Don't worry - your neck WILL fit. This fabric has a lot of stretch to it, and since all of the weight will be pulling from this point it will expand to fit you comfortably. Find your scissors and cut along the dots.
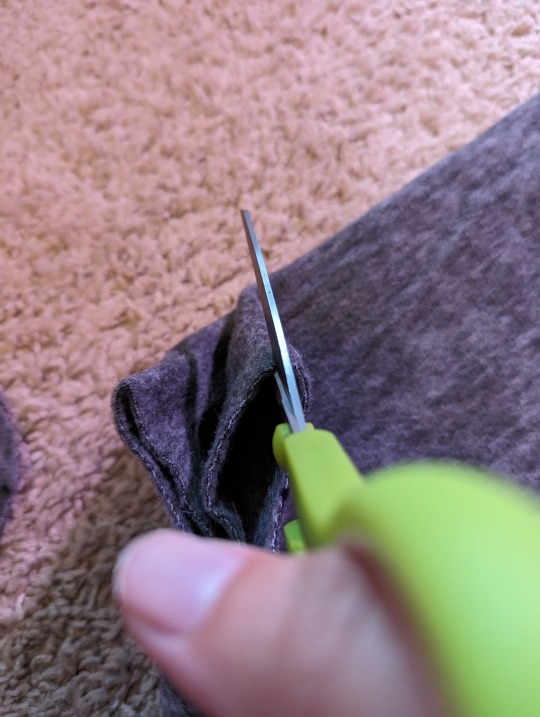
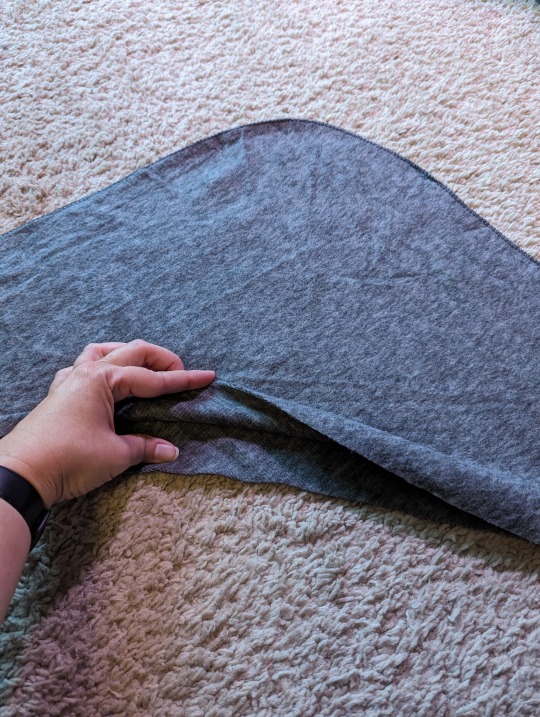
Step 10. Now you have a circle with a hole in the middle of it. Well done. Find your scissors and cut it open, by following the fold from the cut in the neck to the edge of the cloak. This will give you a straight(ish) opening. Try it on and see that I was right about the neck, and you are now cozy and warm.

Step 11. Wait for your housemate to come home so that they can hand-stitch the frog (clasp) closure onto it for you, because you hate hand sewing and she does embroidery as a hobby. Congrats, you have a circle cloak.
PART 2: BUT I WANT A HOOD!
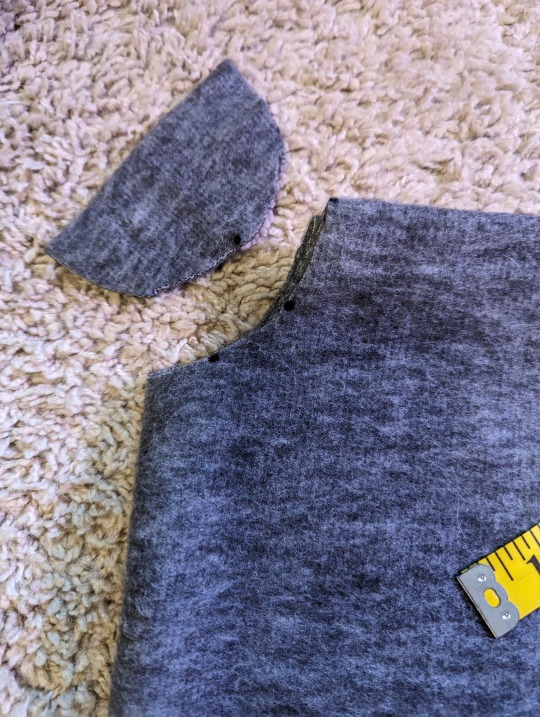
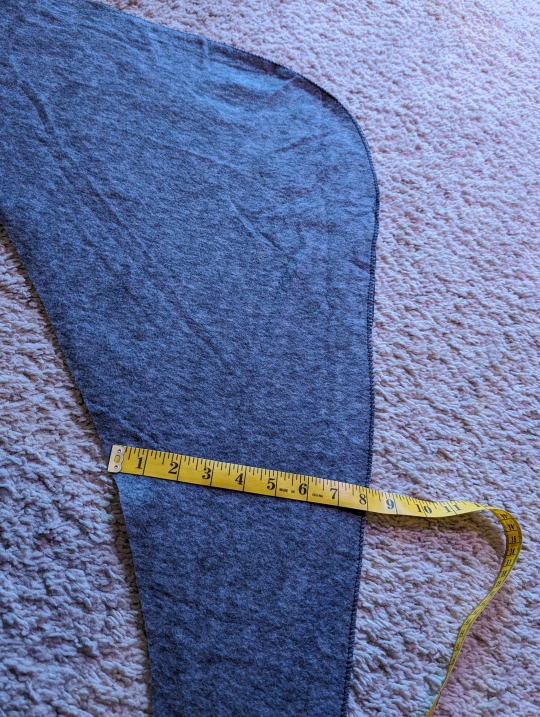
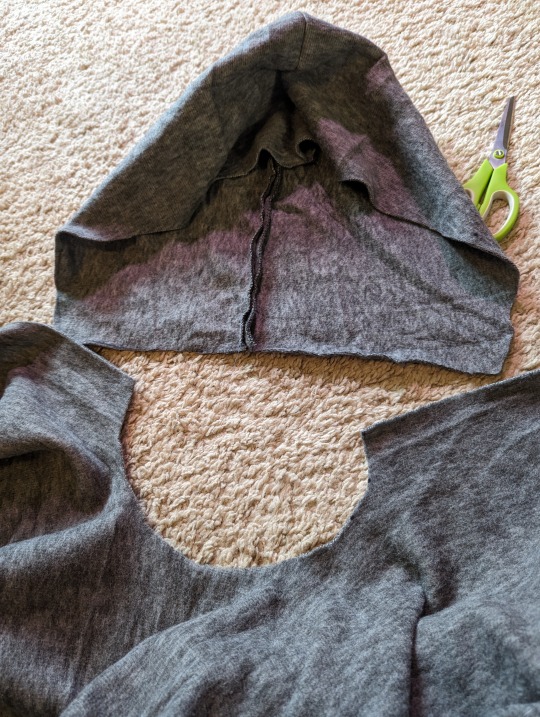
Step 1. Grab that piece you cut off when you made the circle on your blanket. We're gonna turn that into a hood. You only need two matching pieces, but the good news is that you have four. So if you mess up, you still have material to work with.

Step 2. Mark a straight line of 8 inches. This will be the bottom of the hood to connect to the neck of the cloak. Find your scissors and cut it.
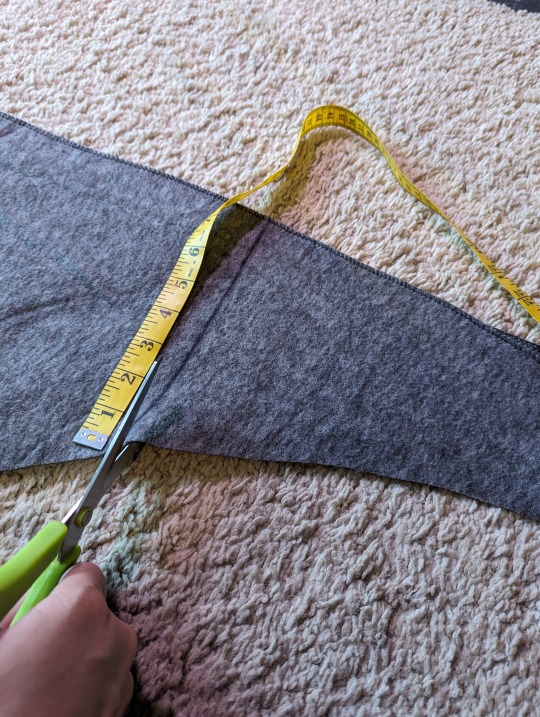
Step 3. Find your scissors and cut off the other tail end, making it as deep as you would like your hood to be. Or leave the tail and have a liripipe hood, you do you.
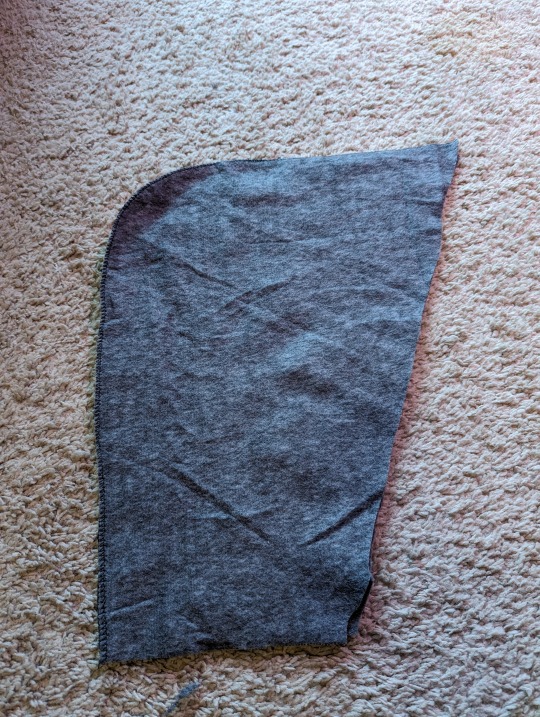
Step 4. Sew up the back and top of the hood. Leave the bottom and face open.

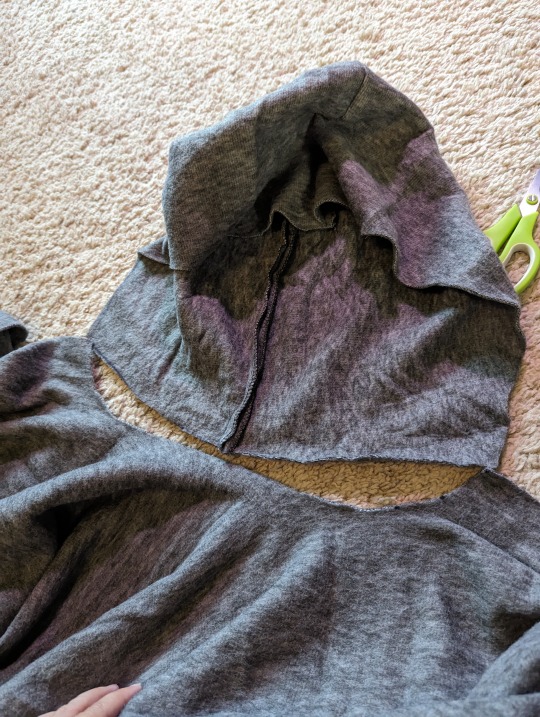
Step 5. Try it on to see if you need to use your back up pieces to make a new hood or not.

That'll do, pig.
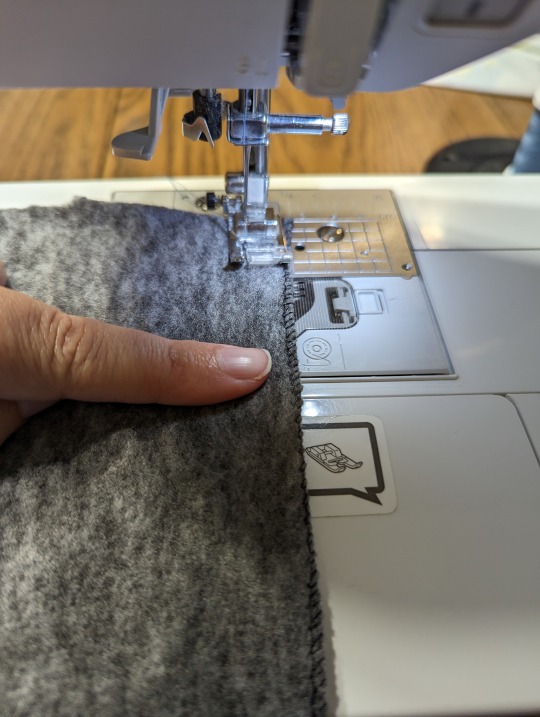
Step 6. Pin your hood to the neck of the cloak, and discover that I was right when I said that 2 inches was enough for your neckline.
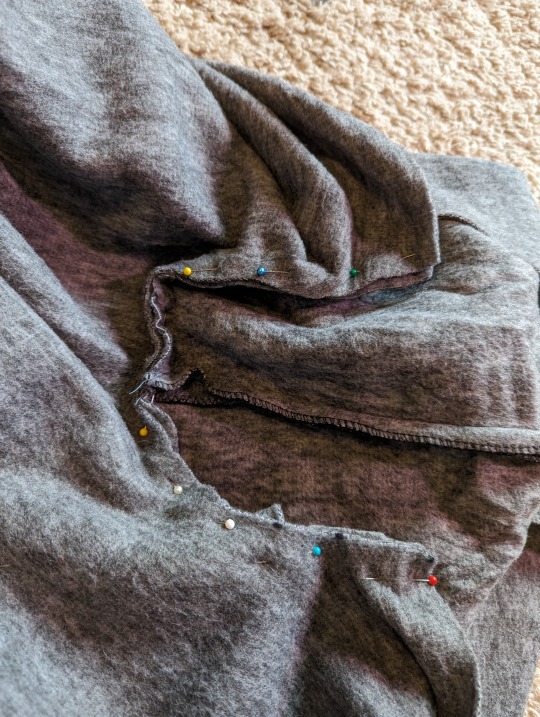
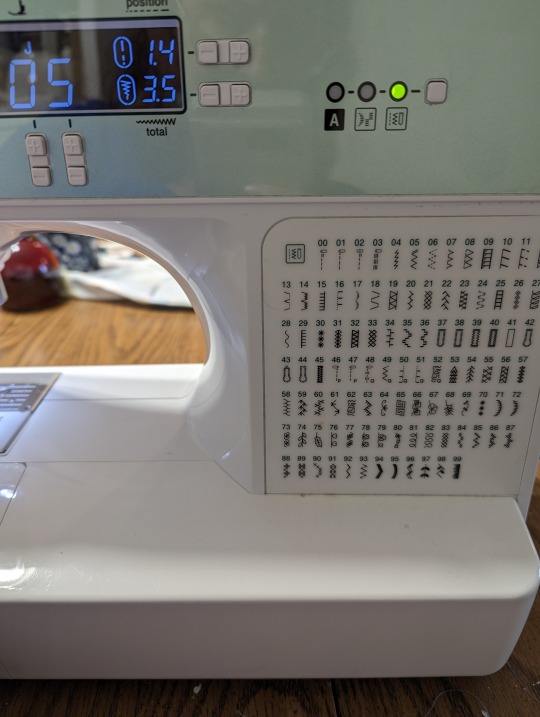
Step 7. Attach them together. You can do a straight stitch, but I prefer to do a zig-zig, only because there IS a lot of pull on that particular area of the cloak and I like the idea of reinforcement.

Step 8. Try it on. Be warm. Enjoy.
PART 3: GETTING BOUGIE WITH IT
Step 1. Realize that you have made four cloaks out of the same colored blankets because Walmart didn't have any other colors available, and while this isn't necessarily a problem, all four cloaks will be in the same camp and you don't want them to get mixed up or confused for each other.
Step 2. Go find some trim that you have had for years and haven't used up because there's so much of it, or run to the thrift store and see what you can find for cheap. Attach it to the front edge of the cloaks and stitch it down.
Note: you will want to attach trim BEFORE you put your frog on.
Step 3. Silently curse yourself for using wide trim that means you will have to stitch down both sides of it, rather than narrow trim that would only require a zig-zag stitch once down the center.
Step 4. Enjoy.
#mysca#society for creative anachronism#sca#garb#cloak#circle cloak#tutorial#cloak tutorial#cheap cloak#blanket cloak#circle cloak tutorial#garb tutorial#sca on a budget
220 notes
·
View notes
Text
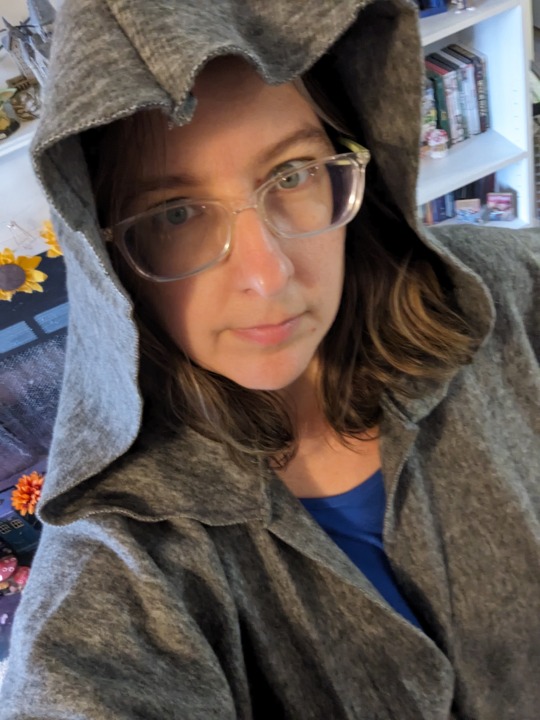
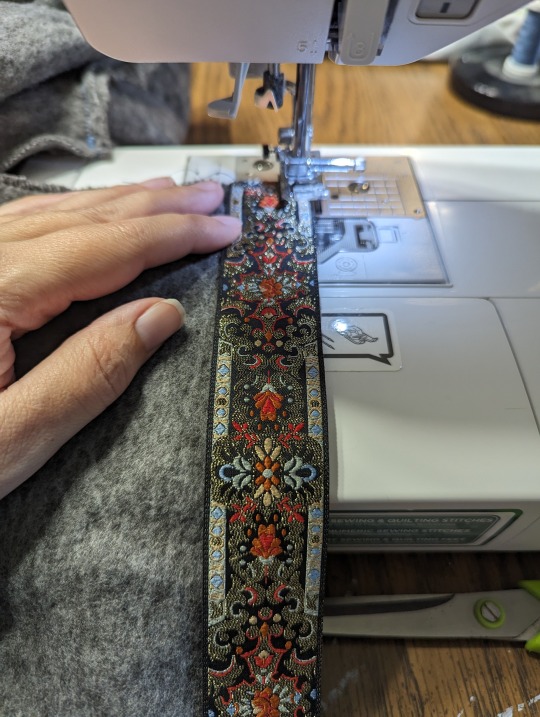
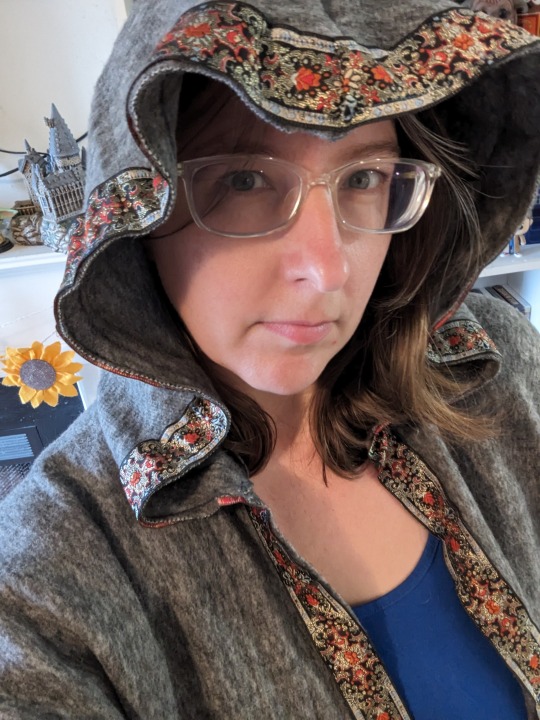
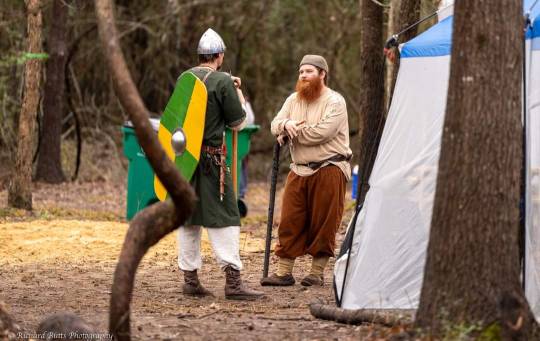
My wife and I are having a debate about my early medieval norse garb for winter ren faire/Yule.
She thinks adding the tablet weave belt on this wool tunic as matching lower trim will be too much, too garish. That I should keep it as a belt and be done.
I think I should add it as trim, with green/blue braids, maybe some embroidery on the brown panels, and use a second woven belt in a brighter color.
A tropey furry hat of questionable historical accuracy. Be the type of chubby bastard you'd expect to see in a movie crawling out of a hut with a bag of hallucinogenic mushrooms.
Maybe some Hogfather tusks.

350 notes
·
View notes
Text
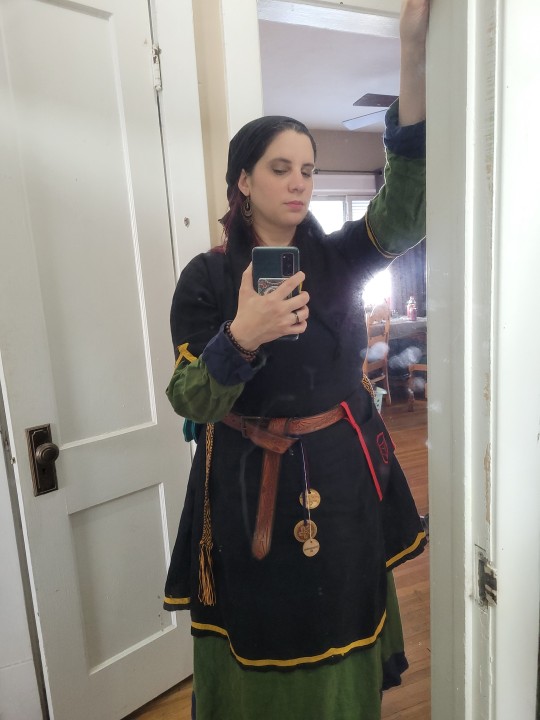
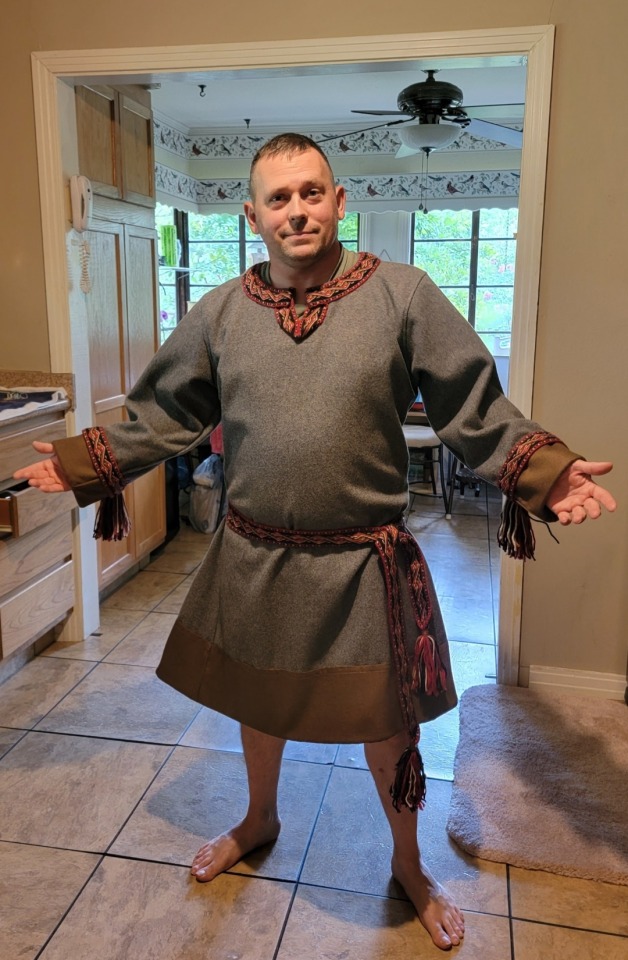
Hello friends, here is a current iteration of my Belegarth garb. Early Medieval with modern and fantasy influence.
I am extremely proud of my tablet woven belt, as I finally worked out keeping good tension on the loom.
21 notes
·
View notes
Text


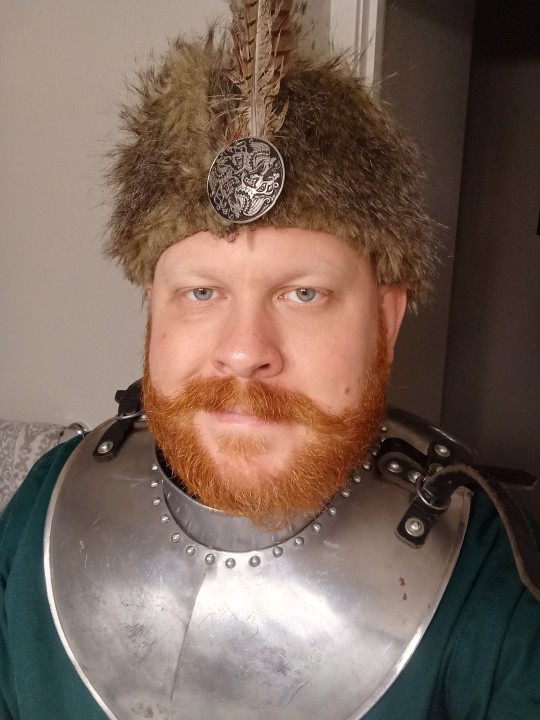
Gotta have the furry hat and curled mustache for a proper hussar.
18 notes
·
View notes
Text

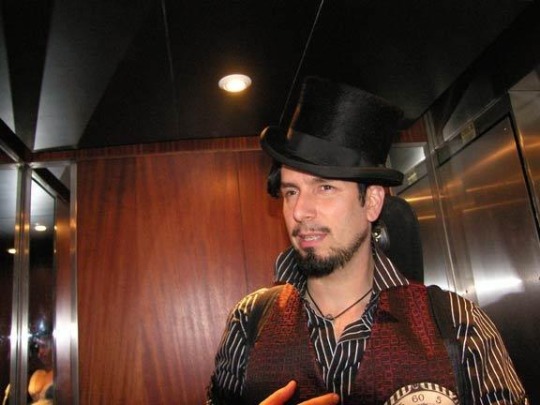
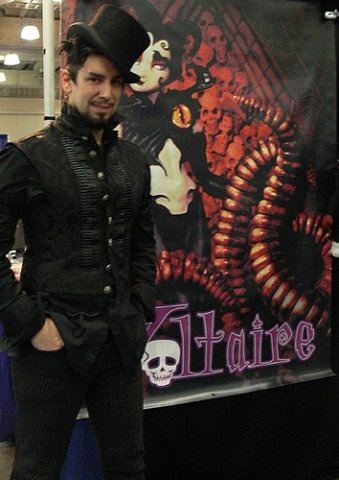

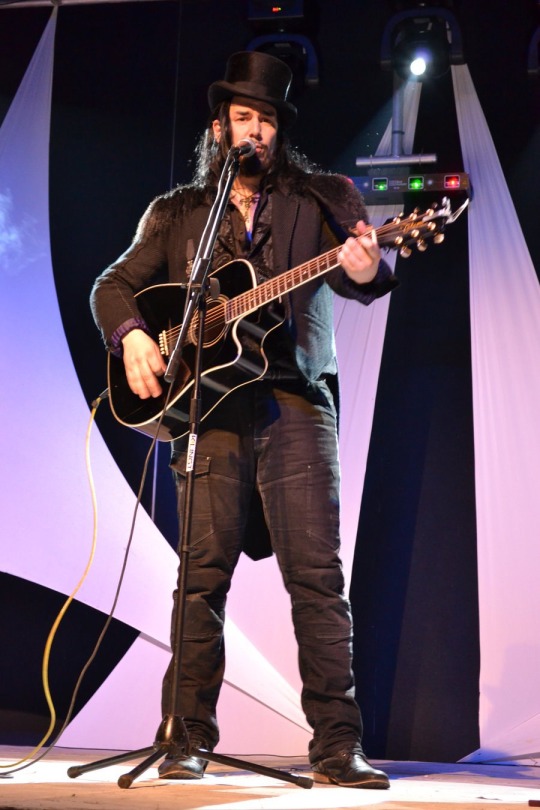
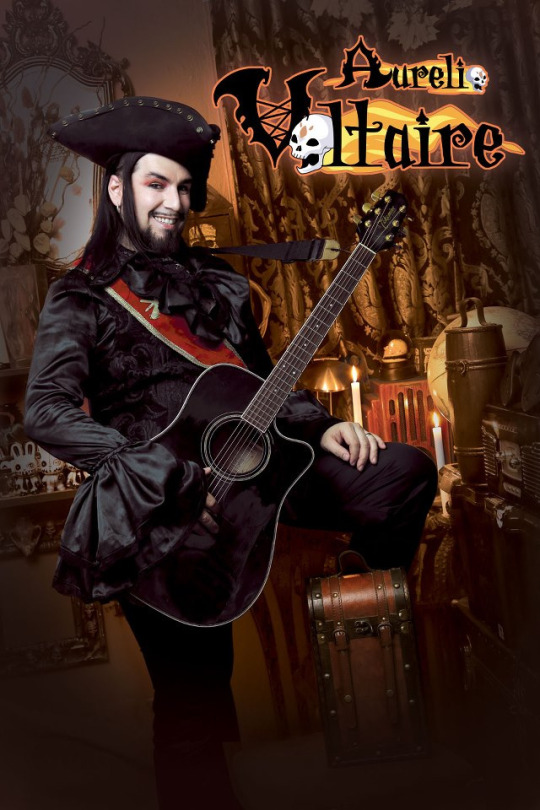
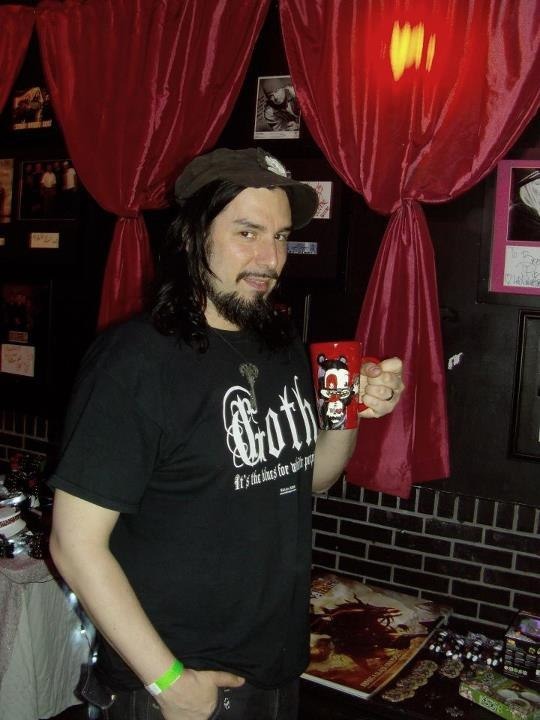
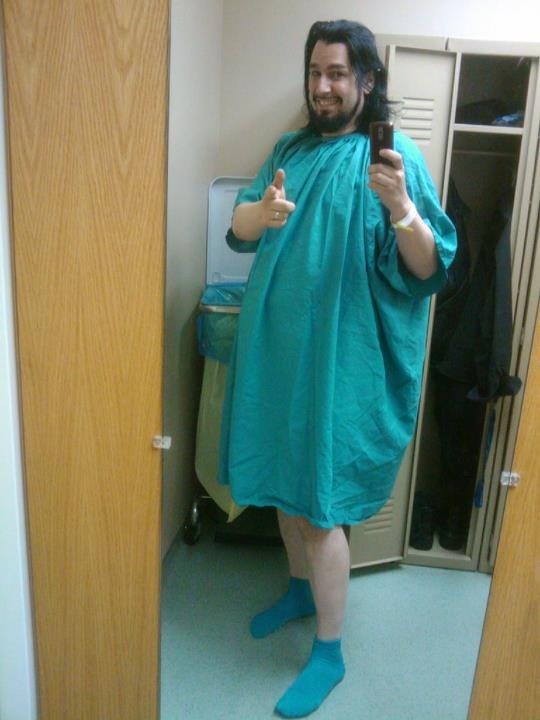
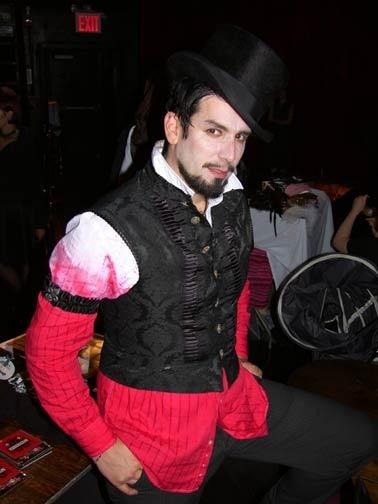
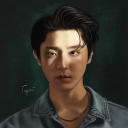
Can we just appreciate the fact that this guy can just about throw on anything and still look like a freaking legend! 🤣🤣
#aurelio voltaire#goth#goth aesthetic#hero#legend#goth legend#rocker#pirate#nerd#patient?#i have no idea what that's all about#this man makes the clothes work#garb#my wardrobe though
25 notes
·
View notes
Text
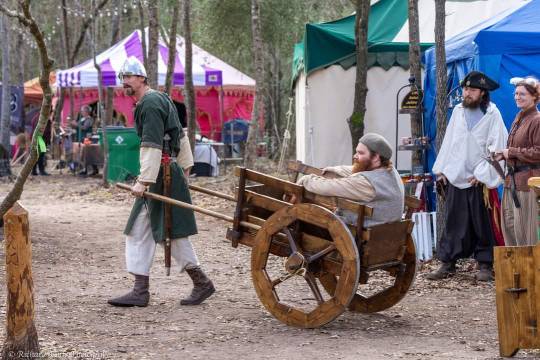
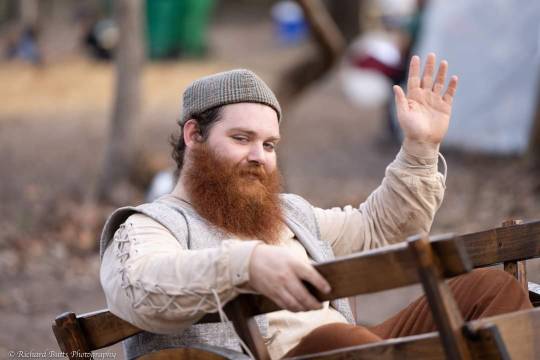


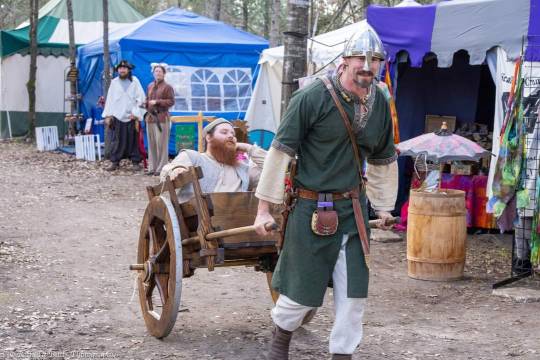


Cart shenannigans with Koerth (Keorth?) the Red and Tostin von Leder on the fifth weekend of Faire of Champions
11 notes
·
View notes
Text
i need you to see this
73 notes
·
View notes
Text
Dragging a Viscount into Early Period
My first hack at more elaborate men's Rus has been prompted by a favorite Viscountess of mine dragging her fighter into early period.
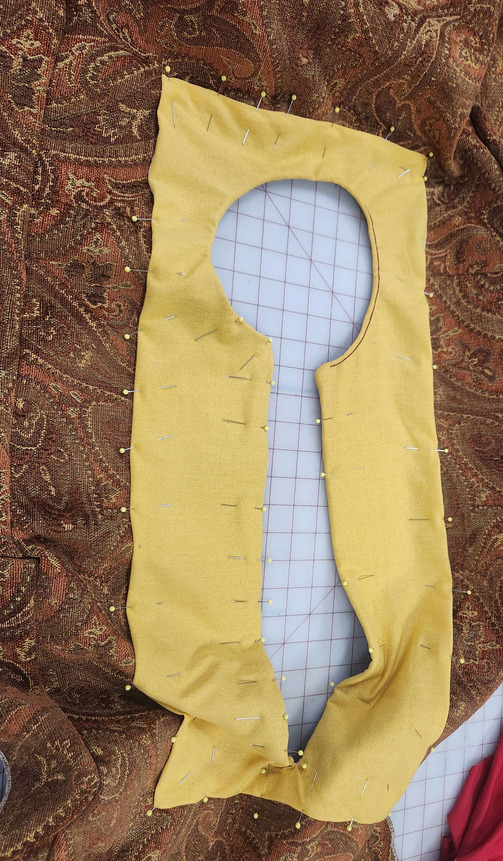
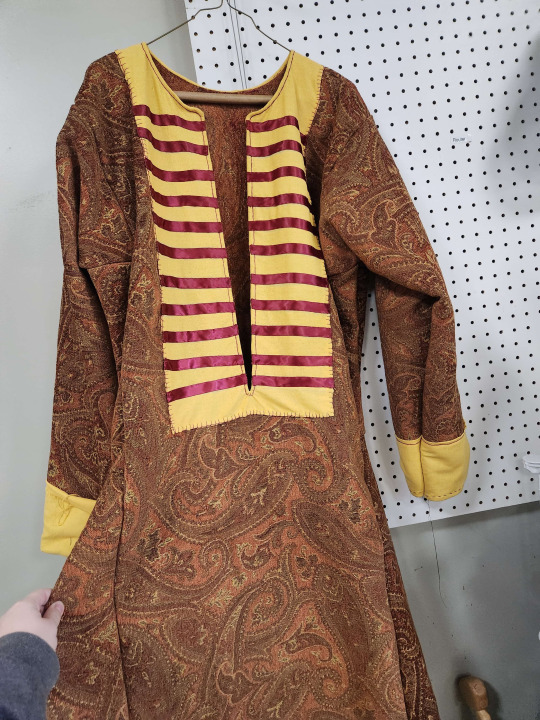
I was given a pile of fabric for pre-determined aspects: a chenille upholstery fabric for the body, a buttery yellow linen for the facings, and a cream linen for the pants. For full disclosure, this piece is a commission that I'm doing at a reduced rate in hopes of getting my name out there on a pretty prominent figure in my region.
I used the calculations for measurements and layout given to me by Dvorianka Anastasiia which are derived from the patterning work done by Mistress Talana the Violet of blessed memory. It is similar to a variation of the style 5 tunic as categorized by The Renaissance Tailor, with trapezoidal gores in both the skirt and armpit, leading to an overall sleeker fit to the body than the standard square armpit gore. As some measurements had changed since Anastasiia last took them, I stressed myself out until I realized I have unlimited power at my fingertips: basic scripting. I wrote a short program to take hard coded measurements and spit out the exact dimensions of the pattern pieces, which felt a little bit like overkill and also not impressive at all.
With pieces patterned, cut out, and (mostly) serged, I delved into construction. I have learned from experience my preferred method of construction is starting by attaching the two body rectangles at the shoulders, attaching and turning the neckhole facing, and then assembling everything flat as follows.

This makes lining up and turning the facing significantly easier for me to do, and hides raw edges within the seams. Starting with the neckhole, however, means there's less fabric for me to fight while I turn a particularly annoying facing.
With the facing laid out on the body fabric, consultation with some of my apprentice siblings determined deep burgundy is the way to go for all the accents. I decided on split stitch around the neckhole and buttonhole stitch around the edges of the neckline, but quickly decided I prefer the split stitch for the rest of the decorative stitching on the garment.

For the sleeve cuffs, I pinned them in place, ran a quick line of running backstitch along the tops of the cuffs to secure them in place, then did split stitch at the top of the cuffs and a running stitch around the opening to keep the edge tidy while still not using visible machine stitching.

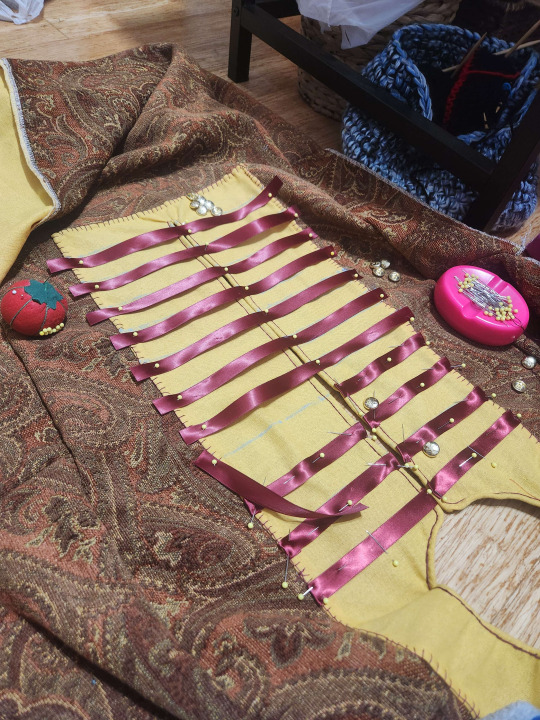
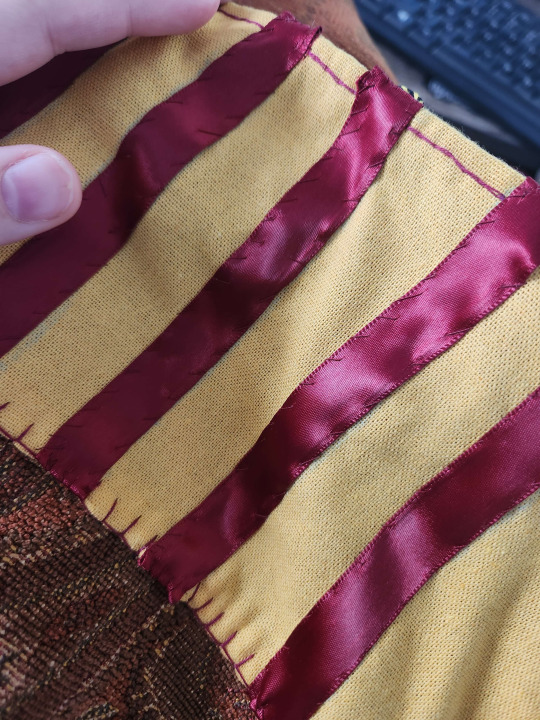
One thing the recipient of this garment expressed is that the striped facing secured with buttons or toggles is an ideal look, and luckily I have a significant quantity of the Vindheim buttons from Bad Baroness in stash. I do not have sufficient woven or braided trim in truly appropriate quantity or style for this garment to be aggressively period, but with the fabric we're already taking liberties and the ribbons look nice and appear to be a popular substitute for strips of silk tape performing the same function in our area. I laid the ribbon out at inch and a half intervals and made sure my lines would be straight on both sides. I turned the ends of the ribbons in and secured them with a whip stitch in a matching thread.
With my facing done and the worst of the neckhole dealt with, I seamed the rest of the garment into an actually clothing-shaped piece of fabric and let it hang for a day while working on other projects.
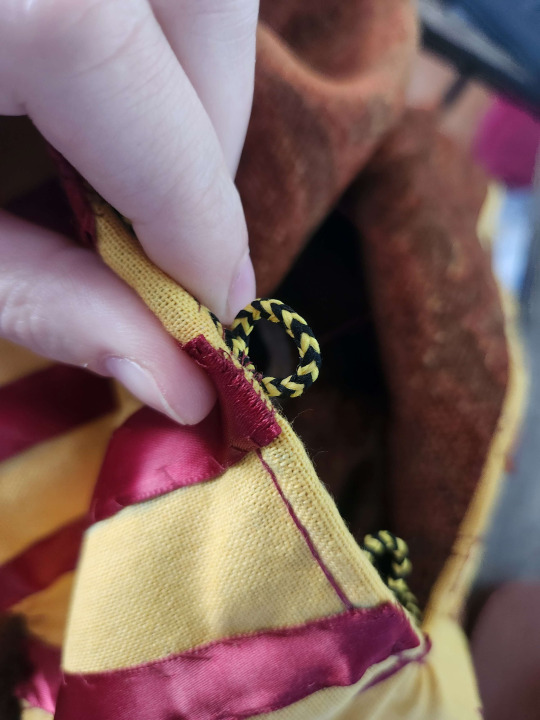
I decided to use a "looped cord" method of button loops, using a cord from an old site token that happens to look an awful lot like the cord used for an award the recipient has received. Starting from the bottom of the neckhole, on the wearer's right side, I've tacked the cord down under the edge of the garment, securing the loops aggressively.
Sometime soon I will get clearer pictures of this garment on the recipient.

The more I look at this garment and all other Rus-ish garments i've made and seen, I think I may need to round the gores into the "skirt" of the tunic more dramatically. I can no longer find the artistic depiction that originally gave me the impression, but until this point i've been letting the right angles of the skirt remain as initially cut, giving an angular overall silhouette but the rounding may be necessary for the right look.
#arts & sciences#a&s#sca#society for creative anachronism#historical costuming#rus costuming#garb#rus and norse#tunics
8 notes
·
View notes
Text
Okay, I'm overwhelmed by the Google, I'm going to try talking to humans.*
I'm going to a ren faire and I need to figure out an easy garb to make. A basic-ass beginner sewing pattern (a short tunic?) that is:
-Reasonably gender neutral (historical accuracy is not compelling to me and I'm too queer to do Women's Dress Designs only)
-Simple to sew (please have mercy on me, I can cut a pattern and sew lines but I have limited time, fabric, and knowledge)
I've been trying to look up patterns but there is an overwhelming amount of "if you aren't using period-accurate wool to embody period-accurate gender roles then leave" and "this is a Beginner Pattern for Beginners, so get out your $1000 serger and prepare your [technical jargon name] in the usual French style" and also just a lot of broken links???
I'm overcomplicating this
;___; help
*(some of you may be three raccoons in a trenchcoat and that's valid)
22 notes
·
View notes
Text
Me> Okay, so. A newbie is coming to an event with me on Saturday and he needs a tunic. Do I make him his own or lend him the one I made named, "Not Before Noon"?
Friend> why is it called that :|
Me> It is so bright ass orange, the original recipient was told not to wear it in camp before noon.

Friend> Personally I think you should use that whenever you can.
#mySCA#SCA#society for creative anachronism#I think it will be too big on him#I will have to make him one anyway since he is coming to war in October#garb#tunic#not before noon
195 notes
·
View notes
Text

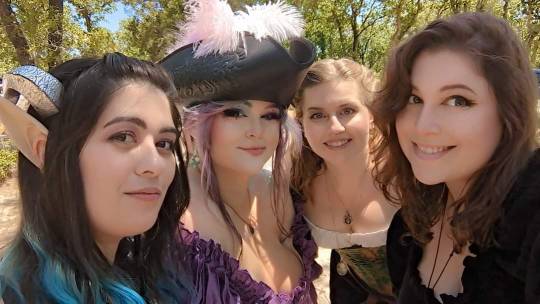

I had a great time this weekend at Sherwood Forest Faire 🥰🥰
Definitely my new favorite renaissance festival tbh
#sherwood#sherwood forest faire#renaissance#garb#siren#pirate#pirate siren#jellyfish siren#idk man i had a great fuckin time#it was awesome#renaissance festival
31 notes
·
View notes
Note
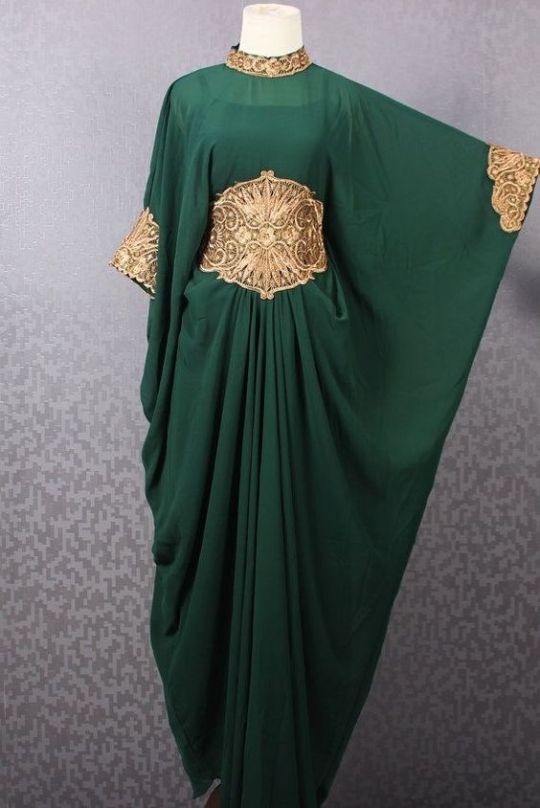
Can we see the full dress?

fullest picture i have! there’s a hiked golden silk skirt in the front 😊☺️
108 notes
·
View notes
Note
hello! i just love your outfit from the festival i saw earlier! the one with the shawl! do you think it’s possible to live everyday life in historical clothing like that? it’s something that’s been on my mind lately but i’m a bit worried about it not being practical or not good with extreme temps or getting the weird looks from people around me. it definitely looks more comfortable and stylish than jeans do tho! and much easier to wear, too!
Hey! So first of, it would absolutely be possible, and I even have a friend working on doing that right now. It would take a bit of time to collect all the pieces needed, as they are either very expensive to buy, or you’ll need to put time and energy into making them. There’s a vastly different feel to a proper recreation of a historical garment, and a costume piece.
I find historical clothing, especially early medieval stuff like the outfit you refer to, extremely comfortable and practical. Working class clothing has always needed to allow the wearer to do a range of activities, meaning it tends to be well suited to everyday wear. Where medieval clothing gets impractical is the late-period high class clothing that was specifically designed to say “look how much I Don’t Have To Do”.
Historical people experienced extreme temperatures as well! In medieval Europe the main overgarment material was wool, which is fantastic for warmth. Still too cold? Put another wool garment on! Turn yourself into a wool burrito!! (Like legit I’m probably gonna be wearing my wool a lot this winter in preference over my normal clothes). On the other end of the scale, linen was commonly used for undergarments, and in hotter climates (eg in Australia, where I live), reenactors often use it for overgarments as well, as linen is light and breathable.
Out of all of these, weird looks is the hardest to answer. When I first started wearing more unconventional outfits into my normal life, I was convinced that everyone was staring at me and judging me. To my continued experience though, this isn’t true at all - most people don’t actually care, and those that do often complement the clothing. A couple of times people have mistaken me for Amish, which I personally think is hilarious. YMMV on this though, and there are ways you can avoid those impressions (I’ve usually been wearing my 14th century female garb, including full veil. The covered head tends to make people think it’s more a religious thing, whereas when I wear male garb like in that picture, people assume it’s cosplay or LARP). Having no idea where you come from, I cannot give you any more specific advice than this, but hopefully it’s helpful.
Anyway, if dressing in historical clothing will bring you joy, then I wholeheartedly support you in it!! I recommend looking at a few different periods/cultures to see what you like (technically if you’re just doing it for fun, there’s no reason you can’t mix and match even!), and then starting to find resources on how that clothing was constructed. It could also be worth checking out if there are any reenactment groups around you, as they can have good resources and advice for newbies.
#ask#garb#long post#this could have been SO much longer dear lord#trying to hit a word count on a Uni essay: ‘ah fuck I need to come up with 500 more words ;-;’#writing anything in response to a question about historical clothing: ‘ok that’s too many words pUt some words BACK or so help me gOD’#anyway if I remember any further points I might add on with a reblog
23 notes
·
View notes
Last Seen Blogs
lilvintagebaby
Don’t Be Shy To Say Hello! :)

mirzakcm
MirzaKCM

bouncyjellyfish
Pigeons Scare Me
tayori2
Infinite fangirl

chazz-anova
follow the path