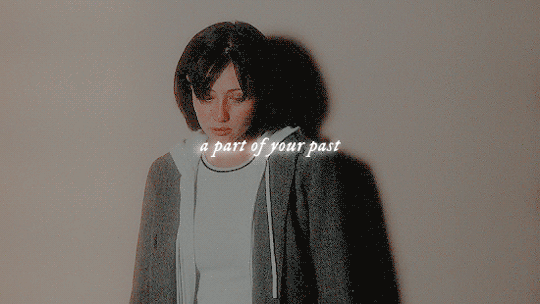
#dirtypeach
Note
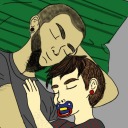
hi! I was wondering if you were willing to share the filter you used on this post? it's so gorgeous! /642712943176417280/he-sleeps-in-fits-and-starts-wakes-up-sweating
hello! i don't have the psd anymore, but i believe it's dirtypeach! 🤍
2 notes
·
View notes
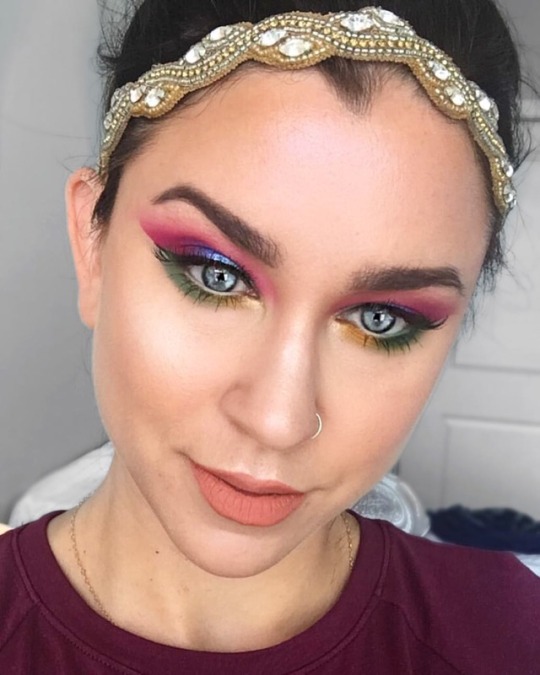
Photo

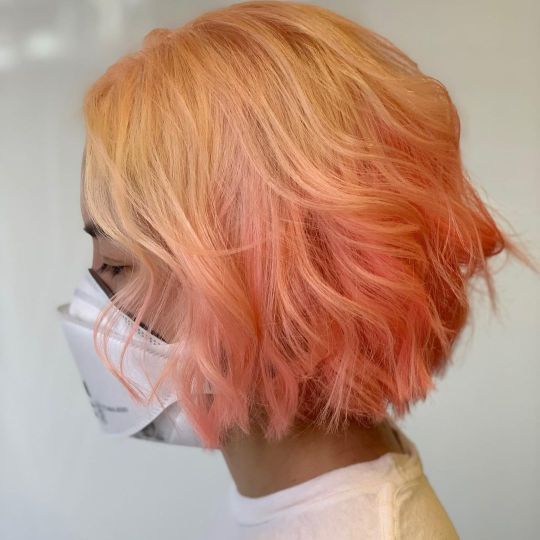
Platinum pink . . . . . Reposted from @haleyvandorenhair (@get_regrann) - I am the artist ..... @pulpriothair is the paint 🎨 I had SO MUCH FUN with this! Thank you @chrislparker79 for being so adventurous! #pulpriothair #hair #haircolor #peachhair #dirtypeach #beautiful #curls #fashion #fashioncolor #seattle #tacoma #lava #balayage #love #pictureoftheday (at Tacoma, Washington) https://www.instagram.com/p/B59ScFXJ8p2/?igshid=26r3r4v6sp0m
#pulpriothair#hair#haircolor#peachhair#dirtypeach#beautiful#curls#fashion#fashioncolor#seattle#tacoma#lava#balayage#love#pictureoftheday
4 notes
·
View notes
Photo
#dirtypeach #haircolor #haircoloring #hairfantasy #hairsalon #hairstyles #lobhaircut #lob #peachhair #beachwaves #hairartist @schwarzkopfusa thank you and @pulpriothair thank you for another #hairsalon experience. #americansalon #califiornia #hairideas #hairpainting (at ArthurSebastian) https://www.instagram.com/p/Caq9Lgxrpkj/?utm_medium=tumblr
#dirtypeach#haircolor#haircoloring#hairfantasy#hairsalon#hairstyles#lobhaircut#lob#peachhair#beachwaves#hairartist#americansalon#califiornia#hairideas#hairpainting
1 note
·
View note
Photo
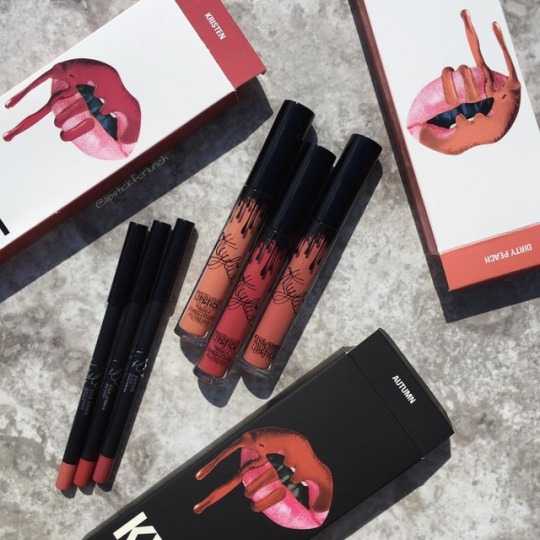
Get these three lip kits for the price of two in the @kyliecosmetics Fall Set Lip Kit Bundle! 😍🙌🏻🍂- shades in the Fall Set: Dirty Peach, Kristen, and Autumn 👄 • • • #kyliecosmetics #kyliejenner #mykyliecosmetics #kylielipkit #lipkitbykylie #lipkit #lipkitbundle #liquidlipstick #matte #mattelipstick #4truthinmakeup #dirtypeach #kristen #autumn #makeup #beauty #cosmetics #makeupporn #makeupjunkie #makeupaddict #makeupaddiction #makeuplover #makeuplove #ilovemakeup #fallmakeup #kingkylie #kylie #lipkits https://www.instagram.com/p/BoNlin3BBth/?utm_source=ig_tumblr_share&igshid=1ltwv8r940o0q
#kyliecosmetics#kyliejenner#mykyliecosmetics#kylielipkit#lipkitbykylie#lipkit#lipkitbundle#liquidlipstick#matte#mattelipstick#4truthinmakeup#dirtypeach#kristen#autumn#makeup#beauty#cosmetics#makeupporn#makeupjunkie#makeupaddict#makeupaddiction#makeuplover#makeuplove#ilovemakeup#fallmakeup#kingkylie#kylie#lipkits
1 note
·
View note
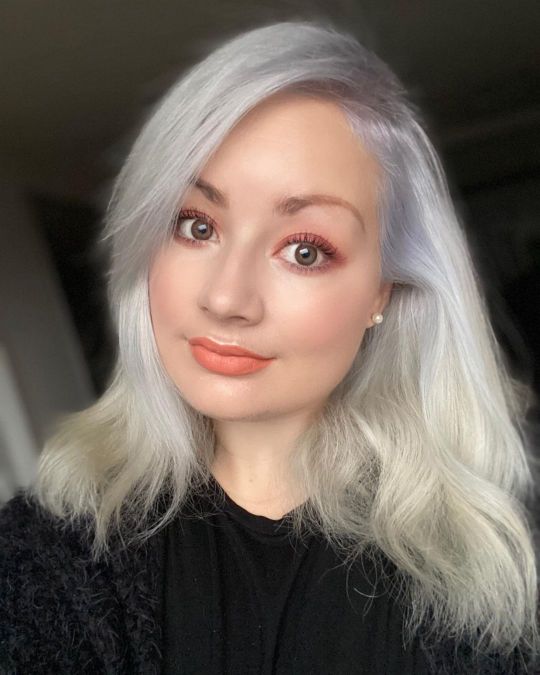
Photo
And this might not be the last of this look! 🙈 . . . EYES _ @hudabeauty Obsessions Electric Palette 😍 _ @ardellbeauty Whispies Lashes _ @katvondbeauty Ink Liner in Trooper . SKIN _ @maybelline Master Chrome Highlighter _ @catrice.us Full Coverage Foundation _ @hourglasscosmetics Ambient Lighting Bronzer _ @milanicosmetics Baked Blush _ @nyxcosmetics Halo Holographic Setting Powder . LIPS _ @kyliecosmetics Dirty Peach Liquid Lipstick BROWS _ @anastasiabeverlyhills Brow Wiz . . #mynyitlook #maybellinemasterchrome #rainboweyemakeup #hudabeauty #obsessionspalette #dirtypeach #kyliecosmetics #howtoglow #igboston #bostonmua #muaboston #colorwonder #hudabeautymakeup #beautytubecrew #beautyobsessions #beautyyoutuber #linkinbio #glowingfreshskin #abhbrows #browwiz #norvina #angles
#glowingfreshskin#browwiz#rainboweyemakeup#beautyyoutuber#abhbrows#hudabeauty#beautytubecrew#hudabeautymakeup#beautyobsessions#norvina#howtoglow#linkinbio#muaboston#igboston#bostonmua#kyliecosmetics#obsessionspalette#dirtypeach#mynyitlook#colorwonder#angles#maybellinemasterchrome
1 note
·
View note
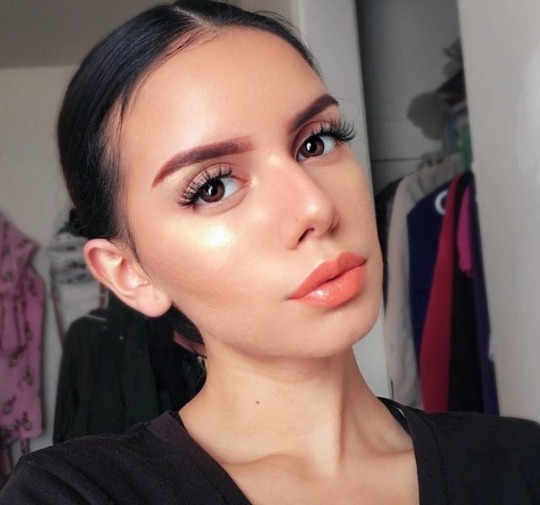
Photo
Eyeshadows: Sand Haze Obsessions palette 🤎 @hudabeauty Lips: Dirty Peach Liquid Lipstick 💄 @kyliecosmetics Glow: Sugar Glow Kit ✨ @anastasiabeverlyhills Blush: Snow Kissed 💕 @toofaced Foundation: Shortbread Faux Filter Stick 🌟 @hudabeautyshop Mascara: Legit Lashes 🖤 @hudabeautyshop #sandhazeobsessions #hudabeauty #hudabeautyobsessions #hudabeautyhazeobsessions #dirtypeach #kyliejenner #kyliecosmetics #anastasiabeverlyhills #toofaced #hudabeautyfauxfilter #hudabeautylegitlashes #makeup #me #beauty (på/i Mölndal) https://www.instagram.com/p/CITKL1AnnVD/?igshid=wcski9dixncq
#sandhazeobsessions#hudabeauty#hudabeautyobsessions#hudabeautyhazeobsessions#dirtypeach#kyliejenner#kyliecosmetics#anastasiabeverlyhills#toofaced#hudabeautyfauxfilter#hudabeautylegitlashes#makeup#me#beauty
0 notes
Photo
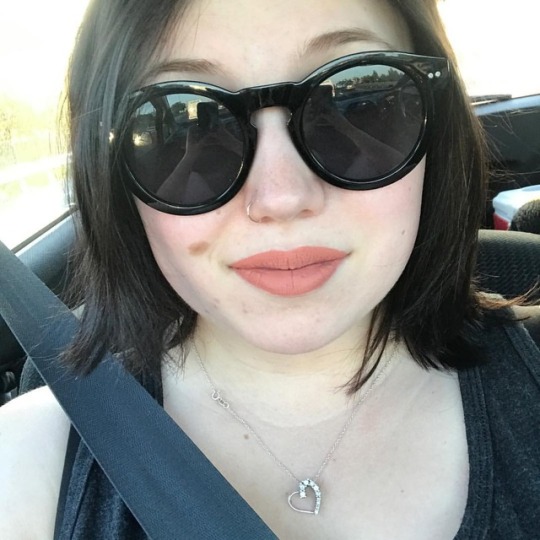
Got my @kyliecosmetics lipkit in #dirtypeach #kyliecosmetics #sunglasses
1 note
·
View note
Photo
Need a new haircut Wearing @kyliecosmetics #saltedcaramel & #bananasplit kylighter with #dirtypeach lipstick & #glamourgloss on top (at California)
0 notes
Photo

Participating in #drfeb2018mc today. It’s orange and shit I love doing orange on myself. || #orange #dirtypeach #happy #iloveit #ilovedre (at Portales, New Mexico)
0 notes
Video
youtube
1 note
·
View note
Photo
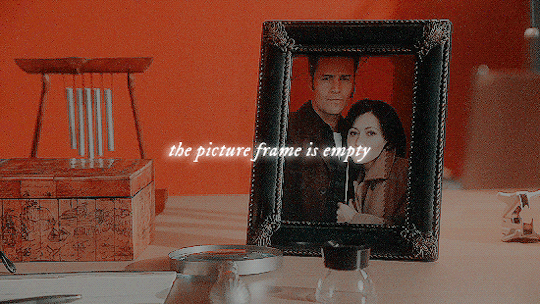

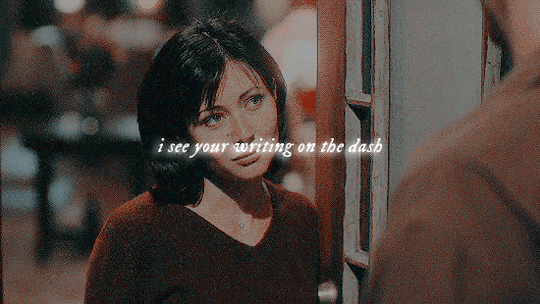
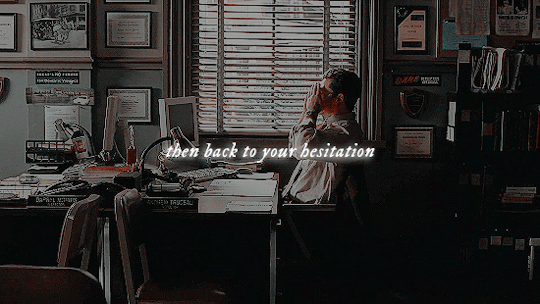
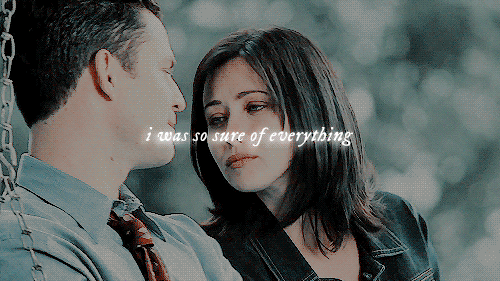
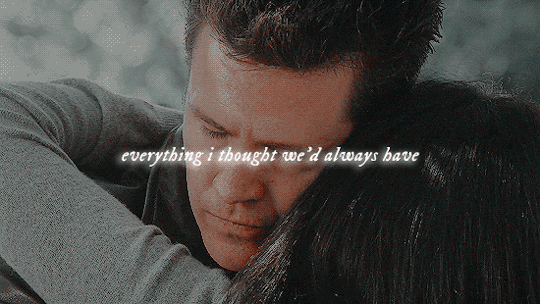
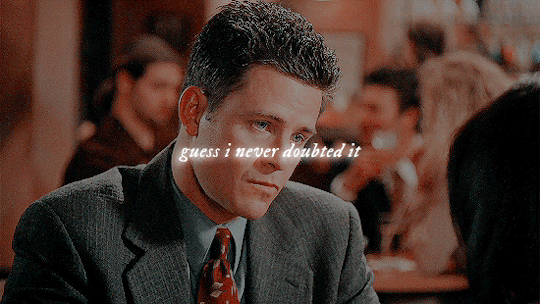
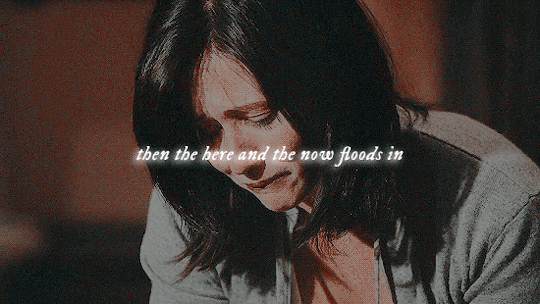
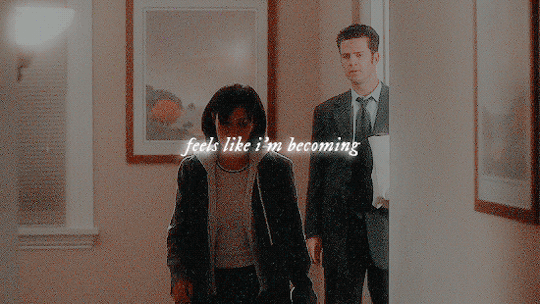
Charmed | Prue + Andy | Bye Bye Baby
“You’re all I want, but it’s not enough this time.”
Lyrics: “Bye Bye Baby” by Taylor Swift
Colouring dirtypeach by allscallie
Taglist: @holyhalliwells, @phoebehalliwell, @dailycharmedgifs, @wearethecharmedones, @charmedxfanforum, @prudencemelinda, @raith-way, @this-is-my-bisexuality
#charmed#charmededit#dailycharmed#dailycharmedgifs#charmedgifs#prue halliwell#andy trudeau#prue x andy#shannen doherty#t w king#katmakesgifs#mygifs#myedits#taylorswift#taylor swift#bye bye baby
137 notes
·
View notes
Note
tutorial for your netflix psd please!!
of course !! tutorial for my netflix psd is under the cut, because it got pretty long! i’ve tried to explain it to the best of my ability, but if there’s anything that doesn’t make sense or if you need any help at all, please don’t hesitate to message me! this psd requires some knowledge of photoshop/photopea (more specifically working with layers, layer masks & clipping masks).
you can download the psd here or here.
fonts used are: helvetica & helvetica neue
made on september 2020 from the US netflix site on photoshop cc & on a mac!
major apologies for how long this was! i tried to make it as clear as possible!
i’ll be walking you through how i made this edit!
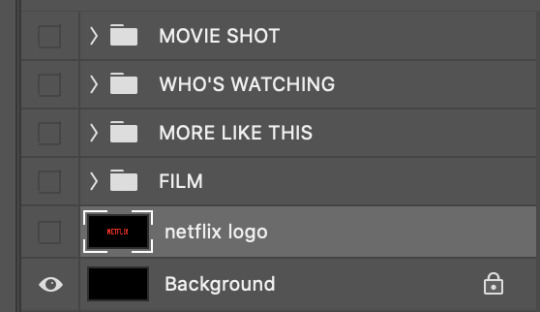
once you open up the psd, you’ll see these layers & folders. (as a side note, some of my screenshots/names of my layers might not add the description, because i renamed some stuff to make it easier for people who aren’t as familiar with photoshop while i was writing this tutorial + reuploaded this psd. 🤍 )
if there’s a particular coloring you’d like to use, go ahead and drag it into this file (or you can go ahead and color later! whatever floats your boat!) i personally really like using dirtypeach with a couple of adjustments, so i’ll go ahead and add that here. as with all coloring, you’ll want it to be above all your other layers, so just make sure it’s at the top in it’s own folder.
FILM.
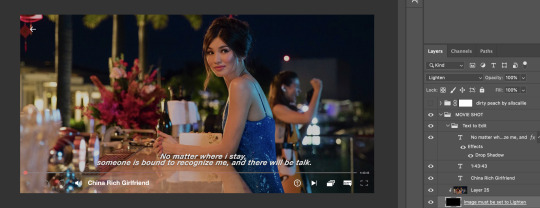
i’m going to start working on my china rich girlfriend edit while doing this -- two birds, one stone, right? so first, click on the little ‘eye’ button next to the FILM folder, and then the > dropdown button to view all the hidden layers. you should then be able to see this:
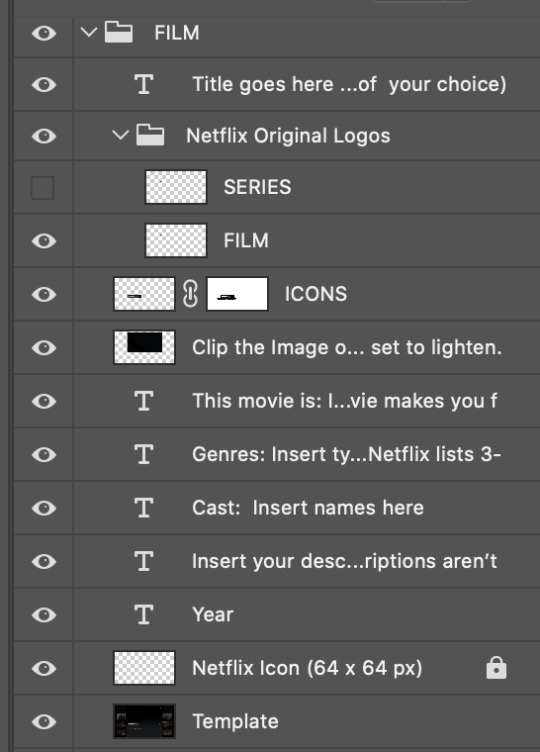
as i’m making a netflix film and not a series, i’ll want the Film layer selected (under Netflix Original Logos). i then pasted the photo i wanted for the movie still right before the “Clip the Image over this (Image size: 1668 x 911 px) & make sure it's set to lighten” layer. you’ll then use a clipping mask and clip your image over that black box layer that tells you to clip the image over it! you can easily clip a layer by right clicking and then clicking on create a layer mask, or if you’re on a mac, holding the option key + hovering over the space between the two layers until a down arrow shows up/on windows you hold ALT and hover the space between the two layers to clip it! since that black box layer is already set to lighten, you shouldn’t have to touch it at all.
as i’ve already dragged the coloring psd that i’m using into this file, i’m going to use a layer mask to make sure the coloring psd only affects the bits i’d like it to! i’ve made sure that the coloring doesn’t affect the other movies in the background (set it up/etc.) because it emphasizes the movie selected.
i would also recommend moving the folder (Move these above your coloring) above the coloring, as it’ll make it easier to read! then, you can add the name of the movie. i like to play with fonts here, as well as blending effects (click on the fx button by the layers window), such as bevel & emboss, drop shadow, satin, inner glow, outer glow, & stroke.
similarly to how to pasted the photo for the main film, i would then edit the Netflix Icon layer. once that’s done, go ahead and edit the Text to Edit folder, and then you should be good with the film panel!

MOVIE SHOT.
the same way that we used clipping masks in FILM panel, we’ll be doing the same thing here! you’ll just want to clip the movie shot over the main black box add edit all the layers in the “text to edit” panel!
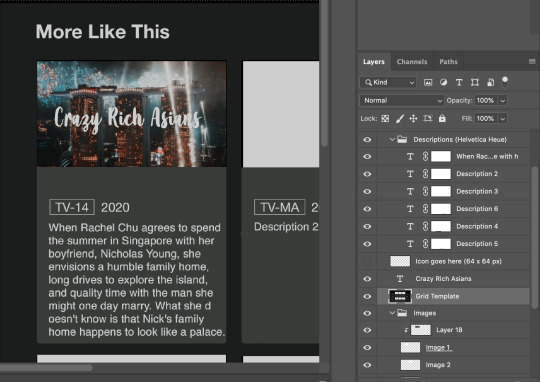
MORE LIKE THIS.
the same way that we used clipping masks in FILM panel, we’ll be doing the same thing here! you’ll just want to clip the frames over their corresponding images (coloring/etc), add the descriptions to the corresponding “description” layer as well as the title of the movie! just repeat this step until you’ve got all the movies done!
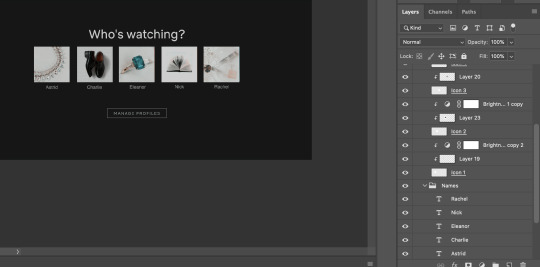
WHO’S WATCHING.
this one is so fun to do! i personally like doing character names, but feel free to make fake profiles for whoever you’d like. just like in the other panels, you’ll be using clipping masks!
that’s the end! thank you so much for using my psd & if you have any questions at all, please feel free to message me 🤍
195 notes
·
View notes
Photo
you turned me on, but now?
1 note
·
View note
Photo
Welcome back to you.
1 note
·
View note
Note
what are some of ur favourite psds ??
hi hello, i only ever use like 4 psds for my edits bc of course i do so:
dirtypeach by allscalliepsds
anything by honeycolouring but more specifically 266 , 286 , and 290
psd #141 by yuriblack
if you’re looking for more check out this tag on my resource blog @nidras or join @chbnet and look in the pins of #yancy-academy. hope this helps!
6 notes
·
View notes
Photo
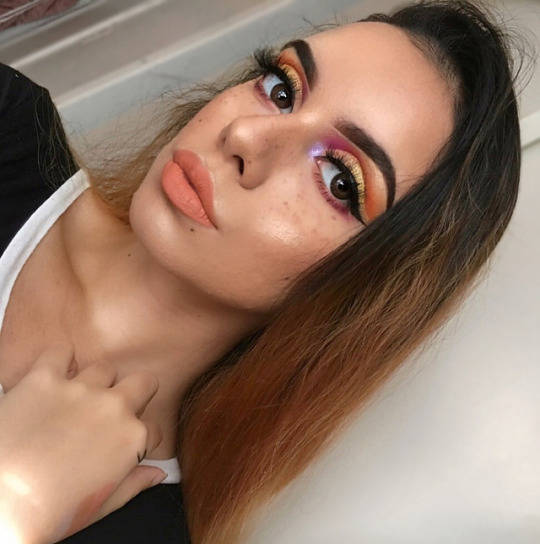
YOOO I loved this look inspired by @gabxxrielle 🌼 PS: I'm not v good at eye pics 😭 Makeup details below 🎉 ❤️ ❤️ BROWS: @morphebrushes 350M Palette EYES: @bhcosmetics Take Me to Brazil Palette, @jcatbeauty glitter in the shade #AmazingGold, @anastasiabeverlyhills Moonchild Glowkit in the inner corners, @starlookscosmetics Luxe Pen eyeliner, random 3D Mink lashes from @wish FACE: @benefitcosmetics Pore-Fessional primer, @neutrogena Skin Clearing foundation in the shade #NaturalBeige, @maybelline Fit Me concealer in the shade #Light, Airspun Translucent Extra Coverage face powder, @tartecosmetics Amazonian Clay bronzer in the shade #ParkAvePrincess, @pacificabeauty Coconut blush, @kyliecosmetics #SaltedCaramel Kylighter, @aveneusa Thermal Spring Water setting spray LIPS: @kyliecosmetics #DirtyPeach #Makeup #Brows #Highlight #MorpheBrushes #350MPalette #BHCosmetics #TakeMeToBrazil #TakeMeToBrazilPalette #JCatBeauty #AnastasiaBeverlyHills #Moonchild #MoonchildGlowKit #MinkLashes #Wish #BenefitCosmetics #Maybelline #FitMe #Tarte #TarteCosmetics #AmazonianClay #KylieCosmetics #Kylighter (at California)
#tarte#saltedcaramel#amazonianclay#dirtypeach#jcatbeauty#light#takemetobrazilpalette#fitme#anastasiabeverlyhills#moonchild#benefitcosmetics#maybelline#highlight#kylighter#takemetobrazil#moonchildglowkit#kyliecosmetics#amazinggold#brows#bhcosmetics#naturalbeige#minklashes#tartecosmetics#wish#parkaveprincess#makeup#morphebrushes#350mpalette
0 notes
Last Seen Blogs