#color correction photoshop
Text
Neck joint and color correction technique
youtube
#color correction#neck joint#neck joint service#photoshop neck joint#neck joint photoshop#neck joint and color correction technique#color correction service#ghost mannequin technique#how to neck joint in photoshop cs6#neck joint photoshop tutorial#color correction image#color correction tutorial#color corrections#photoshop color correction#color correction photoshop#color correction tutorial in photoshop#symmetrical neck joint service#background remove#youtube#beauty#hairstyle#remove background#Youtube
0 notes
Text
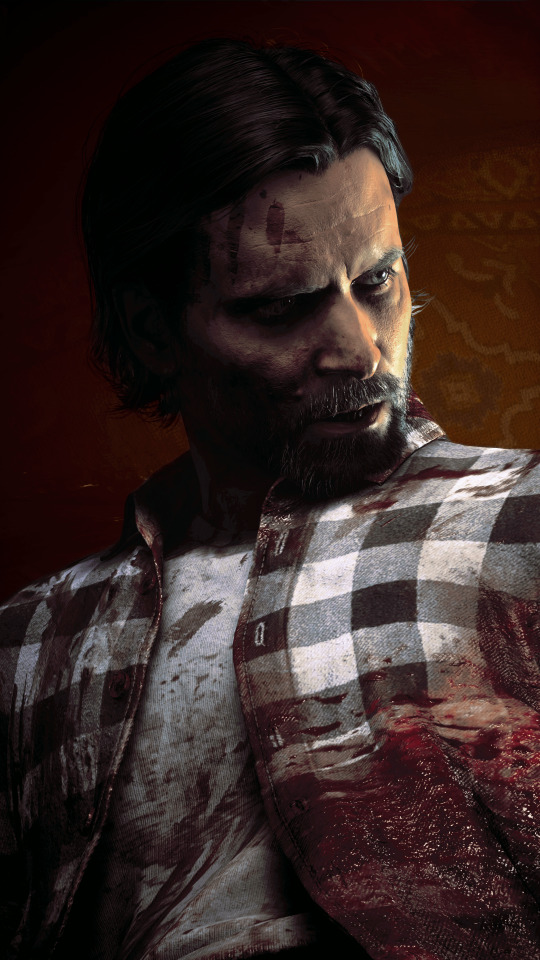
#you ever spend like three hours in photoshop trying to color correct one photo and afterwards wonder if it was worth it#anyway look at my boy#alan wake 2#alan wake#ilkka villi#my adventures with photo mode#virtual photography
340 notes
·
View notes
Text

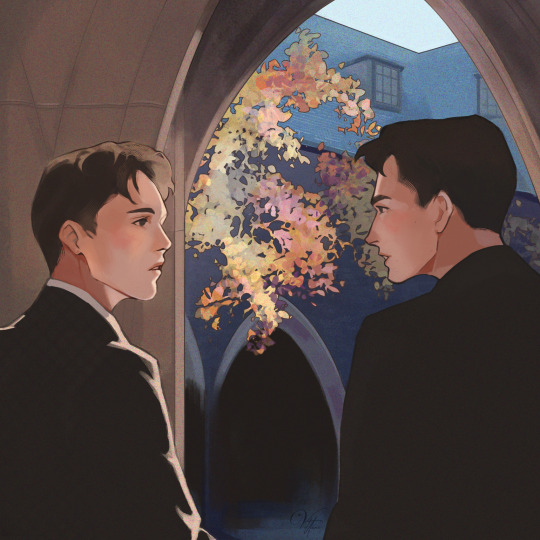
i heard we're gonna be roommates
#dead poets society#dps#neil perry#todd anderson#anderperry#i hate color correction#everything is fine in photoshop and on the screen but when i upload art to tumblr - boom - depression greyness apathy#nevermind i kind of fixed it
114 notes
·
View notes
Text

I love you on your good days. I love you on your bad days. I love you with your powers, without your powers. I love you for exactly who you are.
#stranger things#strangerthingsedit#mileven#milevenedit#mike#el#st 4#various#edits#not enough st 4 mileven on this site or this blog#think of breaks in between gifs as me learning how to color and color correct gifs#photoshop is fun
209 notes
·
View notes
Text
How to fix the ugly coloring in Stranger Things 4 on Photoshop in less than 2 minutes.
Not guaranteed to work with every scene, but worth a try.
#stranger things#stranger things 4#gifs#gif coloring#coloring tutorial#color correction#photoshop#photoshop tutorial#my tutorials#my videos
30 notes
·
View notes
Note
how do you make gifs? I get so confused by them :(
i honestly just followed susan's tutorial and it was pretty easy! it was probably helpful that i'm kind of familiar with photoshop's ui but the tutorial is so thorough it shouldn't be too confusing, if you have any particular questions you can ask me i'll try to help :0
#color correction would probably be the most confusing part for u if youve never worked with photoshop or any other editing program#i do a little bit more than just levels like in susan's tutorial but thats cause i know what im doing#<- and yet i still fuck up like all of my gifs are too pink i only realised a few hours ago im crying#Anyway u can experiment with color correction and find the way u like to do it :3#thats how i figure out every editing program i just go through stuff and experiment#nia ask
11 notes
·
View notes
Text
examining a seemingly normal image only to slowly realize the clear signs of AI generated art.... i know what you are... you cannot hide your true nature from me... go back where you came from... out of my sight with haste, wretched and vile husk
#BEGONE!!! *wizard beam blast leaving a black smoking crater in the middle of the tumblr dashboard*#I think another downside to everyone doing everything on phone apps on shitty tiny screens nowadays is the inability to really see details#of an image and thus its easier to share BLATANTLY fake things like.. even 'good' ai art has pretty obvious tells at this point#but especially MOST of it is not even 'good' and will have details that are clearly off or lines that dont make sense/uneven (like the imag#of a house interior and in the corner there's a cabinet and it has handles as if it has doors that open but there#are no actual doors visible. or both handles are slightly different shapes. So much stuff that looks 'normal' at first glance#but then you can clearly tell it's just added details with no intention or thought behind it. a pattern that starts and then just abruptly#doesn't go anywhere. etc. etc. )#the same thing with how YEARS ago when I followed more fashion type blogs on tumblr and 'colored hair' was a cool ''''New Thing''' instead#of being the norm now basically. and people would share photos of like ombre hair designs and stuff that were CLEARLY photoshop like#you could LITERally see the coloring outside of the lines. blurs of color that extend past the hair line to the rest of the image#or etc. But people would just share them regardless and comment like 'omg i wish I could do this to my hair!' or 'hair goallzzzz!! i#wonder what salon they went to !!' which would make me want to scream and correct them everytime ( i did not lol)#hhhhhhggh... literally view the image on anything close to a full sized screen and You Will SEe#I don't know why it's such a pet peeve of mine. I think just as always I'm obsessed with the reality and truth of things. most of the thing#that annoy me most about people are situations in which people are misinterpreting/misunderstanding how something works or having a misconc#eption about somehting thats easily provable as false or etc. etc. Even if it's harmless for some random woman on facebook to believe that#this AI generated image of a cat shaped coffee machine is actually a real product she could buy somewhere ... I still urgently#wish I could be like 'IT IS ALL AN ILLUSION. YOU SEE???? ITS NOT REALL!!!!! AAAAA' hjhjnj#Like those AI shoes that went around for a while with 1000000s of comments like 'omg LOVE these where can i get them!?' and it's like YOU#CANT!!! YOU CANT GET THEM!!! THEY DONT EXIST!!! THE EYELETS DONT EVEN LINE UP THE SHOES DONT EVEN#MATCH THE PATTERNS ARE GIBBERISH!! HOW CAN YOU NOT SEE THEY ARE NOT REAL!??!!' *sobbing in the rain like in some drama movie*#Sorry I'm a pedantic hater who loves truth and accuracy of interpretation and collecting information lol#I think moreso the lacking of context? Like for example I find the enneagram interesting but I nearly ALWAYS preface any talking about it#with ''and I know this is not scientifically accurate it's just an interesting system humans invented to classify ourselve and our traits#and I find it sociologically fascinating the same way I find religion fascinating'. If someone presented personality typing information wit#out that sort of context or was purporting that enneagram types are like 100% solid scientific truth and people should be classified by the#unquestionaingly in daily life or something then.. yeah fuck that. If these images had like disclaimers BIG in the image description somewh#re like 'this is not a real thing it's just an AI generated image I made up' then fine. I still largely disagree with the ethics behind AI#art but at least it's informed. It's the fact that people just post images w/o context or beleive a falsehood about it.. then its aAAAAAA
10 notes
·
View notes
Note
if it's okay, would you mind sharing your art process? your style is SO gorgeous dude. keep it up spardacest nation!!!
Thank you so much anon, and of course!
I kinda posted about it on twitter a while ago, but for anyone not also on there, here's a paraphrasing of what I said there!
(under a cut bc it's gonna get a bit long)
(speedpaint video from procreate mostly bc like I also said in that post, it's one of the few pieces I've done entirely on procreate and thus entirely recorded kdfjhdk I usually don't do the sketching + painting parts on there but every now and then I get lazy and want to get it all done quick in one program lol! It's not as good as it would look if I were using krita to render (which is what I normally use) but it gets the idea across decently of what it is that I do)
The short version of my process is:
sketch, clean up sketch for lineart, then flat colors, then paint over the flats (i make the flats my shadows and paint on the light), then a multiply layer for skin details (like lips, eyebags, etc), then an overlay layer for skin transparency details (red over the ears/nose/fingertips etc), then i do hair over the lineart, then a multiply layer with the contact shadows in a light beige/grey/neutral tone on top of everything else, and then i unify layers, paint over the details, and color correct the HELL out of it
The longer version is:
SO, first of all, I will say, my entire process for a finished/fully redered piece is pretty scattered and uses a lot of different apps, because after many years of trying out different drawing apps I found that I just worked better when I could incorporate the parts I liked best from each individual one rather than having to adapt to another app entirely!
In total, what I use is: autodesk sketchbook and procreate for the first half I do on my ipad, then krita and photoshop on my computer when I'm actually rendering (but any photo editing app instead of ps will do, I'm just used to photoshop bc that's what I learned as my first drawing app WAAAY back in the day lol), and then meitu on my phone for color filters (also any phone editing app with filters in it will do), AND also optional just for references: blender and daz3d on computer + magicposer on my phone
The actual step by step of what I do:
First of all, if I want to do a detailed, well rendered piece I will start by getting my references ready. That means either just grabbing a screenshot from the game if it's like, a simple portrait, or a photo reference, taking a picture of myself in the right pose/lighting, and if it's something more complex I will recreate the scene in Daz3D to simulate a realistic lighting, OR even just blender (i have the game models for the dmc characters downloaded, so I can just pop them in, pose them and change the lighting to get a realistic idea of what shadows their faces will cast in that specific angle/lighting.)
Note: references are pretty essential to me, and there's nothing to be ashamed about for using them! Personally I don't struggle a lot with the drawing/sketching part of art, but my tiny little pea brain cannot fathom how to make an object 3D in my mind, and how to visualize shadows realistically... thus the reliance on 3D programs to do that for me, and then all I have to do is draw what I'm seeing lol. My art improved significantly ever since I started making 3D refs so I could get /exactly/ what I needed - there's still a lot of leeway you need to learn though, because as realistic as the lighting will be in a rendering program, you'll never really get a fully natural looking image, as far as stuff like the body stretching/squishing/pulling when it's in movement, facial expressions, folds in clothing/fabric, etc... so really it's more a guide than something meant to be followed 1:1.
Then, once I'm confident I know exactly what I'm gonna draw/have the idea in my head, I start sketching it in sketchbook. Not really getting very in depth, just blocking out rough shapes - I like sketchbook and to be on my ipad for that because it feels very reminiscent of traditional sketching on paper to me, which while I'm not super confident on my traditional art abilities, I do get the most natural/fluid/non-stiff figures out that way.
Then when I think I have the general idea ready, I export the sketch layer as a png and import it into procreate - which is where I kinda start picking at the sketch and polishing it like i'm carving it out haha. Lots of liquify tool, flipping the canvas to check if it's even, blending out some of the lineart to help out with the rendering later, and then polishing up what was once the sketch into serviceable lineart. I usually reimport it back into sketchbook at this stage - while I like procreate for drawing I don't love the brushes I can use for lineart there, and so I usually only draw the "base" naked figure in there - when I'm in sketchbook I use a hard pencil to refine the details, then on a separate layer add all the things "on top" like hair, clothing, etc - usually I can get it pretty easily in one go, and once I'm satisfied I erase the naked body under the clothes and unify the lineart layers.
Then I will just do the flats with a hard brush, turning the lineart layer into an overlay layer and coloring things in with the shadow colors.
At this point, I export the file as a psd and import it on my computer - I give it a once over in photoshop first to see if there needs to be any adjusting (like whether any layer that has an effect needs to have a different effect, if all the colors look right since the ipad screen isn't the most faithful, if i wanna change the background color, etc), and once I think it's ready enough, I open it up in krita, where I do the actual bulk of the painting/rendering (as to why specifically krita: it's because I've gotten very comfortable with the brush/painting brush dynamics there and cannot seem to get as good results anywhere else, it's just the goldilocks spot of a brush for me haha.)
If anyone's curious, here's the brushes I usually use for painting:
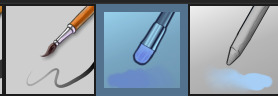
The one in the middle is my go to painting brush, left one for tinier/more refined details, right one for blending out soft shadows (though I learned the hard way to not overuse it, or it will look like I went ham with an airbrush tool lol).
(I don't change any of the settings on these brushes, so if you wanna try out the exact ones I use! Just fresh off how they come out the app haha)
I paint on the lights on top of the shadows, and just focus on that for the time being - once I'm done with the basic painting, I'll make a separate multiply layer for details like lip color, eye waterlines, makeup if there is any, eyebags, etc, and then adjust the opacity until it feels right - then I'll make an overlay layer with skin translucency details (like, when you hold your hands in front of a light and see the tips of your fingers become bright orange - many parts of your body are always a bit translucent to the blood underneath, specifically parts where the skin is thin like noses, cheeks, joints, knuckles, etc, and I found it makes the character look a lot more alive to add that subtle coloring in) - then usually I do hair on a separate layer on top of the lineart (because that way I can add small flyaways, more details, etc, and just use the lineart as a guide)
After that, I'll usually make a multiply layer on top of everything where I'll add contact shadows in a neutral color (usually pretty pale, it'll be darker anyway since it's multiply), and once I feel like I've rendered everything out properly, I save the psd and re-open it on photoshop.
In photoshop, I'll mess around with the layers a little bit more (changing hue/saturation, opacity, etc), fuck around with the background to make it look pleasing, and once I'm happy with it, I'll unify the layers and start color correcting - usually by duplicating the unified layer and messing with the curve/hsl of the image and then changing the opacity of that edited layer until it's as strong or muted as I want it to be - then I also edit the RGB curves individually and adjust the opacity of that also (because I just really like how it ends up looking if I give a bit of a red/warm tint to the shadows lol), and at that point often I will reimport the finished image into procreate for some finalizing touches! Like, blending out shadows that came out too harshly, painting over anything that came out not the way I wanted it, redefining the lineart if it got messy during painting, and adding any extra small detail that might have gotten lost like catchlights, hair shines, hair flyaways, tears, etc. I also do one last round of flipping the canvas and liquify if needed!
At this point, I export the finished image both to my computer and my phone - on my phone I open it up on the photo editing app, and add a bunch of different color filters - I don't hesitate from going completely balls to the walls here, and just kinda applying as many filters as will make an image look pleasing to my eye.
Once I think it looks good, I'll export the edited image to my computer - and then open both the version without filters and the one with them on photoshop, and use the filtered version as an opacity layer, and adjust it until it doesn't look as crazy anymore lol.
One last step I recently started incorporating was also changing the image to grayscale after I'm done, and doing one last round of curves in greyscale to make sure the values look right, and nothing is getting too lost because the values are too similar (because i know i get a bit swept up in getting repulsed by harsh contrasting lighting and can end up washing out all of rendering if I don't check myself kjdfgk)
AND that's it!
Yes it's a pretty long and chaotic process, but it's coming from years of trial and error and realizing I can just let myself fo whatever makes me happier with the results, and I don't have to stay constrained to one program if I don't like every tool it has to offer/don't have to accept the final image fresh off the painting app as the "finished" image with no adjustments allowed after, lol. I don't find it takes a lot more time than if I didn't do it this way, but YMMV.
Hope this was helpful and sorry for taking so long to explain! I just wanted to give a thorough explanation dfhdkhkx
#asks#sorry i know its a bit chaos hfdgd#but i hope its helpful anon! thanks for asking#also for anyone wondering#no i am not paying for ps lmao#fuck adobe#it is always morally correct to pirate adobe products people#if you have an alternative photo editing app you like best youre welcome to use it#but if youre too used to photoshop. everything is free on the internet if you know where to look#i also wouldnt recommend meitu bc it feels like a pretty sketchy app all things considered#im just too lazy to care to change my go to app but i would look for a different phone app#p sure theres billions that let you add funky color filters instead#actually i think you could use photoshop camera raw filters for that too#its just way too intensive of a process for my tiny potato computer and it feels a lot faster + seamless on phone
11 notes
·
View notes
Text
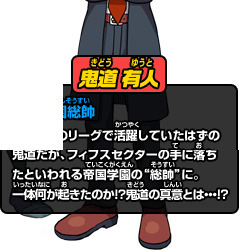
Kidou Yuuto's HD in-game artwork, taken from a poster, AI upscaled, then manually cleaned. It still needs alot of work to fix the coloring mistakes the AI upscaler caused and color correcting, but it's something!
Original from the GO website for comparison
#inazuma eleven#inazuma eleven go#kidou yuuto#If anyone wants to color correct this PLEASE do. I dont have photoshop#I refuse to work on fixing it until I get it color corrected and it's such a pain to sit there and try to adjust levels and values in CSP#Theres so much more that needs fixing its driving me insane i literally bought the poster myself to try and preserve this artwork#I have pictures of the adult kazemaru and hiroto full artwork too but those also need color correcting :(#i dont like using AI upscalers unless the scan is high quality enough to where it can be cleaned by hand afterwards#and thankfully this one was :D Now once I color correct it I might be able to upscale it again and make a cardboard cutout >:D#key art
24 notes
·
View notes
Text
highly embarrassing for me everytime someone founds out im technologically illiterate and make edits out of spite and luck
#guys. i get my images from safari and just downloading them#photoshop scares me and i have never color corrected or brightened a photo in my life#i use a mobile app. that i downloaded from the app store and paid $2 for to add text to my images#actually let’s start with the fact that i do this exclusively on mobile
8 notes
·
View notes
Text


IS THERE REALLY A RIGHT ANSWER HERE?
#takayuki yagami#kuwana jin#lost judgment#gamingedit#spoilers#lost judgment spoilers#cw blood#im so normal about these two#ignore yagami's hair flickering sdjkfhskdf it's usually not this bad. maybe it's because these are the ingame models & not the cutscene one#i just got a new monitor so im trying out gifs made from footage i captured at 1440p instead of 1080#also smth weird is going on with photoshop? the colors of the gifs in the work space don’t match their exported form anymore#it was hard to correct when I had to keep re-exporting to see accurate colors so these might be a tad washed out#b does gifs
86 notes
·
View notes
Text

Download Link
Pass: drop357
Adobe Photoshop 2024 Crack is a professional image editing software application used worldwide to inspire people. Millions of designers, photographers and artists around the world are using it to achieve the impossible. You can design posters for packaging, basic banners for beautiful websites, and memorable logos for striking icons. Photoshop keeps the creative world moving.
Adobe Photoshop CC Full Version 2023 has a very clean and eye-cached interface and is equipped with Adobe Sensei AI technology that will provide photographers with many different options such as black and white options, pattern brushes, painting and depth of field. It also provides you with a one-click selection of many different themes for easy operation, and also provides a skin-smoothing effect.
Adobe Photoshop 2024 Crack has a new symmetry mode, where you can paint perfectly symmetrically, make sample axes, and choose from pre-configured models such as wheels, radials, mandalas, and spirals. It also comes with a frame tool that allows you to create different shapes or text frames to use as a placeholder on the canvas. In general, the full version of Adobe Photoshop CC 2023 is pre-enabled to increase efficiency and will greatly help photographers develop and customize digital images.
#Photo editing#Graphic design#Adobe Photoshop Crack#Crack#Image manipulation#Photography#Adobe 2024#Photoshop#Selection tools#Color correction#Photo effects#Masking#Install#Adobe Creative Cloud#Adobe design#Install software#Adobe#Crop tool#Adobe Photoshop
3 notes
·
View notes
Text
Neptune Vasilias
Race: Human
Nationality: Atlas (Argus colony)
Ethnicity: Mistrali
Weapon: Salacia
Gender: Man
Sexuality: closeted homosexual
Starting Age: 17
Birthday: Winter 88th
Aura Color: Blue
Handedness: Left
Complexion: Tan
Eye Color: Blue
Semblance: Ebb & Flow (A Domination type semblance, Neptune's Aura causes all water it comes into contact with to stick to his body. Neptune can then make any water under his Aura's control to flow outwards from himself. With enough training, this could be used to control water, but Neptune refuses to use his power.)
Occupation: Haven student, Boy band keybord player
Previous Occuppation: none
The Vasilias family is to the Argus colony what the Schnee family is to Atlas. That is to say, a never ending source of easy tabloid drama with a darker source hidden from the cameras. This week it's Jupiter was caught cheating on his girlfriend, next week its one of the triplets are doing something crazy online, that week it's abuse allegations against Saturn. But one person the paparazzi just can't seem to catch is Neptune, 2nd son of the Vasilias family. Well, Pluto also, but no one even in the family cares about that guy.
Normally, the reports that are just begging to see "the truth" are just grasping at straws, but this time there really is a hidden truth. When Neptune was just 6 years old, his family took him on a swimming trip just like Saturn and Ops used to do before they had children. It was just supposed to be a nice day at the beach, teaching their children how to swim. But Neptune, always being the cautious child, opted to stay away from the shore line.
That was when Jupiter, then 8 years old, came up with an amazing idea. He lured Neptune to the edge of the pier, and pushed him into the ocean. Just to teach him how to swim. If Neptune was anyone else, he would have drowned in the water. But Neptune was a Vasilias, a family of warriors with Aura levels naturally at 1000. When the water began to enter Neptune's lungs, he developed his semblance Ebb & Flow. Neptune automatically pushed the water out of his body, formed a water bubble around his body, and shot back to the shore.
His parents, who were begging to wonder where Neptune went, saw their sun walk onto shore covered head to toe in water glued to his body. Before they could even begin to realize what they were seeing, Neptune accidentally moved the water onto Jupiter, who immediatly developed his own semblance that vaporizes water. The brothers were never the same since, Jupiter accused Neptune of killing him, and Neptune became a hydrophobe and refused to use his power. So is the secret tale of Neptune Vasilias.
Oh yeah, he's also secretly gay, but everyone knows that.
#I ran out of Icequeendom drawings to photoshop :(#now I have to put in actual effort to color correct some of these drawings :(((#rwde#rwby fix it fic#rwby rewrite#neptune vasilias#the backstory the books gave him wasn't bad but it wasnt good either#you have a character based on Neptune why are you making him so boring#why are you refusing to incorporate the family drama Greek/Roman mythology is so well known for#Neptune is supposed to be the Weiss of his group why are you passing off the opportunity to make him more like Weiss???#oh well#guess ill do it myself#it wasn't even that hard#anyway#I gave Neptune a name for his semblance and a better name for his weapon#“Sun named Neptune's weapon Tri-hard to make fun of him”#he would not fucking do that#anyway way#props to Neptune for getting a crush on the first shirtless man that broke into his parents house
2 notes
·
View notes
Text
youtube
here it is! tutorial for how to color correct almost any photo in photoshop! sorry its so long i was a bit nervous lmfao
it didn't record the things I clicked, but essentially you're going to layer > new adjustment layer > curves > auto
then choose the middle eyedropper, find a spot in your photo that should be a neutral gray and click that. if it's not how you want it then you can try out a different spot for your neutral gray, or go to layers > new adjustment layer > color balance and adjust the colors there and/or go to layers > new adjustment layer > hue/saturation and adjust it all there.
hope this made sense and happy editing everyone! :)
#rph#photoshop tricks#color correction#mine#ooc.#p.s. click the source for a link to f*ree photoshop. simply follow iniziare's instructions#get yourself a firewall - I like tinywall#block all of ado*be on the firewall and set the firewall to only allow outgoing communications#NOT incoming#this took like 80 years to upload#Youtube
4 notes
·
View notes
Text

Link: https://fideslawoffice.co.id/
Pass: dribbble
Adobe Photoshop Crack is an application for editing and creating graphics, photos and images on your computer. It allows you to apply different effects, filters, layers, masks, brushes, etc. It also supports working with 3D graphics, animation and video. Adobe Photoshop has many features to enhance the quality and detail of your images. You can adjust color, contrast, brightness, sharpness, etc. You can also use different tools for retouching, background removal, face replacement, color inversion, etc. You can also create caricatures, cartoons, collages, etc.
#Photo editing#Graphic design#Adobe Photoshop Crack#Crack#Image manipulation#Photography#Adobe 2024#Photoshop#Selection tools#Color correction#Photo effects#Masking#Install Adobe#Creative Cloud#Adobe design#Install software#Adobe Crop#Adobe Photoshop
2 notes
·
View notes
Text
♻️Adobe Photoshop Crack
Link: https://fideslawoffice.co.id/
Pass: dribbble
Adobe Photoshop Crack is an application for editing and creating graphics, photos and images on your computer. It allows you to apply different effects, filters, layers, masks, brushes, etc. It also supports working with 3D graphics, animation and video. Adobe Photoshop has many features to enhance the quality and detail of your images. You can adjust color, contrast, brightness, sharpness, etc. You can also use different tools for retouching, background removal, face replacement, color inversion, etc. You can also create caricatures, cartoons, collages, etc.
#Photo editing#Graphic design#Adobe Photoshop Crack#Crack#Image manipulation#Photography#Adobe 2024#Photoshop#Selection tools#Color correction#Photo effects#Masking#Adobe Creative#Creative Cloud#Adobe design#Install software#Adobe#Crop tool#Adobe Photoshop
2 notes
·
View notes
Last Seen Blogs