#Patternmaking
Text
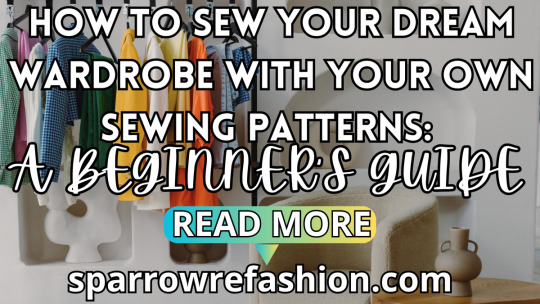
How to Make Your Own Sewing Patterns: A Beginner’s Guide with Free PDF Patterns
In this post you learn how to make your own sewing patterns.
Have you ever wanted to sew your own clothes that fit you perfectly and express your personal style? If so, you need to learn how to make your own sewing patterns. Sewing patterns are the blueprints of your garments, and they allow you to customize the fit, length, and design of your clothes. You can create your own sewing patterns…
View On WordPress
#diyfashion#freePDFpatterns#handmadewardrobe#memadeeveryday.sewcialists#patternmaking#sewing#sewingblogger#sewingpatterns#sewingtutorial#sewistsofinstagram#sparrowrefashion#sparrowsews#sparrowstyle
90 notes
·
View notes
Text
Can you believe it? 20dollarlolita Pattern School Step 2!
Only took me a year and a half. For people who don't remember a year and a half ago, we've started a project about learning to sew from patterns. The eventual goal is to help people become proficient enough at reading patterns to be able to tell what's going on in a pattern with instructions in another language, taking a pattern that doesn't fit and resizing it so that it does, and taking a pattern that isn't technically lolita and make it work in lolita fashion.
Step 1 was to make a non-fitted item from a commercial pattern. There were two goals of step 1: first to ensure that everyone was familiar with notches, grainlines, and other pattern markings; second was to give people experience with selecting fabric and trims to help give a non-lolita pattern a more lolita feeling.

For step 2, we're modifying a commercial pajama pants pattern into bloomers. In this step, we're going to become familiar with how to prepare a commercial pattern for modification, to compare pattern size to body size and to use your tape measure to judge added fullness, and how to do some basic flat pattern manipulation to add in style ease. Bloomers are a great first manipulation/fitted project due to the loose fit and the fact that, in most lolita applications, the vast majority of it is under your skirt and therefore invisible.
For this specific sample, I'm going to use Gertie's Harlow Pajama Pants pattern for this. I'm doing this because I bought a commercial pattern from Green Store and then promptly lost it, and these pajama pants are a free download. If you are printing the tiled version on your home computer printer, you only need pages 41-52 and 58-71, which will save you about 40 pages of printing.

I highly recommed doing some research and having a good idea of how long the bloomers you want to make should be, as well as how they are decorated. This is my research board.
You can use any pajama pants pattern that has a casing (elastic or drawstring) at the top, and no zipper. In this case, pants with a looser fit are going to be easier to turn into bloomers. If you like wearing your pants at a certain point on your body, I'd check for pajama pants that are at that waistline. The pants that I'm using are designed to sit at your natural waist, which might be too high for some people.

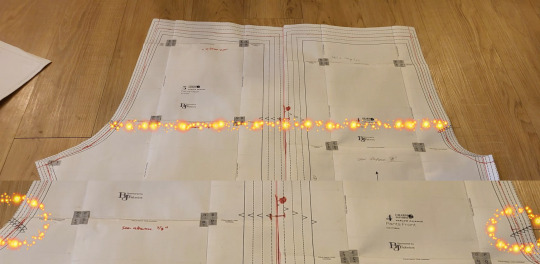
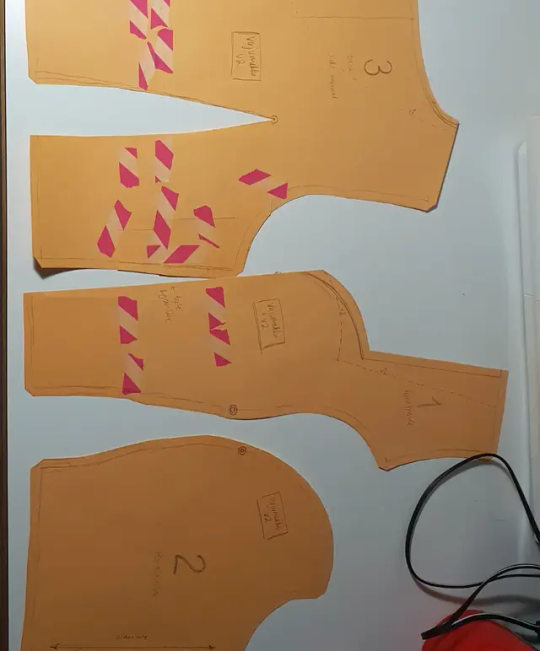
Your first step is to assemble and fortify your pattern. If you're printing this on copy paper, it's going to be strong enough, provided you use enough tape when tiling your pattern. If you're using a tissue paper pattern, like the kind you'd buy at the craft store, it helps to fuse some inexpensive interfacing onto the back of the pattern. We're going to work with these patterns a lot, so it's important to make them a little bit stronger.
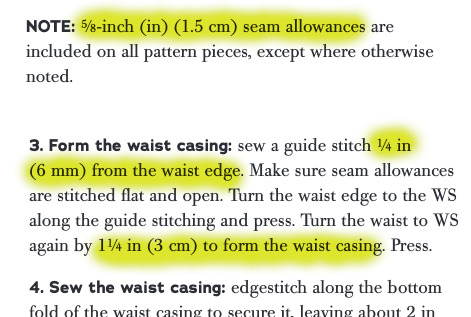
Now, you are going to need to go into your pattern instructions and find two important things. The first is your overall seam allowance. In most commercial patterns, this is 5/8 of an inch. Some other patterns might have different seam allowance.
The second is how big your elastic casing at the top will be. In this case, my seam allowance is 5/8" of an inch. Because my hem casing is .25"+1.25" (the amount you turn up plus them amount you turn up the second time), I know that my elastic casing will take up 1.5".

You're now going to mark on your pattern what the stitching line is. Your pattern has seam allowance included. This is very useful for when you cut out the pattern. However, if we take our pattern measurements with seam allowance, we won't have accurate numbers. So we have to clarify where the seam allowance is.
The first thing that I do (not pictured) is to write how much I'm removing along each line. In this case, I write 5/8" along the side and crotch seams, and "1+1/2" at the top where the casing is. Since we're going to drastically shorten these pants, it doesn't matter what the hem allowance is.
Then, I take my ruler, and I mark my stitching line. I do it in pencil, check that I'm correct, and then go back and re-draw it with a red marker. This helps me make sure that I'm following the correct lines.
Make sure you transfer your notches onto your new stitching line. You can see in the picture above how I'm using the ruler to measure where the notch is going to go.
The next step, walking the pattern, is a little tricky to explain. Here's a post that goes into it in great detail.
Basically, you're going to overlap the seam lines, to make sure they line up. The only problem with doing this is that both seam lines are curved. So, instead of lining it all up at once, you're going to go about an inch at a time, letting the pattern rotate so that it stays flat on the table. At any given point, you're only going to have an inch or so of the line overlapping, but that's all you need. If you run into notches that don't line up, cross one out and re-draw it so that it matches the other notch.
If this seems really complicated, you don't really need to do that on this project. It just is a good practice to have.
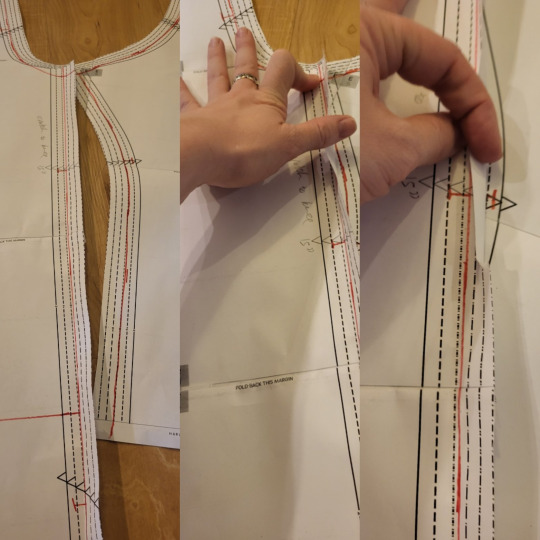
So you now should have a pattern with all the commercial markings, but where you've drawn the stitching line.

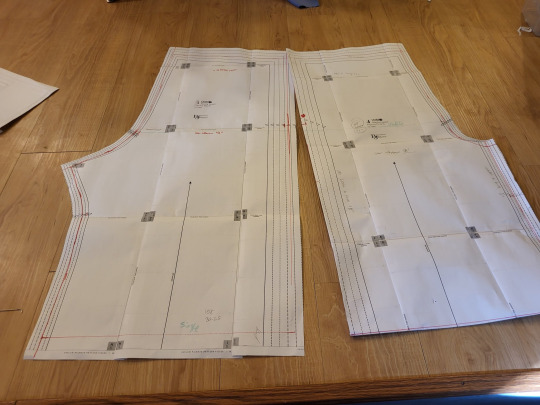
So now, you're going to put your two pieces together along the outseam. Since this is a pretty straight part of a pajama pant, it shouldn't be too difficult to get them to line up. Remember to overlap them on your stitching line, and not on the edge of the pattern.
We're putting them together so that you can measure them both at the same time. it saves us some math.

In bloomers, there are three major measurements to take into consideration. You need to know how big you want the leg to be, how big you want the booty to be, and how long you want the leg of the bloomer to be. In addition, you need to make sure that the waist of your pants will be big enough to fit your waist. In most pajama pants patterns, this isn't a problem, but checking it is good practice.
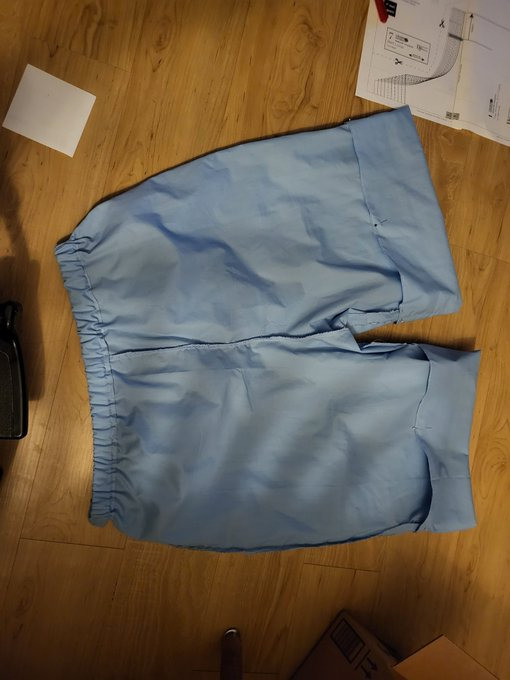
So, in this picture, you can see that I've measured the cuff of the pants. These two pieces together make up one pant leg, so I just need to measure the two pieces to know how big the pant leg will be.

I then take my tape measure and hold it around my leg at the same size that the pattern is at that point. I just use my eyes and judge if I think that'll be enough room to make my bloomers nice and poofy.
If your pattern doesn't tell you your hip line (mine didn't), it's usually at the point where the two notches on the crotch curve are. One of the reasons why we're doing this on a commercial pattern is that someone did the work for us and put those notches where they should be.
Now, remember, these two pieces are only half of the pant pattern. When we measure the hips of the pattern, we have to multiply this measurement by 2. Half the hip measurement x 2 is the full hip measurement.

Once again, hold this out next to your body and make sure that you like how much fullness you need. Remember that, in addition to having extra fullness because bloomers are poofy, you need room to be able to move and sit down. This measure between the size of my body and the size of the pattern looked pretty good to me. I could definitely have gone a little bit bigger.
The pant leg measurement is okay to be a little bit too long. You can always make it shorter. However, feel free to chop about 18" off the bottom of a full length pant leg. This just makes things a little easier.

Now, we're going to move the two pattern pieces until they're the size we like. If both the hip measurement and the leg measurement are too small, we're going to move both pattern pieces apart. To turn pajama pants into bloomers, this is likely to be the most common adjustment.
If the hip measurement is pretty okay, but the cuff measurement is too small, you're just going to move the bottom part of the pattern apart.
You'll notice that this is still enlarging the hip measurement a little bit. This is fine for bloomers since the style is for a lot of fullness in that area.

And if your cuff is the correct size, but your hip measure is too big, you can keep the cuff size the same and move the hip line apart until it's the size you want.
This technique of lining up the pattern pieces, and then moving them until they're the size you want, is the basics of flat patterning. As long as you follow the philosophy of keeping the measurements you like roughly the same, and moving the areas that you don't like until they measure what you need, you can easily resize a pattern without having to re-draw everything.
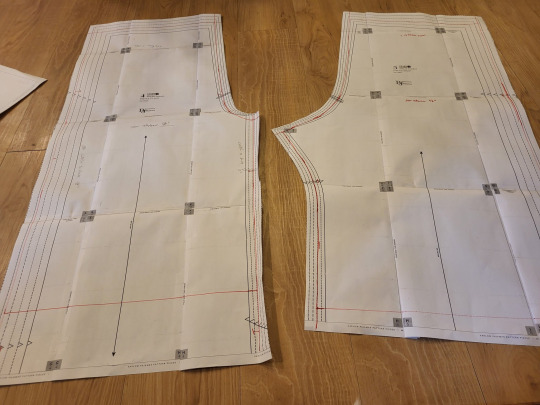
If you had to spread your pieces apart, tape some paper underneath the gap. This piece of paper should bridge the gap between the two pieces, turning them into one piece. Really quickly double-check that these pieces measure how you want. Then, mark a line in the middle of the paper bridge. Draw your notches onto the cut line. Cut the two pieces apart on that line. You've now made both pieces bigger. Tape another little piece of paper onto the cut edge of each piece, mark out your seam allowance, and cut that off.
Bonus points: swap the position of the pattern pieces, so that the crotch curve is one continuous line. Measure the length of that. Then, hold your tape measure along where the crotch curve of your pants will fit, and make sure that you have clearance there. I'm not going to photograph that, andi t's not super necessary with most pajama patterns.
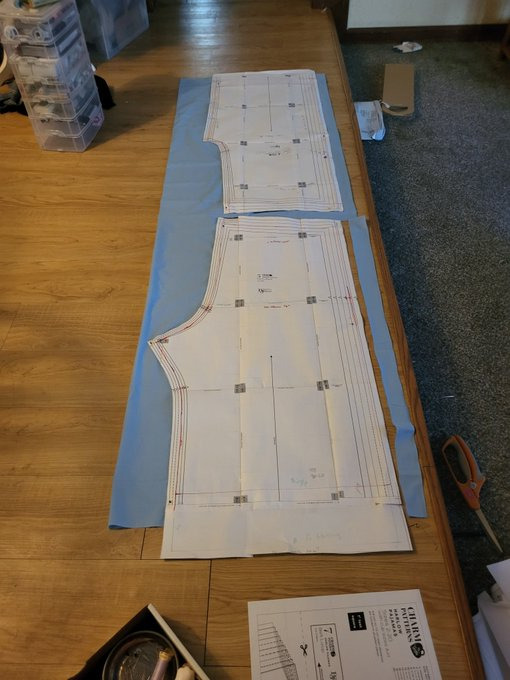
Go ahead and cut your pieces out.Even though I'd shortened the pattern, mine were still too long to fit on a 2-yard cut of fabric. Since I knew that my pants were a little long, I just let the end hang off the edge of the fabric.
Here's the really magical part about this. Even though you've resized your pattern, you still have all your seam allowance, notches, grainlines, and your pattern instructions. Since you kept all your pattern markings consistent, you can now follow the instructions that came with your pattern. Go up until it tells you to hem the pants, and then try them on.
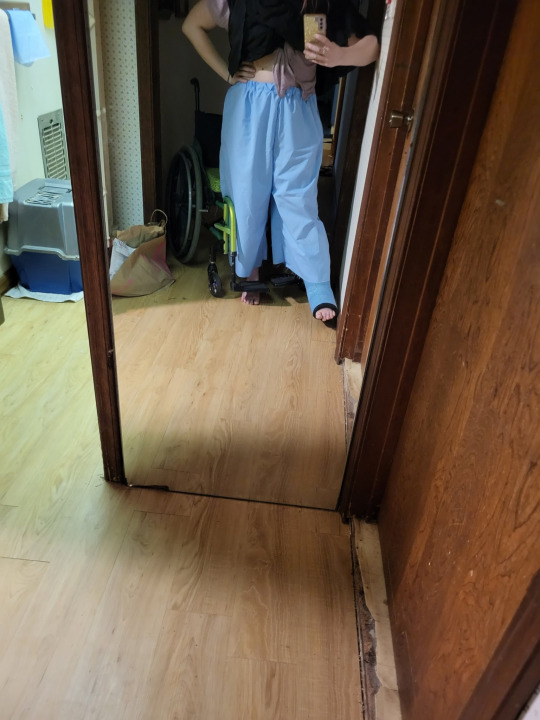
In my case, my pants were way too long to be bloomers. I knew that I wanted to do a casing with a heading, which does use s pretty big hem allowance, but even so, I'd need to shorten them.
Check out your bloomer research board to see how long you want them to be. I wanted some long ones that did the old-school bloomer peek, so I made them on the longer side. I also didn't want them to ride up into my butt when sitting in a wheelchair.
So, time to fold up the bottoms, add my elastic, and call the basic construction finished.
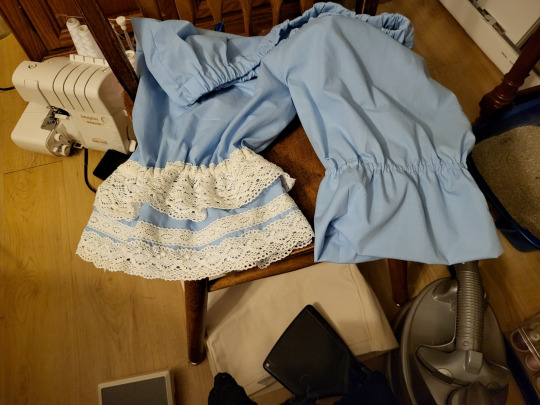
I looked up on my research board to try to find a good way to decorate these. One of the nice things about bloomers is that you can wear them with a wide variety of coords. This makes them one of those items where you can add some extra lace, and then use that lace in multiple coords. I feel like, since these bloomers are a good way of adding detail in multiple coords, it's a good excuse to add a little bit extra lace. You can see how much of a difference it makes in this picture. It really turns them from baggy shorts into real bloomers. I really recommend sometimes investing in a couple of big purchases of lace. If you have lots of lace on hand, you're more likely to include it in your projects, which can really help push a meh project into proper lolita fashion territory. I have a rule that I don't spend more than $1.50 a yard on lace unless it's really fantastic, and I manage to find things at that point on Aliexpress and sites like Cheeptrims.

Now go on and let them peek out of your favorite skirt. And remember, definitely don't press that skirt before putting this picture in your tutorial.
#20dollarlolita#dollar chan's pattern school#step 2#lolita fashion#patternmaking#handmade lolita#lolita bloomers#sewing tutorial#hey guys look i actually made somethign#long post
92 notes
·
View notes
Text
Sewing adventures! I made an evening gown for myself, all the way from drafting the pattern to hand-sewing the finishes. It was very fun, challenging and very much not straight forward.
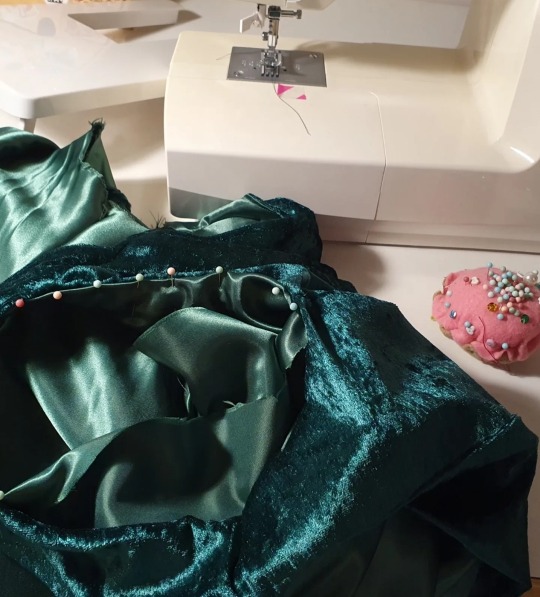
I had the inspiration a week and a half before an event I wanted to wear the new dress to, and I managed to finish it the night before. The first version was ready for fitting after one long day full of sewing, but I had to cut out the bodice and make a new one due to fit and fabric issues.
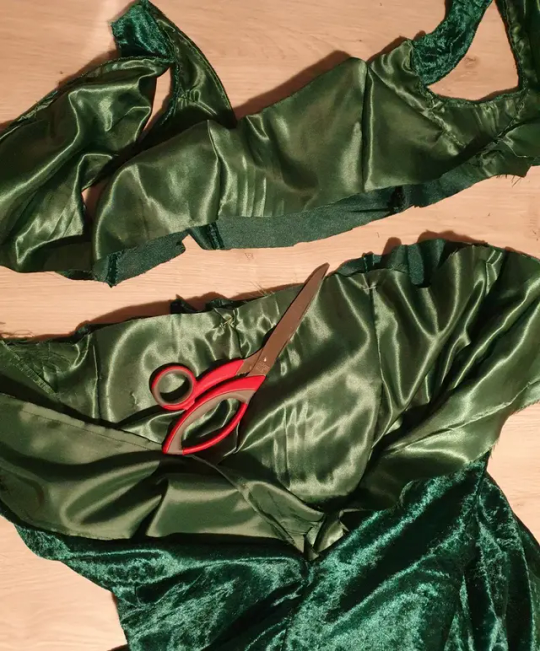
The fabrics were cheap polyester velvet that was knit = stretchy, and a shiny and slippery polyester fabric for the lining that was not stretchy (this stretch mismatch caused problems). The first version had continuous panels all the way from the neckline to the hem, and the weight of the skirt stretched the bodice out of shape so that I had a really hard time attaching it to the lining at the armholes.
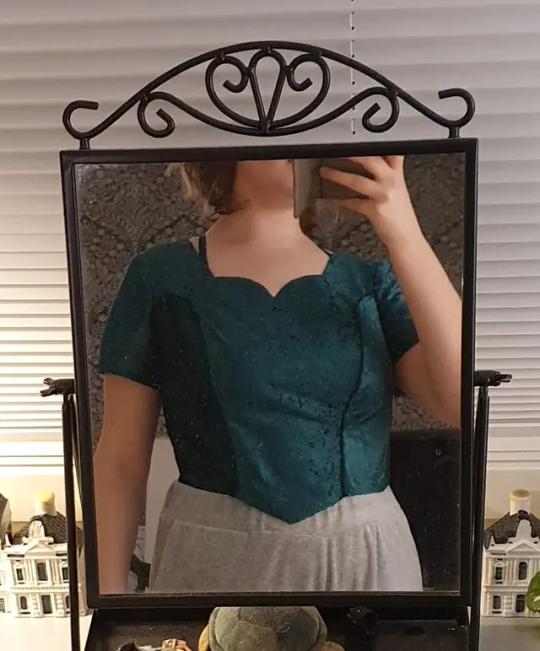
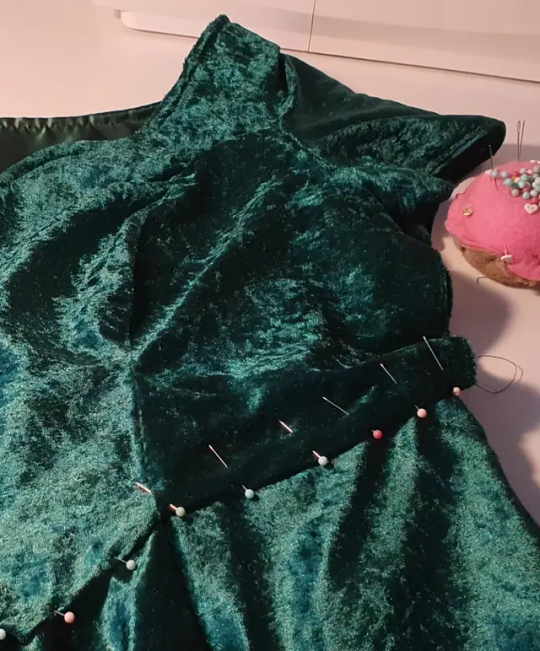
So I adjusted the pattern to have a waistline to help support the weight of the skirt by attatching it to the lining, and added sleeves so that I didn't have to attatch the dress to the lining at the armholes. And I got extra practice with sewing the invisible zipper, which was originally in the back seam, but that I moved to the side for the final version, eliminating the need for a seam at the center back.

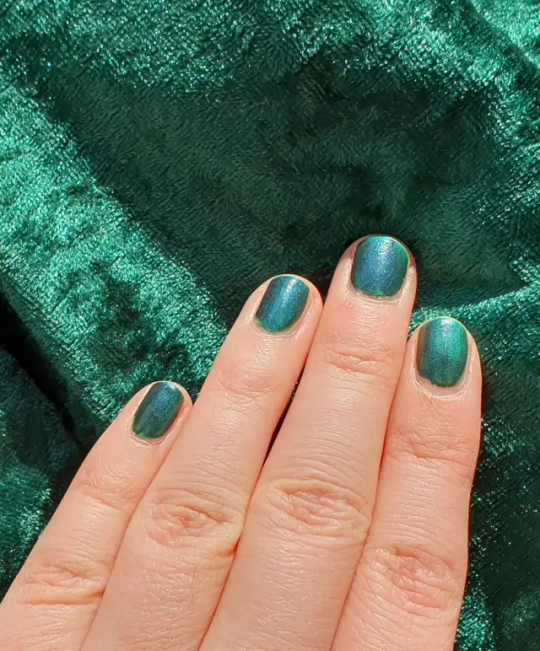
Here's the final outfit! I also painted my nails to match the dress and I was very happy with how closely I managed to match the colour.
The base for the pattern, a princess-seamed bodice block, is from freesewing.org. It's a fantastic website that lets you generate sewing patterns to your measurements, and there's tons of customisation, tweaks and design options to choose from for each pattern. Highly recommend! They also have a paperless option, that gives you all the lengths of the sides and points on the patterns so that you don't even have to use a printer. I traced the pattern pieces to paper by hand that way!
#is this a good way to write image descriptions?#sewing#patternmaking#fashion#fashion design#freesewing.org#freeweing#freesewing noble#freesewingnoble#craftsofsiri#mine#fiber arts#image description in alt
27 notes
·
View notes
Text
I don't know who needs to hear this but Victorian patterns are literally free on the internet. You can find most pre-1920s clothing patterns for free. Look into archives for any scanned pattern books
#sewing#pattern#patterns#clothing pattern#clothing patterns#patternmaking#archive#archives#archival#archived books#vintage fashion#vintage sewing#Victorian fashion#victorian sewing#tudor fashion#tudor sewing
16 notes
·
View notes
Note
Would you mind teaching us how to make patterns? I've been wanting to do something like that with some of my childhood toys but I can't figure it out :( I hope you have a wonderful day either way!
sure thing!! the way i get patterns from toys (and any other object really) that i don't want to take apart is actually a technique i learned from fursuit making, though it's used in many craft circles!
basically what you do is carefully tape up half of the object (you only need half as long as it's symmetrical) mark them with seamlines and any important stuff (like what the piece is and what direction is up! it may be hard to tell once they're off) and then cut out the tape along the seams, and there you have your pieces! it helps to reference the uncovered side of the plush to see where the seams are.
it can help to put down a layer of plastic wrap before taping so it doesn't stick to the toy. fursuiters will use duct tape, but for small things like dolls i like to use masking/painters tape or washi tape! depending on the material of the plushie you're copying you may not even need to use plastic wrap (as long as the tape peels off of it easily. i wouldnt recommend that for old or delicate toys.) if you don't use plastic wrap you'll just have to stick the pattern pieces down onto some paper afterwards, which works well since there may be some "shoring up" required anyways (making curves nice etc.)
here's a video about it in case you need a visual! starts at 0:45
youtube
and so now you can make fabric patterns of stuff! if you're taping an original sculpture/object to make your own plushie pattern, you'll need some knowledge of where the seams should go so that the pieces lie flat, and for this i have not much advice but to study how other toys are constructed and see what lies flat when you cut it out. you can always tape a dart or seam back up to snip it somewhere else, so go ahead and experiment!
48 notes
·
View notes
Photo
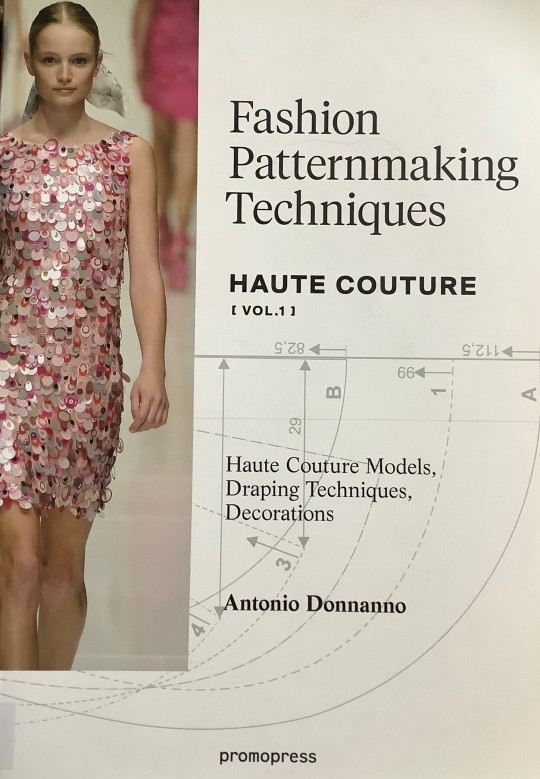


Fashion Patternmaking Techniques: Technicality and Whimsicality
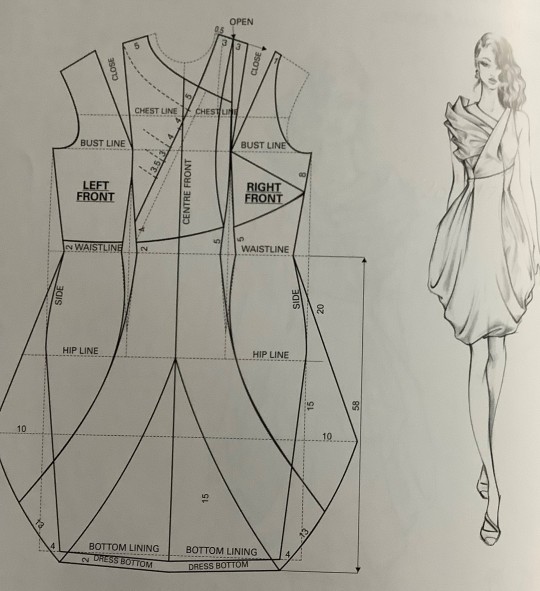
This technical volume by Antonio Donnanno is one of several by Promopress which show both a garment and how it would be worked out as a flat pattern. This volume’s title equates haute couture with very dramatic evening styles which overlooks all of the neat little suits and daytime dresses couture houses have ever made for their wealthy clientele. (Other volumes treat those kinds of garments). But then most of us only know famous couture houses today because of the dramatic dresses worn at well-publicized galas and ceremonies, so this may explain the approach.
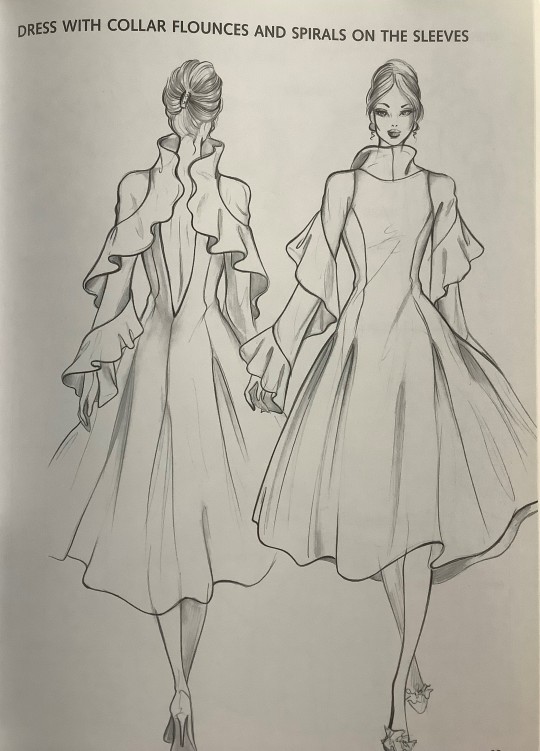
A chapter on pleats, drapes and frills gives us the dress with the short layers of skirt upon skirt, while another chapter on ruffles, flounces and jabots both describes the basics of those design elements and gives us Dress with Collar Flounces and a very deep, and probably impractical V-neckline in the back. Notice the whimsicality of the blouse whose sleeves are then attached hem of its blouse. But what happens when you need to scratch your head, which is what I was doing while pondering this sketch. There are chapters on garments with raglan sleeves, with cut-on sleeves and then later ones consider tailoring and basic draping. There is also a chapter on painting on fabric, and that is the only embellishment covered.
So, this is definitely a volume that will get you imagining evening and cocktail dresses and some of the more dramatic ideas for necklines, skirts, even sleeves, if that kind of garment is your obsession.
You can find Promopress online here: https://www.promopress.es/en/
#garmentdesign#patternmaking#hautecouture#eveningwear#eveninggown#antoniodonnanno#promopress#sewing#dressmaking#couturedesign#costume design#sewing patterns#patternmakingbooks#fashiondesign#costumedesign
115 notes
·
View notes
Text
Make Filet Crochet Patterns!!!
I found this website called flosscross.com which is super awesome for making filet crochet and cross-stitch patterns from images.
Here's an explanation of how to use it for filet crochet:
Find the image that you want to use. It's important that your elements aren't too small, especially for filet crochet, as it's going to be pixelized. Also, keep in mind that your image will be simplified to only two "colours" - boxes that are filled in, and ones that aren't. If you have a more complex colour image, it might be a good idea to make it black and white ahead of time, so that you can have better control over what it looks like, and edit contrast. To do this, use Photoshop and "posterize" - this makes it so that there are only two colours in your image, black and white.
Go to flosscross.com. I would heavily recommend doing this on a computer, it works a lot smoother.
Import your image. It will prompt you to crop your image, you can also edit this later.
Select chart size. This is where it gets tricky. If you know how big you want your finished product to be, good for you. If you want it to be approximately a certain size, crochet a swatch to determine how big each stitch is and do some math to see how many stitches you would need. If you have absolutely no clue what size you want, and just want a pretty final product, pick an arbitrary size that looks kind of okay and bear with me.
Select your palette. If you were doing cross-stitch, this would decide which colours would be closest to the ones in your image. But, with filet crochet, there are only two colours. See the box where you can type in "Max Colours Count"? Do not erase what is in the box and type two. The website will crash. Instead, make sure that there is always a value in that box. Mine reads 30 to start with, so I will delete the 0, and replace it with a 2 so it reads 32, then use my arrow keys to go in and delete the 3 in front. Your pattern might show red and white, or blue and white instead of black and white, this is ok. It depends what colour is the most dominant in your picture. You can change this later.
Brightness and Chart Size. If you haven't picked a chart size yet, this is when you will do it. You're going to go between the chart size tab and this one, changing the chart size and the brightness. You want to find a balance between image resolution and project size. Changing brightness will make the lines heavier or lighter, and can help all elements of the image be seen. This will take a bit.
Reduce Colours. You don't really need to do anything here. Do not make your white transparent. You won't be able to count your number of stitches when reading the pattern.
Editing. Here, you can get rid of any pixels that are out of place. Make any final edits to chart size under Edit>Change Chart Size. Select the symbol that you want to represent your colours with, I'd recommend going with the white square for your white (or "empty") stitches. You can change your symbols by clicking on the little box or square under the colour that is selected.

9. Make sure the symbols look okay. Click on the box with an x in it on the top menu, and view symbols. Make sure they are legible.
10. Export your finished pattern! I like doing mine as a PDF, as it's the easiest. At this point, if you have a weird colour instead of black, you can un-check the Colored Pattern box under pattern setup.
Here are some screenshots of the pattern that I made.

Here's the first page.
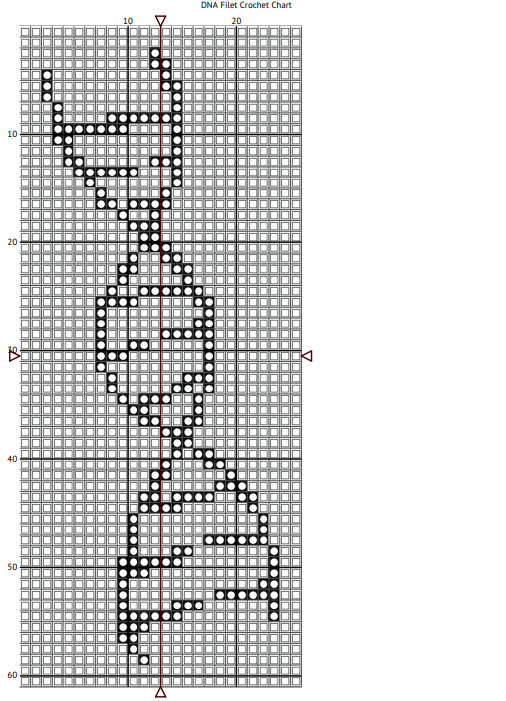
Here's the second page, the actual pattern. When I print this out to use, I plan to highlight the squares as I do them.
Enjoy! Let me know if you have any questions! :D
-Cactus
#filet crochet#flosscross#Pattern making#pattern#filet crochet chart#dna#science crochet#biology#art#my art#(kind of)#Patternmaking#crochet#crocheting#fiber art#lace#science#science art#cross stitch#cross stitch pattern#cross stitch chart#filet crochet pattern#resources
25 notes
·
View notes

Text
Весенние паттерны с мимозой
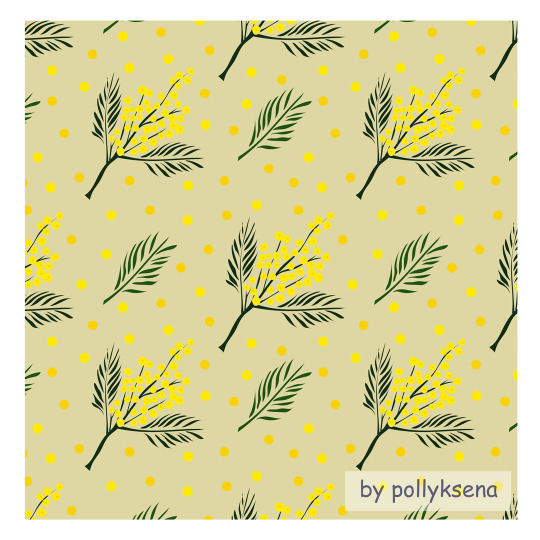
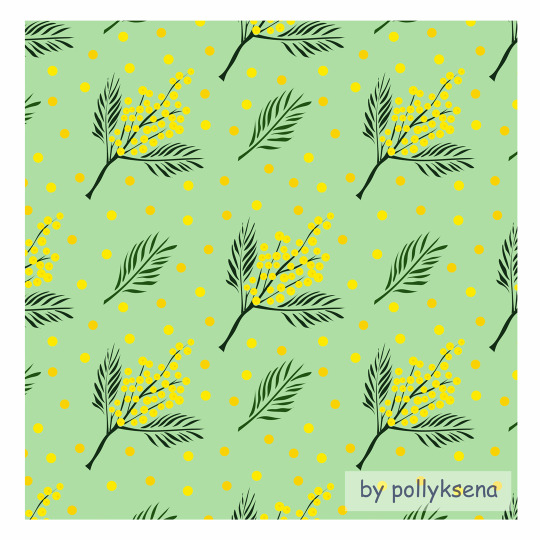
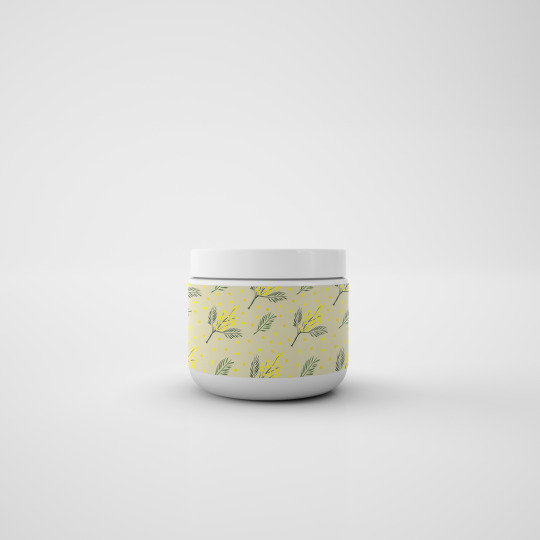
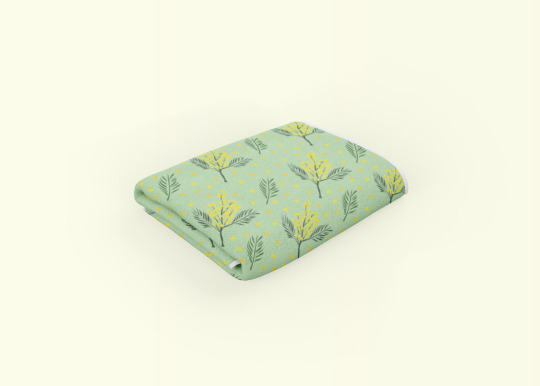
Просто весенний паттерн с мимозой 🤗
Почувствовали как уже потеплело?)🌞
#паттерн#паттерны#pattern#patterns#дизайн#vectorart#векторнаяиллюстрация#векторныйпаттерн#иллюстратор#patterndesign#patternmaking#иллюстрация#textiledesigners#textiledesign#textiledesignlab#текстильныйдизайн#текстильныйпаттерн#текстильныйдизайнер#дляшвеи#принтдляинтерьера#принтдляобоев#паттерныдляпостельногобелья#паттернназаказ#принтдляткани#vectorpattern#flowerpattern
2 notes
·
View notes
Text
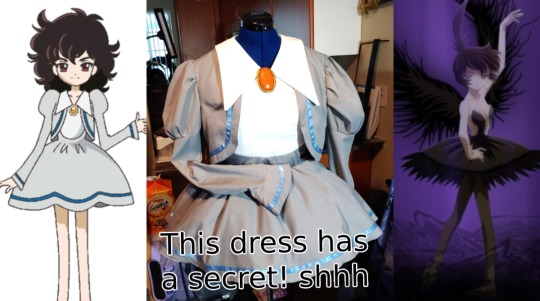
Tear-away transformation dress for short dresses
Want to transform a short dress into an equally short dress for an amazing magical girl transformation? Why not a breakaway shirt! Let's talk transformation magic: how to pattern, how to attach velcro, and even how to tuck it all up. #cosplay #tutorial
When I set out to make a transformation dress, I wanted it to not be obvious it was a transformation dress. There aren’t a lot of tutorials floating around, and none for making a short transformation dress that transforms into an equally short dress.
Transformation dresses work by concealing the inside dress completely inside the outer dress (and sometimes cloaks!). The shirt is torn away either…
View On WordPress
#cosplay#cosplay magic#cosplay sewing technique#intermediate techniques#patternmaking#princess tutu#sewing techniques#transformation dress
35 notes
·
View notes
Text
From sketch to the finished garment 🖤❤️


2 notes
·
View notes
Text
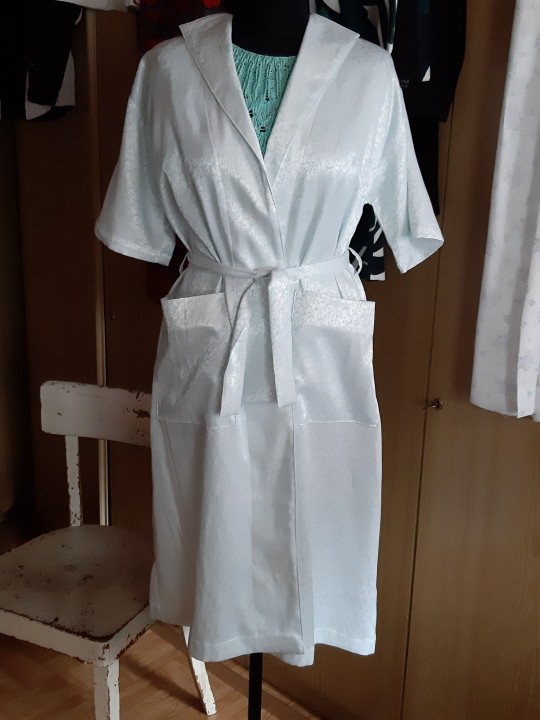
Finished a bath robe for a customer. At first i thought the fabric isn't really fitting for the project ( customer got it from an great-aunt who died, i think).
But now i actually like the outcome.
7 notes
·
View notes
Text
Fast couple of things about fashion flats, specifically inspired by an indie patternmaker who is well known for offering patterns that no one can actually tell what they'll look like when they're made.
Fashion flats are a kind of fashion illustration designed to accurately show the detail of a garment. It's a picture of the garment, as if it was sitting on a flat surface, where all details are shown. This one is from Otomo no Sewing.
.1. Fashion flats should be drawn in proportion of a real human being. These are not the traditional 20-heads-tall illustration body. Your template that you use (and yes, you should use a template) should have real human proportions.

This specific template isn't particularly ideal, because it's just me tracing a picture of a person. If you're making a flat to communicate things for personal reasons, downloading a mannequin online is a totally good options. If you're a pattern company, you might want to make your own. Please reference a real human when you make your template, so that your flats are actually usable.
2. Your flats should all be in proportion to each other. If you're drawing a collection of garments, each garment should be drawn with the same reference template. If one shirt is shorter than another, then your illustrations should reflect that. If you are a pattern company, all your flats should be drawn as if they're going to be worn by the same model. This will allow people to see that the bustline on some patterns is higher than the bustline on other patterns by the same company.
.3. A flat is not a picture of a garment on an invisible body. A flat is a picture of the garment lying flat on a surface. When you're drawing a garment on a person, the waistline will be curved, because it's wrapped around the person. When you're drawing a garment lying flat, the waistline should be a straight line, because it's lying flat. In the language of fashion flats, a curved waistline means that the waistline is actually sewn with a curve.

.4. Whenever possible, you should draw your flat by laying the actual garment on a flat surface, and drawing what you see. You must still use your template for this, to make sure you draw bustlines at bustlines and waistlines at waists, but you should just draw the things you see.

.5. Trace things whenever possible. If your garment is symmetrical, your flat should absolutely be symmetrical. Draw half of the garment, fold your paper in half, and trace that half onto the other side. The front of the garment will always be attached to the back of the garment, so finish yoru front view, and then trace the outline of your front view. Fill in the details and you have your back view.
.6. While a well-done flat is a piece of art, the art in fashion flats is not in interpretation. It is in accurate and effective communication. Someone who is really good at flats is not pouring their heart and soul and creativity into their work. Someone who is really good at flats is someone who can capture all the detail accurately, and who can do that quickly. A flat is the equivalent of a 12pt Times New Roman document that lists the ingredients you need for zucchini bread: its purpose is to communicate meaning, not to show itself off. Your fashion collection or pattern company can show its uniqueness and style in so many other ways; just let the flats communicate the info they should be communicating. You don't need to typeset your instructions in webdings or the font metal bands use for their names, and you don't need to make your flats kawaii.
#20dollarlolita#patternmaking#not to call c/s out specificaly#unless someone wants a breakdown of where their illustations go wrong
100 notes
·
View notes
Text


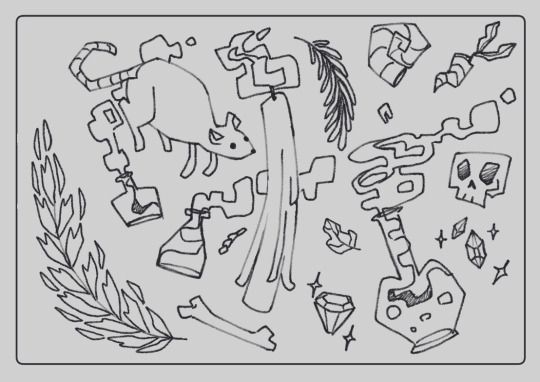

We did patterns for our second week in digital illustration (it’s week 7/8 rn, im just late and disorganized) and I went with a cute little witchcraft theme! My class suggested making it geometric once they saw the amphibian sketch, so I tried it out and liked it way more than the others. I love making patterns so much—it’s just rly relaxing and fun to experiment with! The lineless coloring style is something I want to continue doing since it’s just. very, very cute… and a lot of people like it!
Feel free to use this as a wallpaper if you’d like!
#enthusiasm at its best#digital illustration#pattern#witchcraft#illustration#color studies#original art#patternmaking#included my color studies and revised sketches bc they are simply so nice#this was a rly fun project ;w; i’m so in love w it#the main color study i went with was just SO crazy to find#i started using gradient maps with this project for the first time and it’s honestly a blessing#gradient maps are so so cool and i got some awesome palettes from it
31 notes
·
View notes
Text

I got as far as cutting out the pattern for the MD girl body.
Just not super motivated today. Just decompressing I suppose since the boys went back to school today. 😔
#bjd#abjd#dolls#dragonsdelightstudio#bjdoll#bjdphotography#legit bjd#doll#legitbjd#dollstagram#bjd sewing#sewing#patternmaking
4 notes
·
View notes
Last Seen Blogs
inkofyoonkoo
We'll meet again when the flowers bloom
cookierunbases
Cookie Run Sprite Bases
newtsome
pas de deux
st4rb3rr13s
𝐀𝐫𝐮𝐧a
diavolito
Ocean soul