#craftsofsiri
Text

Got around to darning the holes in my sock heels! Now they're ready to wear in my favourite boots next winter too.
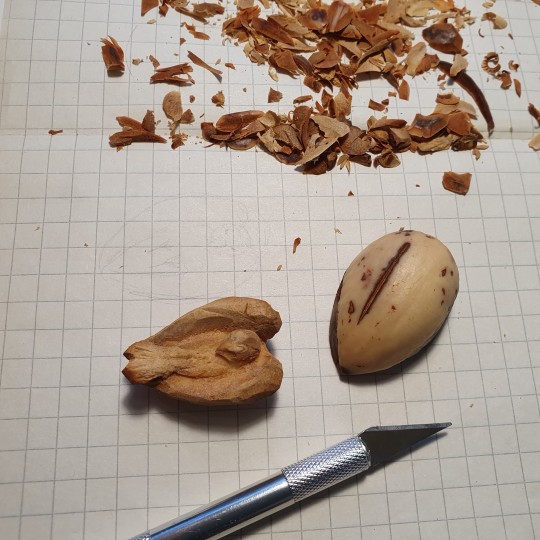
Also tried carving avocado pits! I let it dry for a few days, cut it in half and used a crafting knife to carve a lil bird. Nice and soft to sculpt!
#craftsofsiri#mending#fiber arts#knitting#solarpunk#avocado#carving#miniature#crafts#solarpunk crafts#diy crafts#diy
145 notes
·
View notes
Text
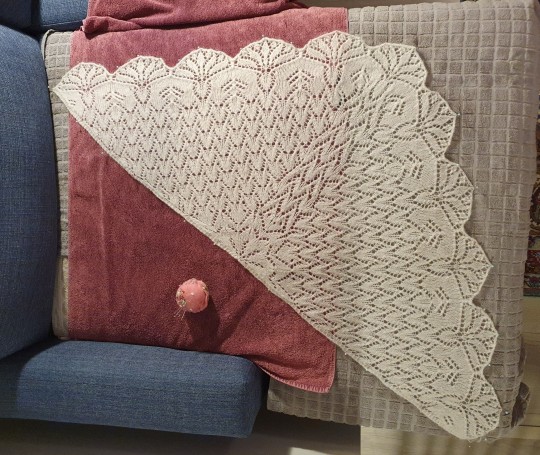
Finally got around to blocking this shawl! This is my first time blocking anything, and I didn't have a proper foam base to pin on, so I improvised with my sofa and some towels. The pattern is Golden Orchids and it has these lovely beaded flower motifs at the border! I used white pearlescent beads on white mohair-acrylic yarn, so they unfortunately aren't too visible.


Here's a close-up, before and blocked. Looks so much cleaner! If you have any tips on blocking, leave a comment!
130 notes
·
View notes
Text
How I mended a hole in knit fabric!
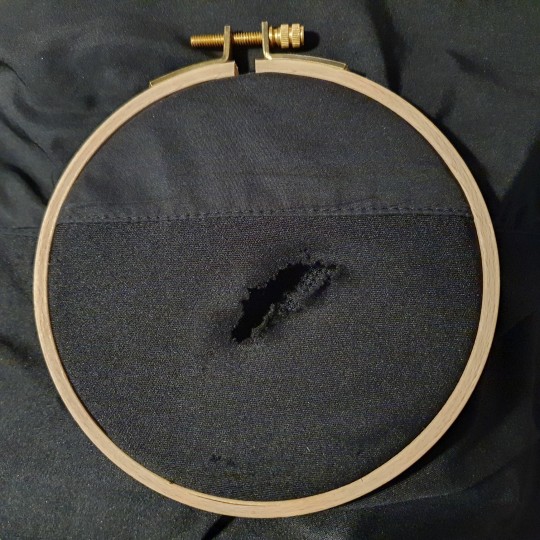
I patched yet another big hole in my reckless partner's sportswear and decided to document how I did it! I used an embroidery frame to help keep the fabric in place, but it can be done just as well without one. Other supplies are just a needle and some yarn. Here I'm using three strand embroidery floss.

I start by securing the fraying edge. Just stitching around the egde, all around the hole! If the edge is not straight, the parts sticking out will fold a bit when you tighten the stitch, but that's fine.
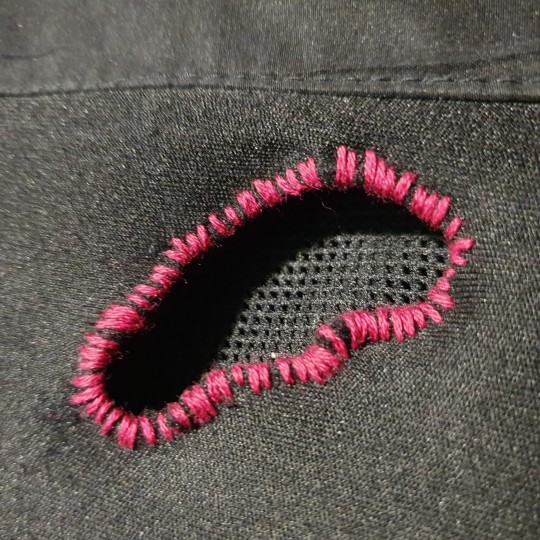
Here is the first step finished. Next, I stitch the two edges together!


There are a few different ways to do it, but the idea is to use the stitches around the edge to pull the two sides together with a ladder stitch. (This means that there's no tension on the fraying edge, just around it on the intact fabric!) I put the needle through two stitches on one side, then two on the other side and so on, always taking either the next two stitches or one previous and one new. Pull tight!
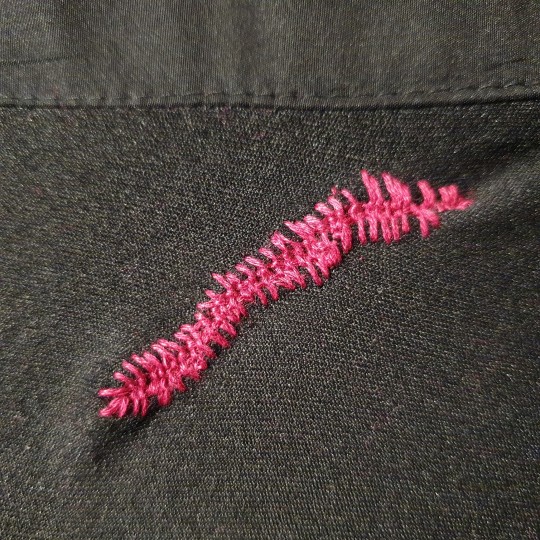
And voilà, the tear is fixed!
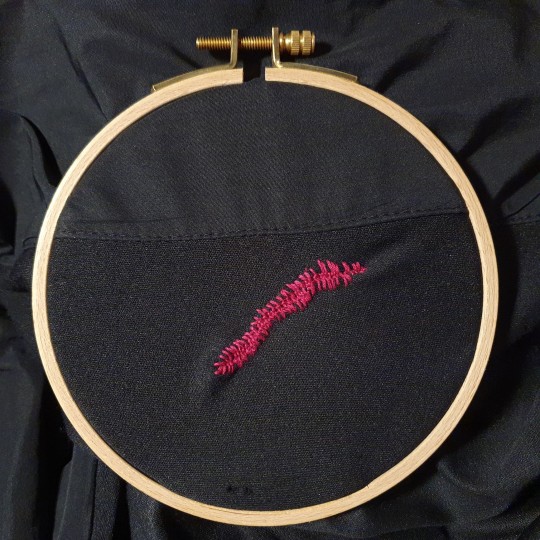
And here's another example with matching colours and finer thread.

#mending#visible mending#embroidery#craftsofsiri#tutorial#fiber arts#yarn crafts#solarpunk#solarpunk crafts
231 notes
·
View notes
Text
Sewing adventures! I made an evening gown for myself, all the way from drafting the pattern to hand-sewing the finishes. It was very fun, challenging and very much not straight forward.
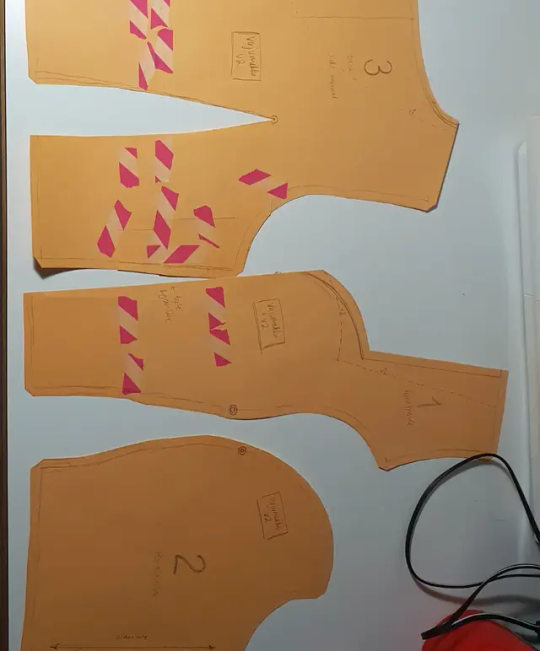
I had the inspiration a week and a half before an event I wanted to wear the new dress to, and I managed to finish it the night before. The first version was ready for fitting after one long day full of sewing, but I had to cut out the bodice and make a new one due to fit and fabric issues.
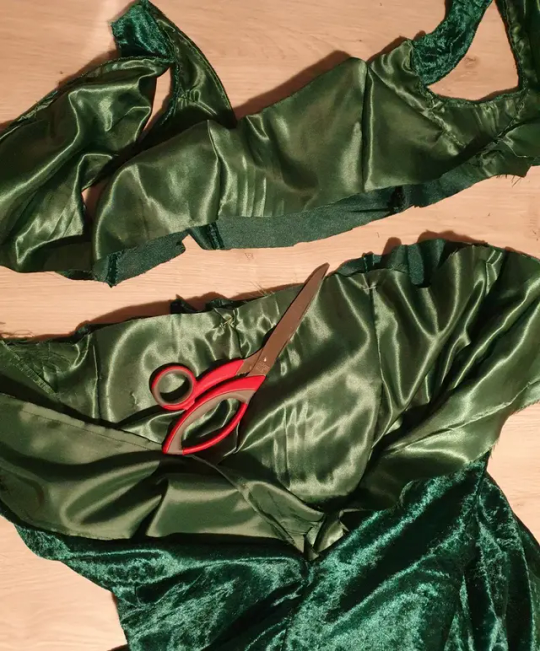
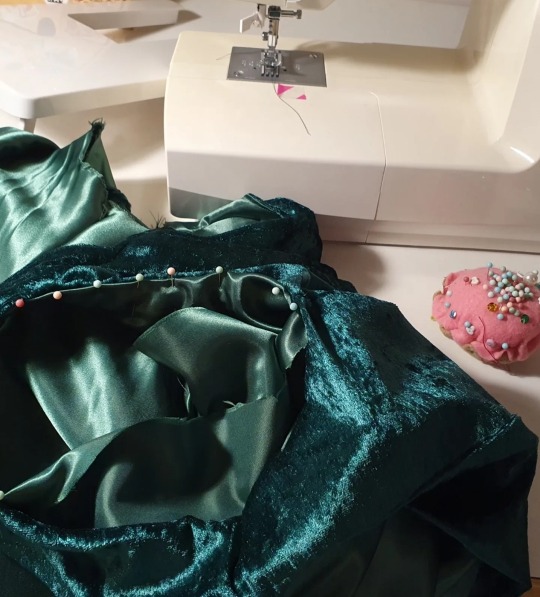
The fabrics were cheap polyester velvet that was knit = stretchy, and a shiny and slippery polyester fabric for the lining that was not stretchy (this stretch mismatch caused problems). The first version had continuous panels all the way from the neckline to the hem, and the weight of the skirt stretched the bodice out of shape so that I had a really hard time attaching it to the lining at the armholes.
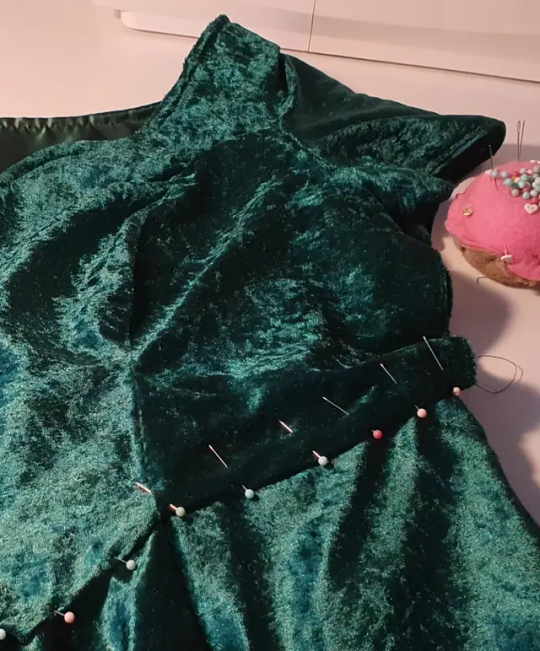
So I adjusted the pattern to have a waistline to help support the weight of the skirt by attatching it to the lining, and added sleeves so that I didn't have to attatch the dress to the lining at the armholes. And I got extra practice with sewing the invisible zipper, which was originally in the back seam, but that I moved to the side for the final version, eliminating the need for a seam at the center back.

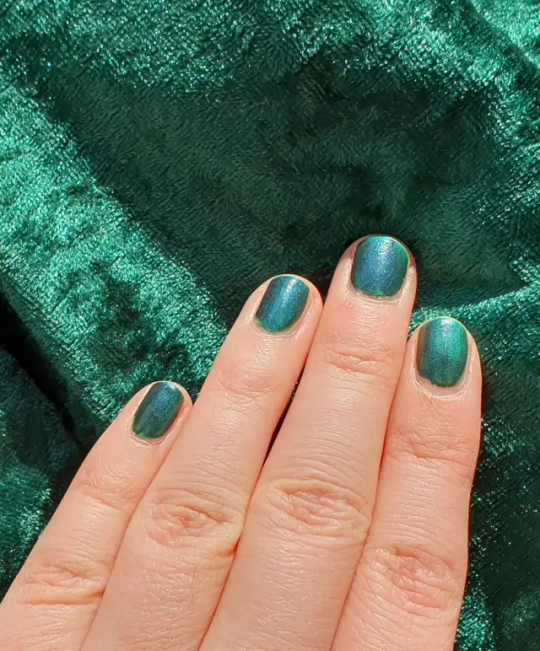
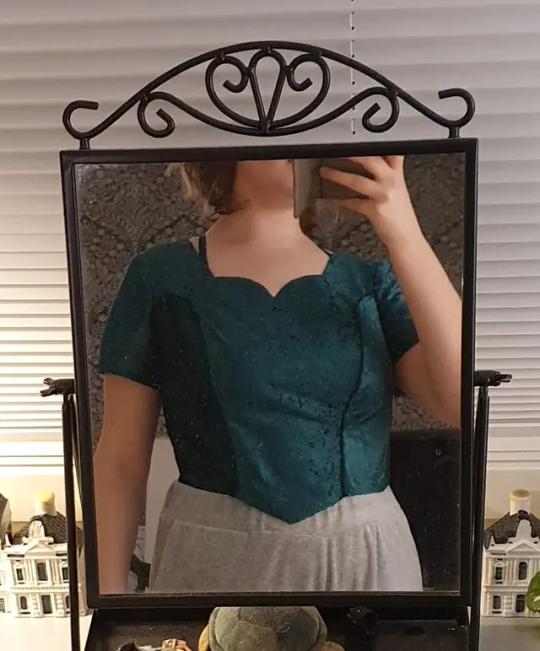
Here's the final outfit! I also painted my nails to match the dress and I was very happy with how closely I managed to match the colour.
The base for the pattern, a princess-seamed bodice block, is from freesewing.org. It's a fantastic website that lets you generate sewing patterns to your measurements, and there's tons of customisation, tweaks and design options to choose from for each pattern. Highly recommend! They also have a paperless option, that gives you all the lengths of the sides and points on the patterns so that you don't even have to use a printer. I traced the pattern pieces to paper by hand that way!
#is this a good way to write image descriptions?#sewing#patternmaking#fashion#fashion design#freesewing.org#freeweing#freesewing noble#freesewingnoble#craftsofsiri#mine#fiber arts#image description in alt
25 notes
·
View notes
Text
I made buttons out of polymerclay! I'm sewing a dress shirt and I don't want it to look store-bought, so I didn't want plain plastic buttons. I wondered if I could make buttons myself instead and found a bunch of tutorials online.

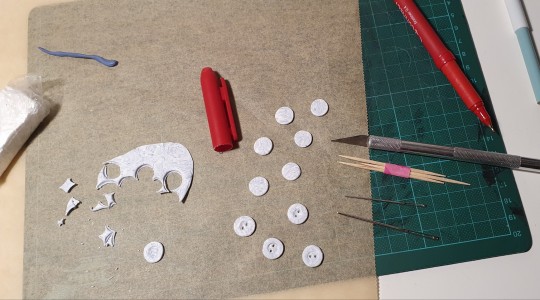
I don't have any fancy sculpting tools, but toothpicks, pen caps, crocheting hooks and some big blunt needles worked well.
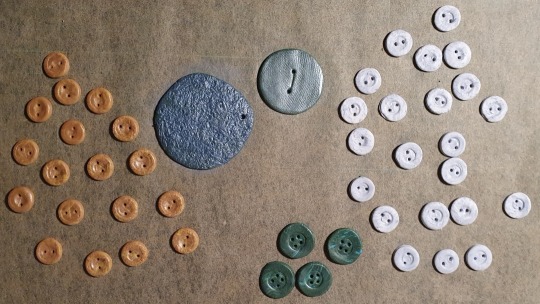
I added a bit of eyeshadow for shine! I'm not sure how well it's attatched though, I might coat them with clear nailpolish. The big ones were pressed and rolled against wrinkled foil/fabric for texture.
The clay was ten years old, I had it wrapped in plastic wrap, and it still worked! It took some time to knead, but it did eventually stop crumbling and became soft.
#craftsofsiri#art#polymer clay#polymercreations#polymerart#diy#diy craft#diy projects#diy punk#sewing
13 notes
·
View notes
Text
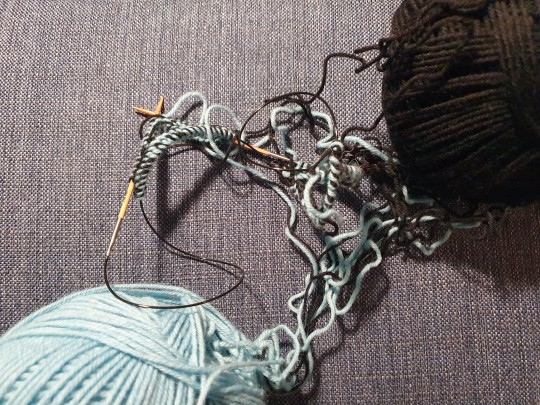
This mess of yarn is the beginnings of my latest project: warm gloves with double knitting, both at the same time with magic loop technique on new circular needles (I snapped my previous needles). I came up with the pattern myself and I feel like this is genious.
It's my first time double knitting, and it's so much fun figuring it out, especially since I'm starting with ribbed knitting. I'm planning to do some kind of pattern to the back of the hand, and I'm letting the future owner of these gloves decide it.
Since I'm knitting two gloves at once, but I only have one ball of yarn of each colour, I have to work with both ends of the yarn. I've done this once before when I made patterned socks with magic loop, and the four yarns always get tangled! And when I dug out the other end of the yarn from inside the ball, it also got a bit tangled, hence the mess.
14 notes
·
View notes
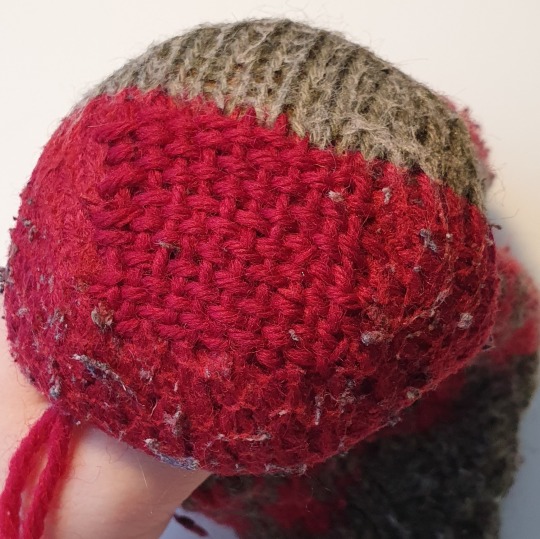
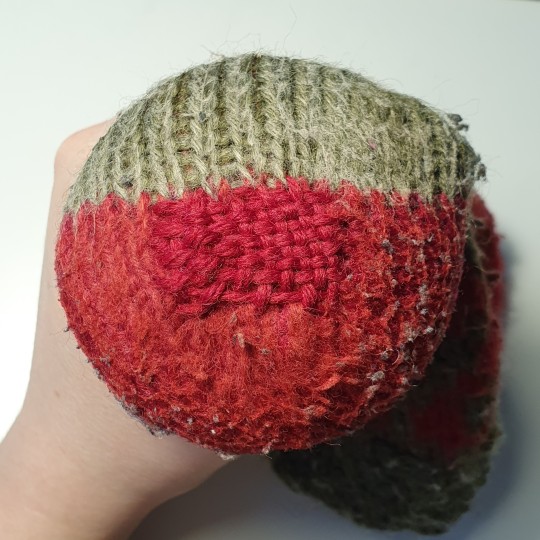
Text
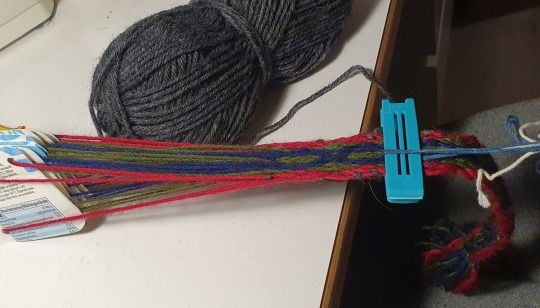
Trying out tablet weaving!
3 notes
·
View notes
Last Seen Blogs

clientgoal5
The Life of Bowman 155

vermont-tool-company
Vermont Tool Company

yashis-world-blog
Thelazybee

illym
I have fun here

caramenghilangkanfobia-blog
Cara Menghilangkan Fobia Tinggi Di Jakarta