
sobbingminotaur
Sobbingminotaur
Yo! SobbingMinotaur here (The name is Raoul). I make bead art, i sell bead art, i read comics (barely anymore) i love Dragon Ball and 80's stuff. If you'd like to purchase any of my bead art, check out www.kamehaus.bigcartel.com
270 posts
Don't wanna be here? Send us removal request.
Last Seen Blogs

immymore-blog
Imogen Moreno

elysiamus
Elysiamus

nobodyisneurotypicalinthebureau
Neurodivergent Bureau Things

safir-kc
Let's Fly

daebom
night crawling
Photo


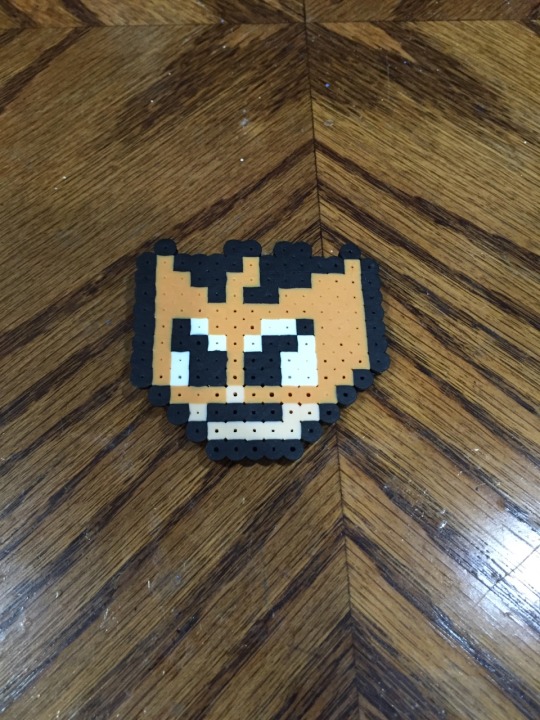
These Megaman heads are available at my shop. I'm using Neodymium rare-earth magnets for these, so they're quite strong. They'll definitely hold your notes and your kid's artwork against your fridge! (Or...you know...your own artwork) Check 'em out at my shop! www.kamehaus.bigcartel.com
9 notes
·
View notes
Photo


Some Megaman style Marvel guys
I found a pattern online for these awesome looking Spidey and Gambit.
I’m in a Megaman kind of mood, I think I’ll make more of these!
These were done with regular sized perler beads.
Update: This is the artist who made the Gambit
5 notes
·
View notes
Photo

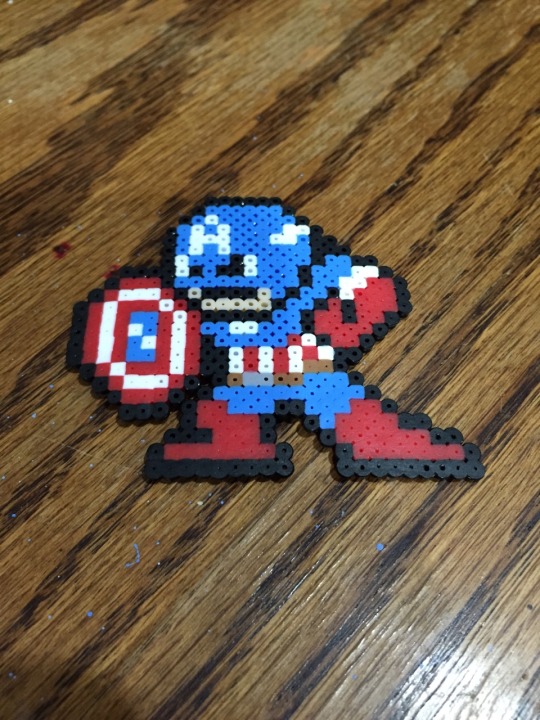
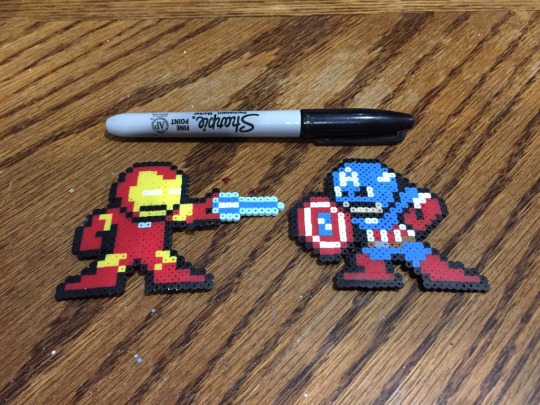
Civil War I picked up some mini beads from Michael's. They turned out to be extremely difficult to work with. The beads are really small and my hands are big. I found a pattern online for these awesome Megaman style Cap and Iron man and decided to make them into magnets. Mini beads are excellent if you wanna make full sprites and not have them take up too much space. I put these up in my store and they sold right away. Maybe I'll do some more with these tiny beads.
3 notes
·
View notes
Link
Here it is my tumblr family! I now have a store! Check it out!
Any feedback is appreciated since it’s my first store.
Most pieces i’ve made so far are there, so help me buy some more art supplies by buying stuff!!
Thank you all for the love!
0 notes
Photo

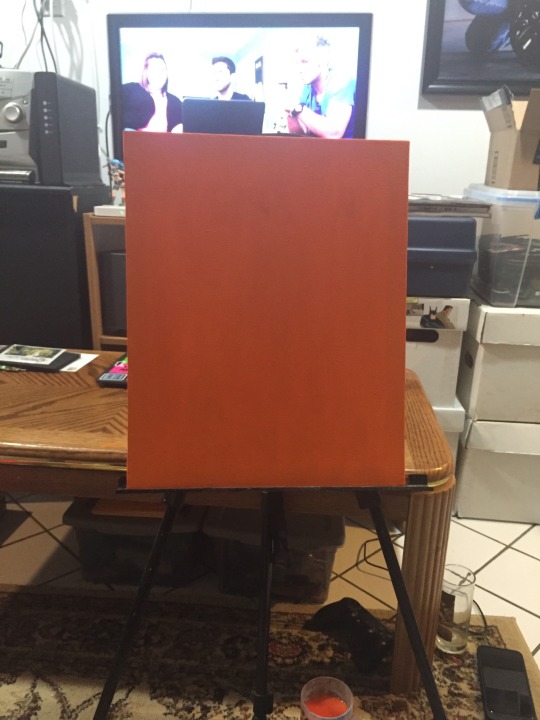


I mounted the Kame Sprite I made onto a canvas. There's a lot of space there but I think the orange makes it pop. This will be available in my store soon, oh yeah! I have a store! I'll post it next!
1 note
·
View note
Photo
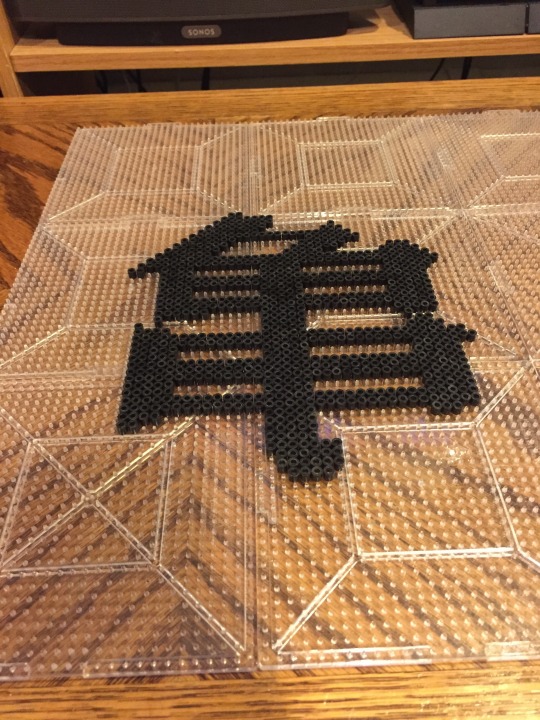


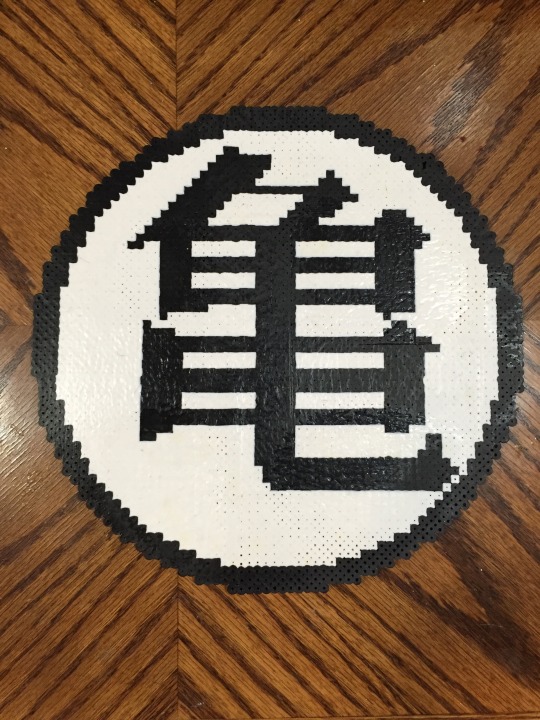
Representing the school. If you're unfamiliar with Dragonball (in which case you may have had a hard time following my most recent feed), this is the Japanese Kanji for the word "Kame", which means "Turtle". Every character who trained under Master Roshi, also known as "Kame Sennin" or "Turtle Hermit" wore a Dougi with this letter on it to honor the master. The uniform was worn by Goku, Kuririn, and Yamcha. I made this bead (I guess you could say it's an original) Sprite by converting a Normal image into a beaded image using an app called "Bead it!". This app is a must-have, so if you make bead art and you haven't downloaded it yet, do it, it's the best $5 you'll spend. I use an iPhone so I know it's available in the App Store, not sure about other platforms or OS.
#dragon ball#dragon ball z#bead art#pixel art#dbz#kame sennin#turtles#master roshi#kame#perler beads
8 notes
·
View notes
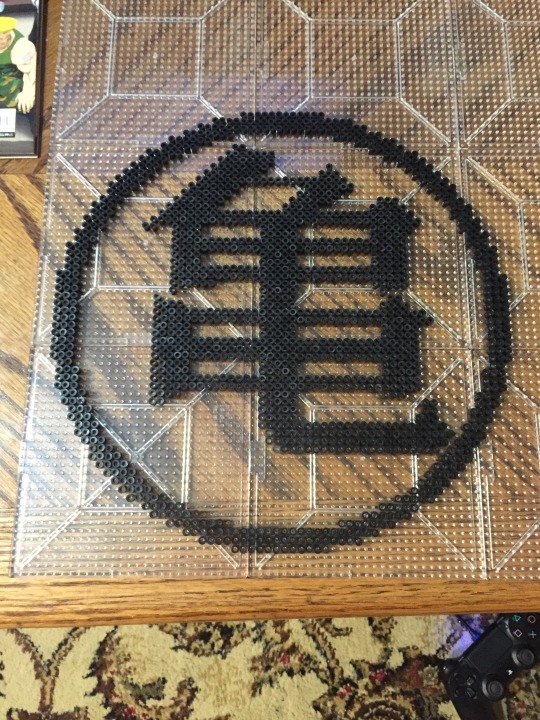
Photo

Sneak peak at something I'm working on. I had to stop because I ran out of black beads...:(
2 notes
·
View notes


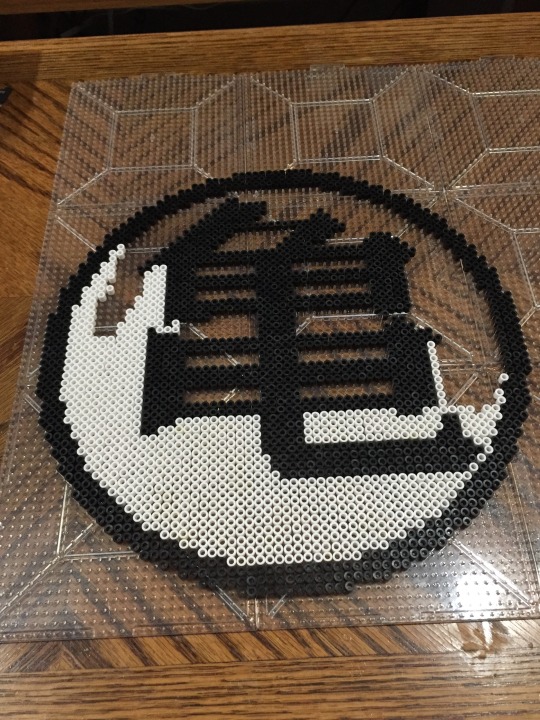
Photo


Ironed and ready
5 notes
·
View notes
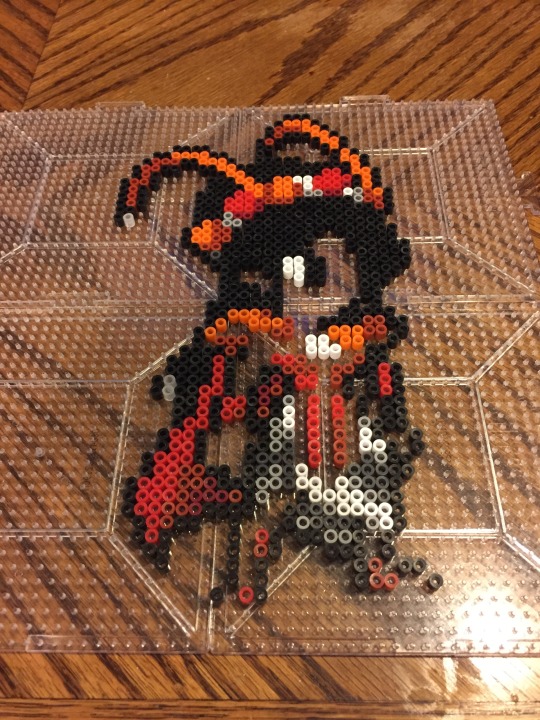
Photo

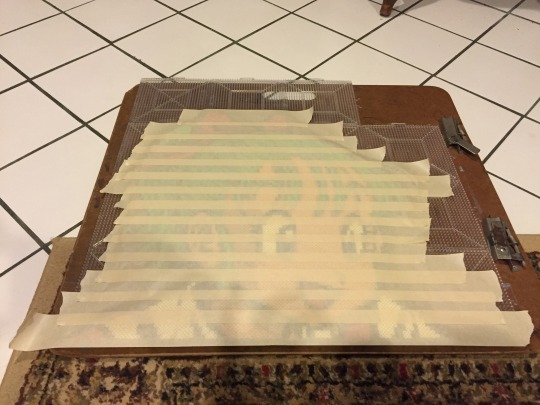


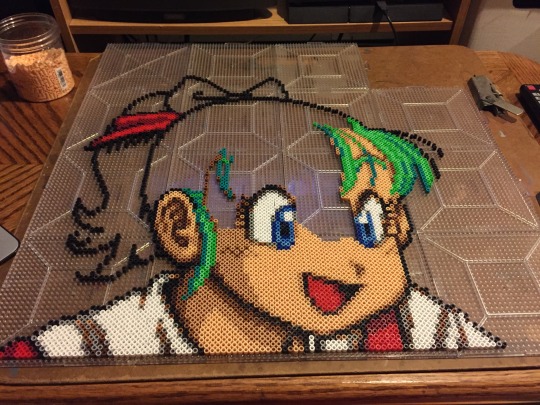
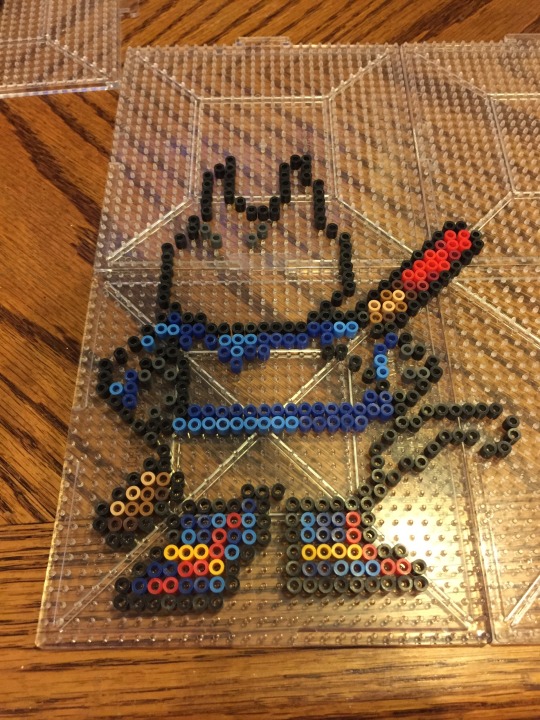
...last one about Bulma, I'm just really excited about it.
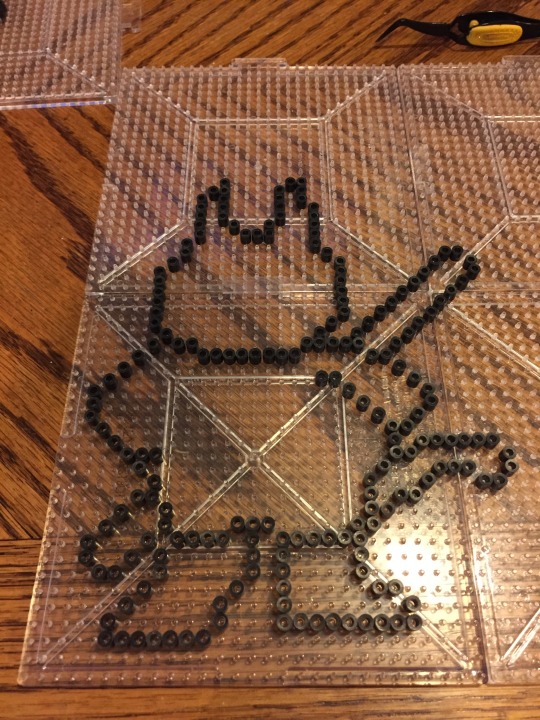
So, this is what (i call) “the taping method”. Most bead crafters use it, and I've heard it’s a must when working on large projects. Here are the steps i followed:
1. Get Masking Tape (preferably wide, to cover more areas).
2. Apply layers of tape, pressing hard to make sure the beads stick to the tape.
3. Once you've applied all those layers, you should end up with one single tape blanket, which you're going to once again press in all areas to make sure the beads stick.
4. You’re going to carefully pull up that masking tape blanket (or mat) and flip it.
5. Even if you press hard in every single area, there will be beads that stay on the board, which can be very frustrating and it happened to me. Later on i found out through other bead artisans on Instagram, that you’re supposed to poke a hole in every single bead to ensure that they stay. Sounds like a lot of work right? It is.
6. If you have beads on the board, don't freak out...just take a deep breath and put them back. I took pictures all through this process so that i could use it as reference if that happened to me. By now, you've flipped the sprite, so the masking tape blanket is sort of your peg board now, so you can go ahead and carefully place the rebellious beads back best you can.
7. I cut around the excess tape with an exacto knife. It gets in the way when you're ironing, because remember, the sticky side of the tape is now facing you.
8. Ironing, the most dreaded part of all this. I was actually a lot more comfortable doing this part, because the beads were so secure on the tape, i could take my time ironing and i didn't have to fear them coming off the board, like it’s happened to me before. The challenging part is applying heat evenly to all sides to get a nice consistent melt, but most importantly, to at least melt them enough so it holds. You need to make sure the beads are holding together on both sides everywhere, otherwise your sprite won't last and it risks falling apart when bending...and that can happen with large projects.
9. The trick to the ironing is patience. Take your time, and have a good amount of wax paper ready. Inspect your sprite before you're ready to say “its’ done”. I had to go back and iron multiple sides because they weren't holding.
And thats that! This is everything i did for this adorable Bulma. I love Bulma. Please feel free to ask any questions. This is a great hobby, so if you're just getting into it, id love to help out!
Hard to think I've been doing this for 5 years now.
Enjoy!
#bulma#bead art#Arts and Crafts#art#capsule corp#GBA#dragon ball#dragon ball advance#pixel art#perler beads
7 notes
·
View notes
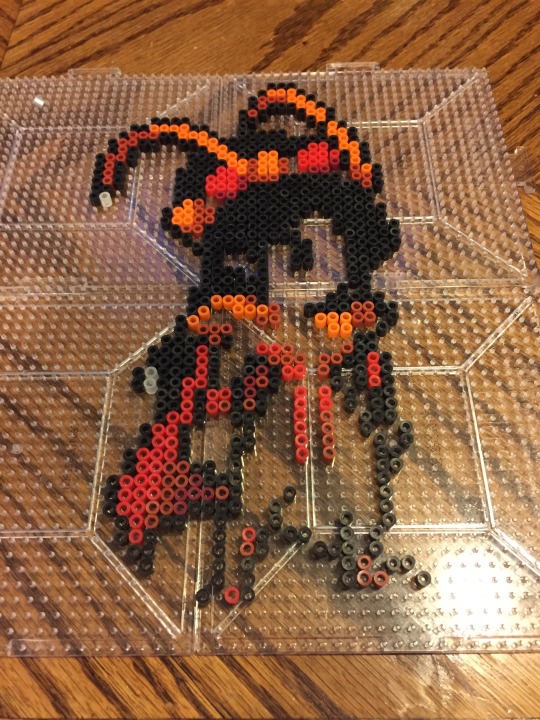
Photo


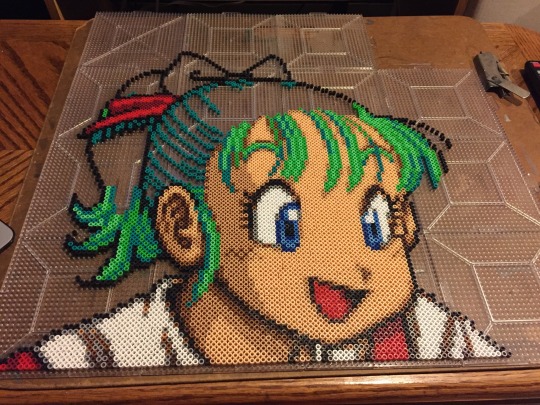

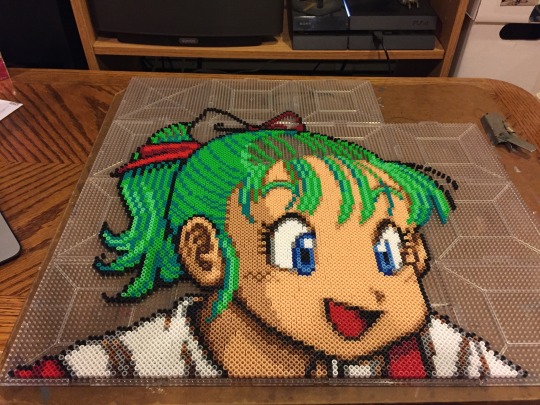


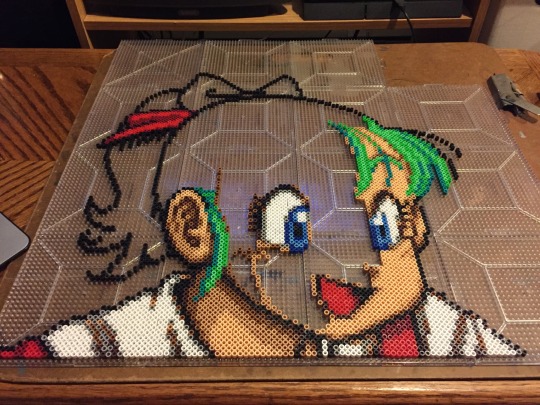
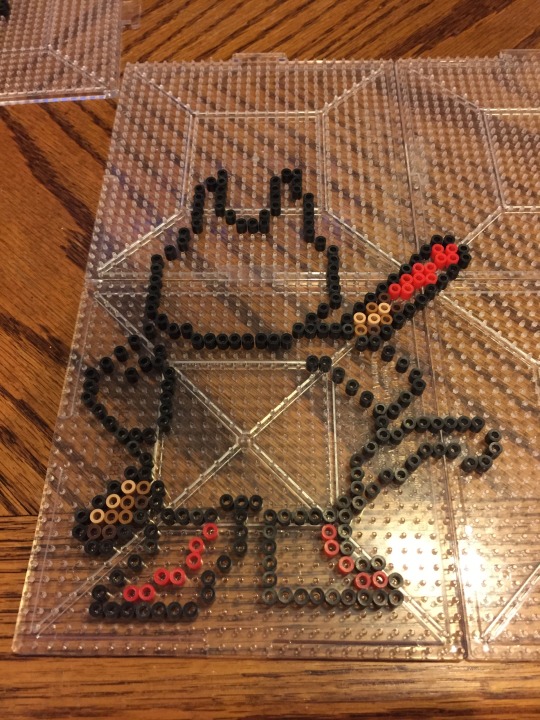
...continued from previous post.
Since tumblr only lets us post 10 pictures at the time, i had to break this into a couple of posts...because i took A LOT of pics.
I’ve posted these so that you can see the direction i went when filling in the colors.
Once it was done, i was excited about the next step.
This is the first time i’ve used “the taping method”. See my next post.
2 notes
·
View notes
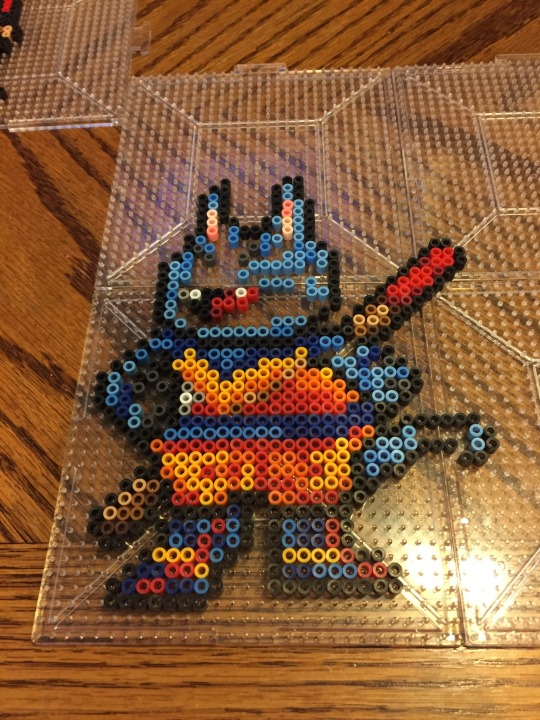
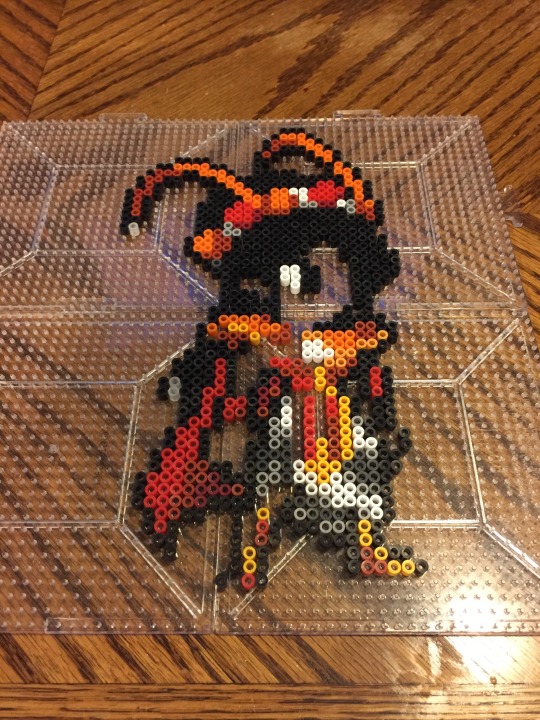
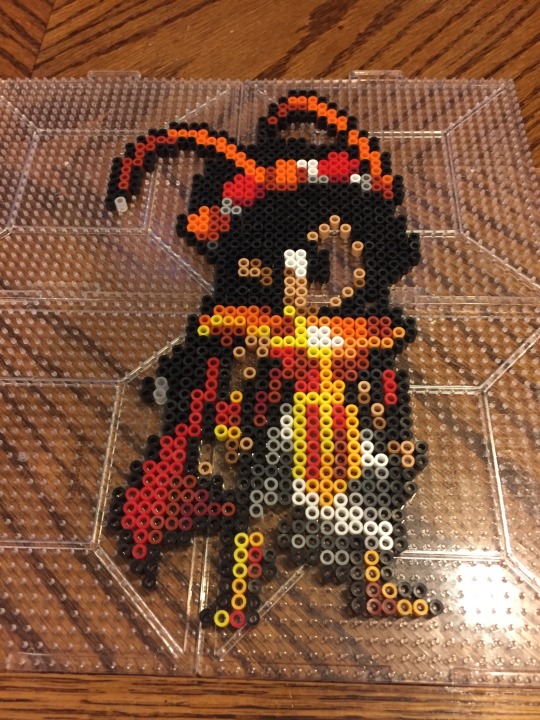
Photo


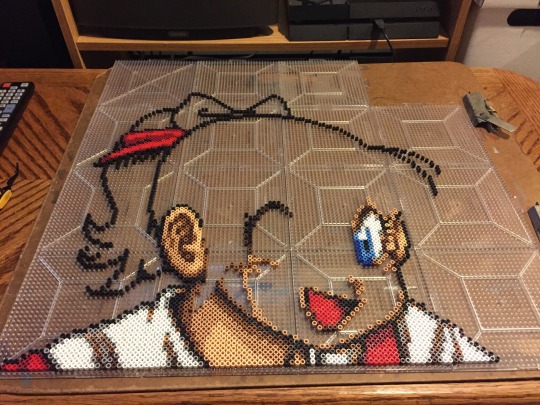


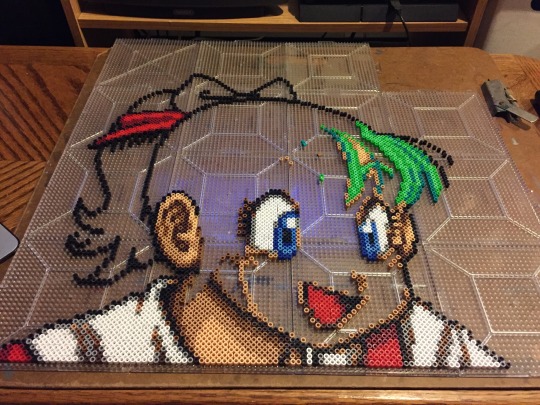

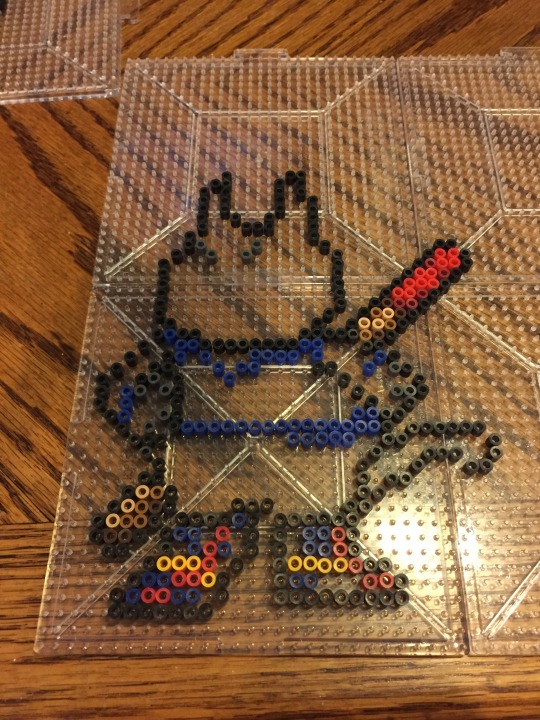
This was the big project i was talking about.
I’ve been sort of on a Bulma kick recently, so i decided to make this bead art piece based off a cutscene from the game Dragon Ball Advanced Adventure (or Dragon Ball Advance in Japan) for the Gameboy Advance.
Quite possibly my favorite Dragon Ball game ever...my only complaint would be that it’s too short! Its got every element to make a wonderful Dragon Ball game: action adventure, fighting, beat ‘em up, and it goes from the moment Goku met Bulma all the way until King Piccolo. Check it out if you get a chance!
This is the largest sprite I've done. It was a LOT of work. It was quite laborious, but that is almost not a big deal because you can work on it little by little when you have time. It is the ironing that becomes very stressful...to be continued...
6 notes
·
View notes
Photo


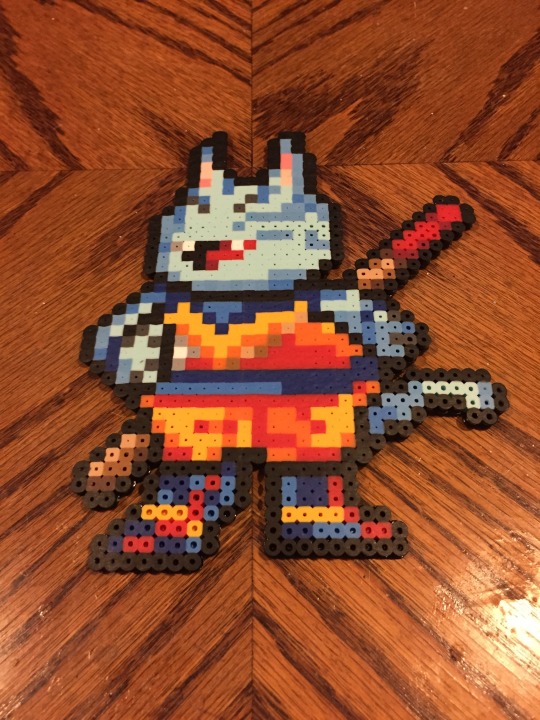
Nekomajin
A character created for the one-shot Neko Majin Z, by Master Toriyama.
This little guy was pretty strong, and was a student of Goku’s. I’m still trying to find an english translation of Neko Majin Z to read, since it did not get a print American release.
Anyway, i love cats, and i love Dragonball, so duh? Of course i love this guy even though i don't know much about him.
This is an original sprite made by Deviant Artist Pizza-Boi, and you can check out the original image right HERE Awesome work!
1 note
·
View note
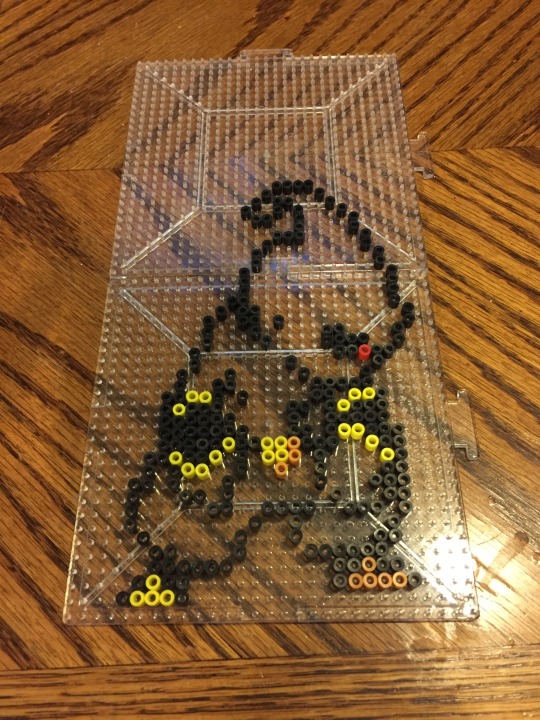
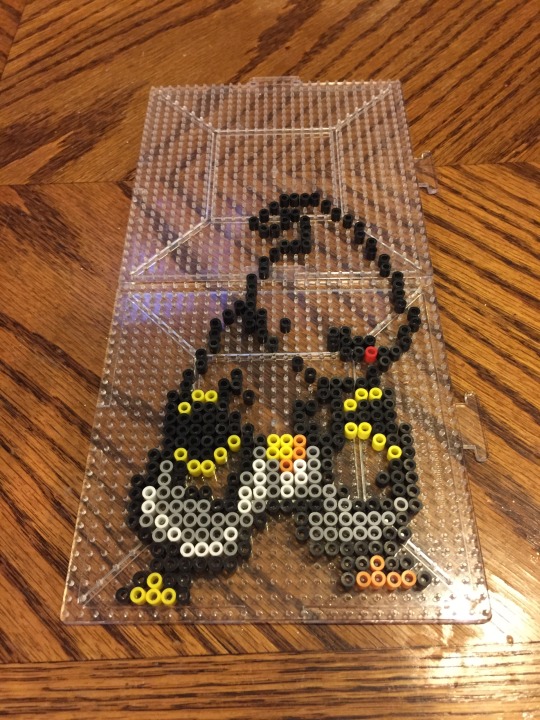
Photo


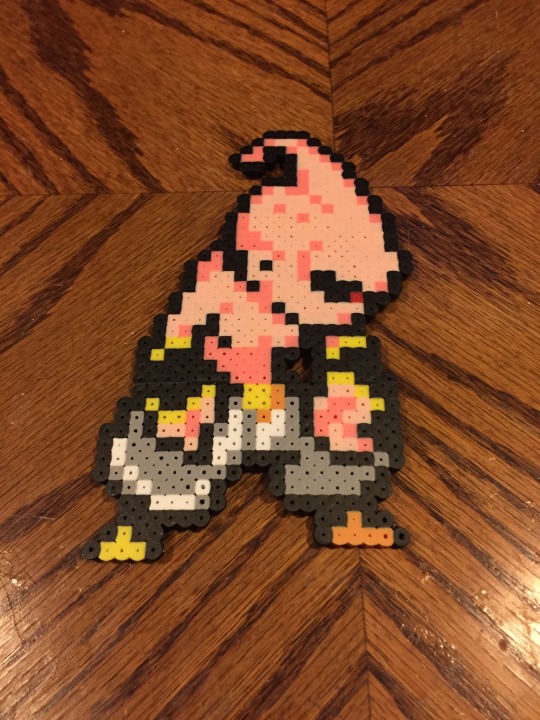
Do you remember An’nin?
She was the last opponent Goku fought in Dragon Ball!!! She was the guardian of the furnace that was sort of the dividing the world of the dead and the living.
She had a very important role in the world, and from what i understand she was the original owner of the Basho-Sen. And her assistant to guard the furnace was none other than Grandpa Gohan himself!
This is not my original design. Credit for the original sprite is reserved for Luka and Angryboy.
0 notes
Photo


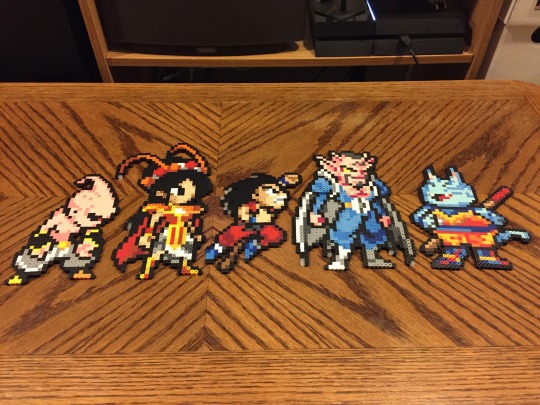
Hi there! I’m back!
I’ve been getting back into making bead art, and I've been working on a big project...well...big for me, the largest sprite I've done so far.
I’ll be posting that soon, for now, feast your eyes on this awesome sprite by Angryboy, which i made into bead art.
#majin buu#Dragon Ball Z#dragon ball#dbz#boo#majin boo#perler bead creations#bead art#arts and crafts
0 notes
Photo


Working on another little set of Perler Bead Sprites made using the designs by Victor.
Check out his Instagram and his Online Store to get some sweet t-shirts!
#peter parker#Amazing Spider-Man#oliver queen#green arrow#arrow#stephen amell#sorrytoosmall#sobbingminotaur#pixel art#bead art#perler beads
2 notes
·
View notes
Photo


Photo for comparison on what i was trying to make.
Original sprite used for this piece by Daniel
67 notes
·
View notes