#unit teambuilding
Text
Unit Teambuilding - Grusha
This one's weird. Iono has a lot of popularity and is a Pokemon Company favorite, so it makes sense she gets in as a PokeFair. But Grusha? I didn't think Grusha pulled that much popularity. Then again, I guess he's just "Volkner but a good character," so he's pulling in all the sad boi fanatics. I can't judge. We all know I have my types that get me, too.
General Overview
Grusha comes in as an Ice support. Not just any Ice support though. This is a man with Ice Zone. That's right, for the first time in a long while, we have Role Compression Support. For the unfamiliar, my stance on these kinds of supports is "Automatically excellent." Being able to remove the need for a Tech pair that supplies the field effect opens up options for debuffers or secondary DPS pairs that really expands your range of effects. SS Kris, SS Morty, and Ingo were pioneers of this approach, and all three were, and still are, excellent. Even NC Calem, who I am often shitting on for his buddy move conditional, is fantastic because of this compression. Grusha doesn't even have the Buddy move hangup, so he's got that going for him. In addition, he offers some fairly nice tools, including Team Fierce Entry 2 for a pop injection of Atk, team recovery per action under Zone, accelerated gauge under Zone and Revenge Boost 9, Impervious and access to Vigilance on grid, and disruptive effects in Flinch and Freeze from Ice Fang. His Buddy move, despite its two-turn nature, negates an attack thrown at him before counterattacking, including voiding an entire AoE move against the team, and inflicts a -3 Atk/Sp Atk debuff on the target, which is all great for survival. So hey, Grusha's set to be top tier.
Except no, he isn't. While I am a huge advocate for these kinds of compressed roles, Grusha encounters a serious problem on closer inspection. Consider this: what made SS Kris, SS Morty, and Ingo so effective? What makes NC Calem so good that the Gamepress tier list ranks him as the third best support in the game despite his many failures? In all of these situations, they are good on offense. Kris boosts Sp Atk, Ingo boosts physical attack, and Calem hits both. Kris is well aligned to her type as many Water types emphasize special, while Ingo is good for Sandstorm as almost everyone who cares about it is physical. Calem's decisions have some questionable elements, but he better supports physical Water than Kris, while emphasizing the common physical Dark types. Even Morty, who doesn't do much for offense, is well aligned, as most Fire types have been in a three-year arms race with SS Red for better and better self-sufficiency, and rarely if ever need more than what Morty offers, instead just appreciating that he covers speed.
Now look at Grusha. +2 Atk on entry if desired. Dire Hit All+. Maybe Pep Rally on his TM. Atk/Sp Atk debuffs. He does nothing for special Ice types, which is for the best as Irida covers that far too well, but it would've been nice to have the option since special ice setup is a nightmare. But for physical, he's...nothing novel. Candice's setup isn't entirely solved through him, and he's not a support for Hail, just Ice, so her weather creates the need for Snow Shelter on grid. Hala's setup is fine, just add Zone, which can be done cheaper with Glaceon eggmon. Summer Steven honestly wants more help with Atk than Grusha provides. Silver desperately wishes Grusha would debuff speed with that Buddy move so he contributed something to his nuke. SS N is the obvious beneficiary, having his sync very well accounted for, but frankly SS N is a better DPS pair and prefers PMUN stackers to blast things apart. Grusha is maladapted to his type. You can't even argue the merits of just having Ice Zone broadly, because any specially offensive Ice type is better served by Irida's compression of high DPS, Sp Def debuffs, inclusion of Hail to solve Blizzard accuracy and apply grid multipliers, and freeing up better supports that do more for Ice types' notorious poor setup.
This leaves Grusha to the role of generalist, where he under-performs compared to Winter Sycamore who just left. Sycamore does exactly what Grusha does, but with better gauge, and with Rebuff to negate the common Extreme Battle condition of Acute Senses, and allows you to take "No Field Effect Change" in CS for a nice chunk of free points. Honestly, without any substantial healing under his belt and a two-turn move, he's arguably worse off than Halloween Phoebe, who I absolutely did not respect. So if he's not useful to his type, and he's not a great generalist, what is he? The fourth Ice Support for a hypothetical Ice High Score. You're getting him in case they only make five supports by the time that type drops. Is this a worthwhile concern? Not to me. But then I don't invest in the good Ice types, only the bad ones because it's funny how hard Irida carries.
EX, Role, and Move Level?
Support, so 3/5 recommended. Especially with his base kit being so generally poor, give him the help he needs. 5/5 gets nice traits, but oddly no Zone extension. Role is Tech, just for stats, don't think it's worth it.
Team 1: Grusha, SS N, Colress
Realistically, this is what Grusha is built for. SS N wants every aspect of what Grusha puts down, particularly for his sync nuke. I personally think this is less advantageous to N compared to PMUN stacking via NC Rosa, but to each their own. Colress should bottom out defense so N can contribute the most.
Team 2: Grusha, SS Silver, Masked Royal
Grusha can attempt to salvage Silver, who can grid Pinpoint Entry for the sure hits. Grusha gives crits, and Masked Royal gives team speed, which can conserve Silver's Buddy move nuke for when it's ready. Problem: the condition is max HP. Grusha cannot heal him. I think this is honestly the worst drawback because it renders Silver a relatively poor choice overall.
Team 3: Grusha, Candice, Summer Steven
It's really hard to get a good F2P team going. Candice is the obvious nuke, appreciating the Zone boost tremendously, as well as the +2 Atk that removes a turn of her buffing. Summer Steven has the DPS inclusion for if you want to let Grusha sync first, though you are then reliant on a quad queue or a denial/flinch. Best of luck.
Team 4: Grusha, Irida, BP Candice
If you really want to pair Grusha with Irida, for whatever possible reason, it's best to run another Hail setter like BP Candice. Alignment with Sinnoh and all. The thing is, I don't think this is optimal. I'm just saying you can use the other two to alleviate Irida's setup. If you want.
Team 5: Grusha, NC Red, SS Hilbert
This is what I think is better. Irida and NC Blue can operate independently, and I think that's legitimately for the best. They're strong enough to clear on their own. In this case, Grusha is sensible as a partner with Red on his own, thanks to application of the Zone for him. Admittedly I struggle to think of a sane third, but SS Hilbert converts to Ice, and has Sp Def debuffs and the third rebuff, so like...sure?
Final Thoughts
Grusha can participate, and a multiplicative field effect is never strictly bad. But this feels like an ongoing bit where DeNA keeps making Ice types kinda bad for no real reason. Maybe they just don't like Ice. It's winter, so I'm inclined to agree with them for the next three months.
6 notes
·
View notes
Text
youtube
#How To Assemble Perfect Teams and Lead Honestly | Clint Rusch How To Assemble Perfect Teams and Lead Honestly with Clint Rusch#award-winning business executive and a decorated US Army combat veteran who has led organizations and teams in a broad variety of sizes#maturity levels#functions#industries#and geographies.
He's built organizational cultures recognized as among the best in the United States#delivered first-rate results for his shareholders and partners#and has invested in the career development of his team members#paying forward his good fortune as a leader.
His values-focused#person-oriented#results-driven leadership style is the key to his success#and his belief in work-life integration fuels him every day.
leadership decisions hiring teambuilding kajmasterclass#Youtube
1 note
·
View note
Note
i was wondering if you could give some general tips for is3?
i have a decently developed account but i still cant manage to even get to the first boss every run, let alone beat it. like most runs in is2 i could at least beat Lucian but here i feel like im hitting a brick wall
I've prepared something special for this ask today.
We will be doing a full breakdown of a squad I've run with restrictions. It's a run I just completed as I'm typing this, so I can go over my thought process on both team building and path taking. I also won a run on my first try with the restrictions in place (in fact my IS3 winrate is actually much higher than my IS2 winrate at this point), so I'm fairly confident my strategies are sound. If the massive text scares you, don't worry. I'll also make a TL;DR version at the bottom.
My Three Restrictions:
Ch'en the Holungday, Gavial the Invincible, Mlynar, Kal'tsit, Texas the Omertosa, Pozyomka, Horn, Ling, Goldenglow, and Yato x Kirin are banned - This is a combination of both CN's usual ban list for IS3 competitions, as well as the latest ban list on Lungmen Dragon's latest IS3 competition for Global. This is to show that I don't need meta ops to win that proper teambuilding is what wins runs
Must be Wave 5 - This means the difficulty is low enough to still be considered "low level IS3", but high enough to have the +1 hope cost, +10 RES, and +15% ATK and DEF on all bosses
CANNOT pick People-Oriented Squad - This means I've got to deal with the big hope costs.
And here is my results screen


Now I know what you're thinking. "What the fuck Shutters, your run got the -2 hope costs for 4 stars, AND for 5 stars, AND the 6 stars! Carried by RNG!" While it is fucking hilarious I got all three Hope cost reduction relics when I was trying to starve myself of hope, be assured I didn't get 6 stars - 2 Hope until late Floor 4 where it was hardly relevant. i'd actually rather have gotten combat relics since I still had Hope leftover by the ending.
Let's get into teambuilding and decision-making.
I started this run with 8 Hope (got the pre-run bonus for +2 starting Hope), which let me recruit one 6 star at the very start (I always go with As You Wish so I can get a 4 star for free). In this case, the random shuffle I got was a 4 star Defender voucher, a Vanguard voucher, and a supporter voucher. My starting squad was Gummy, Ines, and Orchid.
In both IS2 and IS3, a usual strategy is to have one core 6 star operator carry you through the early game until you grab more vouchers. Ines is an incredible starting core in this difficulty, since she sees through Invis, is a fast redeploy, is a vanguard, can block enemies, and has enough damage in S2 to get you through Symbiosis in the worst case scenario. I'm actually surprised she isn't considered ban-worthy.
Your biggest threats in the first two floors are Symbiosis, Sniper Squad (if emergency), and Malady. Always, ALWAYS try to have one operator capable of blocking enemies on the ground. If you get all ranged vouchers, bring someone with a summon such as Beeswax if Caster (or Amiya then change to Guard Amiya), an Artificer for Supporters, or Totter (to kill invis) or Rosmontis for Snipers. If you get Emergency Sniper Squad and have no way of blocking or killing invisible units, you autolose. Malady wants you to have either two melee blockers, or one melee with a medic and some ranged damage. Symbiosis is the biggest threat — One unit has to be able to block, and you need strong DPS to cut through the horde. There's no shame in losing to Symbiosis, you either got the operators you need, or you autolose, so I always make a starting team assuming I'm gonna get Symbiosis.
I got lucky with a medic voucher and got Pith (who is so damn good), and on my next defender voucher I got Spot instead of upgrading Gummy. This is because I wanted to get two sources of melee block-3 ASAP since I was lacking in AOE, and Spot is one of the best 3 stars in IS thanks to being Block-3, tanky, having a heal, and evasion. He's worth the 1 hope.
Once you get ground units and a heal, hopefully by Floor 2, you want to start preparing for Floors 3-5. In this case, I got a Sniper voucher and immediately got Kroos the Keen Glint. I consider Kroos the strongest Sniper in IS3 just behind Pozy herself, because she has two traits any IS3 team needs: a source of stun/bind/freeze, and strong anti-air. The Stun/Bind/Freeze counters two gimmick enemies, UFOs (I forgot their real names but you know which ones) and the hated Nethersea Predators from Stulifera Navis. Both enemy types get countered by crowd control.
So by early Floor 3, I had Ines (promoted), Kroos the Keen Glint, Pith (promoted), Spot, and Gummy. At that point I had pretty much everything I needed to make a run to Floor 5 (to reiterate: one fast redeploy, several ground operators, good anti-air, at least one source of stun that can also hit air units), so I began grabbing operators that synergized with my collectibles. Hand of Pulverization meant Rosmontis, uh, pulverized everything, Gnosis was a second source of crowd control in case I got unlucky with Kroos' stun crit RNG (protip: In IS, getting two different kinds of operators who have overlapping roles will carry you deeper into runs since it gives you leeway to make mistakes), and I got Firewatch for that mix of AOE burst damage, invis if need be, and for her incredibly high damage against ranged enemies.
I got two cursed relics on the way. - light per battle, and all operators start with -15 SP. I always try to pick a path with Fortuitous Opportunity since you can trade cursed relics for good ones. Luckily, I had two such nodes, one in Floor 3 and one in Floor 4.
If operators get cursed (which can indeed be instant losses if it's a bad curse very early on and on your core operator), I go for the node that lets you send units out for supplies, it removes curses and promotes operators. At Wave 5 or below you always start with 100 Light, so it's possible to avoid instant loss curses by playing well in Floors 1-2 and not losing any lives (so even if you roll a 1 you don't get cursed)
While you can start freestyling team building once you have your important roles all assembled, I personally like grabbing counters to Floor 4/5 stages that have the biggest chances of ending my run. For this run in particular, these are
Lin, for Out of Control - This stage is one of the most terrifying no matter how experienced in IS3 you are, simply from the sheer amount of Possessed and Bonethrowers coming at you. Lin hard counters this, since with her module active, Bonethrowers cannot break her shield, giving you a tank that doesn't need medics.
Franka for Ubi Bona Somnia - Those spear-zombies from originium dust have 2000 DEF and 80 RES (90 at Wave 5), Franka is there to kill the one that spawns in this stage specifically.
Pompeii (Territorial Tendencies) - I didn't need to grab a counter for in case I met Pompeii since I already had Firewatch and a hand-powered Rosmontis, but if I didn't, it's always a good idea to grab an anti-Pompeii unit like Jaye.
Then once I got to Highmore it was a simple matter of knocking down Highmore with Gnosis' freeze, pulverizing Phase 1 with Rosmontis S3, knocking down Highmore again with Gnosis, then killing Phase 2 with Ines. If you're aiming for Last Knight or Ishar-mla, your team needs will be different of course!
So! I hope that helped you understand how to think about approaching an IS3 run, but in case none of that made any sense and I wasted 3 hours writing this, here's a TL;DR
What do I generally need?
Floor 1
Ground units because you need to block
DPS to counter Symbiosis specifically
Heals
Floors 2-3
Strong Anti-air (IS3 has a lot of flying enemies)
One fast redeploy like Agent Vanguards or Executor Specialists (effective in a vast majority of stages in IS3)
At least one source of Stun/Bind/Freeze that can hit aerial units (to deal with UFOs and Highmore that need to be knocked down, Nethersea Predators so they stop fucking dodging)
You may realize that Texas the Omertosa has all 3 of these qualities. This is why she's considered an automatic ban in all IS3 tournaments
Floors 4-5
Specific counters to the stages that kick your ass the most
Specific boss counters if necessary
Specific operator combos with your collectibles (for example Cutter + Any spinach type collectible)
92 notes
·
View notes
Text
At the request of the wonderful @realmadrider, here’s some of my comfort footy vids 😁 happy watching!
All things DFB and Bundesliga:
Bayern Summer Games 2022 (especially the Guess the Song challenge)
Agility Challenge • Kimmich vs. Goretzka (AKA Kimetzka being an old married couple for nearly 7 minutes)
Wer kennt mehr? Leon Goretzka & Joshua Kimmich
Stadt, Land, Fußball - Thomas Müller and Leon Goretzka
Thomats Challenge: Bundesliga Edition
The big FC Bayern quiz with Manuel Neuer and Sven Ulreich
Google Autocomplete Challenge with Serge Gnabry and Leon Goretzka
Servus, Leon Goretzka!
Leon Goretzka vs. Julian Brandt: Buzzwire Challenge
Bundesliga Stars Try to Draw Their Team Logos - Witsel, Goretzka, and Co.
Mats Hummels vs. Thomas Müller: Me or Him Challenge
Pro vs. Pro:Direct with Thomas Müller
Read My Lips: 🇩🇪 vs. 🇫🇷
Close-Up with Leon Goretzka
60 Seconds Challenge: 🇩🇪🆚🇫🇷
Neuer, Müller, and Lahm making fun of Kramer’s memory loss during the 2014 World Cup final
One gotta go with Marco Reus and Julian Brandt
Manuel Neuer and Bastian Schweinsteiger dancing on the beach
Don’t get distracted! With Julian Brandt and Marco Reus
Müller & Co. Decorating the Christmas Tree
Hummels & Brandt: Which of You…
FC Bayern Teammate Insights
Neuer, Martínez, and Hernández Carpool Q&A
EURO Taxi with Thomas Müller and Mats Hummels
Manuel Neuer vs. Thomas Müller
New Season, New Berni ft. Müller, Neuer, Sané, and Davies
So feiern die Bayern das Triple
Neuer, Piszczek & Co. Try to Draw - Who is the Best Artist
Take it easy | BVB-Challenge with Marco Reus and Julian Brandt
Kimmich vs. Gnabry | Copy the Penalty Challenge
Chunkz vs. Neuer | YouTuber vs. Pro Keeper Penalty Shoot Out Challenge
Manuel Neuer im Interview
Who am I? BVB-Challenge with Mats Hummels and Marcel Schmelzer
Manu lifting up a jar of Nutella like it’s Simba
DFB Nutella Commercial
Will Grigg’s on fire! Is Mats Hummels terrified?
Bayern Summer Games 2021
Thomats Christmas Challenge
Serge Gnabry: Unlocked feat. Yung Filly
Who knows more? Marco Reus vs. Mario Götze - 2018 edition
Who knows more? Marco Reus vs. Mario Götze - 2019 revenge
Netradio Newcomer with Marco Reus and Julian Brandt
Best of Radio Müller
Thomats dieses Mal olympisch - eng subs
Don’t get distracted! With Mats Hummels and Marcel Schmelzer
Cow-Milking and Welly-Throwing | Team-Building Fun at FC Bayern
Shell Game w/ Manuel Neuer
Pantomime w/ Manuel Neuer
Drawing w/ Manuel Neuer
Marco Reus vs. Mats Hummels - Buzz Wire Challenge
Manuel Neuer reveals the results of his doping test (spoiler alert: it was urine)
Thomats Basketball Challenge
Thomas Müller “JAAA” compilation
A Spanish Lesson for Neuer with Thiago - Repeat after Me Challenge
Fußball-Dart: Goretzka gegen Burgstaller
You Have to Answer - Marco Reus
Bayern Team Photo Vlog
Who knows more 2.0: Brandt vs. Hummels
Thomats Tangram Challenge
FC Bayern wish you a Merry Christmas
Mario Götze’s Most Famous Picture
Mats Hummels pranks Gio Reyna
DFB Water Polo Teambuilding
Erling Haaland being a funny guy for 3 minutes straight
Bromance: Manuel Neuer & Leon Goretzka
Manuel Neuer, Per Mertesacke, & Arne Friedrich - Sky ad
Neustädter vs. Reus
Literally anything else:
50 most shocking moments of the 2010 World Cup
Jose Mourinho explains football to a baffled Ted Lasso
Timo Werner being the funniest German for 2 minutes (because he’s an adorable bean)
Lingard and Rashford | Roommates
Ney…freezin innit
Wingmen: Bruno Fernandes and Jesse Lingard
Manchester United x Stone Roses
I am Jose Mourinho 😎
Sergio Ramos drops the Supercopa under the bus
Marcelo, Bale, Ramos, & Co. joking around on a plane because why not
Lies | Toni Kroos & David Alaba
Kroos & Modrić | Teammates
Toni Kroos’s fantastic interview after RMA beat Liverpool in the UCL final
Luka Modrić taunting Gerard Piqué like the girlboss he is
Real Madrid x NFL with a heavy dose of Modramos
Roy Keane’s angriest moments discussing Manchester United - very validating as a United fan in the modern era tbh 😭
THE Kunessi stream - eng subs (55 minutes in all its glory)
When Kun met Leo
Kun calling Leo on stream
Sergio Agüero interviews Lionel Messi
Honestly every episode of the Champions
#I’m sure there’s some I’ve missed#but these are all the ones I could think at the moment#I tried to stick with vids that are related to football in some way…not just vids of the footballers if that makes sense#I’m not gonna tag everything cuz I’ll be here all day#so I’ll tag the main ones instead#leon goretzka#manuel neuer#mats hummels#thomas müller#fc bayern#fc bayern munich#fc bayern münchen#borussia dortmund#bvb#bvb09#die mannschaft#dfb team#german nt#germany nt#compilations
24 notes
·
View notes
Text
the thing with teambuilding in heroes that's hard right now is that like. the only strategy i know is BIG MOBILITY BIG ATTACK NUMBERS. my primary team is four high attack cav units, two of whom are chroms with their fancy reposition-then-move-again assist skills, and my aim with every map is to either A) stampede in and murder everyone in two turns maximum, or B) nuke a guy and run out of enemy range until the map is cleared.
and to be fair this DOES work most of the time. the chroms + freds are all hard hitters, and they've gotten me thru most story content and a fair amount of other maps like champions.
but also that is my One And Only Trick. so if they end up dying, say, in tempest trials; or if i ever want to actually go try squad assault maps that force you to use like 5 different teams; i have no fucking clue what to do. i have no back up strats. the best i can do is "sort heroes by rating, pick one of each colour, pray"
eventually i'll look up information about proper team composition, figure out some good builds for some of my older units i'm attached to, all that jazz... but hoogh does reading things about this game ever tire me out fast. the way they write skill descriptions is so unnecessarily complex.
5 notes
·
View notes
Text
Ok last 'the gang is working at Goddard now' post from discord before I call it a night, assuming tumblr will let me post this one
Kat
only loosely related, but although the Hephaestus doesn't have a CAPCOM (too far away) I wonder if closer low Earth orbit Goddard installations have one and if they, like NASA CAPCOMs, are all former astronauts.
Probably not, I would think, since if you've got 1 person filtering all communication you'd probably want it to be one of Cutter's more… informed people.
now imagining Jordan doing a CAPCOM stint since she's comms
Jordan: What, you say the hull isn't damaged but you were hit by something. Was it round? Perhaps…. melon-shaped?
Klein who's up doing a satellite launch from a station or whatever: I'll kill you
Gill
Klein’s just never gonna live that down huh
Kat
unfortunately he literally didn't
Gill
Rip
Kate
: ) but also :’ (
Also remind me what CAPCOM means because I’m like “the video game company?”
Gill
Concept: the Hephaestus crew doing a shift or two on CAPCOM to unwind after a long day of dismantling Goddard Futuristics from the inside out
Kat
capsule communicator
basically they're the single line of communication between astronauts and the ground, to streamline stuff
and they're usually astronauts because they know what the crew is doing more personally
"In the context of potential crewed missions to Mars, NASA Ames Research Center has conducted field trials of advanced computer-support for astronaut and remote science teams, to test the possibilities for automating CAPCOM."
hm. Maybe Goddard has AI capcoms
Gill
The Sensus series’ predecessor line, perhaps
Kat
Some poor asshole on a low orbit station: We've got an ammonia leak
Automated CAPCOM: Please choose from the following options. Press 1 for a personnel issue. Press 2 for a maintenance issue
Astronaut: We're dying
Kate
Pfff
Kat
someone: we've got some crew hostility in one of the low orbit stations
Minkowski: Put Eiffel on CAPCOM for a few days. Either they'll calm down or they'll unite in being annoyed by him instead. Win win
Kate
Their secret weapon
Gill
Minkowski likes doing CAPCOM to unwind but Lovelace finds it stressful bc she’s way worse about being a backseat driver
Kat
Minkowski: Finally normal simple problems to solve.
It is usually a pretty simple, boring job.
Until something goes wrong
Gill
meanwhile, Lovelace: What do you MEAN you've never had to duct-tape a water reclamation system back together??
Kat
Haha yeah. Former astronaut capcoms have creative solutions
LEO crew who can get new supplies shipped up basically whenever: We could just… trash this broken part and order a replacement
Lovelace: Why when you can mcgyver this solution with only moderate risk to life and limb
Gill
the Hephaestus Mission and the crew themselves gain such a reputation that when the rumors start circulating that Minkowski got her current job by killing Marcus Cutter ("and did you ever meet Marcus Cutter?") half the company is lowkey terrified of her
Kate
“Ohhh look at YOU with your cushy life, you can just order a NEW part. Back in MY day my boss came up there personally with a gun and shot at us”
Kat
Haha
It’s a very different life being right next to earth
easy mode
Gill
LEO crewmember whispering to another one while their commander is on the phone: God, I hope we don't have to go through a teambuilding exercise run by Isabel Lovelace…
Kat
Although I suppose it makes it even easier for cutter to send goons up to harass you
Kate
True…
“Hey, can we have a new part?”
“No, but you can have Victor Riemann! Have fun!”
Gill
Alternatively:
"Uh… we think we need a new part… ma'am."
Minkowski: …okay? Let me get the word out to the supply team.
"You're… not gonna send Warren Kepler and his minions with them like Mr. Cutter used to, are you?"
Minkowski: What? No. Most of them didn't even come back from Wolf 359.
"/sighs and other noises of audible relief, oh thank god!"
Kat
now imagining SI5 showing up for no goddamn reason on a resupply shuttle and the mission commander being like "i didn't order you" and closing the hatch
crewmember: don't those burn up on re-entry
commander: not my problem
Gill
Telling command you need help? Admitting human weakness? That's a Kepler-ing.
Kat
Yeah well does it admit human weakness to have to be let onto the station before you burn up with all the dirty laundry and other garbage when the capsule gets sent back thru the atmosphere
Eiffel hearing about life on LEO stations: I can't believe this. They got new underwear sent up to them
though it's a dangerous game… .Terry Virts had two consecutive underwear shipments explode
thanks space x
Cutter: The Andromeda station's psych evals are too far in the green. Blow up their next three laundry shipments.
10 notes
·
View notes
Text
Limbus Orientation #1: Gregor Extraction


G Corp Manager Gregor | LANTERN (Teth)
Welcome to this impromptu series where I, your host, discuss Limbus Company units: what they do, how they work, and when and why you should use them. Today, we're going to discuss whether or not you should pull on Gregor's debut banner.
What does G Corp Gregor do?
Actively, at III Tie, he's a 3 Gluttony, 2 Sloth, 1 Lust character. This is incredible, and we'll get to why later.
His skills are as such:

If you haven't noticed, that's a a lot of healing. While his base HP is quite low, you'll barely notice it because whenever he's winning clashes, he'll be healing up a storm and staying close to full all the time.
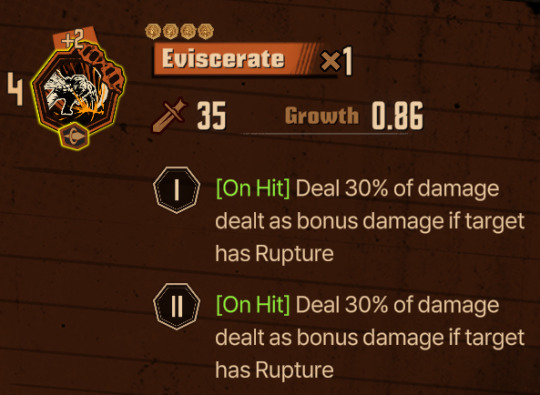
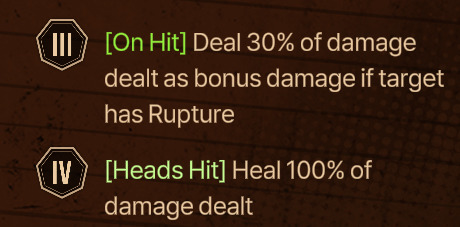
His final skill: Eviscerate, hits a stellar four times, with 100% healing off the damage. If he can pounce on a staggered enemy, they are dying and he is healing to full. It's also Lust, which I have found a difficult Sin to field in my own teambuilding.

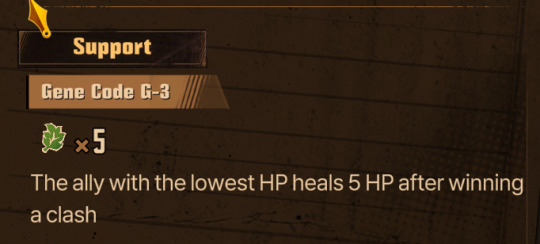
Passively, Gregor's healing doesn't stop there. Chaining 2 Gluttony is incredibly easy when he has three to work with on his own, and gets even easier with teammates with Gluttony skills. While only procing when a character is low on HP, when the situation is dire you'll appreciate it. Off field, if you can get 5 Gluttony all together, healing 5 HP doesn't sound like a lot: but in longform content like dungeons, the extra survivability can make a ton of difference. It's a Win-More support: it helps you heal back scratch damage as your team dives.
Why is all of this stellar? Because of Lantern.
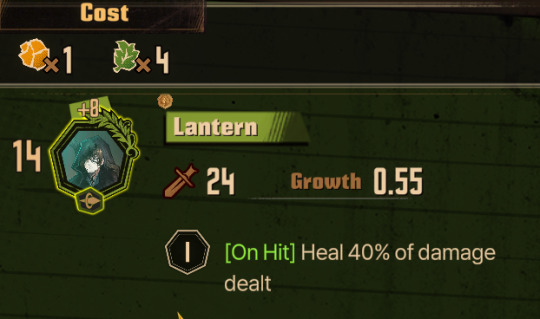
At base, this is a simple clash winner. And it is. But the additional 40% healing can make Gregor nigh-invincible in longer encounters. He can provide everything for himself quite easily: a single teammate having one Gluttony card is enough, and having teammates with their own Sloth and Gluttony allows this to be chained consistently, turn after turn. How can you kill a guy who heals his entire health bar every turn?
So. How do we make this happen? G-Gregor thrives with a team supporting him to do the big damage and big healing. He only has one Eviscerate, so it needs to count.
Unsurprising to anyone who paid an ounce of attention to the plot, Base Rodya is one of G-Gregor's best pairings. With three Gluttony cards in her kit and bleed on everything, Rodya helps make the stalling potential of G-Gregor more viable, giving indirect damage to foes while also having stellar Base HP.
If you're lucky enough to have him, Blade Lineage Sinclair pairs perfectly with G-Gregor. Both Lantern and Sinclair's Tree of Knowledge use Sloth and Gluttony, and Blade-Sinclair has 3 Gluttony of his own to add to the party, making G-Resonance a breeze.
So then, where's the Sloth? We need some yellow-orange to make this happen. The easiest answer is Base Outis, who has three in her kit from the jump. To Pathos Mathos also uses Pride and Sloth, allowing her and Rodya's Pride to not go to waste, and enabling a more flexible fifth slot. You could run plenty of characters alongside, but Base Faust patches most holes. She has Sloth, Gluttony and Pride in her base kit, and Representation Emitter is a Gluttony and Pride EGO that hits multiple targets like a train and restores Sanity, making her a godsend in big boss fights like Doomsday Clock.
29 notes
·
View notes
Text
Fun Fact: I've been playing this game for about 3-4 years and I've never bothered to properly learn how to play it. I have no idea what these stats mean or how to teambuild and I REFUSE to learn. I'm being willfully ignorant. I only know that certain units suck dick because I learned it without my consent. Big number good and that's all that matters.
70 notes
·
View notes
Text
Magnezone for Pokemon Unite!


Season 1
Season 2
Prev: Cradily - Hatterene - Tropius - Cacturne - Ditto - Weavile - Ogerpon - Coalossal - Gogoat - Galarian Slowbro - Luxray - Breloom - Uxie, Mesprit, & Azelf - Wobbuffet - Obstagoon - Lanturn - Castform - Dusknoir - Persian - Tatsugiri & Dondozo
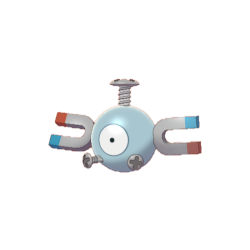
Ah, Magnezone, one of my favorite new evolutions from Gen 4, having evolved from the quirky Magneton which ironically makes it the honorary Steel Type of Gen 1, before the typing existed. What a lovely pokemon with such a convoluted history, despite it's awkward magnet designs, I will always be there for Magnezone, much like how it will always be there for me.
Seriously, this thing is one of my go-to's for teambuilding, especially for Trick Room teams. It's so easy to use, I've grown fond of it. Maybe that's why I'm attracted to the idea of Magnezone for Pokemon Unite, and I'm not just saying that because of the metal implants in my body.
Of which there are none. I'm being facetious.
-

Well, onto the stats, and would you look at that. There's a reason I never hesitated to put a Magnezone on my teams. Extremely high Sp. Attack coupled with high Defense makes the magnet monster bulky enough to take hits and dish them back. The rest of its stats are serviceable, particularly the Sp. Defense is decent enough that Magnezone's bulk is only held back by its below average HP.
While it may appear to have the makings of a Defender, Magnezone is often specialized in taking on specific threats that hinder the entire team. Remember how effective it used to be at trapping opposing Steel Types and removing them from the equation? I mean, it still is, you just gotta watch out for Terastilization. Outside of that, it's hyper focused in a sense that it lacks any other optimizations, and as such it doesn't have many options in sustaining itself. Lack of recovery greatly hinders its walling capabilities, but as long as it eliminates the target, it will have done its job. Yes, this is one of those pokemon that desperately needs support from Supporters and Bulky All-Rounders. What does that make Magnezone? A...
Defender
-
Basic Attack - Ranged/Sp. Attack
The user generates a magnetic field around itself, slowly damaging all enemies within range. After dealing a certain amount of damage, affected enemies will be stunned and pulled towards the user.
The basic attack damages all enemies within range of the user. As damage is dealt, a magnet icon graphic appears over affected enemies that slowly fills. The magnet icon fills in when 15% of the opposing pokemon's HP is lost through the basic attack. When this happens, affected pokemon are Pulled a short distance towards the user.
The magnet icon disappears when the affected enemy is Pulled or leaves the range of the basic attack, or if the basic attack ends from releasing the attack button or when the attack is stopped forcefully through a hindrance. If it disappears from activating the Pull effect, the magnet icon will not reappear until the basic attack ends and restarts.
The magnet icon doesn't deplete if the target restores HP. The mark keeps track of how much HP the target has lost.
Now, the thing about magnets is that they're always on. You ever put a magnet in a small cup of honey, sprinkled in some metal fillings, and watched the particles slowly pull towards the nodes? I mean, aside from having made the world's worst snack, it's pretty fascinating to observe.
In Pokemon Unite, this is how Magnezone and its evolutions attack, by constantly filling the space around it with powerful electric currents. It deals weak damage, but the effect is powerful. If an enemy lingers in the area of effect for too long, they'll get magnetized and will be forcefully dragged towards the user. It's not a very strong pull, but if you coordinate with an ally, you can score some easy KO's this way.
Of course, once the magnetization takes effect, you have to wait for it to become active again. You can't magnetize an enemy multiple times, not unless you turn off the basic attack or let them leave the area of effect. Speaking of which, since you are holding the basic attack button to magnetize opposing pokemon, one disruptive hindrance is all it'll take to stop the magnet waves from taking hold. And there are some opposing pokemon you don't want to pull in, like Bulky All-Rounders. Remember what I said about Magnezone's lack of sustainability? Yeah, that'll become apparent much later on.
For now, work with your allies to make the most of your magnetization skills. You can improve your magnetism with your ability, Magnet Pull.
-
Ability: Magnet Pull
The user's Pull effects are strengthened the more Aeos orbs you have in your Score Pocket. Aeos Orbs on the ground are collected from further away.
Each Aeos Orb in your Score Pocket adds 1% to the power of your Pull effects. This maxes out to 30% from Level 1 to Level 7, 40% from Level 8 through Level 11, and 50% from Level 12 onwards.
This Pull strength multiplier is based on the power of the pull effect, not the distance. Otherwise, it might be possible to Pull an enemy all the way out of their Home Base after they escape into Hoopa's Hyperspace Hole.
Stray Aeos Orbs on the ground are drawn in to you from further away than normal. You will only attract stray Aeos Orbs if you have the space for them in your Score Pocket.
This ability affects only your own Score Pocket, and not the combined Score Pocket of you and an ally Comfey or other future effects.
There are weak magnets, and then there are strong magnets. And then there are really strong magnets, the kinds they use to pick up scrap in a junkyard, like a floating saucer. Hey, that's just like Magnezone!
Magnet Pull powers up your Pull effects by 1% for each Aeos Orb in your Score Pocket. This means that the boost is limited by the size of the Score Pocket, and the only way to increase it is to Level Up during the match. Now, that's easy enough, but when you make a score, you go back down to 0, which can cause moments of bad timing if you score during a hotly contested fight around a Goal Zone. Can't really pull anything without any power, huh?
Thankfully, Magnet Pull has a secondary effect of pulling in Aeos Orbs from further away than other pokemon. You ever find it tedious to manually walk over all the stray Aeos Orbs on the ground to collect them? Well, thanks to Magnezone's magnetic personality, you can just suck them all up like a hungry vacuum just by being nearby. It only works on the points you have space for, so don't forget to make a score with all those points you have.
One other thing to note is that, since it only pulls in Aeos Orbs, dummy Aeos Orbs thrown by Sableye's Feint Attack will be ignored, so that's a handy way of foiling that foolish folly.
Now, you'd think there are no downsides to this ability, and for the most part, there isn't. It's just that, Magnezone has some really strong moves with Pull effects that instantly become weaker if you were to score them all. It might be worth it to hold on to a full Pocket of Aeos Orbs for defending purposes, but don't forget to actually make goals when you need to.
It's a good thing we know how magnets work, in spite of the lack of knowledge in this field of science, nor the insistence of such ignorance.
-
At the start of the game, Magnezone will start out as Magnemite. You can choose between Magnet Bomb and Thunder Shock as your first move. By Level 3, you'll have learned both.
-
Move 1: Magnet Bomb (Ranged/Hindrance)
The user launches metal orbs that fly and stick to any enemy in range. Afterwards, the orbs explode, Pulling affected enemies towards the user. 8s cooldown.
Little metal orb projectiles are shot forward in a conical shape, sticking to enemies within range. This effect is purely visual, as even one hit will cover an enemy with the magnetically charged beads.
After 1.5 seconds, the beads spark and explode, Stunning for 0.25 seconds and Pulling the affected enemies a very short distance towards the user. The distance Pulled is lengthened by Magnet Pull.
I will never not be mad about moves that get cut in between generations, no matter how useless they may have been. I mean, a Steel Type move that never misses? How novel! It's just too bad that the signature user is a Sp. Attacker and that Move was decidedly Physical for whatever reason.
Well, we can remedy this injustice by turning it into an actually useful move in Pokemon Unite. Magnet Bomb is a short ranged move that causes little magnetically charged beads to stick to whatever it hits. The beads explode a short while later, causing Stun and Pulling the affected enemy towards the user. At the beginning of the game, this won't be all that strong of an effect, unless you diligently stockpile Aeos Orbs in order to maximize the Pull power of this move.
The short delay makes the move tricky to use, since opposing pokemon can easily just Dash away from you in order to minimize the impact of the Pull effect. You do threaten big damage, though, when Magnet Bomb is combined with your other move, Thunder shock.
-
Move 2: Thunder Shock (Area)
The user unleashes a bolt of electricity all around itself. The closer enemies are, the more damage is dealt. 6s cooldown.
Electricity is launched all around the user, damaging all enemies nearby.
The damage is multiplied the closer opposing pokemon are to the user. At the edge of the attack, the multiplier is 0.75x. Halfway it is 2.25x. Right next to the user, it becomes 4.5x increased damage.
With both your basic attack and Magnet Bomb being able to Pull enemies in, Thunder Shock is the coup de grace when the opposing pokemon is close enough. It deals pretty solid damage thanks to a proximity multiplier, which is intended to make up for Magnemite's lack longevity in a fight.
The idea is that you target a troublesome enemy like a frail Attacker, pull them in with your effects, then finish them off with Thunder Shock before they can escape. It's a solid plan, especially since ranged Attackers like to keep their distance in the first place. If an enemy Attacker is coming out of Central Area and into your Lane, you and your allies can amass a lot of EXP by coordinating a KO with your Pull effects.
And you're going to need to work together, since Magnemite is a bit of a late bloomer for a Defender.
-

At Level 4, Magnemite evolves into Magneton.
Since they make Magnemite hold a camera for these Unite Battles, do you think they ever get Magneton in on it? I mean, 3D Movies are a thing, and the multiple perspectives would make for a trippy viewing experience.
Yeah, I'm glossing over this section since Magneton evolves early, but you don't reach your full potential until Level 7, when you fully evolve into Magnezone.

At Level 7, Magneton will evolve into Magnezone. At the same time, Magnet Bomb becomes either Magnet Rise or Magnetic Flux.
-
Move 1a: Magnet Rise (Buff/Hindrance)
The user begins floating with electromagnetism, making it immune to damage and effects for a short while. At the same time, a blast of magnetically charged electricity is unleashed around the user, charging all enemies nearby. When the user crashes down, all charged enemies will be damaged and pulled towards the user. 9.5s cooldown.
At Level 12, Magnet Rise becomes Magnet Rise+.
Expands the area of effect.
A short ranged wave of electromagnetism is unleashed all around the user, marking affected enemies with a lightning bolt icon. Magnet Rise+ expands the range of this burst by 50%.
When the user floats into the air, it is completely invincible, similar to Talonflame's Fly, though it is clearly visible. It becomes capable of floating over walls and obstacles and ignores all field effects, whether they be friendly or from foes. Tall Grass also doesn't hide you anymore. This effect lasts only for 1.5 seconds.
When Magnet Rise ends, the user crashes down with a heavy thud, damaging enemies nearby. Those marked with the bolt icon will also be damaged, even if they weren't nearby, and will be Pulled towards the user a short distance. An arrow line is drawn on the ground between the marked enemies and the user, showing where the direction of the Pull effect is. Magnet Pull can increase this Pull strength.
Magnet Rise cannot Pull enemies through walls.
Apologies to Orbeetle, but Magnezone was the first flying saucer pokemon, what with its powerful magnetic tractor beam grabbing things from the earth and pulling them towards it. Don't be surprised that it floats just like a flying saucer as well. And yet, for some reason, it can't have the Levitate Ability...
Anyways, Magnezone is heavy, like ridiculously heavy. So much so, that when it turns on its magnetic powers to fly, the magnetic waves are powerful enough to fry you if you're standing too close to it. That's what happens to nearby enemies when Magnet Rise is used, as it marks them with a quaint little lightning bolt icon.
Now, while Magnezone is flying, it is completely immune to all effects, negative and positive. Yeah, it's immune to damage even, but allies can't affect it with buffs or healing moves either, just like Cinderace's Feint. Magnet Rise only makes you invulnerable for a short while just as well, only you come crashing down with a heavy thud.
The charged enemies you hit with the jump get their polarities reversed when this happens. What this means is, that those marked by Magnet Rise will suddenly get pulled towards Magnezone when it comes down, wherever that happens to be. Magnezone is only in the air for a very short amount of time, so it's not likely you'll get a lot of distance between you and the enemy.
However, it is a Pull effect, which gets strengthened by Magnet Pull, and it is a delayed Pull effect at that. If the enemy gets caught, they can expect to be pulled in the direction you're moving towards, which can be coordinated with your allies. There's a whole electric current drawn on the ground to illustrate this effect, so its their own fault if they let themselves get pulled like dumb little fish on a fishing line.
The invincibility effect is very useful too, as Magnezone lacks any way to heal or empower itself. However, this invulnerability means that you can't pull off any silly tricks like diving into Hoopa's Hyperspace Hole when it opens, since you are immune to all effects, harmful or helpful. You can't even hide in Tall Grass while floating. Being able to avoid Unite Moves is pretty nifty though, but the cooldown of the move means it'll be an extensive wait time if you miss the timing.
Plus, you're depending on a full Score Pocket to power up the Pull effects of Magnet Rise. You really need those Aeos Orbs. It's just too bad that you can't really steal them from opposing pokemon by magnetizing the orbs right out of their Score Pocket.
Or can you?
-
Move 1b: Magnetic Flux (Ranged/Hindrance)
The user fires a beam of magnetically charged electricity forward, damaging all enemies in range. The affected enemies will have their Aeos Orbs taken and added to the user's Score Pocket. When the move ends, the enemies will be pulled towards the user. The user receives reduced damage and the affected opposing pokemon deal less damage to the user while Magnetic Flux is in use. 9.5s cooldown.
At Level 12, Magnetic Flux becomes Magnetic Flux+.
Expands the range of the magnet beam and increases the damage reducing effects.
A magnetic electro beam is launched forward in a conical shape, burning enemies within range with charged radio waves. Magnetic Flux+ expands the range of this beam by 40%. Magnezone can move while using Magnetic Flux, though the direction will maintain constant.
All enemies within range of the beam will have their Aeos Orbs taken from their Score Pocket and added to the users at a rate of 2 Points per second. If the user doesn't have room in their Score Pocket, the excess is left behind on the ground. This doesn't affect Wild Pokemon.
The user receives 15% less damage from opposing attacks and opposing pokemon affected by the magnet beam deal 15% less damage to the user while within the area of effect. Magnetic Flux+ increases both of these effects to 25% each. These effects stack.
Magnetic Flux lasts for 5 seconds or until the attack is cancelled, manually or from a hindrance. When the attack ends, all opposing pokemon within range will be Pulled a short distance towards the user.
Magnezone's third eye, the big red circle in the middle of its face, is fully functional, despite the fact that it doesn't blink. That's because it's specialized to perceive magnetic waves and other strange wavelengths flying about in our world. Oh, and also because it shoots laser beams from it.
While Magnetic Flux is a passive status move, I've turned it into a sneaky little attack. Also, Magnetic Flux can only be learned by Magnezone, not Magneton, which is why Magnezone starts learning its moves at this Level and not at Level 5 as a Magneton.
Anyway, the magnetic waves launched out of Magnezone's eye magnetize the Aeos Orbs in the Score Pockets of opposing pokemon within range. What this does is that the loose change slips out of their pocket and floats into Magnezone's own deep coffers, completely of its own volition. It's not a lot of points passively, but any amount of points getting stolen is sure to illicit a violent response by the opposing team.
Normally Magnet Pull drags in stray points off the ground and towards you, but if there are none nearby, you can 'borrow' some from nearby enemies. It's too bad you get this move at Level 7 and not the early game, where it becomes much more lucrative to score and power up stacking items like Aeos Cookie.
Now, the move only runs for 5 seconds, but during that time, you get a small defense boost, reducing the damage you receive while the move is active. Those in range of Magnetic Flux will also have their damage output reduced, and these two effects can overlap, meaning that Magnezone gets a 30% total damage reduction from those it is directly harming with Magnetic Flux. That's enough to stifle most burst damage attacks coming your way. When upgraded to Magnetic Flux+, it comes out to 50% damage reduction, thwarting nearly all burst damage aimed at the giant magnet.
When the move ends, all opposing pokemon getting zapped by the beam will then get pulled towards the user. Because you are stealing Aeos Orbs, Magnet Pull will slowly increase in power. Magnetic Flux runs for 5 seconds, which totals 10 Aeos Orbs taken from each pokemon within range. More pokemon hit by the beam means more points taken, but that does naturally contribute to the risk of trying to affect the entire enemy team with this move.
While the defense boost is very nice, you can manually end the move early by using the attack a second time. Whether it ends from getting interrupted or the time has run out, Magnetic Flux pulls pokemon in when it goes away. Maybe a particularly twitchy enemy is liable to make a run for it to escape from your tractor beam. In that case, the defense boost of Magnetic Flux won't be all that useful to you since the enemy is choosing to flee instead of fight, so Pulling them in as soon as the beam hits is a great way to finish them off.
Just one thing to note. Magnetic Flux deals damage, but it doesn't hinder the enemy until it ends. You get a defense boost while using the move, but those outside of the beam's range can continue to pelt you with long range attacks like Decidueye or Inteleon, as they won't have to worry about the damage debuff. Speaking of which, hindrance resistance effects like Full Heal or Blissey's Safeguard can snub the damage reduction effects of Magnetic Flux, as well as the Pull effect if they time it right.
There's also the fact that, at this stage, your only other move is Thunder Shock, a pitifully weak move at your power level. Not to worry, as just one level later, you'll replace it with a much more impactful attack like Discharge or Flash Cannon.
-
At Level 8, Thunder Shock will become either Discharge or Flash Cannon.
-
Move 2a: Discharge (Area)
The user builds up a massive surge of electricity before unleashing it all around itself, Stunning nearby enemies. The closer they are, the more damage they receive. Affected opposing pokemon are more vulnerable to the Pull effect of your basic attack. 5.5s cooldown.
At Level 13, Discharge becomes Discharge+.
Decreases the charge time for the move.
Opposing pokemon are Stunned for 0.75 seconds when hit by Discharge.
The damage multiplies the closer they are to Magnezone, just like with Thunder Shock. The damage multiplier maxes out to 5.5x.
For 4 seconds afterwards, opposing pokemon receive a 150% stronger Pull effect from your basic attack. This stacks with Magnet Pull.
It takes Discharge 1.5 seconds to come out, causing the user the crackle with electricity right before it is unleashed. Discharge+ reduces this charge time to 0.75 seconds.
As a direct upgrade to Thunder Shock, Discharge has Magnezone let loose a powerful volley of lightning bolts all around itself. Not only does it hit hard, it also Stuns the enemy briefly, since electric attacks have a tendency to paralyze opposing pokemon that get hit.
It's not completely free to use, though, as Discharge has a short windup to it. It takes an entire second and a half for Discharge to come out when you use it, giving the opposing team plenty of time to try and dash away from your violent volt surges. Now, I would argue that limiting the space the enemy can play in is one of the defining traits of a Defender, as a direct hit can deal massive damage to slower enemies.
Just like Thunder Shock, Discharge has a proximity multiplier that increases the damage dealt to enemies too close for comfort. If they get hit at the edge of the attack, Discharge won't deal a whole lot of damage. In fact, it'll hit for a lot less than normal to those it just barely managed to graze. If opposing pokemon are shoulder to shoulder with Magnezone, however, Discharge will deliver a massive 5.5x damage multiplier to those directly nearby, potentially electrocuting frail Attackers and Speedsters.
Now, a powerful move like this would have some drawbacks, such as the charge time before the move comes out. However, Magnezone lacks the ability to empower itself with healing or shields, so it's putting itself at risk trying to maximize the damage of Discharge. As such, Discharge has a shockingly low cooldown of 5.5 seconds, which makes it ridiculously free to use at any point during a fight. Pokemon that lack sustainability need these sort of crazy cooldowns in order to be threatening to the opposing team as a Defender.
One last thing to note. The residual electricity of Discharge makes it so that your basic attack's Pull effect become much stronger, even if the attack just barely clipped them. If the move didn't successfully KO the opposing pokemon, you can have easier time Pulling the affected enemy towards you and your team with your followup attack.
Of course, you do need to coordinate with your allies to get this done.
-
Move 2b: Flash Cannon (Area)
Let loose a brilliant light all around you, damaging enemies and makes it easier to Pull enemies with your basic attack. The closer they are, the greater the damage increase. 6s cooldown.
At Level 13, Flash Cannon becomes Flash Cannon+.
Movement Speed increases while Flash Cannon+ is active.
Flash Cannon scatters light particles around Magnezone that damage nearby enemies continuously for 5 seconds. The damage dealt increases the closer they are to the user. The damage multiplier maxes out to 4.75x.
The cooldown of Flash Cannon kicks in when the move ends.
While Flash Cannon is active, the basic attack only needs to fill in 10% of the magnet icon in order to Pull opposing pokemon closer.
Flash Cannon+ increases your Movement Speed by 25% while in use.
You ever wonder why Flash Cannon is a Steel type move? Because Steel types manipulate the light refracting off of their polished metal exteriors and focus it into an attack. I mean, that doesn't explain why the non-Steel types are able to use it, but at least it gives pokemon like Magnezone some way to deal Sp. Attack damage with their Same Type Attack Boost.
While Discharge lets loose a big wave of dangerous electricity all around itself, Flash Cannon is a bit weaker in exchange for consistency. It will deal small amounts of damage passively all around itself, which it will continue to do for 5 seconds. It can't even get stifled by hindrances, which is a weakness of Discharge if opposing pokemon are good at timing their attacks.
It also has a proximity multiplier, just like Discharge, though the maximum damage output is a bit weaker. Being able to deal continuous damage is effective, but it can be too weak when engaging opposing pokemon, as it may not deal enough damage to threaten them. It lets Magnezone float up to Wild Pokemon and get the last hit on objectives more often than not, so it's up to opposing Defenders to keep the area safe from this chromatic creature.
Since Flash Cannon is active at all times, it means that you can use other effects while the move is running. If you really want to abuse the proximity multiplier to its full effect, you should use Magnet Rise or Magnetic Flux while Flash Cannon is running to Pull the enemy closer towards you. Flash Cannon also makes the basic attack have an easier time of Pulling enemies inward, requiring only 10% damage to fill in the mark as opposed to 15%.
All these potential effects combined make Flash Cannon a very solid move with no downsides, though the low damage rate may be a deal-breaker for some players. It lacks the immediately threatening power of Discharge in exchange for passive safety, so it's up to you on how you employ Magnezone's defensive capabilities.
Admittedly, it is dangerous to always be pulling enemies towards you in order to Defend the team. Luckily, you have one final gambit to use to fulfill your true potential as a Defender.
-
Unite Move: Polarity Swing
Launches an oversized magnet at the designated area. The magnet damages and pulls enemies inward, dealing more damaging the closer they are. Any Stun effects applied to enemies in range will strengthen the Pull effect. The magnet’s pull effect out-prioritizes your own.
The giant magnet damages enemies on hit, but it doesn't behave as an obstacle. It starts generating powerful magnet waves that damages enemies over time slowly in a large area around it. The damage dealt multiplies the closer they are to the center, maxing out to 7.5x.
While dealing damage, opposing pokemon are constantly being Pulled towards it. However, the Pull effect is very weak and can easily be moved away from. Magnet Pull strengthens the Pull effect.
If affected opposing pokemon are incapacitated by a Stun Effect, the Pull Effect increases drastically, more than tripling in power. This will only remain in effect while the affected opposing pokemon are Stunned.
Your own Pull effects stop working while within the area of effect.
Wild Pokemon are unaffected by Polarity Swing's Pull effect.
Polarity Swing lasts for 8 seconds.
When Magneton evolves into Magnezone, it goes from 6 horseshoe magnets to 3, so where did the other 3 go? Well, it turns out that these parts got disassembled into magnetic sand and float in the air around Magnezone, so that whenever it needs a big fat magnet to start pulling things into it like a localized black hole, it can just reconstitute it and throw it onto the ground. Please note that I am not a pokemon professor and that this is purely hypothetical, as I really don't know where that magnet came from.
Polarity Swing immediately starts generating a gravitational field all around itself, pulling in enemies on the opposing team towards the giant magnet wherever it was thrown. This pull effect can be increased with a full Score Pocket thanks to Magnet Pull, but it's still pretty easy for opposing pokemon to dash away from the magnetic field with moves. They are also just as easily capable of walking away, as the Pull effect doesn't stop them from moving.
The true power of Polarity Swing comes in its opportunistic behavior. While opposing pokemon are perfectly capable of walking away and out of the pull range, the Pull effect boosts dramatically if they are Stunned from any move, whether it be yours or your allies. This means that any Stunned enemy will be suddenly pulled towards the center of Polarity Swing, which can aid in defense, offense, or positioning for your team. Oh, and did I forget to mention that Polarity Swing is dealing damage continuously in its area of effect?
Just like with Discharge and Flash Cannon, Polarity Swing has a proximity multiplier that deals increasing damage to enemies caught in or near the center of the area of effect. The Pull effect is bad enough, but it is also hurting everything in range. This means that it is in the best interest of you and your team to unload all of your Stun moves at the opposing pokemon, since the longer they stay within the middle of the attack, the more damage they receive overall.
The only downside to this Unite Move is that your own Pull effects stop working, aside from the effects of Polarity Swing. If you try to Pull an enemy towards you while you're both in the area of effect, the Pull attempt will fail, since the giant magnet has a much stronger presence. You can Pull enemies that are outside the range of the Unite Move towards you into the area of effect, though. Although, good luck Pulling an enemy deep enough to be significantly affected by Polarity Swing, because if they want to leave, they'll more than likely escape.
It goes without saying, but try to avoid throwing Polarity Swing into a wall or obstacle. The move deals more damage when opposing pokemon are close to the center of the attack, but that won't happen if the center happens to be out of bounds within an object or big wall. Also, the Pull effect won't affect Wild Pokemon, which is actually a good thing in most situations, except for when you're trying to pull Regieleki away from your Goal Zone.
Biased magnets, how do they work?
-
Achievements
Move the opposing team a total of 100 meters through your Pull Effects in a single battle.
Now, most achievements are easy enough to track, what with the formula being based on damage numbers, usually. But for Magnezone, the Achievement is based around the accumulated distance you pull enemies.
Now, everything that I've written down here, everything that I've written in the past, and everything that I will ever write about Pokemon Unite is based purely on conjecture, since I'm supposed to convince you of the idea of any one of these pokemon joining the game. As such, it isn't really possible for me to convey the distance and reach every single move may have, so you'll just have to take my word for it when I say, 'this move reaches far'.
Now, 100 meters is a lot of distance to cover, especially since your Pull effects cover about 2 to 3 meters each. Assuming you Pull each member of the opposing team, you'd have to drag each one for 20 meters to fulfill this achievement. In order to pull 100 meters, you'd need to maximize your Pull effects with Magnet Pull and a full Score Pocket.
The Unite Move, Polarity Swing, is big enough that it can pull the entire enemy team at once and will contribute to the Achievement. But you'd need to guarantee that it affects all opposing pokemon with good placement of the move as well as followup attacks used by you and your allies. Remember, any Stun effect causes Polarity Swing to intensify the Pull effect, so if Magnezone is on your team, give it a helping hand.
Gotta stick together.
-
Holowear
Now, Magnezone is far from the typical body standards we adhere to when it comes to clothing, but that doesn't mean it can't be fashionable. Anything can walk the runway, even if they don't walk.
Starting things off, Movie Style Holowear gives Magnezone a big beret with a hole for its antennae to peek through, a director's clapper in one magnet, a megaphone in the other, a big projector light on one 'shoulder' and a big bulky video recorder on the other. Next, Cook Style Holowear gives it a tall chef's hat and apron, as well as spoons, ladles, pots, pans, knives, and a spatula all magnetically stuck to its body, which makes it always ready to cook. In Mechanic Style Holowear, it's wearing a baseball cap and is covered in wrenches, screwdrivers, and nuts and bolts. Similarly, Musical Style Holowear gives it a big hat that marching band leaders wear, along with an assortment of trumpets, big drums, cymbals, and an accordion stuck to its body. Finally, Space Explorer Style Holowear has it covered in star pins, starry veils, model exoplanets, and a pair of wriggly antennae headbands to give Magnezone an out-of-this-world look.
You'll notice that I like to give Magnezone costumes that has it covered in objects like an overpowered magnet. I'm a sucker for good visual jokes.
-
Strategy
Remember what I said in the beginning? About how Magnezone is overly specialized in what it can do, it can do it well at the cost of general utility? Well, in Pokemon Unite, Magenzone is good at pulling enemies in, but that's it. It can't heal or sustain itself in battle and has to rely on its allies to follow up its Pull effects with burst damage or the like. It's kind of like Crustle and Mamoswine in this regard, as they're also really solid Defenders, but their potential is based on how well the team can back them up.
In order for Magnezone to be effective, you have to have smart teammates that can capitalize on the openings you provide with your Pull effects. Likewise, not every situation calls for a timely Pull, like say dragging an overleveled enemy towards your underleveled Speedster or Attacker. You gotta read the room and figure out how to best Defend the team in this instance. Usually it means to drag the enemy away from your allies, sacrificing yourself in the process, but if it gives your team some breathing room in order to catch up in EXP, it'll be worth the trade.
Starting a match off as Magnemite, your defensive capabilities are much stronger than normal. You have an automatic Pull attack with your basic attack, a ranged Pull move, and a short ranged area attack that deals increased damage to nearby enemies. This is almost unfair, but Magnemite is a bit of a late bloomer, so it's stuck with this moveset for the first 6 Levels. You evolve two times before you learn the first half of your end game moveset, so you need to focus on EXP while you're playing defense.
Because of the Pull effects you have access to at the beginning of a game, you're better off partnering with a bulky All-Rounder that is capable of dealing heavy damage up close, like Buzzwole or Azumarill. The idea is that you supplement your high EXP need with KO's scored against the opposing team, so you should target frail enemies like opposing Attackers or Speedsters. Do this enough times and you'll reach Level 7 fairly quickly.
If things go awry and you fall behind in EXP, it can be very hard to catch up. Losing the first Goal Zone may be your only recourse, since more Wild Pokemon spawn on your side of the map to compensate for the zone loss. Of course, this is assuming you can get this EXP unobstructed by the opposing team, but greedy pushes like this tend to result in a team wipe sometimes.
If you manage to make it to Level 7, then the fun can truly begin. You'd have to choose between Magnet Rise and Magnetic Flux, but both are very solid moves when playing Tag with the enemy team. Magnet Rise offers a very brief moment of invulnerability while also putting the enemies through magnetic shenanigans. It's also one of the safest ways you can grab multiples enemies at once, since you can move over obstacles while flying, though your Pull victims cannot be dragged through walls with this move.
Magnetic Flux hits a slightly wider area but offers two different boons over invulnerability. Firstly, there's the defense buffs you get from the move while it's running, which is arguably worse than invulnerability. However, the magnetic beam will also start stealing Aeos Orbs passively from those hit by the attack. It's not a lot of points, but any amount will passively boost Magnet Pull, increasing the power of your Pull effects. Speaking of which, when the move ends, whether manually, forcefully, or when the move duration runs out, all enemies hit by the beam will be Pulled towards the user, giving you a lot of dominion over how the attack works. You can either let the move run its course in order to steal the most amount of Aeos Orbs possible, or you end the move prematurely to drag those hit by the beam right away, which you'd prefer to do if you have a full Score Pocket anyway. The defense buff really helps out if you are boldly robbing the entire enemy team.
One Level later and you'll learn the upgrade to Thunder Shock, Discharge or Flash Cannon. Discharge is a little slower with the buildup charge, but it hits really hard, especially if you get an enemy nearby. Even the bulkiest opposing Defender will take a huge chunk of damage from an up close Discharge, so it's a matter of risk versus reward when engaging a Magnezone running this move. Of course, it is vulnerable to hindrances stopping the attack before it comes out, so Flash Cannon is a weaker but safer alternative to proximity damage.
Both of these moves also affect how your basic attack affects enemies. Discharge will make the Pull effect of your basic attack stronger, which stacks with Magnet Pull, so you can keep an enemy really close to you if you managed to land the attack. Flash Cannon speeds up the Pull effect taking hold, which is handy for keeping the enemy in range of the high proximity multiplier of the attack. It's all well and good, but the point of keeping your enemies close is that your friends also need to be close by to take advantage of the vulnerable enemies dragged in by your effects. You can deal high damage, yes, but not burst damage or KO damage. That's the job of your allies.
Speaking of allies, the best time for them to pull their weight would be during your Untie Move, Polarity Swing. As it constantly emits a Pull effect that gets stronger when enemies are Stunned, it's the best time for you and your teammates to unload all of their Stun attacks and burst damage at all enemies caught in the Pull. Of course, you can contribute too, but the giant magnet has a stronger Pull effect than you, so you won't be able to accidentally drag enemies away from the center of the Unite Move. Instead, you should use your moves to drag in enemies outside of the Unite Move's Pull range into it, so that everyone can get in on the magnetic waves.
When two opposing forces meet, the breaking point is at the point of contact. You're going to be pulling the enemy towards you to fight on your turf as Magnezone, so you gotta remember to stay positive.
-
And that's Magnezone for Pokemon Unite! One of my favorite pokemon introduced in Gen 4, I always loved using this thing in battle, as it never disappointed. Of course, if it were to show up in Pokemon Unite, it'd be the most attractive pokemon for me to play, and not just because of the magnets covering its body. I favor playing Defenders if the team needs it.
That'll be it from me this week. Until next time, see ya!
2 notes
·
View notes
Text

🌟 Join Our Cancer Fundraising Team! 🌟
Hello everyone,
I'm thrilled to invite you to be a vital part of our Cancer Fundraising Team on GoFundMe! Together, we can make a significant impact in supporting individuals battling cancer. Your participation will truly make a difference.
If you're passionate about making a positive change and helping those in need, we welcome you to join our dedicated team. Follow the link below to discover how you can get started, and please share this with your friends to broaden our reach:
Let's unite under the banner of #teambuilding and demonstrate our commitment to #SupportingOurCommunity. Your support and involvement will contribute to the success of our fundraising efforts.
Thank you for considering joining us on this meaningful journey. Together, we can bring hope, comfort, and assistance to those facing the challenges of cancer.
Best regards,
Byron Burke aka Popâ Ur-Mää
3 notes
·
View notes
Text
Unit Teambuilding - Neo Champion Rosa
Fun fact! Meloetta is my favorite mythical Pokemon. I adore this little Vocaloid baby. So I've been anticipating the day it finally got added. I always expected more of a seasonal/PokeFair kinda deal, maybe with Lisia, but apparently we're going full-on Master Fair with Rosa. So she's gonna be good, right?
General Overview
Psychic Support. An instant OHKO on my hopes for a Normal Meloetta that type shifts, but I guess the plus side is my Psychic army is ever-growing. Also, she does type shift to Fighting, and all her moves seem to be Normal, as her sync is listed with Normal-type damage modifiers, so...I don't know, theme skills are weird.
Buddy Relic Song has AoE, and gives +1 crit, +2 to a random stat, and transforms Meloetta each use, with a passive giving +1 PMUN and SMUN each transformation. Her first attack in each form applies Psychic or Fighting rebuff, she gets both, and each attack gives +1 Sp Def (Aria) or +1 Def (Pirouette). Her trainer move is a pop +2 PMUN (Pirouette) or SMUN (Aria), with +2 team speed. She is the most consistent moves up next stacker in the game, with the most consistent fast-acting stacks in the game at present for either offensive type. And that's just her base kit, with two moves. She has Potion, and changes between Sing in Aria, and Teeter Dance in Pirouette. Her grid provides options like Precision Pals, MPR1 for even more stacking, Force Field/Team Stoic to get some guaranteed defenses, Curative Confusion for passive regen, Easy Pickings for random debuffs on foes, double Potion MPR, and Go Viral in case you really need Sing to just mess with the whole team, but I actually think Go Viral sleep is detrimental at this point in my life.
Rosa's rotation is fairly clear, at least to me. Spam Buddy move out the gate, while your allies handle boosting Atk/Sp Atk by themselves. By the time they're done, you're around first sync, which Rosa takes, getting Support EX buff. She then kicks in Sprint role and ramps so you're guaranteed second sync before foe's first. Then you either use Buddy move once to get to the form you want, or go straight to TM to stack moves up, until the opponent dies. There is no mercy. Only Meloetta.
Rosa's problems, however, are just as apparent. The main one is her Buddy move conditional. She needs to "not be in a pinch." Which is that red blinking HP level around 25%. Heavy hits in CS are a massive threat to her, and if she's taking Half Healing as a parameter, which is often free money in CS, it's hard to get her back on track. She also can't reliably buff Atk/Sp Atk, which means she's excellent for top-tier self-sufficient damage dealers, but pretty bad otherwise. Also she needs partners with good DPS attacks; low DPS gets borderline nothing from her. Another flaw, and this seems to be a personal stance, is that Sing is a bad decision. Yes, I hear you, general meta theorists. Sleep is insanely powerful and broken as a status for disruption. But it also means Rosa can't queue another action before the foe re-queues, which means if she's sleep-locking, she's not doing literally anything else. It also means having to run Troublemaker as a lucky skill to hit literally anything ever, because 45% accuracy. Even with the +20 accuracy she can get from grid, which is expensive and removes her better utility, AND the Precision Pals effect on TM, that's...around 85% accuracy. Which is still far too shaky to rely on. But she doesn't get Vigilance, so you're leaving yourself wide open on crits.
Which brings us to the big flaw. My first opinion of Rosa was "this seems kinda tame." It's because her grid sucks ass. Her kit does a lot, but considering that Blue not only had a super good base kit but also got an absurd grid that gave him even further tools that were unnecessary? Rosa feels like she should be getting more than this. Her tools are underwhelming on grid, and it's hard to build anything overly cohesive out of it. And like...no built-in Vigilance? I thought we fixed this shit with Melony; if you have Sing, you want Vigilance on grid so you can take Troublemaker, otherwise you're Elio, who is bad. Melony got this, but somehow Master Fair Rosa didn't? Why? This isn't exactly a tall order if a general pool can do it. Even her ability to boost team defense is +1 per attack, similar to Blue, but without his offense debuffing and chance for flinch. They even have the audacity to make them two separate skills on opposite ends of the grid. Rosa's grid legitimately feels like one of the worst all year for very little reason.
My stance on Rosa lands somewhere between "This is the best support in the game" and "Oddly under-kitted." Depending on partner, she's either the unquestionable best partner for 3v3 content given her stacking and defensive backbone with healing, or she's accomplishing next to nothing because her kit locked her into one niche unlike NC Blue who got to do literally everything at the same time. I think if the grid were less garbage, she'd have an argument for being better than him. But as it stands, she's at home among the other Master Fair support, but I don't know if I'd call her strictly better than Bede, and certainly not better than Blue. Which is just typical Kanto bias shit. My favorite couldn't just lose to Kanto, but to Zapdos? Rude.
EX, Role, and Move Level?
If you're looking at Rosa like damn. I wish I had that kind of stacking power. 1/5 has all you need. Legitimately, she's fine 1/5. EX is a good idea for the stats, given her buddy move conditional, but you only need the one copy. 3/5 is when you just get silly with the defensive backbone she doesn't need but will gladly take, and some other niche tools that don't do much because again, I do not respect her grid. The EX Role is honestly one of the most worth it things ever. Support/Sprint is one of the best combos in the game, and my pick for outright best. It's perfect pace for 3v3 metas, ensuring two syncs before foe's first even without quad queue, denial, or Adrenaline. Supremely worth it. And good news! She's the first and currently only Sprint sub-Role! So you have the cake. Choose wisely though, because there's good odds of SST Red and Aura Cynthia at the start of the year with roles, and I have a feeling Cynthia's getting Sprint.
Team 1: NC Rosa, SS Lana, SS Lusamine
Alright let's start with one on-type pick each, the best of each kind. Lusamine Hours. Rosa's +1 crit is all Lusamine needs for a successful fast-ramping nuke, and the ability to stack both types of Moves Up Next means both Lana and Lusamine fire at maximum capacity at all times. With a defensive-minded grid, she is able to consistently provide what Bede could not: a serious means of survival in High Score. Potion's pop heal just doubles down on this flexibility, achieving an absolutely bonkers performance. With Lana and Lusamine already fast-ramping to Lusamine's transformation, and Meloetta's Sprint role, she even contributes meaningfully to the ongoing Psychic Ramp meta.
Team 2: NC Rosa, NC Hop, Rei
"But Aura Cynthia-" redundant. Rosa stacks harder than Cynthia could ever imagine, and the rebuff is much better than duplication of Zone. And with Rei's Sprint role, welcome to fast ramp central, complete with sure-flinch lockdown and rapid defensive drops.
Team 3: NC Rosa, Anni Lillie, Renegade Cynthia
Okay, time to start getting a little silly with it. NC Rosa's ability to boost team speed, as well as boosting both offenses, anchors a dual strike opportunity like Lillie and Cynthia. Anni Lillie has tremendous DPS, and adores the stacks of SMUN. Meanwhile, Cynthia has the ability to store one type of moves up for the other, including a potential explosion off of Shadow Force. Having both options at her disposal allows Cynthia to just go ballistic here.
Team 4: NC Rosa, SS N, Glaceon/Colress
As alluded to in the previous set, one thing Rosa can be incredibly funny for is the 2-turn move nuke. SS N's Freeze Shock is bullshit powerful, having 300BP at base. Now consider a situation where N gets to throw out Freeze Shock, but he's loaded up with PMUN. And also there's either Zone, or there's Def debuffs. Are we really...going to argue this one? I might actually, a non-EX SS N often fails me. Two-turn damage is still a problem.
Team 5: NC Rosa, SS Hilda, Blaine/NC Leaf
SS Hilda is similar to Renegade Cynthia, being extremely high damage, but having both physical and special moves available. She can DPS nuke both ways. Add in Sun, and her damage is frankly batty. It doesn't even matter where the Sun comes from, anyone will do, but Leaf is the comedy hour option.
Team 6: NC Rosa, Nemona, Volkner/Jolteon
Another fun option: Nemona. Nemona operates on burst damage, she's not good at DPS. Rosa's stacks PMUN for Nemona to throw around on her Buddy move as needed, while also having that coveted Sprint role for repeat fast-ramping. Nemona instant ramps, Rosa ramps off her sync, into Nemona's sync, which is also a ramp. Speedrunning. There's honestly an argument for Paulo in here if you have him. Just triple fast-ramp sync nuke deluxe, with two of them being Support.
Team 7: NC Rosa, Anni Steven, S!Liza
Okay, NOW it's time to talk. NC Rosa, because of her buddy conditional, approaches CS with a bit of apprehension around field effects. The shuffling of parameters often means taking Offenses +5, which is when things get scary. When she ignores field effects, Rosa is at her most devastating. And with that in mind, enter one of my favorite cores, Anni Steven and Summer Liza. Both of them have very effective physical DPS, with Steven having fantastic speed control and Liza having the ability to rotate in Free Moves Next and her own PMUN. Rosa's ability to boost defense for the team off a 3/5 grid allows Liza to get to TM second turn with full Atk. Her TM boosting team speed eases their rotation of offense as well, as they throw around ridiculous numbers. And again, because Rosa can ramp with Sprint role, there's no more of this need for a denial to keep on pace. Liza will sync, and she will kill.
Team 8: NC Rosa, Paulo, Emmet
Sprint ramping is real, and Paulo was a huge proponent of it with his sub-Support role. Paulo can take first sync to throw out his own Buddy move, which also removes Rosa's grid energy from defense boosting to put into other fun tools like Precision Pals on TM for their accuracy issues. Paulo's GMax having Sandstorm application, and his free -2 with Emmet's -1 TM in Sandstorm composing a fast-ramp, makes this a fairly strong Sandstorm core. That can then pivot into Rosa taking second sync for further ramping, with double Support EX bonus and massive stacks of moves up next on both allies. The accuracy here is key; Rosa's ability to grid in accuracy salvages the issues I have with Paulo's base kit.
Team 9: NC Rosa, Roxie, Looker
I want to use this opportunity to stress something important. When you're dealing with these heavy moves up next stackers? +4 offense is sufficient. Obviously, +6 is the ideal, but you can make do. To that end, Roxie and Looker. +4 offenses is just fine for them, with the moves up next stacks more than making up for the missing +2. And with Rosa, there's always the chance that she rolls that +2 anyway.
Team 10: NC Rosa, Will, Brycen
Okay this is really stupid but I realized something I could do and it was WAY too funny not to consider. So, Rosa has Teeter Dance, right? But no Stop Hitting Yourself. She partners with pairs who do, though. Mallow has poor offensive setup, and Sidney has poor DPS. But Will? Will has Stored Power. "But wait," you say. "Will has no self setup at all! How is he relevant?" Not so. Remember, Five Stats +3 is a thing. Will can simply copy and double their buffs, to get all his stats to +6 instantly! "Okay but...now you're dealing with stronger opponents." Not with Brycen here to Haze that shit. "Crystal this feels like a bad plan that could very easily backfire." True. But I bet it works.
Final Thoughts
Rosa seems very good, and I am excited to try out her kit. I will acknowledge I think she also has some serious flaws which limit the teams she can support. She does not play well with sync nukers with low DPS, and she doesn't play nice with those who need full offensive support. But she does offer the best and most consistent moves up next stacking in the game at current, and given it's literally "every time you attack, +1 to both," this feels like a cap in the same way Aura Cynthia was. I doubt we'll get directly better than this any time soon. We just have to hope the Buddy move conditional isn't too great a burden.
5 notes
·
View notes
Text
(4.6 beta changes) (again) (guys this is so long im just. many thoughts and me thinking out loud abt arle and my pulling plans. & other nonsense etc. my bad)
ooookay so yeah def glad i didnt jump the gun and attempt some sorta "is this a buff or not" feelscrafting nonsense on arles adjustments jkwjkwdjkwdjkwdkjjk and waited for TC (mostly zajef lmao) analysis and opinion on the real changes that ended up happening
anyway so like. it appears to be an universal buff for her p much? but how big of a buff it ends up being depends on some mechanics we still dont have a definite answer as to how they function (mostly how her BoL stacking from E works during the ECAQECA reset thing, if it enables 140% total stacking = massive dmg buff overall)
firstly my fears of her becoming too ult dependent for overworld appear to be? not as bad as i thought? so thats nice at least very pog like if she can do her thing decently enough just for fun running around thats very good
secondly. the ER situation is literally on a 50-50 😭 because its all about whether she has particle ICD on her E. if she doesnt, thats actually like. 0 ER needed or at the very least incredibly little of it. if there is particle ICD. well. thats going to be another story
the way her rotations have changed now seem to gear her towards overload teams with chevy? since they have very long rotations and characters like fischl and yae can have full uptime over those whereas vape teams lose hydro application from yelan or XQ and buff uptime from characters like bennett over time when a rotation stretches past 24s
like from what ive been reading it seems to be a pretty common sentiment that these buffs will make the biggest impact in chevy overload teams specifically (even tho shes obvi buffed just in general in all teams) for that reason and that chevy teams Especially w her at c6 with arle should be the best bennettless teams ultimately. which is definitely an interesting turn ?
(and this isnt all of the changes btw im just talking abt the ones that matter most for my considerations rn)
anyway. my thoughts then.
so im obviously glad the changes turned out to be buffs so far. but. theres still stuff im a bit. ehhhhhhhh on
firstly the survivability situation (which in turn leads back to the teambuilding issues). bc her self heal did get nerfed. so arles no longer going to be able to risk taking very high dmg during a rotation and dragging herself back to full once the next one starts. which to me feels like an emphasis on dmg mitigation for her and shielding.
(not to even get started on the. spam NAs to reduce her now 30s E cooldown so its up in time for the next rotation meaning you Do Not want to be staggered and tossed out of her attack string. and gee would you look at that! neuvillette level interruption res on c1 now! great!!)
(like again. to be clear. its hard to say exactly how much interruptions to her NA spam will end up fucking her over. i could just be overtly wary about how bad it might feel. but at its worst. with enemies that run away from u or go invincible. or stunlock you. the fact that it will at least heavily risk arles ability to reduce her E cooldown the amount she needs for fluid rotations. could definitely end up feeling like shit to play in practice without that interruption resistance. be it from c1 or a shied)
but then if we go back to her synergies and look at. those more interesting (imo) chevy teams that should perform well even without bennett. like arle/chevy/fischl/yae. whos keeping ur arle from dying there 😭 its giving lyney spreadsheet impact vs actual reality trying to play him without a shield 😭😭 guess we know who he got it from...
and yea could replace yae for beidou for damage reduction but her dmg will TANK in single target. as a whole. defensive options list in pyro/electro units only just isnt that good. beidous the one who tanks team dps the least as long as ur in AoE, but outside of that its just. thoma and dehya. and they will 100% tank the team dps
whereas defensive options like zhongli to me feel like they will just end up w her teams just wanting to lean towards that. traditional vape and mono pyro angle. bennett and kazuha and yelan/XQ. the usual stuff. and shes not getting benny and kazuha from childe so we have an issue 💀💀
unironically i will prolly be looking for some double geo zhongli/chiori/yelan vape team calcs for arlecchino (hope someone makes them. all double geo team calcs ive seen so far assume bennett 😭) just out of curiosity in terms of. how much worse it is than her best teams. bc if i can just slap her in that setup its a big bonus to how flexibly i could use her but eh. prolly will end up weaker than any chiorinavia nation core i could play so who knows
but. all this yapping and im only now getting to the point JSWJKDWJKWDJK so. heres the BIG problem
i dont have a single fucking chevrolet 💀 but i do have like 38 pity on a guarantee.
and like people are suggesting that maybe chevy will be on arles banner and fair, especially with these new beta changes incentivizing arle chevy teams way more than before, it would definitely make sense for hoyo to put chevy with her. and i definitely am overall a fan of this possible chevy overload team direction for arle (anything thats not bennett for father. ANYTHING) so id love for that to be the case
but. thats not guaranteed at all. and the same sentiment i had over arlecchinos hypothetical best support in the form of the pyro archon (or honestly. with the lack of electro shielders for chevy teams even clorinde could end up being that missing piece) where id almost rather wait to guarantee that synergistic unit before getting arle herself on a rerun. actually applies to chevy here too. even just a c0 one
and like. yes. if i spend that guarantee now on c2 chiori. and it turns out chevy is indeed featured with arlecchino. i will Not be able to guarantee her anymore - ill get one 50-50 and all the chances for a few solid chevy copies on the way but thats it.
however. the other scenario here is that arle does NOT get chevy. she gets fucking. kaveh noelle mika. and then chevy is going to rerun with like. idk. random banner. clorinde who may or may not have synergy with arle
...and im not really sure if id even want to pick arle up on that guarantee from that sort of banner SJKDKJADJKDJK but ok id skip her. buuut im still sitting on a guarantee i might not want to use on a character i feel just eh abt. but who might be with chevy (and like. i do pull for 4* when im on a 50-50 and low pity, idm the early. so as long as thats the case i can see myself tossing a few pulls at Any chevy banner in the future).
... which brings us back to. okay yeah saving the guarantee for clorinde IF chevy isnt with arle and IF shes an electro shielder sub dps support for those arle chevy teams. and getting arle on rerun as ive considered. doesnt sound that bad. but clorinde might also Not be that. uncertainty uncertainty.
like im fairly sure clorinde Will be an unit i wont mind pulling at 17 pity xianyun style on a 50-50 no matter what. but if shes not that mythical arle BiS support she prolly wont be worth that guarantee is my whole complex here lmao
whereas. c2 chiori. isnt an uncertain factor here. like im investing in her im getting her c6 eventually, c2 is like almost 25% personal dps increase (also my husk pieces LOVE rolling ER so itd actually be useful) it feels like the "safe" option in a sense ya know???
like. yes id leave arlecchino up to a coin toss . (Jail for jen!! fake lesbian!!!) but id also be left with the option of skipping her banner (if no chevy rateup to be clear) in favor of seeing whether she gains any synergistic units in the future and seeing how the various aspects of her kit that i do somewhat worry about end up panning out ?? and i think. id be fine with that ? Over the alternative
ultimately tho. im super happy arle got overall buffed and that at least some of my fears abt her kit changes were indeed unfounded, but some concerns still remain. its kinda wild and still sad to me that she went from an absolute 100% must pull character just bc its Her to like. curse of pyro on fielder idk if i Need this right now 😔😔 but i Will be getting her eventually!! no matter what
anyway have a sticker if u stuck around for all of my bullshit. this is literally just arle buff thoughts into gacha pulls stream of consciousness rambling 😭😭😭
#pov ur watching me talk myself into ripping the bandaid off and just getting that goddamn c2 chiori WDJKDWJKWDKJWDJ#already went the way to the 50-50 for it like we might as well commit to my girl#arles beta is crazy tho like. i havent seen changes this massive to a kit since the yae and ayato days of yore 😭😭#v1 ayato yoimiya dual dps team ThoseWhoKnow LMAOOOOO#prayge for the particle ICD everyone. if she doesnt need ER. my cope zhongli chiori arle yelan vape idea. might actually work out okay#bc i can keep yelan on elegy for buffs and not just favge#aaaanyway. what a wild ride#manifesting the chevy on arle banner SO hard btw. even if i end up losing 50-50 there for arle in the end. it will be worth if i get chevy#genshin#rambles#long post
2 notes
·
View notes
Text
you already HAVE "no order change" as an applicable status you fucking assholes was that not enough. if you hate plugsuit's swap so bad why did you make it TWICE. why are they always doing this shit with their own game mechanics. knowingly introduce arts looping and then constantly start making wave setups that disable it, plugsuit is good so keep forcing shitty mystic codes during story bosses, make a buffed plugsuit and then outright disable swapping (not even using no order change status, just fuck you), forcing more and more supports to undermine teambuilding (and forcibly advertise new units). why even fucking bother introducing literally any game mechanics when lasengle gets cold feet about it every time. they want to sell meta shit but they seemingly want the gameplay to still be as fucking basic as it was day 1 when it really matters, and the fucking femur breaker shit they keep doing to force it usually just makes it harder for people that don't have the meta shit. they have failed to implement grail front pvp so who fucking cares what people do in story boss fights, get off my dick.
#just outright disable bringing oberon castoria or ruler skadi next time you already are working with the subtlety of a brick#switch speaks#fate
29 notes
·
View notes
Note
I don't get it. I dunno what I'm doing wrong, but I'm bewildered by all the people who say IS3 is easier than IS2. I stomped IS2. I could breeze through it without issue, it was fun! IS3 kicked my goddamn ass. I failed a dozen runs before I even saw Highmore, and failed to beat her 9 times before I finally squeaked out a victory, all on the easiest difficulty! And the entire time people were talking about how easy IS3 is I was getting so frustrated that I was genuinely considering quitting Arknights entirely. I'm hoping IS4 doesn't crush me the same way
I just made a detailed breakdown of my thought process in an example run of IS3 here. You might find it educational!(and if not there's a TL;DR at the bottom)
In my experience, the reason why some people who crush IS2 have such great difficulty with IS3 is because IS3's design punishes people that teambuild like it's IS2.
What do i mean?
In IS2, your hard requirements are 1 main DPS, anti-air for drone stages, quick and constant heals for poison mist stages, anti-tank units, and a tank in case you get the unicyclist in Floor 3 or get Sarkaz Lancer pinball. A squad of this composition can run all the way to the final boss without many alterations needed, but can autolose if it fails any one of these requirements (did you get to the emergency poison mist and only have Skadi the Corrupting Heart for heals? Die.)
In IS2, snowballing is much easier, as while these requirements are stricter, they're also simpler to think about. Someone as simple as Thorns, who only has ranged DPS and no utility whatsoever, can hard carry a squad (except vs Poison mist) all the way to the boss without breaking a sweat.
However IS3's requirements are different. You don't necessarily *need* heals for example, but you are going to need crowd control because those Nethersea Predators with their 80% dodge are back. You don't need to have a tank to block an enemy like the Unicyclist or Sarkaz Lancers (barring one bonus stage), but you do need answers to specific problems like Ubi Bona Somnia having Originiutants with 2000 DEF and 80 RES breaking all the rubble, or the massive crowd of sleeping Seaborn Reapers that is best handled with a fast redeploy waking them up one by one, or multiple units being redeployed if you don't have a fast redeploy.
This larger list of softer requirements can really punish you if your teambuilding is in that IS#2 mindset, and it's something I think most people don't even realize consciously. That's why there's plenty of people saying low level IS3 is much easier than IS2, but plenty more that try out IS3 assuming they can breeze through it like IS2 and get completely demolished. In terms of how strict the team requirements are and how difficult the Floor 3 bosses are, low level IS3 is easier than IS2 sure, but the strategy behind it is also different enough that you cannot approach it the same way without being heavily punished.
80 notes
·
View notes
Text
So You Want To Try Alchemy Stars?

Alright well heres a few guides on what you need to know. Some of these are videos and I only recommend videos I have fully watched and critiqued:
HERE is a short, updated, most current beginners guide that explains a fair amount of the games ui and what everything does. I dont personally agree with every single thing this person has said (like their units reroll guide), but they give a really good rundown on a fair bit of the games mechanics and modes and do it at the games current state so check it out.
HERE is the current japanese tierlist that explains character abilities and generally tells you who does what best. It also lets you actually see the characters so you can use it for waifu scouting reasons as well, which is the true reason to check it out
HERE is a guide on teambuilding that I do think gives a really good rundown on general teambuilding and unit roles. It explains what units do, their positions on the team, and generally what you should aim for
HERE is a reroll guide on rolling for the 6*s in the game. Again I believe the true reason to do rerolls are for your specialest scrimblus blimbo glombrous BUT you may also want to know who are the best of the best and this video explains the top units mechanics and how they work, so you can watch the reroll guide here. However, I point to the JP TL if you want to know the Best units to actually get. THAT SAID this one also explains elysium a bit and the characters you should aim for.
As for personal advice, one of the most important things you need to do in this game is advance in the story up to the end of ch8 to unlock all the menus and modes available in the game. This game has no pvp and is very casual HOWEVER you are only lagging your progression on building units if you dont have everything unlocked. Finally the game itself throws tutorial at you at every turn to let you know how things work so if you’ve only glanced at some of these guides do not worry because the game will also tell you how it works. Its a very easy game to get into that has a lot of nuance and progression to its combat system. Good Luck performing alchemy on those stars
91 notes
·
View notes
Note
Riiiise, it's AK question time.
What does your starting squad(s) look like? Like when you get to a stage that you've never played and so don't know what to expect.
Well, I do use the EYESOFPRIESTESS mapping image to decide on adjustments usually since the main surprise is the enemy waves order.
My teambuilding is probably best in Integrated Strategies tbh since that forces you to figure out what you know you can manage with the hand dealt. I found myself an ideal team/item comp to aim for in IS3 that works very nicely but it took longer to get IS2 down and even then IS2 is nastier luck by Floor 3 boss that it's often pretty rough.
Tend to go for a 'brute force then refine as required' style of YOLOing one of my 3 rotating composition squads as far as possible. If they need better balancing I'll figure something out. Usually my go-to Vanguards are Fang/Myrtle or Courier/Vigna; I'll try to balance my Arts and Phys Dmg overall; Gavial/Sussurro will do for Medic and some array of Guards/Defender/Specialist should manage. But I may make something lopsided work, or outright require it in certain Challenge Mode nodes.

This is my seldom-used high rarity shifting composition for 'yeah idk what will happen but I feel like a ROFLstomp should occur' + 'ah 6-star modules need tasks doing oops' where I might experiment testing new units like Puzzle there during early event maps.

This is supposed to be my rotating event team slate; atm it's converted to a Sniper/Caster trust farm I haven't checked recently.
With events I do like to have any of the focus units I've managed to obtain at mid-level E1 at least to theme the squad appropriately somewhat. So for Where Vernal Winds Never Blow I had Nian, Cantabile, Jieyun, Firewhistle as the core deployments alongside Casters/Snipers/Medics.
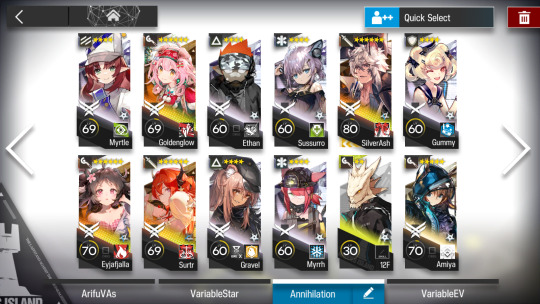
This setup was for the EX-8-CM of Invitation to Wine Rerun that was frustrating to get through but is decently built. Removed Surtr/12F/bnuuy for different ops such as Wind Chimes/Gladiia etc.
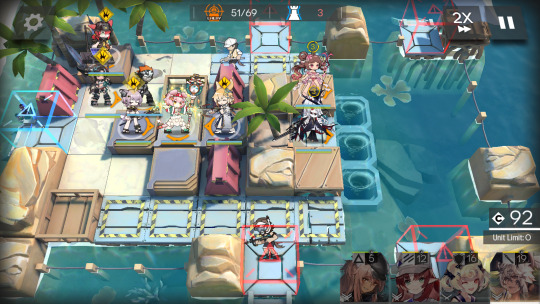
So yeah, Gladiia tile but I started this off a lil awkward before setting up nicely. The unguarded blue box path is so fun, haha.
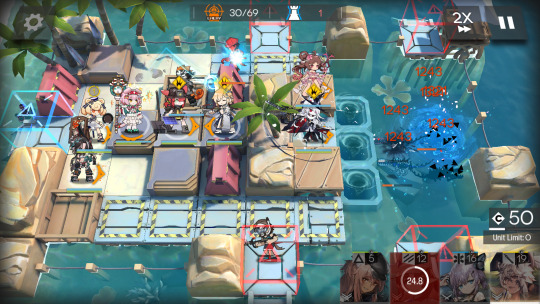
Here's the Challenge Mode where trying out the same team but with slightly better deployment because Now I Know. Still could be adjusted to use less Operators if you're being fancy with it but it had the map on lock. I don't really try those 1p relays but I loved seeing the 7-10 Estelle solo in action firsthand.
#arknights#arbellas-bakery#I just go for Organised Chaos tbh#trust me I'm Dokutah I know how to tactics in the field.#I could plan more meticulously but I want to savour the story's meat.
6 notes
·
View notes
Last Seen Blogs

the-sapplings
baby trees

walldog
Untitled

dgs-tears
DGS2 IS ABSOLUTELY UNSTOPPABLE

bencan-t
Ostensibly,

satish5858
Untitled