#short tutorial
Note
Thank you so much for answering my question. The animations like the ones you have in your Ben Barnes gallery catch my eye (that would be the third avatar). The animations of Lee Dong Wook's avatars too. The first one above is beautiful. Have an excellent day <3
Hello again dear anonymous person!
Well, it's nothing fancy, but I made a short video. I recorded the steps to make this kind of animation! I hope it helps you!
Unfortunately, my Photoshop is in French. But here are the steps will be available bellow the video :
1) You have to open your avatar (jpg or png) in Photoshop.
> I like to use one that is already styled. I just need to add the animation.
2) Create a folder (I named it ANIM) in your layers panel.
> This step is optional, but I like to do it to keep everything clean and easy to find.
3) Create your first empty layer in the folder, name it clearly.
> I choose 1 because it'll be my animation's first frame.
4) Draw the elements you want in your animation with the pen tool in the color of your choice.
> Here I choose the rough shapes of the flowers
5) Create a new layer in your anim folder and draw the second frame of your animation.
> In this step I like to keep the old layer visible so I can see where I put my first animation layer. This is optional.
6) Repeat step 5 and create a third layer for the animation.
> I like to do 3 to 5 layers, depending on the animation I decided to do, but nothing more to make them really light.
7) When all your layers are done with drawing, hide them all with the little eye in the layer panel.
8) Open the Timeline window.
> If it's not already open, you can find it in the "Window" menu of your Photoshop) and make sure you have the "Frames" selected (if you see a timeline, you're not in the right mode, you can easily change it by selecting the 3 little squares at the bottom of the window).
9) You should have an existing frame once you are in the timeline mode. If not, click on "create frame animation".
10) Then click on the little [+] button at the bottom to add a frame near the trash. If you have 3 layers, make sure you have 3 frames
11) Select all 3, then click on the 0s and choose 0.1s (this will control the duration of the frame animation)
12) Select your first frame > then make your layer 1 visible. // Select your second frame > then hide your layer 1 and make your layer 2 visible. // Select your third frame > then hide your layer 2 and make your layer 3 visible.
13) Then you can "save for web" and play your gif to see if you like it!
Again I hope this helps!
Enjoy your creation time!
May you make a lot of nice things that makes you happy!
#tutorial#short tutorial#animation diy#avatar#gif avatar#a devious route explain#ressources#rpg ressources#a devious route
71 notes
·
View notes
Text
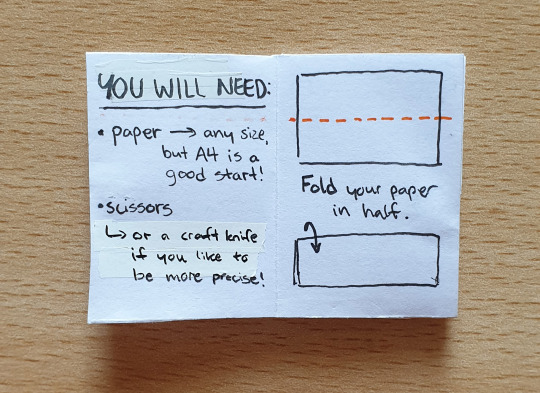
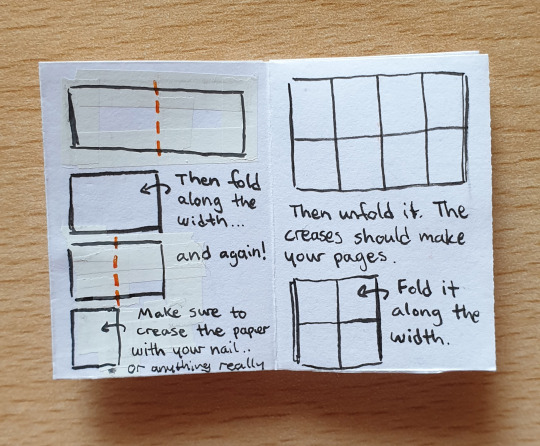
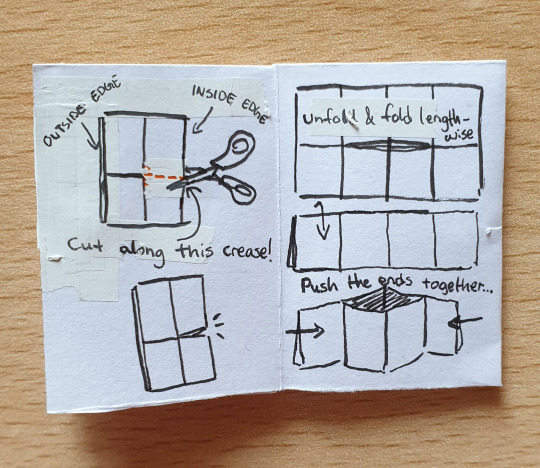

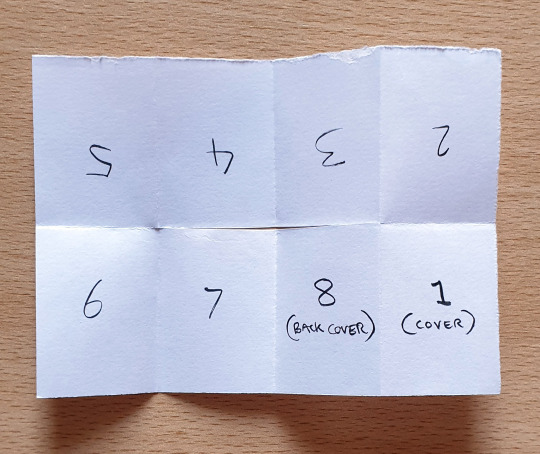


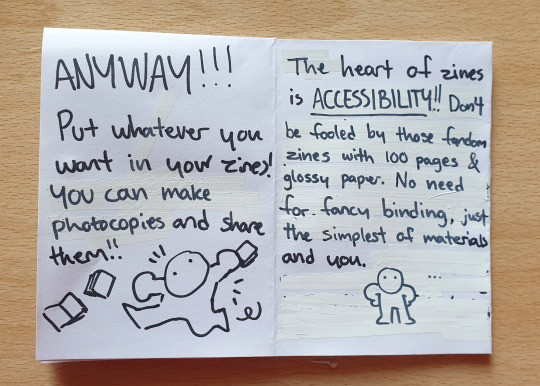
some people have asked about making zines, and i've seen a lot of people in the tags talk about wanting to make some but don't know how... so here is a zine (technically two) about making zines! wowza! pardon the handwriting lol
there are other methods of making zines that require a stapler or sewing, but this one-page zine is the simplest form of it.
i hope this makes sense, feel free to ask if anything is unclear :]
#i seriously think everyone should make zines. i think they're one of the best means of self expression#zinemaking#zine#mini zine#illustration#analogue art#tutorial#i don't know why the tail of my Y in that final “you” is so short.... it looks like uou 💀#nonfandom
9K notes
·
View notes
Text
How to draw short hair from the back by Buboo
9K notes
·
View notes
Text
Made a tutorial a few days ago, to help you all draw eyes lol.
I hope you like it!
You can find more videos made by me on Youtube as well!! Check the link below.
You can find more videos made by me on Youtube as well!! Check the link below.
#tutorial#howtodraw#howtodraweyes#originalartwork#drawtutorial#drawingtutorial#draw#short#really hope you like this. It took a lot of courage out of me lol
2K notes
·
View notes
Note
I LOVE YOUR ART SM, ESPECIALLY THE MIKU ONES, YOUR SHADING ALSO REMINDS ME OF STRAWBERRY SHORTCAKE(the old one) IF YOU DON'T MIND CAN YOU A TUTORIAL ON HOW YOU MADE YOUR ART LOOK SO.... SOFT??? AND LIKE BRIGHT?🫶🫶🫶🫶🫶
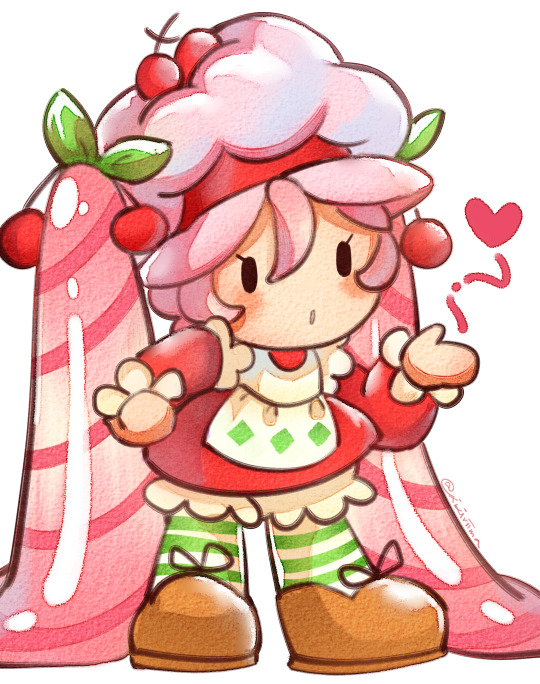
Awe thank you! Have a Cherry ShortMiku
I rushed the loose "Tutorial":
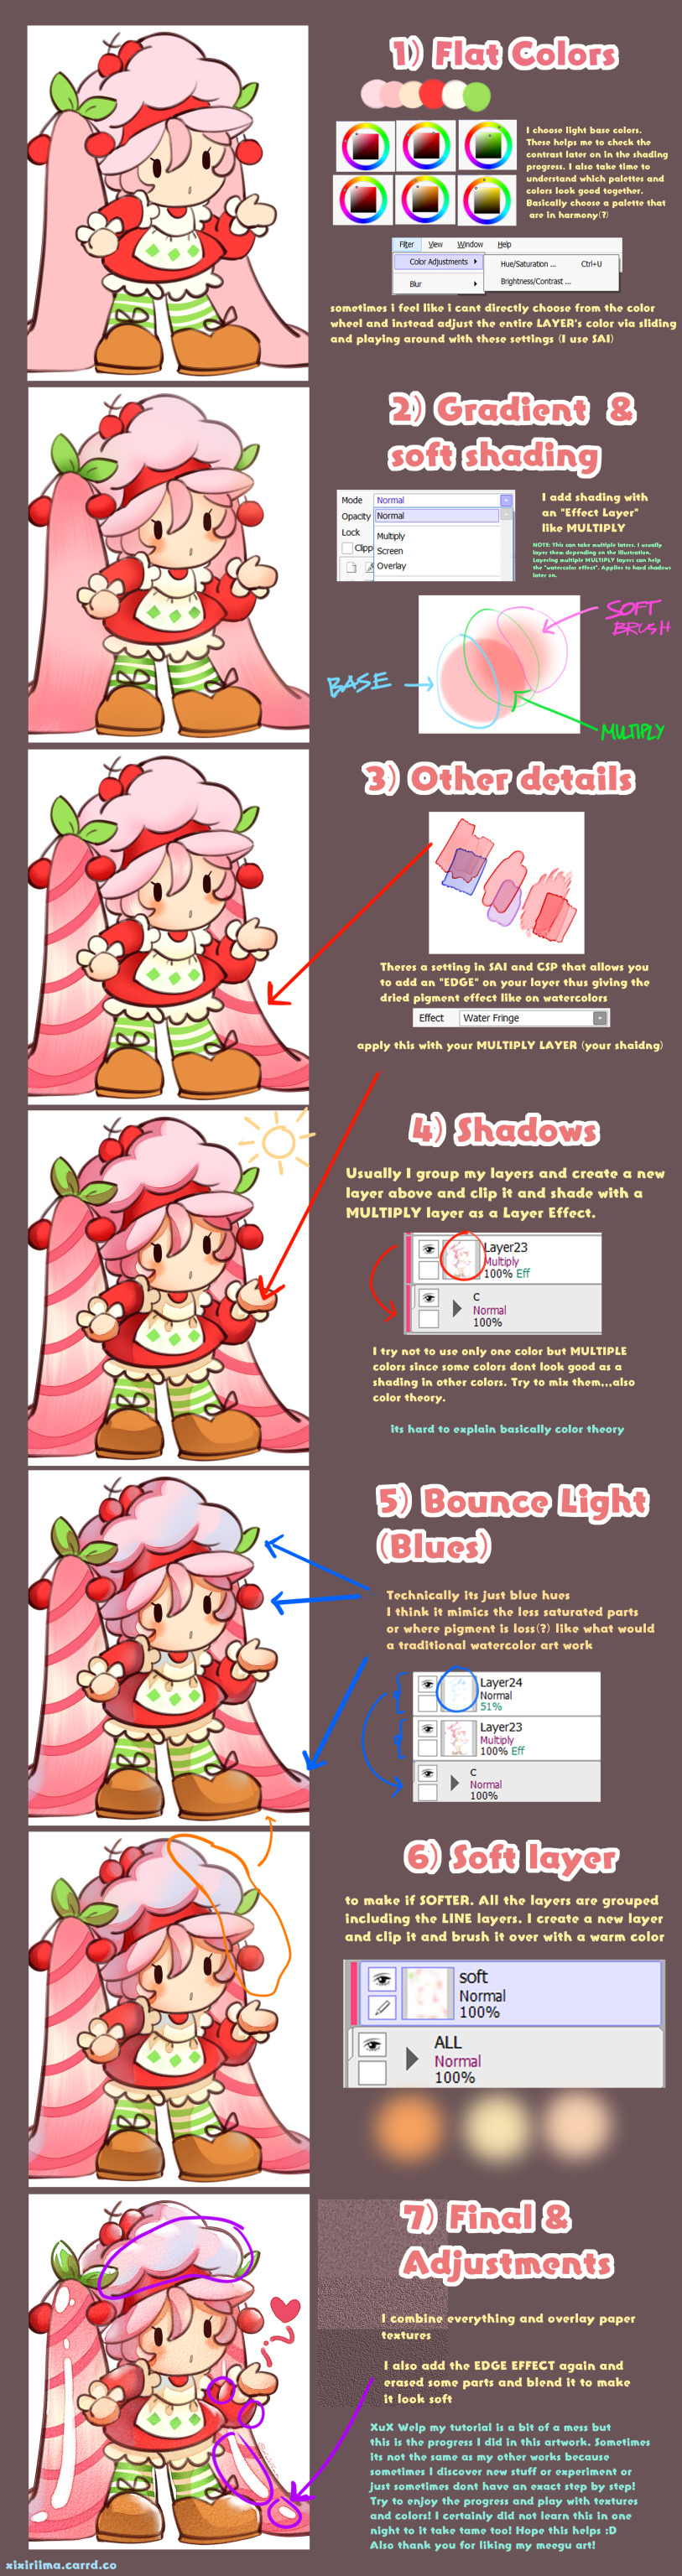
Its a bit messy Its 8:30 am i havent slept yet hahhaaha! So basically colors right? IiiIII also am not knowledgeable with color theory but if it looks good it looks good ya know? I sometimes dont get satisfied with the end game so sometimes I adjust the overall illustration's HUE/CONTRAST/BRIGHTNESS/SATURATION etc. These adjustments are crucial imo! To make the entire illustration homogenous, adjustments are necessary! anyway
all of my illustrations most times arent just a fully step by step thing. Sometimes I go back to a layer, I adjust, I get frustrated that sometimes it doesnt look the way it should be in my head. I think people have been asking me how I draw but honestly couldnt find the energy and time to do so until now granted its a bit of a mess ;-; I think its just that I couldnt give a step by step since I myself am chaotic with my layers and progress which is the FUN part imo -u- so thats it- hopefully it explains the basics(?)
#meegu#strawberry short cake#miku#reply#anon reply#reply ask#ask reply#ask#tutorial#?#fanart#hatsune miku#saskura miku#cherry miku#crossover#xixiriima#my art#art#anime art#ebi noodle doodles#VOCALOID#vocaloid hatsune miku#vocaloid miku#art tutorial#miku related#chubby miku replies#chubby miku#miku related tag#miku related post#vocaloid related post
334 notes
·
View notes
Text
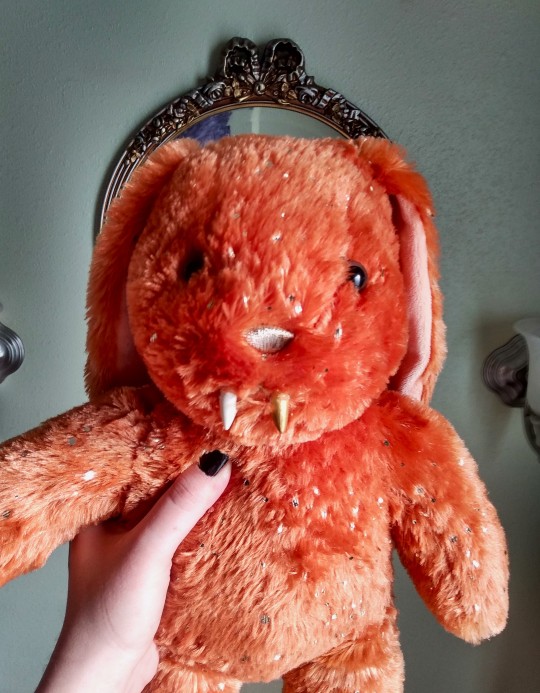
It was my first time performing The Ceremony of the Fangs, so they turned out a little crooked, but I think they still look very nice. I painted one of them gold to match her nose and the gold flecks in her fur. Thank you for the tutorial, Auntie! @gothiccharmschool
#her name is Ordra#short for#Orange Dracula#my favorite store in all of Seattle#although i still haven't made it to the gargoyle store#thank you to auntie jill for the tutorial#hope it's okay that i tagged you#and thank you to my mom for building me the bunny#hi mom#i love you#vampires#fangs#vampire fangs#the ceremony of the fangs#gothic charm school#stuffed animals#plush#build a bear#pumpkin sparkle pawlette
129 notes
·
View notes
Text


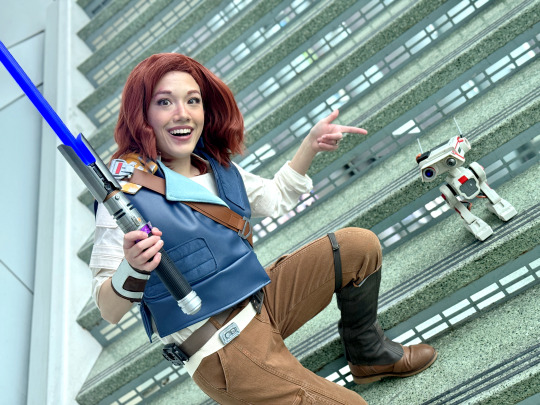
Thank you so much everyone for your kind words on my Cal Kestis cosplay!!! It was a blast to wear around the con, and I can't wait to wear it again!
My mom graciously was the one who made my cosplay, and she did an amazing job!!! She is a very talented seamstress, and I def need to learn how to sew from her haha BD-1 I got from Galaxy's Edge at Disneyland, and my lightsaber I got from Disneyland as well.
#cosplay#cal kestis#star wars#star wars cosplay#jedi survivor#the shoulder armor thing is made of EVA foam and the belt buckles are actually made of shrinky dinks!#the wig is from epic cosplay which is my favorite place to get wigs and for the tattoo I made it with temporary tattoo paper#the pants tho are from amazon haha but they worked perfectly and were super comfy since technically they're more cargo pants#the scar makeup i did was literally from a short tutorial on youtube i found#you basically use 2 shades of pink lip liners and then one red one and keep blending them on top of each other to create the scar illusion
68 notes
·
View notes
Text

Options/offerings for the pop-up shop have expanded dramatically and I still have 3 more ideas to walk through to completion (or the trash bin, who knows). They are going on the backburners for now, though, because I need a break from drawing dinluke by... writing dinluke. Makes sense.
#shirozora draws#shirozora's pop-up shop#dinluke#skydalorian#din djarin#luke skywalker#grogu#oc: cheen yofree#clan of three#clan of two#the mandalorian#star wars#idk how I'll pull off the embroidered patch but i sure would like to try#i AM going to take a very short break and getting off the dinluke train#to try a painting tutorial set in the world of tron and legacy#been feeling some kind of way about my other formative fandom/ship#we'll see where those feelings take me
98 notes
·
View notes
Text
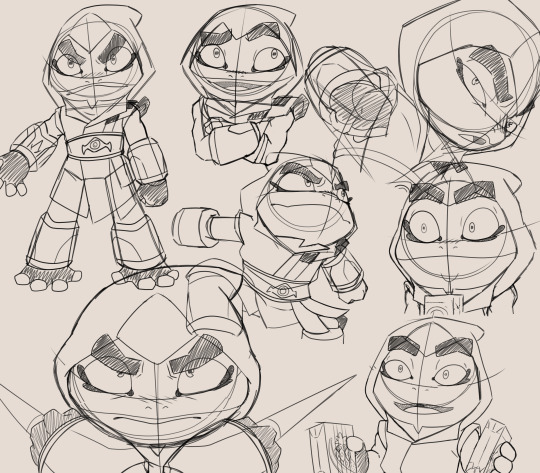
Found some practice sketches I did bout a month ago of me reteaching myself how to draw best boy Bullfrog,,, again lol
A different theme I did with these though is that if he was injured I would fix em up (The right column is the main product of this 👍)
#in conclusion: he is generally very round yet has very sharp features#some angles are incredibly difficult with the circle technique doh#arthrobug#bugbrain#art#captain laserhawk#bullfrog#clh bullfrog#clh#clhabdr#doodles#sketches#practice#honestly should I make a short and basic tutorial of how I draw out bullfrog and rayman? might help s o m e one lmao
115 notes
·
View notes
Text
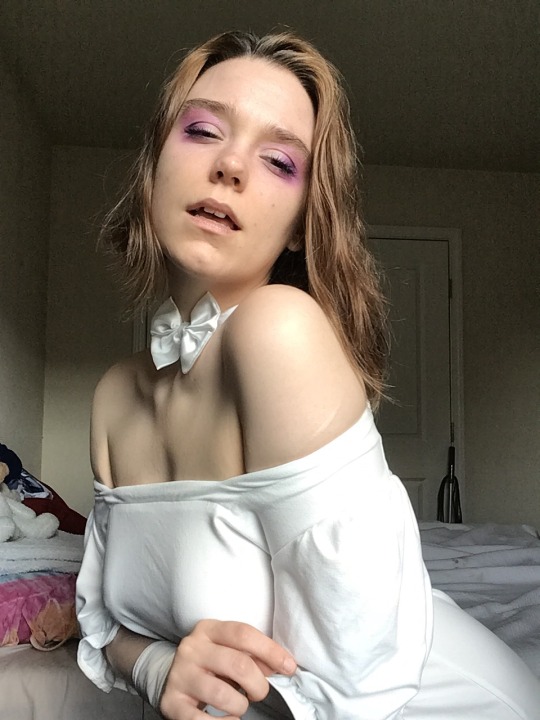


this look ~~
// watch it on youtube //
// merch // // tiktok //
#me.#soft#aesthetic#my face.#selfie.#get ready with me#grwm#youtube shorts#youtube video#makeup#makeup looks#makeup tutorial#bold colors#fashion
147 notes
·
View notes
Text
✧・゚ A short and easy workaround for Reblogs with Beta & XKit Rewritten

Disclaimer: This also seems to work with old Legacy-Threads when reblogging with the new Beta-Editor bc XKit Rewritten doesn’t work with Legacy. The whole trimming order and process of both combined can be confusing, but it’s important so the post doesn’t get fucked up. So technically, it's also helpful for Beta-Reblogging in general. (video below)
SO, IF YOU WANT TO AVOID DOUBLE-POSTING of your own reblog, do the following:
Hit reblog (make sure you’re using Beta).
Enter reply, whatever.
Safe to drafts.
Remove the first post with Trim Reblogs.
Safe.
Refresh drafts.
Remove your own reply that now shows twice with the Beta-Editor. You will only have one option to remove here, so that makes it easy.
Refresh.
Tadaaa.
In this way you can preserve your partner's reply if you want to, since the blockquote-format won't work like that anymore. So hopefully, reblogs with the Beta-Editor & XKit Rewritten should be easier now for you and your partners without having to move your whole Legacy-Thread to a new post after this measure. I am very nostalgic over my old stuff, so that's a reason why I don't want to do it. If you have additions or experience possible errors, feel free to add them.
PLEASE NOTE THAT THIS WILL ONLY WORK if your partner reblogged their response without any XKit-Extension. Just a plain reblog.
#rph#rpc#beta#editable reblogs#trim reblogs#xkit rewritten#new xkit#legacy editor#tutorial#*mine: edits#[ I just needed a short guide for my horrible brain ]#[ just short; no additional info ]#[ just wanted the essentials to get rid of the double reply issue ]#[ maybe it helps you too ]
460 notes
·
View notes
Text
Oh my god they’re finally almost done! The Superboy ones took me somehow nearly 5 hours. Curves are the fucking worst when trying tocut cardboard neatly. My exactoknife is getting dull super fast from this unfortunately so I’ll likely have to go out and get replacements tomorrow.


I think they look super nice and I’m very happy with how they turned out! Just waiting on the glue for the SB logos to dry so I can attach them to the shortbox!
Only 5 more to go!
#was just going to make a little 3D title logo for my impulse short box but lmao it’s getting out of hand#just have jli jla Superman Robin & flash to do!#realized 2D would have looked better for the SB logo but uhh. put too much effort into the already made & painted letters so they’re staying#have to make a couple more short boxes and long boxes as well#eventually I’ll need to make some for worlds finest & YJ but that’ll come when I actually have enough to fit a box#btw if anyone wants a tutorial on how to make a shortbox i gotchu. for whatever reason I couldn’t find any tutorials online#so I decided to make one myself#bones speaks#I’m also contemplating adding a ‘and the Ravers’ to one side of the SB box bc I’m also keeping that run in with my SB 94.#but it’ll be So Much work to do:/
31 notes
·
View notes
Text
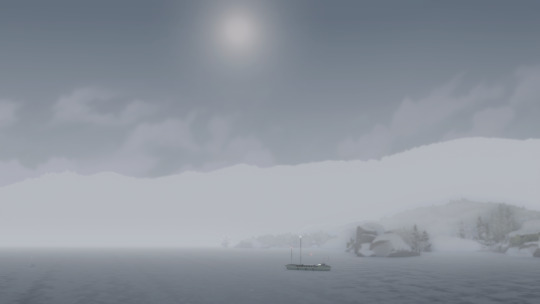
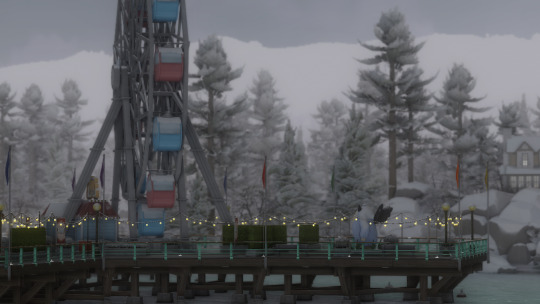
test screen shots for a preset ive been tweaking for a whole year ;-; i think im finally happy w/ it!
#copperdale + sunblind is so sexy#umm idk if ill release this i feel like its so generic since theres so many reshades out there itd be like reinventing the wheel ya know?#but also i love it and i wanna make a reshade overview yt video for it and then maybe an in depth 'how to make a preset' tutorial#ill add it to my list of things i wanna do but never hv time for#ts4 scenery#sims 4#s#simblr#also im finally in a building mood again so gameplay is on a short pause sorry yall idk how to multitask lol
89 notes
·
View notes
Text
to that one anon that asked about how i do my side profiles i hope u see this n i also hope this makes sense ....!!!!
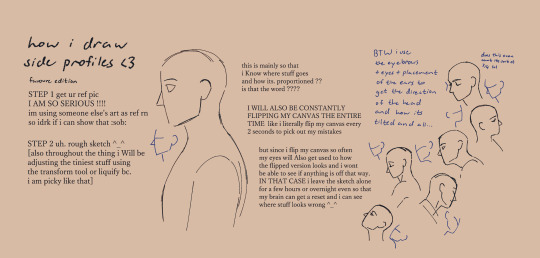

the rest is under the cut vv


#tutorial#art tips#art tutorial#drawing tutorials#anatomy tutorial#anatomy tips#ig ???? idk what 2 tag this really lmao#favourarts#soooo shy to post this my first time posting some sort of tutorial gahh .......#im a observe n learn kinda person when it comes to art so. its rlly hard for me to explain stuff rlly sdhfksdf#STILL i hope. this can help in some way ............#ALSO TO THAT ONE ANON THAT ASKED ABT SHORT OR SLICKED BACK HAIR I'LL BE DOING THAT ONE NEXT !!!!
975 notes
·
View notes
Text
finally geting into zero escape here are my thoughts so far:
good :)
tutorial dragged on for way too long but thats just a spike chunsoft thing in my experience (looking at you RAINCODE with your SIX HOUR PROLOGUE/TUTORIAL /j)
the music is. really unnerving and i hope that changes
silver guy is pretty
i already know im going to like clover cuz ive seen her already from other people
junpei is like really stupid /neutral statement
ive only gotten to the part where they learn the rules of the game so stay tuned for princeumin's epic zero escape reaction
#princeposting#zero escape#zero escape 999#9 persons 9 hours 9 doors#im watching a no commentary playthrough btw#i did this with twewy and neo twewy as well bcus i dont want to buy a game im unfamiliar with and then end up not likign it#plus i dont have the time to play a longass game#and overall im bad at video games so it would take even longer + i'd inevitably get stuck somewhere and give up /j#also i think the 30 minute tutorial thing was mostly a me issue cuz i wasn't the one playing so it felt even longer#and if you've never played mdarc yes the prologue/tutorial really is like at least 5 if not 6 hours long#i love that game but why#my brain is small i need a short simple tutorial :(
17 notes
·
View notes
Text
So, more short-row research for an upcoming design lead me down a wonderful research jaunt:
I wanted to avoid the stair-step bind off on sweater shoulders, and leave the stitches live so I could do a three-needle bind off.
So, first, a tutorial on how to work shoulder seams using short-rows, from TECHknitting:
(the same works for neck lines, or anywhere where there's multiple sets of bound off stitches!)
Then, I had to remind myself how German Short Rows work, thanks to Tin Can Knits:
I find that German Short Rows are much easier to work in a knit and purl pattern - trying to keep wrap and turn short rows in pattern can get fiddly!
12 notes
·
View notes
Last Seen Blogs