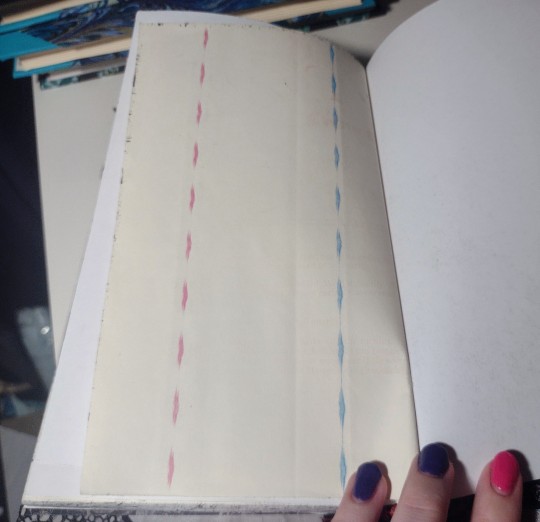
#digital fabric printer
Photo

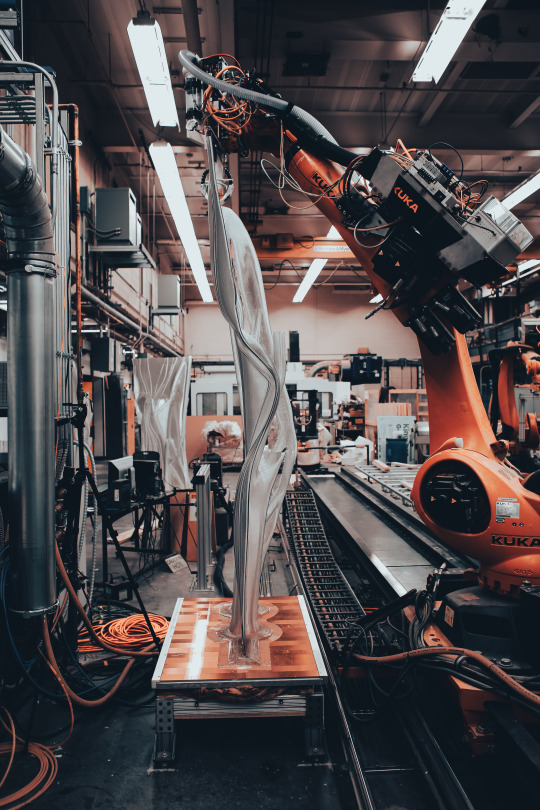
Robotic Pellet Extrusion [2021]
#digital fabrication#robots in architecture#robotic fabrication#computational design#3d printer#3d print#3d printing
12 notes
·
View notes
Text
Avery Dennison Digital Printing Solutions - Transform Your Designs with Precision
Explore Avery Dennison's cutting-edge digital printing products and elevate your creative projects. Unleash precision and quality with our advanced digital printing solutions. Discover a world of possibilities for your designs.
0 notes
Text
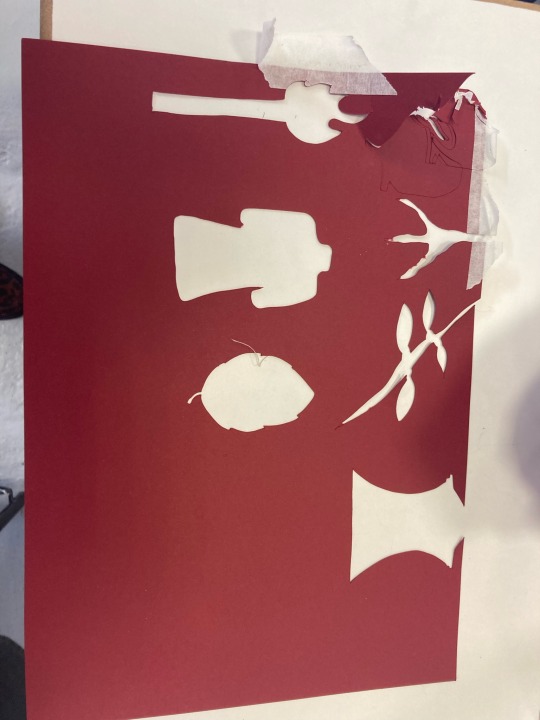


WEEK 2 . Monday Workshops with Jennifer O' Riordan
Beginning our week we got to choose our workshops. I decided to do something that I had no idea about what it was and the opposite to what I normally like to learn about.
These are images from Digital fabrication/ Vinyl cutters/Laser cutter machines and printers.
First we hand drew a clear outline of an image , then it was transferred to Adobe Illustrator to make it into a vector file.
1 note
·
View note
Text
My Punk Tips for a DIY Lifestyle:
Thrift some black fabric (or grab an old black shirt you don't care for anymore), get a white fabric marker, posca, sharpie, or paint and make a bunch of patches to sew onto your clothes.
If you're a digital artist this is your time to shine! Make stencils, posters, design clothes (there are free templates online), and if you don't own a printer libraries will let you print for cheap and sometimes free. My library card allows me to print 10 pages for free.
Reuse everything or if you don't want it anymore donate it or recycle it.
Trash is very punk. Soda can tabs for instance can make for cool jewlery. It's all about creativity.
Drug store makeup is your best friend and honestly they're sometimes better than the luxury name brand products. Or hell even make some of your own.
If you need to order something I suggest etsy. Yes, some of it's expensive but you're supporting small artists and buissnesses rather than a corportation. It's also easier to find poc, queer, and neurodivergent buissnesses and artists.
Overall punk is about being creative. Just get creative and have fun!
#punk subculture#punk#alternative subcultures#alternative#diy#recycle#shoplocal#thrifting#leftisim#leftism#creative#lgbtqia#queer community#black lives matter#alt poc#yallternative#low income#fashion#makeup
2K notes
·
View notes
Text
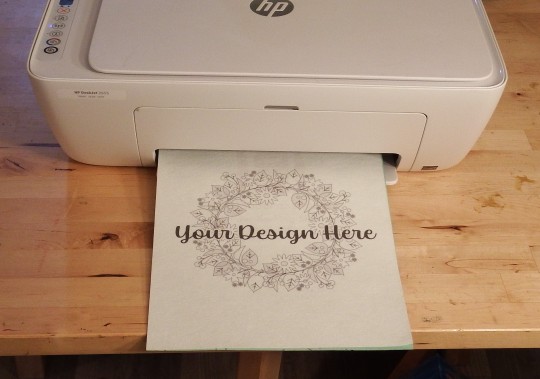
Now at my Etsy shop: The secrets to my success! Do what I do in the comfort of your own home!
Which is to say: I'm finally selling loose sheets of the material I use for all my embroidery patterns, the stick-and-stitch interfacing that dissolves in water. This means you can turn whatever design you want into a super-easy embroidery pattern.
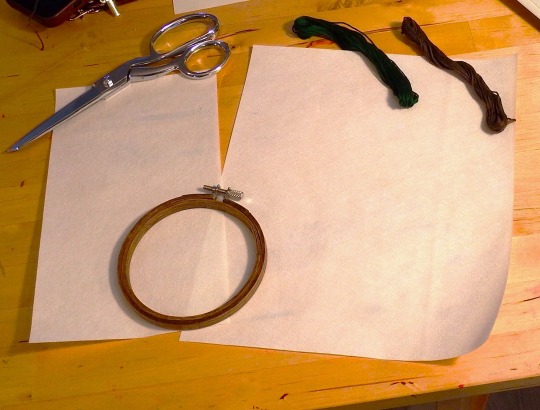
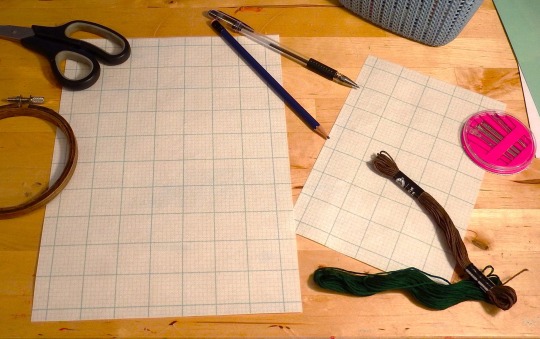
Right now this is an improvement on just buying this paper on Amazon because you can try out a few sheets to see what you think before buying a full multi-pack, and the optional printed grid can really help when sketching out complicated or repeating embroidery patterns. So that's the loose option.
The loose pages are intended for drawing your pattern out by hand with a pen or pencil. But what if you want to print your own digital image onto this paper? That's what my whole business is based on, after all. And I am willing to help other people do that, too!
But, small warning. Pro tip. Do not just buy the loose packs if you want to use your home desktop printer. It will make you cry and waste so much valuable material.
If you want to use a computer printer, buy these packs instead.
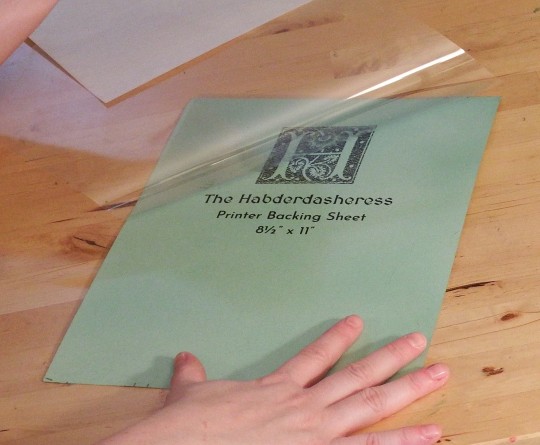
It took me most of a year to figure out best printing practices for this material. It's soft and easy to handle when you stick it on fabric, but that makes it a giant pain to run correctly through a printer. So after months and months of testing, I'm finally willing to say I've found a solution I'm happy with.
I make these sheets in my workshop, by coating cardstock pages with a spray that makes them into a kind of beefy post-it note. When you stick your interfacing sheet to one, the backing sheet holds it steady and helps it feed through your printer with minimal fuss, muss, or printer jams. Then you can pull the interfacing off and do whatever you want, and re-use the backing sheet for your future projects. So if you want to print, I've got bundles of backing sheets and blank pages to help you out.
And oh my god, do I love this material a lot. It opens up so many cool creative avenues.
Sound good? Come try it out for yourself!
140 notes
·
View notes
Text


The Boot is Famous to the Earth (chpt 1-3) tiny book, fic by alamorn, bound Jan 2023.
Making tiny journal charms is so much fun and now that I've made one with a story printed inside, I'm DYING to make more of these! Might post some process pics later in the reblogs. Materials: cotton star-print fabric, text laser printed on acid-free printer paper, archival craft glue, marbled paper scrap for the spine, scrapbooking paper for the endpages, two weights of thread, and a split ring intended for craft jewelry. I drew my digital logo for Tailfeather Binding with a tablet in krita.
#ficbinding#bookbinding#tiny book#my art#artists on tumblr#I think this is like the 9th tiny book I've made and I have consistently improved my technique which is so satisfying#apparently I have better than average dexterity? or maybe it's just higher than average level of fixation on making tiny books#this fic is really lovely btw and not terribly long!#chosen as a gift for my friend who said it's one of their favorite fics in the Fantastic Beasts fandom#fantastic beasts#here there be fandom#hopefully will be able to finish a lot of bindings this month!#check the reblogs for some wip photos
245 notes
·
View notes
Text
how I make my manga patches: a shitty tutorial
figured I'd make a post explaining my technique for making the patches I put on my hororen jacket and other projects. because they're cool and more people should do them
here's how I turned this panel into this patch for my hao pants I'm working on:


you will need:
fabric to paint on (I'd recommend a white fabric without a lot of texture. I'm pretty sure the one I use is some kind of polycotton blend?)
basic sewing supplies (needle, pins, thread)
a laptop/tablet you can lie flat on your desk OR a lightbox + printer
pencil (the softer and darker the better, I use 6b)
thin paintbrush
acrylic paint
fabric medium (optional)
thick gloves (if you're tracing off a touchscreen you WILL need these)
pinking shears (optional)
scissors
decide the scale of your patch. for this project I made a digital mockup and then measured how big I wanted it to be on my project. I settled on 3 inches wide
download the image you plan to trace and either zoom in to the right size or scale and print it (I don't own a lightbox myself but using it should provide a similar effect to my method.
lay out your screen or lightbox flat on your workspace and put your fabric over the image (I'd also recommend ironing your fabric before this if you can). If your fabric is thin enough you should be able to see the lines through it.
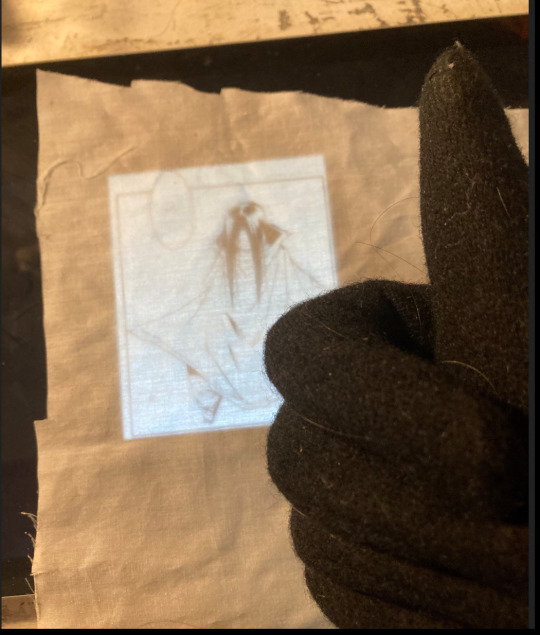
this is where you want to put on your gloves if you're tracing off a touchscreen. without gloves, your hands can sometimes cause the screen to move or zoom in while you're tracing.
now you just need to trace the image onto the fabric with your pencil. this is the absolute WORST PART and to minimize suckage I recommend
checking you're aligned with your previous marks before you make a new one
tensing your fabric along the grain or crossgrain with your hand as you draw, so it doesn't shift (don't fuck with the bias that'll cause problems)
taking your tracing OFF the screen to add the finer details (tracing directly is most important for the big shapes and faces)
using a soft, dark pencil to avoid damaging your screen (you can also add a sheet of transparent plastic between the fabric and the screen, but I've found this makes the fabric slip more)
shading in the flat black areas so you don't forget them later


here's my penciling after finishing on the screen and fully finished
4. now it's time to paint over the pencil
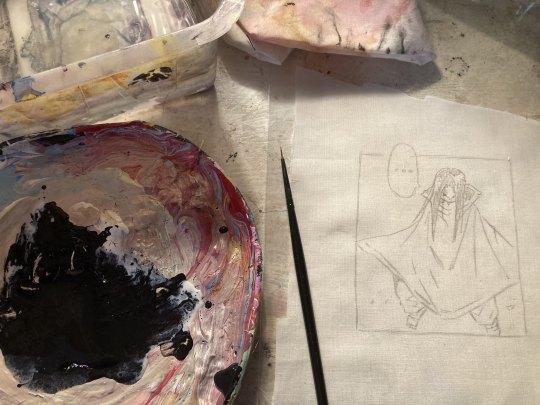
I use a cheap, probably terrible acrylic paint and mix it with a textile/fabric medium. This makes the paint flow better and raises its longevity on the fabric. It's not necessary to use, especially if you don't plan to wash your finished project (acrylic paint is plastic once it dries, it shouldn't chip off too easily).
then you just. paint over the pencil. take you time and steady your hand on the desk. if you're worried about smudges work top-bottom and left-right/right-left depending on your dominant hand.

here's mine fully painted. once the paint is dry, I heat seal it with an iron (and a pressing cloth, so if it sticks I don't have hao fused to my iron forever)
5. cut out the patch. I like to use pinking shears to reduce future fraying, but if you don't have those you can either manually cut notches or fuck it we ball a straight edge.
then you just pin and sew it to your project. boom done
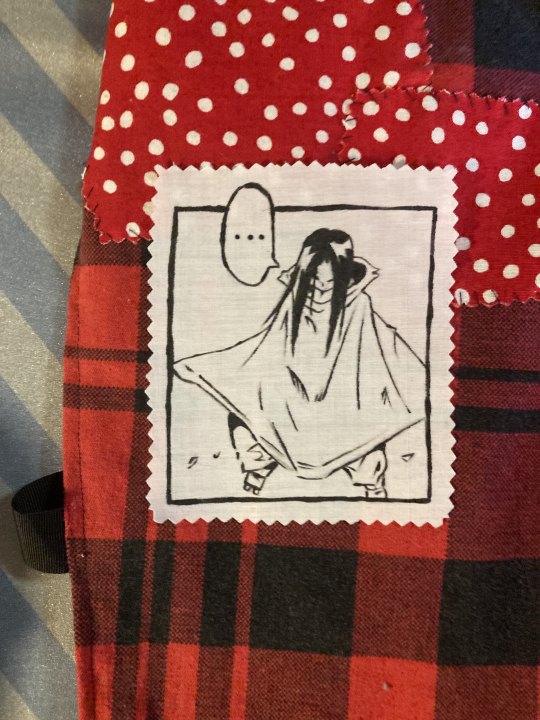
now you can make as many as you want and add them to everything!
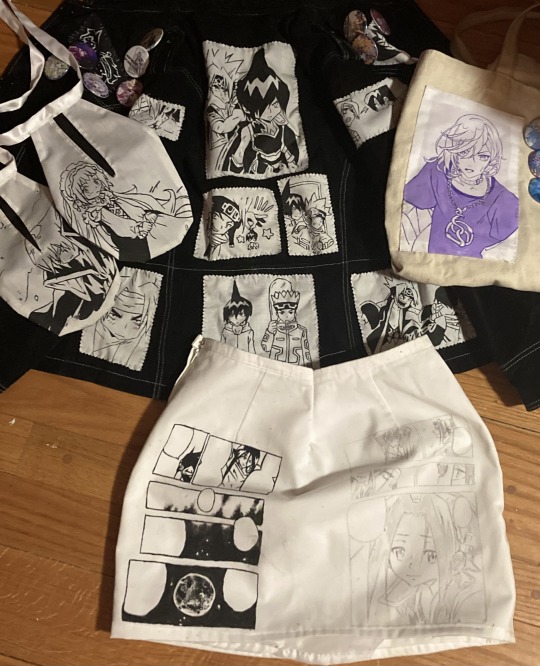
I've used this technique for:
aaaaallllllllllllll the patches on my hororen jacket (took FOREVER don't try to hand sew through SUEDE kids)
tie-on pockets (EVERYONE MAKE THESE THEY'RE SO HANDY)
a cell phone pocket on my cozmez ita bag
painting my favourite manga pages directly onto a skirt (wip because that fabric is a nightmare)
you don't need to just stick to manga panels either, anything works as long as it has clean, defined lines (but manga/comic panels are definitely easiest). if you look at some of the patches on my jacket you can see I've used coloured screenshots and official art and just traced over them in black. would recommend colour correcting images like that to make the lines easier to see, though
I love this technique because I love dressing up for cons but I don't enjoy making cosplays themselves. so I just make an insane jacket wear it to a con and then wear it in regular ass life. shoutout to the three people who recognized my jacket at fanexpo toronto last august. highlight of my life.
#I don't know what to tag this as you get it raw#I don't think anyone cares either so#if you use this please show me!!! I want to see!!!
16 notes
·
View notes
Text
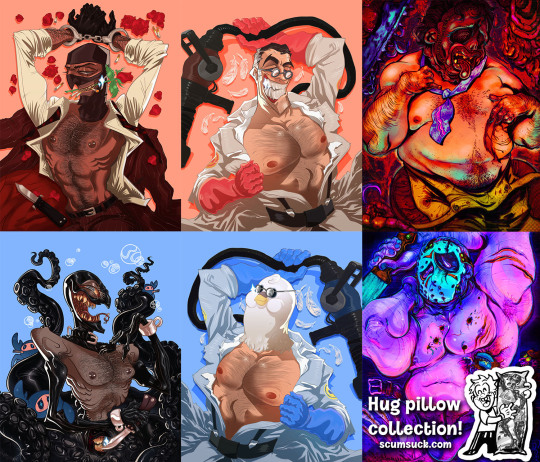


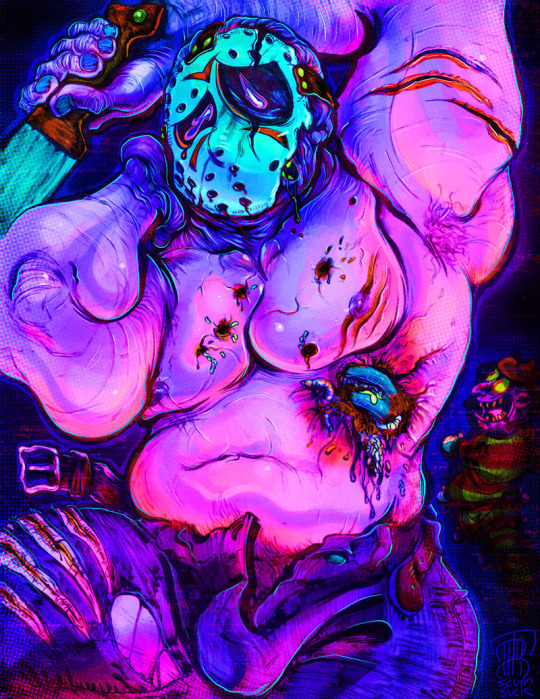
All the half-size dakimakura hug pillows I've designed so far ♥ Good mix of body types, from muscle to skinny to chub.
Get them as physical pillowcases on my site!
Download them as big ol' digital jpgs. Make a pillowcase yourself if you know a fabric printer! Use it as a phone background! Admire my wiggly frantic inking up close!
Shock and awe grandma when she comes over and see your five new boyfriends!!
#draws#leatherface#jason voorhees#medic tf2#spy tf2#tentaspy#x reader#dakimakura#hug pillows#pillowcases#shilling#merch#guro
75 notes
·
View notes
Text
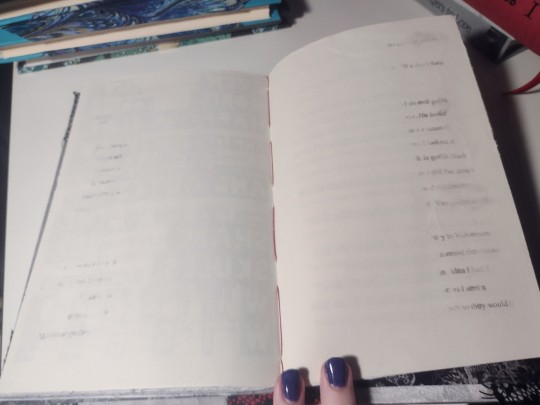
Bind #12 of Binderary, the last one.
Just getting this done, and some of the glue is still wet, so back in the press it goes after these photos.
It's My Immortal! The Renegade group typeset of the infamous fic.
This typeset is amazing guys I love it so much.
However my printer HATES it and I honestly thought My Immortal had killed my brand new printer for a while. But it's fine now, it just won't print THIS SPECIFICALLY.
So I ended up with like 3/4th printed and the rest just increasingly bad misprints. Half of them are one-sided. So...I had A THEME.
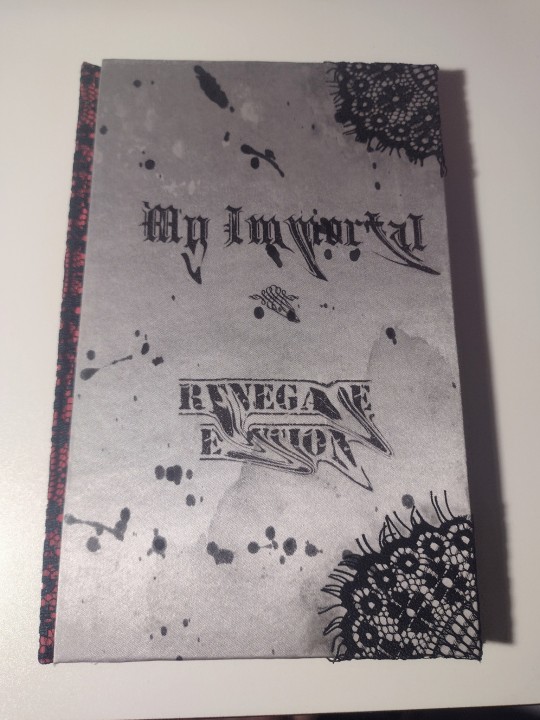
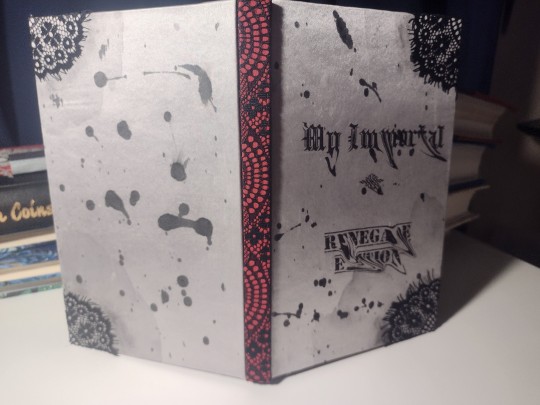
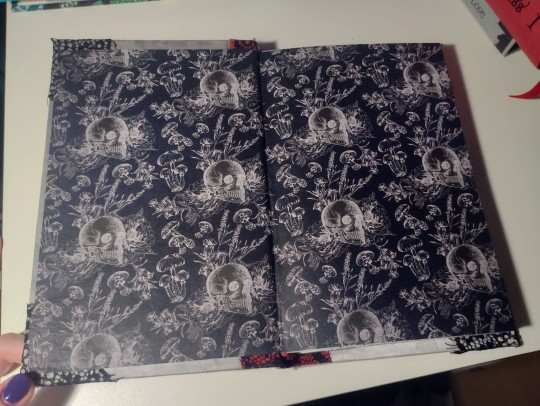
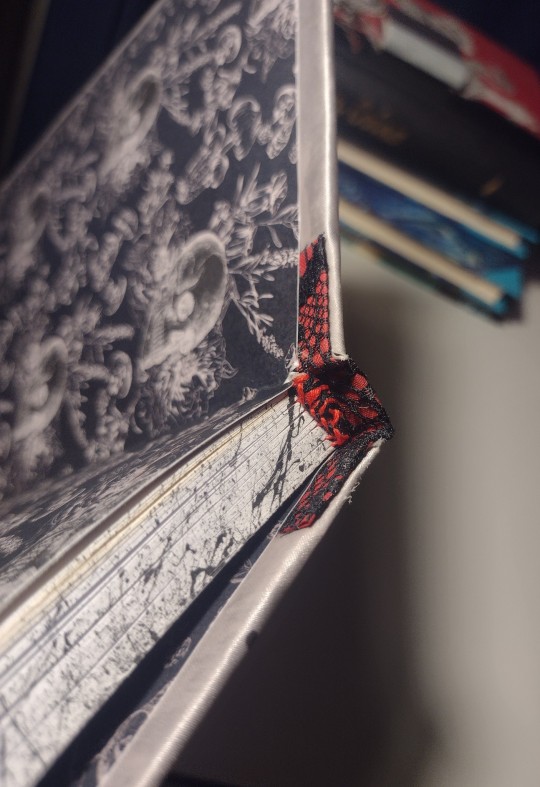
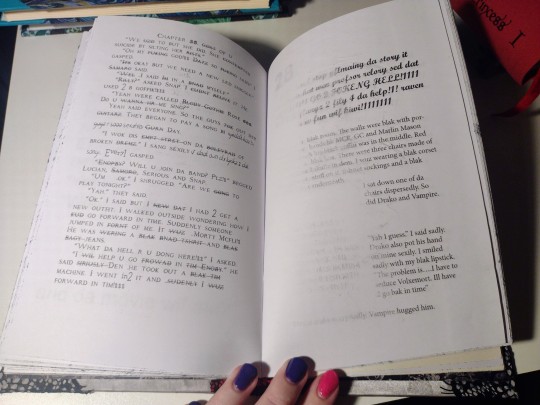
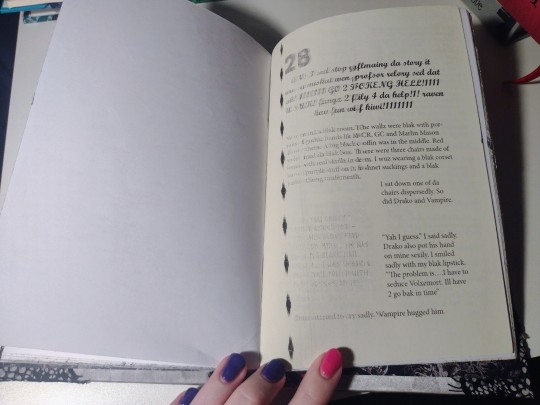
The covers are cheap poly satin scraps from my fabric bin, and surprisingly my printer printed the cover on it PERFECTLY. Paper? No it refused. Satin? No problem. The cover is digitally warped to look misprinted after I figured out I couldn't FORCE it to jam and smear the ink.
I painted the splatters with acrylic and glued on the lace bits...then did a little more painting that went wonky, but yanno. It's a 3 piece bradel binding. The spine is actual bookcloth with lace over it. (Which worked really well, I need to do this again.)
Endpages are scrapbook paper I got from @fanboundbooks at the Havencon Renegade meetup last year. Page edges are splatter-painted with acrylic, my first time trying that. And the endbands are very messy attempts at fancy chevron endbands that I just learned...or sorta learned, I guess judging by results.
92 notes
·
View notes
Text
Okay I’ve learned a cool trick well enough to share it now
So I’ve been trying to do a lot of like physical manipulation to make cool digital effects for ttrpgs so I wanna show folks how to go from like this

to this

Using a combo of physical and digital manipulation. You’ll need a printer, a scanner, and something to cut with; and then I used the Affinity Suite for digital (especially photo), but you can probably do some similar shit with Adobe
The big things in here are “fucking up text with the scanner” and “creating threshold maps for texture and to hide issues”
so here we go
Okay so you’re gonna need a scanner I’m so sorry, but just print out whatever text (or images! It works on images too!) you can as big as your scanner bed will allow. You can go smaller, but you’ll lose a lot of sick texture on the way, and we don’t wanna do that tbh
The short version of this tutorial is “now drag it funny as the scanner goes down the page” but I’m gonna explain longer how that works practically haha
So print it out, cut off the white space on the left and right of the text to make it easier to work with (and I did under as well, but that’s less important). On the back of the paper with a pencil, mark the lines where you want the text to drag. For me that was above the midline on the E, but below the bottom of the top line

Like roughly here?
Set your scanner at a decent DPI, but beware the higher the DPI the harder this gets to do, because the super slow moving scanner light thing really highlights any amount of shaky. For my scanner the sweetspot is like 400 for good texture, but you’re gonna fuck up a lot doing it tbh so trial and error.
As the scanner comes though, keep the light between those lines, and drag it and wiggle it around! Just try to keep a consistent speed and have fun. After a number of scans you’ll pull something like this, there is a weird grey bit I don’t love and it’s gonna fuck us up just a little, but I’m gonna go over how I dealt with it as well~
Pull it into Affinity! If you have Publisher open it here, even if we are planning to work in Photo mostly, because the Persona manager is a life-saver when you’re doing cross program work.
So I first cut out the text, you don’t need to be super exact, but you only want the white paper, and the black text, not the grey of the scanner bed.

I usually then slap this text into a new document, because cropping is for idiots
then lets hop over to the Photo Persona~
Duplicate the layer that is just the text, lock it, and hide the bottom layer because we’re gonna start destroying shit and we want old copies that aren’t fucked up. With your fresh layer, hop into Adjustments>Threshold at the bottom of the Layers Menu, and drag around the preset until the text looks how you like. This gets us cool texture, but also hides that weird grey blob on the page from where I squeeze the paper during the scan and fucked it up some. For me that’s around here, but obv ymmv
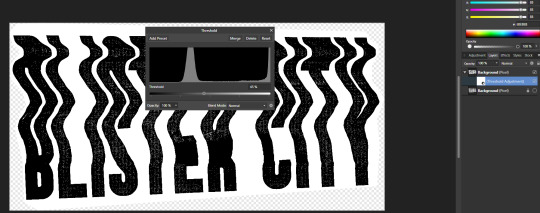
After doing this right click and rasterize your later
Now at the top of Affinity go into Filters > Colors > Erase White Paper

Where this leaves you might be perfect on it’s own! For me there are some areas I don’t love, so now we’re gonna texturize the whole thing. I circled the areas that I don’t love, but the tldr is I need to hide my sins where I had fucked up the scan some, and as a result have no texture

So if we zoom in on the gain some it is strongly vertical instead of just square
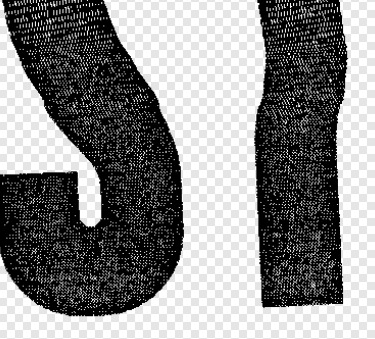
If your grain is a different shape you’ll wanna find different stock for this, but this looks a lot like denim to me? So I’m going into the Stock screen (View>Studios>Stock will bring it up if you don’t have it enabled already, but it just goes to Pexels and Pixabay to grab images for you is the tldr) and grabbing a high quality scan of some denim. You’ll wanna resize it so the fabric texture is around the same size as what’s here already. This might mean making it smaller than the whole page and that’s fine, for me I just duplicated it till I had enough to cover the whole image, but the tldr here is “cover the whole page in denim or concrete or whatever texture you’re using”
If you used multiple images group them, rasterize the entire group, tldr make it one big image. Afterwards hop back into the Threshold page, and try to replicate the grain pattern! You’re gonna slap it over the whole image so don’t worry about getting it perfect. You want the image to be mostly white, with black as a the textured bits, BUT if you can only get it to mostly black with good white texture? Totally fine, you’ll just want to inverse the image at the end (I personally find this way easier, but like ymmv)
anyway for me we ended up here

Because it’s mostly black we are gonna want to Adjustments>Invert on this. Same as before now we want to rasterize the image, and go to Filter>Colors>Erase White Paper. Set the blending mode to Erase
This whole thing requires a lot of patience, and a lot of trial and error, but eventually you’ll land on something like this

We aren’t going for a ton of texture, just enough hide some of our mistakes along the way
Group the whole thing, duplicate it, lock and hide the original again
Now on one group go ahead and rasterize it again, slap some color under it (or idk a book cover? That’s what this is for) and you’re good to go!
Anyway hope this is helpful, I do a lot of threshold maps on stock photos to get cool texture so I can zoom through this pretty quick, but like it takes some time and effort!
#uhhhh I need a skill share tag so im gonna make it#skillshare#yeah that'll do it#its nice not being on twitter because I can just do something like this without making a thread of it now
128 notes
·
View notes
Note
Quick question and please don't feel obligated, but would you mind if I asked how you printed patterns on interfacing like that? I've been wanting to get into making my own clothes and adding little embroidery flair to collars and sleeves, but my stitching is pretty amature, and I'm not super confident about my ability to snag your patterns on a restock, considering how rapidly you've been selling out. (Alternatively if you don't want to share the process which is totally valid if you could stock your cottagecore pattern plentifully I can just take my chances on Tuesday)
You've got a lot of options! (Especially since I had to return the interfacing I got on Tuesday, and the new stuff won't be here until Saturday, and I am quietly dying of agony with the delay)
The simple answer is, I bought a pack of "printable self-adhesive water soluble interfacing" online. They're available on Amazon in US letter-sized sheets of 12, and I could put them in my cheapo inkjet printer and tell my computer to print my computer files onto them. I didn't experience many hassles that way. (Well, until I ordered the 6m roll, which was... an Experience from beginning to end.)
You can also just trace or draw a pattern onto the interfacing with a pen. Or skip the interfacing completely, and draw your pattern onto your fabric. I often cheat and use a pencil, because it might not wash out of the fabric completely, but if it's covered with embroidery, who cares? But there are all kinds of pens and pencils and paper and chalks and dyes you can use, depending on what you need and what's available to you.
I know that some embroiderers work spontaneously, making it up as they go. I wanted to be that person for a long, long time, but the truth is, I find it way less stressful and more artistically satisfying to have a pattern to follow. There are a ton of embroiderers who spend their entire careers stitching other people's patterns and not even feeling the need to make their own. There's a ton of artistry and craft just in the act of embroidery itself.
In other good news, Etsy has a lot of other people selling embroidery patterns with stick-and-stitch designs. What got me started on this track is buying a stick-and-stitch pack from Florals and Floss, which has lots of really cute little designs that fit really easily into modern clothing. The content of our embroidery patterns is centuries apart, but the materials we use are the same.
Its artist has also published a book, The Embroidered Closet, that sounds like it would be right up your alley. (For people worried about shipping, it's also sold as an ebook and is available to many libraries on Hoopla Digital.)
26 notes
·
View notes
Photo
#3d printing#3d print#3d printer#computational design#robotic fabrication#robots in architecture#digital fabrication
6 notes
·
View notes
Text
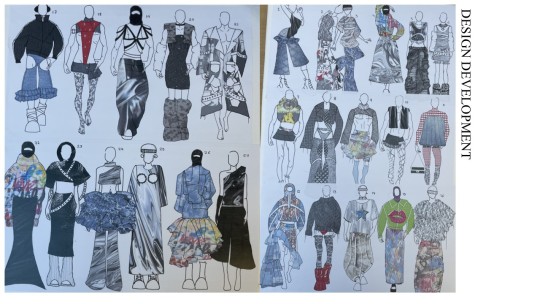
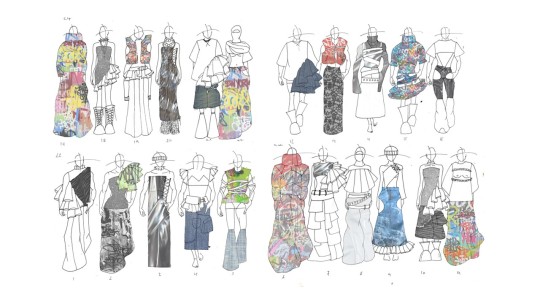
initial and developed designs both created by drawing designs authentically onto paper using fine liner to then scan them via the printer and photoshop prints or fabrics onto the garments. I really enjoy designing in this way as I feel the contrast of the raw hand drawn shapes alongside the digital print creates an interesting and clear composition.
5 notes
·
View notes
Text
I’m so mad at capitalism for ruining printers. Printers as a concept are the most amazing creatures. They can fabricate a digital image into the real world…. But now it’s like they’ve been forced to inbreed so much so now they have horrible health complications and now every single printer ever is just like that
8 notes
·
View notes
Text
Printing my fabric
With the help of the people in the digital art department, I was able to print my desired print onto my final patterns. I found this an extremely stressful experience as I feared that my print would not turn out the way I had expected. But in the end, I quite like the look of the design and I think it came out well.
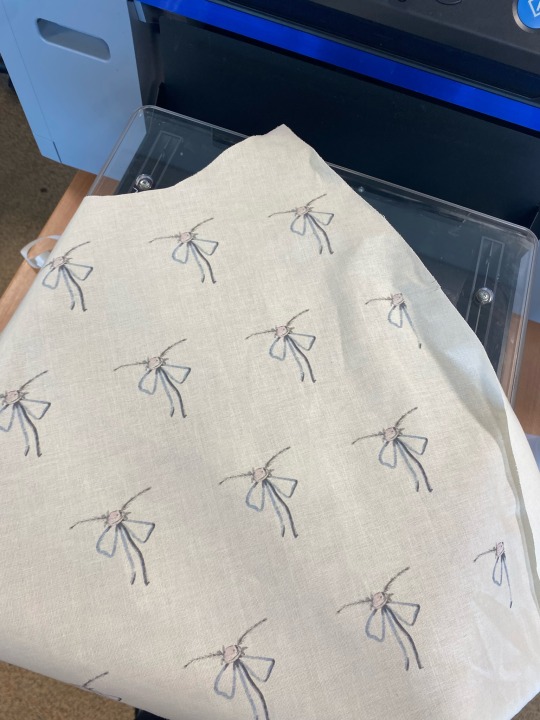
The steps for this process are;
- Scan the print on the photocopier and send it to the digital printer,
- Place the fabric on the printer bed and position it where you want the print,
- Press the button and begin the printing,
- Once the printing is complete, use a hot press for 45 seconds to set the ink.
#fashion#textiles#fashion illustration#fashion marketing#history#the duchess#fashion history#development#cannon hall#print design
4 notes
·
View notes
Text
Hey you! Are you new to art and feel uncomfortable asking questions about what tools people use to create art and/or have asked and been ignored or told off for it? Well, those people were jerks and you deserve answers. So, feel free to ask me! Anon or not. Whatever you’re comfortable with.
My artsy ‘resume’ is below, but I also am generally good at research so anything I don’t feel I know with confidence I can still help put together some info for you.
Art types that I have the most experienced with:
Comics- traditional and digital. including pencils, inks, colors, lettering (not my strongest), layout/printing, etc.
Illustration- different style types, including but not limited to: general illustration, book covers, children’s books, horror/graphic, etc.
Photography and photo editing- general, fantasy/art photography, portrait, animals, nature, etc.
Animation- mostly 2D and some 3D. Storyboarding/animatic/full projects, stop motion, voice acting (not my strongest), backgrounds/effects (not my strongest), props, etc.
Traditional arts: pencils, charcoal, oils, acrylic, watercolor, ink, printmaking (not my strongest, but I know a lot about it), figure study, still life, etc.
Printing/merch: sticker making at home and with pro printers, mugs, calendars, fabric printing, art prints, etc. Multiple merchants so just ask!
Tools:
Wacom Cintiq 16 (current)
(Have used a Wacom Intuos before)
iPad w pencil (current-she’s an older generation though)
Digital PC program experience:
Photoshop/After effects/Flash/Etc (until 2015 so not quite up to date on any major program changes after that, sorry!)
Clip Studio Paint- Pro and Ex (current)
GIMP- (current but I used it more before 2014ish)
Poser- (2020 right before the update. I had to get rid of it because the company that I bought it from sold the program to another company but didn’t include my key code anywhere so I basically got stolen from. Aye)
Apps:
Procreate-(current)
MediBang Paint-(current)
Other apps:
Picsart- (current)
CapCut- (current)
26 notes
·
View notes
Last Seen Blogs
lxverss
HIATUS
salm0ncann0n
Lily !

mnqufwbsn76734
주안동출장안마

frenzytooth
Frenzied Archivist

mktaquarock-blog
Aquarock