#blender 3d help
Text
Blender - How do I get my material to look better on the underside of this arch?
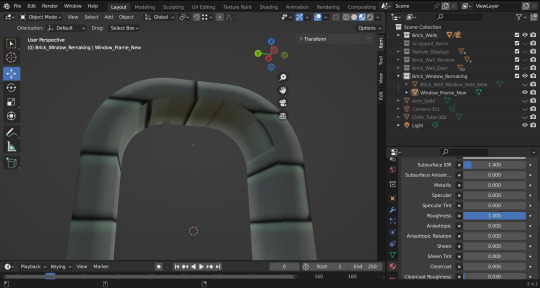
I'm trying to get this brick material to wrap neatly across this window-frame model I made. The front looks fine, and I've got the outside sides/bottom/top looking okay too, but the inner faces on the top of the arch are giving me a lot of trouble.

Here's my material nodes for the model.
I've tried fiddling with the material's nodes (adjusting the scale, in particular) , nothing seems to help me tidy things. I've tried UV unwrapping, smart UV project, and adjusting the UV map for the faces several times, didn't help much.
Does anyone have any suggestions?
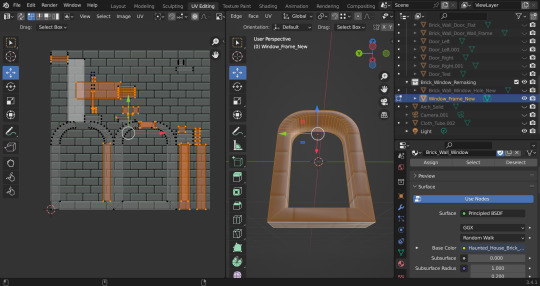
Here's the full uv map, if that helps.
Here's a link to the model.
#blender 3d#blender help#blender 3d help#3d modeling#materials#textures#texture mapping#uv#uv mapping#blender3d#blender#shaders#nodes
6 notes
·
View notes
Text
[⚠️Warning: Flashing Lights⚠️]
Spamton's lies 🎙 Made another Spamton animation, hope you all enjoy! (Listen with audio or click "keep reading" for the transcript + more!)
II Voice Source II Music II On YouTube II
Transcript:
I'm a pretty good liar. Done a lot of lying in my time. I've lied to men who wear belts, I've lied to men who wear suspenders. But I'd never be so stupid as to lie to a man who wears both belt and suspenders.
Free Downloadable Wallpapers (use them for whatever you want!):
#deltarune#spamton#ralsei#3D animation#animation#blender#blender animation#flashing lights#flashing lights warning#nubert#starwalker#the ORIGINAL starwalker#deltarune chapter 2#deltarune animation#been meaning to animate this for a while now so im really happy i got around to it#when i listened to this voice line i just couldnt help but envision spamton doing the sillies ahah#ralsei is mike confirmed
4K notes
·
View notes
Photo

trapinch trapinch trapinch trapinch trapinch trapinch trapinch trapinch
#chomp#pokemon#gif#fanart#3d#3d modeling#3d model#3d models#blender#blender 3d#lowpoly#low poly#3d art#trapinch#i wanted to finally try out the texturing tool inside blender cause usually i just make a uv map and export it and texture in medibang#but i feel like sometimes being able to draw on the model itself can be super helpful#so i did this so figure out how it works and practice#its not perfect but i think its cute so it doesnt matter :]#trapinch my beloved#pretend its tomorrow so i can say trapinch thursday
9K notes
·
View notes
Text
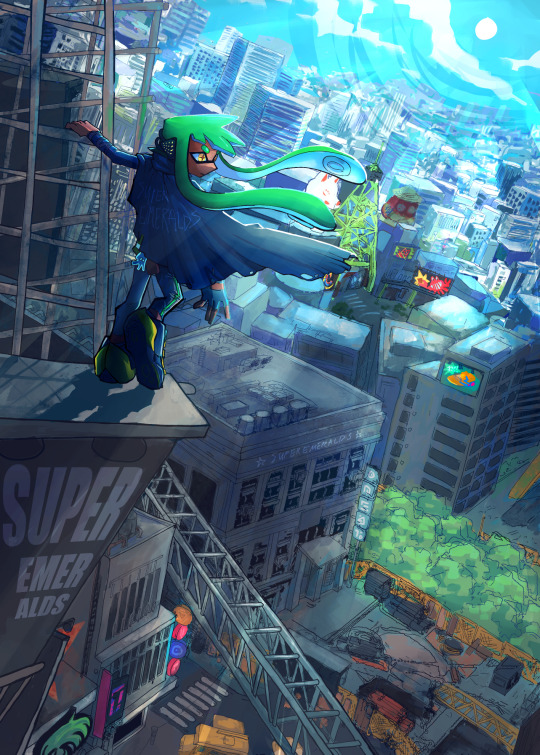
attention all squiddies! I'm finally revealing the stuff i made for the @heroshotzine!!!
grab leftovers while u still can!
#splatoon#splatoon 2#agent 3#my art#this one was so fun i had a blast experimenting for this one#remind me to never draw cities by daylight again#i used some free to use stock images to help me but oof#should out to whoever ripped the 3d model of inkopolis square tho#throwing that in blender to get that angle was a life saver
601 notes
·
View notes
Text
*in the tune of mr. sandman* Little moon boy... bring me a dream...
His name is watson n he likes bunnies
#oc#original character#low poly#lowpoly#blender 3d#3d art#blender low poly#b3d#3d model#3d modeling#object head#moon#help i havent drawn or made art of him for years... im sorry my boy my lore has just been severely changed#you weren't as relevant to the story anymore JASKDS
204 notes
·
View notes
Text
REPLIKA BIOMECHANIK
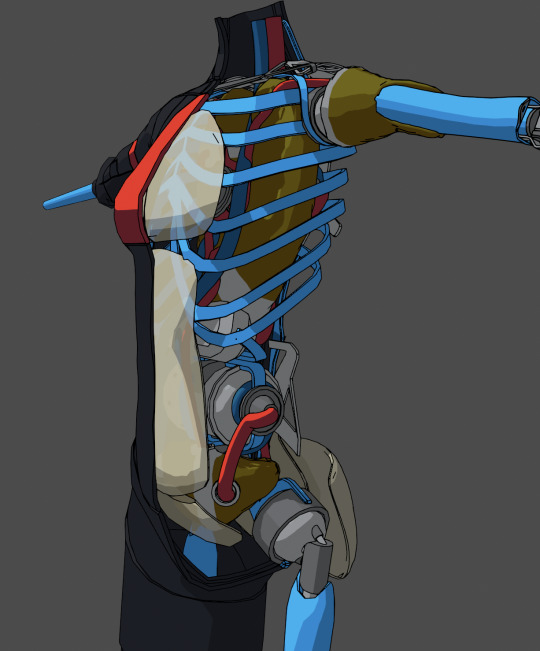
AEON Replika units incorporate both mechanical and organic parts in their construction. All replika units are based on a titanium skeleton, which is covered in a layer of protective plastic, giving it a distinctive blue look. A variety of biocomponents are also present, regulating energy production, filtration, and to mimicry of pain response. Mechanical components are used in high-intensity areas such as power production, oxidant flow, and high-strength locomotion. Artificial padding protects internal components and is used to give replika units an appearance similar to gestalts, improving co-work.
#signalis#blender#3d#OK so this started as just making the ribcage and a few bones to help with mesh setup but i got uh. carried away
337 notes
·
View notes
Text
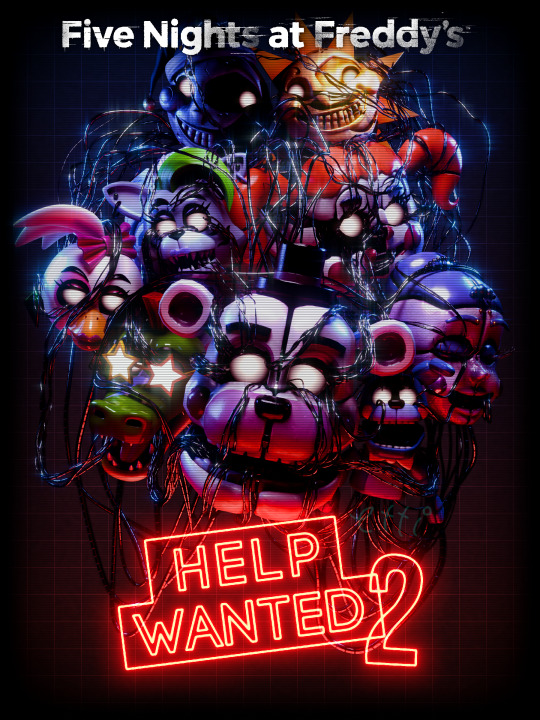
Remake of the Help Wanted 2 cover art, because I don't like the official one.
#b3d#blender#3d render#3dart#blender cycles#fnaf help wanted#fnaf#fnaf fanart#fnaf security breach#fnaf sb#fnaf movie#five nights at freddys#funtime freddy#montgomery gator#fnaf roxy#bon-bon#bon bon#ballora#circus baby#glamrock chica#roxanne wolf#monty gator#daycare attendant#moondrop#sundrop#sunnydrop#sunrise#game cover
89 notes
·
View notes
Text
I really want to learn Blender! It seems like a cool and (most importantly) free way to get back into 3D art. But, tumblr, I need help. This was literally the first thing I noticed when I tried to play around in Blender, I haven't been able to fix it on my own, and it's so frustrating that I'm positive I can't be the only person who's wondered about this.
These little things, the Gizmos, the colorful arrows demonstrating the "Move" tool visible in this picture:
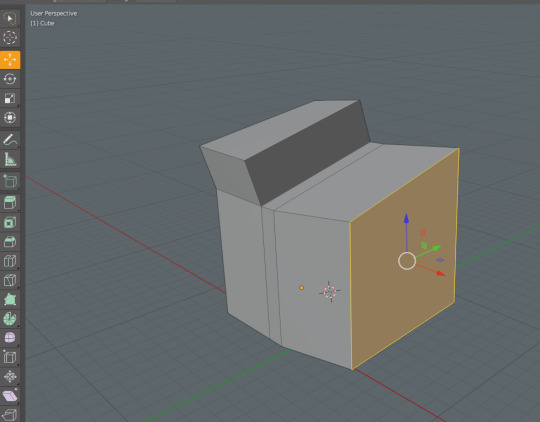
they're for moving different components of a 3D object around in space and editing them (a number of editing tools are visible in the vertical menu on the lefthand side of the screenshot) and are absolutely essential to be able to use hotkeys for. If I can't use hotkeys, my Blender experience will be miserable. But right now I'm having trouble with hotkeys because, when I hit them, the gizmos vanish, and instead the face (I haven't tried this with vertices or edges yet) that I have selected will just move when I move my mouse, with no fine control whatsoever.
I'm used to 3D programs that, when you hit a hotkey, display the relevant gizmos over the selected part of a mesh and then let you manipulate the gizmo by clicking and dragging it with the mouse, letting you move the mouse freely around the viewport otherwise. And, confusingly, when I click the button in the lefthand menu for the tool I want to use (Move, Rotate, Extrude, etc), the gizmo appears just as expected and I can click and drag it to edit the mesh just like I'm used to.
Does anyone else know what I'm talking about and also how I can fix this? I just really want the gizmos to appear when I use a hotkey and let me choose when and how to move them by clicking and dragging on the little gizmo graphic with my mouse. Also I'm asking here because I just looked around the r/blenderhelp subreddit and I know that if I rolled up over there with this nonsense they would eat me alive.
158 notes
·
View notes
Text

worked on this like early last year, forgot about it, came back 2024. we’ve gone full circle fellas
#hi rob enjoyers how do we feel abt this#<- says the guy that has no idea how to work blender#blender#tawog#the amazing world of gumball#tawog rob#rob tawog#wip#work in progress#modeling#send help#3d
71 notes
·
View notes
Note
Please i gotta know HOW DO YOU COLOR YOUR MODELS PLEASE I CANT SPEND A DAY TRYING TO FIGURE OUT HOW AGAIN /nf
no worries anon :} i literally just use materials / material slots. i avoid texturing because 1. that's closer to phighting's style (there's very very few things that are actually textured in phighting) and also because 2. i can't texture for the life of me. thankfully for both of us, materials are actually super simple to use!
first, make sure to be on material preview mode in the viewport shading, you do this by selecting it in the top right

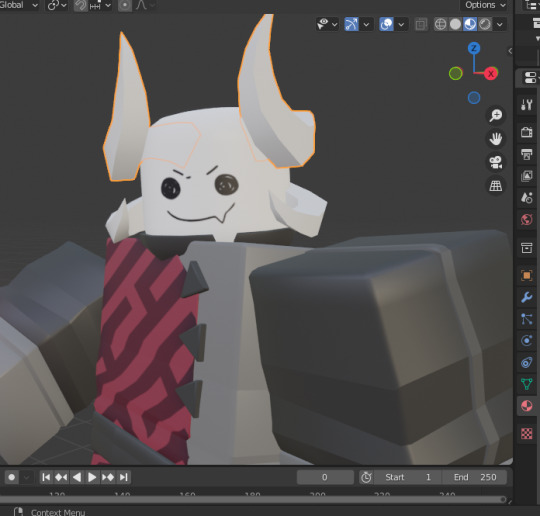
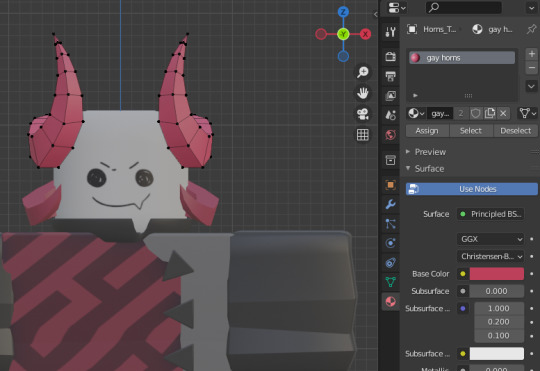
so, let's say we want to color subspace's horns here (i removed their color for the sake of this post. don't worry, they'll get it back)

what you want to do is select an object (in this case, his horns here) and go to its material properties
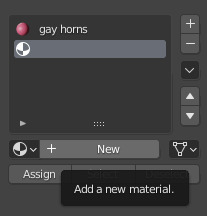
and here you can add a new material
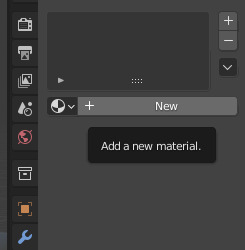
now all these things will show up. (if they don't, you'll have to click the 'use nodes' button under the surface tab.) though you probably won't be needing nodes unless you want something more specific. in this case though, we want to pay attention to where it says 'base color'

if you click on the white box next to base color, this little colorwheel should show up. you can choose any color here, or input a hex code in the hex tab if you want a specific color
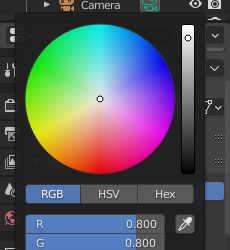
once you choose a color here, it should show up on the current object you have selected

now i just do the same for his bottom horns. any material that you've created before will save, so here i just selected the exact same material as the horns on the top of his head
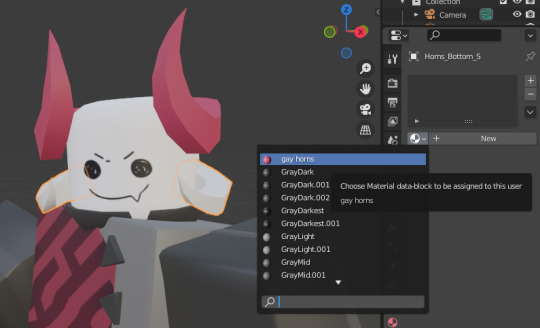

and there you go :} one thing to mention. because both of these objects are under the same material, if you change the color then it should change for both of them at the same time!

here you can see i only have the bottom horns selected, but because they're under the same material as the top horns, it's changed colors too
there's also a way for an object to have more than one material. to do this you have to select an object and go into edit mode
(i had to reset his pose here. goodbye to his gay ass pose)
let's say that, for example, we want only the tips at the top to be a different color. so we do this by selecting the faces at the top
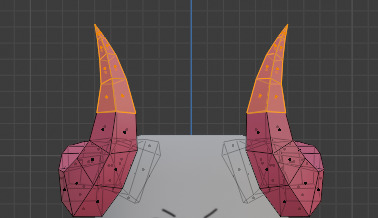
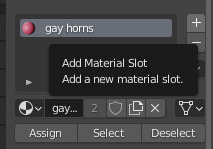
and we click on 'add new material slot', then 'new'
because we already have the faces we want a different color selected, we just click 'assign'
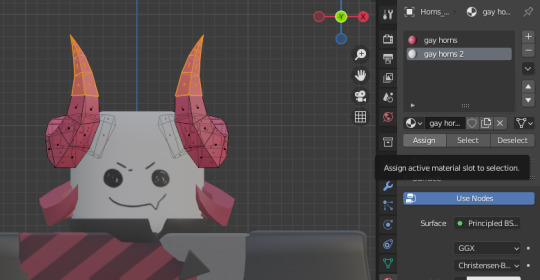
now you can just change the base color as we did before, and only the assigned faces will change color while the rest stays the same

^ he dyed his horns. so stylish
and there you go :} sorry for the long tutorial, but i hope this helps! there's a lot more you can do with materials and it can go a lot more in-depth, but generally for this sort of style the very basic features will suffice (at least for me. i don't like to do texturing. it hurts me)
#answers#long post#SORRYYY i got carried away. i was malding over something and answering this helped me take my mind off it. so thank you anon#3d#tutorial#? it's very basic stuff but it'll help someone out there i imagine#blender is very much not intuitive to use and how to use materials definitely evaded me at first. orz
38 notes
·
View notes
Text
Step 1: Pause the video
Step 2: Screenshot the angle(s) you need
Step 3: Reference or trace the screenshots in any of your art, including commission work (no credit necessary, but you can if you want to)
⚠️ BUT please do not repost this video or the screenshots you took (if they appear in a speedpaint etc. or you send them to a friend that's fine, I'm talking about direct reposts only)
❗Note: While this model was made by heavily referencing the Neytiri bust at Disney's Animal Kingdom as well as movie screenshots, it's not meant to closely resemble her. I'm also aware that it's not exactly as detailed or anatomically accurate as the models used in the movie, that's simply a skill issue on my part. I hope you can still get some use out of it as a rough reference for your art.
💡Requests & feedback: If there is enough demand, I can create a slower moving video, one with a moving light source, a screenshot pack with some basic angles, maybe even a male version (most likely based on Tsu'Tey), etc etc etc. Please note that my free time is very limited right now, so I can only consider stuff that is in high demand. Let me know in the comments!
83 notes
·
View notes
Text
"I should get into blender"
Many artists often joke about this.
But honestly, please don't force yourself to do it or think that this is the best way to getting better at 2D art. 3D is its own, very huge, complex and confusing medium of art with a high learning curve. You can easily get frustrated at the start. There's plenty of other ways to use 3D tools to help you.
But if you're scared and still looking to break into it here's some ideas you can do to start small and/or use it to help with your 2D art:
If you just want to model objects for you to trace/use as references:
-> Basic lowpoly modelling is enough, especially if you just wanna get a background perspective right. Get some cubes, extrude faces and move around their faces/edges/verts.
-> Alternatively, go to sketchfab and look for models, get it into position, screenshot and trace it. No modelling needed.
-> Learn how to block out scenes or characters!
If you want to make characters:
-> Learn 3D Sculpting! It's a lot more intuitive for a 2D artist. Blender has a sculpting feature. There's also NomadSculpt on iPad but it costs a little money.
-> Also helps immensely with anatomy practise! Look up some anatomy references and really work out the details by blocking out the shapes of muscles.
-> You can also do other props with sculpting, it's called Hard Surface but it's more difficult to do than organic shapes.
The infamous Blender Donut tutorial:
-> This may be subjective but I've seen many 3D artists actually recommend against doing the Blender Donut. It doesn't cover all of the basics.
-> Look for tutorials that aren't Blender Guru. You could also just look up individual steps such as "blender lowpoly modelling" or whatever.
-> There are multiple ways to start out with a model. I personally like to do lowpoly (also known as low-to-high workflow) without using the subdivision modifier. Find something that's right for you!
3D taught me a ton about art and did make my 2D art improve. But I also do it because it's fun on its own. Don't think you have to do it. You're doing fine.
Also these are just ideas, i am not a professional. I'm simply going off from my own and other art students' experiences.
If you do try it, i wish you good luck and have fun!
#3d#art tips#blender#b3d#this isnt negative i just think the statements of '3d helps you improve your art' and 'dont push yourself to get into 3d' can coexist#every time i see people joke about 'getting into blender is the 'ill work out' for artists' i get upset#bc you dont need to! you are fine#and even if you do want to try it out. you can start small! you dont need to know everything. it doesnt have to be scary#dont learn 5 steps at once just learn one
129 notes
·
View notes
Text
Sorry about my inactivity, I exploded and died
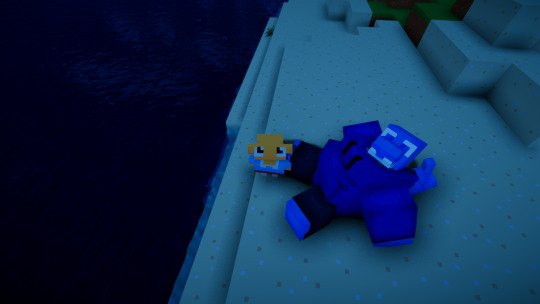
Anyway sharket in minecraft jumpscare *throws this at you*
Yes it works in game because of mods (credit to dankie for taking pictures because I have not been taking any myself)
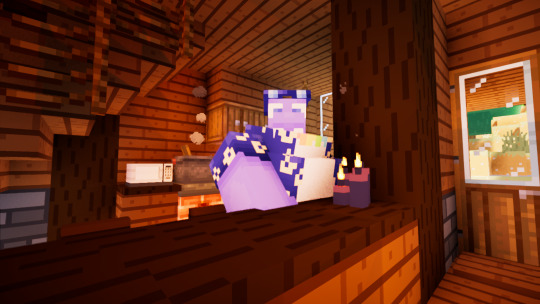

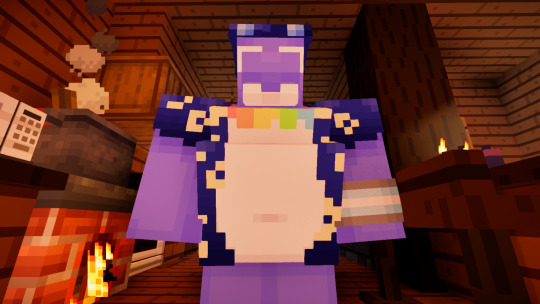
Also comes with my awesome fav blue hoodie toggle, sitting emote, equip sunglasses toggle and several custom animations for things like swimming, falling, crawling and others (don't have any good pics of these and I am too lazy to go make them so again credit to dankie for the pics that do exist and say hi to poochie)


#there are now 3 different sharket models that exist in the world#this one the one i got from theonixie and my work in progress blender model i'm making myself#anyway minecraft is so cool and fun i love playing with mods i've gotten addicted this is not a cry for help#oc:bucket#oc#my oc#my sona#3d model#minecraft#minecraft modding#minecraft mods#custom player models#minecraft custom player model#minecraft custom player models mod#furry#shark furry#anthro shark
25 notes
·
View notes
Text

Too late.
#shuakeweek2022#Goro Akechi#Ren Amamiya#crow#joker#p5#persona 5#persona 5 royal#p5r#my art#3D#blender eevee#What if when Crow and Joker were fighting against Cendrillon#the rest of the Phantom thieves were too late to help them?#Bonus point if Joker won't survive the battle and they all decide to accept Maruki's reality to save him.#sorry I love to create bad endings scenarios
404 notes
·
View notes
Note
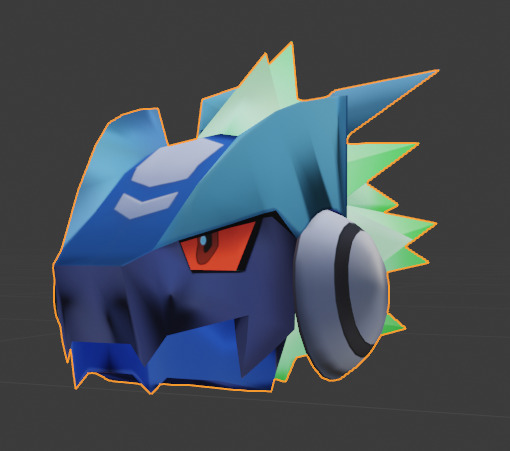
If your still answering blender stuffs, I've been incredibly curious on how you do your outlines!!! Specifically the colors fading depending on the color part. Is it done manually? Or is it a fun color shader??

The method I use for outlines is called the inverted hull method! Basically, it duplicates the original mesh, thickens it a bit, and inverts the normals so it renders behind the base mesh.
soo.. what do inverted normals do?
Normals are basically how the computer understands where a face of geometry is pointing! all faces have an inside and an outside, and typically the inner face (back face) is made invisible, which is called backface culling
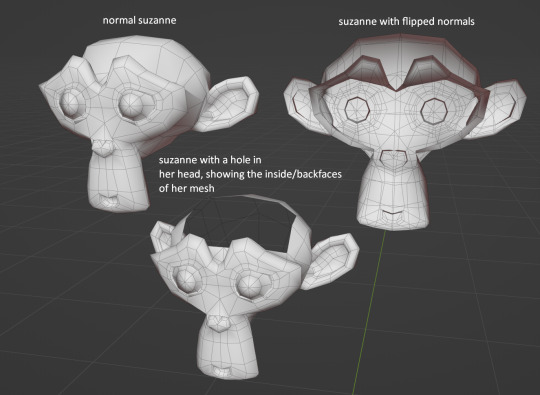
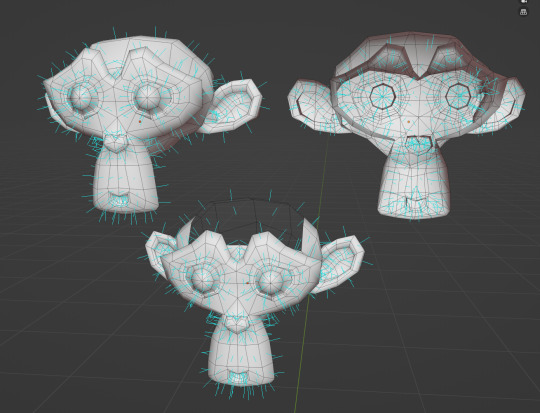
You can see how the blue face normal lines mostly all facing inwards on the flipped normals suzanne
So here's what the outlines look like with a little bit of shading!
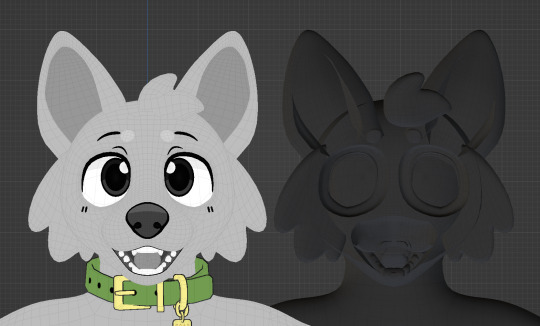
I'm really careful with how I make my characters to where their shape is specifically curated to look good with outlines, I typically add outlines within the first hour or two of making a model
1: You can see here how the pink outlines blend in with some black parts that AREN'T outlines, but just meshes or part of the texture
2: This is what my outlines look like without any outline masking, they apply equally to everything. I use masking to change the thickness of the outline mesh!
3: This is what my outline mask looks like! I recently figured out how to bake this to a texture instead of just guesstimating it for Unity

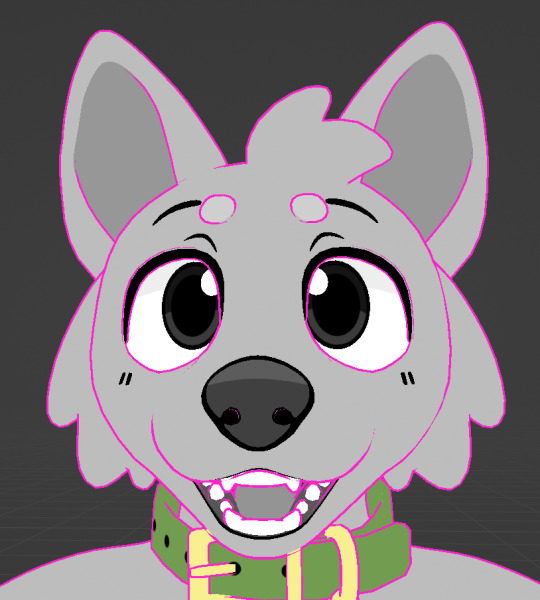

These outlines aren't too hard to set up in Blender, they're just a solidify modifier with flipped normals and a black material. But I use the Outline Helper addon by Feline Entity to make adding them super quick
The way I have outlines in Unity is the exact same concept, but done in a shader (Poiyomi Toon) so it's more optimized than having a 2nd real mesh.. Don't ask me how its more optimized I'm not That smart 😔
Finally, I'm not really sure what you mean by colors fading? If this response didn't cover it, could you elaborate or link an example of my work where you see that effect so I could explain? :3
54 notes
·
View notes
Note
Hey there! I've noticed you draw a lot for Star Force and ZX. Do you have any tips for A. Drawing Omega-Xis' head B. Drawing the Biometals because they are somehow REALLY HARD TO DRAW and C. Any particular design elements the ZX characters have❔ (Emoji because my keyboard hates question marks)
well these are important questions so ❔ is necessary here XD
anyhow, i hate to disappoint you💦but i don't have any tips to draw them.
when i want to draw more accurately, i just use their 3d model

i could tell you how i usually sketch omega-xis head

the most important thing is to draw his snout (?) first just so you know where he is facing
#ask#megaman#KArts#the biometals? best is looking up 3d models for them online#or just make them yourselves on blender. it doesn't have to be perfect.#just look decent enough to help you visualize them in 3d space
27 notes
·
View notes
Last Seen Blogs
scapeegoat-blog
Ground Zero

ielts-tips-and-tricks
Get Your Required ielts Result Here!!!
wikipotorio
El Wikipotorio
black-the-black-blog
Nero
dutdut-out-up-catch
SPIN IT to GET IT