#artprocesses
Text
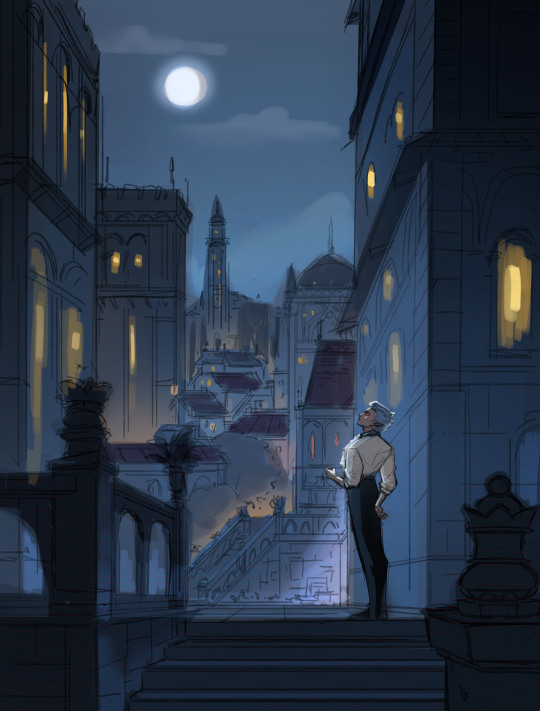
Here are some of process snapshots of this piece of Astarion in Baldur's Gate.

I am a messy painter and I often adjust and change the designs as I paint. (Mostly because I don't have the patience to do proper line art haha)
I start out with a rough sketch, I usually sketch ideas out on my ipad and move to my cintiq to work with colors.

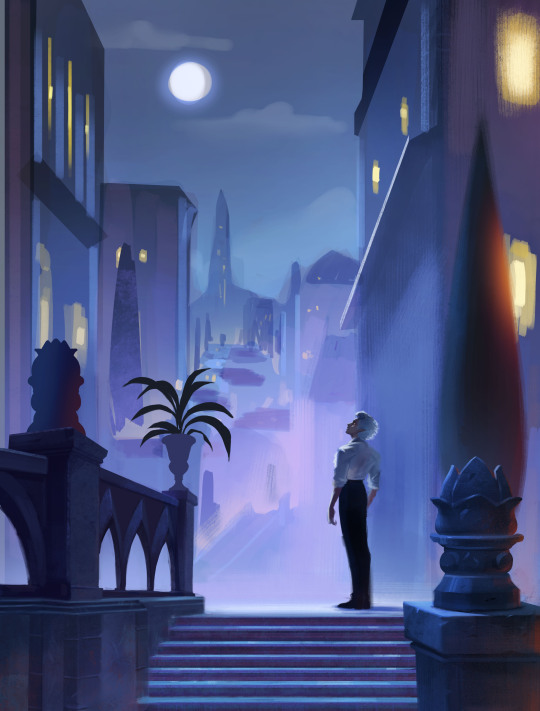
Next I block in rough color thumbnail. I keep this part messy as I just want to figure out the value structure and the overall mood.
At this point, I have collected a myriad of screenshots and reference images from the game, pinterest, and also from artists work that inspires me.
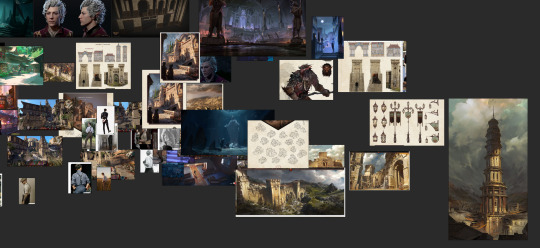
With the references on one screen, I start to paint the details, I work from foreground to midground to background. (Sometimes I'll bounce between the depth when I get bored from painting one thing for too long)
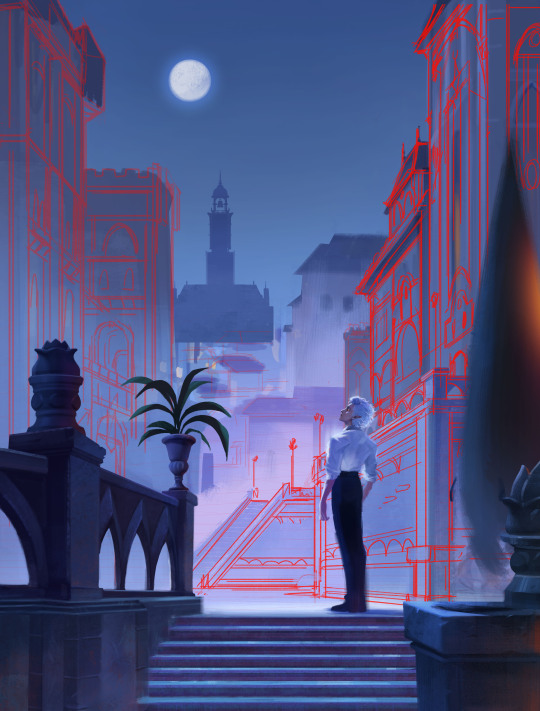
Sometimes after I block in the colors I'll make adjustments. I didn't like how warped the perspective was getting on the building on the screen right side, so I adjusted the vanishing point and added more tiers to the design. I went back into the game and looked at more how the stairs were designed and figured it out more thoroughly with a sketch on on top.
I think sitting down and doing the details is the most time consuming part. I still want the focus to be on the character despite all the detail going on the background. At this point I'm toggling on black & white filters constantly to check the value, grouping everything in the background together, making sure the lighting frames the subject in focus. At this point I realized, I forgot to paint Astarion's hair LOL, and that the bg was getting a bit too detailed, so I used a more textured brush and painted away some of the edge details of bg buildings.

Last, I make final adjustments, and I make a overall lighting/fx adjustment folder. Adding in some noise, adjusting the contrast, color balance, and lighting over all and call it done!
Link to Print shop!
#astarion#astarionfanart#bg3#baldurs gate astarion#baldur's gate 3#artprocesses#art tutorial#astarionpainting#bg3art#bg3fanart#art process#artists on tumblr
7K notes
·
View notes
Text

"Help is on the way." 🌊
Prompt : F I S H
Have a free-flowing week!
#inktober#inktober52#inktoberfish#penandink#koiillustration#inktoberallyearlong#illustrator#drawing#artprocesses#blackandwhiteartworks#fishartonline#koifishdrawing#kidlitartists#illustrationworks
0 notes
Photo

The underpainting process begins. Each person in their life touches another through action and even inaction. Acknowledge, inspire and be inspired. #thankfulgratefulblessed for this creatives like @evadormanphotography and others who show us the beauty in life. #keepgrowingkeepgoing and #seewhatliesbeyond #belovegivelove #natureart #artistworking #create #birdart #whatdoartistsdoallday #artprocesses (at Los Angeles, California) https://www.instagram.com/p/CqBF3MorffV/?igshid=NGJjMDIxMWI=
#thankfulgratefulblessed#keepgrowingkeepgoing#seewhatliesbeyond#belovegivelove#natureart#artistworking#create#birdart#whatdoartistsdoallday#artprocesses
0 notes
Photo
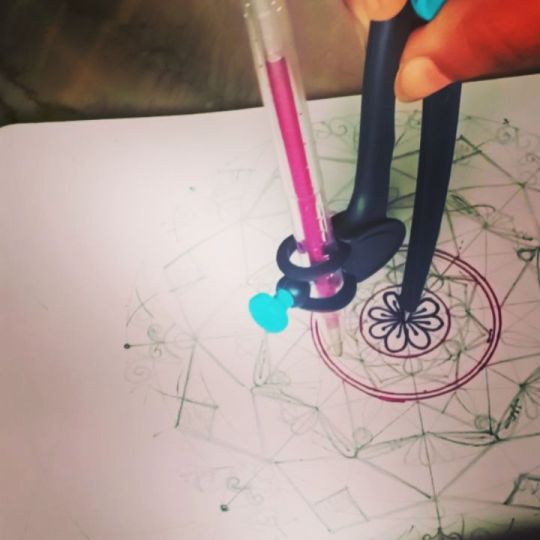
PART 2 - Swipe to continue watching🎨✏️ #mandalaprocess #artprocess #artprocessvideo #artprocess #artprocesses #artprocessvideos #artprocessing #artprocessideas #mandalartist #mandalatutoriallovesmywork #mandalatutorial #art🎨 #arte #tutorial #tutorialmandala #arttutorial #tutoriarte #arttutorial #artetutorial https://www.instagram.com/p/Cp7YmlaygOG/?igshid=NGJjMDIxMWI=
#mandalaprocess#artprocess#artprocessvideo#artprocesses#artprocessvideos#artprocessing#artprocessideas#mandalartist#mandalatutoriallovesmywork#mandalatutorial#art🎨#arte#tutorial#tutorialmandala#arttutorial#tutoriarte#artetutorial
0 notes
Photo

New! “Hope” 15,7 x 19,5 x 1,7 inches, 40x50x4,5 cm #artprogress #newartcollection #femalepainter #abstractartist #artprocesses #abstractpainter #homedecoration #homedesign #modernartists #contemporarypainting #contemporaryart #artandinteriors #artistlife #modernliving #modernart #artistoninstagram #artofinstagram #interiordesign #abstractexpressionist #interiordecor #gallerywall #abstractart #abstractmodernart #abstractartwork #abstractarts #abstract_art #modernabstract #artistas_pontodasartes #rolskaya https://www.instagram.com/p/CmBcUyAgiCf/?igshid=NGJjMDIxMWI=
#artprogress#newartcollection#femalepainter#abstractartist#artprocesses#abstractpainter#homedecoration#homedesign#modernartists#contemporarypainting#contemporaryart#artandinteriors#artistlife#modernliving#modernart#artistoninstagram#artofinstagram#interiordesign#abstractexpressionist#interiordecor#gallerywall#abstractart#abstractmodernart#abstractartwork#abstractarts#abstract_art#modernabstract#artistas_pontodasartes#rolskaya
0 notes
Photo

‚ My brother has a watch ‚ #SEAK #ClausWinkler #SEAKClausWinkler #artfoundation #foundationart #contemporaryarts #wipart #arthandler #modernartist #artistlifestyle #modernpainter #modernpainting #abstractart_daily #contemporaryartcollector #contemporaryartcurator #onview #newpaintings #àrtprocess #artprocessing #artprocesses #visualart #visualarts #creativity #largescaleformat #workonpaper #newexhibitions (hier: Oberkasseler Rheinwiesen) https://www.instagram.com/p/CgNO5M4L88x/?igshid=NGJjMDIxMWI=
#seak#clauswinkler#seakclauswinkler#artfoundation#foundationart#contemporaryarts#wipart#arthandler#modernartist#artistlifestyle#modernpainter#modernpainting#abstractart_daily#contemporaryartcollector#contemporaryartcurator#onview#newpaintings#àrtprocess#artprocessing#artprocesses#visualart#visualarts#creativity#largescaleformat#workonpaper#newexhibitions
0 notes
Photo

Drawing trees #drawing #natureart #drawingcomics #comicstyleart #inkingcomics #artprocesses #workinprogressart #comicart #comicartists #hackslash #cassiehack #seanceroom #sourcepointpress https://www.instagram.com/p/CfKjrxyPkrd/?igshid=NGJjMDIxMWI=
#drawing#natureart#drawingcomics#comicstyleart#inkingcomics#artprocesses#workinprogressart#comicart#comicartists#hackslash#cassiehack#seanceroom#sourcepointpress
0 notes
Video
From Sunflowers to Anemones ❤️
3K notes
·
View notes
Text
WIP... looking forward to finishing this one!
#artists on tumblr#digital art#digital illustration#illustration#artwork#character art#character design#semirealism#digital painting#original character#artprocess#art process
67 notes
·
View notes
Photo

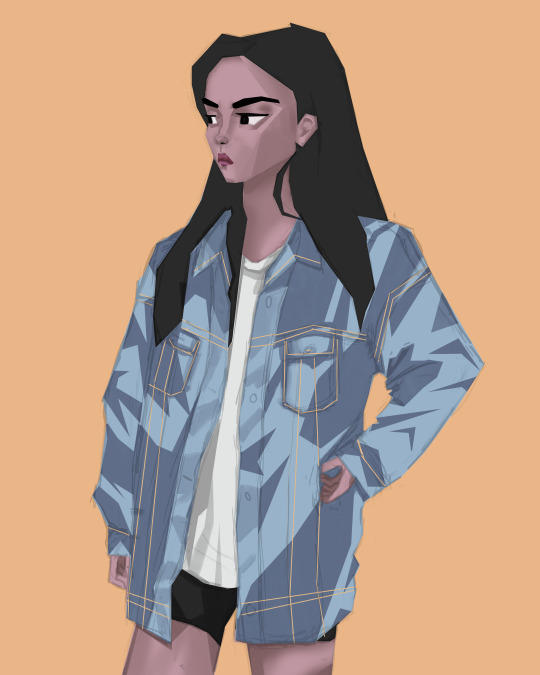
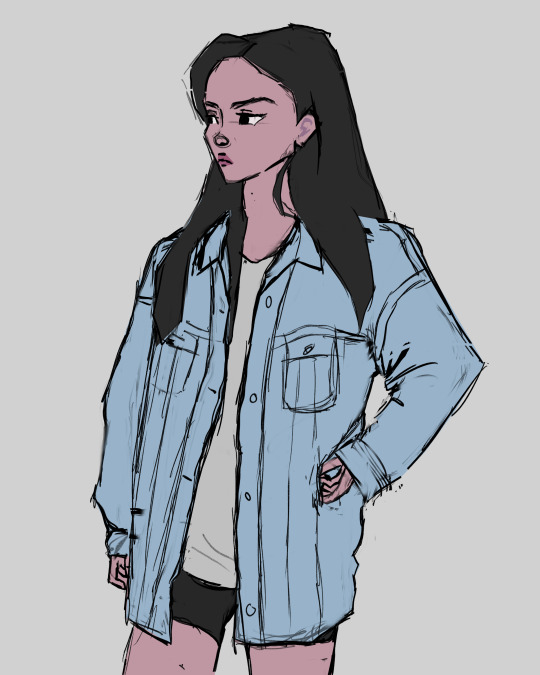
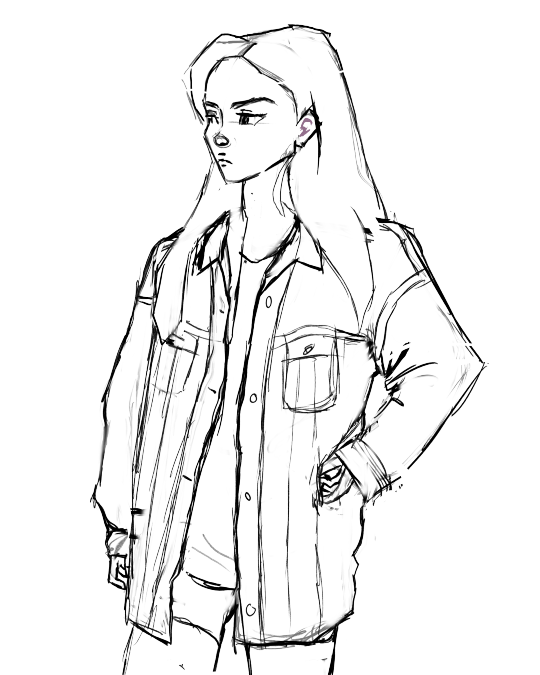
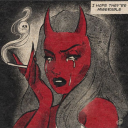
Want to post process of the latest fanart I did~
I just had so much fun drawing it!
253 notes
·
View notes
Text

Art trade w/ @stxrrstrxx
I really wanted to draw a horse so....
18 notes
·
View notes
Text
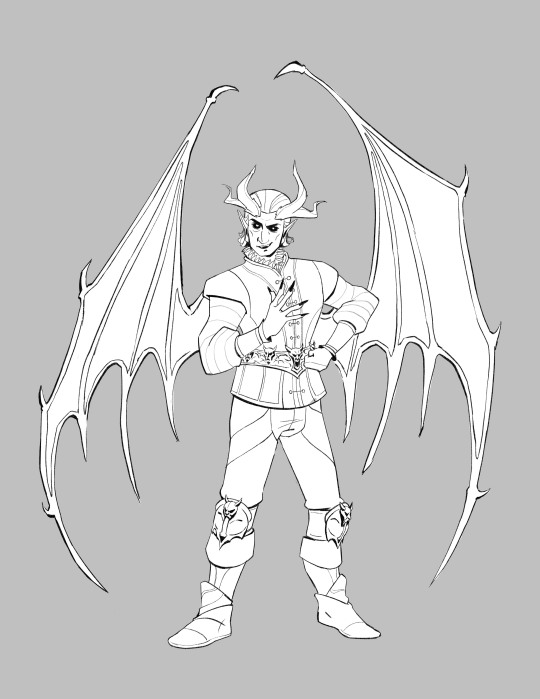
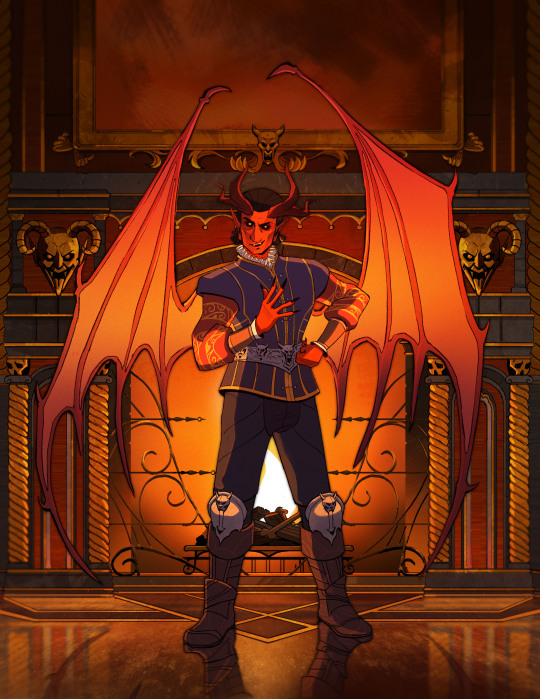
Here are some process shots for this one of Raphael from BG3! That magnificent bastard...

So I started out with a sketch of Raphael. He's got such a charismatic swagger doing the whole "What's better than the Devil you don't know? The devil you do" scene. I just wanted to do a caricature study and have a bit of fun.

Moving from rough sketch to clean line art is always challenging for me as I often get bored or what was originally loose and fun can become stiff.
I had to redo the linework twice because I didn't like how the first one turned out! Second time is always the charm.
I initially only planned to draw the character but I love the design of House of Hope too much, so I went back into the game and took a bunch of screen shots and sketched out the rough bg.
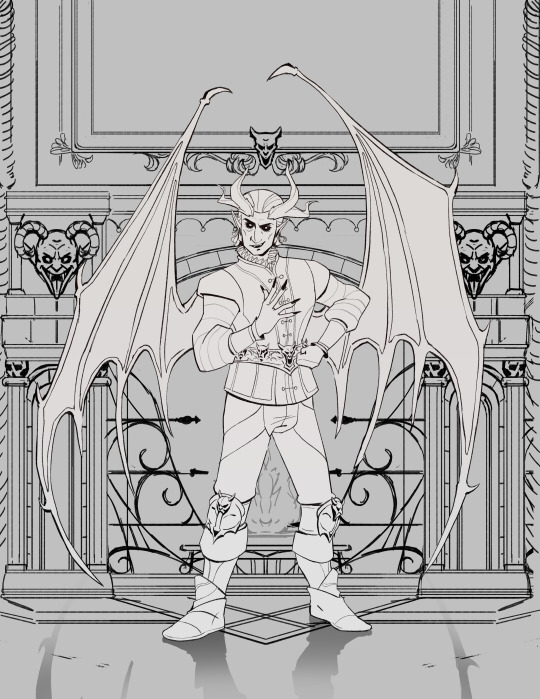
Then I went ahead and cleaned up the bg. At this point is when I group the layers properly, so there is a clear separation between foreground, and background as well setting up the layers for animation. (Making sure the fireplace guards overlaps the walls behind it.)
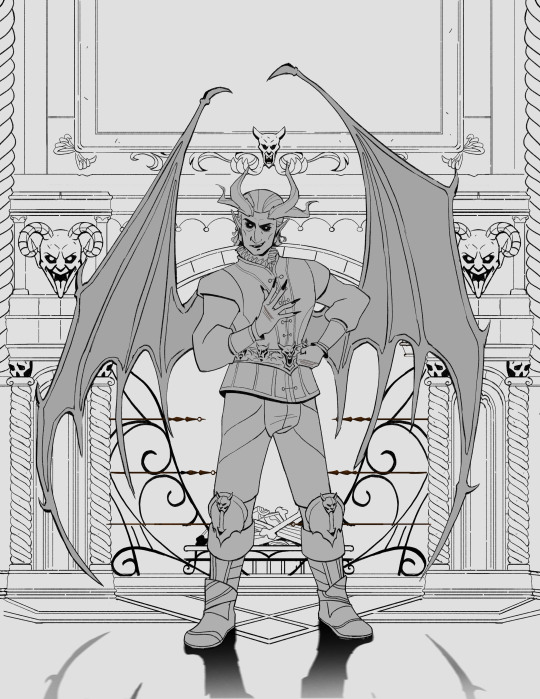
At the next stage I adding in the flat colors. I wanted to keep the style treatment of this piece more on the cell shaded/cartoony instead of super painterly. So I keep the color treatment fairly flat with a small amount of texture with the intention to add lighting as a fx overlapping treatment instead of painted in.
I work on the characters and the bgs at the same time to keep the values and color temp consistant, constantly adjusting as I go. From habit from work, I always paint the entire BG JUST incase I need to make changes or make adjustments to subject in from. Here is the bg all done, with fire painted in as a place holder.

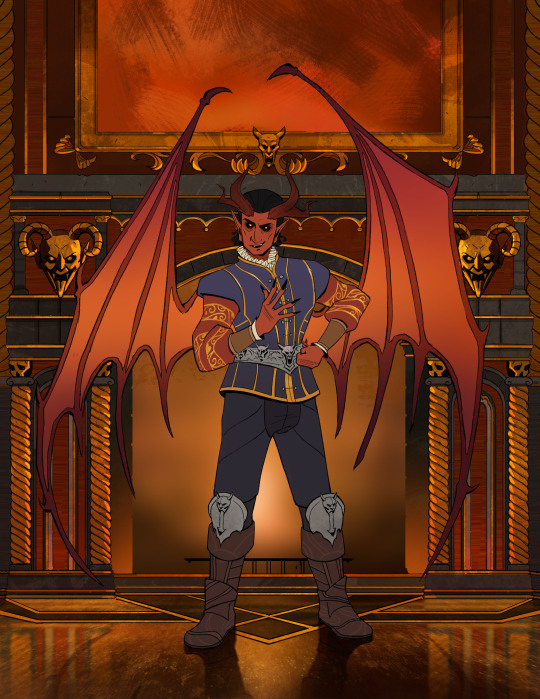
And finally, adding the final lighting layers added on Raphael. I keep it simple here, just a redish/purple multiply player with the areas in the light masked out, and inverse mask on an orange/red overlay layer of the areas in the light.
Animating the fire took ironically the longest, the animation tools in photoshop is clunky and I haven't animated since school days. I looked up a lot of references and tutorials! It's not perfect but good enough for me!
#raphael bg3#raphael baldur's gate 3#bg3 animation#bg3#badlurs gate 3#bg3 fanart#artists on tumblr#sketches#drawing#art#artprocesses#art tutorial#bg3 art#art process#art style#animation#bg3 spoilers
131 notes
·
View notes
Photo
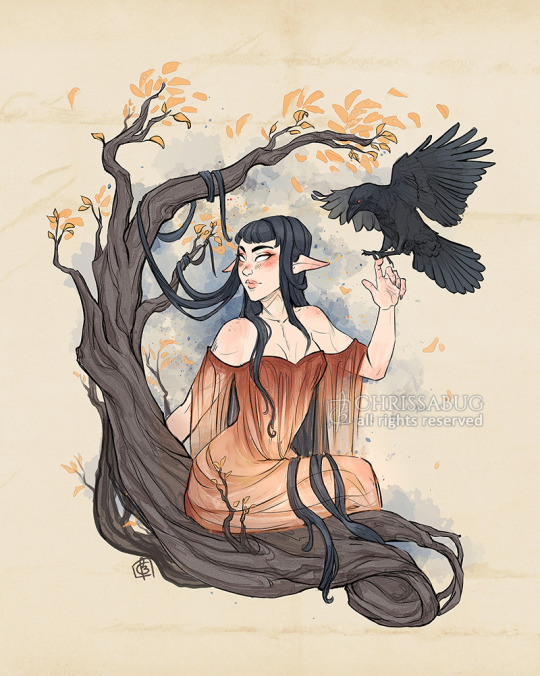

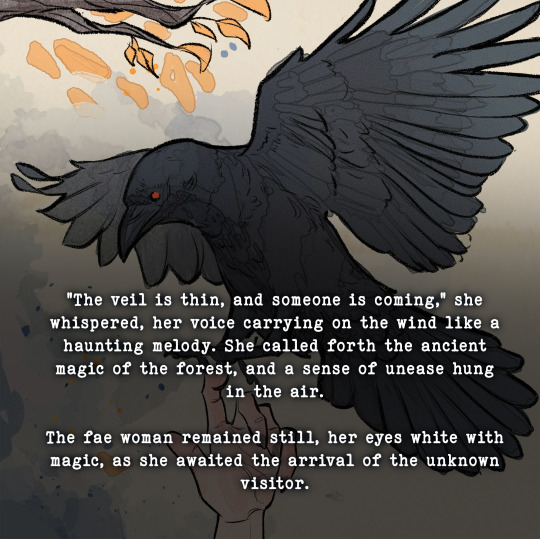
Darkwood Fae 🌲✨
#faeart#ravenart#watercolor#digitalwatercolor#fantasyart#darkforest#magicalart#artprocess#enchantedforest#witchyvibes#mysticalart#eerieart#watercolour#crow#raven
92 notes
·
View notes
Photo
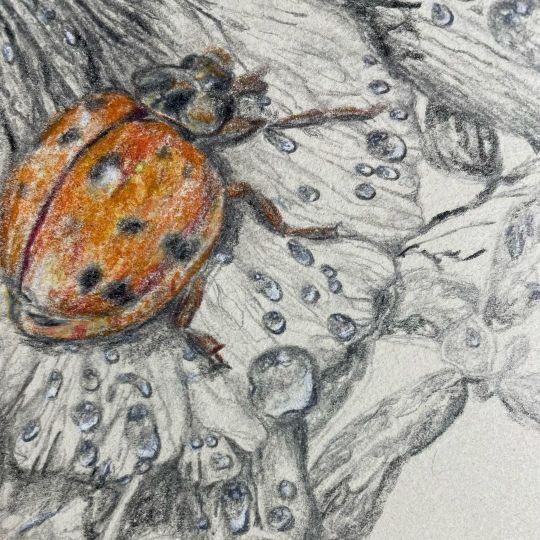
Ladybug time. 🤭😄A little friend for my Grosbeak! #littlethingsinlife are special so #countyourblessings before #everystorm and #findthegood #natureart #artprocesses #whatdoartistsdoallday #drawdrawdraw #natureartist #fineartists #artcollectors (at Los Angeles, California) https://www.instagram.com/p/CiabR-cruTq/?igshid=NGJjMDIxMWI=
#littlethingsinlife#countyourblessings#everystorm#findthegood#natureart#artprocesses#whatdoartistsdoallday#drawdrawdraw#natureartist#fineartists#artcollectors
0 notes
Video
youtube
🍂 Chill Sketchbook Session // Pumpkin spice latte INK DRAWING ... #inkto...
215 notes
·
View notes
Photo
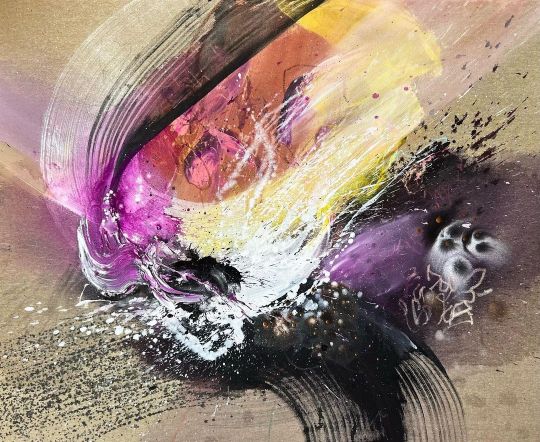
New! “Star” 90x110cm 35,4 x 43,3 inches #artprogress #newartcollection #femalepainter #abstractartist #artprocesses #abstractpainter #homedecoration #homedesign #modernartists #contemporarypainting #contemporaryart #artandinteriors #artistlife #modernliving #modernart #artistoninstagram #artofinstagram #interiordesign #abstractexpressionist #interiordecor #gallerywall #abstractart #abstractmodernart #abstractartwork #abstractarts #abstract_art #modernabstract #artistas_pontodasartes (at Rolskaya Abstract) https://www.instagram.com/p/Cl6NUyLtZt_/?igshid=NGJjMDIxMWI=
#artprogress#newartcollection#femalepainter#abstractartist#artprocesses#abstractpainter#homedecoration#homedesign#modernartists#contemporarypainting#contemporaryart#artandinteriors#artistlife#modernliving#modernart#artistoninstagram#artofinstagram#interiordesign#abstractexpressionist#interiordecor#gallerywall#abstractart#abstractmodernart#abstractartwork#abstractarts#abstract_art#modernabstract#artistas_pontodasartes
0 notes
Last Seen Blogs
luv-doritos
lol
missghostxx
Död på insidan
ba-burrito-art
Baburrito's Art Blog

thesinnerdaily
The Sinner Daily