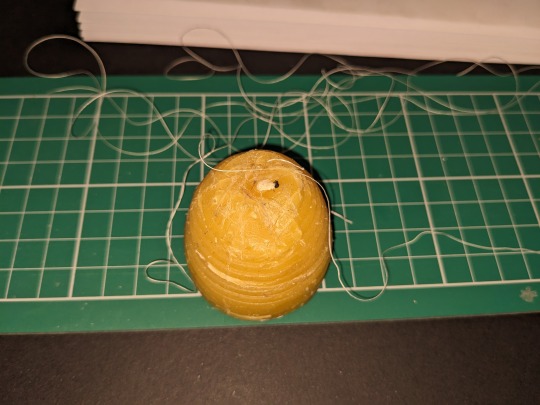
#I've printed half of the signatures of the first book.
Text
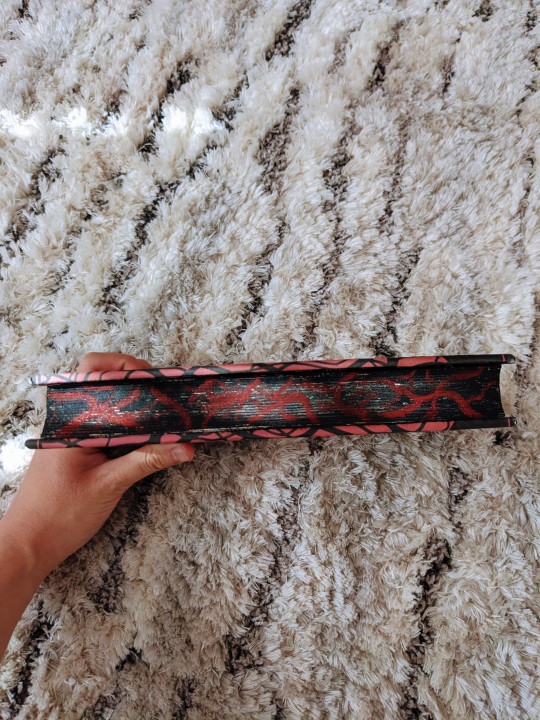
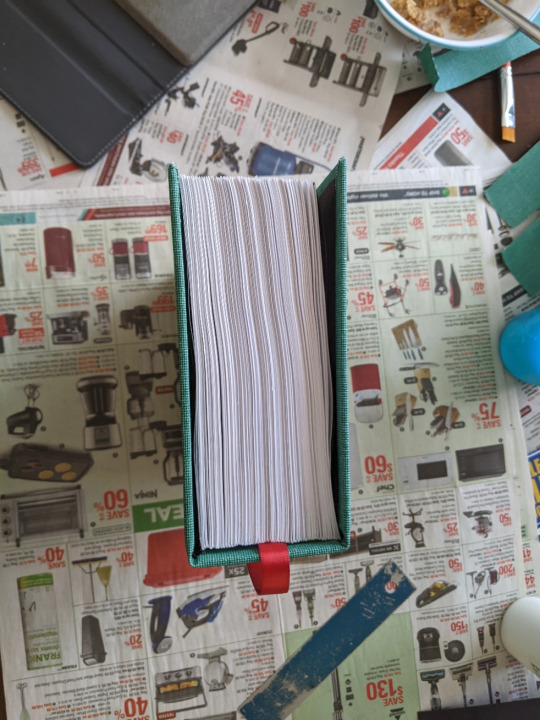
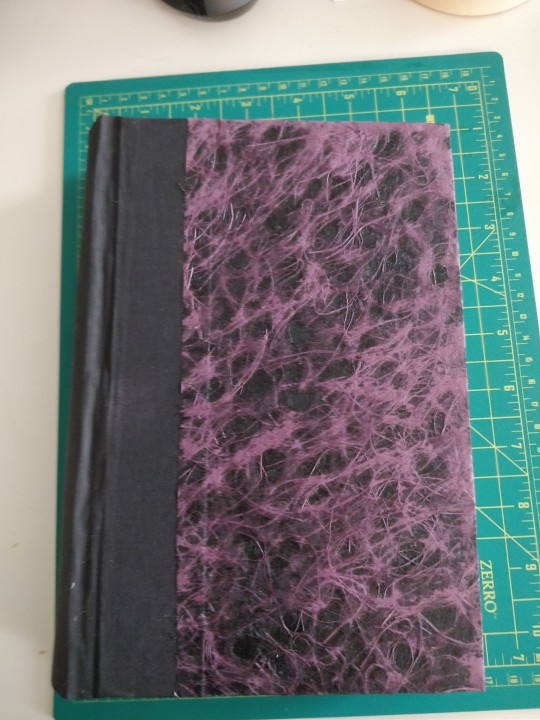
The binding of Mabel has Begun.
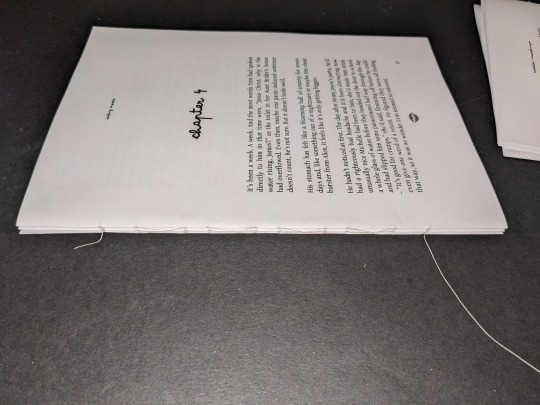
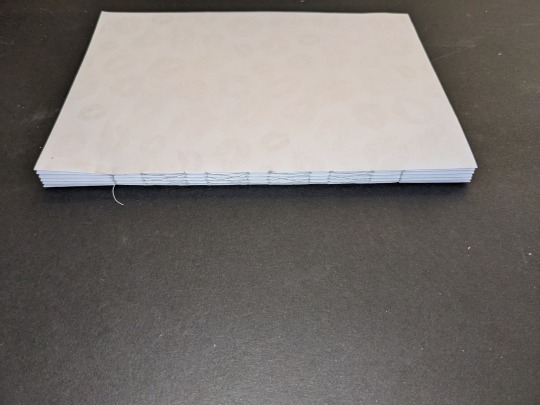
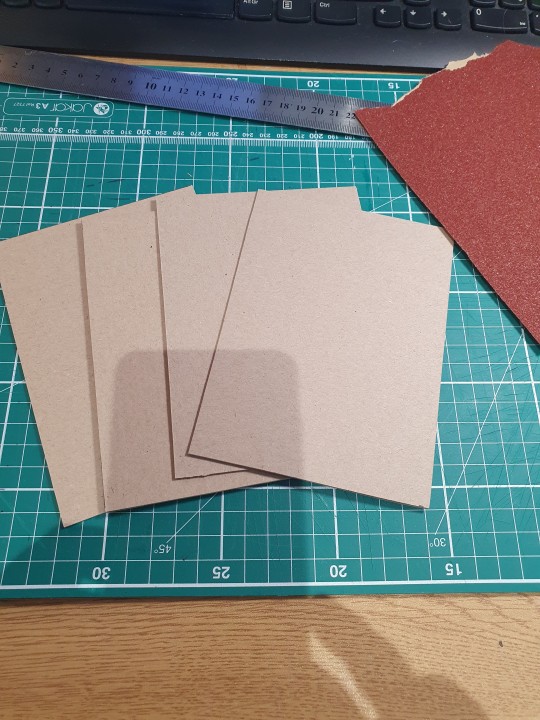
#I've printed half of the signatures of the first book.#it will be fourteen in total which i think is the biggest book I've bound?#worries me a little because i may have to round it which i don't really want to do.#don't love the paper I'm using but I need to use it up and I'd rather do it on something I'm not selling#i still have no idea what I'm doing for the cover. haven't even decided on how I'm going to bind it.#i was really hoping the inspiration would have struck me at this point but no luck#i want the two volumes to match but i don't want them to be the same#i think I'm going to hold off on the second book in case we do ever get another season#two volumes the same size will look nicer. and be easier.#been out of the book binding groove for a while so it's nice to ease back into it#even if formatting was HELL i don't know how you fic binders do it#bookbinding#mabel podcast
22 notes
·
View notes
Text
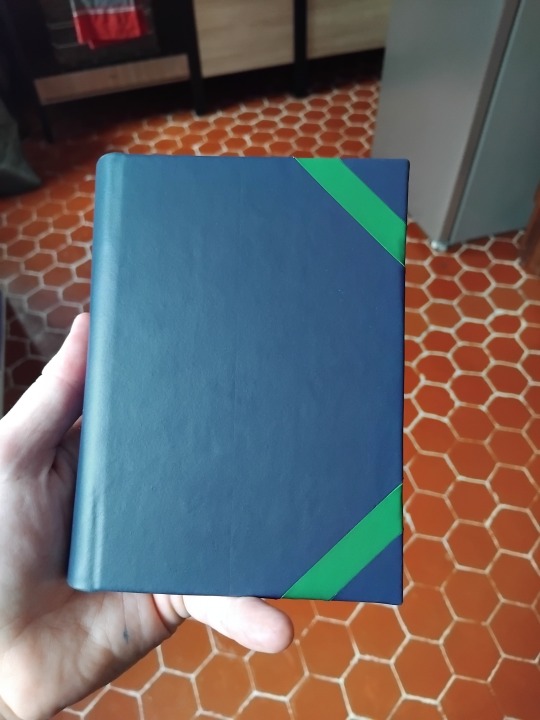
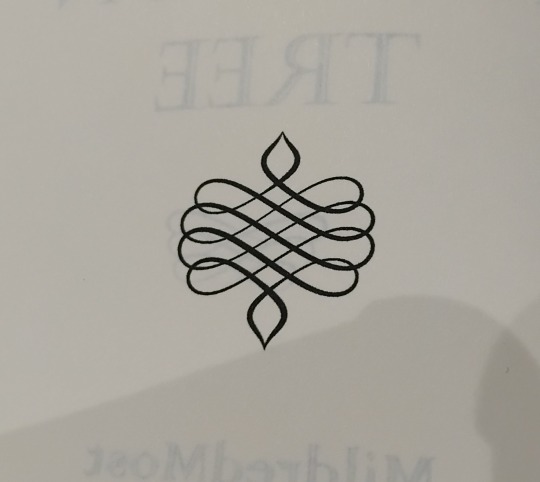
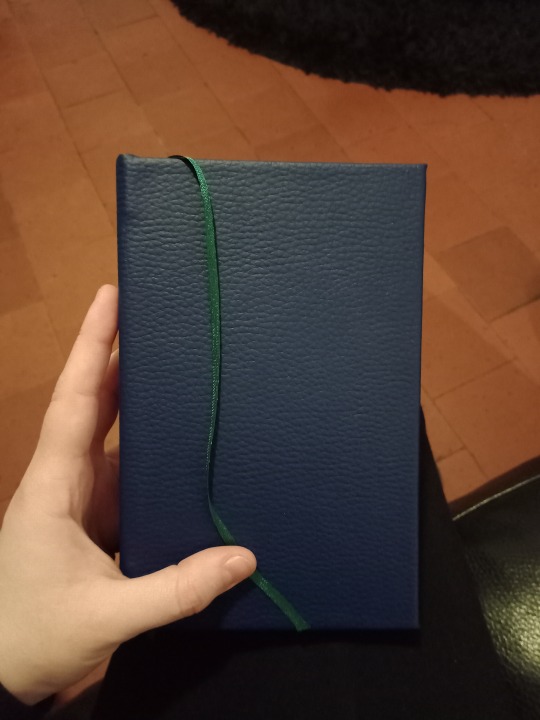
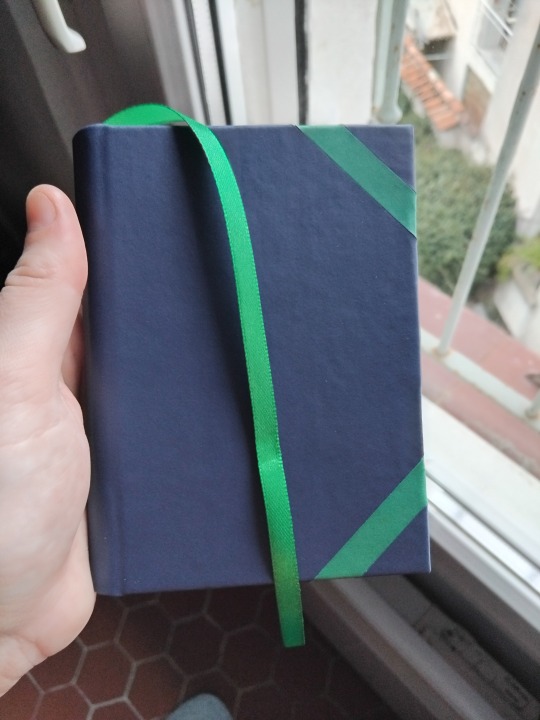
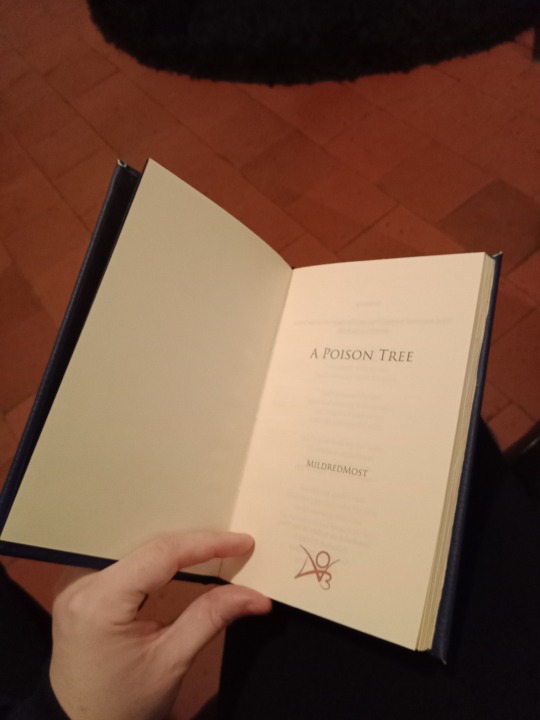
Ficbinding: A Poison Tree by @mildredmost
A year and a half ago (ish), I was getting started in bookbinding and one of my first projects was A Poison Tree, a Poldark fic I loved. I was proud of it at the time, but I've learned a lot since then and thought it was time to have another go at it. (long post ahead)

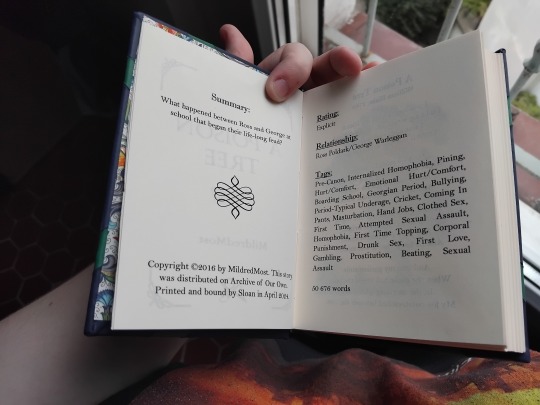
The fic: Poldark, Ross Poldark/George Warleggan, E, 50.6k
What happened between Ross and George at school that began their life-long feud?
The reason I like this fic so much is that it surprised me. I was looking for Ross/George fics and this is one, but not only. George's character is so well-explored here that you can't help but be on his side (while understanding why the things he does offend Ross) and wish him to be happy. I'm not usually into OCs, but the one in this story is so good I loved him as much as the other characters. I went in expecting something specific, the author went another way midway through, and I loved it. The atmosphere is perfect too, it's faithful to the time period and the show/books.
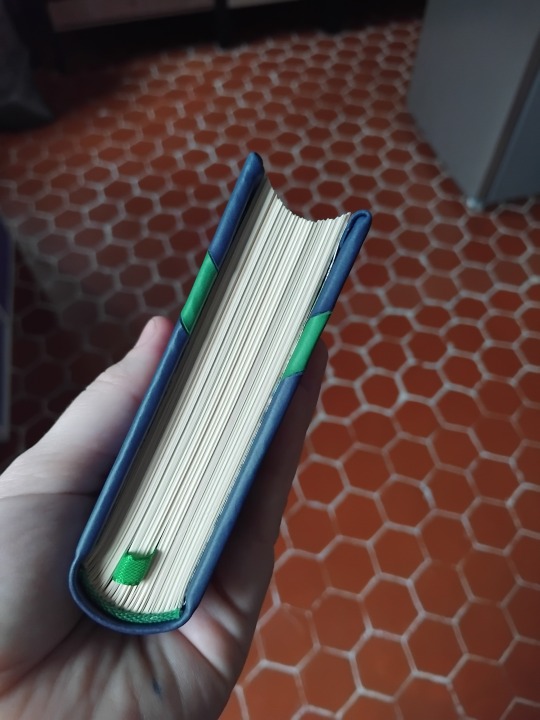
The bind: I kept some ideas from the original bind, such as the color of the cover, headbands and bookmark, and the paper type, but I improved the general quality and added details.
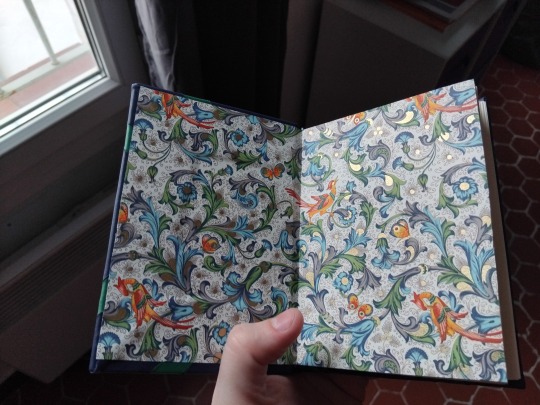
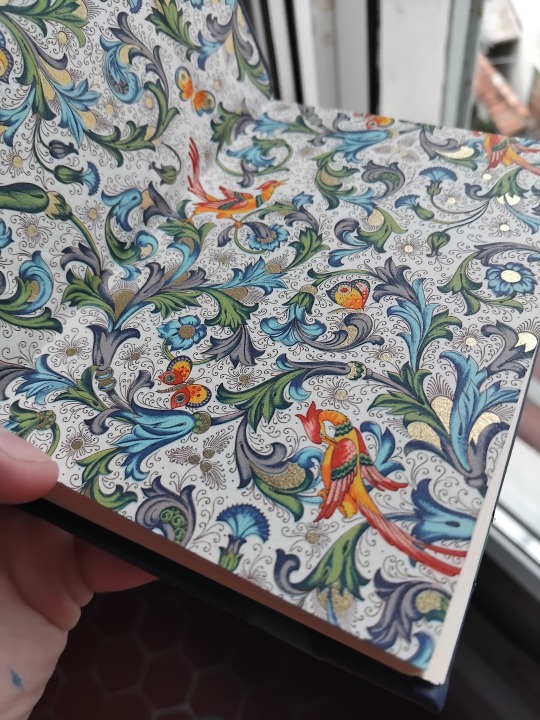
I used blue and green because they're the Warleggans' heraldy's colors in the books. The endpaper is a florentine design with golden touches, the kind of luxurious-looking stuff a 1780s nouveau riche would love.
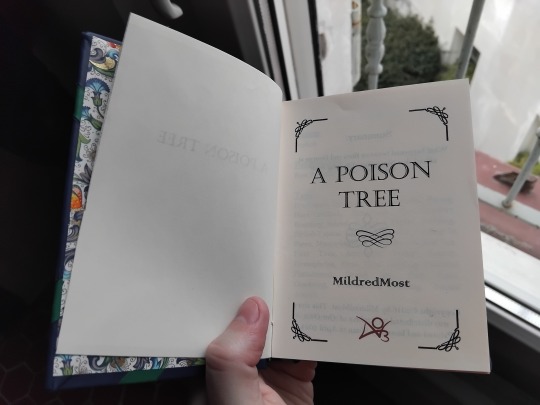
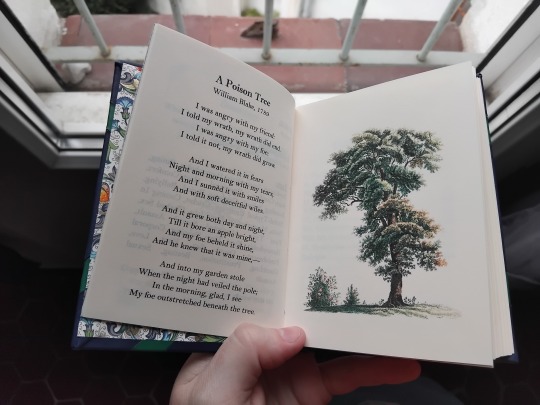
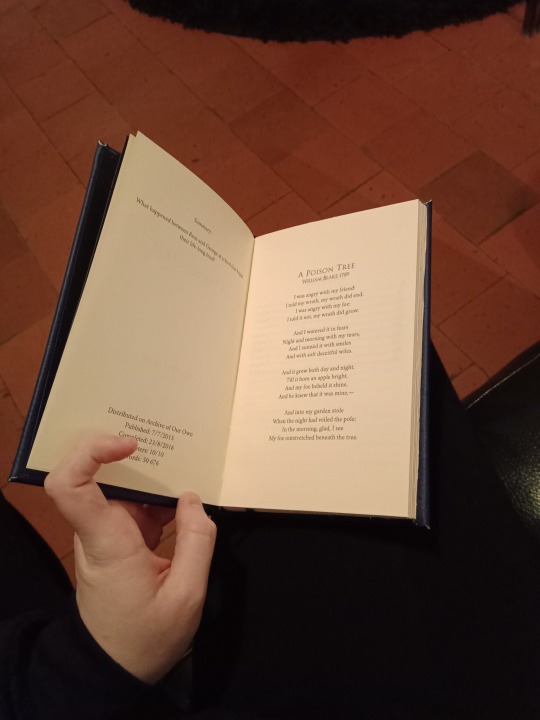
I added the Blake poem the story takes its title from at the beginning because it's one of my favorite poems ever.
New things I tried:
This is the first time I combine several elements for a cover. The green strips scared me because MATHS but they turned out good in the end. I'm still not interested in putting titles on my binds, but I think I'll keep exploring decorations of that kind.
Real endpapers. Up until now, I used paper that wasn't made for bookbinding because the thinness of true endpapers scared me, but it holds up perfectly. The book still feels strudy. And look at it, it's so FANCY.
Free vector images to make decorations. There's a wealth of free resources out there!

Huge positives:
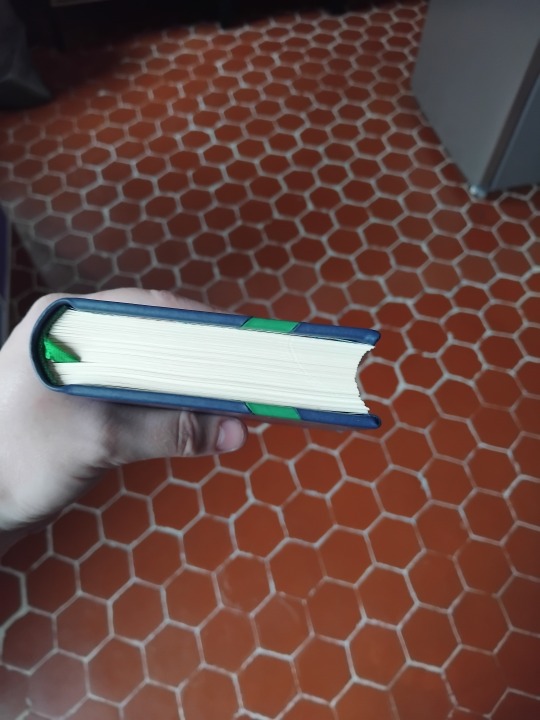
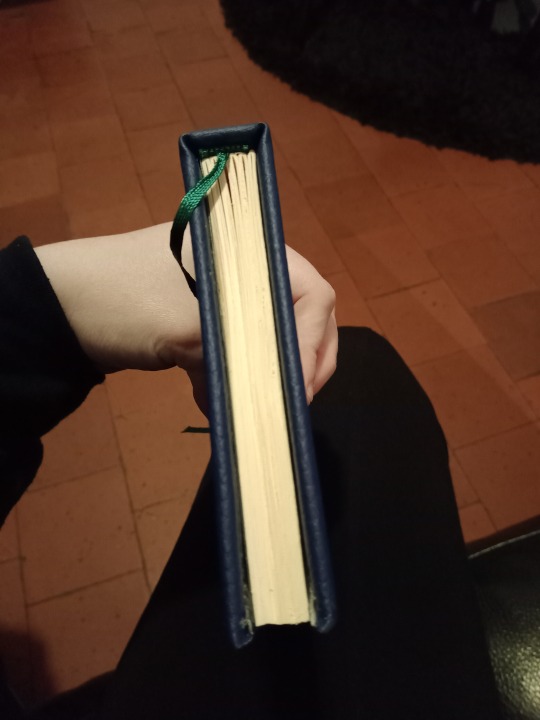
I printed, folded, sewed, glued and trimmed this a first time, but wasn't satisfied with the cut. If you've read more than one of these posts, you know I'm desperately wrangling my guillotine into compliance. The second time, I trimmed the texblock before sewing and gluing, which is scary because the signatures are LOOSE, but it worked perfectly. The result is so fucking neat. I was ready to sandpaper the edges but didn't have to.
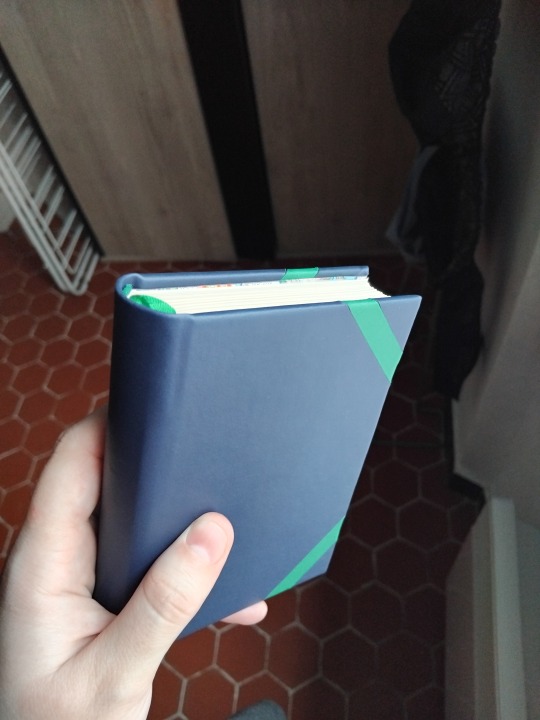
Look at this snuggy fat boy. This is the thickest book I've made at the A6 format, and it sits very nicely in the hand. The spine is round, the leather is smooth, and it's still very light. A pretty baby.
Details:
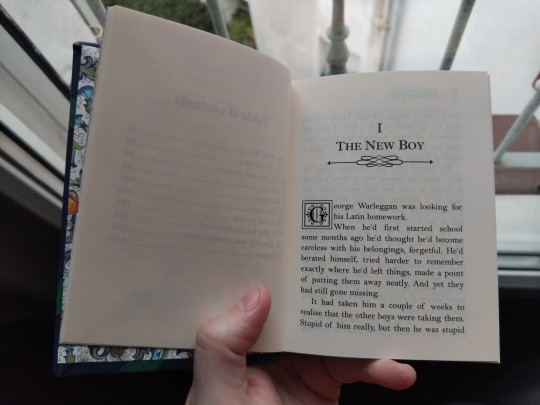
The typesetting: I tried many fonts (what's new) before I landed on the right one. It had to have serifs to fit with the period context. I already mentioned the decorations (I looked up georgian-period books to get inspired and discovered they weren't all that decorated, so I made those up). The drop caps are very nice.
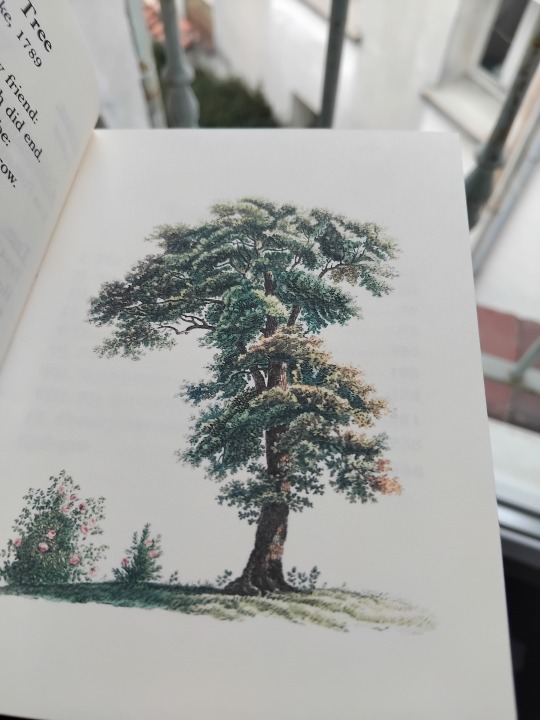
The tree: I decided to get the most out of my printer and, after fiddling with the settings a little, got it to print in color with magnificent quality (which you can't see because of the cold light. It's cloudy today, I'm sorry).
Negatives:
The cover boards should have been wider. The pages are very close to sticking out from the edge of the cover. They're not, but it's a tight fit. I think that from now on, I'll use a 5mm "overhang" (is that the word?) instead of a 3mm one like I've learned. I like my spines too round, 3mm are not enough to compensate.
That's it this time. I don't want to brag, but I'm getting good at this (it's been a year and a half jesus).
Characteristics:
Fonts: Castellar (title), Colonna MT (author name), Bell MT (text), Apex Lake (drop caps)
Materials: blue and green apple leather and endpapers from Schmedt, 80g/m² Clairefontaine ivory paper, pre-made headband and synthetic ribbon.
Feel free to ask me more about materialsand fonts (or whatever), it won’t bother me at all to tell you what I used, but I’m too lazy rn to write it in this post that’s long enough already.
--
Comparison (because why not):
#ficbinding#poldark#sorry that was a long post#no I shouldn't be sorry this is my blog#anyway huge rec for the fic as usual even though I know I don't have Poldark people in my circle here#bookbinding#my bookbinding#I hope you don't mind the tag and my doing this mildred
24 notes
·
View notes
Text


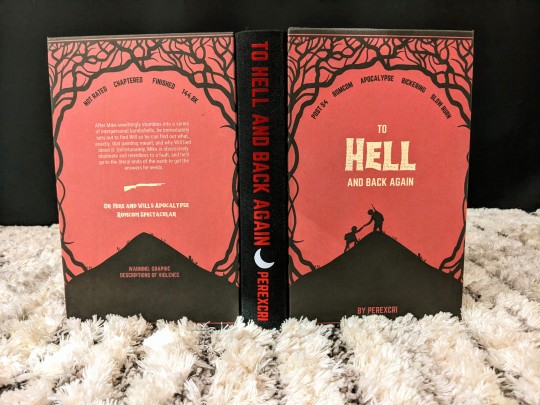
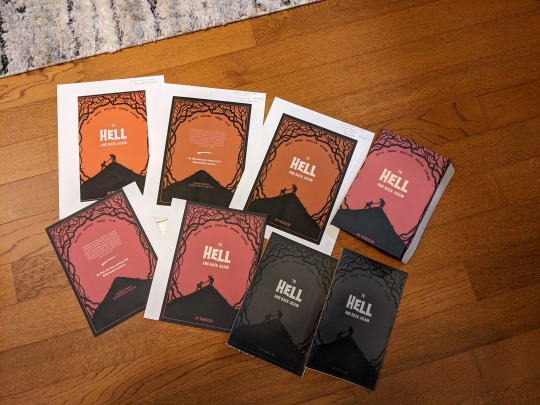
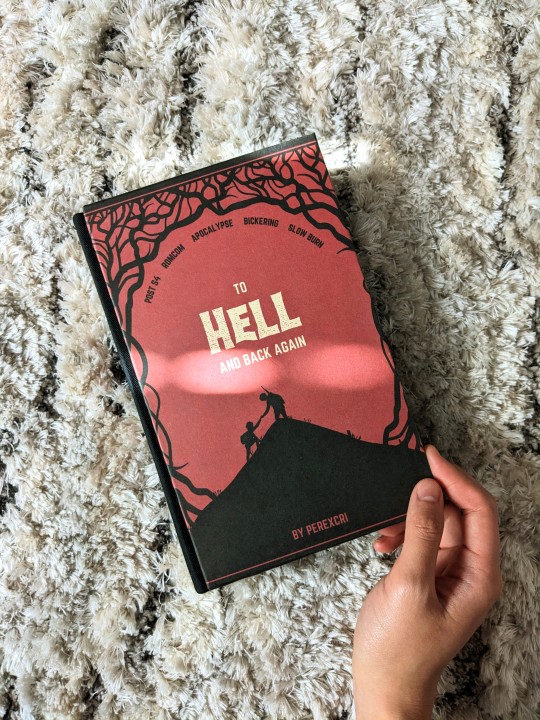
GUESS WHOSE BOOK ARRIVED TODAYYYYYY SO NOW I GET TO POST PICS!!!!
This is To Hell and Back Again, by dear dear @perexcri. Cover design by @byierficrecs (thank you SO much for letting me use your design!). Binding by me!
I'm not in ST fandom, but I had the pleasure of skimming this fic while I was typesetting, and can I just say? I'm rooting for these kids SO hard. I'd go to hell and back again for them--[GUNSHOT]
But in all seriousness, Leah's writing is whip-smart, sincere, and funny as hell. I cannot recommend it enough to anyone who is a fan of these crazy kids. Her ao3 is a veritable treasure trove of excellent byler stories, which you should absolutely check out right now go do it!!!
As usual, process chatter and more pics, under the cut! <3
WORD COUNT: 144k
FONTS:
Title: Hellprint
Heading/Chapter Headings/Spine Titling: Norwester
C4 Summary: Roboto Condensed
Main Body Text: Garamond
COVER MATERIAL: Epson Premium Presentation Paper Matte, printed on my Epson Ecotank (more on that later baha)
HEADBANDS: Trebizond silk thread in the colors Garnet and Black
EDGE PAINTING: Acrylic paint in Crimson and Black
TITLING: Red iron-on foil for the text and white HTV for my maker's mark. Cut by Charlotte, my Cricut!
BINDING:
This was my first go at a German Bradel binding! I've seen lots of Renegade folks use this method and am so psyched I got around to trying it myself. I modified DAS's approach a bit and tipped on endpapers instead of sewing them in (there were a lot of new things to learn so I decided to shelve sewn endpapers for the next binding XD). I also only had 2.0 mm bookboard instead of 1.0 mm, so instead of layering two of the same boards like DAS did, I instead used one 2.0 mm board and one very thin piece of cardboard to create the groove for the hinge. The original article that DAS bases his video on actually uses boards of two different sizes too--a "thick" board and a "thin" board--but I still want to experiment with DAS's way of doing it, especially since I think it'll be easier to do cutouts on thinner board.
As far as matching the groove with the hinge, I think I did pretty okay for my first try! One board is definitely better fitting than the other though baha. There's always room for improvement, but hey that's where half the fun is anyway (and also you can't tell after the case-in whew), so I'm not stressed about it :D

COLOR SCHEME:
Nearly all of my design decisions for the color scheme were based off of @byierficrecs's gorgeous cover design! They were so generous in letting me use their cover and answering my questions about fonts, for which I can't thank them enough. And with so many wonderful elements to work with, it was so much fun to tease out the elements I loved from their work!
I decided to keep with the theme of red/black, which I also thought was fitting for a ST fic set largely in the Upside Down. Thus, black painted edges with red vines, as a kind of inverted, "upside down" continuation of the cover:

Even the thread I used to sew the signatures is red/black! :3 (please also ignore how the picture of the textblock is not focused on the actual textblock ajsldkfjs it was very late when I took that photo)
COVER PRINTING:
This was my first time printing a cover on my new printer (!!!), and BOY oh boy was it an adventure. Figuring out the dimensions took a second, but not as long as it took me to figure out what settings produced something I was happy with. Behold, all my test prints:
Very long story short, let's just say now I understand why being a prepress color specialist is literally a career you can have in publishing LOL.
Also, for some reason I could only sometimes get the bleed to work? Basically what I ended up doing was painting over the parts where the design didn't quite extend over the turn-ins, using with the same black acrylic paint I used for the edges. You can see this more clearly in the photos I took of the groove, and the endpapers covered the messy bits when I cased in:

THE MAIN INGREDIENT: LOVE
Finally!! The most important part of the process!!! HI LEAH ILY!!!! This fic is special for a lot of personal reasons, but chief among them is LOVE!!!! Your A/N's made me tear up when I first read it, because AH! You read my words of love!!! And went and wrote hundreds of thousands of your own words of love!!! And now I hope I've given that love back once again :3 And on and on we go, ad infinitum, until we are relieved of the curse of literacy and greet whatever comes after all this, thanks be to Todd. But until then, I'm so glad I get to shoot holes out of bagels and scream about radioactive tumblr posts and cry over fake people with you, friend :] Truly, peace and love on FUCKING Planet Earth. We are making it and we will all go together when we--[ANOTHER GUNSHOT]
I'm so excited to see where we're going, and what other stories we have to tell. But for now: EEEEEEEE YOU WROTE A BOOK!!!!!!!
<33333!!!
#Stranger Things#Byler#bookbinding#fanbinding#ficbinding#To Hell and Back Again#perexcri#friend fic!#<333
313 notes
·
View notes
Text
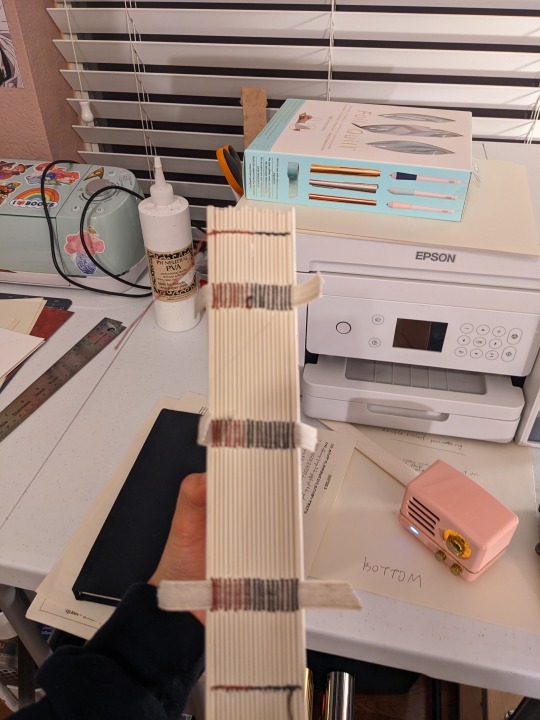
Updates in bookbinding:
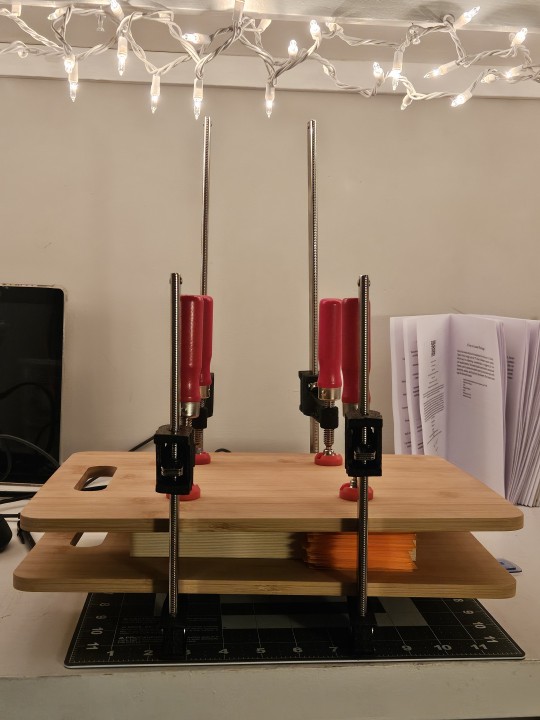
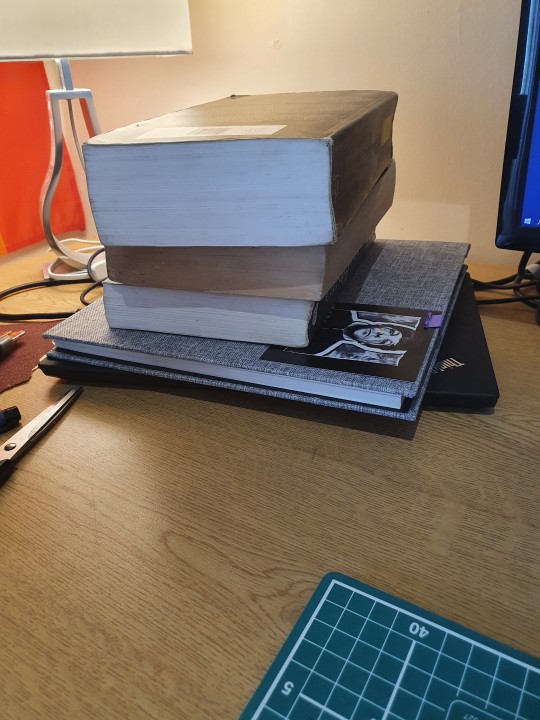
BOOKPRESS!!! yes it's kind of bad bc it's 2 $5 cutting boards from walmart and some screw c-clamps but im EXCITED to have smth better than. a large stack of books piled on top of each other.
currently being pressed is Scared to Live (But I'm Scared to Die) by @major816 bc its what i managed to get to the printing stage first! I'm gonna be sewing tomorrow since I'm only working a half-day so wish me luck with that :')
and for printing stage... well...

let's say I've had quite a time figuring that out
something something my printer was only like $40 and among the things it lacks, including the ability to actually do printing on both sides automatically (I could cry)(actually I did cry), i have also learned it likes to do scaling when printing in booklet :) which is why I've been having such a difficult time with the huge margins and tiny fonts and printing 2789 signatures trying to fix the issue as you can see above :)
with Scared to Live, I did the typeset for it which meant I had a lot of ability to edit the original document in order to fix the issues presented by my printer, which meant ultimately there were only ~6-7 test prints to fix it.
Even In Another Time by @irregularcollapse however. well. she did the typeset herself and shared it and i have spent so much time staring at it bc it's so pretty and i adore it. however that meant I only had the pdf version and pdf is infamous for being basically uneditable. which has been fun.
outside of staring listless at my computer, I also got help from my dad, and then help from a family friend who does printing semi-professionally (among other things), and we Still Didn't Kniw What To Do. eventually I caved and got the adobe free trial and FINALLY I fixed the issue. So yay! EIAT is next to be printed, possibly tomorrow or over the weekend :)
now i need to find a place to recycle paper. bc I have So Much.
#also need to look for a place to trim the edges bc quite frankly i dont think ill be able to without fucking up my nice paper#which i am Unwilling to do#also phlegmatuc when you see this i know i couldve asked you and we mightve been able to work it out#but aside from the many pages of paper and ink and the much frustration i mostly wanted to figure it out#in case i run into the same issue again later when i cant just ask the person who made the typeset!! and i did figure it out so im happy :)#tho idl what ill do about having to pay for adobe.... maybe ill just pay for like. a month at a time when i have to fjsjjf#or ill just try and make more of my own typsets. we'll see.#anywho#<3#shh ac#adventures in bookbinding#big post but also! big updates and im happy and proud#also also i acknowledge that a LOT of binders - especially early on - have book presses like this so im happy with it
11 notes
·
View notes
Text
Bookbinding for Beginners by a Beginner part 4- Quarto Edition
SO QUARTOS! I've mentioned them a few times between 1 - 3 posts. So let me just jump into Quarto before I get into "Now I have this neat-o type faced document that I have split off... so what do I do now o' gremlin writing these posts???
I believe in being a tease sometimes, plus if I don't do it now while I'm remembering shit I won't do it.
ONWARD!
SO What is a quarto?
Well a Folio is 4 pages per one sheet of 8.5 x 11 paper.
A Quarto is 8 pages per one sheet of 8.5 x 11 paper.
And these things will BREAK you if you don't pay attention. Tiny, mighty and o-so-sweet looking.
Behold a text block I have finished up with end pages tacked on but this is 8.5 x 5x5 on the bottom... on the top? THAT is a quarto... about 5.5 x 4.5

SO what do you do? HOW do you get a quarto?
I will mention again- that this is for fics 50K or less. The sweet spot for me seems to be somewhere around 20-30k or less. But that's just me.
Well like previous go through your formatting as you usually would but for the text body itself the font size will need to be increased. Not unless you enjoy squinting or using Sherlock Holmes' magnifying glass to read. I think you might need serious help but do you boo-boo.
I set my font size for folio around 11 or 12 depending upon my mood. For Quarto? I set the font size to 26 and that's just so it's legible.
I will keep all of the fic info at a smaller font size but that would be 11 or 12 now instead of a font size of 8 or so depending upon how much I'm using from the tags.
But it will be a lot of "See the previous post" for formatting.
The trick is going back to Bookbinder JS if you want to format word to spit out Quarto size- be my guest. I cheat. I choose the path of least resistance and less math you have to deal with.
There will be more mathing involved.
But back to Bookbinder JS:
Paper size and Duplex remains the same.
Page Layout section? Hit "Quarto" and upload your pdf file.
Going down to the signature you can do perfect bound (again paperback) or signatures (for stitched books). I keep to stitched books because honestly it's nice to not rely only on glue to keep your book together. But once again follow your happiness. I'm merely stating opinion. Don't take anything as gospel all I want to do is help people break into bookbinding and fan binding cause once you get the basics down I find it very relaxing.
With that aside out of the way, fiddle with the signature size- the more the signatures the more you're going to have to sew. But if you keep everything together it won't lay nice and neat and look rather bulky. So strike a middle ground.
NOW after you do your print off... you're going to have to fold each page... one by one... twice. You're going to have to play "Line the numbers up with each individual page" for the entirety of that signature. I suggest having the pdf open while you're doing this so you can jigsaw puzzle your way into a text block.
But fold down first, then fold that in half.
By the way I hope you have some sort of cutting mat and ruler and cutting hobby knives by this point cause you're going to have to shave the tops off of the pages so you can open it up and read it like a normal book.
I would only do this if you're like me, and have a fondness for smaller fics that you'd like on your shelf and also have a special breed of self inflicted masochism.
I'm a multi-tool of reasons as to why I've done this. One- I got curious as to how to do this. Two- it's now a hyper fixation and weekender hobby. Three- The sea has called me home and having copies of my favourite stories just sounds like making a boat a home to me. Four- I was born with the "Fuck it how hard can it be?" Gene. Five- that gene is a double edged sword but I'm at least spreading what little I know around for anyone that may wish to teach themselves how to do this.
Once you have everything folded, and trimmed, it's time to put that tiny precious stack of paper into your book press, and you compress it down like it owes you money and think of it as you getting your own back for having to do so much fucking math and folding.
NOW I can start getting into how to make loose pages of folded paper into something resembling a book.
#book binding#book binding for beginner by a beginner#I'm tired of this grandpa#that's too damn bad#the people need to know
9 notes
·
View notes
Text
Almost a year to the day after first asking @its-sixxers if I could print out and bind Half Light (after figuring out how one actually does that), I've finally finished it!!!
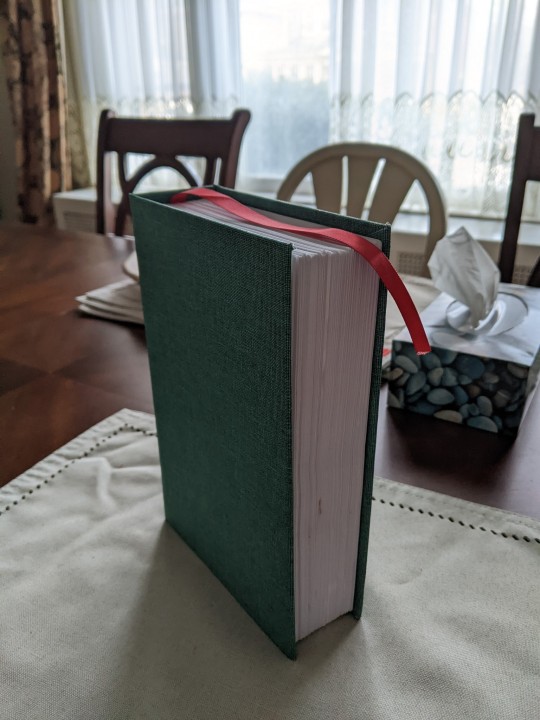

She's 825 pages long, has some of the early pages warped from glue, and blood (?) staining the text block, and I am so excited to fall in love with Nines and Mary all over again. Thanks for letting me do this, it's been a really rewarding project and I got a new hobby out of it!!!
Please go read Half Light and everything else Six has written, she is immensely talented. Mary is my favourite character in Bloodlines bar none and reading her story endeared me to VTMB when the game itself did not. Six's Fallout works are also masterpieces, and I haven't checked out her newer stuff with Elder Scrolls but I fully intend to because even if I've never touched a Skyrim game in my life, I know I'm going to adore it too!
More info about the process under the cut.
SeaLemon was an invaluable resource starting out here because I barely know how to sew and I had no idea how to approach the actual construction of a book. I'm gonna plug her right off the bat because she's very beginner-friendly if anyone else wants to learn.
But before all of that I had to format everything in Word! Chapter by chapter I copied the text over from the downloadable PDF from AO3 and would scan through the fic to ensure the formatting was correct (italicization, bolding, paragraph breaks, etc). I'd do this for about an hour at a time over the course of a couple months, until I decided to do the rest of it all at once after one March night at 10PM where I decided to learn how to bind it all, because fuck it, why not. (Answer: I was freaked out about my upcoming departmental talk and this seemed like a good distraction).

Printing all of it just on regular printer paper (don't know if I'd do that again in the future, but it's what I had on hand) it ended up being 52 signatures, or collections of 16 pages (4 pieces of paper) folded in half. Pierced holes in all of those using an awl and an old phonebook to hold the pages open, and then used my old embroidery thread to sew them together. This part took me maybe two days because I was just so damn pumped about it lmao. I also don't have any kind of bookpress to weight down the pages, so I had made due with old textbooks and MCAT prep material.

It stayed this way for LITERAL MONTHS as I gathered all the other supplies - chipboard and brushes from my local craft store, PVA glue online, and by far the hardest part was fabric. I've since learned that you can make your own fabric using book cloth and basically anything you want (if I had known this book would have been coated in red silk I swear) but for now I just wanted to be sure it was something designed for this purpose, as the woman at Fabric Land assured me it needed something specialized. So binder's buckram! Took a while to find something local and the color selection was pretty limited, I was hoping for a dark red or a dark blue but the green was the best they had in stock. Took even longer to get here. And by that point I had enough going on that it fell by the wayside until uh.... last week.
I glued the spine, again realizing that maybe I should've just made my own bookpress but powering through with textbooks to hold things in place, and let that sit for a couple days to fully dry. Ideally it would be flat, but beggars cannot be choosers. Gave her a lil ribbon too.

Not pictured because I forgot, the final text block with black construction paper glued to it to form the inside cover (would probably use something thicker/crisper in the future, something more like cardstock perhaps?). But then it came to putting the cover together! And that was just cutting chipboard to fit and gluing it correctly onto the fabric, leaving gaps around the spine.
Let that dry, and then I glued the text block in and let everything sit for just over 24h, again with makeshift weights to prevent the fabric warping (it's the second book from the bottom).

And then tada! Finished book! (This one's from before it was pressed but it looks the same now)
All in all extremely cool to hold in my hands and I look forward to the next fic that makes me this insane. If I get permission to do The Sun Is Now Fading I might take a crack at that and make a little set! Follow your dreams and one day you too will be able to take notes in the margins of your favourite Vampire the Masquerade fic.
#vtmb#vampire the masquerade#its-sixxers#bookbinding#mine#cant wait to read this on my flight and pray that no one asks me what it is lest i have to respond with#..... uh are you familiar with the 1991 TTRPG world of darkness and its subsequent media#em.chats
44 notes
·
View notes
Note
bookbinding question: how did you format the pages so that they read in the correct order when stacked and folded into signatures?
Hi! I use Word to create my signatures and typeset them to read like a book. I followed amazing tutorials from Hana Bobb on TikTok - I'd really recommend looking at her content but here's the bare bones! (If you use other applications this probably won't be as helpful for you, I'm sorry!)
First things first, you need to get your word document set up. From the top ribbon, go to Layout, then select Margins > Custom Margins which will open a page setup popup window. Here are the page size, margins, and layout settings I use:
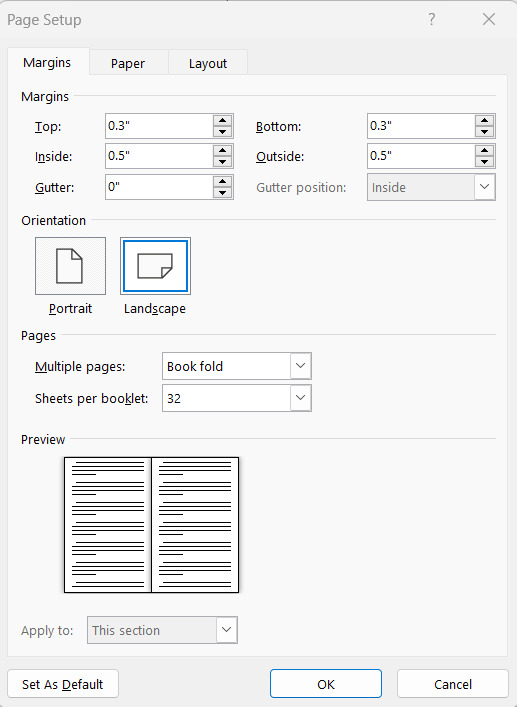
My margins are set based on US Letter sized paper. I find that they're not too big but allowed me to trim the foredges and don't eat up the text in the spine.
HOWEVER, if you're typesetting a really large fic, you're going to want to increase your side margins! For example, I am typesetting a tandem read of TRTTD/ATWT that is 900+ pages and my side margins are .65" to compensate for the deeper, rounded spine and the amount I'll have to trim off the foredge.
If you're uncertain if you like your margins, you can do test prints of the first signature to see how your margins end up looking.
Our page orientation is landscape because, although we want our individual pages to be portrait, each landscape page will have two portrait pages.
By setting the "multiple pages" setting to book fold, you will automatically print into signatures that you can then sew and glue into a book.
Sheets per booklet is really personal preference, just in mind that one sheet of paper is equal to FOUR book pages (two front and two back). So my 32 page booklets take 8 sheets of paper. Some people do 7, others do up to 10! It's harder to punch holes in 8+ pages of signatures, but easier to sew in my opinion.
From here, you can input your text! You can post the raw html from AO3 into the document which which bring over the text and general formatting, and you can format chapters, headings, title pages, etc. from there. This is a time consuming process but is really helpful when familiarizing yourself with how typesetting works. If you do go with this option, I'd again recommend Hana Bobb's detailed tutorials - she goes over incredible info for newbies and I wouldn't be half as good as I am without her guidance.
If you're not interested in deep diving on typesetting, you can do what I do now which is use a Word macro from the macro mommy herself - Blak Books Bindery.
She has some incredible macros which allow you to quickly and easily add text dividers, drop caps, and so much more to your typesets! The one I use the most is her "Raw-Text Formatting" macro which allows you to copy raw text directly from AO3 into the word document and turn it into a formatted typeset through computer magic. I usually just use this as a starting point and heavily adjust the aesthetics from there, but it saves so much time moving author notes, formatting chapters into sections, adding title and publishing pages, etc.
After your typeset is formatted how you want it, you can print it! I typically go into File > Print and select "Print to PDF."
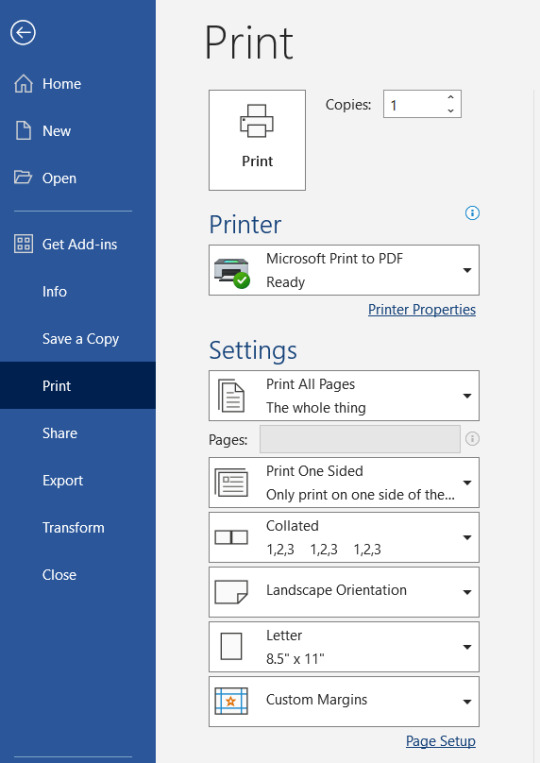
This allows you to save the document as a PDF. You can print directly from Word but I haven't tried it since people say it really messes up the formatting.
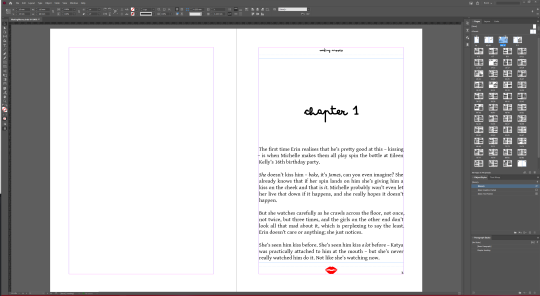
Your finished typeset file should look something like this:

Just print this double sided with "flip on the short edge" selected, and start folding! Even if you're super confident about your typeset, I would highly recommend test printing your first signature on paper you don't care about. I've caught misaligned page numbers, margin issues, and other problems this way and saved myself the headache and reams of paper.
That's it! I hope this answered your question, I went probably went overboard but I'm not sure what knowledge you're working with so I wanted to be thorough. If you or anyone else has any other questions, feel free to reach out through asks or DMs!
#my stuff#fanficbookbinding#fic binding#bookbinding#tutorial#typesetting#asks#bookbinding tutorial#typesetting tutorial
5 notes
·
View notes
Text
an approximately chronological list of things i've fucked up in my current bookbinding project
When merging the individual chapter files into a single pdf I messed up the page numbers and had to go back and redo it
I did that again
I fixed the page numbers but forgot chapter 7 entirely and only caught it halfway through printing. Thankfully fixed it
Realized I fixed all of that without catching an image cutting off part of the text in the colophon. fixed it in the UK edition
Didn't test my inkjet ink for bleed before designing and drawing the entire Eriador map, only to realize that the magenta ink bled horribly. Fixed it by image editing all the red elements to brown.
(there were lots of other map mistakes but we're going to keep Fred Mithrin between us)
Marbling fuckups, which deserves a whole separate category:
Tried marbling outside. As it turns out, wind moves paint when it's floating on top of a pan of water. This makes it difficult to put the paint where you want it.
Alumed the paper, then pressed it in a stack under weights and left it overnight. Turns out the alum deactivates (chemistry something something) if left in an anaerobic environment for a long time and the sheets were ghostly pale
Made the size too thin (there was a wake like I was jet skiing with those combs and the patterns were illegible)
Made the size too thick (so many. fucking bubbles. everywhere)
Air bubbles in all the wrong places RIP
Made my stencil BACKWARDS because I didn't check which arm was injured before marbling
Alumned before applying the stencils (the paper warped everywhere except where the stencil was and then it wasn't flat)
Alumned after applying the stencils (now the paint could bleed under the stencil and it didn't have clean edges)
Used freezer paper for the stencils (this was my ultimate mistake it just doesn't stick enough to prevent bleed. i think. i never fixed this so who knows)
Black paint was haunted. (That's not so much a mistake as an unavoidable reality I didn't realize when planning my marbling)
Back to regular fuckups:
Tested a new endpaper style (hidden linen-joined endpapers) on one of my good marbled sheets rather than on a blank sheet of paper, only to realize the sulphite paper was too weak and would tear. Impossible to remove the linen from the sheet and had to abandon it for one of my sub-par marbled sheets
Glued the cloth hinges for the UK editions on BACKWARDS with PVA. compounded this mistake by trying to carefully remove them with a microspatula rather than living with it. Tore the paper. Attempted to mend it with kozo and warped the paper. Attempted to color it with paste paint to cover it up and tested my color match on plain rather than mended paper, leading it to be obviously the wrong color.
When sewing the US copy of ATWW I pulled the wrong thread while doing a weaver's knot and ripped the first signature out of the book (mended it with kozo tissue)
Trimmed the head of US DR with the pages askew because I forgot to square the book in the press in all 3 dimensions. Trimmed it again to try and correct that, but didn't take enough off so it wasn't flat. Tried to sand it flat and still didn't succeed. Gave up.
Glued and rounded the spine of UK ATWW before trimming the fore edge. Had a panic. Got the trimming setup and done in under half an hour, a new record.
Rounded the spines unevenly (always)
Didn't press UK DR tightly enough while sanding the inside fore edge and some of the pages got hooked in on themselves, necessitating going through with a microspatula and unhooking each page individually, then sanding again.
Over to edge marbling fuckups:
Used too strong of masking tape to tape off the head and tail when dipping the fore edges, which ripped the back side of the endpapers while removing.
Didn't dip US edition fore edges deep enough, leaving blank spaces
Panicked and dipped them a second time, making the pattern muddled
Managed to get bubbles on both the head and tail of the UK editions, because god hates me in particular
Attempted to fix one of the bubbles with paint and accidentally washed off a patch of marbling in the process.
Didn't press the books tight enough (quick release clamps were a mistake
Should have dried off the edges gently with a paper towel before air drying - the water on the edges seeped into the pages, causing both paint bleed and the books to warp out of square
Forgot the paste paper endpages and literally GLUED THE BOOKS SHUT. Had to very carefully pry them open again. 🤦
Aaaand that's as far as I've gotten so far but never fear more mistakes are on the way
#bookbinding adventures#it might be possible (idk how) to think i'm good at this but never fear!!#i am not!!!#i am just stubborn as hell#i'll come back and edit this later once i inevitably fuck up more#long post
3 notes
·
View notes
Text
How I bind my fics - Part 1
So, I said to one of my mutuals (@imstressedx) that I might do a step-by-step on how I bind books, so this is as good as opportunity as any! The first glue up on the spine is drying, so while I'm waiting I'll show you how I assemble the text block ready for trimming and endbands.
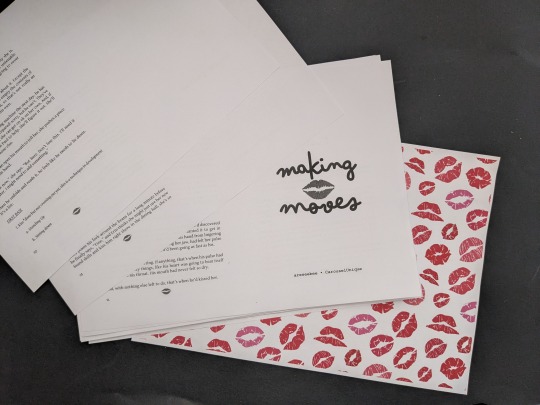
The fic I'm using for this is "Making Moves" by @areseebee and @derrygirlstrash, and starts with typesetting:
I've recently switched to using inDesign (previously I used LibreOffice), and for the most part it's pretty good - explaining how to typeset is far beyond my skills, but the basics are pretty easy to get a grip on.
Since we're printing two pages to each side of the sheet, and printing front and back, the number of pages in the document should be divisible by four - we add in extra pages or tweak the layout to get this number. Ideally the number of pages match one of the numbers in this grid, to make the signatures the same size.
For this book there ended up being 96 pages, which gave me the options of six signatures made of four sheets, four signatures of six sheets, to three signatures of eight sheets. I went with four signatures, but in retrospect I'd probably go with six signatures next time.
Next up is to print it, grouped together into the desired signature size and laid out accordingly (e.g. the first sheet would go pg 24, pg1 on one side, then pg2, pg23 on the other) so that when we fold and stack the pages they are in the correct order. We also print/cut/use the endpapers at this point. I've printed this on 100gsm A4 paper (approx 27lb letter paper for you Yanks, although the measurements aren't quite identical)
Next, we fold the pages. It's a simple case of aligning the corners, folding flat, then using a bone folder (actually made of teflon) to make the crease nice and crisp:
(The first two signatures folded and stacked)
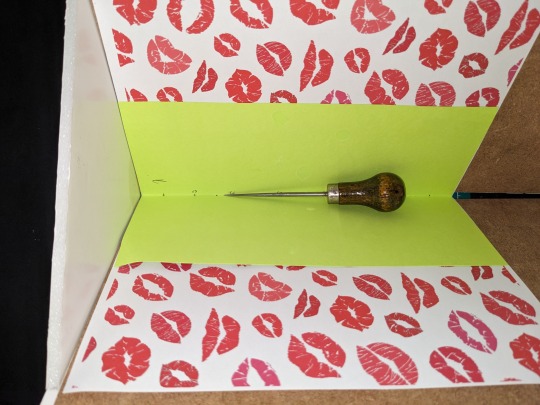
Next, we need to pierce holes in the creases to sew through, so we make a template using scrap paper/card (I used a piece I was using as a glue shield on a previous bind - I like to use a bright/contrasting colour to make it easier to see):
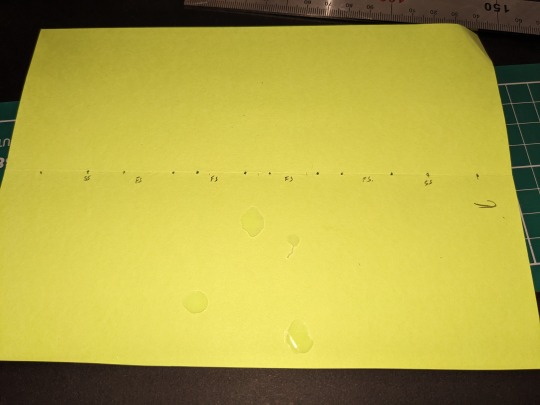
The gaps at the top and bottom are quite large on this template, and that's because I'm intending to slice off an entire inch of paper on those sides due to the way the printer scaled the margins.
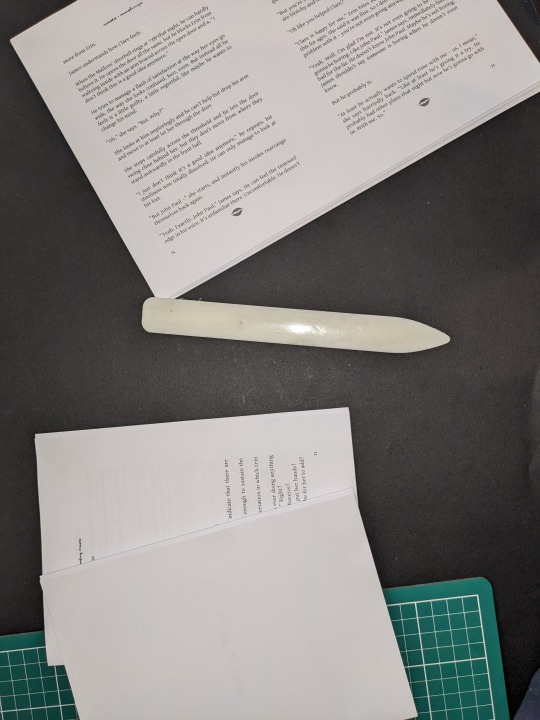
We then place each signature/endpaper in my janky, homemade punching rest, and use an awl to pierce through according to the template:
Once that's done, we can stack them ready for sewing, and wax our thread. We use thread as wide as the signatures, and use that number of passes to get a decent length. We then wax it, to make it easier to slip through the paper and to untangle any inevitable knots. I use beeswax and cotton thread, although I originally used parrafin wax and polyester - there's not much difference IMO, but if I'm doing this by hand I want materials I'm happy with.
Next, we sew - I like to use French Stitch, as it gives a nice finish. If it were thicker I'd use cotton tapes behind the wider sections, but for this book I just went with the thread. Tip - keep the thread taut, but not tight, otherwise the pages could rip.
(Half way done - fun fact, chapter four takes up two of the four signatures by itself)
Finally, for this part, we just need to put it in my (also) homemade press, and apply two layers of glue to the edge.

Once this is dry it'll be onto the next part!
#fanfic binding#bookbinding#making moves#i may have spilled half a pot of glue in the making of this...
5 notes
·
View notes
Note
Hi, as someone who has also dabbled in bookbinding as a hobby, I'd be super interested in any insights you have in typesetting in MS Word. You mentioned that you don't usually talk about it on here, so if you have a different blog a post along those lines would fit better, I'd appreciate being pointed in its direction
Hi! By on here I actually meant on tumblr, or online as a general thing. I talk my family's ears off about it irl but the post I made yesterday is the first time I've ever really talked about making books online.
I am far from an expert on this. I made my first book a little over a year and a half ago and have since made a grand total of five books, working on #6 right now, and a lot of what I've learned about typesetting I picked up from r/bookbinding over on reddit (I don't have an account there, I just read other people's posts). I wanted to link the tutorial I used but I can't find it in my bookmarks so I think my browser ate it.
I'm not sure how much you already know and I've never written a tutorial before, so some of this may be too detailed, but here's the parts I think are important:
-Book fold is the setting you need to make signatures. In the version of Word that I have it's under Layout, the first box that says Margins Orientation Size etc. Click the little box in the corner of that section and you'll get a popup where you can set custom margins. Set the orientation to landscape and the Pages dropdown to Book Fold. You'll need to set Sheets per Booklet (right under that dropdown) before you print because the default is "all", but I like to do this at the end when I know how many pages the text is.
-Sheets per booklet is how many actual pieces of paper are in the signature. If you tell it 4, the lowest setting, it will give you signatures of 1 piece of paper. 8 is 2 papers that nest like proper book pages, 12 is 3 papers, etc. No one told me this and my first book of like 50 pages had 12 signatures in it when I was expecting it to have 3 or 4. I got to practice stitching but it was ridiculous.
-Size 12 font is too big for most books, unless you want Large Print. I like size 11. Footnotes and page numbers should be a little smaller so I use size 10 for those.
-If you're going to trim the edges, leave extra space in the top, bottom, and outer margins. If you have page numbers or footnotes in the header or footer, you can adjust how far they are from the top and bottom of the page. Go to add the header and at the bottom of the dropdown for it is an option for "edit header". If you click this it will give you a toolbar at the top of the screen with new options; the last one on the right is "header from top" and "footer from bottom". If you leave it standard Word will put them in the space you intended to trim off, regardless of what you set your margins to.
-The tutorial I used talked about the gutter, which is the space in the middle of the book where it runs into the fold. I have not found that I needed to have a gutter, and setting the inside margins works well enough for that so your words aren't hidden in the seam. I think this comes into play more with longer books, or books that have rounded and backed spines. I haven't rounded or backed anything I've made yet so I can't speak about that.
-You can format tables of contents in Word, there are templates, but I think they look like corporate expense reports so I don't use them. I usually do the front matter (title page, contents, author's notes, etc.) in a separate document so I can add the right number of blank pages and not worry about having page numbers on the title page. For tables of contents I make a numerical list. I like 'em simple.
-If you can, Word allows you to make custom templates for anything you want. Once I had settings I liked I made a template and saved it so I don't have to reset the margins and stuff every time I make a new book. The only caveat here is remembering to hit Save As instead of Save the first time you save your work.
I hope that helps! If you'd like I would love to hear about your own tips working in MS Word, god knows mine are far from exhaustive. Or if there's something you wanted to know that I didn't mention, if I can help I'd be happy to.
#bookbinding#long post#asks#i wanted to put this under a readmore but i only reblog on here and i don't know how#time to learn i guess#snek makes books
3 notes
·
View notes
Text
I'm finally getting around to organizing this coloring book that I bought a couple weeks ago--or more correctly, I bought twice, not realizing that they were the same fucking coloring book.

Yes. It's backward. Actually, it's printed two pages to a side, double sided, since, a) it's just a coloring book, and b) more specifically than that, it's going to be a reference book for me.
Oh but wait! I got, in my opinion, scammed twice:


Yep. These are four unique sheets. But only fourteen unique designs.
I actually have not cataloged how many times this has happened, but it really infuriated me, since particularly these two examples happened close enough together that I had to go through the pages like five times before I realized what was going on.
Anyway, since I'm on this project now, and I won't be able to let it go until I've finished......... some stage--I really wanted to punch the signatures while I was at work, but between calls, it took till a little while after work to finish ensuring my signatures were in order. And then of course, the other day, with all the issues I had starting up my printer after time off, I did not finish printing this coloring book.
So now I have to fold and organize these fresh pages and then, if there's still time this evening, I can start punching the sigs and see if maybe I have time and will to begin stitching.
First point: I bought this coloring book for my own personal reference.
I can get about two or three designs inspired by one of these designs (okay, sometimes I use my imagination to merge two designs together).
Mandalas are really pleasant to design at work. I could see myself, over time, designing at least a couple honest hundred page coloring books--none of this "five hundred pages! Oh but some of them I blew up or cropped differently and those are definitely unique designs" bullshit. I mean, look at those two pairs of pages. Somehow even lower fucking effort than I could imagine asking people to give me their money for.
Oh, not to mention, some of these aren't mandalas. They're whatever you'd call what a kaleidoscope does--tesselation? And worse, some of these are just completely, entirely, unapologetically half-assed.


Effort? Is that some kind of disease??
Hhhhhhhhhhh................ okay. I'm sorry. I'll stop being such a massive bitch.
1 note
·
View note
Note
How do you do your book binding? Would you be willing to show the process? I find book binding so fascinating and your finished products are so rad!
Oh sure! And thank you so much for the complement! There's lots of ways to bookbind, and there's lots of different material out there to teach you how to bookbind as well! I'm actually part of the renegade bindery discord sever which is a collection of fanfiction bookbinders who also share tips and trick and resources with each other (you can ask to join by searching up their tumblr @renegadepublishing and requesting access. It's a really lovely and supportive community).
Specifically I've learned from the book Hand Bookbinding: A Manual of Instruction, as well as the Google docs How To Make a Book by ArmouredSuperHeavy, (the person that founded renegade publishing) although I've used the latter mainly for how to typeset something before I print it out, even if it goes into detail on how to physically bookbind. There's also lots and lots and lots of YouTube tutorials (DAS Bookbinding is one favoured by the renegade publishing community) and written tutorials online (I wouldn't be surprised if there's a PDF copy of the book I learned from out there as well), but I haven't really learned from much of them, although they'll teach you the same things (or another slightly different but valid) way of doing bookbinding.
Below the cut I'll go over a breakdown of my general methods; I'm not going to go into details on how exactly to do it, just the materials and techniques I personally use as well as some tips I find handy that weren't in the materials- because otherwise we'll be here for a long time, and there's plenty of much more accurate instructions out there then me, since I'm still learning and playing around with things.
To be noted, I use some specific tools which don't nessecarily need to be used for bookbinding. It just makes it faster. Also, here's a bunch of great resources for bookbinding, including links to places that tell you how you can make these specific tools.
1. Printing out of materials (If you intend to print out a book, not just bind a blank book)
2. Folding of papers to create signatures. I just use my hands at first, and then I either use a triangle/protractor or a seal's rib I found on a beach to go over it again to entirely flatten it (normal people who aren't a cheapskate purchase a bone folder. But I've honestly found using a triangle works perfectly for this, so I haven't really been inclined to buy one). Normally after this I set it in a 'press'- either squished beneath books, or set inbetween books on a bookshelf that then is tightly wedged with other books, to fold them as flat as possible.

Please ignore how messy my desk is god the triangle is beside the papers in the middle to be folded into a signature.

My beautifully versatile 'press'- there's a half finished book in there, plus a bunch of signatures ready to be punched being pressed.
3. Punching sewing holes into the signatures. I've created a punching cradle for myself, and I use a template to first denote where the holes will be punched and then punch them through with an awl. Then the signatures go back into the 'press'

Difficult to see, but the long piece of paper in the middle has marks along specific lengths where I leave marks for where to punching holes through. I prefer an open ended cradle as that I can hold the papers down with my thumb, but most people prefer a close ended one as the papers in the signatures are exact (which... Yeah I can see why. I find that I get exact enough paper alignment however, but I guess I'm not the most picky perhaps in that manner).
4. Sewing the signatures together; here there's a lot of variability depending if you want to use ribbons, cord or just sew the signatures together. I use ribbons, since that's the way I learned in hand bookbinding, although that's a bit overkill for small novels. I've whipped up a shoddy but functional sewing frame, which makes this much easier to do. I cut three ribbons to align with the holes in one of the signatures which I'm laying flat on my frame; I tape them to the bottom of my frame and pin them to the frames bar so they align. Then I sew the signature together, passing over and around the ribbons so that the ribbons get clamped to the signatures. For thread, I use white Gutenberg thread (it's just what I have on hand) that's been passed over a chunk of beeswax to both make the threads stick to each other while sewing to minimizing knots, which also makes them a bit stronger and makes the thread last longer. I sew using the kettle stitch, so tying a knot at the end of each signature to keep the signatures tight to each other; I press down with my fingers of my other hand when I tie a knot, to make sure it is as close as possible. After that's done, I put it back into the press to flatten again.

A just about finished textblock in the frame.
5. I then cut some linen (I buy those cheap Micheals squares of linen) to paste onto the back of the book; I cut it so it just covers the ends of the sewing holes on the top/bottom, and with about 3 cm of linen off each side of the spine to be glued to the bookboard that will become the covers. I paste it onto the sewn signatures by clamping the signatures between two large books, and then rounding the spine of the signatures, so they can fit nicely within the spine cover once it's made. I do this by lightly hitting the signatures with the flat area of the handle of an Swiss Army knife (normal people use a mallet). I make my own book binders paste to paste the linen down (it's literally just boiled flour and water). You can use any glues as well, and most people prefer to use pH neutral PVA since there's issues with acidity in paper and longevity. I use bookbinders paste because it's (theoretically, in my brain) pH neutral, and I'm... A bit cheap. With bookbinders paste, if it's too wet then the papers in the signatures might get wavy though, so you want to make sure it's pretty thick and rather the texture of custard (just follow the recipe properly). I also suggest you try to get the backs of the signatures as close as possible to where you clamp it between the books, as this means that once you've clamped it as much as possible, the signatures will be glued into a closer position to each other, and will not gape between signatures (or at least, not as much) when you are flipping through the book later.

Were ignoring that in this photo I've already added endbands (again, you can move around some steps- I like to add endbands after the bookboard is added as the textblock rests on the bookboard instead of the textblock, which minimizes any bending of the textblock. It's a little annoying to push the needle through the linen on the back, but I don't particularly mind). I like to measure and add lines for where I should be attaching the linen so it's not wobbly.
6. Cut the bookboard (there's a lot of things you can use as bookboard, and I've used varying things as well. I've used chipboard, backs of sketch books, and actual bookboard). I like to cut the bookboard so that there's a 4 mm overhang from the signatures inside, with a 7 mm space from the hinge for the bookboard.
I find using the heavy duty fixed x-acto blades is best for hand cutting bookboard, as they are the least liable to snap when putting pressure while cutting (I use scalpels for cutting the actual paper, not board, as a rounded edge cuts through cross-grain paper better as the cutting pressure is less horizontal and more downwards, and will not 'snag' the paper and give it little rips which can happen with the above). I find it best to not put a great amount of pressure to get it cut through in one cut, as you're more liable to slip your triangle/ruler- going over it a couple times with more moderate pressure tends to give me more accurate results. As well, using a ruler or triangle that has a flat surface that touches the paper surface will be more accurate as well- there's some rulers out there that hover over the paper since they have a cork bottom, and that means you're going to have more wobble in your cut as well, even when your ruler doesn't move at all.
7. Paste the bookboard to the signatures; I always make marks on everything where it should be aligning to, to keep everything as straightened out as possible. I put paste on the outside of the linen, with cardboard underneath so no paste gets on the signatures; I then press the cover on, and gently flip it to do the other side. I then place a heavy book on-top to ensure it dries correctly. After, I glue on the ribbons in much the same manner. After the ribbons are dried, I trim them along the linen, so it keeps them tidy.

Post ribbon trimming; unfortunately you can't see the outside lines on the linen I denoted for where the boards should be attached. Scalpel which I used to cut the ribbons and the paper is also within the photo (I bought mine off of Amazon for 20$ I think? I got one handle and a pack of 100 blades).
8. Create head/ends bands. I follow this tutorial for sewing headbands; there's lots of different ways to do it as well. For materials I use DMC embroidery thread (which is pretty thick... At some point I'll probably try actually thread, rather than embroidery floss as you can get more exact and even lines with thread) and cotton twine- I like this one as that I've found it keeps its circumference even, while other twine I had previously been using didn't always do that.
9. Attaching cover papers and spine. The way I've done them varies depending on my plans for the cover. I tend to paste down the paper of the covers first before the spine paper. For the spine, what I do is I first add the title, before attaching the spine paper (I do my titles by printing out the title to the size I want, rubbing graphite to the back of it and then tracing aggressively the title over the spine paper). I like to use Oxford hollows for my spine, and generally follow this guide (also done by one of the renegade bindery folks). I however like to paste in a thicker sheet of paper which over the area of the spine to add some heft to the spine and then curving it once it's dried, before glueing the spine paper onto the signatures. An important thing for when you're pasting paper/cloth to the covers, is that when it dries, if you haven't placed it under books/in a press it'll immediately start to curl the covers edges up. To minimize that, place it in a press immediately after you're done with pasting. Adding endpapers will remove/minimize the effect, although you can also get the covers to curl in the opposite direction then.

Cover paper added before spine. The type of embroidery thread I use for endbands is to the right.

Spine being worked on. For this one I cut out tabs for where the spine goes for an easier fold-over, but either way is fine I find.
10. Endpapers. Make a mark of where the text block ends on the covers; measure the amount of space between the edge of the cover to the mark, so you can make guiding marks for where you want the end papers to go. I cut the end papers and actually line them up before pasting- you want to make sure the paper will align to the textblock, so adjustments are often required to the marks you've made following the edges of the textblock. I apply paste to the bookboard, then align the paper to be just inside the marks, gently smoothing it with my hands (I find doing it with an implement can cause warping/tears in the paper. It's the same with any paper, although thicker paper definitely can take a lot more, and the stock coloured paper I use my triangle on for flattening, but only for edges). Once the end paper is gently pressed down against the cover, I press a triangle into where the spine would bend the endpapers to begin making a fold there; after going over it once or twice, I then begin to fold the book with the triangle still in, so that the crease remains, and after going over it another few times, I put a piece of cardboard and thin plastic (old overhead plastic papers, but others often used wax paper) and let dry overnight. If you don't add cardboard and plastic, the moisture will migrate into your textblock making it wobbly. Once it's dry (and not cold to the touch. Cold means it's not actually dry) I open it back up to add a small strip of paste on the first page of the text block near the hinge, so that it sticks to the end papers, and leave it again to dry over night with the same set up. And voila! You've got a finished book!

Tracing the edges of the textblock for endpapers

Using a triangle to guide the fold of the endpapers
11. Extras: you can also at this point make a extra cover, or add art to the covers on the book, like a nice title or something. You can also add a waterproofing step, which I've been meaning to get around too in my books. Some people have suggested spray acrylics, or simply clear acrylic medium as well, as it'd work (there's some resources out there about it). I personally apply a beeswax/mineral spirits mixture, which another binder in the Renegade discord has been recommending (it's a 50/50 ratio recipe. I just heated my beeswax slowly in the microwave at 1 min intervals, and then added and mixed in the mineral spirits). It very minimally at worst darkens the paper, and leaves a nice sheen along with making the cover water resistant. The book may be at first a bit tacky feeling, but as your hand oils get onto the cover it'll feel nice and smooth.
One note: For the icha icha books I swap around some of the stuff as that the paper I purchased isn't big enough to wrap around the whole book- so I actually attach the spine before the bookboards and wrap the bookboards with the cover paper before assembling all of it, to avoid having a line though the bookboard covers. I prefer the way I've outlined above over this method though as this method I personally find a bit more messy.
Aaaaaand that's pretty much my method! Hope this was helpful- if you have any specific questions feel free to ask 😊
#bookbinding#books#ficbinding#fanfiction#bookbinding tutorial#somewhat???#bookbinding links#renegade bindery#ask response#asks#asks are always appreciated!#rose serpent press#rose serpent bindery#renegade collective#me: 'otherwise we'll be here for a long time' me: is still here for a long time anyways#fanbinding resources
153 notes
·
View notes
Note
Hey, so I saw your recent post about book-binding projects and once I got past "insanely impressed that you bind books" I moved on to "very curious". Would you be willing to talk about the process?
Thank you for your patience! I've been wanting to answer this ask for ages but my most recent books had to remain a complete secret in order to preserve the surprise until they arrived at their destination. Now, however, I am free to talk about the process!
So the books you're referring to from my tags are my more experimental pieces. I'd never worked with velvet or leather before, so the results you see are the results of fun trial and error. The cleaner kind of binding that I learned in school is done with paper-bound covers. The specific technique I use is called 'Case Binding,' which is a kind of hard cover binding.
I won't go over formatting your books for printing in this tutorial as that's its own complicated process and very individualized depending on your project and the general process for binding can carry over into any project.
So the first step after printing your book is to fold each page in half down the middle. Trim all the excess paper until you have your desired size.

When you stack the pages inside of one another, each complete segment is called a signature. I typically have 3 pieces in each of my signatures; front and back, that comes out to 4 pages per piece of folded paper, or 12 book pages. Get all your signatures put together and check the print quality, ensure you have all the pages in order. If you need to reprint anything, now is the time.

Next is making the holes in each signature. Always work in an even number. I like to use six, but four works just as well. Be sure to measure carefully so the holes will all line up neatly. A good way to ensure quality is to take a thick piece of paper like cardstock to use as a guide. Cut the guide so that it's as tall as your signature. Put holes in your guide first, then use it to press holes in the paper—you can use a tool called an awl for this, or just a regular sewing needle. My awl is make from a sewing needle pressed into the handle of a wax seal stamp. You'll want to keep each signature closed at an acute angle so the holes you punch go directly in the middle of the fold.

You don't need to poke the needle all the way through. Just make sure it's enough to poke a hole in all the papers in your signature. Do this for all your signatures.

Sewing time! Start with the very last signature and work your way up to the first signature. We build the book up as we go to make things neat. My professor taught me to sew from the bottom hole first. Start sewing from the OUTSIDE of the signature. When you get to the last hole, you shall see that you end on the outside as well. This will keep all your sewing work well hidden.
Lay your next signature on top of the first one. You will enter through the top hole and work your way down:

Before you tighten your thread, you may now add your book tapes. If you don't have book tape, this can be a piece of linen or some ribbon. Here I've used a bit of thin canvas ribbon. Tighten your threads and tie them together at the last hole. Do not trim. We will be gluing down the ends eventually. For a more traditional bind, I suggest using the Kettle Stitch. I only use the kettle stitch knot on the end holes of my works because God abandoned me halfway through creation without reason or sense. Continue sewing until your block is complete.

Add glue to the spine. ONLY to the spine. Clamp to dry.

Now is the time to add your ribbon if you wish (ignore that the tapes are glued down in this picture and just focus on the ribbon). Press a length of ribbon onto the spine and add glue over the top as well. Allow to dry.
Now it's time to measure your boards!

You want to measure with the spine of your book block pressed to the very edge of the left side of the board. You want just a bit of space on the three other sides of the block. The board for the spine will be the same width as the spine of the book block, with a bit of room on top and bottom. The height will be the same as your cover and back boards. Cut your boards.

Add glue to your boards. My professor taught me to use a bit of scrap board to spread the glue so that there isn't too much. Too much glue might over saturate your paper if it's thin or cause the board to buckle. Don't worry too much about it though: it's easier than it sounds to make a good book.

Press your boards onto your paper. The book made in this tutorial is the Quarter Bound Book, so I will be attaching them with the spine paper rather than leaving the books attached on a single paper. I find the quarter bound book to be more forgiving for beginners, as you can fix the parts individually if you mess up somewhere.
Continued in Part 2.
75 notes
·
View notes
Text
Show your process
To continue supporting content makers, this tag game is meant to show the entire process of making creative content: this can be for any creation.
RULES - When your work is tagged, show the process of its creation from planning to posting, then tag up to 5 people with a specific link to one of their creative works you’d like to see the process of. Use the tag #showyourprocess so we can find yours.
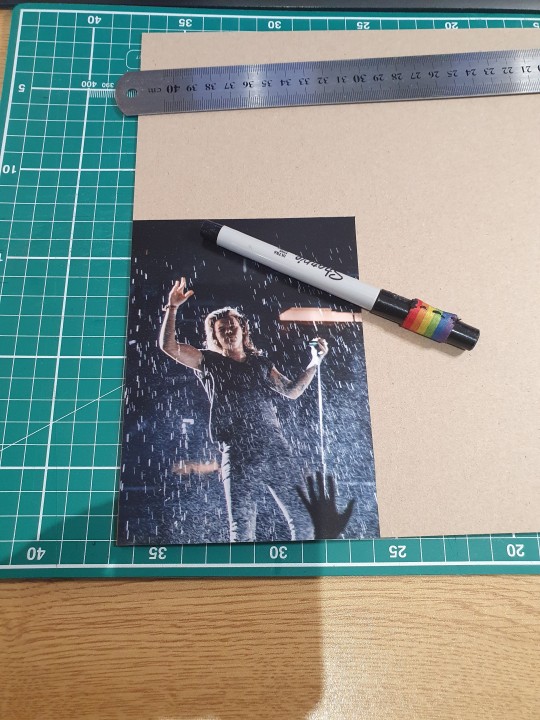
Thank you Anni @whatagreatproblemtohave for the tag! This is even more fun because this is her notebook I’m making.

Planning
Well, I’m a terrible planner, I don’t really plan things. I feel like they happen by accident and luck most of the time lol it started when I was using some leftover dyed paper to make a junk journal, and I’ve realized that making signatures with A5 paper was about the same size as a photograph and they would make nice covers. Then by luck I found some really cool A5 acrylic/mixed media and watercolor papers at the dollar store (I was there to get something else, but I always go through the whole store because I might find something cool) and I’d printed some of my favorite Louis/Harry/Liam pics, inspired by my desire to own copies of the House of Solo outtakes. It all sort of came together and I just had to make these.
Materials
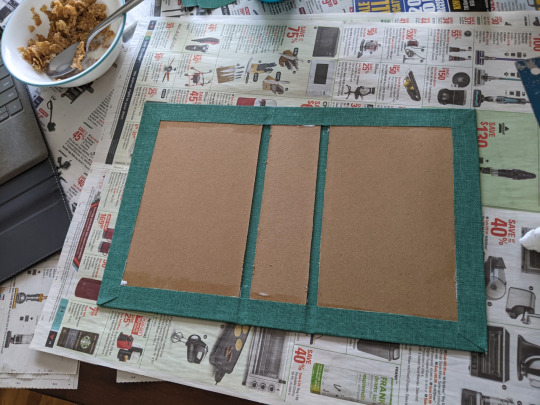
# Cover:
Kraft board 935gsm 1.5mm
Black paper A5 220gsm
Strong glue stick
Strong clear glue
Sandpaper
Picture
# Interior:
White paper A5 160gsm
Watercolor paper A5 190gsm
Acrylic/mixed media paper A5 190gsm
# Binding
Waxed cord 0.5mm
Awl
Curved needle
Scrap cardboard
# Etc
Cutting mat
Metal ruler
Craft knife/box cutter
Fine tip pen/marker
Making
I’ve been a subscriber to SeaLemon’s channel for years, and while I only started book binding this year, I always found it very relaxing watching her videos. I’m using her old Coptic Stich videos for these journals, both for how I make the cover as well as the binding method itself.
I started by cutting the cover boards. I’m making two notebooks at once, so I cut 4 boards by first tracing the picture, then using the ruler and box cutter to cut it to size. I sand any stray bit of the cardboard I don’t want it, or any uneven part.
This board is thick enough that I could just paint it, and I tried that at first with acrylic paint on my test notebook (Louis drinking milk), but the first and last page were getting a bit of transfer from the paint and looking dirty. I tested on a scrap piece of board painting and doing a clear coat, but the even when the can said “matte coat”, it still came out shiny and I didn’t like the look, so I decided to go with the paper wrap path.

It’s important to use a glue that is not very wet, or else the board warps, so I do as much as I can with the glue stick and set the board the dry under heavy books (or a book press, if you have one of those). I use the clear glue to glue the inside as it’s a bit stronger and the edges that are exposed need to really stick down. To make sure nothing warps, I use a glue brush so the layer is very thin, and set it to dry under the books to make sure everything is flat.
While that is drying, I fold my signatures (paper folded in half and stacked in groups). For the white paper, as it’s a bit lighter, I do 3 pages per signature, and the thicker watercolor and mixed media paper I do just 2. For each notebook I do 5 signatures of white, 3 of mixed media and 2 of watercolor paper, giving me a total of 50 pages per notebook. It’s not a big journal, and I don’t know how practical it is to really paint on them, but I’m using the coptic stich, which makes sure every page opens completely flat without harming the other pages, and I also saw videos of Slew painting a full oil painting on his notebook, so I know it’s not impossible. I still think the writing or sketching experience will be pretty good on this because of the paper type. Also, they get to look at those pictures, that’s always a plus.

Once the signatures are all stacked, I create a template using an extra paper to measure where the holes will be. I use the spare cardboard in a V shape as a punching cradle, and with the help of the template I pierce through all the signatures.


This is where I’ll diverge a bit from the pictures. Initially, I bound the signatures and cover first, then glued the picture over the cover stitch, and let it dry at least a couple hours under the heavy books to make sure there was no warping or bubbles. Looked pretty cool because the thread I’m using is very thing, and it didn’t really show under the picture. However, because the thread is very thin, I didn’t like how it opened and closed. The thread feels strong and I didn’t think it would snap, but I decided to cut the binding and redo it with a double thread. As the picture was already glued to the cover, I had to pierce the picture to do the binding. I ended up liking the look better with the exposed thread anyway, so it wasn’t a big deal. Also, not shown here is Evi's final notebook, because I've decided to redo it. I had an issue with the cover (used a different folding technique for the paper and it was bulkier than I wanted to, so her cover is currently under very heavy books drying right now. So the final picture I chose will be a surprise for when she gets her mail in a week or so.
Not counting all the drying time, the whole process takes me about two hours per notebook.
Posting
Well, I shared it on the Larry Library, but I didn’t post it here until now. It’s not original art or an edit so I just didn't 🤷🏻♀️
☆ • ☆
I haven’t seen if these were done, but I really liked them, so I’m tagging it.
@sunsmile-lou for this moodboard. Moodboards fascinate me and I want to learn how to make them.
@whatagreatproblemtohave for her Tired Tired Sea art. I feel like I was there for some of it, but it’s just one of my favorites.
@killmygoldenn for the Faith in the Future edit
@essercipertuttienonperse for the Livestream tickets or her rainbow series which I love so much
@evilovesyou for A Song Not for Whispering
20 notes
·
View notes
Text
So I had this whole post about getting started in bookbinding with pictures and shout-outs and all that, and then tumblr ate it.
So I guess I'll try again.
Here I am, minding my own business, scrolling through my feed, when I come across a post by @armoredsuperheavy detailing their work in ficbinding and giving process shots and links and a whole bunch of resources for people to use. I can't find the exact post because of the way this hellsite works, but this post has a bunch of their resources.
Cue me going "holy shit I love that idea", and then having it sit in my brain for weeks until I finally cave and go "okay, I'll just get a few supplies and try it out."
Because I was determined to test the waters and didn't want to invest a huge amount of money, I got a few supplies from Hollander's and a cheap set of tools and gave this whole 'bookbinding' thing a shot.
I have OpenOffice on my computer, which is a free, open-source alternative to Word and which works in similar enough ways that I was able to still use the Google doc @armoredsuperheavy put together to format a fic I had pulled from AO3.
Then, because I started all this after quarantine happened and wasn't comfortable getting things printed out at a copy shop for a multitude of reasons, I shoved some paper into my printer and spent a truly ridiculous amount of time figuring out how to print in signatures.
It was around this time that it came to my attention that printing out a book takes a lot of ink. Like a LOT of ink.
Who knew.
Home printers being what they are, ink cartridges are an exorbitant amount of money and printer manufacturers will do everything in their power to make it so that buying their ink cartridges is your only option.
Yeah fuck that.
Several hours, forums, and perhaps a questionable transaction or two in exchange for some drivers and codes, I had successfully jailbroken my printer so I could use aftermarket ink cartridges at half the price, and eventually convert to a continuous ink supply system (CISS).
When I told them about this, none of my friends were surprised, which I suppose says something about me.
BUT! I now (finally) had a stack of signatures that I could turn into a real book!
I got started right away, folding all the papers with my little bone folder and punching holes into the stacks. I was ready sew everything together!
I did not have a sewing frame. I still do not have a sewing frame. What I do have is sheer bullheaded stubbornness, several hours with nothing to do, and random crap grabbed from around my my apartment.

Meet my 'sewing frame', aka a scroll frame twist tied to a piece of cardboard.
With the text block sewn together, I could glue it all! But like the sewing frame, I don't have a book press. Instead, I've got what I like to call the Booksquisher.

A thick stack of geek books ready and willing to squish the heck out of a bunch of paper.
I don't have any pictures of the next few steps in the process, but that first project actually resulted in something I could hold in my hands and read!

So did the next one.
And the one after that.

Okay, so I might actually love this? Except for the part where I live in a small studio apartment and don't have either the room or the inclination to keep the things I make.
This might be a problem.
186 notes
·
View notes
Text
The Unknown Muggleborn - Chapter 8
3rd Person POV
Later that night, (Y/n) crawls under her covers to go to sleep; Marvel lies her small head on (Y/n)'s chest.
"'Night, girl," (Y/n) murmurs, drowsily scratching behind the cat's ears.
. . .
A few hours later, Marvel lifts her head, nuzzling (Y/n)'s face to try to wake her up. She lets out a whimper, pawing (Y/n)'s face.
The girl was sweating and her neck was resting at an awkward angle. Her breath had quickened and her eyes were moving rapidly under her closed eyelids.
Marvel jumps off the bed and streaks into Hermione's room. Hermione had always been a light sleeper, so when the cat jumped onto her bed, she wakes.
Marvel meows, and Hermione's head tilts in concern.
"What's wrong, Marvel?" Hermione asks and the black-and-white feline paws at Hermione's hand and jumps off the bed, stopping at the door, then looking back at the brunette.
What a peculiar cat, Hermione thinks, throwing back the covers and following the cat across the hall to her sister's room.
Marvel streaks over and onto the bed, her green eyes wide as she tries to nudge her companion awake again.
Realization and fear dawn in Hermione's eyes and she walks across the room and switches on (Y/n)'s bedside slight before placing a hand on her sister's shoulder, shaking it roughly.
"Come on," Hermione murmurs. "You've got to wake up."
(Y/n)'s eyes flash open, and she sits up in her bed, her eyes closed, head leaning against the headboard, her hands trembling.
Hermione sits down on the edge of (Y/n)'s bed, and takes her sister's hands in her own.
(Y/n) looks up, her eyes wide with shock - and a bright silver.
Hermione looks at her sister and (Y/n) subconsciously moves over and Hermione slides under the covers, her back leaning against the other half of (Y/n)'s pillow.
(Y/n) leans against Hermione's shoulder; Hermione, used to these nightmares, remains silent.
After a few minutes, she reaches over and turns off the bedside light.
(Y/n) turns on her side, her head resting on the pillow, and Hermione does the same.
. . .
(Y/n) and Hermione don't talk about the nightmare the night before as the two go about the rest of the break leading up until Christmas.
After breakfast Christmas morning, (Y/n), Hermione, and their parents walk into the living room.
"You girls want to pass out gifts?" Mrs. Granger asks and (Y/n) and Hermione nod.
After passing out the gifts, (Y/n) settles back down at her place in front of the couch. (Y/n) pulls the wrapping paper off one from Fred, and sitting on top was a card. It said:
(Y/n),
Somebody got this picture of your first Quidditch match, I thought you'd like it.
- Fred
Lifting up the card, (Y/n) smiles seeing a picture in a frame. It was a picture of Fred and George lifting her up onto their shoulders after her first Quidditch match.
(Y/n) sets the picture and card beside her before picking up a gift from Harry. She smiles when she sees a Advanced Charms book and a book on Magical Creatures.
(Y/n) looks over at Hermione as the brunette at her side opens her gift. (Y/n) had given her sister a copy of Hogwarts: A History.
"I have a copy already," Hermione says, turning to (Y/n).
"There's a charm on it," (Y/n) explains. "Whenever something important in Hogwarts' history, it get's copied down in here. Look," (Y/n) says, opening a page. It says, October 31, 1991 - Hermione Granger, (Y/n) (L/n), Harry Potter, Ronald Weasley, defeated a mountain troll in a girls toilet.
Hermione stares down at the book and a smile slowly spreads across her face. "This is really cool! I love it! But that's not how that went," Hermione says.
"Ah, but it's better than what actually happened," (Y/n) argues. "That was not my best birthday."
(Y/n) grabs another gift, pulls the paper off, and finds a box of chocolate frogs from Harry, and she sets them aside, promising to have one later.
One of (Y/n)'s last gifts is a package wrapped in glossy blue paper with wolves printed on it.
(Y/n),
Happy Christmas! I'm very proud of what you have accomplished at Hogwarts in such a short amount of time.
-Love,
Uncle Remus
(Y/n) gazes down at the card, a small smile on her face. Then she sets the card at her side and looks at the contents of the box. Inside was a small stuffed wolf with a tag on it's ear that read - (Y/n)'s first stuffed animal, a gift from Uncle Remus. Under that was a new stack of photos that (Y/n) promises herself to look at later.
(Y/n) opens a package and finds a red sweater with a silver (First Initial) on it. Under the sweater was a large box of homemade fudge and a letter.
(Y/n),
My sons Ron, Fred, and George have told me a lot about you. My husband, Arthur, and I wish to meet you soon. Happy Christmas!
-Molly Weasley
Grinning, (Y/n) pulls the sweater over her head and the four finishing opening all their gifts, both (Y/n) and Hermione take all their things upstairs.
3rd Person POV - with Harry - A few hours earlier
On Christmas Eve, Harry goes to bed looking forward for the next day for the food and the fun, but not expecting any presents at all. When he wakes early in the morning, however, the first thing he sees is a small pile of packages at the foot of his bed.
"Merry Christmas," says Ron sleepily as Harry scrambles out of bed and pulls on his bathrobe.
"You, too," says Harry. "Will you look at this? I've got some presents!"
"What did you expect, turnips?" says Ron, turning to his own pile, which is a lot bigger than Harry's.
Harry picks up the top parcel. It is wrapped in thick brown paper and and scrawled across it was to Harry, from Hagrid. Inside is a roughly cut wooden flute. Hagrid had obviously whittled it himself; Harry blows it - it sounded a bit like an owl.
A second, very small parcel contains a note. We received your message and enclose your Christmas present. From Uncle Vernon and Aunt Petunia. Taped to the note is a fifty-pence piece.
"That's friendly," says Harry.
Ron seems fascinated by the fifty pence, "Weird!" he exclaims. "What a shape! This is money!"
"You can keep it," says Harry, laughing at how pleased Ron is. "Hagrid and my aunt and uncle - so who sent these?"
"I think I know who that one's from," says Ron, turning a bit pink and pointing to a very lumpy parcel. "My mom. I told her you didn't expect any presents and - oh, no," he groans, "she's made you a Weasley sweater."
Harry had torn open the parcel to find a thick, hand-knitted sweater in emerald green and a large box of homemade fudge.
"Every year she makes us a sweater," says Ron, unwrapping his own, "and mine's always maroon."
"That's really nice of her," says Harry, trying the fudge, which was very tasty.
Harry's next present also contains candy - a large box of Chocolate Frogs from Hermione which Harry thought was kind of funny because he had gotten (Y/n) the same thing.
Harry's next parcel was from (Y/n). Opening it, he sees a small box. Feeling curious, Harry opens the box to see a couple of photos. One was of a raven haired man with amber eyes, Harry's father, and a red haired women with emerald green eyes, his mother. The two are standing with a (M/H/C) haired women, (Y/n)'s mum; all three were smiling.
Harry looks at another picture of two kids, probably about a year old. One was a boy with raven hair and emerald eyes, the other was a girl with (H/C) and green eyes - Harry himself and (Y/n).
Then, Harry sees a piece of paper sitting in the box.
Hey Harry,
I found these pictures in the box my godfather left me and I made a few copies. I figured you'd want them.
-Love,
(Y/n)
Harry smiles and picks up the final present. He picks it up and feels it. It's very light, he thinks, and he unwraps it.
Something fluid and silvery gray goes slithering to the floor where it lies in gleaming folds and Ron gasps.
"What is it?"
Harry picks up the shining, silvery cloth off the floor. It's strange to the touch, like water woven into material.
"It's an Invisibility Cloak," says Ron, a look of awe on his face. "I'm sure it is - try it on."
Harry throws the cloak around his shoulders and Ron gives a yell.
"It is! Look down!"
Harry looks down at his feet, but they are gone. He dashes to the mirror. Sure enough, his reflection looks back at him, just his head suspended in midair, his body completely invisible. He pulls the cloak over his head and his reflection vanishes completely.
"There's a note!" says Ron suddenly. "A note fell out of it!"
Harry pulls off the cloak ans seizes the letter. Written in narrow, loopy writing he had never seen before were the following words:
Your father left this in my possession before he died. It is time it was returned to you.
Use it well
A very Merry Christmas to you
There is no signature; Harry stares at the note, while Ron is admiring the cloak.
"I'd give anything for one of these," Ron says. "Anything. What's the matter?"
"Nothing," says Harry. He fells very strange. Who had sent the cloak? Had it really once belonged to his father? he thinks.
Before he can say - or think - of anything else, but the dormitory door is flung open and Fred and George Weasley bounds in. Harry stuffs the cloak quickly out of sight. He doesn't fell like sharing it with anyone else yet.
"Merry Christmas!"
"Hey, look — Harry's got a Weasley sweater, too!"
Fred and George are wearing blue sweaters, one with a large yellow F on it,the other a G.
"Harry's is better than ours, though," says Fred, holding up Harry's sweater. "She obviously makes more of an effort if you're not family."
"Why aren't you wearing yours, Ron?" George demands. "Come on, get it on, they're lovely and warm."
"I hate maroon," Ron moans halfheartedly as he pulls it over his head.
"You haven't got a letter on yours," George observes. "I suppose she thinks you don't forget your name. But we're not stupid — we know we're called Gred and Forge."
"What's all this noise?"
Percy Weasley sticks his head through the door, looking disapproving. He had clearly gotten halfway through unwrapping his presents as he, too, carries a lumpy sweater over his arm, which Fred seizes.
"P for prefect! Get it on, Percy, come on, we're all wearing ours, even Harry got one."
"I — don't — want —" says Percy thickly, as the twins force the sweater over his head, knocking his glasses askew.
"And you're not sitting with the prefects today, either," demands George."Christmas is a time for family."
They frog-march Percy from the room, his arms pinned to his side by his sweater.
Harry had never in all his life had such a Christmas dinner. A hundred fat, roast turkeys; mountains of roast and boiled potatoes; platters of chipolatas;tureens of buttered peas, silver boats of thick, rich gravy and cranberry sauce —and stacks of wizard crackers every few feet along the table. These fantastic party favors were nothing like the feeble Muggle ones the Dursleys usually bought, with their little plastic toys and their flimsy paper hats inside. Harry pulls a wizard cracker with Fred and it didn't just bang, it went off with a blast like a cannon and engulfed them all in a cloud of blue smoke, while from the inside exploded a rear admiral's hat and several live, white mice. Up at the High Table, Dumbledore had swapped his pointed wizard's hat for a flowered bonnet,and is chuckling merrily at a joke Professor Flitwick had just read him.
Flaming Christmas puddings follow the turkey. Percy nearly breaks his teeth on a silver Sickle embedded in his slice. Harry watches Hagrid getting redder and redder in the face as he calls for more wine, finally kissing Professor McGonagall on the cheek, who, to Harry's amazement, giggles and blushes, her top hat lopsided.
When Harry finally leaves the table, he is laden down with a stack of things out of the crackers, including a pack of non-explodable, luminous balloons, a Grow Your-Own-Warts kit, and his own new wizard chess set. The white mice had disappeared and Harry has a nasty feeling they were going to end up as Mrs.Norris's Christmas dinner.
Harry and the Weasleys spent a happy afternoon having a furious snowball fight on the grounds. Then, cold, wet, and gasping for breath, they return to the fire in the Gryffindor common room, where Harry breaks in his new chess set by losing spectacularly to Ron. Harry suspects he wouldn't have lost so badly if Percy hadn't tried to help him so much.
After a meal of turkey sandwiches, crumpets, trifle, and Christmas cake, everyone feels too full and sleepy to do much before bed except sit and watch Percy chase Fred and George all over Gryffindor Tower because they'd stolen his prefect badge.
It had been Harry's best Christmas day ever. Yet something had been nagging at the back of his mind all day. Not until he climbs into bed is he free to think about it: the Invisibility Cloak and whoever had sent it.
Harry leans over the side of his own bed and pulls the cloak out from under it. His father's ... this had been his father's. He lets the material flow over his hands, smoother than silk, light as air. Use it well, the note had said.He has to try it, now. He slips out of bed and wrapped the cloak around himself. Looking down at his legs, he sees only moonlight and shadows. It's a very funny feeling.Use it well.Suddenly, Harry feels wide-awake. The whole of Hogwarts is open to him in this cloak. Excitement floods through him as he stands there in the dark and silence. He can go anywhere in this, anywhere, and Filch would never know.
Ron grunts in his sleep. Should Harry wake him? Something holds him back— his father's cloak — he felt that this time — the first time — he wants to use it alone. Harry creeps out of the dormitory, down the stairs, across the common room, and climbs through the portrait hole.
"Who's there?" squawks the Fat Lady. Harry says nothing. He walks quickly down the corridor.
Harry, his heart racing, and thought. And then it came to him. The Restricted Section in the library. He'd be able to read as long as he liked, as long as it took to find out who Flamel was. He sets off, drawing the Invisibility Cloak tight around him as he walked.The library is pitch-black and very eerie. Harry lights a lamp to see his way along the rows of books. The lamp looks as if it was floating along in midair,and even though Harry can feel his arm supporting it, the sight gives him the creeps.
The Restricted Section is right at the back of the library. Stepping carefully over the rope that separates these books from the rest of the library, he held up his lamp to read the titles. They didn't tell him much. Their peeling, faded gold letters spelled words in languages Harry couldn't understand. Some had no title at all. One book has a dark stain on it that looked horribly like blood. The hairs on the back of Harry's neck prickled. Maybe he was imagining it, maybe not, but he thought a faint whispering was coming from the books, as though they knew someone was there who shouldn't be. Harry had to start somewhere. Setting the lamp down carefully on the floor, he looked along the bottom shelf for an interesting-looking book. A large black and silver volume caught his eye. He pulls it out with difficulty, because it was very heavy, and, balancing it on his knee, lets it fall open.
A piercing, bloodcurdling shriek splits the silence — the book is screaming! Harry snaps it shut, but the shriek goes on and on, one high, unbroken, earsplitting note. He stumbles backward and knocks over his lamp, which went out at once. Panicking, he heard footsteps coming down the corridor outside —stuffing the shrieking book back on the shelf, he runs for it. He passes Filch in the doorway; Filch's pale, wild eyes looked straight through him, and Harry slips under Filch's outstretched arm and streaks off up the corridor, the book's shrieks still ringing in his ears.
Harry comes to a sudden halt in front of a tall suit of armor. He has been so busy getting away from the library, he hadn't paid attention to where he was going.Perhaps because it's dark, he didn't recognize where he was at all. There is a suit of armor near the kitchens, he knew, but he must be five floors above there.
"You asked me to come directly to you, Professor, if anyone was wandering around at night, and somebody's been in the library — Restricted Section."
Harry feels the blood drain out of his face. Wherever he is, Filch must know a shortcut, because his soft, greasy voice is getting nearer, and to his horror, it's Snape who replies, "The Restricted Section? Well, they can't be far, we'll catch them."
Harry stands rooted to the spot as Filch and Snape come around the corner ahead. They can't see him, of course, but it is a narrow corridor and if they come much nearer, they'd knock into him - the cloak didn't stop him from being solid.
Harry backs away as quickly as he can. A door stands ajar to his left. It's my only hope, Harry thinks. He squeezes through it, holding his breath, trying to to move it, and to his relief, he manages to get inside the room without their noticing anything. They walk straight past, and Harry leans against the wall, breathing deeply, listening to their footsteps dying away. They had been close, very close, It is a few seconds before he notices anything about the room he his hidden in.
It looks like an unused classroom. The dark shapes of desks and chairs are piled against the walls, and there is an upturned wastepaper basket — but propped against the wall facing him was something that didn't look as if it belonged there, something that looked as if someone had just put it there to keep it out of the way.
It is a magnificent mirror, as high as the ceiling, with an ornate gold frame,standing on two clawed feet. There is an inscription carved around the top: Erised stra ehru oyt ube cafru oyt on wohsi.
His panic fading now that there is no sound of Filch and Snape, Harry moves nearer to the mirror, wanting to look at himself but see no reflection again; he steps in front of it.
He has to clap his hands to his mouth to stop himself from screaming. He whirls around, his heart pounding far more furiously than when the book had screamed - for he had not seen only himself in the mirror, but a whole crowd of people standing right behind him.
But the room is empty. Breathing very fast, he turns slowly back to the mirror.
There he is, reflected in it, white ans scared-looking, and there, reflected behind him, are at least ten others. Harry looks over his shoulder - but still, no one is there. Or are they invisible, too? Is his, in fact, in a room full of invisible people and this mirrors trick is that it reflects them, invisible or not?
Harry looks in the mirror again. A woman is standing right behind his reflection is smiling at him and waving. He reaches out a hand and feels the air behind him. If she is really there, he would touch her, their reflections are so close together, but he only feels air - she and the others exist only in the mirror.
She is a very pretty woman. Dark red hair and her eyes, emerald green eyes. Harry edges closer to the to the glass. Bright green - exactly the same shape as Harry's, but then he notices that she is crying; smiling, but crying at the same time. The tall, thin, black-haired man standing next to her put his arm around her. He wears glasses and his hair is very untidy. It sticks up at the back, just as Harry's does.
Harry is so close to the mirror that his nose is nearly touching that of his reflection.
"Mom?" he whispers. "Dad?"
They just look at him, smiling. And slowly, Harry looks into the faces of the other people in the mirror, and sees other pairs of green eyes like his, other noses like his, even a little old man, who looks as though he as Harry's knobbly knees - he is looking at his entire family for the first time in his life.
The Potters smile and wave at Harry and he stares hungrily hack at them, his hands pressed flat against the glass as though he is hopping to fall right through it and reach them. He has a powerful kind of ache inside him, half joy, half terrible sadness.
How long he stands there, he doesn't know. The reflections do not fade and he looks and looks until a distant noise brings him back to his senses. He can't stay here, he has to find a way back to his bed. He tears his eyes away from his mother's face, whispers, "I'll come back," and hurries from the room.
Harry does for the next two nights and Dumbledore had found Harry the last night. Dumbledore had told Harry the purpose of the mirror, to show the deepest desire of their hearts.
Dumbledore had convinced Harry not to go looking for the Mirror of Erised again, and for the rest of the Christmas holidays the Invisibility Cloak stays folded at the bottom of his trunk. Harry wishes he could forget what he'd seen in the mirror as easily, but he can't He starts having nightmares. Over and over a again he dreams of his parents disappearing in a flash of green light, while a high voice crackles with laughter. What Harry didn't know, was that (Y/n) was having the same dreams. Repetition from the one on Christmas Eve night.
"You see, Dumbledore was right, that mirror could drive you mad," says Ron, when Harry tells them about these dreams.
Word Count: 3759 words
14 notes
·
View notes
Last Seen Blogs

hjotp30
hidden box 30

viinhas
Garota Indomável

ask-leon-skennedy-dbd
Rookie cop

soymreco
Mr. Ecö!

c-vomitoria
WILLOW HOMINIVORAX