#*DIY
Text

i made khachapuri cat 🥺
131 notes
·
View notes
Text
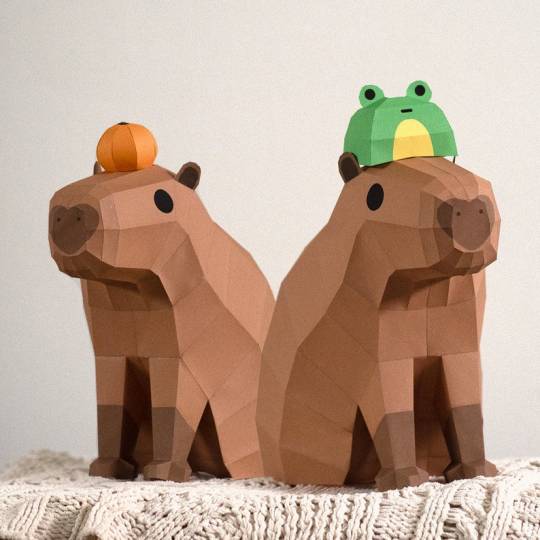

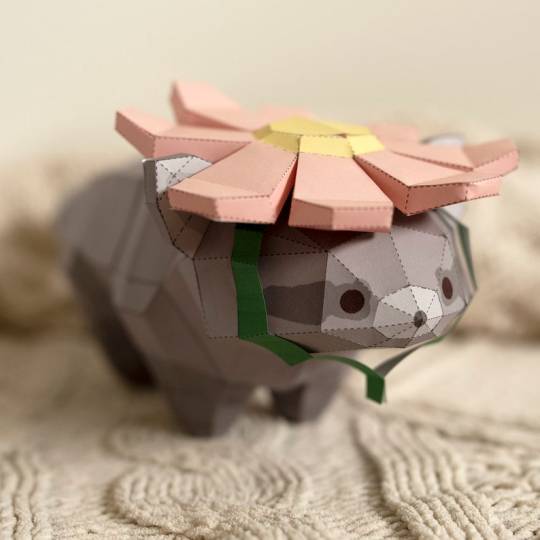

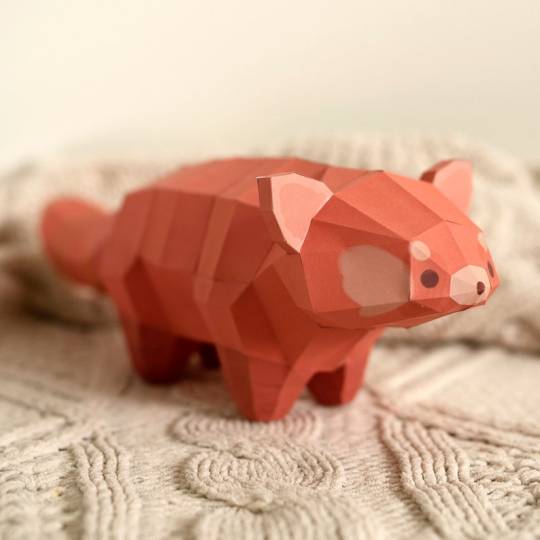
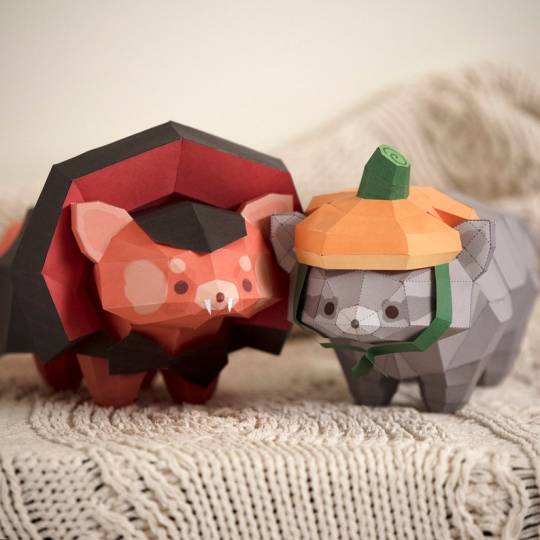
Low Poly Papervraft // sneepsnorp3d
x • x • x
x • x • x
82 notes
·
View notes
Text
#diy#quicksilver#gowns#rainbowcore#00q#50s#fushiguro megumi#tom cruise#top#the losers club#furniture
122 notes
·
View notes
Text
#wednesday#outer space#cosas de la vida#harvey specter#curvy hips#nightwing#fortnite#selling#lay#diy
126 notes
·
View notes
Text
https://karen-950.mxtkh.fun/a/y6kwrWU
#diy#quicksilver#gowns#rainbowcore#00q#50s#fushiguro megumi#tom cruise#top#the losers club#furniture#ffxv#trigun maximum
122 notes
·
View notes
Text
DIY Egg Candle Molds For New Beginnings
I've been working on my candlemaking skills for a while now with mitigating success but these are the easiest candles I have ever made.
I really like these for all kinds of spring spell work. They would work perfectly for a Spring Solstice or May Day spell but I also see them as a perfect vessel for a spell to invoke new beginnings. I personally associate eggs with pure potentiality.
Here the goal is to create an egg candle with the "Seed" of your intention, then incubate your intention, and finally burn your candle to hatch your magic into the real world.
Note: This is not a magical how-to on how to CAST a spell, this is a how-to on how to make a vessel for your spell. I expect you to bring your own magic and traditions to this.
For this project you will need:
One egg (probably chicken but goose or duck works too)
A pokey tool
Candle Wax*
A wax-safe container for melting
A wick
Something to stabilize your eggshell (egg cartons work fine)
Scents, wax color, powdered botanicals (optional)
I'm assuming here that if you're interested in this project, you have some experience with candlemaking and the right tools to do so. If not, you can buy a basic candlemaking kit nearly anywhere on the internet that includes some wax, a wax boiler, and wicks.
*I would suggest using beeswax for this candle as it will help the candle to maintain its shape as it burns. Soy wax has a low burn point and tends to melt which will deform the shape of your candle more quickly
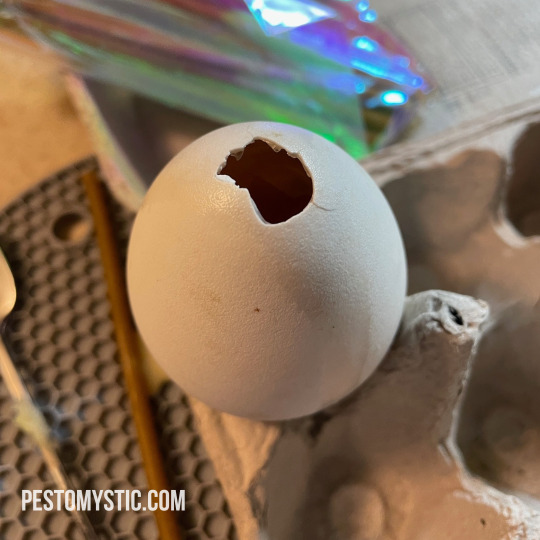
1. Clean out your Egg
You need to make a small hole at the top of your egg with a pokey tool. I used a knife to make the hole and then inserted a chopstick to whip the insides so the yoke would come out. Pour out the egg (and eat it! Yumm!) and then wash it until the water running out of the egg runs clear. From this step, you want the inside of the egg to dry out - you can put it into a 200°f oven for two hours or let it sit out until it dries (it may take a couple of days depending on your humidity levels).
Letting your egg dry out isn't strictly necessary but if you don't take this step, the egg membrane will stick to your candle. This will make more work for you when you remove the egg mold later.
Note: My friend gave me two goose eggs to try, so I used them for this test run of egg-shaped candles. If you use chicken eggs, they will be significantly smaller (3/4 the size probably).
2. Heat wax in a double boiler until it is fully melted.
You can add in anything that supports your intention here: scents, coloring, or powdered herbs/flowers work well. (please practice good fire safety here and only add in things that are safe for candlemaking)
Note: if you are adding botanicals to your wax, you want to be very careful to make sure they are fully powdered or they may cause a fire.
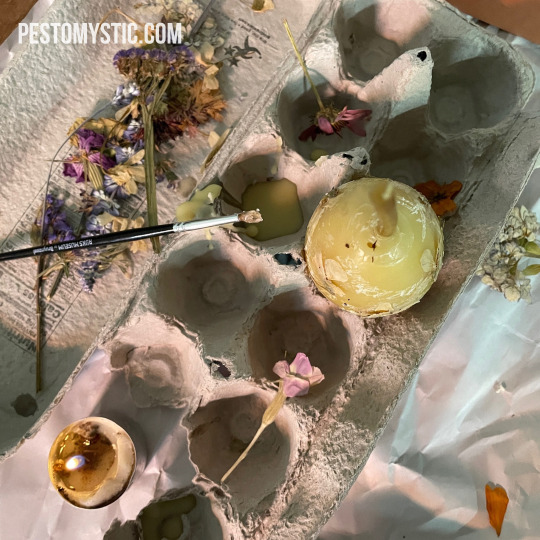
3. Pour Your Wax
Place your eggshell mold in an egg carton for stabilization and carefully pour the hot wax into your mold.
You want to fill to the top as much as you can - the wax may settle as it starts to cool so you may want to add more.
Note: the hole in your egg should be wide enough to accommodate pouring your wax. I used an extra flask funnel I had on hand to facilitate this process.
4. Add Your Wick
Let your wax cool slightly (approximately 10 minutes) and then add in your wick. With a chicken egg, you can use a birthday candle for this step or any wick that you have on hand. You can use a wick stabilizer or chopsticks to keep your wick in place while your wax hardens.
5. Cure Your Candle
Candles should cure for 7-10 days (for beeswax, this may differ for other types - do your research!) before you burn them. Though there is some debate on the internet, it is generally considered true that curing is a part of candle safety as a young candle that has not properly hardened can burn unevenly which may cause fires.
You can choose to begin the process of changing/incubating your candle (listed below) during the curing stage.
6. Remove Your Shell
Once your candle is done curing, it is time to remove the eggshell. For chicken eggs purchased from the grocery store, this should be a relatively easy process. Simply roll your egg candle on a hard surface until the shell cracks and then carefully peal the eggshell away from the wax.
If you are using non-chicken egg or a farm-fresh egg, the shell may be more difficult to crack. I used a goose egg for my candle so I had to use a tool to remove the shell - I used a dental pick that my partner uses for clay sculpting.
Take your time with this process, if you use tools, it is easy to scratch the surface of your egg.
7. Incubate/Charge Your Egg Candle
Unless you added magic during the wax step in this process (which is totally valid), this is where the major magic begins. You want to imbue your magic into the egg at this stage - this can be done in any way that suits your level of creativity and your personal practice. You can carve your intention directly into the wax or mark it with bindrunes or sigils. You can charge it with energy. You can dedicate it to a particular deity or spirit that you work closely with or set it on your altar. You can charge it in the sunlight or moonlight (beware of low-temperature wax and high heat from the sun here). You can make it a nest full of objects that represent your intentions.
The goal in this step is to build your intention by returning to your egg over a period of time (or, alternatively, letting it sit in a way that charges it) before you burn it to release this intention. You can use numerology here by choosing a number that aligns with your intentions, or begin your incubation on the new moon and burn your candle on the full moon.
Pro-tip here: Chicken eggs need to incubate for around 21 days so this is a good number to use if your mold was a chicken egg, or you otherwise work with chickens in your craft.
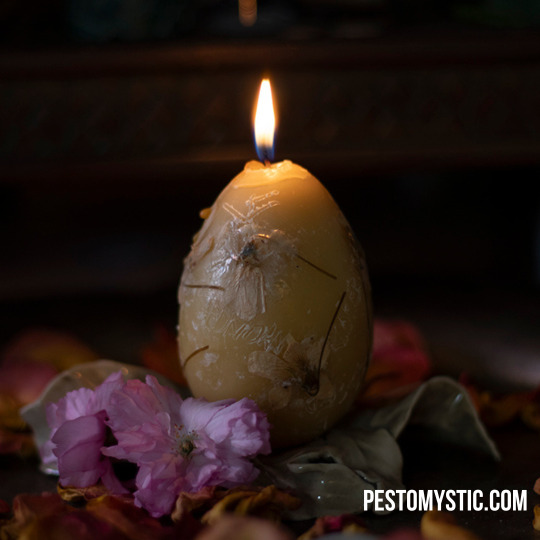
Note: This was a test on the applicability of this method, but I couldn't help but enchant my candle. I carved my intentions into my candle and then glued (with wax) dried violets onto my candle because I use violets in my craft to encourage transformation. I also used other methods to create a vessel for magic.
8. Use Your Charged Egg Candle in a Magic Ritual
The majority of work is already done here, the rest, as they say, is up to you. Because egg shells are round, you will need to find some way to stabilize the bottom of your candle while you burn it. You could choose to level the bottom of the candle or use any other method that works for you.
I happened to have a piece of pottery from a friend that made the perfect stand for an egg-shaped candle.
______________________________________________________________
Do you like my work? I am doing a fundraiser over on my KoFi page to help pay off an unexpected bill. You can tip me there, commission me to write an astrology report for you, or sign up to be a monthly supporter of my writing.
39 notes
·
View notes
Text
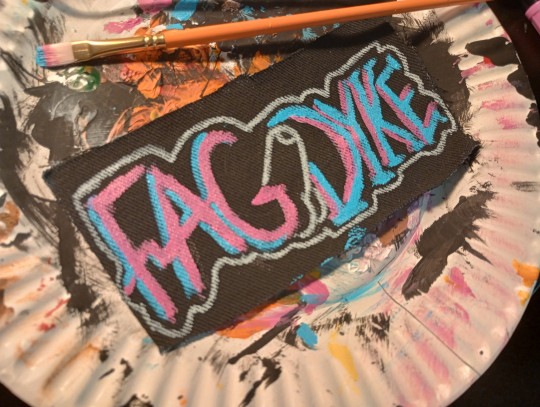
New patch yay
[I.D. A picture of a patch with a black base and words that read 'FAG DYKE'. There is a small simple illustration of a penis between the words. The word fag is done in pink paint with a blue shadow effect and the word dyke is done in blue paint with a pink shadow effect. The words are outlined in pink. END I.D.]
31 notes
·
View notes
Text

POV I’m your trans girlfriend and send your bulge pics in my new panties
#lgbt#lgbtqia#mtf trans#trans woman#trans man#transgender#trans lover#so fuckable#fuck my body#trans#lgbtq#life quotes#sexy content#sexy titts#sexy tease#gayhot#gay love#gayboy#i love him#love quotes#self love#i love you#lovely breasts#perfect butt#diy
26 notes
·
View notes
Text
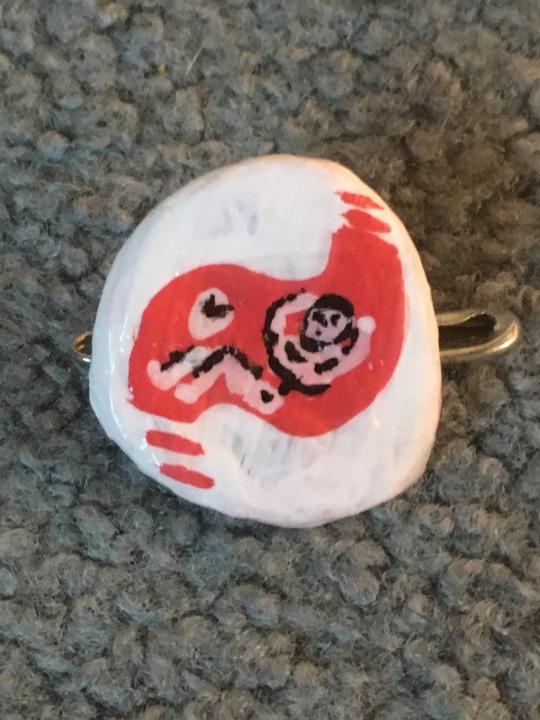
dungeon meshi pin I made instead of studying… save me dungeon meshi pin
(I am aware it kinda sucks, I need a smaller paintbrush next time lmao)
25 notes
·
View notes
Text

I know, I know, it’s too early for Halloween! Or is it? 🎃
Crochet pattern for amigurumi Halloween Minis set 3 is available in English, German, French, Spanish, Portuguese, Italian and Dutch here -> https://etsy.me/46AWi5C 🤗
#aradiyatoys#olka novytska#adorable#crochet#handmade#cute#diy#crochet pattern#amigurumi#kawaii#grim reaper#halloween#halloween minis#amigurumi pattern#aww
30 notes
·
View notes
Text
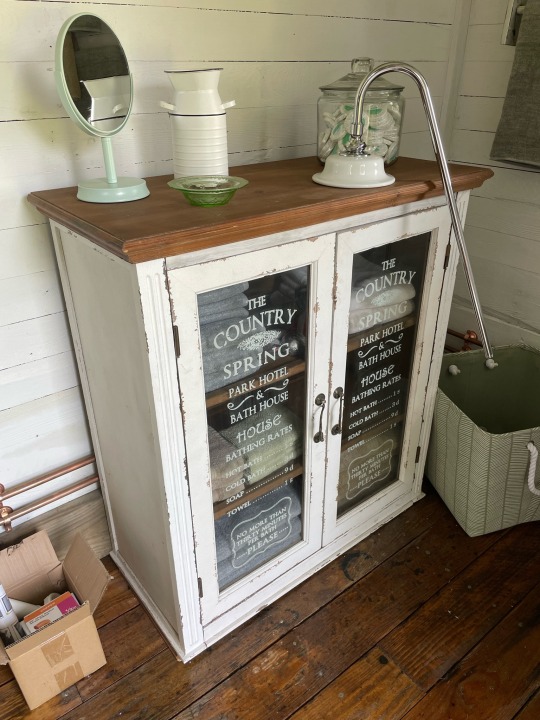
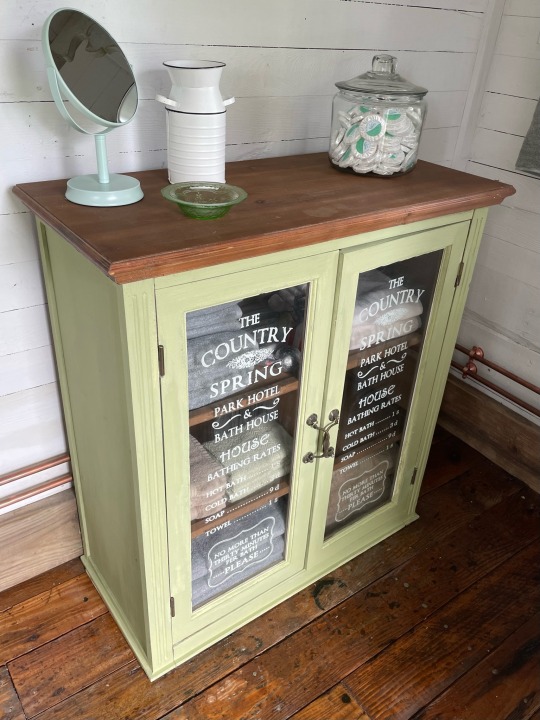
Decided to paint the cabinet in the bath house. A little touch of green to break up all that white. The other accents in the room are a similar green. I’ll give it a day or two and then go out with some sand paper and distress it a little, like it was. Then wax it to seal the milk paint. Have I mentioned how much I hate milk paint?! Luckily that’s the last of it.
Oh man, now that lil mirror looks blue, not green…
24 notes
·
View notes
Text
Today I got to replace an important missing piece of a desk someone wanted by modifying a discarded part from other desks that nobody liked. 🛠 🤠👍


20 notes
·
View notes
Text

finished back patch!
20 notes
·
View notes
Text
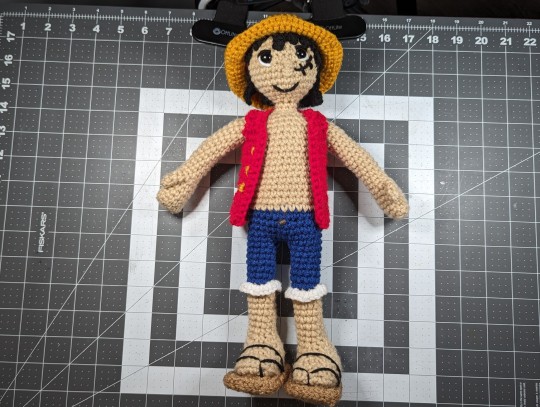
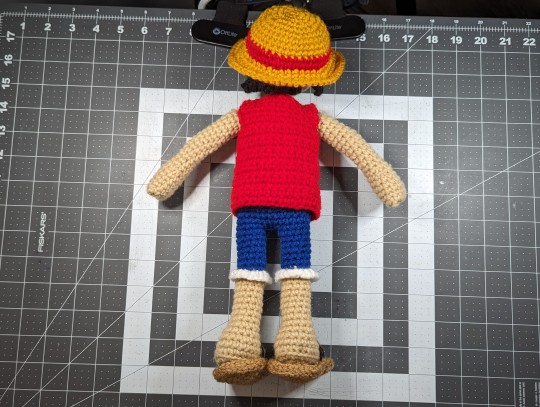
Made this Luffy for my dad!! A full tutorial of how to make him and how I designed the pattern will be up sometime this week. It'll have to be broken into two parts, however, because of how much footage there is of. A written pattern will eventually be sold but I'm thinking about changing the hair a bit first! What do y'all think about his hair?
#crochet#cute#kawaii#crochet plush#diy#crochet plushie#crochet doll#one piece#one piece luffy#luffy#monkey d luffy#crochet luffy#luffy one piece#anime#anime doll#tutorial#crochet tutorial#youtube#anime character#crochet anime character
20 notes
·
View notes
Text
Loftus Bralette Mk II COMPLETE!!
OK the second round of construction went more smoothly and, yes, as I suspected, most of the fit issues were solved by sewing more carefully.
I fucked up the center gore, it drifted out of position while I was sewing it down and I did not realize. I'm going to have to pick that out and redo it I think, or somehow fix it.
But, overall, it has now taken its place as The Nicest Best-Fitting Bra I Own, and it's cute besides.

[image description: a red lace and black bra lies on the table in front of a sewing machine, straps not yet connected.]
The waistband is silver metallic, and I thought about just putting the other solid black elastic I have on there instead, but then i was like, meh, I'll just do it as packaged. But now I wish there was some silver anywhere else in this thing. Yeah I might go back and add silver metallic topstitching in some places. If I have time and get obsessive, LOL.

[image description: the red and black and silver bra, on my body, cropped rather closely because nobody really needs to investigate my shower that much.]
So the fit is much better than the first one, there's no bagging or sagging or gapping or anything, but on the right of the photo there the center gore got wobbly at the top and I have to fix that.
Overall I wish it corralled my boobs more forward than it does, they're kind of leaning toward my armpits a tiny bit more than I'd like.
But it turns out there's an entire series of blog posts about tweaking the fit of the Cashmerette bras. So there's a whole post about narrowing that center gore, and another post with a section about shortening the inside edge of the powerbar to increase support that way. So I may do those two things for my next version, and see how that works out.
21 notes
·
View notes
Text
SOMEEEE JJK SPOILERRRSS ‼️‼️
I SWEARRRRRR IF GOJO DONT FIND A WAY TO COME BACK IM ENDING IT ALLLLLL 😣😣😣 WHEN THAT LEAKED PANEL OF GOJO W/ HIS EYES LIKE OPENED A BIT AFTER HE GOT LIKE CUT IN HALF I DEADASS THOUGHT MY MAN WOULD BE ALIVE BUT NOOOOOOO SUKUNA JUST GOTTTTAAA SEE HIS FUCKIN GHOST OR SUM SHIT LIKE WTF THEN WITH YUTA AND STUFF BRRORORO OK LIKE STILL GOJO BETTER COME BACK OMG 😞😞😞😞 GEGE WANTS US TO DIEEE MANNN
#jjk#jujutsu kaisen#jjk gojo#gojo satoru#beauty#story#ryomen sukuna#yuta okkotsu#trending#jujutsu sorcerer#kenjaku#lol#fashion#art#diy#food#landscape#illustration#vintage#design#typography
22 notes
·
View notes
Last Seen Blogs

domiderhomi
Journey to Creativity

murgles
Murgles

skeletalcat
Skeletal Cat

maemaesstuff
burnt chicken nugget

dokidobe
yellow.dr.monv