#woocommerce for beginners
Video
youtube
Full Tutorial - How to make your Woocommerce emails look very professional with this Free PluginComplete WooCommerce Tutorial For Beginners | eCommerce Tutorial 2023. Customize your business email templates sent from wordpress woocommerce site for free with the free wordpress plugin mentioned in the video. Generate free SEO Audit report of your website to improve your website ranking and traffic, Go to; www.ecomhardy.com #Woocommerce, #emails, #professional, #FreePlugin, #Customize, #business, #emailtemplates, #WordPress, #website, #tutorial, #marketing, #e-commerce, #design, #branding, #communication, #customer, #sales, #e-mail, #online, #store, #shop, #commerce, #retail, #B2B, #B2C, #webdesign, #ecommerce, #template, #customization, #marketingautomation, #digitalmarketing, #onlinestore, #shopify
#wordpress#woocommerce#elementor#dropshipping#ecommerce#ecomhardy#woocommerce tutorial#woocommerce for beginners#woocommerce plugin#ecommerce tutorial#ecommerce wordpress#complete webshop tutorial#woocommerce stripe#woocommerce shipping#woocommerce variable product#woocommerce wordpress#build your own webshop#sell products online#ecommerce from scratch#woocommerce tutorial 2022#webshop#woocommerce email customizer#email customizer for woocommerce
0 notes
Text
5 Best E-commerce Platforms for Startups To Boost Your Sales Now!

Make decisions, decisions, again and again! Sure, you can make a lot of these when you first launch your internet enterprises. Which eCommerce platform you choose is one of the most important decisions you'll have to make. But how can you choose the best e-Commerce platform for startups when so many compete for your business?
Let me help you with that decision here!
2 notes
·
View notes
Text
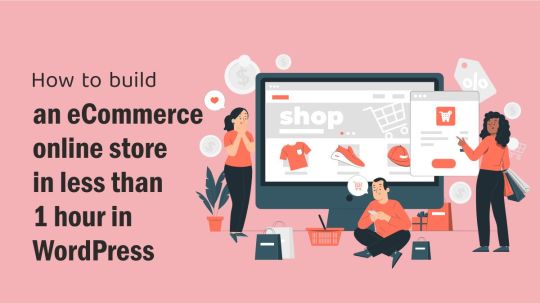
How to build an eCommerce online store in less than 1 hour in WordPress 
How to build an eCommerce online store in less than 1 hour in WordPress 
Are you looking to build an online business? It’s better to build an eCommerce website with WordPress.
You can build an online store and start selling products online in less than an hour. I assume you might think is it possible to build an online store quickly?
Yes, of course, it’s possible and pretty simple also easy, to build an eCommerce store quickly with WordPress.
Basic requirements to…
View On WordPress
1 note
·
View note
Link
In this WooCommerce tutorial for beginners, you will learn how to create an eCommerce website on WordPress.
Do you run a WordPress website and want to start listing and selling products?
WooCommerce is your solution!
WooCommerce powers about 12% of eCommerce sites on the internet.
Its free eCommerce plugin seamlessly integrates with WordPress.
This plugin allows you to list and sell products directly on your WordPress site.
0 notes
Note
Follow-up question about your site, sorry! I was wondering how you got the read time for your posts and how you set your store's URL to "store.kiriska.com"? Are they plugins? I'd love to have an easy URL for my store like that when I open it. Sorry for bugging you!
Read time is a plugin.
The store is on a subdomain, which points to a different WordPress installation (and uses WooCommerce). Depending on your domain situation, you should be able to set up any number of subdomains and point them to whatever you want (as long as the destination allows for it). So if you wanted to have your store at Shopify or Storenvy or whatever, you should be able to point it there.
No worries at all about website questions! I'm all for people exploring making their own sites!
I wrote a blog post about some website basics a while back, though I suppose I'll need to edit it to no longer really rec Tumblr as a "web host."
I've been sitting on a WordPress-specific post for literally years, but have mixed feelings about it I guess. I don't think WP is as beginner-friendly as it'd like to pretend to be, and while technically open-source, Automattic does still have a strong hand in its ongoing development, and I haven't liked its development direction in a while, personally.
That said, there are absolutely no shortage of WP resources out there, which makes it more accessible than some alternatives, imo.
7 notes
·
View notes
Text
The Evolution of PHP: Shaping the Web Development Landscape
In the dynamic world of web development, PHP has emerged as a true cornerstone, shaping the digital landscape over the years. As an open-source, server-side scripting language, PHP has played a pivotal role in enabling developers to create interactive and dynamic websites. Let's take a journey through time to explore how PHP has left an indelible mark on web development.
1. The Birth of PHP (1994)
PHP (Hypertext Preprocessor) came into being in 1994, thanks to Rasmus Lerdorf. Initially, it was a simple set of Common Gateway Interface (CGI) binaries used for tracking visits to his online resume. However, Lerdorf soon recognized its potential for web development, and PHP evolved into a full-fledged scripting language.
2. PHP's Role in the Dynamic Web (Late '90s to Early 2000s)
In the late '90s and early 2000s, PHP began to gain prominence due to its ability to generate dynamic web content. Unlike static HTML, PHP allowed developers to create web pages that could interact with databases, process forms, and provide personalized content to users. This shift towards dynamic websites revolutionized the web development landscape.
3. The Rise of PHP Frameworks (2000s)
As PHP continued to grow in popularity, developers sought ways to streamline and standardize their development processes. This led to the emergence of PHP frameworks like Laravel, Symfony, and CodeIgniter. These frameworks provided structured, reusable code and a wide range of pre-built functionalities, significantly accelerating the development of web applications.
4. PHP and Content Management Systems (CMS) (Early 2000s)
Content Management Systems, such as WordPress, Joomla, and Drupal, rely heavily on PHP. These systems allow users to create and manage websites with ease. PHP's flexibility and extensibility make it the backbone of numerous plugins, themes, and customization options for CMS platforms.
5. E-Commerce and PHP (2000s to Present)
PHP has played a pivotal role in the growth of e-commerce. Platforms like Magento, WooCommerce (built on top of WordPress), and OpenCart are powered by PHP. These platforms provide robust solutions for online retailers, allowing them to create and manage online stores efficiently.
6. PHP's Contribution to Server-Side Scripting (Throughout)
PHP is renowned for its server-side scripting capabilities. It allows web servers to process requests and deliver dynamic content to users' browsers. This server-side scripting is essential for applications that require user authentication, data processing, and real-time interactions.
7. PHP's Ongoing Evolution (Throughout)
PHP has not rested on its laurels. It continues to evolve with each new version, introducing enhanced features, better performance, and improved security. PHP 7, for instance, brought significant speed improvements and reduced memory consumption, making it more efficient and appealing to developers.
8. PHP in the Modern Web (Present)
Today, PHP remains a key player in the web development landscape. It is the foundation of countless websites, applications, and systems. From popular social media platforms to e-commerce giants, PHP continues to power a significant portion of the internet.
9. The PHP Community (Throughout)
One of PHP's strengths is its vibrant and active community. Developers worldwide contribute to its growth by creating libraries, extensions, and documentation. The PHP community fosters knowledge sharing, making it easier for developers to learn and improve their skills.
10. The Future of PHP (Ongoing)
As web technologies continue to evolve, PHP adapts to meet new challenges. Its role in serverless computing, microservices architecture, and cloud-native applications is steadily increasing. The future holds exciting possibilities for PHP in the ever-evolving web development landscape.
In conclusion, PHP's historical journey is interwoven with the evolution of web development itself. From its humble beginnings to its current status as a web development powerhouse, PHP has not only shaped but also continues to influence the internet as we know it. Its versatility, community support, and ongoing evolution ensure that PHP will remain a vital force in web development for years to come.
youtube
#PHP#WebDevelopment#WebDev#Programming#ServerSide#ScriptingLanguage#PHPFrameworks#CMS#ECommerce#WebApplications#PHPCommunity#OpenSource#Technology#Evolution#DigitalLandscape#WebTech#Coding#Youtube
17 notes
·
View notes
Text
Everything related to E-Commerce
The importance of email marketing - Email Marketing
https://bit.ly/3x1ecSO
Top 10 Free Ecommerce Website Templates
https://bit.ly/3wSjS1v
The 7 best WordPress templates to create a THEME E-COMMERCE store
https://bit.ly/4aAkyq3
Shopify vs. WooCommerce, which is better in 2024
https://bit.ly/4bOd83w
How to sell digital products online at E-COMMERCE 2024
https://bit.ly/4aDAXtX
Top 9 Email Marketing Tools for Ecommerce
https://bit.ly/4bPZD3q
10 Ecommerce Marketing Strategies to Increase Traffic and Increase Sales
https://bit.ly/4dWMlnG
The 5 most important tips to increase online sales for beginners in e-commerce
https://bit.ly/3WVy0l6
How to turn your Google search impressions into sales in 10 steps?
https://bit.ly/3WT3aJV
What is digital marketing? What are its types and how to start and achieve success
https://bit.ly/3WZZAhd

#AITech#ArtificialIntelligence#MachineLearning#TechInnovation#Ecommerce#OnlineStore#DigitalCommerce#ShopOnline#EcommerceSolutions#Blogger#WordPress#WebDevelopment#WebDesign#WebDev#WebsiteDesign#Coding#SEO#SearchEngineOptimization#DigitalMarketing#SEOTips#SEOExpert#CSS#FrontendDevelopment#ResponsiveDesign#CSS3#WebStyling#Blog#Blogging#ContentCreation#BlogLife
3 notes
·
View notes
Text

Starting an e-commerce business with a low budget and focusing on dropshipping can be a good way for beginners to enter the world of online entrepreneurship. Here are some tips to help you get started:
Choose a niche: Select a specific product category or niche to focus on. It's easier to target a specific audience and establish your brand identity within a niche. Research popular trends and products to find a profitable niche with a reasonable demand.
Conduct market research: Identify your target audience and analyze their preferences, needs, and purchasing habits. Look for gaps in the market or untapped opportunities that you can exploit. Use tools like Google Trends, social media platforms, and keyword research tools to gather insights.
Select reliable suppliers: Find trustworthy suppliers or manufacturers who offer dropshipping services. Research and compare their product quality, shipping times, pricing, and customer service. Platforms like AliExpress, Oberlo, and Spocket can help you connect with suppliers.
Set up an online store: Choose an e-commerce platform like Shopify, WooCommerce, or BigCommerce to set up your online store. These platforms provide user-friendly interfaces, pre-built templates, and various customization options. Optimize your store for mobile devices as well, as many customers use smartphones for online shopping.
Create compelling product listings: Write detailed and persuasive product descriptions that highlight the benefits and features of each item. Use high-quality product images and videos to showcase your products from different angles. Make sure your listings are optimized for search engines with relevant keywords.
Develop a marketing strategy: Promote your store and products through various marketing channels. Utilize social media platforms, email marketing, content marketing, influencer partnerships, and paid advertising to generate traffic and increase brand awareness. Experiment with different strategies and track their effectiveness.
Provide excellent customer service: Offer exceptional customer support to build trust and encourage repeat purchases. Respond promptly to inquiries and address any issues or concerns. Positive reviews and satisfied customers can help establish your reputation and attract more business.
Optimize for conversions: Continuously monitor and analyze your website's performance using analytics tools. Identify areas of improvement, such as website speed, user experience, and checkout process. Implement A/B testing to optimize your product pages, pricing strategies, and marketing campaigns for better conversion rates.
Build a brand: Focus on building a strong and unique brand identity that resonates with your target audience. Use consistent branding elements, such as a logo, color scheme, and voice, across your website, social media accounts, and marketing materials.
Learn and adapt: Keep up with the latest e-commerce trends, industry news, and consumer behavior. Stay open to learning from your experiences and adapt your strategies accordingly. Continuous improvement and staying up-to-date will help you stay competitive.
Remember, starting a successful e-commerce business takes time, effort, and patience. Be prepared to learn from your mistakes, adapt your strategies, and constantly iterate to achieve long-term success.
Also check out my ebooks (social media marketing and shopify dropshipping) its on 70% off sale!!
Have a nice day🌹
#ecommerce#digitalmarketing#shopify dropshipping#make money fast#social marketing#social media marketing#woocommerce
2 notes
·
View notes
Text
The7 WordPress Theme Exposed: Uncover the Must-Have Features That Will Take Your Website to the Next Level - Don't Miss Out!
WordPress has long been the go-to platform for creating stunning websites, and with its vast array of themes, it offers countless opportunities for customization. Among the plethora of options available, The7 WordPress theme stands out as a versatile and powerful choice. In this blog post, we will delve into the features, customization options, and overall flexibility that The7 theme brings to the table, making it an excellent choice for creating professional websites.
Aesthetically Pleasing Design Options: The7 theme boasts a collection of 1000+ professional and customizable website designs, providing a wide range of options to suit various niches and industries. These designs are visually appealing, modern, and fully responsive, ensuring that your website looks stunning on any device or screen size. With a single click, you can import a pre-built website template and customize it to match your brand or personal style.
Advanced Customization Options: The7 theme takes customization to a whole new level, offering an intuitive and user-friendly interface for modifying various aspects of your website. It comes with a powerful theme options panel that allows you to tweak layouts, colors, fonts, headers, footers, and more without any coding knowledge. You can easily create a unique website that perfectly aligns with your vision, making The7 suitable for both beginners and experienced developers.
Dynamic Page Builder: One of the standout features of The7 theme is its integration with WPBakery Page Builder (formerly known as Visual Composer), a popular drag-and-drop page builder plugin. This seamless integration allows you to effortlessly create custom page layouts, add elements, and rearrange content blocks with ease. The intuitive interface empowers you to build complex pages in a matter of minutes, saving you time and effort.
Enhanced WooCommerce Integration: For those planning to set up an online store, The7 theme offers comprehensive integration with WooCommerce, the leading e-commerce plugin for WordPress. It provides pre-styled templates and elements specifically designed for online shops, ensuring a cohesive and professional look throughout your store. With The7, you can create stunning product pages, shopping carts, and checkout processes that are both visually appealing and optimized for conversion.
Stellar Performance and SEO Optimization: Website performance and search engine optimization (SEO) are crucial for online success. The7 theme is optimized for speed, ensuring fast loading times and an excellent user experience. It also implements clean code and follows the best SEO practices, helping your website rank higher in search engine results and attract more organic traffic.
Extensive Plugin Compatibility: The7 theme seamlessly integrates with a wide range of popular WordPress plugins, expanding its functionality and allowing you to add extra features to your website. Whether you need to incorporate a slider, a contact form, a portfolio gallery, or social media sharing buttons, The7 has you covered. The theme is designed to work harmoniously with plugins such as Slider Revolution, Contact Form 7, Yoast SEO, and many more.
Conclusion: The7 WordPress theme is a highly versatile and powerful option for anyone seeking to create a stunning website. With its extensive collection of pre-built designs, advanced customization options, seamless integration with WPBakery Page Builder, enhanced WooCommerce compatibility, stellar performance, and extensive plugin compatibility, The7 offers everything you need to build a professional and visually appealing website. Whether you are a beginner or an experienced developer, The7 empowers you to create a unique online presence that stands out from the crowd.
Get The7 WordPress Theme Click Here
2 notes
·
View notes
Video
youtube
How to fix main image showing up twice on the product page of woocommerceWatch the full video to learn How to fix main image showing up twice on the product page of woocommerce. This issue is comman with wordpress website where some themes code conflicting with the caching plugin. I have showed in steps in this video how to find out the root cause of this issue and fix it. Hope it helps you to fix it and if so, please.. please Like this video and Subscribe to my Youtube channel ecomhardy. There are up to $1000 worth of tools avaiable for free on my website ecomhardy.com so feel free to visit the website and hunt them down for free. Take care, bye for now.
#woocommerce#ecommerce#ecomhardy#wordpress (blogger)#wordpress featured image#wordpress double images#wordpress image showing twice#wordpress featured image double#how-to (website category)#wordpress too many featured images#wordpress beginner help#wordpress featured image help#wordpress double featured#woocommerce product picture not showing#woocommerce product image not showing on product page#woocommerce product price not showing#woocommerce product page image
0 notes
Text
My Path to a Print-On-Demand Business
Finding the Right Print-On-Demand Service: Why I Chose Printful Over Printify
Hey everyone,
As I embarked on my journey to start a print-on-demand (POD) business, one of the first and most crucial decisions I had to make was choosing the right POD service. After extensive research and consideration, I decided to go with Printful over Printify. Here’s a rundown of my experience and why I believe Printful is the more user-friendly option, especially for beginners.
The Search for the Perfect POD Service
When I first started exploring POD services, I felt like a kid in a candy store 🍭, except the candy was replaced with endless options for printing custom designs. I needed a platform that was easy to use, offered a wide range of products, and provided excellent customer service. After reading numerous reviews and comparing different platforms, I narrowed my choices down to two: Printful and Printify.
Why Printful Stood Out
Beginner-Friendly: As someone new to the world of POD, I found Printful to be incredibly beginner-friendly. The platform provides extensive tutorials, guides, and resources that made my transition into this new venture smooth and enjoyable. It's like having a knowledgeable friend guiding you every step of the way 🛠️.
User-Friendly Interface: One of the first things that attracted me to Printful was its intuitive and user-friendly interface. As an IT project manager, I appreciate well-designed software, and Printful’s platform is clean, easy to navigate, and straightforward. It's like the IKEA of POD services – without the missing screws 🛋️!
Wide Range of Mockups: Printful offers a vast array of mockups, which is fantastic for showcasing products in a professional and appealing manner. These mockups are a great tool for marketing and help bring the designs to life 📸.
Wide Range of Products: Printful offers an extensive range of products, from apparel to home decor, which aligns perfectly with my goal to expand beyond just pillows in the future. This flexibility is a significant advantage for anyone looking to grow their POD business. Plus, who doesn't want to print their face on a pair of socks? 🧦
Integration Options: Printful seamlessly integrates with popular e-commerce platforms like Shopify, Etsy, and WooCommerce. This makes it easier to manage my store and sync orders automatically, saving me time and effort. No more copy-pasting like it’s the 90s ⏳!
No Monthly Fees: Printful doesn’t charge any monthly fees, which is great for someone just starting out. You only pay for the products when an order is placed, making it a cost-effective choice for new entrepreneurs. My wallet heaved a sigh of relief 💸.
Pros and Cons: Printful vs. Printify
Printful Pros:
Beginner-Friendly: Extensive tutorials and resources to help you get started 🏁.
User-friendly interface and intuitive design tools. It’s like they read my mind 💡.
Wide range of products, including unique items like custom pillows. You can even print your cat's face on a pillow – if that's your thing 🐱.
Extensive array of mockups for professional and appealing product presentations 🖼️.
Seamless integration with major e-commerce platforms. Automation, baby! 🤖
No monthly fees; pay-as-you-go model. Only pay when you make money – sounds like a dream, right? 💭
Printful Cons:
Higher base prices compared to some competitors, including Printify. Quality comes at a price, but it's worth it! 💰
Limited customization options for certain products. Sometimes, simplicity is key 🗝️.
Printify Pros:
Competitive pricing with lower base costs for products. Your wallet will thank you 💲.
Access to a network of print providers, offering a variety of printing options and locations. Options, options, options! 🌐
Flexibility in choosing print providers based on price and location. Play it smart, choose your printer! 🎯
More product options than Printful, giving you a wider selection to choose from for your store 🛍️.
Printify Cons:
The interface is less intuitive compared to Printful. A bit like navigating a maze without a map 🗺️.
Some users report issues with customer service response times. Patience is a virtue, they say ⏳.
Final Thoughts
While both Printful and Printify have their strengths, Printful’s beginner-friendly approach, user-friendly interface, extensive product range, wide array of mockups, and seamless integrations ultimately made it the better choice for me. The decision came down to ease of use and the ability to manage my store efficiently, both of which are critical when managing a new business inspired by a personal passion. Plus, who doesn't love a platform that feels like it was designed just for you? 🎨
For anyone considering starting a POD business, I recommend weighing the pros and cons based on your specific needs and goals. Both platforms offer unique advantages, and what works for one person might not be the best for another.
Thank you for joining me on this journey. I look forward to sharing more about my experiences, the creative process behind my designs, and maybe a few more jokes along the way 😂.
Warm regards,
Ivo
#Print-On-Demand Business#Printful vs Printify#Beginner-Friendly POD Platforms#Choosing a POD Service#Printful Review#Printify Review#POD Business Tips#Starting a POD Business#Custom Pillow Designs#E-commerce Integration for POD
0 notes
Text
In the ever-evolving landscape of website creation, two dominant platforms reign supreme: Webflow and WordPress. Both cater to a vast array of users, from seasoned developers to absolute beginners. But with their distinct strengths and weaknesses, choosing the right platform can feel like navigating a labyrinth. Fear not, fellow website warriors! This comprehensive guide by Sohojware, a leading web design and development agency, will equip you with the knowledge to conquer the Webflow vs WordPress debate and forge the perfect digital domain.
Understanding Webflow
Webflow seamlessly blends intuitive design features with robust content management capabilities. Imagine a playground where creativity meets functionality – that's the essence of Webflow.
Here's a glimpse into what Webflow offers:
Visual Editor: Unleash your inner designer with Webflow's visual editor. Drag, drop, and customize elements to craft pixel-perfect web pages without ever touching a line of code.
Clean Code Generation: Webflow meticulously generates clean, semantic code from your visual creations. This ensures your website is not only stunning but also SEO-friendly and performs exceptionally well.
Built-in CMS: Effortlessly manage your website's content with Webflow's built-in CMS. Create new pages, edit existing content, and keep your website fresh and engaging – all within a user-friendly interface.
The Advantages of Choosing Webflow
Webflow shines in several aspects, making it an ideal choice for a specific set of users:
Design Freedom: For those yearning for complete design autonomy, Webflow reigns supreme. With its visual editor, you can craft unique layouts and user experiences that are difficult, if not impossible, to achieve with WordPress.
Rapid Prototyping: Webflow's drag-and-drop functionality makes it perfect for rapid prototyping. Experiment with different design ideas, get client feedback and iterate quickly to bring your vision to life.
Clean and Lightweight Websites: The code generated by Webflow is clean and lightweight, resulting in websites that load faster and perform better on search engines. This translates to a smoother user experience and potentially higher rankings on search engine result pages (SERPs).
Exploring the Depths of WordPress
WordPress, the undisputed king of content management systems (CMS), empowers users to create and manage websites with ease. Its open-source nature fosters a vibrant community that continuously develops new themes and plugins, extending its functionalities far beyond its core features.
Here's a look at the core strengths of WordPress:
Unmatched Flexibility: With a vast ocean of themes and plugins available, WordPress offers unparalleled flexibility. You can customize nearly every aspect of your website, from design and layout to functionality and features.
SEO-Friendly: WordPress is built with search engines in mind. Its core architecture and a plethora of SEO-optimized themes and plugins make it an excellent platform for websites seeking top SERP rankings.
Large and Active Community: WordPress boasts a massive and supportive community of developers, designers, and users. This means you'll find an abundance of resources, tutorials, and forums to troubleshoot any issues you encounter.
The Benefits of Opting for WordPress
WordPress offers a multitude of advantages, making it a great choice for a wide range of users:
Cost-Effective: WordPress is a free, open-source platform. While there are costs associated with domain names, website hosting, and potentially premium themes or plugins, the core platform itself is free to use.
Ease of Use: Even with no prior coding experience, WordPress is remarkably user-friendly. Its intuitive interface and plethora of drag-and-drop page builders make it easy to create and manage your website content.
E-commerce Functionality: Transforming your website into an online store is a breeze with WordPress. E-commerce plugins like WooCommerce seamlessly integrate with WordPress, allowing you to sell products and manage your online store with ease.
Sohojware Can Help You Choose
Ultimately, the ideal platform hinges on your specific needs and preferences. Sohojware, a leading web design and development agency, can assist you in navigating the Webflow vs WordPress conundrum. Our team of expert designers and developers will meticulously assess your requirements and recommend the platform that best suits your vision and goals.
Here are some additional factors to consider when making your decision:
Technical Expertise:
Technical Expertise: If you're comfortable with code or have a developer on your team, Webflow's design freedom and clean code generation might be a perfect fit. However, if you prefer a more user-friendly, code-light experience, WordPress might be a better option.
Budget: While WordPress itself is free, ongoing costs include domain registration, website hosting, and potentially premium themes and plugins. Webflow offers a tiered pricing structure with varying features, so factor in your budget limitations.
Website Maintenance: WordPress requires more frequent maintenance compared to Webflow. This includes updating the core software, themes, and plugins to ensure security and functionality. Webflow handles most of this on the backend, freeing you to focus on your content.
Making the Final Choice: Webflow vs WordPress
There's no single "best" platform – the winner depends on your specific requirements. Here's a quick recap to solidify your decision:
Choose Webflow if:
You prioritize complete design control and a unique user experience.
Rapid prototyping and iteration are crucial for your project.
Clean website code and exceptional website performance are top priorities.
Choose WordPress if:
Cost-effectiveness is a major concern.
You value unmatched flexibility and a vast library of themes and plugins.
Building an online store is an essential feature of your website.
You have limited technical expertise and prefer a user-friendly interface.
Conclusion
Sohojware empowers you to make an informed decision in the Webflow vs WordPress battle. We hope this comprehensive guide has equipped you with the knowledge to select the platform that perfectly aligns with your website goals. If you're still unsure, don't hesitate to contact Sohojware's team of experts. We'll delve deeper into your project requirements and recommend the most suitable platform to craft your dream website and propel your online presence to new heights!
FAQ’s
I have a great website concept, but I lack coding skills. Can Sohojware help me build it on either Webflow or WordPress?
Absolutely! Sohojware's team of expert designers and developers can transform your vision into reality, regardless of your coding expertise. We'll meticulously assess your needs and recommend the platform (Webflow or WordPress) that best suits your project. We can then design and develop your website using your chosen platform, ensuring a stunning and functional end product.
What if I need ongoing maintenance for my website after it's built? Does Sohojware offer such services?
Sohojware understands the importance of website maintenance. We offer comprehensive website maintenance plans that encompass regular updates, security checks, and performance optimization. Whether your website is built on Webflow or WordPress, our team will ensure it stays up-to-date, secure, and running smoothly.
Let's say I choose Webflow and prioritize clean code. Can Sohojware still assist with my project?
Webflow's strength lies in its generation of clean, semantic code from your visual creations. Sohojware has extensive experience working with Webflow and can leverage this aspect to ensure your website performs exceptionally well on search engines and delivers a seamless user experience.
I'm leaning towards WordPress for its vast plugin library. Can Sohojware help me navigate the options and choose the right ones?
WordPress's plugin ecosystem is undeniably powerful, but it can also be overwhelming. Sohojware can assist you in selecting the most suitable plugins to achieve your desired functionalities without compromising your website's performance or security. Our team stays up-to-date on the latest WordPress plugins and can provide expert recommendations tailored to your specific needs.
I'm still stuck between Webflow and WordPress. Can Sohojware provide a more in-depth consultation to help me decide?
Sohojware is here to guide you through the Webflow vs WordPress maze. We offer consultations where we delve deeper into your project requirements, budget, and technical expertise. Through this personalized approach, we'll provide a clear recommendation on the platform that best aligns with your vision and goals. Don't hesitate to contact us – we're happy to help you navigate this crucial decision!
0 notes
Text
Create Online Store Using WordPress: Complete Guide

Creating an online store has never been easier, thanks to WordPress. This powerful platform offers flexibility, user-friendliness, and extensive customization options. If you're looking to start your e-commerce journey, this guide on how to create an online store using WordPress is for you. Follow these steps to set up your store, attract customers, and start selling your products online.
Why Choose WordPress for Your Online Store?
WordPress is a popular content management system (CMS) that powers over 40% of websites worldwide. Its versatility makes it an ideal choice for building an online store. Here are some reasons to choose WordPress:
Ease of Use: WordPress is user-friendly, even for beginners. Its intuitive interface allows you to manage your store with ease.
Customizability: With thousands of themes and plugins, you can customize your store to fit your brand and needs.
Scalability: Whether you’re starting small or planning to scale, WordPress can grow with your business.
SEO-Friendly: WordPress is built with SEO in mind, helping your store rank higher in search engine results.
Step-by-Step Guide to Create Online Store Using WordPress
1. Choose a Domain Name and Hosting Provider
Your domain name is your store’s address on the web, and choosing a memorable, relevant name is crucial. For hosting, select a provider that offers reliable performance and excellent support. Popular options include Bluehost, SiteGround, and WP Engine. Most hosting providers offer one-click WordPress installation, simplifying the setup process.
2. Install WordPress
Once you have your domain and hosting, install WordPress. Most hosting services provide an easy, one-click installation. Follow the prompts, set up your admin account, and you're ready to go.
3. Select a WordPress Theme
Choosing the right theme is vital for your store's look and feel. Browse the WordPress theme repository for free themes or invest in a premium theme from sites like ThemeForest. Look for themes that are responsive, customizable, and optimized for e-commerce.
4. Install Essential Plugins
Plugins enhance your store’s functionality. To create an online store using WordPress, you'll need:
WooCommerce: The most popular e-commerce plugin for WordPress, providing all the tools needed to sell online.
Yoast SEO: Helps optimize your site for search engines.
WPForms: Creates contact forms to stay in touch with customers.
Jetpack: Offers security, performance, and site management tools.
5. Configure WooCommerce
After installing WooCommerce, follow the setup wizard to configure your store. This includes setting up your currency, payment methods (such as PayPal or Stripe), and shipping options. Add your products, complete with descriptions, prices, and high-quality images.
6. Design Your Store
Customize your theme to reflect your brand. Use the WordPress Customizer to adjust colors, fonts, and layouts. Create essential pages like Home, Shop, About Us, Contact, and Privacy Policy. Ensure your site is easy to navigate, with clear calls to action.
7. Optimize for SEO
To help your store rank well on search engines, focus on SEO best practices:
Keyword Research: Use tools like Google Keyword Planner to find relevant keywords.
Optimize Content: Include keywords in your product titles, descriptions, and meta tags.
Improve Site Speed: Use a caching plugin and optimize images to reduce load times.
Mobile Optimization: Ensure your site is responsive and performs well on mobile devices.
8. Set Up Analytics
Understanding your audience is key to growing your online store. Set up Google Analytics to track visitor behavior, sales, and other important metrics. This data helps you make informed decisions to improve your store.
9. Launch and Promote Your Store
Before launching, test your site thoroughly. Check for broken links, ensure all forms work, and make sure the checkout process is smooth. Once everything is set, it's time to promote your store. Use social media, email marketing, and SEO strategies to attract customers.
Conclusion
Creating an online store using WordPress is a straightforward process that can be accomplished by anyone, regardless of technical expertise. By following this guide, you’ll have a fully functional, attractive, and optimized online store ready to attract customers and generate sales. At ShopperBuild, we specialize in helping businesses create their online store using WordPress. Start your e-commerce journey with us and watch your business thrive.
0 notes
Text
BlueHost Review – The Best WordPress Host Yet?
New Post has been published on https://thedigitalinsider.com/bluehost-review-the-best-wordpress-host-yet/
BlueHost Review – The Best WordPress Host Yet?
If only one web host had the bragging rights for being the best WordPress host on the market, it’d be BlueHost. Whether you are a webmaster or are looking to migrate your existing website to a new provider, you have definitely heard of BlueHost.
Many of the websites I have managed including my personal ones have been hosted on BlueHost and I will share my personal thoughts on my experience with them.
In the rest of this BlueHost review, we’ll go in-depth into the core features you get with the host’s plans, how affordable their packages are, how easy it is to use their platform for your website’s management, how responsive their support is – all the good stuff!
So if you are considering BlueHost, this is the only guide you’ll need.
BlueHost Review – The Host’s History
BlueHost is just a little over 2 decades old and was found in 2003. Since then, the company has grown into an empire currently powering over 2 million domains around the globe. BlueHost has impressive accolades to their name – they are the longest running number 1 WordPress.org recommended host. Their hosting plans are WordPress-heavy with everything you need to create, manage, and promote your website.
The host provides a variety of hosting packages – shared hosting, VPS hosting, cloud hosting, dedicated hosting, WordPress and WooCommerce hosting. BlueHost also provides emails, a domain registration engine, and marketing tools and services that you can pay for as addons. On every hosting package you go for on BlueHost, you get a free SSL, free domain name registration, access to live chat with their agents, free CDN and free WP themes. Aside from their most basic shared plan, you also get Malware Scanning and daily backups to powerful SSD drives.
BlueHost caches customer websites across a network of servers in 6 locations around the world. Nearly 13,000 people have reviewed BlueHost on TrustPilot and they score a pretty impressive 4.1.
BlueHost Pros and Cons
BlueHost is recommended directly by WordPress
They provide hosting plans for every website need
Their plans are pretty affordable
Website essentials are provided for free
They have vast complementary services
BlueHost is incredibly easy to use for beginners
Excellent uptime
Their servers get slow sometimes
Not privately owned
Many out-of-the-box addons are only free for the first year
BlueHost Rating – How I Score The Host
We’ve discussed BlueHost’s rating on TrustPilot. However, what’s my personal take? Considering the host’s prices, features, real-life performance, user friendliness, customer support convenience, how will I rate each core consideration on a scale of 1-5. It makes sense to actually take a dive into some of the host’s core features and see how well they score.
And if you think about it, given that there are thousands of hosting providers on the market, having a ‘standardized’ rating of each host enables you to compare different providers fairly.
So if you want a simple outline out all that BlueHost has to offer and how I’ll score them, let’s take a look. Note that these scores are based on my personal opinion and experience with the host and may change as the host improves on their offerings:
Quality My rating Why I gave this score Features and specs 5.0 Virtually every kind of hosting, free SSL, domain, email, CDN & WP themes, and third-party marketing tools built-in make BlueHost an absolute beast. Pricing 4.8 With BlueHost’s shared plans starting at $2.95/month, the host is really affordable. However, I’d give them a 4.8 because, after the first year, the subscription prices quadruple. Performance stats 4.7 BlueHost is known for their 100% uptime guarantee. With each of their plans providing SSD storage, you are also guaranteed high-speed website data delivery. However, after several speeds, the average server response time was around 400 ms which is great but not the fastest. Ease of use 4.9 BlueHost uses the modern cPanel for your website’s backend and a visually appealing design on the frontend that’s also incredibly intuitive for even hosting newbies. However, many hosts also now offer custom control panels that are even easier to use than cPanel. Customer support guarantee 5.0 BlueHost offers an excellent customer support guarantee – you can reach their agents via phone and live chat, and you can learn how to use their products as well as other WordPress specific answers on their Academy page, knowledgebase, and blog.
BlueHost Hosting Plans & Pricing – 2024
BlueHost offers shared hosting, VPS hosting, cloud hosting, dedicated servers, WordPress hosting, WooCommerce hosting, and cloud hosting for WordPress. For every plan you subscribe to, you are protected by a 30-day money back guarantee to give you enough time to decide if it meets your need
And when you decide to commit to a particular plan, BlueHost accepts payment via card – Visa, Mastercard, DISCOVER, American Express – and Paypal.
BlueHost’s shared hosting plans
BASIC
Storage space – 10 GB SSD storage
Number of websites – 1 website
Features – Free CDN, SSL, domain, and email, custom WP themes
Price – $2.95/month
CHOICE PLUS
Storage space – 40 GB SSD storage
Number of websites – 3 websites
Features – Everything in BASIC plus daily backups, domain privacy, malware scans
Price – $5.45/month
ONLINE STORE
Storage space – 40 GB SSD storage
Number of websites – 3 websites
Features – CHOICE PLUS plus eCommerce specific features
Price – $9.95/month
CLOUD
Storage space – 225 GB SSD storage
Number of websites – 50 websites
Features – Unmetered bandwidth, priority support, WAF, caching, DDoS protection
Price – $29.99/month
BlueHost recommends their CHOICE PLUS shared hosting plan for new customers. You can host 3 websites with 40 GB of SSD storage, charged at $5.45/month for the first year.
Who this is for:
BlueHost’s shared hosting plans are best suited for new websites that are not yet pulling in a lot of traffic. New websites or websites that are only meant to serve content to a few target personas fit this bill nicely – think portfolio websites, parked pages, landing pages, etc. However, BlueHost actually integrates a cloud plan CLOUD to allow upgrade seamlessly should your resource demand increase.
BlueHost’s VPS hosting plans
STANDARD
Memory – 2GB RAM
Number of CPUs – 2 core CPU
Bandwidth – Unmetered bandwidth
Price – $31.99/month
ENHANCED
Memory – 4GB RAM
Number of CPUs – 2 core CPU
Bandwidth – Unmetered bandwidth
Price – $41.99/month
ULTIMATE
Memory – 8GB RAM
Number of CPUs – 4 core CPU
Bandwidth – Unmetered bandwidth
Price – $71.99/month
As usual, BlueHost recommends their intermediate ENHANCED VPS hosting plan to webmasters. For just $10/month extra on their STANDARD plan, you get double the RAM and 45 GB of extra storage.
Who needs BlueHost’s VPS hosting?
BlueHost’s VPS plans are excellent for you if your website is growing and you are maxing out your shared resources. VPS hosting gives you more resources and also gives you a dedicated virtual engine, even though you are still sharing the same physical server with other websites. VPS hosting plans are great for blog websites, growing eCommerce stores, and websites that handle sensitive user data.
BlueHost’s cloud hosting plans
CLOUD 1
Number of websites – 1 website
Storage space – 10 GB SSD storage
Computing power – 2vCPU computing power
Price – $29.99/month
CLOUD 10
Number of websites – 10 websites
Storage space – 125 GB SSD storage
Computing power – 20vCPU computing power
Price – $49.99/month
CLOUD 25
Number of websites – 25 websites
Storage space – 175 GB SSD storage
Computing power – 75vCPU computing power
Price – $89.99/month
CLOUD 50
Number of websites – 50 websites
Storage space – 225 GB SSD storage
Computing power – 150vCPU computing power
Price – $109.99/month
Who needs BlueHost’s cloud hosting plans?
Fun fact: BlueHost just launched their cloud hosting plans!
BlueHost’s cloud hosting plans cater to websites that experience sudden spikes in traffic and need resources on demand. Like the idea of paying for only the resources you use? Then these plans are for you. Ecommerce websites selling seasonal products and web apps find cloud hosting plans invaluable.
BlueHost’s dedicated hosting plans
STANDARD
Cores/thread – 4 cores/8 threads
Memory – 8GB RAM
Storage – 1 Terabyte HDD storage
Price – $91.98/month
ENHANCED
Cores/thread – 8 cores/16 threads
Memory – 16 GB RAM
Storage – 2 Terabyte HDD storage
Price – $121.88/month
PREMIUM
Cores/thread – 8 cores/ 16 threads
Memory – 30 GB RAM
Storage – 2 Terabyte HDD storage
Price – $141.99/month
BlueHost recommends their intermediate ENHANCED dedicated hosting plan. A dedicated server with 16 GB of RAM, 2 Terabytes of storage, and unmetered bandwidth, for $121.88/month.
Who is BlueHost’s dedicated hosting for?
BlueHost’s dedicated hosting plans give you a whole server to yourself. All of the server’s resources – storage, bandwidth, storage, memory – are yours. BlueHost’s dedicated hosting plans make the most sense if your website receives tons of traffic and you need the most security – your website doesn’t share these resources with any other website.
You can choose a managed dedicated hosting plan or if you have an IT team that can manage your dedicated servers, you can request complete control over your website’s servers.
BlueHost’s WordPress hosting plans
BASIC
Storage space – 10 GB SSD storage
Number of websites – 1 website
Features – Free CDN, SSL, domain, and email, custom WP themes
Price – $2.95/month
CHOICE PLUS
Storage space – 40 GB SSD storage
Number of websites – 3 websites
Features – Everything in BASIC plus daily backups, domain privacy, malware scans
Price – $5.45/month
ONLINE STORE
Storage space – 40 GB SSD storage
Number of websites – 3 websites
Features – CHOICE PLUS plus eCommerce specific features
Price – $9.95/month
CLOUD
Storage space – 225 GB SSD storage
Number of websites – 50 websites
Features – Unmetered bandwidth, priority support, WAF, caching, DDoS protection
Price – $29.99/month
BlueHost’s WordPress plans exactly mirror their shared hosting plans albeit with WordPress-heavy features optimized to accelerate creating and managing your WordPress website. They recommend their CHOICE PLUS plan that accommodates 3 websites, gives you 40 GB of SSD storage, daily backups, and malware scanning.
Who is BlueHost’s WordPress hosting for?
Plan to build your website on WordPress or you currently have one? BlueHost’s plans offer affordable hosting with WordPress essentials for your website. You get custom WordPress themes, the BlueHost WONDERSUITE – an AI-powered website setup stack, WordPress pre-installed, WordPress-tailored support, and so much more!
BlueHost’s WooCommerce hosting plans
ONLINE STORE
Storage – 40 GB SSD storage
Ecommerce features – Store website, analytics, Yoast SEO, YITH integration, daily backups for WordPress and Jetpack, online payments enablement
Price – $9.95/month
ONLINE STORE + MARKETPLACE
Storage – 100 GB storage
Ecommerce features – All in ONLINE STORE plus multi-channel selling through third-party platforms – Ebay, Amazon, eBay, etc.
Price – $12.95/month
BlueHost’s WooCommerce hosting plans are billed annually or triannually.
Who needs BlueHost’s WooCommerce hosting plans?
BlueHost’s WooCommerce hosting plans build upon their WordPress plans and give you eCommerce functionality. Plan to build an eCommerce store or migrate your store from another platform, then these plans are for you. You can choose the ONLINE STORE if you only plan to use your website as your point of sale. If you plan to harness other Ecommerce platforms, then the ONLINE STORE + MARKETPLACE is just the one for you.
BlueHost’s Features
Let’s take an overarching overview of the features that BlueHost offers across most of its plans:
SSD storage
Free domain, SSL, WP Themes, and professional email
Free CDN
Unmetered bandwidth
BlueHost WonderSuite website builder
1-click WordPress acceleration and WordPress built-in
BlueHost offers most of the features typical of a leading provider, however, they stand out because they are first a WordPress host – their shared hosting plans are actually all WordPress plans.
BlueHost Performance Tests
To test BlueHost’s performance, we will perform real tests on websites hosted by the provider to determine their average server response speed, performance score, and uptime.
The quicker the server response is, the more quickly any website hosted on them will load whenever a user tries to visit that website. Pages that load under 2 seconds have a bounce rate of 9% but that figure shoots to 38% once the load time is more than 3 seconds.
So it’s incredibly important that you choose a host with very quick server response times as this contributes to your overall website load time. Another important factor to consider is the web host’s uptime or reliability.
The uptime simply measures the amount of time your web host’s servers are running – and in turn, your website is available online. The industry standard for uptime is 99.9%.
Here were the results of the tests I carried out on BlueHost:
To measure the web host’s server speeds, I considered the time to first byte (TTFB) and after several tests, the average TTFB was 490 ms. This is a decent score but other hosts like SiteGround have more impressive figures.
The overall performance of the website was 99% which is excellent.
To test BlueHost’s uptime, I used Uptime Robot to investigate the website’s availability over the past month:
BlueHost’s servers have a 100% uptime and their websites have been available for the same portion of the time.
BlueHost’s Customer Support
What support portals are available on BlueHost? And how easy would it be to reach an agent when you have inquiries to make or errors to troubleshoot? Let’s see.
BlueHost has a thriving support hub where you can get in touch with their agents 24/7 via:
Phone
BlueHost has phone lines for it sales department, customer support, and international phone lines for customers calling from abroad.
Live chat
I was quite impressed because for many hosts you need to be a paying customer first before you can reach out to their support agents. On BlueHost, you can chat with an agent live to make inquiries about their services or seek support.
I tested BlueHost’s live chat to see how quickly I would get the help I wanted. When you initiate the chat, you are first attended to by a chatbot that asks for what category the inquiry you want to make falls under:
Next, you are asked to provide your name and are redirected to speak with a human agent. In this test, the agent connected with me in less than 20 seconds which is impressive:
I asked a couple of questions and they seemed very knowledgeable in the technical details about BlueHost’s plans:
Overall, I was satisfied with their live chat support and you’d find it invaluable as a customer.
WordPress Academy
It’s only natural that WordPress’s number 1 host has an academy page dedicated to WordPress tutorials. BlueHost’s academy page has 14 lessons and you can take them for free even without creating an account with BlueHost. You only need to fill in your email address.
Knowledgebase
BlueHost’s search engine enabled knowledgebase contains resources and information on managing your account, email, their different packages, DNS, WordPress, domain names, and so much more.
BlueHost Blog
And finally, the BlueHost blog with informative articles on generic industry topics every website owner will find useful irrespective of your industry.
BlueHost’s Security Features
There are bad actors everywhere, more so online. BlueHost gives you a host of security features out-of-the-box to protect your brand and your website from cyberattacks and malware.
On even the most basic plans, you get a free SSL certificate to give your website the ‘HTTPS’ badge of trust. You also get a free CDN built-in to cache your website content across their network of servers and improve your website performance.
For their higher-tier shared hosting plans, your website is backed up daily to protect your data. BlueHost also gives you access to their built-in malware scanner and domain privacy free for the first year. Domain privacy protects your personal information from being shown publicly on the WHOIS database.
BlueHost’s premium hosting plans also give you DDoS protection and a web application firewall(WAF). You can also buy security software as addons to all your plans on BlueHost including CodeGuard Basic and SiteLock Essentials both billed at $2.99/month each.
BlueHost’s Website Builder – WonderSuite
BlueHost’s website builder, WonderSuite is powered by AI to simplify designing your website. WonderSuite encapsulates several AI-powered products including:
WonderStart
BlueHost’s WonderStart simplifies creating your website by asking you a number of specific questions right from the beginning, instead of having to fill them at each stage.
The AI powered tool then finds the right themes and fills in your details automatically.
WonderTheme
WonderTheme generates website samples based on the business niche, themes and font you choose in WonderStart so you know exactly what your website’s final look will be.
WonderBlocks
WonderBlocks is BlueHost’s drag-n-drop website design interface that allows you customize the themes and webpages in a few clicks. Fill in the content blocks with page essentials like a contact form and photo gallery.
WonderCart
WonderCart is BlueHost’s website design tool for eCommerce websites. With WonderCart, you can customize your eComm website pages and your checkout pages to drive more sales and conversions.
BlueHost’s User-Friendliness
BlueHost is known as one of the easiest web hosts to use, especially for new webmasters. Let’s take a look at how to create an account with the host, what its control panel looks like, and how to setup WordPress on BlueHost:
How to register an account on BlueHost
Like with any other host, to register an account with BlueHost, you simply buy one of their hosting plans:
Step 1
Navigate to one of their hosting plans and click on “Select”. You’ll be redirected to the domain page.
Step 2
On the domain setup page, you can put in your domain name if you have or specify a new one you’d like to register in BlueHost’s domain search engine on the left.
If you don’t want to setup a domain yet, you can just click on “I’ll create my domain later”
Step 3
On the checkout page, fill in your account creation details:
Next, your billing schedule from the dropdown – month, annually, or a 3-year plan:
Choose any additional services you want as addons, fill in your payment details, and click ‘Submit’. And that’s it!
Once your payment is confirmed, you will have your BlueHost account created.
BlueHost’s modern control panel
Managing your account and website backend on BlueHost is fairly easy and the host features a modern cPanel to help you do just that.
To access your CPanel, from your main dashboard, simply click on ‘Hosting’ and cPanel. You will then be redirected to the login page.
BlueHost’s cPanel allows you to set up new email accounts, organize your website files, access your DNS settings, manage your database, configure your security settings, and so much more.
How to install WordPress on BlueHost
BlueHost comes with WordPress built in and only requires a few clicks to install the software and assign it to your website.
Step 1
To install WordPress on BlueHost, from your dashboard, click on ‘Hosting’ and then ‘Add site’ to set up a new website on your account.
Step 2
Click on ‘Install WordPress’ and click ‘Continue’. You’ll then be directed to fill in your site title. However, you can also click ‘skip for now’ to move right on to the next step.
Step 3
Enter your domain name or use a temporary domain name and click ‘Continue’. WordPress will now begin to install.
Finally, click ‘Login to WordPress’.
BlueHost makes it incredibly easy to access your WordPress website. Once set up, you won’t need to login to your WordPress portal anymore but can directly access your website from your hosting dashboard.
What are some of BlueHost’s complementary services?
BlueHost offers some of the most comprehensive complementary services on the market. Some of them include:
Website design services
Digital marketing services
Professional email setup
Access to third-party suites like Google Workspace
Premium WordPress services
BlueHost’s complementary services help consolidate all your website’s needs in one place. You can use one provider to purchase a domain name, get hosting, design your website, get professional email addresses, get marketing services, etc.
Conclusion: Do We Recommend BlueHost?
We put BlueHost through its paces to see if its packages are worth considering. BlueHost is easily one of the best hosting providers on the market – they not only provide hosting plans but a truckload of complementary services that simplify setting up and managing your website.
If you plan to create a website using WordPress, BlueHost is indeed the best host for you. When you check out their WordPress-specific features and WonderSuite website builder, you’ll see why they have retained the title of WordPress no. 1 recommended host.
My only criticism of BlueHost would be they can do better in terms of performance and server response time.
Visit BlueHost →
#000#Accounts#agent#agents#ai#AI-powered#Amazon#amp#Analytics#apps#Articles#backups#badge#Blog#BlueHost#BlueHost Hosting#box#Business#Byte#cache#cdn#change#channel#chatbot#Cloud#Cloud hosting#comprehensive#computing#content#control panel
0 notes
Text
Dream Site Pro Review - Good or Bad?
In today’s digital age, having a strong online presence is not just an option, but a necessity. Whether you’re a small business owner, a freelancer, or an entrepreneur, your website is your digital storefront, the place where first impressions are made and lasting relationships are built. But let’s face it—building a professional, eye-catching website can be a daunting task, especially if you’re not a tech wizard. Enter Dream Site Pro, the game-changing platform designed to simplify website creation with the power of AI.
What is Dream Site Pro?
Dream Site Pro is a revolutionary AI-powered tool that allows anyone to create stunning, professional WordPress websites in just minutes. Whether you’re an experienced web designer or a complete beginner, Dream Site Pro provides the tools and templates you need to bring your vision to life without the headaches of coding or design complexities.
How Does It Work?
Dream Site Pro’s magic lies in its simplicity and AI-driven features. Here’s a step-by-step look at how it works:
1. Select a Theme: Start by choosing from over 200 beautifully designed templates, organized into more than 30 niches. Whether you’re looking to create a site for a coffee house, a travel blog, or a dental clinic, there’s a template that fits your needs.
2. Customize with Ease: With the intuitive drag-and-drop editor, you can easily tweak the layout, colors, fonts, and other design elements to match your brand. The AI tools also offer suggestions to enhance your site’s appearance and functionality, ensuring it looks professional and is user-friendly.
3. Enhance with Features: Dream Site Pro comes packed with built-in features like call-to-action management, Google Maps integration, and social media tools to boost engagement. For e-commerce needs, the seamless WooCommerce integration allows you to set up an online store effortlessly.
4. Publish and Optimize: Once you’re happy with the design, you can publish your site with a single click. Dream Site Pro handles all the technical details, ensuring your website is fast, secure, and optimized for SEO.
5. Manage and Grow: The platform includes advanced lead management and analytics tools, helping you track performance and refine your strategies. Plus, with the built-in autoresponder integration, you can automate your email marketing to nurture leads and drive conversions.
Why Choose Dream Site Pro?
AI-Powered Efficiency: Dream Site Pro leverages AI to simplify and accelerate the web design process. From automatic SEO optimization to compliance with ADA and GDPR regulations, the AI handles it all, letting you focus on what matters most—your business.
Cost-Effective Solution: Forget about expensive developers or recurring monthly fees. Dream Site Pro offers a one-time payment for lifetime access, making it a budget-friendly choice for entrepreneurs and small business owners.
Versatility and Customization: With a wide range of templates and customization options, Dream Site Pro is versatile enough to cater to any industry or niche. The drag-and-drop editor and AI enhancements ensure that your site is not only unique but also highly functional.
Commercial Licensing: Looking to expand your business? Dream Site Pro comes with a commercial license, allowing you to create and sell unlimited websites to clients. It’s a fantastic opportunity for freelancers and agencies to boost their revenue.
Comprehensive Support and Training: Dream Site Pro provides extensive training resources and dedicated customer support to help you every step of the way. Whether you’re setting up your first website or managing multiple client projects, you’re never alone.
Real Success Stories
Dream Site Pro isn’t just another web design tool—it’s a catalyst for success. Take Sarah, for example, who skyrocketed her website traffic by 200% after switching to Dream Site Pro’s AI-powered designs. Or John, who saw a 300% increase in revenue within three months of using the platform. These are just a few examples of how Dream Site Pro is transforming businesses and lives.
Conclusion
In a world where digital presence is key to success, Dream Site Pro offers an unparalleled solution to web design challenges. It’s more than just a tool; it’s a partner in your entrepreneurial journey, empowering you to create stunning websites with ease and efficiency. Ready to take your online presence to the next level? Discover the power of AI with Dream Site Pro today and watch your business soar.
So why wait? Unleash your creativity and build your dream website with Dream Site Pro now. Your digital future awaits!
#dreamsitepro#dreamsiteproreview#dreamsiteprooto#AIpoweredwebsitebuilder#dreamsiteprobundle#dreamsiteprocouponcode#dreamsiteprobonuses#WordPresswebsitetemplates#easywebsitecreationtool#Bestwebsitebuilder2024#Draganddropwebsiteeditor#Affordable web design software#SEO optimized website builder#AI-driven web design tool#One-time payment website builder#Small business website builder#Professional website templates#Fast website creation tool#Website builder for beginners#Best WordPress themes 2024#E-commerce website builder#AI website design software#Website builder with lead management#AI tools for web design#Commercial license website builder#Customizable website templates
1 note
·
View note
Text
How to Create a WordPress Website from Scratch
Building a website from scratch can seem like a daunting task, especially if you're new to web development. Fortunately, WordPress, one of the most popular content management systems (CMS), makes the process straightforward and accessible, even for beginners. In this guide, we'll walk you through the steps to create a professional WordPress website from scratch. Whether you're setting up a blog, an online store, or a portfolio site, this step-by-step guide will help you launch your WordPress websites efficiently.

Step 1: Define Your Website’s Purpose
Before diving into the technical aspects, it’s crucial to define the purpose of your website. Are you creating a blog, an online store, a business site, or a portfolio? Understanding your website’s goals will help you make informed decisions throughout the setup process, from choosing the right themes and plugins to organizing your content effectively.
Step 2: Choose a Domain Name and Hosting
Domain Name
Your domain name is your website's address on the internet (e.g., www.yourwebsite.com). It should be unique, easy to remember, and relevant to your site's content. Tools like Namecheap or GoDaddy can help you check the availability of your desired domain name and purchase it.
Hosting Provider
A hosting provider is where your website files are stored and accessed by visitors. Reliable hosting is crucial for your website's performance and security. Popular hosting providers include:
Bluehost: Great for beginners, offering easy WordPress integration.
SiteGround: Known for excellent customer service and performance.
WP Engine: Specializes in WordPress hosting with robust features.
Sign up for a hosting plan that suits your needs. Many hosts offer one-click WordPress installation, simplifying the setup process.
Step 3: Install WordPress
Most hosting providers offer easy, one-click WordPress installations. If your provider doesn’t, follow these steps:
Download WordPress from the official website (wordpress.org).
Upload the WordPress files to your hosting account using an FTP client like FileZilla.
Create a MySQL database via your hosting control panel.
Run the WordPress installation script by navigating to your domain name.
During installation, you'll need to enter your database details and create an admin account. Keep this information secure, as it grants full access to your website.
Step 4: Choose and Install a Theme
WordPress themes dictate your website's appearance and layout. The WordPress repository offers thousands of free themes, and there are premium themes available from marketplaces like ThemeForest.
Installing a Theme
Navigate to Appearance > Themes in your WordPress dashboard.
Click Add New to browse free themes from the WordPress repository.
Search for a theme that fits your website’s purpose, preview it, and click Install.
Activate the theme to apply it to your website.
Premium themes usually require downloading a zip file from the marketplace and uploading it via the Upload Theme button in the Themes section.
Step 5: Customize Your Theme
Once your theme is activated, you can customize it to match your branding and style. Navigate to Appearance > Customize to access the theme customizer. Here, you can:
Upload your logo
Modify colors and fonts
Set up your homepage and other pages
Adjust header and footer settings
Themes often come with their own set of customization options, so explore the settings to make your website unique.
Step 6: Install Essential Plugins
Plugins extend the functionality of your WordPress website. Here are some essential plugins to consider:
Yoast SEO: Helps optimize your website for search engines.
Contact Form 7: Allows you to create and manage contact forms.
WooCommerce: Turns your site into an online store.
Jetpack: Offers security, performance, and site management features.
Wordfence Security: Protects your site from malware and threats.
To install a plugin:
Navigate to Plugins > Add New in your WordPress dashboard.
Search for the plugin you need.
Click Install Now, then Activate once the installation is complete.
Step 7: Create Key Pages and Content
Start creating the essential pages for your website. Common pages include:
Home Page: The main landing page that welcomes visitors.
About Page: Provides information about you or your business.
Contact Page: Allows visitors to get in touch with you.
Blog Page: Displays your blog posts if you’re running a blog.
Shop Page: Showcases your products if you’re running an e-commerce site.
To create a page:
Navigate to Pages > Add New in your dashboard.
Enter a title and content for the page.
Click Publish to make the page live.
Use the built-in WordPress editor (Gutenberg) to add text, images, and other media to your pages.
Step 8: Configure Your Site Settings
Customize your WordPress settings to enhance your site’s performance and user experience. Key settings include:
General Settings: Set your site title, tagline, and timezone.
Reading Settings: Choose what your homepage displays (static page or latest posts).
Permalinks: Configure how your URLs are structured for SEO. Navigate to Settings > Permalinks and select the Post name option for a cleaner URL structure.
Step 9: Optimize for SEO
Search engine optimization (SEO) is crucial for driving traffic to your website. Here are some basic SEO practices:
Install an SEO plugin like Yoast SEO to guide you through on-page optimization.
Use keywords relevant to your content in titles, headers, and body text.
Optimize images by using descriptive filenames and alt text.
Create an XML sitemap to help search engines index your site (Yoast SEO can generate this for you).
Submit your sitemap to Google Search Console to monitor your site’s presence in Google search results.
Step 10: Secure Your Website
Website security is essential to protect your site from hackers and malware. Follow these steps to secure your WordPress site:
Use strong passwords for all user accounts.
Keep WordPress, themes, and plugins updated to the latest versions.
Install a security plugin like Wordfence or Sucuri.
Enable SSL to encrypt data between your site and visitors. Most hosting providers offer free SSL certificates.
Backup your site regularly using plugins like UpdraftPlus to prevent data loss.
Step 11: Launch Your Website
After you've set up and customized your WordPress website, it's time to launch. Before going live, perform a thorough review:
Test all links and forms to ensure they work correctly.
Preview your site on different devices to check for responsiveness.
Check for any errors or inconsistencies in design and content.
Once everything is in order, you can officially launch your website. Share it with your audience through social media, email newsletters, and other marketing channels.
Conclusion
Creating a WordPress websites from scratch is a manageable task, even for beginners, thanks to the platform's user-friendly interface and extensive resources. By following this step-by-step guide from VAW Agency, you can launch a professional and functional website that meets your needs and engages your audience. Remember, the key to a successful website is continuous improvement, so keep updating your content, optimizing for SEO, and enhancing your site's features as your needs evolve. Happy website building!
0 notes
Last Seen Blogs

7h3g3n3r4l
[ TheGeneral ][ 7h3g3n3r4l ]

metaisach
Thư Viện Sách Điện Tử - Tải Sách Miễn Phí

nicole0anne
❝ Keep looking where the light pours in. ❞

rorygilmorecore
Noel

iliketodoitmyself-blog
Crafty Betch