#they Do overcook it Just A Bit and the texture can be a little tough as a consequence
Text
oh my god i need to eat home cooked salmon today. the urge just hit me like im some kind of grizzly bear fresh out of hibernation. i've been holding off on making it myself because of the heat but oh my god. oh my god.
#i am thinking about fresh just Barely underdone salmon fresh out of the oven#that finishes cooking as it comes up to temperature on the pan#with crackly skin and lots of herbs#i got some earlier this week from the fish place nearby but as tasty as it is/was (they put soooo much crushed garlic and vinaigrette on it#they Do overcook it Just A Bit and the texture can be a little tough as a consequence#i want to make it myself so bad i'm going to watch a thing with friends and then i am making a beeline for the supermarket#mio needs salmon its good for their heart and soul
49 notes
·
View notes
Text
MEATBALL TIME
Since @friendly-peep asked how I make them. :3
Original recipe (it's been altered a lot since) I got from my Italian grandma who didn't measure anything so none of this has actual measurements, sorry--I never do either, I just Vibe. Keep in mind pretty much all of this is "to taste" so you can add or remove various ingredients if you know how you like your stuff seasoned.
I've got some notes by the ingredients because multiple of them I use specific preparations for sensory or energy issues due to chronic fatigue and wanting to save myself the energy of prepping certain things.
Ingredients:
Ground Beef (The variety I use specifically is 80% lean, 20% fat.)
Minced garlic (I use the jar stuff mostly, I don't really notice a big difference when using fresh)
Ground sage
Powdered/ground rosemary (You can probably use the needles, I use this for texture sensory issues)
Ground black pepper
Table salt
Crushed dried basil (you can use fresh! I use this for energy and convenience reasons)
Crushed dried marjoram
Bread crumbs (I use a store-bought "Italian seasoned" mix)
Water (original recipe used tomato sauce, but one of my family members has a tomato allergy so I use water instead and it works well)
Garlic powder
Onion powder
Instructions!
Preheat the oven to 350 Fahrenheit/177 Celsius
Grease up some glass cooking pans (you can probably use nonstick cooking sheets instead, I just haven't myself). Depending on the amount you make and the size of your pans/cooking sheets, you may need just one or you may need several.
Get a good-sized bowl to mix everything together in! Always err on the side of larger rather than smaller, it's way easier to avoid mixing issues in an oversized bowl than an undersized one. If making a lot of meat, feel free to split it between more than one bowl or to do it in batches!
Make sure you have all your ingredients to hand--double check before handling the meat!
Start adding all the ingredients to the bowl(s). I personally like to layer down meat, then sprinkle the rest of the dry ingredients in, then layer more meat, more dry ingredients, etc. Once all the meat is in the bowl(s) pour in the water (or tomato sauce).
Adding the fluid is usually the hardest part, you can't have too much or too little. If you're unused to making stuff like this, it might be better to make a few smaller batches where you experiment to get a feel for how much you need. Too much and they'll be mushy, too little and they'll crumble and be hard to work with.
Mix it all up! I do this by hand, do it carefully--it's really easy to overmix and then they get kind of tough. This is where I find bigger bowls are helpful, easier to get it all mixed together. This is also why I find layering the ingredients helps! You get the flavor throughout without having to mix it too much.
Shape the meat into balls! Ideally I kind of try to get them golf-ball sized but they inevitably end up larger. But really it's just kind of preference. Keep in mind the larger they are the longer it will take to cook the inside properly so you might get overcooked outsides and undercooked insides if they're too big.
Place them in the pans. They can be close to each other, even pressing against each other but you don't want them squishing together too much.
Once they're all in, cook for 18-20 minutes, then check. Once you get a feel for them you can usually tell if you'll need to start at 18 or 20 depending on size.
Make sure they're cooked properly inside! If needed, put them back in for a bit. I usually do 2-4 minute increments depending on how obviously undercooked they still are. When in doubt, you can always do less time and just keep putting them back in as needed!
And that's that!
This recipe I also use for meatloaf with no alterations aside from the following steps:
Shape into a loaf
Put some oil on top of it, spread nicely over the whole thing
Cook for 18-20 minutes, then pull out and cut in half, get some oil on the newly opened inner parts
Cook for another 18-20 minutes then check with meat thermometer for correct internal temperature. Cook longer as needed.
You can also just cook it straight for about 30-40 minutes or so, but due to sensory reasons I find that I prefer the texture when I prep it like this.
You can make both the meatballs and some meatloaf from this at the same time, too--I often do because if I'm making a lot then by the end I don't have the pan space for a bunch of meatballs but I can slap a loaf in that space easily!
I'm aware most people use an egg, my grandma never included one so I never did and I've liked the taste and texture well enough I never bothered experimenting with adding any, personally.
6 notes
·
View notes
Text
Season 3 Episode 6: Queen of Puddings
I started watching GBBO at least four years ago, and yet I still do not know what a pudding technically is. Sometimes it seems to just be a catchall term for “dessert”. This VOX article claims that “A British pudding is a dish, savory or sweet, that's cooked by being boiled or steamed in something: a dish, a piece of cloth, or even animal intestine,” which is confusing, because I don’t think I did any of that for this week’s bake. (There were certainly no animal intestines involved.) But whatever a pudding is, this week I made the Queen of Puddings, at least as defined by Mary Berry.
https://www.bbc.co.uk/food/recipes/queen_of_puddings_79904
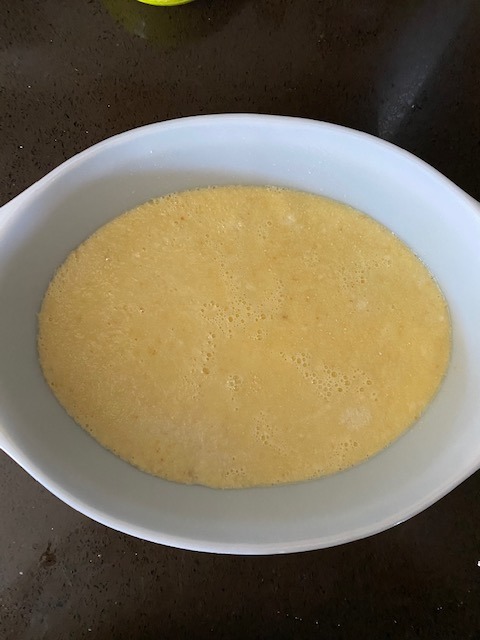
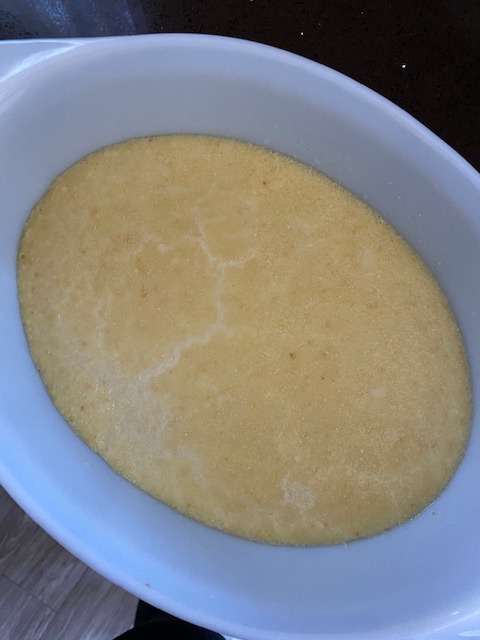
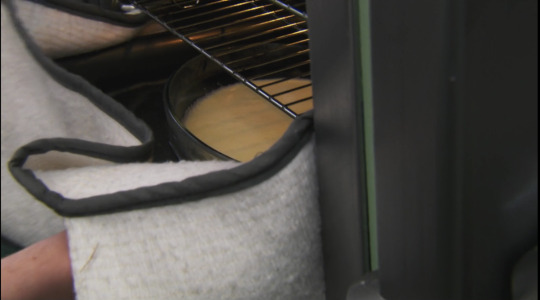
Step one was to grease a ¼ liter shallow ovenproof dish, which I do not have. Off to a great start! In my defense, there is only so much room for baking equipment in my apartment’s kitchen. I dug this dish up from my parents’ house and went with it because it was oval-shaped, like Mary’s example photo, but it definitely doesn’t qualify as “shallow”.
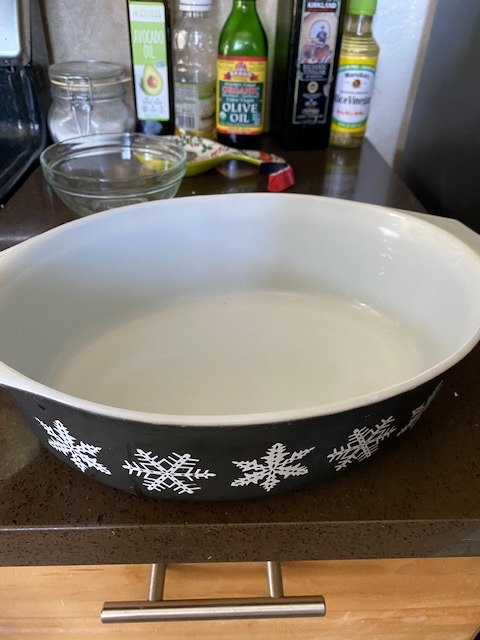
Good enough.
Next up was to make a custard. First, I heated up milk, butter, lemon zest, and sugar in a sauce pan.
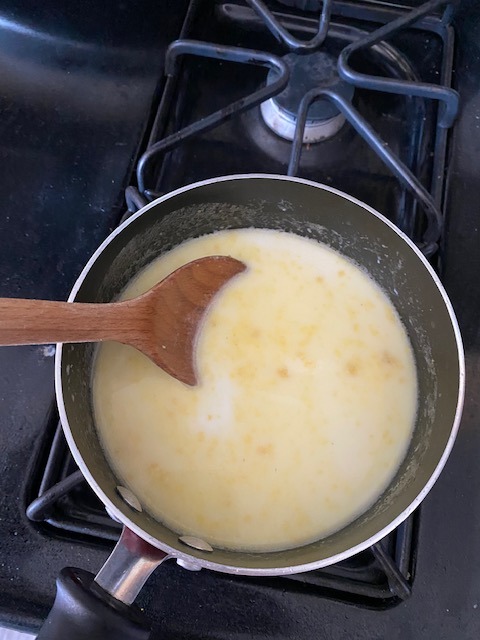
Does this count as “boiling or steaming” something?
Then, I carefully poured my warm egg mixture into a bowl with my egg yolks, which I had already separated from the whites. I whisked it together, and a custard was born.
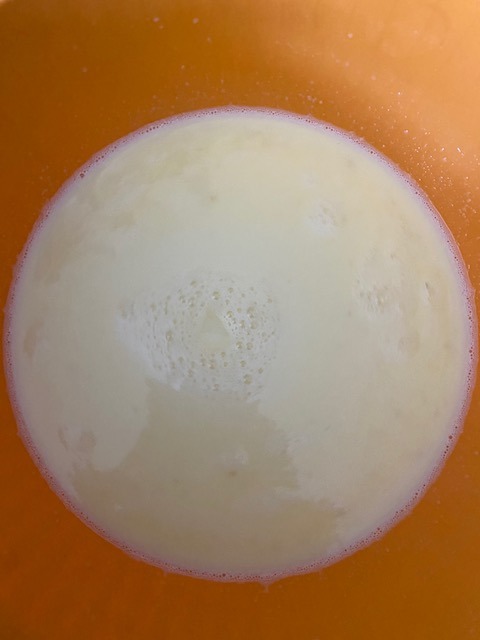
Custard!
To make this custard more substantial, it is poured over a base of bread crumbs. Mary’s recipe specifies “fresh” bread crumbs, but I did not have a bunch of semi-stale bread lying around, so pre-packaged bread crumbs it is.
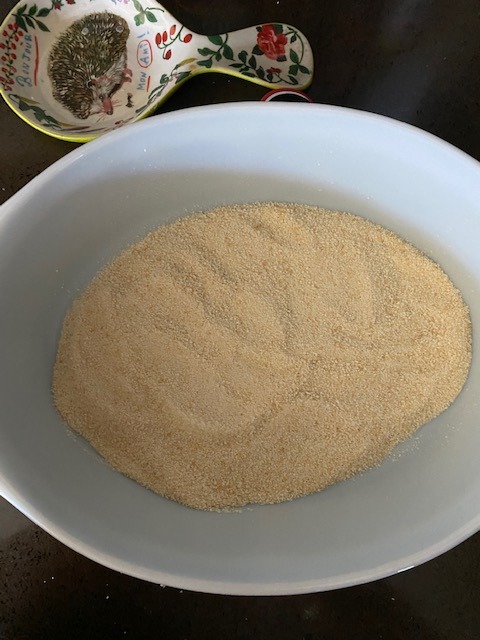
I told myself after my last bake that I’d stick to the recipe moving forward. Clearly that lesson did not sink in.
Crumbs + custard
I put my dish into a roasting tin, filled the tin with water, and stuck the whole thing in the oven.
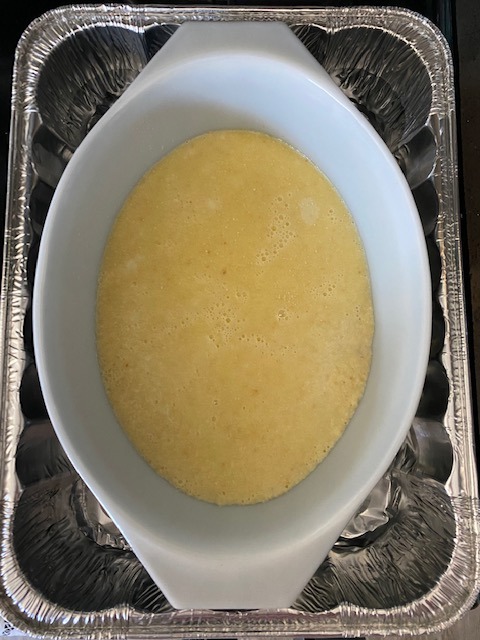
At least my dish fits in the tin.
While my custard baked, I turned my attention to the next element of my bake: jam. Mary’s recipe suggests that you can use store-bought jam if you don’t want to make your own, but I have never made jam before and figured it was one of those things that was bound to come up sooner or later. Plus, I knew the bakers would have to do it, and I wanted to stay in the spirit of the competition. So I gave it a shot.
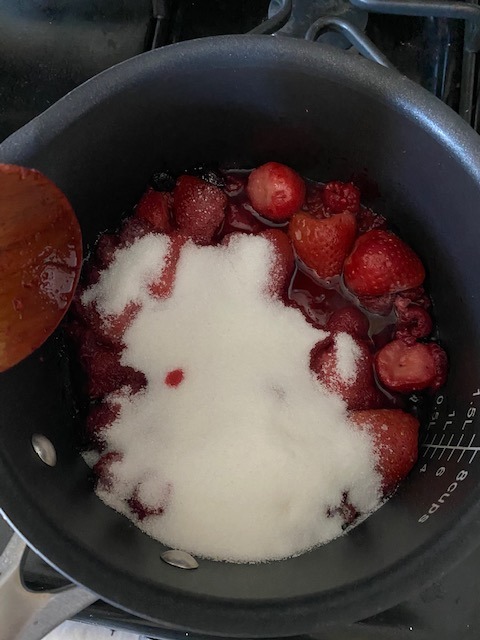
I used a mixture of raspberries, strawberries, and blackberries, since that’s what I had on hand in my freezer, but it seems any “summer fruit” will do.
I had some trouble getting my frozen berries to fully reduce into a cohesive sauce, and after what felt like ages of cooking time, my jam still seemed a bit watery with big chunks of fruit.

I guess this also counts as “boiling something”…
I decided to run my jam through a strainer, which didn’t help my watery-ness issue one bit, but I managed to mash the bigger pieces of fruit against the strainer to make them more sauce-like, and reincorporated it into the strained juice to produce something that could pass for jam, albeit a very runny one.
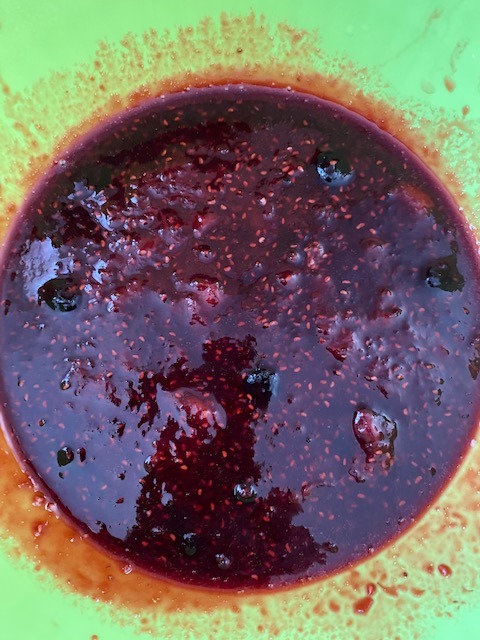
It’s a pretty color, at least.
Meanwhile, it was time to pull my custard out of the oven. I think I overcooked it slightly, but I had trouble getting the custard to set as much as I felt it should.
I baked the custard for about 35 minutes, instead of the 20-30 specified by the recipe.
While my custard cooled, it was time to make meringue. Luckily, I had some egg whites just sitting around that I had to separate from their yolks for the custard earlier. It’s always nice when a recipe doesn’t waste ingredients. Those egg whites and a bit of sugar quickly became meringue.
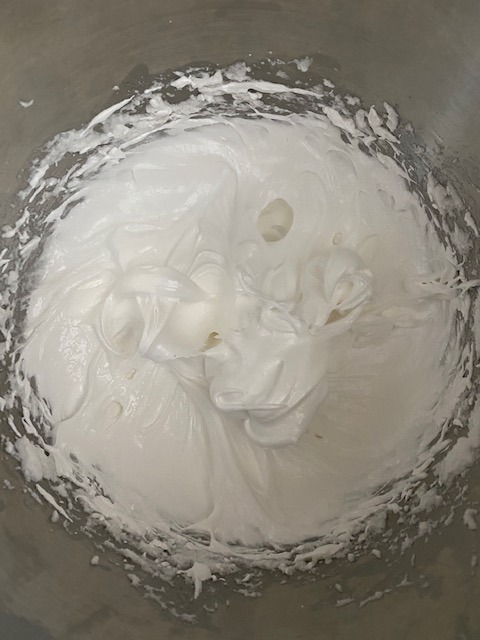
Thanks, KitchenAid stand mixer!
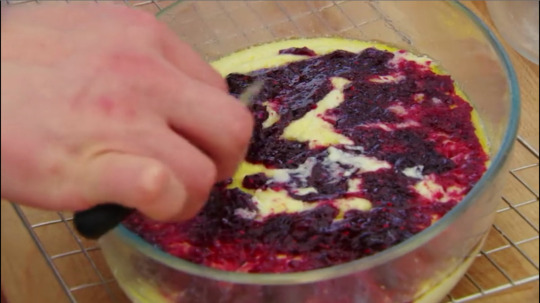
Finally, it was time to assemble. First, I put my jam on top of my custard. I vastly overestimated how solid the custard was and dumped a whole bunch of jam right on top, which caused it to mix in a bit with the custard. I quickly realized that it was better to gently spoon the jam on top of the custard.
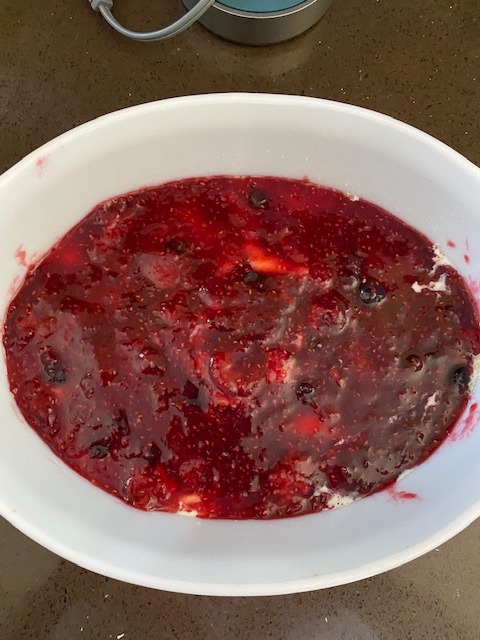
Hopefully didn’t mess up the layers TOO much.
Next, it was time for meringue. I piped little poofs all over the top of the dish.
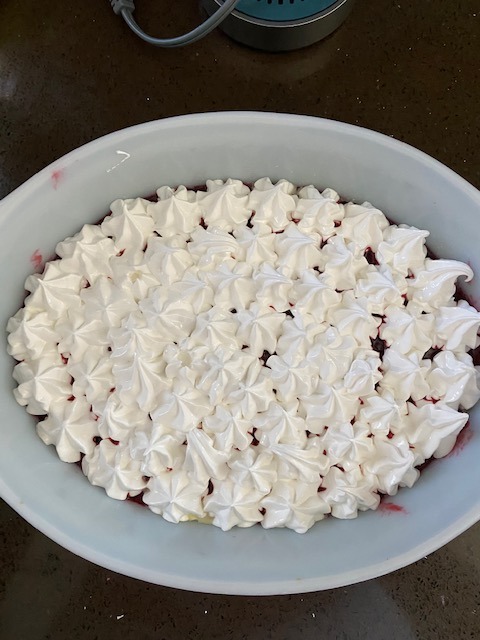
I’m actually very proud of my piping on this one.
And with that, the whole thing was ready to go back in the oven to brown the meringue. Not too difficult, all said and done. But would the bakers agree?
Sarah-Jane isn’t feeling too confident heading into the technical, as per usual. “You just have to kind of draw on everything you know about… everything… ever… in the space of five minutes,” she says.

I think Sarah-Jane might be my spirit animal.
Ryan has somehow never made custard or jam before, which leads me to question his GBBO preparation techniques.

Even I’ve made custard before!
Mary explains that the Queen of Puddings is many families’ favorite pudding, which I guess presumes that said families eat a variety of puddings on a regular enough basis to choose a favorite.

I’m really hung up on this whole “pudding” thing, I know.
As the bakers prepare their custards, Mel explains that they shouldn’t bake their custards too long or the surface will crack. I’m now thinking back to my own custard, which definitely had some cracks in the top. Whoops!
I mean it will be covered in jam and meringue… no one will know.
Next, it’s time to move on to the jam, and Brendan seems to be some kind of jam savant, explaining that he’s looking for a soft-set jam. After all, he says, “There are some advantages to being older… you learn the setting point of jam.”

Showoff.
Like me, John has some problems with the jam running into his custard, although his are much worse.
“Mary’s going to slap me in the face,” he moans.
The bakers seem intimidated by the meringue layer, which I find confusing. Meringue just… isn’t that hard?

Here, Danny whips up a second meringue, worried that her first one was too runny.
Finally, all the puddings are in the oven.

Classic GBBO on-the-floor oven-watching pose.
Brendan seems to have gotten a nice golden brown color on the top of his meringue. Will this be the key to a technical challenge win?

Like a perfectly roasted marshmallow.
During the judging, Mary announces that the glass dishes they gave the bakers were part of her evil plan, so she and Paul can see how even the layers are on the puddings.

Feeling grateful for my ceramic dish right about now…
Unfortunately, James has overcooked his custard, which means it came out watery.

Would I fall victim to the same pitfall?
In the end, Brendan’s lifetime of jam knowledge proves useful, and he takes home the win.
It does look like a rather royal pudding.
My pudding was ready to come out of the oven, but would it be fit for a queen? First, here’s Mary’s example pudding…
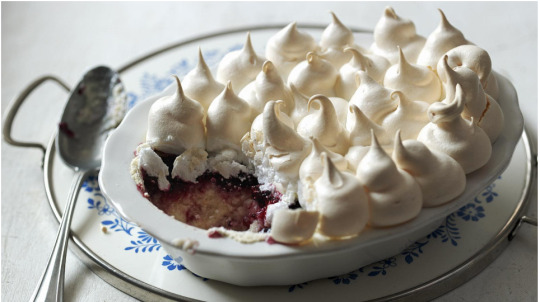
That’s a very elegant shallow dish.
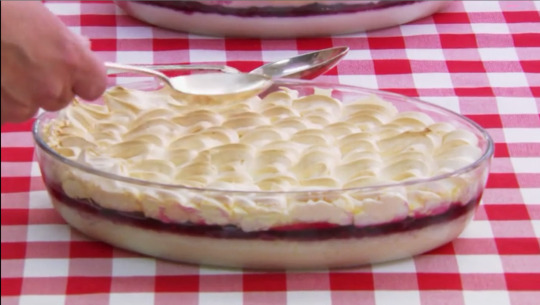
And here’s mine.
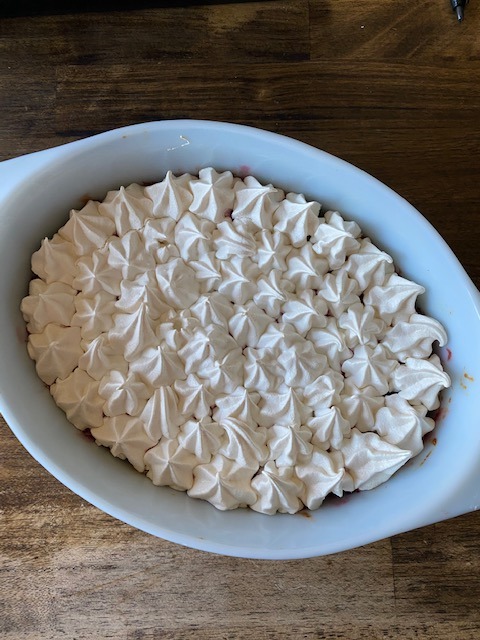
Look at that piping!

The slice admittedly didn’t look too delicious, but there’s a reason Mary’s photo only includes the dish – I just don’t think this one is meant to look pretty on the plate. The show also didn’t really showcase what the bakers’ slices/scoops of pudding looked like. So I’m pretty sure mine is about right. Also, Mary’s recipe said to serve with “pouring cream”, so that’s what the puddle is around the pudding, not melted custard. (The bakers did not seem to do that in the show).
I thought my Queen of Puddings was pretty regal, actually. The meringue had good volume and was nicely crispy, and the jam and custard layers actually held up on the plate. But now it was time to see if my esteemed panel of judges would agree.
***
Matt’s Review: I was actually full from dinner when I dug into this pudding, and I was worried it was going to be too heavy. But as soon as I took my first bite and felt how soft and airy it was, I quickly ate the whole thing. Turned out, that’s a purely mouth-feel thing and I got a horrible stomach ache. But it was worth it. It’s a bread mush with surprisingly complicated flavors—sweetness was potentially the least pronounced one there. The fluffy texture (which I have to assume Jenna nailed) really let you focus on those flavors. It’s a balancing act, and the pudding landed it gracefully. I have no way to fairly judge presentation, but I will add that there’s nothing better than having a Tupperware full of pudding arrive at your door.
Wilson’s Review: Beautiful presentation, clearly defined merengue structure. Some nice peaks, clearly have a steady hand with the piping. But, the color’s a bit light isn’t it? In the future maybe keep it in the oven for a touch longer, or up the heat. Cutting it open you’ve got some nice defined layers, well done. Flavor is good, you can really taste the summer in the jam. The lemon isn’t really coming through, and that’s a key element to balance the sweetness of the jam and the crisp of the meringue – need that acidity. Overall a very good bake, worthy of being served on anyone’s summer table.
***
Final Thoughts: As Matt mentioned, the pudding was delivered to him in the least royal of ways, dumped unceremoniously in a Tupperware and left on his doorstep. So sadly he didn’t get to witness the beauty of my pudding in its original form, and personally, I thought it looked great. I also enjoyed eating it – the meringue was crispy on the outside, soft on the inside, and the custard was smooth and creamy. The jam was definitely a little runnier than a store-bought variety, but I did like it enough to use the leftovers on toast for several breakfasts, so it worked out well enough. And to Wilson’s point, it needed a little more browning on the top of the meringue – perhaps I should have used the broiler at the very end to get that nice golden color. Overall, this was not a particularly tough bake, which was a nice change of pace after trying to get pie dough to defy gravity for the last bake. I still don’t know what a pudding is, but I did enjoy eating it.
50 notes
·
View notes
Note
Can we get Talviel's most hated dishes of each race?
I'm really not a picky eater, but Tamriel is a big place with many strange flavours, and some of them are more unconventional than others! Here's a list of the few foods I simply couldn't handle...don't try them the next time you're out exploring unless you really hate yourself!
Nord
Pickled fish (usually river betty, silverside perch, or slaughterfish) is, for some reason, a cornerstone of the Nord diet. Despite having grown up by Riften Fishery, I have nothing but dislike for the jars of sour, slimy fish that the average Nord gulps down every breakfast. Some variants of pickled fish are also fermented, giving it an extremely pungent odour that has made plenty of outlanders throw up or pass out if the jars are mistakenly opened indoors. Pickled fish is also great for catching skeevers when placed in traps. 1/10
Bosmer
Despite having spent almost a year in Valenwood, there are some aspects of Bosmer cuisine that I may never wrap my head around. Thunderbug soup is one of those things. Thunderbug flesh is grilled over an open flame and seasoned with a bit of salt, then stewed in a large cauldron with a copious amount of thunderbug eggs and sometimes other insects (witchetty grubs, grasshoppers, and large spiders are popular). The end result is a hot, lurid green mess that possibly tastes even worse than it looks, as there is no plant-based seasoning to speak of for obvious reasons, and a lot of antennas and legs poking out in various directions which make for a prickly and generally unpleasant meal. Very nutritious though. 4/10
Orc
Smoked bear paw with harpy innards is a classic stronghold delicacy, and one of the most unpleasant dishes I've ever had to try. The bear paw is so tough and dry that it's basically inedible, and the harpy guts and brains are a chewy and acidic grey mess. The best part is the bread that's used to sop up the harpy bile-based sauce, unless you actually touch the sauce itself. 1/10
Altmer
Honestly there isn't much to dislike about Altmer cuisine, but if I had to choose a dish I'm not mad about, it would probably be heron-liver pâté. Wild herons aren't traditional food birds and their diet of frogs, snails and bottom-feeding fish gives their meat a distinctly muddy flavour and stringy texture. This is especially noticeable in pâté form, even when spiced, and no amount of mashing will compensate for the chewiness of cooked heron livers. 4/10
Redguard
Unless you really enjoy the feel of sand in your mouth, I'd recommend steering clear of Alik'r sand-baked camel. The meat of a camel is covered in spices and salt, and lowered into a hot sand pit in the desert and buried for three weeks to "cook". If the jackals or scorpions haven't gotten to your meal before you do, you're in for a dry, dusty treat! The meat becomes so dessicated that you might as well chew on a Ra-Netu, but it has some great crunch from all the sand. You'll be brushing your teeth for days after eating this just to get the feeling of this monstrosity out of your mouth. 3/10
Argonian
Boiled wamasu and swamp jelly salad sounds exotic, but not too terrible, right? Wrong. Wamasu is an acquired taste, but when cooked right it can be quite tasty. Boiling it is absolutely not the right way to cook it, as it becomes slimy and acidic, and develops a nasty oily sheen. Cut that up into chunks and toss it together with raw swamp jellies, seaweed, bitter swamp grasses, and crickets...and you have the makings for Tamriel's worst stomach ache. Definitely not for anybody but Argonians. 3/10
Dunmer
I'm really very fond of Dunmeri cuisine, but I could quite happily live the rest of my life without ever eating guar wrapped in trama root and scathecraw ever again. First off, I love guars, so eating one was like asking me to eat a dog or cat. It turns out that guar meat is extremely tough and ashy-tasting, so wrapping it in trama root and scathecraw is meant to soften it up as it's cooked over a coal grill. The end result is some acrid, bitter and slightly burned-tasting meat that has the texture of an extremely overcooked steak. I believe that the Ashlanders are extremely wise and interesting mer, but I'm really doubting their commitment to good food after trying this. 4/10
Breton
As much as I love Breton food, it isn't really the sort of cuisine for big flavours and spices. As such, you end up with some pretty bland meals, like sweetbreads in pudding. It turns out that sweetbreads are not sweet, nor are they bread (they are usually lamb pancreas, tongues, and testicles), and the pudding isn't pudding (it's a spongy bread thing). In other words, it wasn't the tasty dessert that a young Talviel on her first trip to High Rock was hoping for, but rather a few soggy pieces of breaded mystery meat served with some bizarre gluten sponge and drowned in flavourless, watery gravy. 4/10
Khajiit
Face it, Khajiiti food is fantastic. Well, that is until I made the mistake of reaching for what I thought was a jar of jam for my flatbread one breakfast. I took a big spoonful of what appeared at first be a sweet and fragrant red chutney, and ended up lying down retching for the rest of the day. It turns out that in Elsweyr, many Khajiit enjoy a moon sugar chutney that's made with flaming hot chilies, herbs, fire ants and ant eggs. The acid from the ants only amplifies the capsaicin from the chilies, and most Khajiit don't use more than a teaspoon, let alone a big dollop. It burns, it stings, and nothing you drink or eat after will put out the fire. Consume at your own risk. 2/10
Imperial
Like Altmer cuisine, I really don't have something I actively dislike with Imperial food. However, I am pretty squeamish about the very upper-class delicacy of fried dormice dipped in honey and stuffed with herbs, cheeses, bacon. Admittedly, they're pretty tasty, but the little feet and faces are absolutely horrible to look at, not to mention the amount of tiny bones you have to spit out. 5/10
#Worldbuilding#Tes#The Elder Scrolls#Food#Fantasy#Argonian#Nord#Dunmer#Bosmer#Khajiit#Redguard#Breton#Imperial#Altmer#Orc
197 notes
·
View notes
Photo
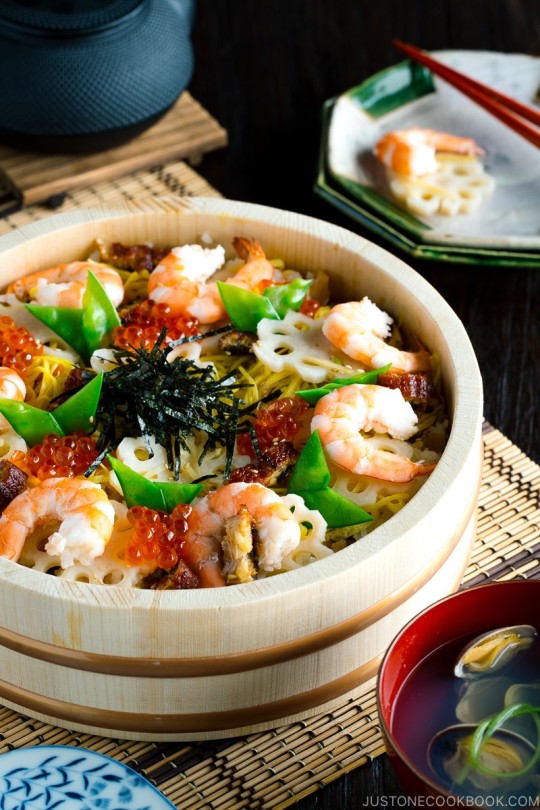
CHIRASHI SUSHI
(From BtN)
https://www.justonecookbook.com/chirashi-sushi/
Ingredients:
FOR PICKLED LOTUS ROOT & GINGER
2 inches lotus root (renkon) (5 cm)
1 inch ginger (2.5 cm)
½ cup rice vinegar (120 ml)
⅓ cup sugar (65 g)
½ tsp kosher/sea salt (use half for table salt)
FOR CHIRASHI SUSHI MIX
4 dried shiitake mushrooms
½ cup water (120 ml) (for soaking dried shiitake mushrooms)
⅔ gobo (burdock root)
0.8 oz dried kanpyo (gourd strips) (20 g)
1 tsp kosher/sea salt (use half for table salt) (for rubbing kanpyo)
½ carrot
1 ¼ cup dashi (300 ml)
¼ cup sake (60 m)
3 Tbsp mirin
1 Tbsp sugar
2 Tbsp soy sauce
FOR EGG CREPE (KINSHI TAMAGO)
3 large eggs
1 Tbsp sugar (optional)
1 Tbsp dashi (or sake or water)
¼ tsp kosher/sea salt (use half for table salt)
½ Tbsp neutral-flavored oil (vegetable, canola, etc)
FOR SNOW PEAS
6 snow peas
pinch kosher/sea salt (use half for table salt)
FOR SUSHI RICE
3 rice cooker cups uncooked Japanese short grain rice (540 ml)
Water
2 inch kombu (dried kelp) (5 cm)
⅓ cup rice vinegar (75 ml)
3 Tbsp sugar
1 ½ tsp kosher/sea salt (use half for table salt)
FOR UNAGI (EELS)
1 package unagi (eel) (160 g)
FOR SHRIMP
8-10 large shrimp
1 Tbsp sake
pinch kosher/sea salt (use half for table salt)
TOPPINGS (OPTIONAL)
4 Tbsp Ikura (salmon roe)
4 Tbsp shredded nori seaweed (kizami nori)
½ Tbsp toasted white sesame seeds
Directions:
TO MAKE PICKLED LOTUS ROOT & GINGER:
Combine rice vinegar, sugar, and kosher salt in a small saucepan. Bring it to boil and let the sugar dissolved completely. Set aside to cool.
Peel and cut the ginger to julienne strips (thinner the better). Peel the lotus root and cut out the edge to make a flower shape
Slice the lotus root into 1/8” (3 mm) and soak in vinegar water for 5 minutes to prevent from turning brown (just drop a few rice vinegar in water – doesn’t have to be precise).
Boil water in a small saucepan and blanch the ginger and lotus root for 3 minutes. Drain well and transfer them to the vinegar mixture to marinate. You can make this ahead and keep it up to 1 week in refrigerator.
TO MAKE CHIRASHI SUSHI MIX:
When the water is boiling cook kanpyo for 3 minutes. Transfer to iced water to stop cooking process and squeeze water out.
Cut kanpyo into small pieces and cut the carrot into julienne strips.
Soak dried shiitake mushrooms with ½ cup water until they are hydrated and tender. Then squeeze the mushrooms and reserve the liquid (= shiitake dashi) in the bowl. Cut off and discard the stem.
Slice the shiitake mushrooms. Strain the reserved shiitake dashi to remove impurities. Save this shiitake dashi until you’re ready to use in Step 8.
Make a criss-cross incision at one end of the gobo. This criss-cross incision will help you shave the gobo like a pencil. Shave into small thin pieces as you rotate the gobo. Soak the cut pieces in water so they won’t turn brown. Change the water 1-2 times. Drain right before you start cooking in Step 8.
In a small saucepan, bring water to boil. Quickly rinse the kanpyo in running water and drain. Rub kanpyo with 1 tsp salt. Rinse and drain well.
Add shiitake mushrooms, gobo, and kanpyo in the pot (keep the carrot aside for now). Add dashi, reserved shiitake dashi (the liquid from hydrating dried shiitake), sake, mirin, sugar, and soy sauce, and bring to simmer on medium heat.
Skim the foam and scum on the surface as much as you can, decrease the heat to simmer, and cover with Otoshibuta (drop lid). This lid ensures that ingredients are submerged under the liquid and flavorful cooking liquid circulates well. You can make one with aluminum foil easily.
Add the carrot while there is still liquid in the pot but toward the end of cooking so that you don’t overcook carrot and get mushy. Continue to cook with Otoshibuta until the liquid is almost gone. The whole cooking process is about 20-25 minutes depending on the heat. Transfer the Chirashi Sushi Mix to a plate to cool completely. If you end up with some cooking liquid, you can save a little bit so you can season the rice later. You can make this ahead and keep it in the refrigerator up to 3-4 days.
TO MAKE EGG CREPES:
Heat the large non-stick frying pan and grease the pan with paper towel dipped in vegetable oil. Make sure to wipe off the excess oil. When the pan is hot, pour the egg mixture just enough to cover the bottom of the entire fry pan.
Gather all the ingredients.
Whisk the eggs and add the rest of ingredients into the bowl. Whisk to combine and strain the egg mixture to get silky texture.
Tilt the pan to fill the fry pan with the egg mixture and cover with the lid. Remove from the heat and place the pan on a cold towel to cool the pan so the the egg won’t become brown. Once the egg crepe is cooked through, transfer to a wire rack and let cool completely. Continue this process until all the egg mixture is gone.
Roll up the egg crepes and cut thinly into julienned strips. Loosen them up and set aside. You can make this ahead and keep it in the refrigerator up to 2-3 days or freeze up to 4 weeks.
TO PREPARE SNOW PEAS:
Remove the tough strings along the edges of snow peas. Bring water to boil in a small saucepan. Add pinch of salt and blanch them for 2 minutes. Drain and cut diagonally in half or thirds.
TO MAKE SUSHI RICE:
Rinse the rice, soak for 30 minutes, and drain. Put the rice in a rice cooker bowl and add the water till “Sushi” water level (a bit less than regular). Place kombu on top and start cooking. Combine the sushi vinegar ingredients in a bowl and mix together. You can microwave or heat the mixture in a saucepan over the stove to dissolve the sugar completely and remove the strong vinegar taste/smell.
TO PREPARE UNAGI
Preheat your oven to 400F (200C). As the unagi you purchased is already grilled/broiled, all you need to do is reheat. Place the unagi on a parchment paper or silicone baking sheet and bake for 7-10 minutes. Remove from the oven and let cool. Once it’s cool to touch, you can cut into ¼ inch (0.6 mm) pieces. Set aside.
TO PREPARE SHRIMP:
Using a skewer, devein shrimp without removing shell. We peel the shell after cooking to retain the flavor of the shrimp. Boil water in a medium saucepan. Once boiling, add sake and shrimp and simmer until pink, about 2-3 minutes. Remove the shell and set aside.
4) TO ASSEMBLE CHIRASHI SUSHI:
Start this step when all the steps above are completed.
Discard the kombu from sushi rice and transfer to Hangiri (or a large serving platter). If you use hangiri, quickly run water so rice doesn’t stick. Pour sushi vinegar over the rice paddle to evenly distribute sushi vinegar over rice. With the rice paddle, slice the rice at a 45 degree angle to separate the rice instead of mixing. At the same time you need to use a fan to cool rice so the rice will shine and doesn’t get mushy.
Gather all the toppings you’ve prepared.
Once the sushi rice is cooled, squeeze the Chirashi Sushi Mix to remove excess liquid (otherwise rice gets too soggy) and combine with sushi rice. You can always add a few Tbsp of reserved liquid to season the rice if you like (I don’t usually do it).
First, spread the shredded egg crepe. Decorate the chirashi sushi as you like. I usually start from lotus root, shrimp, unagi, snow peas, ikura, sesame seeds, and nori in the center. Enjoy!
#food#recipe#sushi#harvest moon#story of seasons#sos#hm#recipes#chirashi sushi#hm cookbook#harvest moon cookbook#main dish#ginger#vinegar#mushroom#carrot#sake#mirin#soy sauce#egg#peas#rice#seafood#shrimp#fish#nori
8 notes
·
View notes
Text
Happy Birthday, luminescentlily
May 23-Victor Creed/Darcy Lewis super fluffy! Where Darcy is pregnant with their first child and is cravings something but can’t figure out what. Victor then goes out and brings back a dead deer, which at first freaks Darcy and the other avengers out, but then Victor gives her a bite of it to eat and she realizes it’s exactly what she was craving, making Victor very happy that he’s providing for his mate and cub., for @luminescentlily
Written by @ozhawkauthor
… I couldn’t quite make myself write a pregnant woman eating raw meat. Sorry. This is as close as you get.
“It’s… actually really good,” Jane said, her tone surprised.
Darcy eyed the piece of steak Jane was cutting into. “I’ve never tried venison.”
“I gotta admit I didn’t think Victor was going to carry in a dead deer nearly as big as he is when he said he’d handle getting the meat for the barbecue,” Jane admitted, cutting another piece, “but it really is good.”
“We wouldn’t try to poison you. Honestly.” Logan grinned down at Darcy as he set a plate down in front of her, with the piece of well-done steak she’d requested on it. “Victor’s so happy he gets to be provider for his mate and cub, even if you don’t like it, please pretend you do?”
“Did you seriously just say mate and cub?” Darcy riposted. “And since when did you care about Victor’s feelings?”
“Since you convinced him our cookies are better than the dark side’s.” Logan took his seat beside Jane, slung an arm along the back of her chair and started playing with the ends of her hair. “Also, since Jane told me to.”
“Note he’s not commenting on the mate and cub thing,” Jane pointed out.
“Eh, I’ll give him a pass. I feel like that probably came from Victor anyway.” Reaching for the salad, Darcy piled some on her plate. Victor came to join them just as she was picking up her knife and fork, plonking a plate down in front of Logan with a steak so rare it was practically still mooing, or whatever it was deer did. Another one for himself followed. Darcy eyed it, amused. The steaks were so big they were literally overhanging the edges of the plate.
“Are you going to take some salad and pretend like you’re not a complete carnivore?” she asked.
“I am a carnivore, my love.” Victor leaned over to kiss her, flashing his fangs with a wicked grin. “Now eat up.” A warm hand covered her swollen stomach in a tender caress. “You need to keep your strength up.”
At least he hadn’t said she was eating for two, Darcy mused as she cut a sliver of meat off her steak and popped it in her mouth, chewing thoughtfully. He’d learned better.
The flavor wasn’t too bad, she supposed, but damn, that was hella tough. She chewed and chewed, thinking she’d have more luck chewing on a strip of shoe leather.
“Drinks, Victor!” Logan said suddenly, and Darcy caught his wink as he got to his feet. “We forgot the drinks!”
Blessing her brother-in-law silently, she discreetly spat out the tough piece of meat as he and Victor headed back inside and hastily lobbed it into the lake they were picnicking beside, grateful she had somewhere convenient to dispose of the evidence and there wouldn’t be an inconvenient piece of meat for Victor’s over-sensitive nose to find. The rest of her steak quickly followed.
“Not a word,” Darcy warned a giggling Jane.
“Wouldn’t dream of it. You just going to fill up on salad?”
“I’ll be fine.” Darcy looked down at her plate, hiding a grimace. Vegetables seemed to have completely lost their taste, in the last few weeks.
“Shame you can’t stomach it. Really is very good,” Jane said around another mouthful of venison.
“Tasted all right, it was the texture. Like old shoe leather.” Darcy sighed and poked at her salad with a fork unenthusiastically. Victor’s juicy steak, overhanging the edge of his plate and darm near dripping juice onto hers, caught her eye. “It was dry. Maybe Victor overcooked it too much. I mean, that one looks a lot more appetizing.”
“He’d hardly notice if you pinched a bit,” Jane pointed out. “And if he did, he certainly wouldn’t begrudge it.”
Which was completely true. Darcy prodded Victor’s steak with her knife experimentally, watching the pinkish juices flow.
“I might give it a try.” Just one bite, she thought.
Jane’s eyes were very wide, Darcy noticed a couple of minutes later, and the astrophysicist was actually leaning away from her slightly.
“What?” Darcy asked around a mouthful of meat.
“Nothing,” Jane said hastily. “Nothing at all. I mean. Would you like some more? I’m sure Logan wouldn’t mind.” She pushed Logan’s plate across the table towards Darcy.
Darcy blinked and looked down. Victor’s plate was empty apart from some of the meat juices pooled in the center. “Did I eat all that?” she said, startled.
“Apparently,” Victor’s deep voice said, and then he leaned across, grabbed Logan’s plate and put it in front of Darcy. “And you can have all of this too, if you want it. Logan, go put some more steak on the grill.”
“I really don’t think…” but damn, that steak did look good. Darcy reached out to jab in her fork. “Maybe just a little more.”
Victor’s grin was joyous, proud and very sharp. “Eat as much as you want, my love.” Bending down to kiss her, he laid one huge hand gently over her stomach. “It’s gotta be hard work, carrying my cub. I’m gonna make sure you’re well-fed. Even if I have to bring back a deer every day.”
53 notes
·
View notes
Text
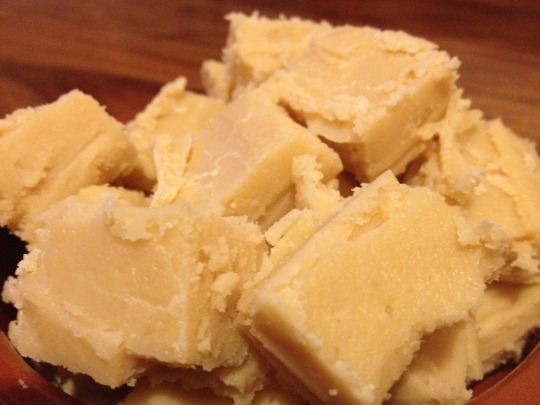
Air Fried Tofu Italian Style
I’ve had an air fryer for well over a year and even started a Facebook group, FatFree Vegan Air Fryers, to share cooking ideas. I’ve posted several air fryer recipes, but I’ve never taken the opportunity to write about the air fryer in depth, to review the different air fryers, describe how they work, give formulas for converting “regular” recipes for the air fryer, etc.
And there’s a reason for that:
I don’t think air fryers are really necessary. And if you don’t have one, you can still make this air fried tofu because I’ve included oven directions at the end of the recipe.
Let me back up a bit and say that an air fryer is basically a small, super-charged convection oven; a fan circulates heat through the perforated basket that the food sits in, browning it in all sides. I have two appliances which have air frying features: A small Phillips Viva (a model that has been discontinued) and a large Breville Smart Oven Air, which is a toaster oven on steroids with an air frying setting and basket. Both of these fryers are considered top of the line among air fryers and have the price tags to prove it. (I bought them both myself, and have no affiliation with either company.)
Let me also qualify my statement that they aren’t necessary by confessing that I mostly use mine for only two foods: potatoes and tofu. Every now and then I make burgers and air fry them in the Breville, but I use my Phillips mostly to make “French fries” and tofu. So I’m hardly an expert on air frying, though that doesn’t stop me from having an opinion.
Italian Style Tofu in the Air Fryer Before Cooking
There are a few advantages to air frying instead of baking. Before I get to them, I want to say something controversial: I don’t consider the Breville Smart Oven Air (BSOA) a real air fryer. Now, I love the thing and use it daily for baking and reheating (it will hold a full-sized pan of lasagna, I kid you not), but as an air fryer it is huge but lackluster. I consider the air frying setting a gimmick, a very successful one by the number of people who have bought it. It works okay, but most of the following advantages of air fryers do not apply to it.
Air Fryers are Fast
I find that my Phillips air fryer cooks food in about half the time that it would take in the oven. The BSOA takes a little more time but normally less than an conventional oven (if you increase the heat.)
Air Fryers Cook at a Lower Temperature
Something about having hot air whipping around at hurricane speeds means that you don’t have to use as high a temperature as oven cooking. I reduce the temperature of a conventional recipe by as much as 70 degrees F when I make it in an air fryer.
Note: This does not apply to the BSOA. I find that everything needs to be cooked at much higher temperatures with the Breville’s air frying setting. For instance, I make thin French fries with the Phillips at 360F but have to turn the BSOA up to 425F.
Air Fried Food Does Not Need To Be Turned as Often
Because air is circulating through the mesh basket, food doesn’t have to be turned as often and is less likely to stick badly. But I find that I do need to loosen and rearrange the food at least once halfway through cooking so that it cooks evenly. I do this with a thin spatula; even though instructions will often say to “shake the basket,” often food is too stuck to really shake loose.
All in all, I think air fryers have some benefits, especially in terms of energy efficiency and time savings. But there are a few downsides:
They’re one-use appliances that take up space in the kitchen.
The better ones can be expensive.
The smallest ones are often too small, unless you are cooking for one. The Phillips I have, for instance, will hold only one burger unless I use the rack I purchased separately, for an extra $30. Then it holds two burgers. (Advice: Buy the biggest one you can afford.)
The cheaper ones often have non-stick coatings that flake off. Read the reviews on Amazon before you buy.
If you avoid non-stick coatings, it can be difficult to find a model without them (the Phillips’ basket is metal but the interior where the food drips is non-stick.)
Unless you’re used to fat-free food, you won’t find air-fried food much like fried food. A lot of buyers have felt disappointed that the results didn’t match the hype. And yes, you can cook without any oil in an air fryer, despite what the user manual states, though I’m sure that using a little oil would give the food a more realistic fried texture.
If you’d like to buy an air fryer, I’m not trying to dissuade you, but I think it’s important to know these things going in.
There is one thing that the air fryer does very well, and it alone is almost enough reason to buy one:
TOFU
The air fryer does something magical to tofu. It crisps the edges and makes it firmer and chewier, all without you having to freeze it or press it with fancy tofu presses. It’s absolutely addictive, and it’s oil-free.
I often make air fried tofu for stir-fries by marinating it in a mixture of soy sauce and sriracha, soy sauce and chili garlic sauce, soy sauce and a dash of sesame oil and garlic. The only essential is the soy sauce. I find tofu unappealingly bland if it’s not salted, and soy sauce adds the salt as well as the umami flavor.
What I do not add is starch. I tried just once adding starch to my tofu, and it was nowhere near as good as it is “naked.” It left a powdery residue in my mouth that I wish I could forget.
Last week I was trying to pull a last-minute lunch together from limited ingredients–not enough of anything to make a big salad but just enough salad vegetables to stuff a couple of wraps. I was tired of hummus and wanting something different, so I quickly marinated some tofu in Italian seasonings while the air fryer was preheating. Italian style air fried tofu was born.
I posted the photo of that lunch on Instagram, and so many people wanted the recipe that I knew I’d have to make it again and keep track of the amounts I used of each ingredient so that I could post it here. That was no hardship! I loved it so much that I’ve had it four times in the past week, and I hope you’ll love it, too.
Air Fried Tofu Italian Style
Using an air fryer makes this savory tofu crispy in record time, but if you don't have one, see the notes for baking in an oven or toaster oven. Also, the longer you marinate, the tastier the tofu will be, so start it soaking early for the best flavor.
Ingredients
8 ounces extra-firm tofu
1 tablespoon soy sauce or tamari
1 tablespoon aquafaba or broth (see notes)
1/2 teaspoon dried oregano
1/2 teaspoon dried basil
1/2 teaspoon granulated garlic
1/4 teaspoon granulated onion
black pepper to taste
Instructions
Drain the tofu and cut it into three slices lengthwise. Put down a double layer of tea towels or paper towels, place the tofu slices on top, and cover with more towels. Place your hands over the tofu slices and press down, gently increasing pressure, to press enough water out that the towels are noticeably wet. (You can also use a tofu press for this, of course.)
Return the tofu to the cutting board and cut each piece into about 10 cubes (one cut down the length and then 5 across works well.) Place the tofu in a large ziplock bag or bowl.
Mix the remaining ingredients well. Pour over the tofu and gently turn the bag or stir the tofu until all sides are coated. Let it marinate at least 10 minutes--the longer you marinate it, the more flavorful it will be.
Preheat your air fryer at 390-400F for about 3 minutes. Place the tofu in a single layer in the basket (leaving any marinade behind) and immediately reduce the temperature to around 350F. Air fry for 6 minutes. Use a thin, flexible spatula to loosen the tofu and turn it. Return it to the air fryer and begin checking at 4 minutes to see if it is golden overall and slightly darker at the edges but not overcooked or it will be tough.
Use any way you like--my preference is in wraps with plenty of veggies and balsamic vinaigrette--but it's also good in pasta.
Recipe Notes
Aquafaba is the liquid from cooking chickpeas. In this recipe, its main purpose is to dilute the soy sauce and help spread the flavor around, so any liquid will do.
To bake in the oven, line a baking sheet with parchment paper or a silicone liner and bake at 400F for about 20 minutes, turning after 10 minutes.
Sodium listed in the nutritional info is for regular soy sauce; use low sodium soy sauce to reduce the sodium. Or replace the soy sauce with a flavorful liquid such as wine to drastically reduce the sodium.
This tofu is zero points on Weight Watchers new Freestyle program. The recipe makes about 20 pieces, enough to fill 4 medium-sized tortilla wraps.
Nutrition Facts
Air Fried Tofu Italian Style
Amount Per Serving (4 ounces)
Calories 87 Calories from Fat 40
% Daily Value*
Total Fat 4.4g 7%
Saturated Fat 1g 5%
Sodium 452mg 19%
Potassium 221mg 6%
Total Carbohydrates 3.4g 1%
Dietary Fiber 1.3g 5%
Protein 10g 20%
* Percent Daily Values are based on a 2000 calorie diet.
Please pin and share!
Please let me know in the comments if you have any questions that I didn’t answer about air frying.
Enjoy!
This post contains Amazon affiliate links. When you buy something through them, I receive a commission that helps support this site. Thanks for your purchase!
Source: https://blog.fatfreevegan.com/2018/03/air-fried-tofu-italian-style.html
0 notes
Text
Paleo Cooking 101: How to Cook Meat Like a Pro
Eating healthy can be wildly difficult when walking through a world of processed and refined foods. Paleo eaters are all about living and sourcing their food as close to Mother Earth as possible. In this modern world, it can be quite the task to eat this way!
It can be difficult for anyone who isn’t comfortable in the kitchen to find ways to get enough protein into their daily grind, but with a few basic skills, you can become as comfortable and proficient in the kitchen as expert Paleo cookers. Here’s a breakdown of what you need to know.
Get Comfortable in the Kitchen
A favorite go-to snack is fruit. Just grab a peach and go, right? Delicious and easy. There are not as many grab-n-go protein sources as naturally occurring as fruit that literally grows on trees.
Leaps and bounds are being made with on-the-go Paleo snacks and meals, but we all know that when you are following a diet that clashes with the standard American one (aka S.A.D. and yeah—it is!), you must arm yourself with a few cooking techniques if you don’t want to only be eating handfuls of nuts and jerky day in and day out. Getting yourself in the kitchen is a surefire way to have quality control over your meals and getting that protein in!
The kicker is that unless you cook full time, you are most likely too busy doing your thing to then come home and labor over the stove. Eating Paleo in this S.A.D. world means you also need to be your own full-time personal chef, and that’s a dealbreaker for many. Finding the time to cook can be super tough but if you are Paleo, or have recently made the switch, there is no way around it: the kitchen must be your new stomping ground, your safe haven, and yes, even your peaceful retreat.
With the right tools and knowledge, it’s totally possible to find a way to love cooking clean, delicious, Paleo meals for yourself. The biggest hurdle for most when digging deep to find their inner-chef-selves, is meat preparation. Between what cuts to buy, how to season, what to put in the marinade, and then the actual cooking, there is a lot going on and so many decisions to make.
Basic Cooking Skills
Getting a few cooking methods under your belt, and understanding the way that certain ingredients act, will empower you to make more efficient meals and more interesting choices in the kitchen. Arming yourself with some basic cooking 101 will enable you to create clean and delicious meals at home with ease, and eventually, some creativity!
Recipes are fantastic, yet they don’t leave you too much room for you to freestyle. Learning cooking methods is where the power lies. A little knowledge can be a game-changer and up your confidence in the kitchen.
So yes, cooking can be intimidating. Which is sort of hilarious because food and shelter used to be pretty much the only things humans had to do! But fear not, even in a modern world, we can relearn the basic skills of preparing meats and proteins.
Here are some of my favorite ways to prepare proteins, and hopefully get your creative juices flowing in the meat department!
Eggs
Perhaps one of the most basic Paleo foods, it’s easy to fall into a rut with these. Learning multiple ways to properly prepare eggs can add instant variety to your Paleo diet.
Soft Scrambled Eggs
A good soft scramble is like gold in my house! No more overcooked eggs for you. Amazingly, most people overcook their eggs, and when the proper cooking technique is learned, eggs can become quite a delightful favorite.
Use a cast iron skillet. It distributes heat more evenly, and that’s good! I also love my Green Pans, which are nice and heavy and also distribute heat well.
Get that fat hot first. Over medium high heat, melt your butter, coconut oil, avocado oil, or whichever high-smoke point fat of choice you like, before adding your eggs.
Scramble less. Using a heat safe spatula, gently stir and fold, but not too much. Just a few turns of egg around your pan, and you’re good. Let em’ be!
Cook less. Once you pour your eggs in your hot pan, turn off the heat after a few seconds. Let the residual heat slowly cook your eggs.
Poached Eggs
To me, perfectly poached eggs are the most elegant of egg preparations. Don’t be intimidated by the title—poaching an egg is actually quite simple.
Add apple cider vinegar to simmering water to help coagulate the egg white which creates a tidier little poach.
Using a whisk, create a cyclone before pouring your egg into the simmering water. The swirling water will wrap the egg white around the yolk without too much fuss. This is known as the whirlpool method.
Crack your eggs separately and one at a time. Crack your egg in a little bowl before sliding it into the simmering water. Helps with the peril that is a shattered eggshell and the eventual hunt to find it. Pouring your egg in, rather than cracking it over your simmering pot of water, also helps with accuracy.
Frittatas
Frittatas are the way to go if you are serving a small army of Paleo humans, plus, they’re just so convenient.
Crack your eggs separately and one at a time.
Crack your eggs in a separate bowl. When you eat free-range, pastured eggs, sometimes directly from your own chickens and ducks or someone else’s healthy birds, you may be prone to getting a bad one here and again. Real food goes bad sometimes, because it is real and not treated. But you don’t want one bad egg to ruin your whole dish.
Use an oven safe pan that distributes heat evenly, like a cast iron skillet or green pan, but with a metal handle so you can not only cook stove top, you can also stick it in the oven.
Sauté your veggies slightly and pour your beaten eggs over the sauté. After a few seconds, turn off your stovetop and place the entire pan in a preheated oven. Your frittata will cook just enough on the bottom, and will finish evenly and with a nice browned top!
Pork
The other white meat! There are a lot of cuts to choose from, and bacon is always a crowd pleaser in the Paleo world. But learning to use the other cuts of pork will step up your Paleo protein game. Here are some preparations that I like, as well as some tricks for you to get your cook on.
Tenderloins
One of the more common preparations, tenderloins are versatile and quick to prepare.
Use a marinade. Tenderloins are, it may not surprise you, tender! They take on marinades super well. Marinate for an hour in the fridge before cooking.
Make your own marinade. Oil+Acid+Seasonings are the general components for the making of a marinade.
The tastiest marinades have quite a bit of vinegar or acid to them; using apple cider vinegar or fresh squeezed orange or lime juice is truly delicious.
Be aware that when using an acid-forward marinade you only need to marinate for one but no more than two hours to avoid denaturing the protein and curing your tenderloin before cooking. You will want to make about ½ cup marinade per pound of tenderloin. Err on the side of making more marinade since cooking down leftover marinade to make a reduction will be delicious as a pour over sauce!
Sear then roast. After you marinate, sear your tenderloin on the stovetop quickly on all sides to develop a bit of color. After a nice brown caramelization occurs, finish cooking in a preheated 400ºF oven. Line a baking pan with parchment paper and roast your meat until a meat thermometer reads 150ºF as an internal temp.
Always rest. Let your meat rest about 10-15 minutes before slicing. This goes for all meat. This helps keep your tenderloin juicy and moist. Slicing too early will allow all those tasty juices to escape!
Pork Chops
All chops are not created equal. Just as there are different cuts of beef for steaks, there are different cuts of pork chops, too. They taste and cook differently. Ask your butcher for tips on the best cuts of pork chops for your intended cooking method. Here are some general tips and methods for pork chops.
Brine. To brine is to make a saltwater bath for your meat. This results in a tastier and more tender texture. Your brining liquid can be as simple or as complex as you’d like. Start with a one to twelve ratio of salt to water (something like ¼ cup salt to 3 cups water) and from there feel free to add peppercorns, bay leaf, cinnamon, chili, etc. Simmer your brine until salt has dissolved, cool completely, and pour over your chops. Let brine for two to four hours. Rinse and pat dry. Now you are ready to cook!
Stuffed chops. Loin chops taste amazing when stuffed. Use a paring knife to create a little pocket in the center of your chop. Stuff with chopped apple, apricots, or even red grapes! Sear stovetop to brown and to trap those juices in, and then finish in the oven.
Dry well, sear well. Meat sears best when dry. Unless there is sugar content, like orange juice from a marinade, you can’t expect much color from a sear unless you have dried your cut of meat. Color is where the flavor is, so make sure to get a good sear on.
Bacon
Bacon is the salty goodness that non-Paleo eaters still believe is bad for you. But if it’s bad, we don’t want to be good!
Stovetop: Lay your bacon into a cold skillet, add only enough water to just cover the bottom of your pan, then turn on the heat. This helps with even cooking, and even eliminate some splatter.
Baking: Start roasting your bacon in the oven! Lining a sheet pan with parchment paper and laying out your slices not only allows you to prepare more strips at once, but this way all of your slices will cook up more evenly. Plus, no splatter!
Once your bacon is done cooking, save the leftover fat in a jar. Cooking your veggies in a little bacon fat imparts delicious flavor. Try sauteing Brussels sprouts or mushrooms on the stovetop in a little of your leftover bacon grease.
Beef
Grass-fed beef is higher in all the good B vitamins and minerals and lower overall in fat. It has more omega-3 fatty acids than conventional beef, too. So, go grass-fed! Here are the basics of cooking beef to perfection.
Steaks
People pay top dollar for perfectly cooked steaks in restaurants, but you can learn to prepare five star steaks at home.
Do not overcook. Hot and quick is your mantra when preparing grass-fed steaks.
In comparison to conventionally treated beef, grass-fed cooks about 30 percent quicker and will continue to cook a bit after you remove your steak from the pan, oven, or grill. So be hot and ready to cook your beef steaks quickly!
Do a ‘quick-age’ on your steaks. Salt your steak and let sit for about 20 minutes. This will break down connective tissues and create a more tender result for your dining pleasures. You may notice a bit of a weeping. Simply pat dry before cooking.
Ground Beef
A good burger is worth it’s weight in gold, right? Nothing is more classic, but you definitely want the get the right cook on, whether it’s burgers, meatballs, or a classic meatloaf.
Keep it moist. When using ground grass-fed beef, you want to be sure to impart as much moisture as you can.
Use coconut aminos, a little mustard, homemade applesauce, grated carrot and onion, and a touch of grade B maple syrup to add moisture.
Form into the desired dish and make yourself some delicious burgers, meatballs, or meatloaf!
Beef Roast
Roasts are a great lazy-Sunday meal as they take relatively little effort and cook while you’re doing other things. Anything that you can set-and-forget is great for anyone who doesn’t want a ton of prep time.
Preheat your oven to 450°F. Season your roast with preferred spices, salt, and pepper.
Get a good sear on your roast by adding to a preheated hot skillet and browning on all sides.
Add root veggies to your roast pan and cover with stock, bone broth, or water. Cover tightly.
Put your covered roast in the oven for 30-45 minutes, then reduce heat to 325°F and continue to cook for four to seven hours. The more time, the better! Even 30 extra minutes will make all the difference in a fall-apart roast. Slow and low is the key.
Beef Bone Broth
Bone broth is a gut-nourishing food that can be consumed by itself or added to soups and stews and other dishes. Making your own is a great way to save time and money.
Roast beef bones on a baking sheet at 350°F for 20-30 minutes.
Add beef bones, herbs, and spices (such as peppercorns, fennel, oregano, and thyme) to a large stockpot. Fill with water until bones are covered, with an additional inch of water.
Bring to a boil and then reduce to a simmer for 8 to 24 hours. Skim the film off the top every 2-3 hours.
Strain the broth and store in mason jars in the fridge for up to 2 days, or freeze leftovers.
Lamb
Lamb is amazing because it is rich, meaty, and smooth with robust flavor. Lamb can be an acquired taste, but really, it’s all in the preparation.
Lamb Chops
A classic lamb preparation, you’ll want to find these in a nice thick cut for super juicy results.
No matter the chop, be it loin or rib, choose a thick cut, up to about 1 ½ inches is ideal.
Adding a good amount of fat and salt will ensure that your lamb is tender.
Trim away any hard, extraneous pieces of fat, but leave the internal marbling intact and the chop whole.
Lamb chops are best when cooked to medium or even a touch medium-rare. Cook over moderate heat until about 10°F from the desired internal temperature (160°F for medium), and then finish over high heat to get a yummy crispy finish.
You can get a good cook on a lamb on a grill utilizing cold versus hot spots, or you can go from oven to stovetop.
Rack of Lamb
The show-stopper of the lamb world, this dish looks supremely gourmet and pro.
Slow cook the rack of lamb in a roasting pan in the oven heated to 200-250°F. Check internal temperature and remove from oven when desired temperature is reached (160°F for medium).
Sear the rack on a pre-heated stovetop pan over high heat to achieve a decadent crispy crust.
Chicken
The favorite white meat, chicken is a staple on Paleo diets because it tends to be the most affordable. It can also dry out quickly, so to get a pro cook on your chicken, follow these tips.
Roast Chicken
Roasting a whole chicken is the ultimate, but it can also be immensely intimidating. Whole chickens are convenient since you can eat once for dinner, again pulled, and then roast the bones and make your own bone broth or stock. Aside from that, it is simple, cozy and even elegant when you need it to be.
Be sure your chicken is patted very dry.
Rub coconut oil all over and in all the crevices of your bird.
Salt and pepper fiercely.
Optional but tasty: stuff the cavity with herbs, citrus, fennel, apples, onions—you can get really creative here. Be sure to salt the cavity as well.
Fried Chicken
If you’re jonesing for crispy fried chicken, there’s a Paleo way to do that!
Make a dredge with coconut flour, dried or shredded coconut, paprika, dried mustard, and salt.
Dip chicken tenders or sliced breast in dredge then into egg wash (one egg beaten with a squeeze of lemon), then back into dredge.
Semi-fry on the stovetop in a high heat oil, like coconut or avocado. Boom! Healthier fried chicken! It is crispy and delicious, and very kid-friendly as well.
Tender Chicken
Making white breast meat tender can be tricky, but it’s completely possible if you add an extra step. While some may balk at adding more cooking time, the juicy, perfect results will be more than worth the effort.
Thoroughly pound the chicken by placing the breast between plastic wrap, cover with a dishtowel, and then pound the chicken flat with a meat tenderizer or rolling pin.
Pound until about ¼ inch thick, add salt and pepper, and then sear stovetop until cooked all of the way through. The texture is fantastic and versatile. Sauce it, slice it, dice it—it will all be tender.
Bone-In Chicken
If you want the juiciest cuts of chicken, opting for cuts that still have the bones in will result in a result that is moist and delicious.
Chicken thighs and breasts can both be purchased with the bone in.
Boneless cuts are more expensive, so this is a budget-saving tip!
Cooking times may be longer with bones in, but use a meat thermometer to determine when the chicken is done. It needs to reach 165ºF.
Bone-in chicken has a smoother and more rich texture, so it’s well worth the extra effort.
Bone Broth
It’s not that hard to make your own delicious stock. Many store bought versions have MSG and other chemicals or additives, so you’ll not only spend less, but you’ll get more nutritional value.
Request chicken feet from your butcher if you aren’t raising chickens or don’t have another source.
Roast the feet along with the rest of your bones for about 30 minutes or so, add to a large stock pot, and cover with water.
Add chopped onion, carrots, celery, shiitake stems, and if you want to really get creative, kombu and astragalus root as well. Most importantly, a very healthy splash of raw apple cider vinegar.
Simmer for 12-24 hours, adding garlic and herbs during the last two hours of simmering.
Periodically skim the foam that rises to the top of your broth and discard, these are impurities and make your broth quite bitter.
Strain off the broth and use to sip, add to soups, or use as a flavorful cooking liquid instead of using water or store-bought stocks.
Turkey
Whether it’s Thanksgiving or not, learning how to cook turkey properly will always yield richer, juicier results.
Whole Bird
Many people find roasting a whole turkey bit pretty daunting. The fear of it drying out can be intense!
Spatchcock the whole bird, or ask your butcher to do it for you. A spatchcocked bird roasts wonderfully. It will turn out evenly, browned and moist. It’s a crowd pleaser when roasting a whole bird.
You can also braise your whole turkey. Tent a whole bird with foil to create the braising effect. Fill your roaster pan with flavorful liquid first, tent, and braise for four to six hours in the oven, or more if your bird is huge. Watch the meat fall off the bone! This kind of turkey will be moist and super tasty to make all of your turkey salad, chili, wraps, and snack dreams come true.
Turkey Meatballs
Unlike traditional turkey roasts, when you make something like meatballs you have more control over the moisture content.
Add chopped onions and garlic, pureed butternut, acorn or kabocha squash, along with unsweetened tomato ketchup, mustards, coconut aminos, etc. to ground turkey before rolling into shape. This will keep your meatball moist and add tons of flavor.
Experiment with adding superfoods like hemp and chia seeds for an added nutrition boost!
Seafood
Fish and seafood are an important part of a healthy Paleo diet. Fish tastes best when it is prepared simply.
Fish Filets
Perhaps the most common way to eat seafood, fish filets are simple and delicious. Purchasing a whole fish or a large filet that you cut down into smaller portions can save you a significant amount of money.
Invest in a good, sharp fish knife or dedicate a set of tweezers for plucking out pin bones.
Use a big plastic cutting board for handling whole or large cuts of fish.
If you don’t want to deal with the skin, ask your seafood counter to remove it for you.
Cut filets into your desired portion sizes.
Heat your preferred cooking fat in a pan and then sear the filet on each side for three minutes, or until the filet flakes apart easily with a fork.
En Papillote
It sounds fancy, but really it is just fish atop some veggies in a parchment paper. It yields a delicious, one-dish meal that will quickly become a favorite.
Start with a square of parchment. On one side lay down some batons of zucchini, carrot, or sliced brussel sprouts.
Salt your sliced veggies and drizzle with a touch of avocado or coconut oil.
Next, place a few ounces of a filet (salmon, halibut, whatever your pleasure may be) atop your veggies.
Add a touch more salt and a slice of lemon along with some herbage.
Fold the other half of parchment over and tightly roll all of the edges together to create a pouch.
Place onto a sheet pan and bake in a preheated oven at 350ºF for about 10-15 minutes. Serve and enjoy!
Fish Cakes
A great way to prepare unfussy fish dishes are to make fish scraps into patties.
Add a rough chop of raw fish to a food processor, along with some onion, garlic, lime, cilantro, and salt.
Pulse until just incorporated, and working about ¼ cup of your fish cake mix at a time, form into a patty.
Place in the fridge between parchment paper and chill overnight to help the patties maintain their shape during cooking.
These are best cooked stove top, in a skillet. Add some coconut oil and get the fat hot first. Add patties and sear on each side for about three minutes.
Change up the flavor profiles. Capers and lemon or curry paste with basil and mint, you can really get creative here, with endless possibilities.
Game Meat and Offal
If you are willing to explore, you might just surprise yourself! While new Paleo eaters can be turned off to game meats or offal (organs), these are highly nutritious options that actually don’t taste as “weird” as most expect.
Duck
Duck breasts are a great way to break into the pheasant and waterfowl market. They have a poultry-like taste and produce a delicious fat that can be used for roasting vegetables or other dishes!
Choose a breast that has a nice healthy fat cap on the top.
After rinsing, pat your duck breast very dry and score the top with a sharp knife.
Salt the fat layer well.
Let your pan heat up before cooking. Over medium-low heat, cook your breast fat side down, slowly rendering the skin.
Pour off the fat (save for later use) as you go.
Once the skin is rendered, completely golden and crispy, flip the duck breast and finish cooking from the other side.
Serve with sweet potato fries or any other favorite Paleo side dish!
Rabbit
If you come across some rabbit meat, ask your butcher to grind for you. Rabbit makes lovely ragout and a fantastic meatball!
Brown your ground rabbit and add onion, red bell pepper, garlic, tomatoes, and some unsweetened tomato paste.
Once you have sautéed for about 15 minutes or so, take some of the tomatoes and blend with a little bone broth or water. Add back to pan.
Simmer for 45 minutes or so. Season well and use as a sauce over zucchini noodles!
Chicken Liver
Perhaps the most daunting of offals, liver gets a bad reputation for being only food that your grandmother would eat. Chicken livers have the most delicate flavor of all livers, and taste similar to ground beef, with a smoother texture.
Saute chicken livers with onions, cherries, apples, quince, currant, and aromatic spices.
Blend in a food processor with butter or ghee, and you have yourself a homemade pate!
Elk, Bison, and Deer
Start by adding game meat to dishes like stews and chili. One pot meals tend to have a lot of room for other flavors, lots of veggies, and are usually fairly forgiving when it comes to experimenting with recipes!
If the flavor of game is too much for you, try trimming away any excess fat or brining.
You can also pair with ground beef, turkey, or chicken in a chili dish to temper the game flavor and provide the comfort of an expected meat.
Start with a basic chili or stew, like this bison chili.
Bottom Line
Even if you’re not a professional chef, you can learn to prep and cook meat in delicious ways that will tantalize your palate and take your Paleo diet to the next level.
P.S. If you want access to the best recipes, organized each week in meal plans with complete shopping lists and prep notes, check out a free trial to our Paleo meal plan.
The post Paleo Cooking 101: How to Cook Meat Like a Pro appeared first on Paleo Plan.
Source: http://ift.tt/10qRbxJ
20 notes
·
View notes
Text
Skilled Suggestions And Tips To Much better Cooking
Learning how to cook is like learning how to dance. It normally takes lots of examine, tough work and dedication. The ideas we have set collectively in this post must support you figure out the sorts of things you must concentrate on mastering in buy to turn into the cook dinner you've got often wanted to be.
When you are chopping herbs before your meal, a idea that you can adhere to is to toss a minor little bit of salt on the chopping board. This will give you further friction so that you can maximize your cuts. Good quality cuts of herbs will lead to a wonderful food when every thing is total.
If you would like to have crispy French fries, then you should soak the potatoes in great water for 30 minutes and then fry them. When potatoes are allowed to soak up cold h2o, the texture is in a position to withstand the excessive warmth of cooking with out breaking down and turning into mushy.
When you are going to the keep, do not constantly have a big purchasing list which can restrain you to just getting specified products. See what you like and what you are in the temper for and obtain primarily based on that. This will give you the spontaneity to cook dinner whatever you pick.
Rooster broth must be employed when you are sautéing your veggies. Rooster broth can be purchased at any grocery shop. It is important to choose a rooster broth that is lower in sodium so that you do not eat way too a lot sodium. Sodium can trigger you to keep water which is not excellent.
When cooking oil cook dinner veggies, attempt employing some chicken broth! Rooster broth provides flavor to veggies and stops them from obtaining caught to the base of the pan. Rooster broth is commonly offered at most grocery retailers, and it is extremely affordably priced.
One crucial tip to remember focuses on who you prepare dinner for cooking oil supplier than what to prepare dinner. If you are cooking for your boss, a date, or a person genuinely essential, attempt to refrain from testing out new recipes and new ingredients. You ought to refrain due to the fact you have not experienced a opportunity to check and best the recipe, which may possibly result in cooking problems and unexpected benefits.
If you determine to make a roast, leave the bone in if you are in a hurry. You will have a more quickly cooking time because the bone will transfer the heat. Soon after the roast is cooked, just slice all around the bone to serve.
To make the excellent pasta, prepare dinner it one particular moment considerably less than what you read through on the box and prepare dinner it the relaxation of the way with the sauce you are serving with it. This assures that you do not overcook the pasta if you have been to toss it in with the sauce soon after you cooked the pasta until it was accomplished in the pot of h2o.
When you are cooking pasta, use a reasonable amount of salt in the h2o. This is the most effective time to time pasta. Salting the pasta after cooking it does not permit it to maintain seasoning that effectively.
If you are a single of individuals men and women that does not take in a lot of greens so the fresh veggies you get go negative extremely fast you need to purchase frozen vegetables. Frozen vegetables are flash frozen so they are the identical as taking in fresh veggies and you only have to just take as considerably as you need to have from the package deal and return the relaxation to the freezer.
To make perfect deviled eggs, make sure the yolk is evenly centered inside of the egg by spinning the egg on a flat area ahead of boiling. Spot an egg, lengthwise, on the leading of the kitchen counter and gently spin it a pair of occasions. The spinning action aids center the yolk inside of the shell. cooking oil will help develop completely-fashioned deviled eggs.
Check out your meatloaf or meatballs by examination cooking a small piece. You want your meat to style excellent, so when you make a mini hamburger patty, and fry it up to style it, you can decide if the seasoning is just right or if you require to insert more flavor. Carrying out this makes certain your meatloaves and meatballs are excellent when you pop them out of the oven.
Make investments in a great roll of parchment paper. When you are baking, line your pans with it and you will save yourself a lot time and mess. The baked items slide proper off of the paper and all your pan demands is a simple rinse in some hot soapy water!
When it arrives to cooking, attempt to deal with your time by cooking several foods at 1 time. This is important because not only will it conserve you income by getting a pre-cooked food but it will also preserve you from having to devote the time cooking it later on on in the 7 days.
If a dish calls for thinly sliced meats (like some Chinese dishes, for case in point), freeze the meat before slicing. This helps make it keep its shape far better when you are slicing, which enables the knife to lower by means of with a cleaner line. When meat is thawed out, you typically have to use a sawing movement to reduce the beef, which can make your strains uneven and jagged.
When you are cooking rice make certain that you comply with the instructions to the tee! It is greatest when you are cooking the rice to put all of the components in the pot and use the timer! Do not open up the pot till your time is up! You will have the ideal rice.
For a a lot more flavorful fried fish coating, substitute the typical crackers with your favourite kind of chips. Salt and vinegar chips crush up just as wonderful as crackers even though including more depth to the closing flavor of fish. You can also change the normal milk dip with dressing for an additional pop of unexpected taste.
Just like a dance, you are never ever completed with studying how to cook. There is usually a new style for you to research and master. Just take these ideas and understand to include them into your each day cooking. Constantly bear in mind that you are never done finding out about the artwork of cooking.
1 note
·
View note
Text
Read More 17 Common Mistakes When Making Burgers
The following post 17 Common Mistakes When Making Burgers is republished from Eat This Not That by April Benshosan
You’ve invested in a shiny new barbecue and even tackled the weed jungle that accumulated in the backyard. Grilling season is here, and now that you’ve got the perfect setting to flip patties for friends and family, all you need to do is master the classic hamburger.
Seems easier than spraying weed killer until your thumb goes numb, right? While many folks don’t put much thought into crafting homemade patties, there’s more to it than grabbing ground beef and a package of buns. Below, we’ve rounded up six common mistakes people make when cooking burgers. And we’re not gonna leave you in the dark: you’ll also find easy solutions to all your grilling woes. Read on to discover how to build a better burger, and then don’t forget to throw these 43 Best Foods for Fiber on the grill to round out your meal while you’re at it.
1
Your patties aren’t flat.
Shutterstock
Mistake: “Ever had burger patties that were rounded and not flat? These types of burgers are awkward to eat! People tend to forget that flattening your patty before cooking is essential to making that perfect burger form,” Derek Wolf, fire cooking enthusiast and owner of Over the Fire Cooking, reminds us.
Solution: “Flatten the patties by pressing them flat using a burger press. If you don’t have a burger press, then try pressing together two plates or two cutting boards to get that flat burger form. Fun tip: If you are looking to double stack burgers, make sure to have thin patties or else you will have a very tall burger!”
2
You seasoned the beef too early.
Shutterstock
Mistake: “Ever had a burger that was tough and dry? You might have thought this was because you cooked it too long, but I bet it was because you seasoned it too early,” Wolf says.
Solution: “When seasoning the meat, make sure to form the patty before you add Morton Coarse Kosher Salt and black pepper. Salt extracts the moisture from the meat and leaves you with a dry patty. Adding the salt right before you cook can help guarantee you have a nice, juicy burger that is full of flavor.”
3
Your grill isn’t clean.
Shutterstock
Mistake: “Nothing is worse than burgers sticking to the grill grate when you try to flip them. Most people think that burgers are so juicy that they will release from the grill very easily. This is not always the case,” Wolf tells us.
Solution: “Make sure to clean your grill grate before cooking. Preheat the grill so that the heat loosens some of the previous residues. Take a grill scraper and brush off as much as possible. If the grate is really dirty, then add some oil to the brush and put it onto the grill grate (be careful with oil and fire!). Fun tip: Clean your grill immediately after cooking while it is still hot so that you are ready to start cooking at your next backyard grill out!”
4
You rely only on the grill.
Shutterstock
Mistake: Another error folks are guilty of is thinking they can’t use a pan to make the perfect burger, Claudia Sidoti, head chef & recipe developer at HelloFresh, tells us.
Solution: “Burgers are simple to make on a stovetop, too—with the right seasonings and toppings. A little seasoning can go a long way to bring out the best flavors. Drizzle olive oil into a frying pan on high heat,” Sidoti says, adding that a cast iron is your best bet. “Once it gets nice and hot, and the heat is distributed evenly, it’ll deliver on those grill marks you’re hoping for.” While the cast iron warms up, form the burger patties using your favorite type of meat and then sprinkle on both sides with salt, pepper, and oregano, Sidoti says.
5
You forgot the thermometer.
Shutterstock
Mistake: “If you’re a newbie at cooking burgers, it may be difficult to know when the burger reaches the right internal temperature for your desired doneness,” Sidoti warns.
Solution: To help clear up the confusion, Sidoti recommends using a meat thermometer to check for the desired doneness. An internal temperature of 125ºF denotes rare while 130ºF will render a medium-rare burger. Prefer your meat more done? For medium, cook until the meat reaches 140ºF; for medium-well, aim for 150ºF; and for well-done, leave the patty on the grill or pan until it reaches 165ºF.
6
You flipped the patty too early.
Shutterstock
Mistake: Sidoti tells us that one of the most common mistakes people make when cooking burgers is flipping the patty too early or pressing down on the burger while it’s cooking.
Solution: “Stay hands-off!” Sidoti advises. “Let the meat do its thing and cook and then rest for a minute or two when it’s done!”
7
You flip your patty too many times.
Shutterstock
Mistake: Chef Tamra Scroggins, director of food culture at Sizzler, advises against flipping your burger too much while it’s cooking. “Resist the urge to flip or poke and prod at your patty as it cooks,” says Scroggins. “Doing so can remove the moisture from the meat.”
Solution: “At most, you should cook your burger for at least 3-4 minutes on each side, depending on the doneness you’re aiming for,” she says. “Of course, it’s always best to use a meat thermometer to check the internal temperature of your burgers.” (Refer back to tip #5!)
RELATED: The easy way to make healthier comfort foods.
8
You put the burger on the grill too early.
Shutterstock
Mistake: “Ever have a burger that is overcooked on the outside but not right in the inside?” asks executive chef and concept creator of Shore Club South Beach’s eatery Diez y Seis, chef Jose Icardi. “In that case, you may have put your patty on the grill before it was readily hot.”
Solution: “One of the biggest mistakes people make is putting the patty on the grill before it’s reached the right temperature. Just because the fire is going, doesn’t mean the grill is ready to use for cooking. You want to make sure the grill or pan is hot before throwing on the patty, and then, of course, let it cook before flipping,” he says. And speaking of getting the grill hot…
9
You use lighter fluid to start the fire.
Shutterstock
Mistake: “Have you ever had a burger that hinted at a taste of lighter fluid? You probably used too much lighter fluid to start the fire and rushed to get the fire started,” says Icardi.
Solution: “Invest in good charcoal. Lighter fluid does a great job at starting a fire, but it can majorly ruin the taste of your food. Start up your grill with plenty of time to ensure that you get the perfect fire going without having to utilize any additives,” he says.
10
You stack your burger with too many ingredients.
Shutterstock
Mistake: All too often people top their burgers with just too many toppings, at which point, you begin to taste a plethora of different flavors. Corporate Executive chef for INK Entertainment USA, Patrick Ochs, says achieving that perfect burger to topping ratio is a key aspect in the burger-making process.
Solution: “Balance is key to any burger. Based on whichever condiments, produce, and meat you decide to put in your burger, you must remember to keep a balanced ratio of all ingredients. I tend to make my burgers with the following ratio: 50 percent Bun, 30 percent patty, 10 percent produce, 5 percent cheese, 5 percent sauce. Burgers are meant to be simple and fresh. You want to be able to taste all of your ingredients in every bite,” says Ochs.
11
You over-season your burger.
Shutterstock
Mistake: “Ever try a burger and couldn’t taste the actual quality of the meat? You may have tried too hard to impress your guests,” says Icardi.
Solution: “Keep it simple. Buy good quality meat, and try to go straight from the store to the grill. Freezing the meat may take away from its natural flavors. A little salt and olive oil can go a long way,” he says. Do you hear that? You can ditch that tray of seasoning!
12
You scorch your patties.
Shutterstock
Mistake: Danny Lee, the executive chef of Burger & Lobster USA, says the worst thing you can do is let your burgers flame up. “It looks good on TV commercials, but it makes whatever you’re cooking taste like gasoline,” he explains. “What people confuse this with is the process of flambé, where you’re cooking off the alcohol of wine [and] brandy. What is actually happening is that the fat is touching the flames and burning up, leaving a residue that tastes like gasoline.”
Solution: “I understand it is difficult to control this on grills due to the amount of fat in burger patties, so I would recommend moving the patties away from the flames to a different spot on the grill. Otherwise, the other option would be to cook the burgers on a griddle, which helps it cook a bit in its own fat,” he says.
13
You’re not using the right kind of grind or cut of beef.
Shutterstock
Mistake: “Too fine or too coarse of a grind on your patty and using the wrong cut of beef can also ruin a burger,” says chef de cuisine at Wolfgang Puck Bar & Grill in Downtown Summerlin, Las Vegas Daniel Stramm.
Solution: “When making burgers fresh you want to make sure that your grind is just right. If you have too coarse or too fine of a grind, it will take away from the texture of the burger. Also, the cut of meat that you decide to use can play a huge role in your burger texture. I like to use a blend of chuck, brisket, and chain meat from tenderloins. If your meat is too lean your burger will be dry. If your meat is too fatty your burger will fall apart,” says Stramm.
14
You neglected to pick the right bun.
Shutterstock
Mistake: “Many people forget that the bun is just important as the meat,” says Ochs.
Solution: “Just like all the other ingredients when constructing a burger, the bun is the main piece to the puzzle, which holds it all together. There are many types of buns such as classic, brioche, wheat, potato, and lettuce. Based on your preference, you can then decide on how to build your burger patty. I personally prefer to use a potato roll, which is light and soft, making it the perfect combination to enjoy all the flavors of the burger itself. Remember to also toast the bread to add a layer of flavor and complexity,” he says.
15
You squish your burgers to cook faster.
Shutterstock
Mistake: You may feel like pressing down on your burger will expedite how fast it will cook, however, chef Stramm warns against it. “This lets all of the flavor you developed through seasoning drip right down into your coals, causing a spark, which in return will put a carbon taste into your burger,” he says.
Solution: “Let your burger take time to cook and develop stronger flavor through the Maillard reaction, he says. The chef says this kind of reaction is a chemical one that occurs between an amino acid and a reducing sugar once heat is applied. He says it has a similar effect as caramelization.
16
You cook too many burgers all at once.
Shutterstock
Mistake: If you’re hosting a party or cookout, you may feel the need to whip up all of the burgers at once, but Executive chef Linh Aven of B.GOOD says to reconsider so you don’t sacrifice the taste.
“It can be tempting to cook a whole bunch of burgers at once to avoid being stuck standing at the grill while everyone else is socializing, but spending a few extra minutes at the grill to cook your burgers to order is well worth it.”
Solution: Make sure to prep everything else beforehand so that way you can spend time flipping the burgers.
“Burgers are best eaten right away,” she says. “You don’t want to compromise on taste when you’re feeding a group of guests, and nobody wants a cold burger wrapped in foil! That said, you can minimize the amount of additional work needed by prepping everything else like condiments, toppings, [and] plateware in advance.”
17
You don’t let your patty rest.
Shutterstock
Mistake: Culinary Director at King’s Fish House, Fabrice Poigin, and chef Ochs both say that one of the biggest mistakes you can make while making burgers is not giving it adequate time to rest on the grill. Have you ever bit into a hamburger and thought the bun was just too soggy? It’s likely that you’re just eating your burger too quickly after it finished cooking. Here’s how to avoid that.
Solution: “Allow the beef patty to rest at least a couple of minutes after cooking, some blood and juices will drip away thus keeping the bun from getting soggy,” says Poigin.
“Resting is very important when cooking a burger. Like most meats, giving your burger the chance to rest allows all of the deliciously mouthwatering juices to collect and re-distribute throughout the patty, for a real concentrated juicy flavor,” says Ochs. “The smaller the burger patty is, the less time that’s needed to rest. For larger patties, you should allow the burger to rest for up to 6-10 minutes.”
The post 17 Common Mistakes When Making Burgers appeared first on Eat This Not That.
0 notes
Text
Get The Most From Your Kitchen area With These Simple Cooking Suggestions!
Understanding to cook dinner can be very tough. Read this post to begin studying more about cooking.
When seasoning your meals, bear in mind that it is significantly simpler to include far more seasoning if required, but you cannot consider it away if you insert also considerably. That is why it's important to go gentle when seasoning with herbs and spices. You want to compliment the flavors of the foods and not overpower them.
Discover to use your arms when cooking (right after washing them completely first of course!). Hands are the most delicate but adaptable cooking utensil you will own. They can be used for mixing, measuring and testing whether a merchandise is cooked adequate. A cake, for example, will demonstrate that it is carried out by springing again when touched frivolously with a finger on its prime.
It is incredibly uncomfortable to have lumps in your gravy. It takes place to everyone from the beginner prepare dinner to the grasp chef. There is a basic trick you can use to eradicate them. Drain the gravy via a fantastic strainer and discard the lumps. This strategy can be utilised for other sauces or soups too.
Help save your butter and margarine wrappers to use when baking. The wax paper that butter and margarine is wrapped in just takes place to be the best dimensions for greasing pans or rubbing onto a potato before popping it in the oven for baking. Save wrappers butter-facet to butter-side in a closed storage container, so it stays fresh for your baking wants.
Cooking a large food? Do the preparations the day or evening ahead of! This way, you will have significantly less to do on the working day you are heading to make your food. For occasion, if a salad will be element of your meal, make it the night ahead of.
It is achievable to cook dinner healthful without having abandoning all of the prosperous, creamy dressings that can lead so much flavor. One particular method is to use Greek-style yogurt as a alternative for mayonnaise. Half of the mayonnaise known as for in the recipe should be changed with the yogurt. This will give the identical wonderful flavor even though cutting down on the harmful consequences of the mayo.
Shelling pecans can be actually tough. Make it simpler by soaking them in a cup of water and set the cup into the microwave for five-6 minutes. It is often possible to soak the pecans into boiling h2o to get the very same influence. Scorching h2o helps make the shell softer and simpler to crack.
One essential suggestion to remember focuses on who you prepare dinner for instead than what to cook dinner. If you are cooking for your boss, a day, or someone really important, consider to chorus from testing out new recipes and new ingredients. You should chorus because you have not had a possibility to take a look at and ideal the recipe, which may possibly end result in cooking mistakes and sudden benefits.
When cooking with a sauté pan, change the deal with of it in the opposite route of you. Keeping the take care of dealing with you boosts the opportunity of bumping into and spilling your meals. This is also a security problem since you can burn off by yourself if the pan guidelines or falls above.
No issue what type of cheese you could have in your fridge, be certain that air can't enter it by wrapping it tightly. Air contributes to mildew progress on cheese. If your cheese does happen to have a minor little bit of mold on it, you can nevertheless use it by just cutting off the portion with mold.
When you are cooking any dessert that has strawberries in it, incorporate a modest volume of aged balsamic vinegar. The vinegar presents the dessert a sweet taste and it helps to increase the strawberry's flavor. If the dessert is anything bigger, these kinds of as a strawberry cake, incorporate a contact a lot more balsamic vinegar.
If you have left over wine in a bottle from meal or drinks with buddies, you can pour out the remaining wine in an ice tray and place it in the freezer. When you are creating a sauce that has wine in the recipe you can drop in a few of cubes.
Keep away from overcooking pasta when you boil it. Overcooked pasta loses some of its critical health advantages, as nicely as its taste. When you overcook pasta, the noodles take in way too considerably drinking water and grow to be swollen and limp. It is much better to somewhat below-cook dinner it to keep the best texture and flavor.
Having on cooking is a fantastic way to make your self really feel greater about your meals alternatives. You can see what you put into a dish and then be rewarded by the preferences and flavors you've got customized to you technical specs. Acquiring a couple of recipes from shut family members or magazines are great areas to commence.
Cooking pasta a minute quick of its full cook time. When you brief the prepare dinner time on your pasta you can complete the cooking method when mixing with the sauce. This will stop your closing methods in the dish from overcooking the pasta and destroying its texture or shape. Your dishes will preserve an inviting search this way.
Whip up some Angel Meals Delight for a rapid tasty desert. All you need is 5 substances, a pack of flavored jello, a pack of shelled nuts, some canned fruit cocktail, some cottage cheese and a frozen tub of whipped cream. Combine all of the substances jointly in a huge mixing bowl and refrigerate before serving.
Reduce ΣΟΥΒΛΑΤΖΙΔΙΚΑ ΧΑΛΑΝΔΡΙ of cooking for a good deal of folks by planning the components the working day just before or earlier in the working day. This will help stop burning specific dishes because your attention is on preparing another dish. When you put together the substances beforehand, you can target all your interest on cooking the best meal possible.
Cooking is a point you can enhance upon by making use of these guidelines. Subsequent time you need to have to prepare meals, consider about making an attempt one thing you have study in this article. You will observe a distinction in the top quality of your meals and the compliments you obtain.
0 notes
Photo

New Post has been published on https://jmuo.com/pacific-razor-clams-how-to-catch-clean-and-cook/
Pacific Razor Clams: How to Catch, Clean, and Cook...
amzn_assoc_placement = "adunit0"; amzn_assoc_tracking_id = "fresh17-20"; amzn_assoc_ad_mode = "search"; amzn_assoc_ad_type = "smart"; amzn_assoc_marketplace = "amazon"; amzn_assoc_region = "US"; amzn_assoc_title = "Shop Related Products"; amzn_assoc_default_search_phrase = "cooking"; amzn_assoc_default_category = "Kitchen"; amzn_assoc_linkid = "51fe4d035c7af8dc5928e6f5e5b79c4e"; amzn_assoc_default_browse_node = "284507"; amzn_assoc_rows = "4"; amzn_assoc_design = "text_links";
Razor clammers on the beach at dusk. [Clamming photographs: Chris Low. Cleaning and chowder photographs: Vicky Wasik]
When you hear a Pacific Northwesterner casually drop the term “clamming,” they’re probably not talking about the bivalves most of us enjoy tossed into spaghetti or served on the half-shell. They’re boasting about razor clams—the big, oblong ones you unearth from sandy shores with a shovel or gun, then quickly clean and (if you’re like most clammers) coat with bread crumbs and pan-fry, then serve with lemon and tartar sauce.
I moved from New Jersey to Seattle over 20 years ago to go to culinary school, and when I first heard my Seattle friends were taking their guns to the beach to hunt clams, no one could blame me for thinking that I’d relocated to the Wild West. These same friends, after all, had already taken me on a death march up the side of Mount Baker in a snowstorm, with steel-toothed crampons on my boots for traction. I had good reason to be afraid.
But I quickly discovered that the “gun” refers to a length of PVC pipe with a handle, which you wiggle into the wet sand, pulling up a core sample that, if properly extracted, will contain Siliqua patula, a.k.a. the Pacific razor clam. Gone was the image of me holding a Remington shotgun and pointing it hesitatingly at a bivalve on a sandy beach at night.
The author with her clam gun.
Still, that doesn’t mean my first time razor clamming, years ago in early December, wasn’t memorable—equal parts The Walking Dead meets Survivor, it’s the kind of experience one tells their grandkids about with bravado. A fine mist was falling, and the wind blew sand and water into psychedelic rivulets at my feet. A friend and I fell in line with other bundled-up, intrepid hunters as we trekked out toward the surf line in the pitch black, the collective light of our headlamps casting eerie shadows on the beach. Occasionally, a jeep would zoom down the beach; heads would lift up to watch, then drop back down, scanning left and right for the telltale quarter-sized, doughnut-shaped dimples in the sand that indicate a razor clam is hidden beneath the surface.
Since that night, I’ve learned a lot about the rugged approach Northwesterners take to their food—particularly their striking degree of savvy about stalking it in the wild, capturing it, and then, importantly, knowing how to clean and prepare it. The Pacific razor clam is a prime example. Here’s a rundown of everything you need to know about this unique regional delicacy, guns and all.
What Is a Pacific Razor Clam?
The Pacific razor clam is not to be confused with the Atlantic razor clam (Ensis directus), which is narrow, rectangular, and more aptly named, given its resemblance to a straight razor. The Pacific razor clam, on the other hand, is beefy and ovoid, with far more protein. It’s the meaty equivalent of a Dungeness crab compared with the smaller blue crab, to put it in East Coast seafood terms.
The clams can grow as long as six inches, in contrast with the common Manila clam, which tops out at three to four inches. (Of course, razor clams are dwarfed in size next to the Pacific Northwest’s most famous clam, the geoduck. If you include its siphon, the geoduck can be over three feet long, making it a clam so immense—and phallic—that nearly two million people, presumably mostly 12-year-old boys, have viewed my educational video on the subject just to gawk and send it to their friends.) The greatest concentration of razor clams is found on the 53-mile stretch of shore on Washington State’s southern coast, where the flat, sandy beaches make an ideal habitat.
How to Gather Them
Razor clams are collected in the hours just before low tide, when the receding water leaves behind soft sand and the above-mentioned little dimples, or “shows,” appear where the clams have been digging downward. Physically incapable of moving sideways, razor clams occupy the shellfish equivalent of an elevator, spending their days going up a few floors for food, down a few for safety. (Sometime last year, you may have caught a viral video of a burrowing Pacific razor clam spurting a jet of wet sand, much to the delight and revulsion of many internet commenters.)
To harvest them, you’ll need boots, a clam gun or shovel, a shellfish license, a headlamp—many low tides occur after dark—and a net bag or bucket to store them in. You’ll also need to check any lingering self-consciousness at the door: When you spot one of those shows, you’ll have to spring into action, and let me tell you, the first few times I did this, it wasn’t pretty to watch. It takes a lot of leverage, wrist strength, butt-wiggling, and speed to plunge the gun into the sand, meaning you’ll look funny from the back, sides, and front. If you give in to any feelings of self-doubt, the clam will sense your vanity and get a head start on its escape. Never turn your back to the ocean, as rogue waves are a real risk. You want to angle the gun ever so slightly toward the ocean, and twist or plunge the tube like mad until the pipe is at least two feet down into the sand. If you hear a crunch, as I have numerous times, you definitely got one, but you also mangled it. You are required to keep it and count it toward your daily limit of 15. (Luckily, mangled clams are still edible.)
The thrill is in unearthing the big ones undamaged, and it’s especially exciting when you pull the core sample of sand up and out, kick it over to find nothing, and then see the clam in the hole, digging down like mad. Now’s the time to plunge your arm into the hole—be fearless!—and pull the clam up and out and into your net. And start planning your dinner, because you’re about to eat the best clams in the world.
If you need more advice (and encouragement), the Washington State Department of Fish and Wildlife has a great video on tools and digging technique. And, if you’re not up for a wet-and-wild beach adventure, check out your local high-quality fish market to purchase razor clams cleaned and ready to go, or order them online.
How They Taste
I’m likely biased, but I think razors are among the tastiest of all the clams, with both tender and chewy parts that make for a more interesting texture. (They would have to be this good, or why else would I stand out in the rain with a bunch of other shellfish-crazy yahoos holding clam guns?) The flavor of the siphon and digger, the choice bits most harvesters are after, are exceptionally clean-tasting, a little saline, with just a passing hint of sweetness, as if you were kissing a mermaid. Some folks also eat the brown bits, which include the stomach; I remove them, as I’m not keen on the slightly muddy, metallic finish.
How to Clean Them
A quick step-by-step visual guide to cleaning Pacific razor clams. [Video: Vicky Wasik]
If you’ve bought your razor clams from the store, already cleaned and frozen or on ice, congratulations—you’ll have literally no cleaning work to do. Processors flash-freeze the clams after cleaning them thoroughly. Thaw them and use them within a day or two, or keep them in your freezer for months. Side-by-side tests I’ve done comparing flash-frozen razor clams with fresh ones I’ve caught myself convinced me that these frozen clams—at least, the brand I bought (I purchased them from Alaska-based Custom Seafoods)—are equal to fresh clams in flavor and quality.
If you’ve harvested them from the beach, though, you have some work ahead of you.
Step 1: Rinse
Before you get started, rinse off all the sand from the clams, then place them in a bucket with a damp cloth over the top while you work. Do not keep them in a bucket of seawater, as they will run out of oxygen and die.
Step 2: Remove the Shell
Right away, we have our first debate: Though some people blanch and shock the razor clams for five to 10 seconds, in order to pop open the shell and release the clam, I prefer to use a knife to cut open the shell. Blanching may be the easier method, but I don’t like precooking the meat this way; it overcooks so easily that I’d rather not heat it any more than necessary.
You’ll want a paring knife for this job—a clam knife, designed exclusively for opening hard-shell clams, is of no use to you here. You need a longer, sharper, and, most importantly, thinner blade. Slide the blade carefully along the inside of the shell, cutting just underneath the small, bay scallop–looking pieces (known as adductor muscles) that attach the clam to its shell. There are two of these on each side of the shell. If you accidentally leave them attached to the shell (whoops), cut them off and add them to the cleaned meat to cook—they’re tasty!
Once the shell is released, you can compost it, or boil it for a minute to sterilize it, then use the shell to serve the cooked meat in for fancy-presentation points.
Step 3: Cut Lengthwise
Using kitchen shears, cut off the tough and dirty tip of the siphon. Next, use the scissors to follow the zipper line of the meat up to the top, butterflying the first chamber of the siphon. Then butterfly the second side of the siphon. Rinse thoroughly, as sand and dirt tend to get caught in the siphon.
Step 4: Remove the Brown Bits (a.k.a. Internal Organs)
Cut or pull out the brown bits and the digger foot, or leave the digger foot attached if you want to cook the razor clam in its entirety. You’ll be left with the splayed-open siphons and an oblong-doughnut shape of razor clam meat. Press on the digger foot to push the stomach forward, then snip off the stomach and compost it.
You might see a translucent rod, known as the crystalline style, jutting out from the digger. This is used to break down the silica-like shell of the plankton the clams consume, and it’s both shocking and fascinating the first time you see it emerge. Resist the temptation to scream, even though it could be an extra in an Alien movie (but do look for it so you can pull it out because, ugh).
Step 5: Butterfly the Digger Foot
Next, butterfly the digger foot, rinse, and pull or cut out any brown bits. You might see a brown line, which is the clam’s intestinal tract. Get rid of that, too, by scraping it out with your knife.
Step 6: Pound the Meat (or Don’t)
To pound or not to pound? The siphon part of the clam is the tougher portion, and some prefer to pound it a bit between two pieces of parchment paper, using a meat mallet, to tenderize it. I’ve found that you can save time by skipping this step, and focus instead on not overcooking the clam. Plus, I enjoy the slightly chewier texture, especially in contrast with the more tender digger portion. If you do go the pounding route, make sure not to hit it too hard, so it remains intact.
Cleaned meat can be vacuum-sealed and frozen for about six months, or stored in a container in the fridge for a day. However, the meat is quite perishable. The best plan is always to grab some friends and clean and cook them the same day they’re caught—failing that, clean and freeze them immediately, if at all possible.
If you prefer to see the cleaning process in slower motion than our quick video above, this is the best video I’ve found online to help guide you.
How to Cook Them (i.e., How Not to Overcook Them)
As with littleneck or Manila clams, a prolonged cooking time will lead to rubbery and tough razor clams. If you’re pan-frying or deep-frying, cook them at very high heat, and make sure they’re in and out of the pan in under a minute. As the siphon portion is especially prone to overcooking, I sometimes separate it from the rest to give it a little less time on the heat. Alternatively, try poaching the clams in hot liquid or, even better, butter.
The tougher siphon meat is great in ceviche, while the tender digger makes for incredible fried clams, though both parts can be used in both dishes for a mix of textures. You can keep it simple and go classic Northwest style, dipping the cleaned clam meat in flour, then egg, and finally bread crumbs or panko, then shallow-frying them and serving with tartar sauce, lemon wedges, and hot sauce.
Or, take them in a more unusual direction: Shota Nakajima, chef and owner of Adana Restaurant in Seattle (and a recent contestant on Iron Chef Gauntlet), sears both parts quickly with minced ginger, mushrooms, and burdock root, then poaches them lightly in dashi, white soy sauce, and a pinch of butter. He garnishes the razor clams with the Japanese herb mitsuba—think celery meets chervil, though it looks like flat-leaf parsley. Chef and cooking teacher Michelle Nguyen steams them and serves them with crushed peanuts, basil, chilies, garlic, and fish sauce.
Ashlyn Forshner, chef and owner of Whidbey Island Bed and Breakfast (and the friend who first took me razor clamming), riffs on an excellent ceviche with razor clams she learned how to make at Elemental Restaurant in Seattle. “I chop the meat into medium dice and then add the juice of a lime, lemon, and orange, as well as the zest,” she told me the other day, as we were heading to the Olympic Peninsula to hunt for mushrooms. “Drizzle good, fruity olive oil on top, thinly slice some jalapeños into rings, and add those for heat.” She then lets it all mingle in the fridge for a few hours before serving. I whipped up a batch the other day, added bits of orange flesh and Maldon salt, and served it with crispy tortilla chips, and it was one of the best ceviche dishes I’ve ever had. I imagine it would be equally great with a bit of diced avocado as well.
And, if you want to put your razor clams to work in a wholeheartedly American preparation, I’ve attached my recipe here for razor clam chowder, adapted from a recipe published in the latest edition of my book Good Fish: 100 Sustainable Seafood Recipes From the Pacific Coast. Here, the key to avoid overcooking the delicate clam meat is to turn off the burner after cooking the rest of the chowder, then poach the clams gently, off the heat, for just one minute. This will ensure that you don’t miss out on the unique flavor and texture of this chowder’s most precious feature.
amzn_assoc_placement = "adunit0"; amzn_assoc_search_bar = "true"; amzn_assoc_search_bar_position = "bottom"; amzn_assoc_tracking_id = "fresh17-20"; amzn_assoc_ad_mode = "search"; amzn_assoc_ad_type = "smart"; amzn_assoc_marketplace = "amazon"; amzn_assoc_region = "US"; amzn_assoc_title = "Shop Related Products"; amzn_assoc_default_search_phrase = "cookware"; amzn_assoc_default_category = "All"; amzn_assoc_linkid = "b45319dac495d29e17b5eff312392025";
Source link
0 notes
Link
How to Cook Brussels Sprouts Dr. Mercola Brussels sprouts are probably one of the top vegetables that often get a bad rep, and are often disliked by many children and adults. But this nutrient-dense food is often misunderstood — and improperly cooked — which is why their delicious flavor isn’t always maximized. A member of the Brassica family, along with broccoli, kale and cauliflower, Brussels sprouts look like small, cabbage-like buds that grow on a large stalk. This plant was cultivated in Italy during the Roman emperors’ reigns, and was named after the city of Brussels, Belgium. The cultivation and consumption of this vegetable has been referenced since the 1200s. The thing about Brussels sprouts is that they can be tricky to cook. Leave them on the stove for too long, and they will turnmushy, overly smelly and will lose their bright green color — a sign that they’re overcooked, making them unappetizing. However, if properly cooked, these vegetables will have a bright green color, a pleasant, nutty-sweet flavor and a mildly crisp texture. How to Cook Brussels Sprouts: Prep Them Properly First Whether you’re making pan roasted, baked, sautéed, grilled, fried or steamed Brussels sprouts, there are three important preparation steps you need to follow: washing, trimming and cutting. Here are some basic steps to get you started. , Wash the Brussels sprouts using lukewarm water, either by running them under the tap or submerging them in water in a bowl for 10 minutes. Remember to use lukewarm water specifically, as it is better in removing dirt and chemicals than cold water. While the first one is faster, the second method actually cleans them better, dislodging dirt and chemicals both on the exterior and in the inner folds of the leaves. You can also add baking soda to help clean Brussels sprouts more thoroughly. This is crucial if you’re working with conventionally produced vegetables, as baking soda has been found to help remove pesticides better than just water. According to one study, baking soda can remove as much as 96 percent of toxic pesticides that contaminate most produce, such as the fungicide thiabendazole and the insecticide phosmet. The researchers used a concentration of about a teaspoon of baking soda for every two cups of water, which they deemed an effective ratio, and used it to gently scrub the produce for 12 to 15 minutes. The only disadvantage with soaking them is that the Brussels sprouts can become waterlogged. If you're going to sauté, grill or roast them, you have to allow them to dry first. Using a ceramic knife, trim a little bit of the tough stem off, which will make the vegetable more tender. Remember not to remove too much, no more than an eighth of an inch, or the leaves will fall apart while cooking. Afterward, remove any brown or yellow leaves, as they’re already wilted. Cut an X shape into the top of the sprouts if cooking them whole. This is because the outer leaves cook faster, and by the time the center is cooked, they will already be mushy and overcooked. By carving an X into the sprouts, they will cook more thoroughly. If cutting into smaller pieces, make sure that they’re all the same size so they will cook evenly. The website Enjoy How to Cook recommends Brussels sprouts with diameters bigger than 1 1/2 inches to be cut in half. If you have a variety of sizes, bigger ones should be cut in quarters and medium sprouts in half. Once you’re done prepping, you can now try any of these methods to cook the sprouts. The sweet, delicate flavor of Brussels sprouts pairs well with bacon, beef and other meats, making them a delicious side dish. Each cooking method has its own advantage and disadvantages, so select the one that best suits your preference. How to Cook Brussels Sprouts on the Stove: 3 Methods You Can Try There are three ways to cook Brussels sprouts atop your stove: You can either sauté or fry them in a pan, boil them in a pot or steam them. Check out the differences between these methods: How to Cook Brussels Sprouts in a Pan Cooking Brussels sprouts in the pan not only retains their beneficial compounds better than steaming or boiling, but they also don’t get too overcooked and they won’t have a strong smell. Plus, it also lets them caramelize, bringing out their delicately sweet and nutty flavor. Here’s how to cook Brussels sprouts in the pan: Ingredients: 1/2 pounds Brussels sprouts, trimmed and halved lengthwise 1 1/2 tablespoons raw butter 1 tablespoon Dr. Mercola’s coconut oil 2 tablespoons pine nuts 2 large garlic cloves, thinly sliced Salt and pepper, to taste Procedure: Melt a tablespoon of butter in a pan with the coconut oil, over moderate heat. Add garlic and cook until pale golden. Transfer to a small bowl. Reduce heat to low and arrange the sprouts in the pan, cut sides down, in one layer. Sprinkle with salt to taste. Let cook, without turning, for about 15 minutes or until the undersides are golden brown and crisp tender. Transfer sprouts to a plate, browned sides up. Add more garlic and remaining 1/2 tablespoon butter to the pan and let cook over moderate heat, stirring, until the nuts are more evenly pale golden, about 1 minute. Spoon this mixture over sprouts and sprinkle with pepper. As a side dish, this recipe makes two to three servings. How to Boil Brussels Sprouts Take note that boiling Brussels sprouts can cause some of their flavor to leech out. However, if you’re after a mild-tasting dish, then this would be perfect for you. Here’s how to do it. Ingredients: 1 quart Brussels sprouts, washed and prepped 1 1/2 cups water 1 teaspoon salt 1/4 teaspoon pepper 2 tablespoons raw butter Pepper, to taste Procedure: Place the sprouts, salt and water in a saucepan, until completely submerged. Add more water if needed. Cover the pan and boil sprouts gently, for 15 to 20 minutes, or until crisp tender. Drain and season with butter pepper. Serve while hot. How to Steam Brussels Sprouts Steaming is a good way to cook Brussels sprouts, especially if you don’t want to use oil or butter. It makes them tender but not overcooked, and they do not end up waterlogged or soggy. You can use a steam basket or just place the vegetables in the pan. Direct Steaming Method: Fill the pan with a half-inch of salt water and let boil. Add the sprouts, cover and reduce the heat to medium-low. Let cook for five minutes or until sprouts have become tender to the bite or the water has evaporated. Using a Steamer Basket: Place an inch of water in a pan and let boil. Place the sprouts in a steamer basket and place over the boiling water. Let steam for five minutes or until tender to the bite. How to Cook Brussels Sprouts in the Oven Roasting is a wonderful way to enjoy Brussels sprouts, mainly because it gives them a deeper flavor. The natural sugars in the vegetables are caramelized, highlighting their inherent sweetness. Here’s what you should do: Ingredients: Brussels sprouts, prepped and halved or quartered Coconut oil Salt and pepper, to taste Herbs and spices (optional) Procedure: Preheat oven to 400 degrees F. Toss the sprouts with salt, pepper and coconut oil, and any herbs or spices you might like. Make sure the vegetables are thoroughly but thinly coated so they will not dry out. Place the sprouts in a roasting pan, in a single layer and into the oven. Let cook for 35 to 40 minutes until they are nicely browned. Halfway through cooking, stir them. You can also add in pine nuts, cheese or almonds. Serve and enjoy. A great ingredient that will add a depth of flavor to oven-roasted Brussels sprouts is balsamic vinegar. You can check out my Balsamic Drizzled Brussels Sprouts recipe, a variation of the recipe above. How to Cook Brussels Sprouts on the Grill If you love hosting barbecues, then grilled Brussels sprouts will be a wonderful dish you can make. Grilling adds a smoky flavor to the sprouts, complementing its natural sweetness. Try this recipe: Ingredients: 16 ounces of Brussels sprouts, halved 2 tablespoons raw butter, melted 2 teaspoons garlic powder 2 teaspoons cracked black pepper A pinch of salt 1 lime, halved Procedure: Brush butter over the sprouts and season with pepper, garlic powder and salt. Place the sprouts on the preheated grill and let cook until tender, and have grill marks. This would take about 10 minutes. Before removing from the grill, squeeze lime juice over the sprouts. Serve while hot. Here’s a Healthy Meat Recipe That Features Brussels Sprouts Brussels sprouts are versatile — as noted above, they can perfectly be served on their own, as a side dish or a healthy snack. However, you can also use them as an ingredient for another dish. Here’s an example: Braised Pork Shanks recipe by Australian chef Pete Evans. Ingredients: 2 organic pork shanks (about 2 pounds each) 1 pound Brussels sprouts, trimmed Sea salt and freshly ground black pepper 3 tablespoons good-quality animal fat, plus extra if needed 6 French shallots, halved 3 garlic cloves, chopped 3 carrots, chopped 2 tablespoons tomato paste 3 tablespoons Dr. Mercola’s apple cider vinegar 1/2 teaspoon crushed red pepper (optional) 1 rosemary sprig, leaves picked and roughly chopped 1/2 teaspoon fennel seeds, toasted 2 teaspoons paprika 14 ounces canned organic whole peeled tomatoes 6 cups organic chicken bone broth 2 bay leaves Procedure: Preheat the oven to 300 degrees Fahrenheit. Season the pork shanks with salt and pepper. Melt the fat in a large flameproof casserole dish over medium-high heat. Add the pork shanks and cook, turning occasionally, for six minutes until golden brown. Remove the shanks from the dish and set aside. Add more fat to the dish, if needed, then add the shallots, garlic and carrots, and cook, stirring occasionally, for five minutes. Stir in the tomato paste and cook for a further minute until the vegetables are lightly caramelized. Add the vinegar, stir to deglaze and cook until the vinegar has evaporated, two to three minutes. Pour in 1 cup of chicken broth, bring to a boil and simmer until reduced by half, about five minutes. Return the pork shanks to the dish, then add the Brussels sprouts, chili flakes (if using), rosemary, fennel seeds, paprika, tomatoes, remaining broth and bay leaves. Stir and bring to a boil. Cover with a lid and cook in the oven for two hours. Flip the pork shanks in the liquid, add more broth or water if needed, and cook for another two hours until the pork is tender and falling off the bone. Remove the shanks and vegetables from the braising liquid with tongs. This recipe makes 6 to 8 servings. Brussels Sprouts Nutrition and Health Benefits Despite being overshadowed by other Brassica family members, Brussels sprouts are one of the most nutritious vegetables out there. It’s a good source of manganese, potassium, fiber, choline and even B vitamins. In addition, they boast of an impressive array of antioxidants and phytochemicals, which may help fight diseases like cancer. Brussels sprouts contain glucosinolates, sulfur-containing compounds that your body uses to make isothiocyanates, which activate cancer-fighting enzyme systems in your body. These vegetables have been actually linked to the prevention of various cancers like colon, ovarian cancer and more. Brussels sprouts also help prevent inflammation. Aside from vitamin C, they contain important antioxidants like isorhamnetin, kaempferol, ferulic and caffeic acids, and the relatively rare sulfur-containing compound called D3T (3H-1,2-dithiole-3-thione). These antioxidants help ward off chronic oxidative stress and curb inflammation in the body. Don’t Say ‘No’ to Brussels Sprouts — Learn to Cook Them Properly Instead Brussels sprouts get a lot of hate from adults and children alike, but that’s likely because they’re not properly prepared. Follow the tips above when cooking these vegetables, so you can truly enjoy their crunchy texture and sweet, nutty flavor — who knows, this nutrient-dense green veggie may just turn out to be your new favorite food!
0 notes
Last Seen Blogs