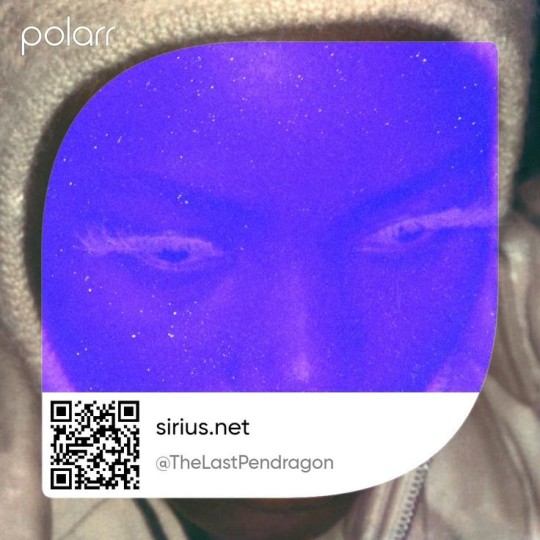
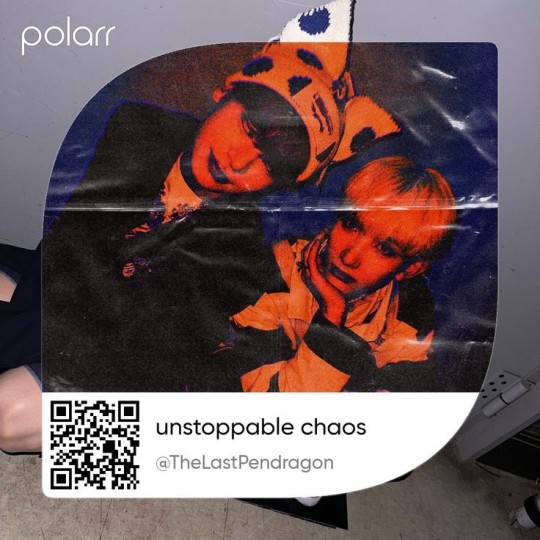
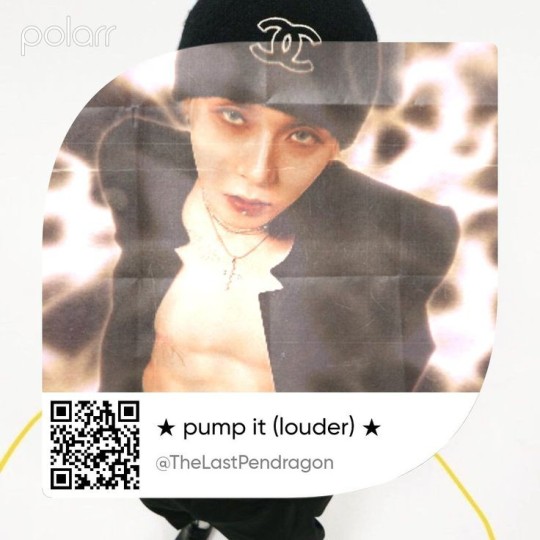
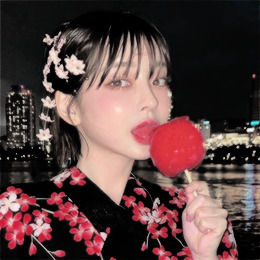
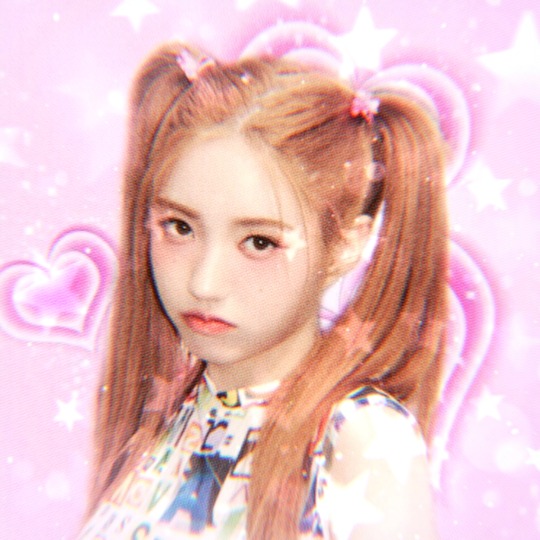
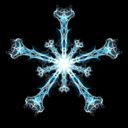
#polarr effect
Text
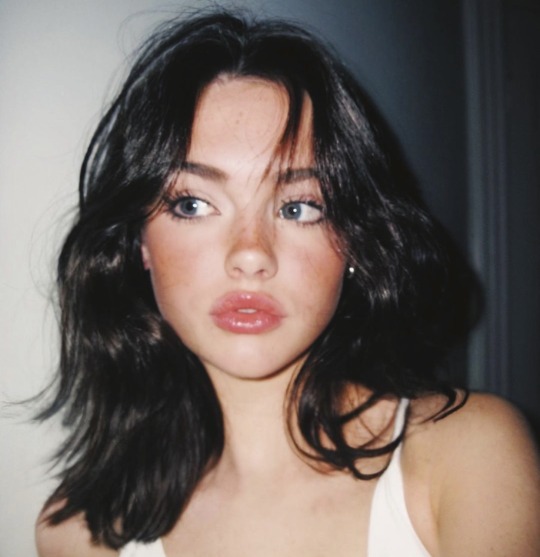
THE COOLEST Y2K GRAPHIC FILTERS (POLARR PACK)

here i am, once again (if you sang "victorious" theme song we should probably marry rn), bringing a new "the coolest pack" and i can genuinely say this is the coolest pack. the filters bring the y2k vibe, specially the graphic design, like magazine and fanzine. i hope you like them. save them below!
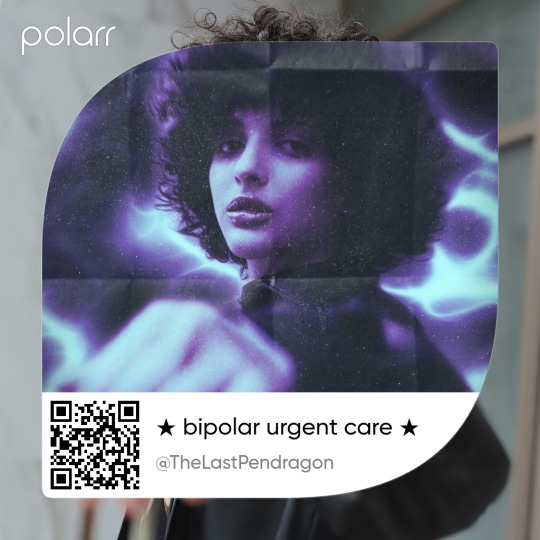
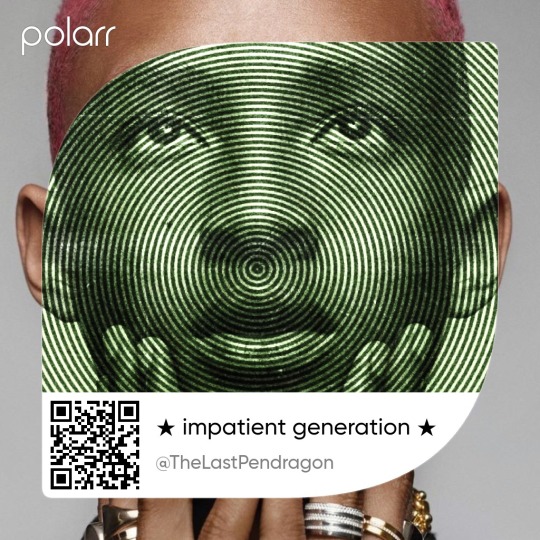

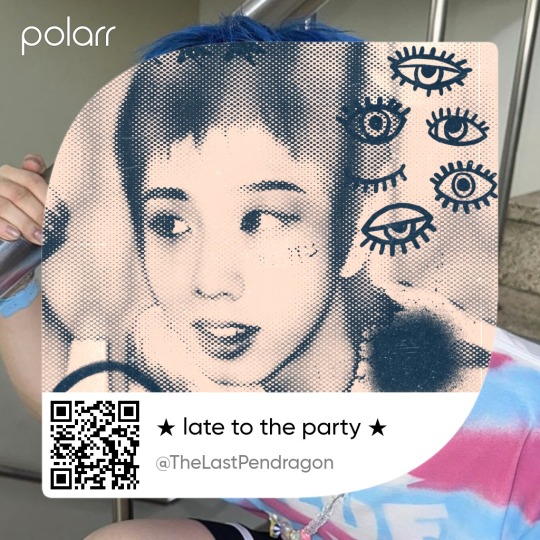

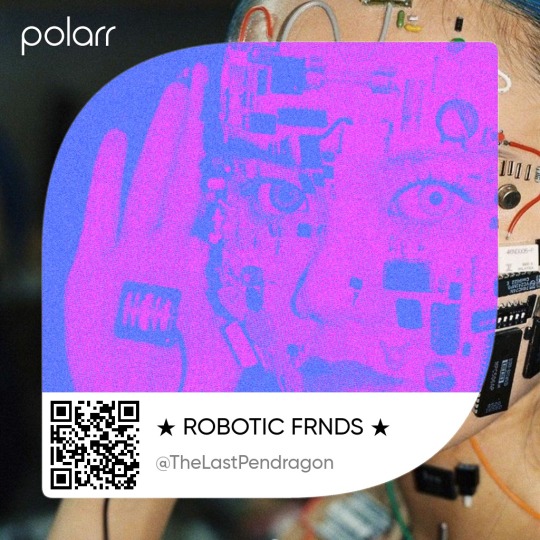
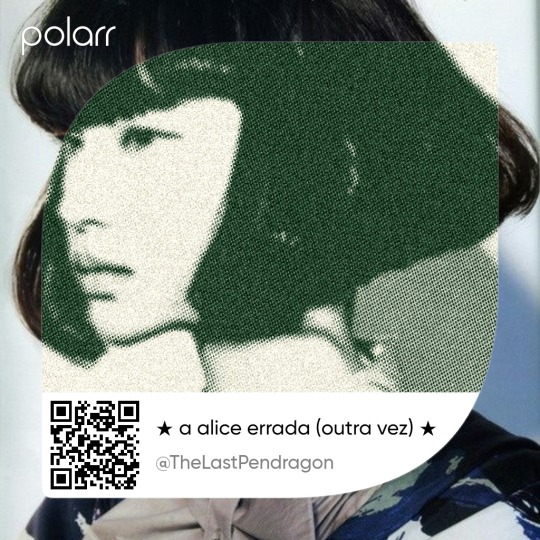
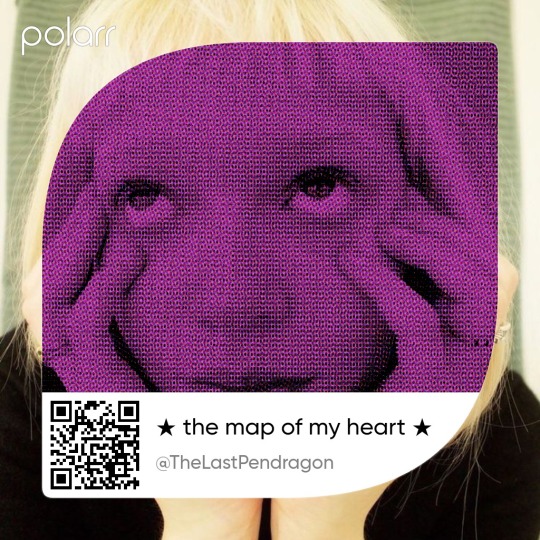
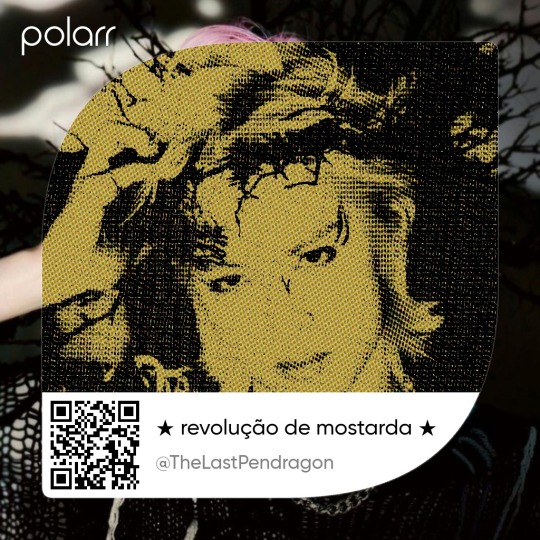
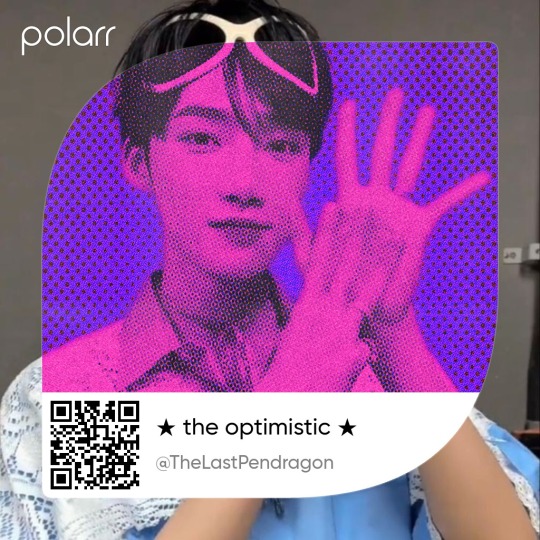


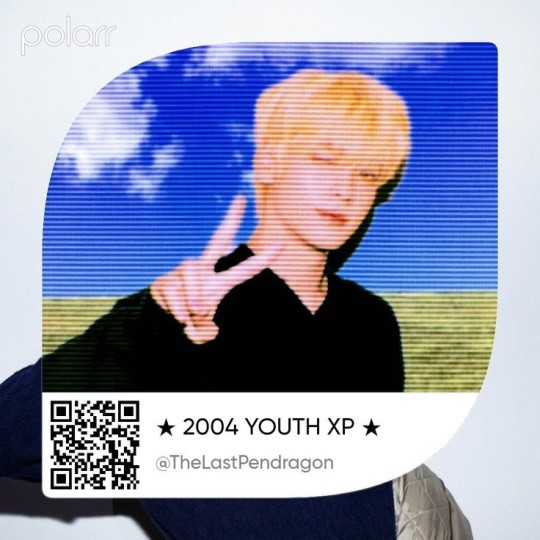
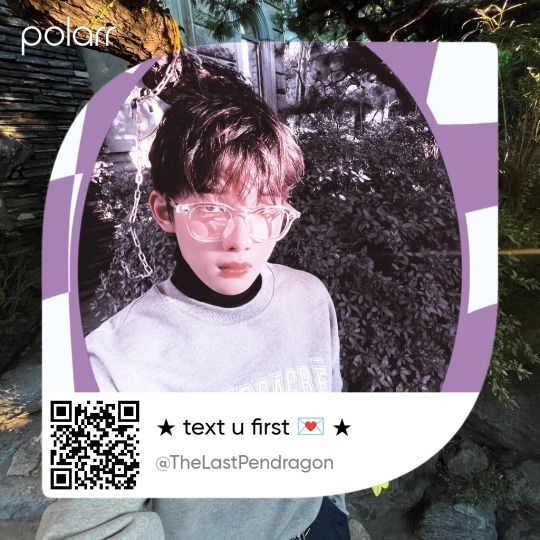
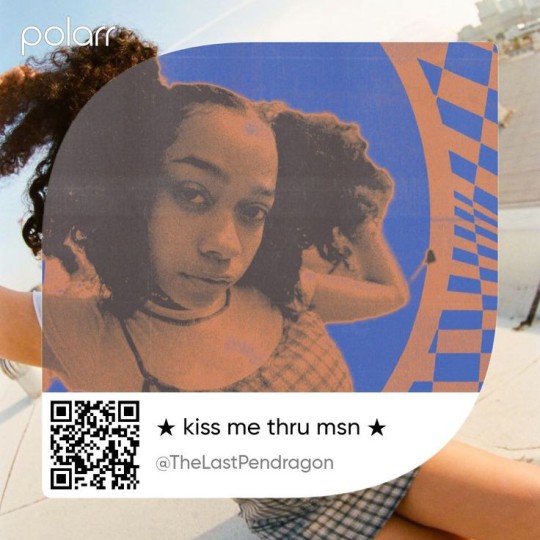


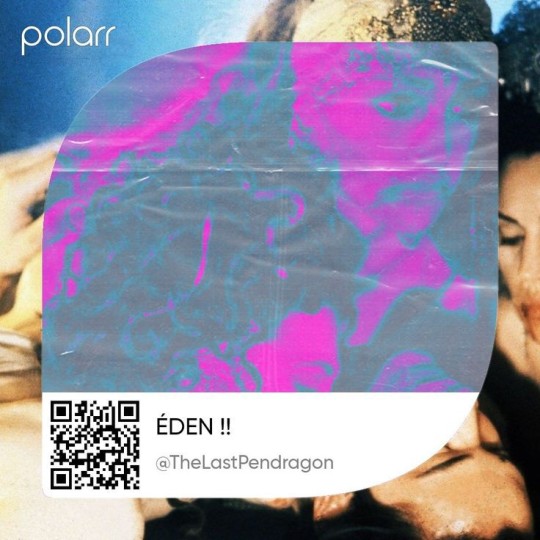


rules: do not use it to make yours, do not claim as yours, only for personal use. this is free, but i'd appreciate like or reblog.
#filter polarr#polarr#polarr filter#code filter#filter code#filtros polarr#polarr code#code polarr#polarr style#style polarr#polarr pack#polarr collection#psd#free psd#free filter#polarr tutorial#polarr effect#made with polarr#filtro#tbz#sunwoo#sunwoo icons#y2k style#cyber y2k#y2k aesthetic#y2kcore#y2k moodboard#y2k magazine#icons with polarr#icons with filter
25 notes
·
View notes
Text


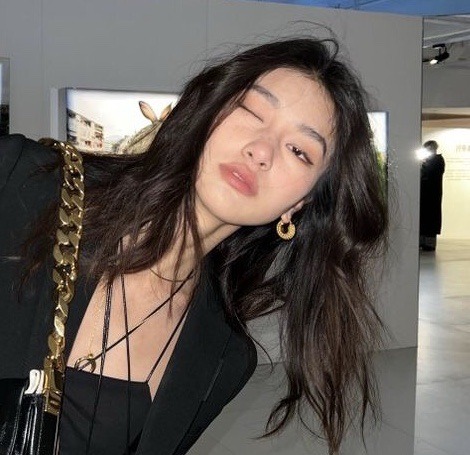

like or reblog if you save
#twitter icons#icons polarr#polarr effect#icons aesthetic girls#girls icons#pinterest icons#pinterest girls#dixie damelio icons#alyssaerenee icons#eirunneba icons#gracie mckenna icons#site models twitter#pdm.clara icons#christina nadin icons
103 notes
·
View notes
Text
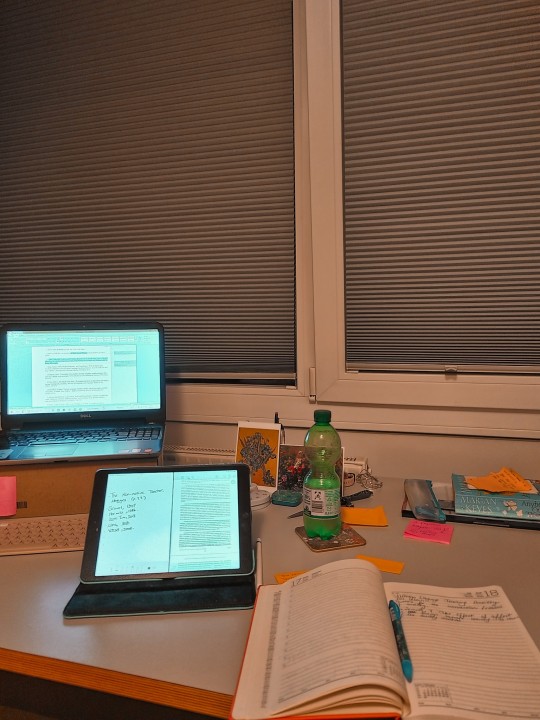

late night article reading. ฅ^•ﻌ•^ฅ
🎧 carrying your love by david morris, dover beach by baby queen
#studying#studyblr#studyspo#studystudystudy#study blog#study motivation#student#studygram#studyinspo#lunlunstudies#deskgoals#desk setup#desk#desk aesthetic#study desk#study area#study space#study hard#studywithme#thank u polarr for this effect ehehe#and also thank you my dear phone bc the night mode is just amazing???
518 notes
·
View notes
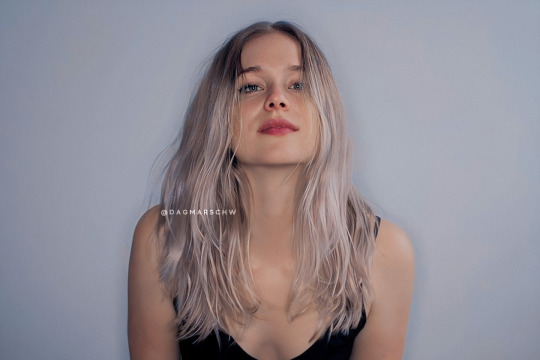
Text
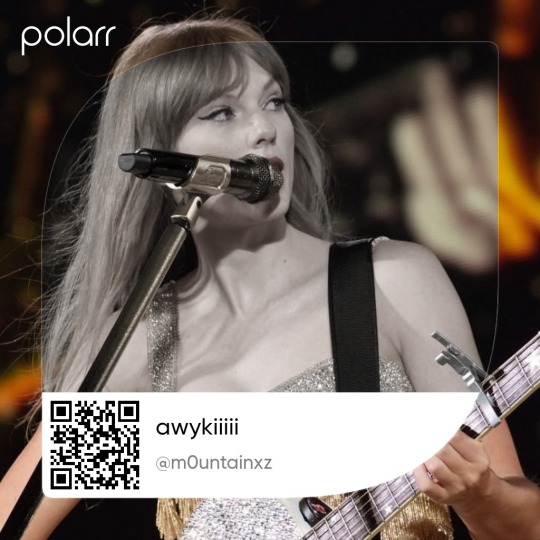

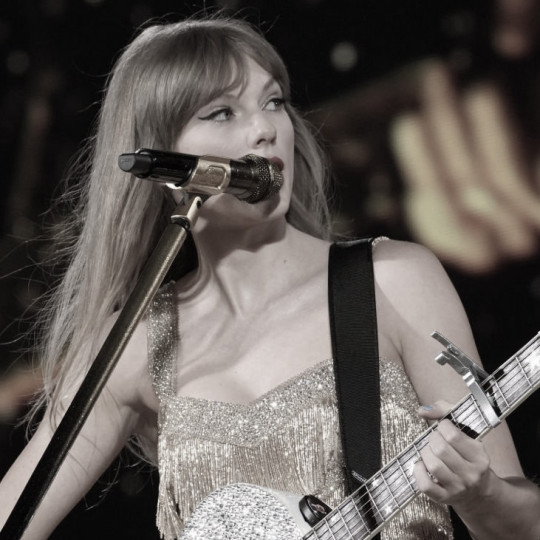
olá, vi que algumas pessoas pediram pra eu liberar a receita/efeito que eu uso na maioria dos meus moodboard's. Para quem não tem o celular compatível com o polarr, não se preocupe, pois tem como utilizar a receita pelo lightroom. ♡☺️
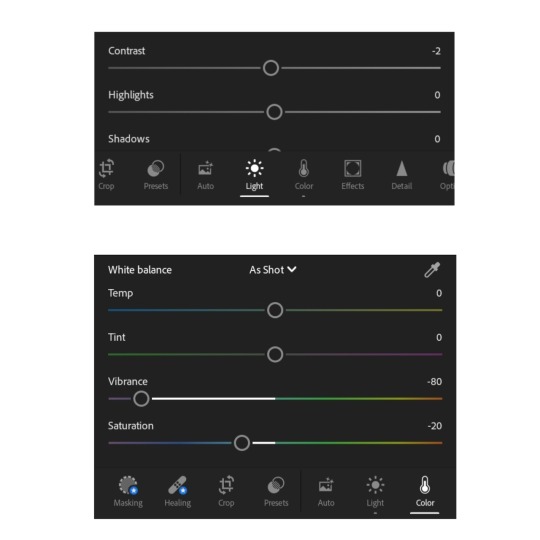

Hello, I saw that some people asked me to release the recipe/effect that I use in most of my moodboard's. For those who don't have a polarr-compatible cell phone, don't worry, you can use the recipe in lightroom. ♡☺️
#m0untainxz#kpop#moodboard amino#ddc#polarr code#icons with polarr#icons with lightroom#vsco effect#moodboard edgy#messy layout#messy icons#taylor swift#the eras tour#moodboard skz#moodboard coquette#moodboard couple#clean moodboard#moodboard messy#design amino#polarr filter#lightroom filter
131 notes
·
View notes
Text


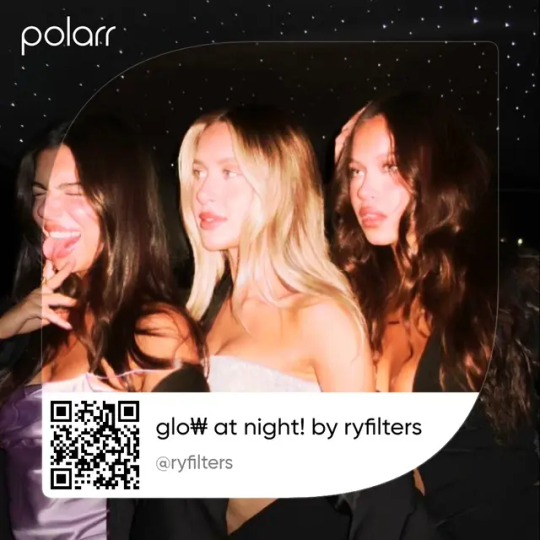
GLOW EFFECT 🌟
READ!
rules: follow me on Instagram/Polarr + like or reblog
regras: me siga no Instagram/ Polarr + curtida ou reblog
GIVE THE CREDITS IF YOU USE 💗/ DON'T REPOST🚫
#code polarr#polarr code#polarr filter#polarr#psds#free psd#filter#makersleague#dailypsd#cottagecore#glow effect#soft filter#soft moodboard#soft aesthetic#glow up#glowingskin#glow in the dark#glow aesthetic#soft effect#paris fashion week
11 notes
·
View notes
Text
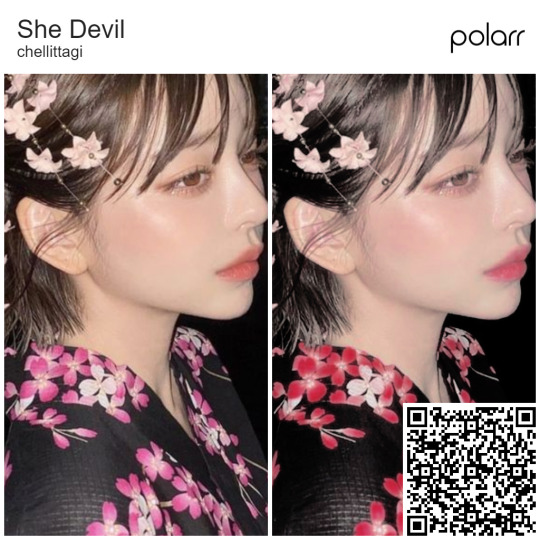
04: She Devil | Original psd: She Devil by @opulenceps. Year: 2015

All the filters belongs to me, don't copy or repost. The images use to make the previews are not mine and had no intention to violate copyright rules. I pick them from pinterest, If any of these belongs to you and had been share whitout your consent, please tell me so I can change.
#polarr#filter#filters#photo filters#polarr codes#effect#effects#polarr code#polarr filters#polarr filter
3 notes
·
View notes
Text

{.psd 322: Ito} by opulenceps // • download •
That’s made by me, what means… don’t copy dude. You can change the layers if you want to. I’m not taking requests, cause I like to keep my creativity and do what I want to do. I do not reproduce any effect. Like or share if you download it. (before/after)
• Polarr Code: instagram // See more in Instagram.
#psd#psds#coloring#colorings#psd coloring#psd colorings#soft psd#soft psds#pink psd#pink psds#pastel psd#demis#322#hisources#yeahps#dailypsd
130 notes
·
View notes
Note
How are you making the headers for the stories? They are so nice
headers tutorial!!
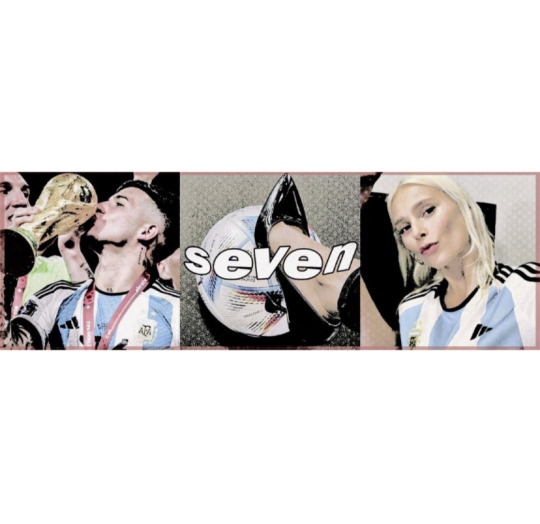
1. first pick three pictures that have a similar theme. for example i go on pinterest and find a picture from a player i really like and go in the suggested section to see if there are any more pictures from that event or match. for example:

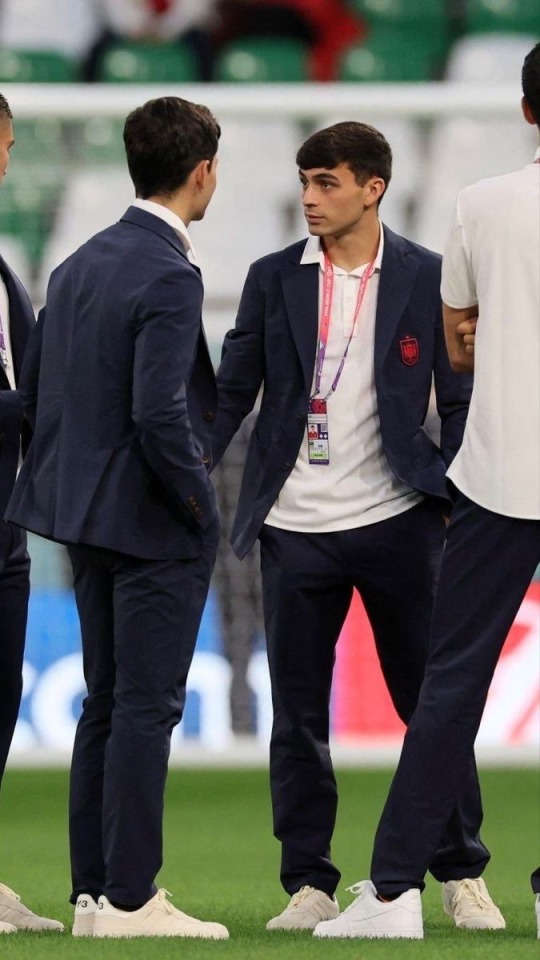

these are all of pedri wearing the same suit so i could use these
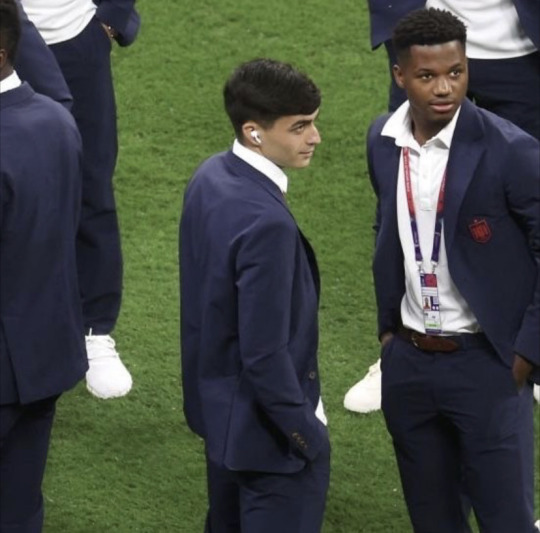
2. place your three pictures and turn them into square format. you can do this in your settings or any editing app you have. (i use alight motion) example:
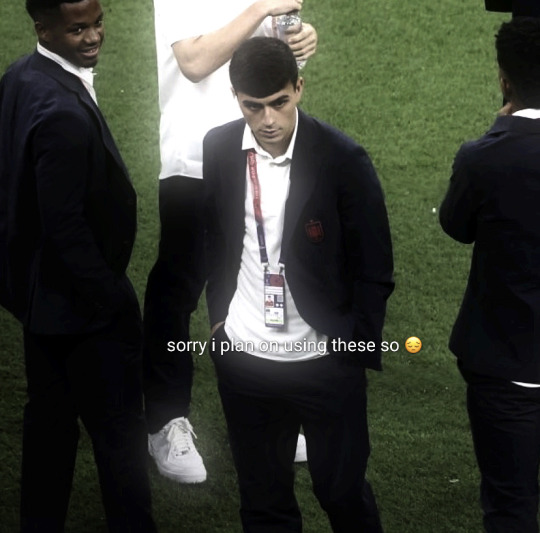
3. once they’re all in square format you can add any coloring you want on them. i used to edit so i use my old coloring but you can go on polarr and apply whatever filter you like! example:

4. afterwards go on whatever app you use to edit and them together. once again i use alight motion.
i also use this picture for reference
it’s from an enzo fic on wattpad unfortunately i don’t remember who the author was but all credits to them for giving me the inspo to do the headers
so the end result should be this:

for the border i usually choose a color that kind of ties in with the all the photos? here it’s a dark gray almost black but i could’ve done a dark green as well or maybe even a dark blue or white.

for the border i usually add rectangles and make them really skinny and simply make them a bit transparent to add the border effect like in the reference pictures
i hope this helped 😵💫
20 notes
·
View notes
Note
hiii can u do a tutorial on making layouts.. 👉👈
hihi !! I'm not 100% on what you mean, so this is more of a walkthrough of my process rather than a tutorial, but I hope it helps nonetheless!

my process consists of 4 steps: gathering resources, cropping, editing, posting.
︵☆ Gathering Resources 〃︶
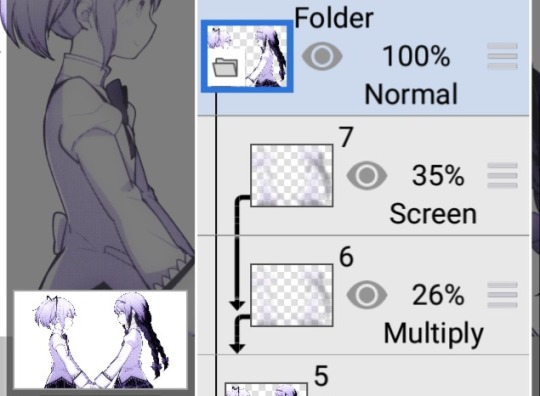
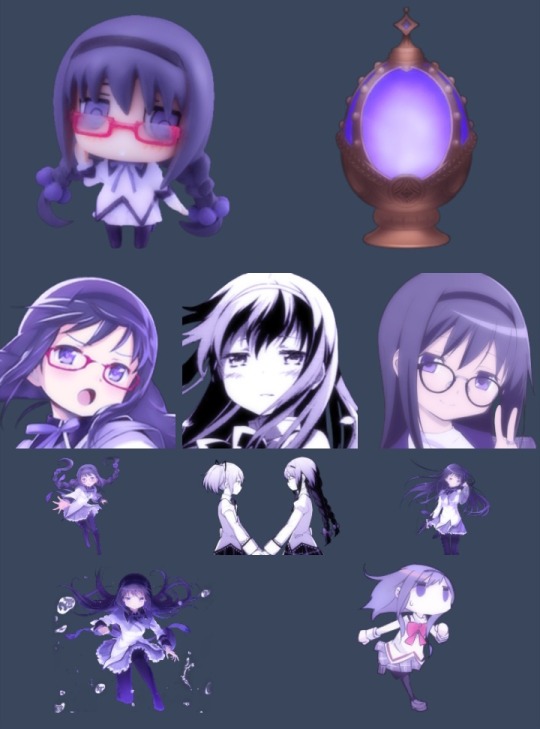
Gathering resources is either the easiest or the hardest part of the process. Generally I use the source's wiki to gather official art, although some blogs here on tumblr also post transparents and assets. Sometimes I make my own transparents too, like the diona in these layouts that I transparented from this artwork.
All of these are taken from @/madomagitransparent !! It's good to gather more than you think you'll need, as sometimes it just doesn't crop well or work with the filters. I have a surprising amount of icons and headers that have been scrapped because of this.

︵☆ Cropping 〃︶
I use ibis paint to crop all the resources i've gathered down to either their icon or header size. This isn't required, but I like making sure everything is the same! Some platforms are also really particular about their header sizes, so this just makes sure none of your hard work is getting cut off when they're actually used.
For these layouts I stuck to official artwork and merch, but you can also use photography and do these same steps!

︵☆ Editing 〃︶
From there, you can use any editing software you're already familiar with! I personally use my own filters on polarr, but other editors sometimes post their own codes or psds for free use! I'll try and do a polarr tutorial at some point too, since it's really trial and error and a lot of the tutorials I found didn't really help me when I was starting out.

A thing to note if you are using polarr is that it doesn't support transparency! I'm unsure if this is a general thing, or if it's a paid feature, but either way all you have to do is reopen ibis paint, and use a clipping mask to bring it back!

For these layouts, I also used ibis to add a subtle blur effect! I can't find the tutorial in which I initially learned about this, but tldr: duplicate your image, gaussian blur, then use blend modes and opacity to get the effect you want!


︵☆ Posting 〃︶
Then the easiest part, posting! Sometimes I test layouts on a spare blog I have, other times I just mess around in the post editor to pair the icons up to headers. The people using your layouts will likely use a different combination anyway, so don't overthink this!
finished layouts can be found here ♡

19 notes
·
View notes
Note
How did you color your pictures? They look so good!!
Hii thank you!! 💗 I usually use the website Photopea which is kinda like free after effects but for pictures and gifs
Example:

But!! For the "your bubblegum pink lips" fic I used the app Polarr.
Example:

Pls feel free to DM me if you want a tutorial or if you have any questions, I'm not scary dw 🫶
7 notes
·
View notes
Text
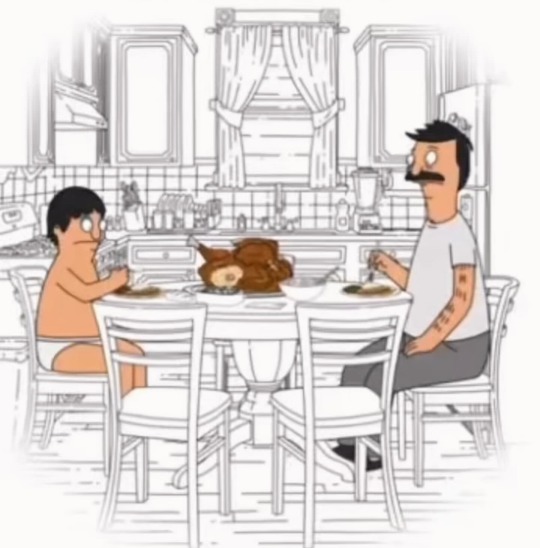
All right, because @babsvibes asked me how I picked colors for my latest Thanksgiving art piece yesterday, I’ve decided to make an official walkthrough of how I do coloring/shading and lighting for my pieces!! This isn’t technically a tutorial, but maybe you can count it as one?? Take everything I say with a grain of salt, though, as I’m just a self-taught artist who still has a lot to learn!!
Usually, the way I start coloring is by taking a screenshot from the show and take the colors directly from there. Having a screenshot is also handy so I can use it as a reference! Is it cheating to take colors directly from the show?? Maybe, but I like doing it so so know the colors are exactly correct.
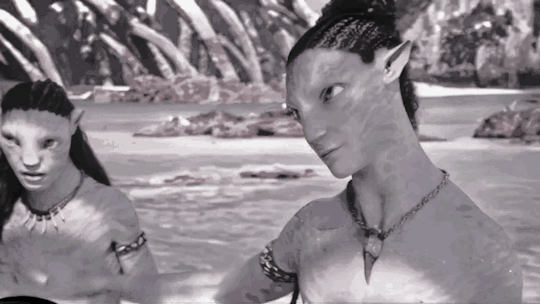
Using my latest piece of Bob and Gene eating Thanksgiving dinner together, I used this screenshot as both a reference and to take the colors:
Then, to do my shading, I take a shading brush in Procreate and paint in everywhere where there would be a shadow. I’ve trained my eye to look for places where I know light wouldn’t really touch, such as below an arm or neck or directly under a character’s hairline. Then, when I’m done, I just lower the opacity and pick a layer setting that looks the nicest to me. This is what my latest piece’s shadow layer ended up looking like (with the opacity turned up a bit):
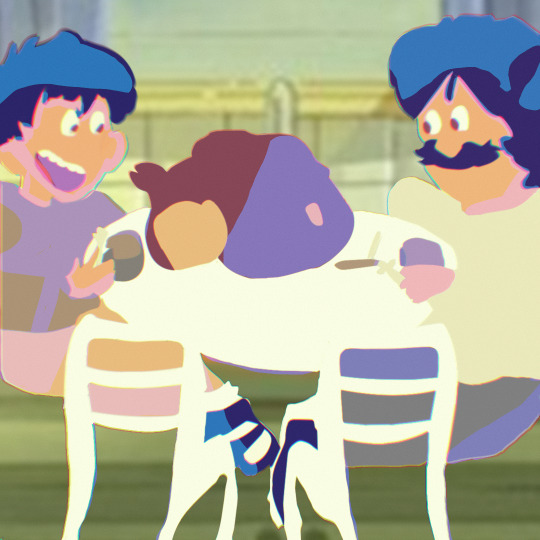
Then, once I’m done with shading, I go on to lighting. I use a new technique now where I just paint in everywhere else (AKA everywhere I didn’t put in a shadow). I used to not even do lighting, because I found it complicated, but I feel it adds a nice touch to my pieces now. The way I do it is kind of tedious, but it’s what I’ve found I can help me understand lighting the easiest. Sometimes I also duplicate my lighting layer, use a Gaussian Blur, then turn the layer to “Add” to create a glowy effect. This glowy effect is usually reserved more for things like torches and flashlights, but I feel as if it gives my lighting an extra “oomph”. Here’s what my lighting layers looked like:

And to make my colors pop even more, I use my phone’s edit feature to go through the process of putting on a nice-looking filter and going insane with all of the features! I’ve found it has a really nice effect.

If I want to go even crazier (yes, I actually do this), I might go into this photo editing app I have on my computer and do even more messing around with filters and colors and the like.
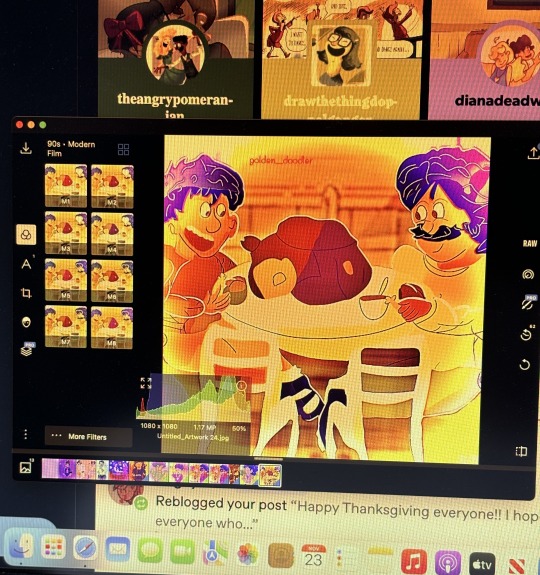
It’s called Polarr Pro Photo Editor for anyone who’s curious!! I also put on my signature in here if I forgot to do it in Procreate.
But that is how I do my coloring and shading/lighting!! I’m still learning and I’m sure I’ll continue to improve. I definitely still have a lot to learn when it comes to shading and lighting!! There are honestly so many ways you can tackle this, so my method absolutely isn’t the end all be all!!
I even have a different technique for when I’m doing a simpler piece or just want some shading that has a lot more texture. I duplicate my color layer, lower the saturation, make a mask, and “paint in” the light really quickly with a super textured brush.
Here’s what it looks like before:
And here’s what it looks like after!
I actually find this technique a bit difficult because my brain works in shadows and finding where shadows would hit, so painting in the light is a challenge. But it can be fun too!!
If anyone has any techniques of their own, feel free to share them!!
#personal#art techniques#special thank you to babs for asking me about this and inspiring this post❣️#i always used to dread shading and lighting (sometimes i still do) because of how difficult it can be but i have a lot more fun with it now#i also adore using as many crazy filters and settings as possible to make my pieces look nice#and random color palettes because slapping those on is always super fun#i am NOT qualified to give out art advice in the slightest so like i said this isn’t technically a tutorial just how i do things#but if you want you can still consider it one!
3 notes
·
View notes
Text
𝚑𝚘𝚠 𝚒 𝚖𝚊𝚔𝚎 𝚖𝚢 𝚎𝚍𝚒𝚝𝚜

1. PICK


Pick the pictures you want to use and download them. I often pick a picture of a person and then a background that already fits or I'll edit to fit (change colours with polarr). I only use stickers from picsart or ones I downloaded from tumblr.
2. CUT
In picsart I tend to start with a blank canvas (scroll all the way down to see) and then add the bg after adding the pic of the idol. That way I can erase the background around the idol. For me, it always looks better that way. If you want to do it the other way around that's fine too!
After the background is added you can start adding your stickers. This edit is quite simple. I only added one sticker.
3. EFFECTS
If you've seen my previous post you might notice lots of effects recently. That's because I've started using prequel for almost every single one of my edits. For some people prequel might be a pain in the ass to work with since the app keeps crashing when you try to save your edit. That doesn't keep me from using it, though. You can even screenshot what you made instead of saving.
For this edit I used this one 'print' effect I discovered a while ago. It basically gives it this paper printed look. Sometimes it'll just make the pic look lq but i think it looks fun. I turn down the colour filter, switch off the text, get rid of the blur, etc. until only the print texture is left.
The I go into 'adjust' and add vibrance, skin colour, make the image colder and add abberation which gives it that 3D-ish look.
4. ADJUST

The last step! Here I just play with the brightness, saturation, colours, etc.
There's no real recipe for this one. Every picture will look different even if you follow the same steps.
For this pic i lowered the brightness and highlights and made the shadows and blacks brighter. I made the image even colder and gave it a green tint to cancel out yeseo looking literally red and purple. I made the purple hue more blue and the magenta hue more pink and added saturation and brightness for both of them. And that was it!
23 notes
·
View notes
Note
Hi, your edits are great. You’re so creative with them, the tsc fandom is lucky to have you. I’ve joined an account to make edits for fandoms that aren’t popular or have that much people. I want to make more and different edits and I was wondering what apps you use? Thank you for your contributions.
HIYA✨🌿🎄
Thank you so much 🙇🏼♀️ I'm using android btw, if u have iphone - you'll be able to find much more interesting apps ;-; but anyway, let's start!
PicsArt - effects, filters, stickers
Videoleap - video effects on photos/videos, montage, chromakey option (for example, u take this glittery gif, add it on your photo and click on chromakey option)
Polarr - filters, general photo editor
Lightroom - almost the same functions
Prequel app, 1998 cam, mojo
I hope I helped 👉🏻👈🏻🥺
8 notes
·
View notes
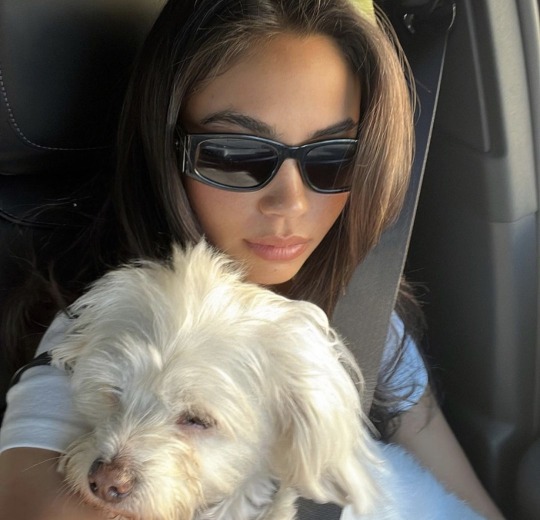
Note
The other day, I saw some photos that you edited of Elizabeth Lail, and I loved the filters you used. I would like to know how you edited those photos, what effects you used to make them clear but smooth at the same time. I hope you can answer my question.


hi! I always use Remini to add quality and the filter is from @charmingfiltrs (on Instagram) the name of the filter is fifty shades of beauty 🖤 (I use polarr to add the filter to the image )
10 notes
·
View notes
Note
Any advice on Tumblr editing and where to start? Apps? Anything? Would love the support!! Love the edits xx
hi! so first of all, i suggest you start off with over studios (now called go daddy in the appstore, i know it’s weird) and picsart to help grasp the basics of editing first. most editors use photoshop or paid apps like superimpose, but you don’t have to use those to be a good editor. i’ve been using over for a few years and i still manage!
once you’ve gotten the hang of using these apps, i suggest using ibispaint for extra effects like 3D text, outlines, recolouring etc. i also suggest polarr for making photos black and white (although they suck and put most of the stuff behind a paywall, you can still get around it by screenshotting your finish product.)
then, at last, phonto to apply text. there are lots of cool fonts online that are similar to fonts you get in photoshop! websites i recommend are befont.com & dafont.com, befont for fancier stylistic ones and dafont for basic ones. text can make or break an edit so i suggest you not go crazy with fonts when you’re editing, use one basic font and one fancy one and it’ll look good!
thank you for the compliment! it made me smile <33
5 notes
·
View notes
Note
hello ! ive been wanting to start an editing blog for a while now, but i don't think my edits are good enough for it yet. do you have any tips for getting better at it ? ive been following you for a while and i find your blog to be really pretty !!
alright, this is probably gonna be a long post so everything will be under the cut
there are a ton of things that could make you improve, so here's a list!
1- Experiment, and experiment a ton: This may be the most important one! experimenting new styles and new effects is extremely useful when trying to become better at editing, use new apps (i used to only edit on Ibis Paint but recently I started using apps like PicsArt and Polarr that are way more centered around editing, and that's been extremely helpful!) try new effects, and even look at other people's work to get inspired! (obviously I'm not telling you to just go over and copy another person's style lmao) look at how they position stuff, look at how they use filters and all that, this was something extremely helpful for me to get better at editing!
2- Get new resources: Whether it be new filters or new vectors! on Tumblr there's a ton of resources for that, some creators make borders, some make free to use PSDs and Polarr filters, and on apps like Pinterest is really easy to find stuff like decors and textures for edits! this will not only make it easier for you to make your edits, it can also help with getting motivation to edit, whenever I see a new resource i go "damn i really want to use this in an edit" and then I do it! it doesn't matter if it's just a simple border or decor, everything is a part of the edit, and every single part of it matters!
3- Take your time: Remember when I said that the first one may be the most important one? well yeah forget that, this is the most important part of editing. If at one point you don't feel like editing, then take a break from it! I have done that a ton of times before hehe, and everytime i had the motivation to edit again I did everything in a different way, somehow taking breaks makes me improve, i really don't know why, maybe because i have more time to get inspired from others, maybe because i got some cool new editing resources, or maybe because i learned some new effects, idk, but not only is this part important to improve, it's also an important part to never end up stressing over editing, you said that you wanted to make an edit blog, and sometimes that may be pretty draining to do (i say this from experience lmao) so, never feel forced to edit all the time! maybe do some self indulgent edits before doing some of the requests, maybe take a break of days and return when you finally feel the motivation to edit, decline requests that you know will be tiring to do, anything for you to never feel bad from editing! recently the editing community has been acknowledging stuff like this, so don't expect a bad response from taking your time with editing! (although maybe some rude anons may say some stuff, but don't worry, we don't take those guys seriously around here). So yeah! you are in all your right to take your time!
Aaaaand I think that's it, i wanted to link to some extremely useful posts about this but i can't do a draft when responding an ask and i don't have the links to them sooo :(, but i may do a reblog to this post with all of the links to those posts!, i hope this was useful to you in some way, have a great day!

17 notes
·
View notes
Last Seen Blogs
wolftail7
Laughter In Slaughter
sassybrit
Daily Sassyness

tourdulichtl
Tour Du Lịch Thái Lan
im-kinda-sensitive-ok
Im kinda sensitive ok

paigedillustrates
Paige D. Illustrates