#if you see me reusing the same image with different captions
Text
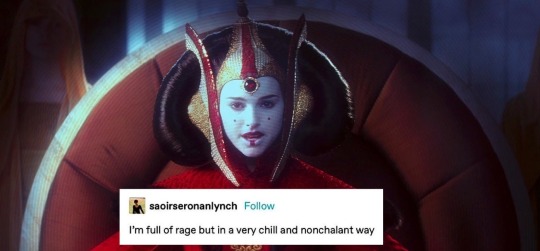
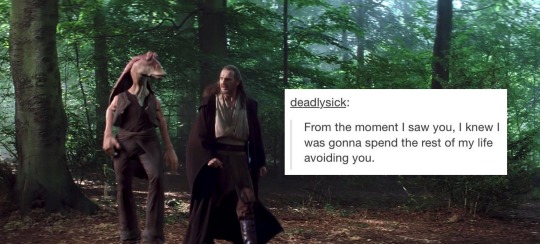


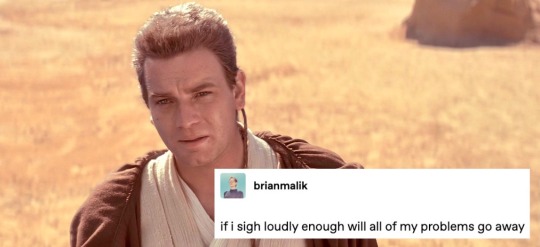


Star Wars: The Phantom Menace (3/?)
Star Wars + Text Posts & Headlines
#if you see me reusing the same image with different captions#no you didn’t#padme amidala#jar jar binks#qui gon jinn#obi wan kenobi#anakin skywalker#the jedi council#the phantom menace#darth maul#naboo#star wars the phantom menace#sw tpm#phantom menace#star wars#star wars prequels#prequels memes#sw memes#TPM text post#star wars text post#mine
1K notes
·
View notes
Note
youre annoying too lol you draw the same woman w different hairstyles. diversity where
Regardless of the fact I know you truly do not actually care for reasoning and are at this point being mean purely for the rush of it, I’ll actually explain why this is—
My [fem!] listeners do all look like the same woman.
That’s because a good amount of my listeners are the same woman. That woman in question being me.
With the exception of a hand full of actual OC’s [Bright eyes, Angel, Darlin’, etc.] the other couple of listeners I have drawn have all primarily been self inserts [A character that’s based purely of my own appearance]—
And, if you ever by chance paid attention, almost every time I draw a self-insert listener for the first time I will clearly label either in the tags or in the caption that the listener is in fact a self-insert.
“Oh but that’s lame why don’t you get creative—“
Honestly? Because it’s what I enjoy— I enjoy seeing myself in some form in the universe.
And, I suppose unfortunately for people like you anon, I am the one behind the wheel when it comes to my art- so I get to make the decisions.
So, if you have a plethora of diverse listener OC’s anon, that’s fantastic! But also if you’re like me and you reuse the same character in the same font, that okay too! This entire series was made to allow the listeners to create their own image of all the characters, feel free to do whatever you want! :)
50 notes
·
View notes
Note
I love your Sam & Max Miraculous AU, I hope to see more in the future. Can you add Flint Paper in it? If so, what would you do with him? He's an ally/friend of Sam & Max.
I imagine that, for the most part, Flint Paper in this au is basically the same as he is in the original Sam and Max media, with the caveat of him being a college kid like the majority of the rest of the cast. He’s either their roommate or their neighbor, but either way they probably share a communal kitchen. He’s COOL. He’s in college, but not like, INVESTED in it, and he’s been doing a lot of like, vigilante stuff on the side despite not having any powers. His family probably comes from money, so it’s not like he has to worry about scholarships like Sam does or employment like Max does, and he tends to blow off his classes a lot to go fight monsters with his bare hands. This results in a sort of mutual idolization between Flint Paper and Sam&Max, in a pattern that almost mimics the Love Square?

Image ID and rest of words under the cut:
Image ID: Flint Paper from Sam and Max as a college kid. He has a mullet and is wearing flannel and ripped pants. Comic book style captions read: Flint Paper (Sam & Max Miraculous AU), shaved eyebrow or cool scar?, shaved sides with dyed streaks (changes colors every once in a while), Mullet, wears Miraculous as queer signifier earring, buttoned-down flannel shirt (cover them up, slut!), sleeves rolled up to show off forearms, got pride bracelets for free at various raves; wears them cuz they look cool, changes it out for a different one every day, torn dress pants (he tore them himself in various scuffles), fancy leather jazz shoes, and *is he gay or European voice* is he gay or a Butch Lesbian? /end id
He’s probably a film student, if only because he reminds me of some film students I knew back in college? He’s got the dramatics for it, and I assume he could use knowledge of practical effects and stunt man techniques for vigilante purposes. Who knows, maybe he even films his encounters and turns in the resulting footage for homework, Peter Parker style.
Eventually, he does get to use the Miraculous, but it’s very mid-late-game, and even then he doesn’t really have a single one that’s HIS (at least, not at first). Sam and Max might trust Flint Paper, but the Commissioner thinks he’s just a violent wild card, so he doesn’t get a permanent one like the rest of the cast. But Sam and Max both like him enough that they’re both thinking of him whenever they need a helping hand, so he ends up using a lot of different powers. He usually ends up with a sort of, like, Tom of Finland/DCAU Superhero aesthetic to his outfits whenever he gets a miraculous, and he’s gonna try fighting the monsters wether he has powers or not, soooo.
(If this was a show that sold toys like Miraculous does, Flint Paper would be the mold that the company reuses for EVERYTHING, and his designs in the show would reflect that. All his superhero designs are pretty much unimaginative reskins of each other, which is both cost effective and ENTIRELY in-character.) (He eventually - EVENTUALLY - ends up with the Ox Miraculous as his default, just cuz that’s the one he’s best at using.) (I’ll draw a buncha his superhero outfits later don’t worry lol)
Oh yeah and he’s also Not Straight. Like. You will see him unironically hitting up the gay bar, and leaving for an evening of no-strings-attached fun with a twink on one arm and a drop-dead Gorgeous drag queen on the other. He’s not gonna SAY he isn’t straight - he’s in college! He’s having fun, he’s experimenting! He’s also the kinda guy who assumes that’s what college is FOR. He’s probably aromantic tbh. He flunked his Art History midterm
#sam and max#flint paper#miraculous ladybug#miraculous au#artists on tumblr#long post#fanart#college au#looney mooney rants#looney mooney art#mooneyart
9 notes
·
View notes
Text
Still thinking about an image description aggregator blog I saw recently that said IDs are not art because they’re an accessibility tool (in the context of “it’s always ethical to grab someone’s ID and add it to the original image as alt text”, which I don’t disagree with)
And like... idk, can���t they be both? It’s a translation process. Often, as I’ve been trying to get better at writing IDs that are more useful, more succinct, more able to capture the humor or emotions or point of the original image... it’s using many of the same skills I use to write anything original. Just like translation, there’s no single correct answer and it’s not an unskilled task that everyone will do the same. Visual and written art are good at different things. The process of adaptation is inherently creative. I’ve written some IDs that feel like art in and of themselves, that made me look at the images much more closely to get a better idea of what they’re communicating, and a lot that are just transcription of text which didn’t need to be an image in the first place.
But sometimes it’s an accessibility tool and it’s art.
To the original point, I don’t think credit, here, should take priority over accessibility. I don’t personally care if anybody credits me or reuses/adapts my IDs (although it is nice and motivating to see people reblogging them from me and know that my work is useful--that’s very human). But I don’t think you have to devalue the skill of captioners in order to make that point? Translators and web designers and programmers and all kinds of people who do accessibility work that may or may not be art deserve to be valued, because they’re doing valuable work--the conversation should be about how we want to do that as a community.
13 notes
·
View notes
Text

[image ID: a screenshot of a Tumblr interaction.
On May 3, someone posted, “[cloud emoji]: [redacted] blinkies <3 anti abuse only plz,” with six blinkies, captioned “all made at blinkie.cafe”
On June 2, critical-collective reblogged the original post. A third person reblogged this reblog, saying, “Many of those you would consider pro-abuse would consider themselves anti-abuse, and I can firmly say that even without knowing your stance. Sorry, but this is literally the same as ‘basic DNI,’ ‘DNI shitheads.’”
critical-collective reblogged from the third person, adding the tags, “#tbh i didnt even see that anti abuse thing when i first rbed #i was just captivated by the rolal blinkie #but rbing for that addition #also important to say that you cant really control who uses the things you post to public domain”
/end image ID]
I’ve been seeing this take more and more often among people I would consider friends/closely acquainted comrades, and I strongly disagree. It’s kind of worrying, actually. I’d wanted to address this earlier, and even started drafting this post weeks ago, but unfortunately stress + ADHD made me unable to actually finish writing it until now.
I remember seeing a similar sentiment around here from this following set of answers to anons. I hadn’t wanted to say anything about those answers at the time, because I was triggered and distressed, and thought it wasn’t really important enough of an issue to make a fuss about. But I think I’ll talk about it now, and I’ll also take this chance to address these in the same post, because they run on similar faulty logics.
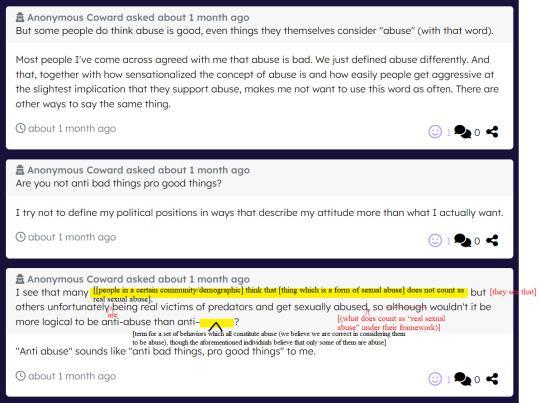
[image ID: three asks sent to a person (not through Tumblr) about 1 month ago.
The first ask:
I see that many [[people in a certain community/demographic] think that [thing which is a form of sexual abuse] does not count as real sexual abuse,] but [they see that] others unfortunately [are] being real victims of predators and get sexually abused [(what does count as “real sexual abuse” under their framework)], so although wouldn't it be more logical to be anti-abuse than anti-[term for a set of behaviors which all constitute abuse (we believe we are correct in considering them to be abuse), though the aforementioned individuals believe that only some of them are abuse)]?
answer:
“Anti abuse” sounds like “anti bad things, pro good things” to me.
second ask:
Are you not anti bad things pro good things?
answer:
I try not to define my political positions in ways that describe my attitude more than what I actually want.
third ask:
But some people do think abuse is good, even things they themselves consider “abuse” (with that word).
answer:
Most people I’ve come across agreed with me that abuse is bad. We just defined abuse differently. And that, together with how sensationalized the concept of abuse is and how easily people get aggressive at the slightest implication that they support abuse, makes me not want to use this word as often. There are other ways to say the same thing.
Some portions have been redacted. The text in brackets was edited in by me to clarify context or make things easier to read.
/end image ID]
(I’m aware that this might make the OPs feel attacked. To clarify, I don’t intend this as an attack of some sort, just as a way to air my disagreements and frustrations and possibly provide useful information or arguments. Usually I don’t say anything at all when a friend/close acquaintance says something which I find problematic, because I don’t want to make people mad/upset at me, and feel like nobody would agree anyway. I’m not mad and don’t want any apologies; just bringing up points for consideration.)
It’s very important to me that people do not confuse what “should” be done from what “can” be done. It’s true, for example, that it’s difficult to truly have control over who reuses your designs you post to Tumblr. That doesn’t, however, make it wrong for you to wish for your creations to be reshared in respectful and ethical ways. Is it actually wrong for someone to violate a “do not use this if you are X”? I don’t know; the ethical considerations surrounding boundaries regarding non-direct interactions like these are far more ambiguous and difficult to determine. That doesn’t mean, however, that we should use doomer arguments—the logic of “you can’t enforce this, which is why you should not expect (want) people to respect this” itself can be applied to anything. Including boundaries that are much more obviously obligatory to respect. Leaving this open is dangerous. A similar set of arguments applies to DNIs in general.
And is it wrong for, say, a bigot to interact with a marginalized person who says “people bigoted against my identity DNI”? IMO, yes, but not really because I’d say “all DNIs are always inherently wrong to violate”; it’s because a bigot, with the beliefs they hold, makes those marginalized people unsafe. But the very same DNIs that are (pretty much) most unambiguously unethical to cross are also the ones which are hardest to enforce, because by definition bigots do not care about the boundaries of marginalized people. But, using this to argue against DNIs as a whole misunderstands the reason why many people say “[bigoted group] DNI.” They know that it’s not really enforceable without a block, but it sends a message: that this is what they want, and it indicates what they believe, and that they are likely hostile to bigotry. The same logic applies to abuse apologia.
This is in no way the same as things like “basic DNI criteria” or “DNI shitheads.” “Basic DNI criteria” and “shitheads” are nebulous, basically impossible to define universally, because they can’t be the same among everyone; they're by themselves vague and extremely subjective. But “abuse” is not such a term. Abuse is possible (arguably easy!) to define objectively, and one should expect people to adhere to a single definition of “abuse” (and believe that it exists). Of course most people don't agree on what constitutes “abuse”—and that is a problem, actually! Most people are abuse apologists; that’s not a good thing. Of course most people aren't the type of edgelord that’s unironically supportive of what they personally believe does constitute “abuse.” That doesn’t mean they’re not actually pro-abuse though; it means they’re wrong thinking some abuse isn’t real abuse. But the solution to that is not to cater to their abuse apologia, to coddle them and refuse to tell them the truth for the sake of some liberal ideals of “tolerance” for a “diversity of opinions.” Some opinions are not valid! Some opinions are harmful!
Bigots (in general) use the exact same tactics, rejecting labels like “racist” or “homophobe” when they’re accused of being such, because they don't believe what they’re promoting or doing “counts” as “real” bigotry or oppression. That doesn’t mean they're right about that. It also does not mean that people should stop saying “I don’t want [bigots] here” because “well what about the [un-self-aware bigots]!!” (They are un-self-aware bigots, not people who just happen to have a neutrally different and equally valid opinion on what constitutes bigotry.)
Ceding that the definition of abuse can reasonably/should be relativized is what abuse-relativizers (and abuse advocates/abusers in general) have been cheering on since forever. They believe that “abuse” is “simply a word to indicate nebulous individual feelings of perceiving Bad Things” because they support abuse and don’t view it as a serious issue specifically defined by exploitation of power/violation of autonomy which is inherently unethical, and view victims as lying, overreacting, contemptible, and unreliable witnesses to or interpreters of our own lives. They apply this view to victims/survivors all the time, dismissing our concerns as simply “subjective feelings” or Moral(tm) Judgment(tm), and cast this labeling as “demonization.”
The term abuse is “sensationalized” in most people’s minds BECAUSE of pervasive abuse culture and pro-abuse attitudes. Of course many people only believe that Actually Extremely Bad actions are “abusive”—they don’t have a good understanding of what abuse is! That is a very bad thing! It is one of the most important factors in making most abuse go undetected and most victims unsupported! (Meanwhile, the actual problem with the anon’s statement and beliefs went unaddressed, missing out on a useful opportunity, because the responder decided to focus completely on the wrong problem.)
I can’t really take this (the responses to the asks) as just some sort of personal preference indicator regarding terminology and comfort levels. It’s clearly a capitulation to abuse culture that fundamentally misunderstands the dynamics at play, and ultimately reinforces these problems.
Yes, much of abuse victim advocacy advises that (at first) you should not directly use the term “abuse” when telling someone that the abusive behaviors they’ve experienced were wrong or that their abuser is harming them. But that has never been a call to keep doing that forever, perceiving avoiding the term “abuse” (them having internalized their abuser’s abusive rhetoric) as some sort of good thing. It’s a crucial part of healing and breaking free from abuse to be able to understand that the abuse was in fact “abuse” and that abusers are abusers.
The word “abuse” is language extremely important to victims/survivors and anti-abuse activists. Abuse apologists’ fear of/aggressive opposition to being labeled abusers is a clear indicator and product of their own ignorance, entitlement, and oppressive ideologies. That makes it even more important to confront their problematic rhetoric and lack of understanding instead of defanging our ability to analyze and critique power dynamics and advocate for ourselves.
Everywhere I look I see people wanting to water down, co-opt, or constrain the language developed and used by survivors because nothing will satisfy them but, ultimately, complete silence. Everywhere people seem allergic to the term “abuse,” complaining that it is “too strong a word” and maybe you shouldn’t use it? I mean it’s kind of harsh/mean/too extreme/subjective/exaggerating/hysterical isn’t it? Just pick a different word!!! (No word ever truly satisfies.) I’m fucking tired of this bullshit and I don’t want traces of it to stick in places where I am supposed to feel safe and have my issues and my needs understood too.
(update: talked it out with the aforementioned third person; we mostly agree)
2 notes
·
View notes
Text
One Lenten Season Later…

(Sorry for the hiatus, I took a break from Tumblr for a while.)
I CHECK NEWS ON NINTENDO ALMOST EVERY DAY AND THEY HAVE TO DROP THIS MINI DIRECT WHEN I DON’T CHECK?!
And suddenly I get an email saying, “This is what you missed from the 3-26-20 Nintendo Direct Mini!” and I freaking lost my—
The shockingly not-spoiling trailer analysis time!

Alvis
Let’s not beat around the bush—Alvis has a core crystal necklace. He is Ontos. This is officially confirmed. You can’t hide that from me, Nintendo!
I’m expecting this to be one of many subtle changes to the game to match Xenoblade 2, and since they have Adam Howden for the epilogue (more on that further down), I wouldn’t be shocked if they re-recorded the Klaus experiment scene or reused VA lines from Xenoblade 2.
Gameplay
Nintendo talks about the game having smoother combat and UI. They also mentioned making quests easier to keep track of. This could mean a lot or a little, specifically, one thing—the little blue line leading to the exclamation point on the map.
“Fashion Gear” is something brought in from Xenoblade Chronicles X. That is where you can choose one set of armor to wear for appearances and another set for the actual stats. I had to look that up, since I didn’t get too into X to realize that was a thing. I think it’s a nice addition, and this forum user nicely sums up my feelings on it: “Finally I don’t have to make Sharla look like a stripper to optimize her!”
https://gamefaqs.gamespot.com/boards/272738-xenoblade-chronicles-definitive-edition/78508768
And since this falls not really under any category in this analysis, I’ll note it here. XCDE won’t have amiibo compatibility or the Collection Mode from the New 3DS port.
Major Things (VA, Music, Art)
Voice acting is the same. I synced up a couple of lines from the scene in the trailer where Shulk grabs the Monado from Dunban. I didn’t need to do much comparison to draw that conclusion, so we’re good, they’re not doing a redubbing. :)
A thing I noticed though was that we didn’t hear Melia’s voice in the epilogue sneak peek (again, more on that later down). I’m guessing they’re still trying to get her VA on board, or her lines aren’t finished being recorded yet. Or they were forced to get a new VA. If they did, don’t hate on this VA, please. She’s got huge shoes to fill.
If they haven’t gotten the lines recorded/finished being recorded yet, this may be why the funky captions were added into the epilogue to give bigger teases to the story without revealing the fact that they miiiight not have gotten all the voice acting down yet. I really hope this is the case, and it’ll match the rest of the game’s cutscenes. The funky text is strange. I’ll find the font name for anyone wanting it for some reason.

What’s not the same is the music, and before they even directly stated that 90 songs are being remixed/rerecorded, I knew they remastered the music. I have listened to the soundtrack every night for years, I know when it’s different.
And when they say 90, they mean literally every song in the game. The official soundtrack has 91 songs, and “Hope” was cut from the game, so that makes 90 songs redone.
Based on how it sounds, I’m actually thinking these might be live orchestra like Xenoblade 2’s. In Iwata Asks’ interview with ACE+ and the other composers, they talked about needing to pick one program to use as a group instead of multiple composition programs. And after listening to the special live orchestrations of some of the music, I think Xenoblade’s soundtrack was synthesized digitally. I’m not saying that’s bad at all, it’s just one way to make music. But I am thinking they used a real orchestra for DE.
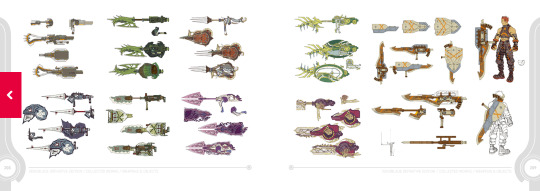
You guys remember my post on how Xenoblade’s official character art were all retouched 3D models? Well, here are some preview pages from the art book that I found off Nintendo of Japan’s website for XCDE. Absolutely gorgeous art in a 250-page art book. We now have weapon designs, concept art of locations, new outfit/armor turnarounds, Scuba Shulk(TM), and new official character art—3D models! Lol.
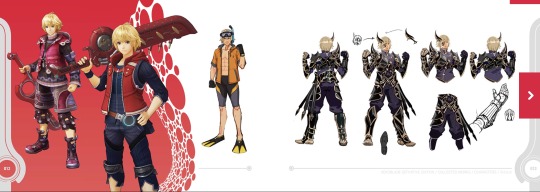

As a note, the Mechonis art on the front of the special edition art book is exactly the high-definition art of the Mechonis in the Monado Archives, and the Mechonis’ texture in the game looks pretty darn close to this art. I think they modeled the remaster/remake Mechonis model off of this art piece, and the same goes for the Bionis’ Monado Archives high-definition art.


Yes, the epilogue, Future Connected. I saved it for last because I genuinely stopped the Direct after the main trailer not realizing there was more.
So I realized the promotional images had more that I didn’t see, so THEN I watched more of the Direct and saw this.
I’m torturing you all.
You get to wait until Part 2.
I’ll be posting next some high-definition images of some in-game locations I pulled from Nintendo of Japan’s website for the game. I felt like a hacker, using Inspecting the Elements in Google to get these. They make great desktop screensavers. I love my grandiose shot of the twin statues of Soltnar and Khatorl.
Honestly, I’m so grateful and thankful Xenoblade Chronicles Definitive Edition is being made.
Part 2: Future Connected (facts and theories) and images of in-game areas from the Japanese site for XCDE.
#xenoblade#xenoblade chronicles#Xenoblade Chronicles Definitive Edition#nintendo switch#I'M SO PSYCHED#And when I say not spoiling I mean the game trailer didn't spoil anything#I probably spoiled something
14 notes
·
View notes
Text
Deutsche Börse Photography Foundation prize Catalogue with text by Orit Gat.

The award will now be announced (virtually) on Sept 14th. For further info on how to join the webcast please consult The Photographers Gallery Website.
Image = Information
Orit Gat
1 A beginning
In Paris, an artist painting in a studio that used to be part of a monastery. She goes out and gets the largest drawing papers she can find. Surrounded by paint pots and brushes, it’s an image that belongs in a tradition of artists painting away in Parisian garrets, only this is not that story. What Clare Strand was painting in her Paris studio during a three-month residency at the Centre Photographique d'Ile-de-France in 2017 was a translation of pre-existing photographs that were ‘read’ to her over the phone by her husband in the UK. From across the English Channel, he would give her directions that would encode an image of his choosing, and she would paint it.
2 Transmission
Strand and her husband were following an existing model. The method they were using to transmit information was described in George H. Eckhardt’s ‘Electronic Television’, from 1936, in which he outlined how a photograph can be transmitted via code over telegraph. In this system, the original image is divided into a grid, with every square being given a value from 1 to 10. 1 is white, 2 has a tinge of grey, 3 is greyer, 4 darker and so on until 10, which is black. The initial source images from which Strand’s husband chose the images he would transmit to her were 10-by-8 inches, which they divided into a grid of forty-nine squares across and sixty down, each about 5 square millimetres. If it’s boring to read, imagine the couple’s phone conversations: he would call and say 24-2; 25-4; 26-5; and so on. Through conversation, with Strand following her husband’s direction, the language would form a representation of the original image. Like a human fax machine.
3 The result
Is a series of ten black-and-white paintings in acrylic on paper. The history of art brings forth associations and relations, from the development of the grid as a foundation for perspective in the Renaissance, to the nineteenth-century illusionism achieved through Pointillism. There are Gerhard Richter’s black-and-white paintings, László Moholy-Nagy’s telephone paintings, Agnes Martin’s feather-light grids. But the connection to the history of art crumbles in front of the actual framed paintings. They’re human, Strand says, as she reasserts that she is not a painter. They’re messy, imperfect. There are hairs that stuck to the paper, dust congealed into the paint. However, in installation shots of the whole series, they look like another kind of work. Photographed, the paintings seem faultless: the black, white and grey hues reminiscent of aestheticized black-and-white photography; the paintings look clean, their edges not frayed, the small mistakes blend into the frame. It’s like they have two lives, as object and as image. When I ask Strand which one matters more, she answers, ‘I don’t know. What I find ironic is that, as much I try to push “photography” into different mediums, I can never escape the camera and how it operates as a tool of representation. With each press or catalogue reproduction, the paintings are represented as photographs, which is somewhat at odds with the concept of the work – photography transposing into painting only then to be represented by photography!’
4 Utility
To talk about the history of art and about installation shots is to ignore how the objecthood of the paintings depends on their creation. This series, titled The Discrete Channel with Noise, is at once the result of and the documentation of communication and its possible failures. Looking at the paintings, I want to say they look pixelated, but that would make them more photo than painting, more final product than process.
5 The first man who saw the first photograph
The relationship between painting and photography always makes me think of Roland Barthes writing in his essay on photography, Camera Lucida, that ‘The first man who saw the first photograph (if we except Niépce, who made it) must have thought it was a painting: same framing, same perspective. Photography has been, and is still, tormented by the ghost of Painting.’ Later in the book, he writes about photography’s relationship to reality, or to the document: ‘No writing can give me this certainty. It is the misfortune (but also perhaps the voluptuous pleasure) of language not to be able to authenticate itself.’ The photo as confirmation of fact. That fact, that reality, is communicated over phone lines in The Discrete Channel with Noise. When we look at a photograph, what we’re looking for, according to Barthes, is knowledge that a thing, an event, happened. He writes about Polish soldiers in a 1915 photo by André Kertész: ‘that they were there; what I see is not a memory, an imagination, a reconstitution, a piece of Maya, such as art lavishes upon us, but reality in a past state: at once the past and the real.’ What we see, in The Discrete Channel with Noise, is a story about reality rather than proof thereof.
6 Whizzing through the air
When I meet Strand, she hands me an assortment of notes. She’s hesitant about it for a minute, as if giving me homework rather than help. Or as if she expects communication can fail, and thinks a list of references may offer a way out of an impasse. The history of Morse code; pigeon post between Paris and England c. 1870–71; Eckhardt; Cybernetics founder Norbert Weiner and American mathematician Claude Shannon’s information theory, which gave The Discrete Channel with Noise its title: Strand’s research does not explain as much as expand the work. And then in the notes is a quote from the 1973 movie Charlie and the Chocolate Factory based on Roald Dahl’s writing, recreating Eckhardt’s transmission of images over radio. Here the character Mike Teavee, the winner of the fourth golden ticket, who loves this technology, explains: “You photograph something then the photograph is split up in to millions of tiny pieces and they go whizzing through the air, then down to your TV set when they are all put together in the right order”
Mike Teavee, Charlie and the Chocolate Factory, Roald Dahl (1971).
That it is possible to share an image, and the labyrinthine process of it whizzing through the air is in line with Dahl’s 1971 book, in which the candy factory includes an impenetrable room-sized machine that, when operated, makes a lot of noise, takes a lot of time, and then produces a single bit of chewing gum. Unimpressive until someone chews it and realizes it is as nourishing as a three-course dinner: tomato soup, roast beef with baked potatoes, blueberry pie and ice cream for dessert.
Proof: the overcomplicated can sometimes be amazing.
A lesson: also worth exploring.
7 Thirty-six images on a journey
The ten images in The Discrete Channel with Noise were chosen from a collection of thirty-six images Strand has compiled for a previous work, The Entropy Pendulum (2015), in which each of these photographs, which were taken from a tabloid newspaper’s archive, was eroded by the weight of a pendulum over the course of one day in an exhibition, then framed. Strand rephotographed the physical photos from the archive, creating a digital output that becomes a dataset ready for reuse. The subject of those images related to what Strand refers to as the subject of her work in general – magic, illusion, the paranormal, communication, transmission, the way people thought communication technologies were magical when they were first introduced, the way Alexander Graham Bell called the telephone a way to ‘talk with electricity’. How to read the transformation of these images through the process in The Discrete Channel with Noise These images are on a journey of losing and gaining information. The project is a metaphor, if not a realization, for what images do anyway: in flux, they move and shift in meaning.
8 Shifting in meaning
Why pay attention to shifts? Because shifts in context can mean that information is lost, or misused. An art historian friend of mine regularly points out that Alexander Nix, the founder and CEO of Cambridge Analytica, studied art history in university. Art matters, images matter, she wants to say. All channels of misinformation need to be decoded. Is there a present and a real, like Barthes thought there was in an only slightly less technological time than the one we occupy, today? Or is the subject of study now how realities are fractured across channels of communication?
9 An entire history of communication
The diagram used to explain Eckhardt’s ‘Electronic Television’ has a man sitting at a table in front of a large black-and-white image divided into a grid of a woman with short, curly hair who looks a bit like an early Hollywood film star. His sleeves are rolled up, his back a bit hunched, he is clearly concentrating. He holds a long pointer stick and taps information onto a device resting on the desk he is sitting at. The cable running from that device spirals into a growing network of telephone poles that reach a window, and from that window to a box on the wall, and straight from the box to a set of headphones that another man wearing a blazer (or is it a lab coat?) standing in front of a large grid, only partially completed with the recognisable top of the short-haired woman’s head. He holds a paint brush at the same spot the other man’s pointer is. Behind him on a table are 10 boxes of paint numbered from 1 (white) to 10 (black) and some paint brushes. The caption reads, ‘Fig. 26. A Simple Method for Sending Pictures by Wire or Radio.’
Visually, it matters that the example is always a woman and the transmitters and receivers are always men. The message is that even in new technologies, even in a new world, some old signals remain. That is what Eckhardt’s diagram exemplifies. An entire history of communication reinforces the idea of who gets to speak across these lines. It is therefore fitting that The Discrete Channel of Noise is structured and executed by a female artist.
10 A piece of Maya
When Barthes writes that ‘no writing can give me this certainty’, he is asserting photography’s relationship to what he calls ‘the real’. But as a writer, he must have known that it is the rest of the above-cited list – ‘a memory, an imagination, a reconstitution, a piece of Maya’ – that is one of the potentials of art: to reconstitute is a way of reimagining the world. After Cambridge Analytica, or in line with Charlie and the Chocolate Factory, I want to argue that the redefinition or the exploration of that real is the contemporary condition. We come to things with suspicion, some of which is about recognising the failures of the systems around us. But we also come to them with a sense of possibility, a remnant of the Maya or the three-course meal chewing gum: the idea that the world is a story, and it can be shared.
2 notes
·
View notes
Text
Mum wows with ingenious idea to reuse little one's cot bed in the garden – and it cost just £6
Have you seen this growing new garden trend, championed by savvy mums everywhere. It seems mums are getting creative with outgrown nursery cot beds by turning them into vertical garden planters!
Not just the kids are growing up eh! This idea is an amazing DIY project to inspire all parents, especially those who love gardening.
More garden inspiration: Homeowner uses Victorian-style tile stencil to paint the patio
Kate O’Donoghue first shared her ingenious cot creation on the Extreme Budget DIY & Life Style Hacks Facebook group. Where it has amassed 2.1k reactions and a staggering 209 comments.
Kate’s DIY cot base vertical garden planter
Image credit: Kate O’Donoghue
Kate told Ideal Home, ‘I had been looking for something to hang from our fence for some time that could hold some pots. Whilst changing my little ones cot bed to a single bed we decided to see if the base could be used in something in the garden.’
‘A few coats of wood paint, Ikea plastic hanging pots and and some donated plants later and we had this. Total cost of £6! Exactly what I had in mind.’
Image credit: Kate O’Donoghue
Kate shared her DIY vertical planter with the caption, ‘Cot bed base painted, Ikea 50p clip on tubs with holes made in the bottom and some plants given to me from a friend … tada’.
One inspired group member writes, ’Beautiful. I have 2 cot side and was thinking what to do with it now I have seen your display I will use it for my herb garden . Thank you Kate ’.
Kate’s creation inspired fellow group member Claire Wright to do the same too…
Claire’s DIY wall planter
Image credit: Claire Wright
In the same group Claire posted, ‘Turned the side of my son’s old cot…into a wall planter…Lightly sanded the frame then spray painted the cot and plant baskets… ’.
Image credit: Claire Wright
When asked about the pots Claire tells fellow members she bought them at Home Bargains – and they were originally terracotta! What a difference a coat of spray paint can make, the new black shade makes the pots look almost galvanised. It’s the perfect accent colour to make the greenery ‘pop’.
Image credit: Claire Wright
‘Woww good idea’ writes one fellow group member in amazement. ‘I love this idea it’s great’ shares another. And Ideal Home is in complete agreement.
Related: Five simple ways to revamp a rented garden without upsetting your landlord
Do you have a nifty upcycling project to share with our readers? Share with us in the Ideal Home Room Clinic Facebook group.
Happy DIY-ing to all.
The post Mum wows with ingenious idea to reuse little one's cot bed in the garden – and it cost just £6 appeared first on Ideal Home.
from Ideal Home https://ift.tt/38nsuN0
0 notes
Text
Gif tutorial (Avisynth, Photoshop and Topaz)
okay so I’ve gotten a lot of questions asking me how I get my gifs so nice and smooth and HD and normally I don’t really go into depth because it’s kind of a combination of stuff I’ve learnt over time. My old gif tutorial only outlines using photoshop and is like over a year old so here’s an updated version.
Everything below the cut
So I’m going to break this tutorial down into 3 key parts, avisynth, photoshop and topaz. So you can pick which section that applies for you and each tutorial is basically independent.
Avisynth
disclaimer: not recommended to start out using avisynth, learn and familiarise using photoshop to make gifs first.
some background - why I use avisynth is because it’s a way to downscale the video without/next to no loss at all, so the quality is retained. Definitely check out brandinator’s tutorial and explanations here as he’s basically the innovator for avisynth gifs. He’s also super friendly so if you have any issues definitely hit him up. His tutorial basically explains everything and I guess I’ll just outline what it’s telling you to do.
Drag your video file onto normalwebmrange.bat and a command prompt will pop up
if your file does not work with normalwebmrange, then useless lossless intead
Type in your start time and hit enter, do the same for the end time (must be in hh:mm:ss format, i.e. 00:00:03 for it to start at 3 seconds)
Then after all the frames are done processing resizer.html will automatically open up in your browser
From here you figure out the sizing of your video (please refer to brandinator’s video here because it explain it really well)
For the following steps just refer to the rest of the video because its visually easier to learn off
When you copy your code across, dont include the crop line of code just in case you want to move things around in photoshop later
What do all the options in the resizer.html mean?
GIF size - Here you just plug in the value that you intend for your gif. Refer here for the tumblr post width guides. I personally use:
540 x [anything] for single gifs
268 x 350 for double gifs
177/178 x 250 for triple gifs
Opacity - This slider is just so you can see which part of the video will be shown in your given dimensions and is really useful as a preview to see if everything you want in your gif is visible for that dimension so you can go back and tweak your size if necessary
Resizing - In the bottom right hand corner of the video itself you can click and drag to resize the video so that you can find the desired size/zoom for your given dimensions
Pre-processor - Okay this is the important one and where all the smooth and HD quality comes from. In the first box you are given these options
Use for standard video formats (mp4, avi, mkv etc)
None (choose none for every video that is not a .ts file)
IVTC (tbh idk what this does, but you don’t need it)
1 in 5 Dupe (some videos have a duplicate frame for every 5th frame and this fixes it, kind of rare to use)
Only use for .ts files
Basically the 30 and 60 is talking about 30fps or 60fps, recommend that you choose 30fps for single gifs because you’re going to find it hard to fit anything of substance under 3mb for single gifs. Double gifs can be either 30/60 at your own discretion. Triple gifs can definitely be 60fps without worries about cutting out frames. The fast and slow options are the encoding speed once you’ve saved the avs, slow renders at a better quality but its barely noticeable so you can use fast every time
qtgmc 30 fast
qtgmc 30 slow
qtgmc 60 fast
qtgmc 60 slow
In the second box you can pick between resamplehq, debilinear and dithertools. All you need to know is that you choose debilinear every time and for every video format
Didn’t want to make another comparison gif so just reusing this one again, it’s slowed down so you can really see the different between 30fps and 60fps which you don’t normally feel too much if the gif is faster but definitely makes a difference. Notice the quality differences also between the first two, thats what avisynth helps with the most; making sure the quality loss is minimal

Photoshop
if you haven’t used avisynth to cut/resize your video then you can do that in photoshop, although I recommend that you cut the video first in another editing program so there’s less loading time and strain on photoshop itself (I use to use Adobe Premiere for this)
Refer here for the sites that I use to download my videos from.
Importing/Resizing
Import it into Photoshop (File > Import > Video Frames to Layers)
Match the settings to these

Select the part you want with the slider on the right and hit okay
Once it’s all into Photoshop, make sure you have the timeline/animation window open (Window > Timeline) and you should be able to see all the frames of your gif
If you’ve used avisynth you only need to crop it (Image > Canvas Size; and input in the desired size of your gif) otherwise you’ll need to crop it and then down size it to the desired gif size (Image > Image Size; setting width to either 540, 268, 177/178). Remember to set it to Bicubic and locking the width when you resize it


delete all the unwanted frames from your gifs
Sharpening
At this point I normally apply topaz (so refer below) otherwise you can do standard sharpening now
Select all your frames and layers and then convert it to a video timeline (bottom left of the timeline window)

Convert your layers to a smart object (Filter > Convert to Smart Object)
Then use Smart Sharpening (Filter > Sharpen > Smart Sharpen)
These are the settings that I used before, feel free to tweak them to whatever you like. (Note that .ts files resized with avisynth rarely need to be sharpened at all because sometimes they already look over sharp, and thus we use topaz to clean them up)

After you’re happy with your sharpening, flatten the layers back to frames, make sure your gif is on the first frame (top right hand corner of the timeline (Convert Frames > Flatten Frames to Clips) and then create the frames again (Convert Frames > Make Frames from Clips)
Click the bottom left again to change your video timeline back to frame view and delete the first frame (it should be blank) and your first layer (it should be the one thats still a smart object)
Now everything should look like it did before you did your sharpening except now your gif will be sharpened
Colouring
I’m not really going to tell you how to colour your gifs because everyone does them differently and it’s also kind of each individual’s signature thing, like often I can tell who’s gif it is just by the way its coloured. Things to note here that too many colours and over saturation will lead to your gif file being extremely large. If you want to lower the file size of your gif it’s helpful to note that darkening the blacks and/or brightening the whites helps a lot. Colouring overall can drastically change your gifs so much. Here’s an example


of course you don’t want to change the colours so heavily every time but its just an example of what’s possible
Timing
To change timing (speed) for your gif you just need to select all your frames and then click on the arrow at the bottom of any of the frames and someone will pop up for you to input the time. Generally this is what I use for my gifs
0.02/0.03/0.04 for 60fps
0.04/0.05/0.06 for 30fps
Exporting
After all your colouring and timing is done you just need to export your gif (File > Export > Save for Web (Legacy)), double check that your gif is less than 3mb (in the bottom left) and also here are my export settings. Never lower the colours unless your gif is black and white or you’ll probably lose quality
200212 update: gif size limits have been increased and can reach up to 8mb but have exponential loss in quality the larger the file size. The optimal size is to remain under 3.5mb-4mb, another larger and you’ll start to notice a loss in quality.

Topaz
I’m not going to tell you where and/or how to download topaz because you can probably look that up yourself, there are a bunch of tutorials how on tumblr/youtube etc so you can sort that out. I use Topaz Denoise and Topaz Clean. Topaz Denoise does exactly what you think it does, it removes the noise from your gifs and it helps clean everything up. Topaz Clean is basically the same principle of sharpening but it’s a lot nicer and doesn’t over sharpen like smart sharpening does most of the time. Topaz takes a lot longer than regular sharpening because it processes it frame by frame so if you don’t want to bother and wait for it that’s alright.
Following the same two steps as the sharpening section of the photoshop tutorial, you’ll have a video timeline and a smart object
Then apply Denoise first (Filter > Topaz Labs > Topaz Denoise)
Play around with the settings as you see fit
Then do the same for Clean (Filter > Topaz Labs > Topaz Clean)
After you’re happy with the settings you’ll need to flatten the frames back (refer above to the sharpening section), and then just put on your psd like normal
Sometimes topaz isn’t as noticeable but when compared to original and smart sharpening it’s more noticeable


Smart Sharpen, while it does sharpen the gif also increases how grainy it is so for gifs which are originally grainy it’s not a good solution. Meanwhile topaz sharpens it without increasing the grain and can also reduce it. (The gifs above aren’t that grainy so smart sharpening doesn’t look that bad)
Here’s another example of how topaz removes the noise from gifs

Wrap-up
Okay so this is a pretty comprehensive post about everything and anything I know about photoshop and gif-making in general, it outlines all the little steps I take to make my gifs look really nice and just for an overall comparison to show you that the little things really add up

and slower for you to notice the framerate

Additional Video Tutorial Resources:
Basic gif tutorial (photoshop only)
Gif Tutorial
How I adjust for coloured lighting
Colouring tutorial - levels + exposure
Blurring text/captions
If you have any other questions on this or felt like I’ve missed something feel free to send me an ask. Happy Gif-ing!
#text#tutorials#okay this is was longer than i thought it would be#i really hope it covered everything#hmu if you think i missed anything#i proof read it but i probably missed smth so cut me some slack#ive been @ this for like 1387201 hours#long post#this is the most comprehensive thing i've written in my life
1K notes
·
View notes
Text
Content Generator ֠Auto Content Creation Tool
youtube
https://clickonthis.one/freecontent
hey babe this is Neil Napier hey and in this video I’m going to give you a walkthrough of content gorilla and I’m going to show you all the cool features that you’re getting as part of this awesome application so content gorilla at the very basic level helps you take content from YouTube videos those closed captions or subtitles that we talked about and turn them into a blog post so let’s first start by creating a blog post and then I’ll show you a few other features as well so the very first thing you see when you Landon it’s a dashboard where you can pick video URL or you can pick a search term as well so let’s say in my case I go for content marketing so I could order them by relevance or most recent and most viewed if I do that let me search and see what comes up so I’ve got all these different options but just to stay on the good side of Google and everyone else what I’m gonna do is I’m gonna choose videos and I’ve created a Creative Commons license what this means is license that allows me to reuse this video and I don’t even need to link back to this although you know you have to check all creative common license videos have different rules so you can just check that underneath the video just there once I’m happy with this one I’m just gonna go ahead and click on create post and when I do that what we do is we grab that content from YouTube and we turn that into a decent-looking blog post right over here so you can see what the video title is how long the video would be and also then how many words this text has as well as the post title if you want to change that you can do that as well so if content marketing 101 or you could say 101 rules of content marketing and you can then publish that then you’ve got your post right over here you can go ahead and make changes to it if you think something’s out of shape if you think some grammar does make sense you can just click here and it automatically corrects your grammar grammar irons out any issues that you post would otherwise have which makes it easy for you to then focus on the things that really matter which is creating more content all the time so I’ll wait for this one to stop there we go the grammar has been fixed and as you’ll see there is if you remember program an extra M&E that’s been taken out so this is what it looks like right now and I think it’s pretty good it’s good to go if I wanted to change it still I could spin the content so just by clicking this it automatically spins the content and make sure it is still human readable but again you can always check and ensure that that all fits together we also grab the image from the video so we also put an image here for you but you can click here and add your own image as well you can search images based not integrations too so once you’re happy with this going to featured image and again this is the video that we grabbed the image that we grabbed from this video I could click here and again let’s say upload an official mission my computer which is always good because you want to make sure it’s personalized then a lot of these videos that are ranking high getting a lot of views they have perfect tags as well so you want your blog post to have good tags as well these are the tags that you can use then if you wanted to you could use indication but this is part of the pro version just FYI then when you’re ready you can publish it so you can integrate multiple websites over here and what I can then do is say I wanted to I want to publish this and on categorized and content and I want to also include video in the post and video attribution I could take all that and I could publish this and that’s it it’s done that’s literally how fast the process is to create a new blog post if you wanted to you can then jump on into your blog and start editing out this post and just FYI you can add multiple sites right from over here so it’s very easy to add your own sites to this as well let me go into this one and I’ll show you the blog post that’s been published there so right here you can see this as a blog post that we made content marketing 101 and then if you were the test post going in here as well from a few other people so the multiple people using this access right now now with the bulk posting option you will be able to add multiple posts in a queue and automatically schedule them better than light so let me show you what I mean by that so say if I go for this particular website I can choose multiple different languages and all I need to do is put in some key words so something like and then I can select how many posts I want to schedule so it could be like say 10 and I could say I wanted to go out every 18 hours and then pick a category in the same blog and then I can just click on spin text and say include video and purses while I’m video attribution and then for the text as well so I could say that’s it it’s done I showed you the post and now all the personal automatically we configured to go out in the designated time frame so the next thing I want to show you is the post later option so then the post later option you can also find the video that you’re looking at earlier so that’s if I go back and I go for content marketing and I choose let’s say creative common license can I find this one I could click here and then it’s added to post later which means I can come back to it later on and then create a post for it so it’s really perfect if you have a team and you can have someone to log in and make sure that they find relevant videos for you that you can then later go in and configure the posts then we also have article rewriter so if you have an article that you have written before you can just insert it in here and you can also rewrite it based on our scale over here and remember again this is something we built exclusively for content gorilla and you get access to this as well we have integration option here as well which means you can integrate this with buffer if you wanted to publish out your post into your various different places and then finally you can manage all your settings here you can go to knowledgebase check out all the training or just click here and reach out to us while support desk this is Neil Napier I hope you enjoyed this very quick walkthrough of content gorilla I look forward to seeing you in the members area
Read More: Best SEO tools : Tips and Tricks From the Trenches
https://reviewsarena.net/marketing-software/content-generation/content-generator-auto-content-creation-tool/?utm_source=rss&utm_medium=rss&utm_campaign=content-generator-auto-content-creation-tool
0 notes
Text
Content Generator ֠Auto Content Creation Tool
youtube
https://clickonthis.one/freecontent
hey babe this is Neil Napier hey and in this video I’m going to give you a walkthrough of content gorilla and I’m going to show you all the cool features that you’re getting as part of this awesome application so content gorilla at the very basic level helps you take content from YouTube videos those closed captions or subtitles that we talked about and turn them into a blog post so let’s first start by creating a blog post and then I’ll show you a few other features as well so the very first thing you see when you Landon it’s a dashboard where you can pick video URL or you can pick a search term as well so let’s say in my case I go for content marketing so I could order them by relevance or most recent and most viewed if I do that let me search and see what comes up so I’ve got all these different options but just to stay on the good side of Google and everyone else what I’m gonna do is I’m gonna choose videos and I’ve created a Creative Commons license what this means is license that allows me to reuse this video and I don’t even need to link back to this although you know you have to check all creative common license videos have different rules so you can just check that underneath the video just there once I’m happy with this one I’m just gonna go ahead and click on create post and when I do that what we do is we grab that content from YouTube and we turn that into a decent-looking blog post right over here so you can see what the video title is how long the video would be and also then how many words this text has as well as the post title if you want to change that you can do that as well so if content marketing 101 or you could say 101 rules of content marketing and you can then publish that then you’ve got your post right over here you can go ahead and make changes to it if you think something’s out of shape if you think some grammar does make sense you can just click here and it automatically corrects your grammar grammar irons out any issues that you post would otherwise have which makes it easy for you to then focus on the things that really matter which is creating more content all the time so I’ll wait for this one to stop there we go the grammar has been fixed and as you’ll see there is if you remember program an extra M&E that’s been taken out so this is what it looks like right now and I think it’s pretty good it’s good to go if I wanted to change it still I could spin the content so just by clicking this it automatically spins the content and make sure it is still human readable but again you can always check and ensure that that all fits together we also grab the image from the video so we also put an image here for you but you can click here and add your own image as well you can search images based not integrations too so once you’re happy with this going to featured image and again this is the video that we grabbed the image that we grabbed from this video I could click here and again let’s say upload an official mission my computer which is always good because you want to make sure it’s personalized then a lot of these videos that are ranking high getting a lot of views they have perfect tags as well so you want your blog post to have good tags as well these are the tags that you can use then if you wanted to you could use indication but this is part of the pro version just FYI then when you’re ready you can publish it so you can integrate multiple websites over here and what I can then do is say I wanted to I want to publish this and on categorized and content and I want to also include video in the post and video attribution I could take all that and I could publish this and that’s it it’s done that’s literally how fast the process is to create a new blog post if you wanted to you can then jump on into your blog and start editing out this post and just FYI you can add multiple sites right from over here so it’s very easy to add your own sites to this as well let me go into this one and I’ll show you the blog post that’s been published there so right here you can see this as a blog post that we made content marketing 101 and then if you were the test post going in here as well from a few other people so the multiple people using this access right now now with the bulk posting option you will be able to add multiple posts in a queue and automatically schedule them better than light so let me show you what I mean by that so say if I go for this particular website I can choose multiple different languages and all I need to do is put in some key words so something like and then I can select how many posts I want to schedule so it could be like say 10 and I could say I wanted to go out every 18 hours and then pick a category in the same blog and then I can just click on spin text and say include video and purses while I’m video attribution and then for the text as well so I could say that’s it it’s done I showed you the post and now all the personal automatically we configured to go out in the designated time frame so the next thing I want to show you is the post later option so then the post later option you can also find the video that you’re looking at earlier so that’s if I go back and I go for content marketing and I choose let’s say creative common license can I find this one I could click here and then it’s added to post later which means I can come back to it later on and then create a post for it so it’s really perfect if you have a team and you can have someone to log in and make sure that they find relevant videos for you that you can then later go in and configure the posts then we also have article rewriter so if you have an article that you have written before you can just insert it in here and you can also rewrite it based on our scale over here and remember again this is something we built exclusively for content gorilla and you get access to this as well we have integration option here as well which means you can integrate this with buffer if you wanted to publish out your post into your various different places and then finally you can manage all your settings here you can go to knowledgebase check out all the training or just click here and reach out to us while support desk this is Neil Napier I hope you enjoyed this very quick walkthrough of content gorilla I look forward to seeing you in the members area
Read More: Best SEO tools : Tips and Tricks From the Trenches
https://reviewsarena.net/marketing-software/content-generation/content-generator-auto-content-creation-tool/?utm_source=rss&utm_medium=rss&utm_campaign=content-generator-auto-content-creation-tool
0 notes
Video
youtube
DOJA CAT & TYGA - JUICY
[5.89]
Cancel culture is cancelled
Wayne Weizhen Zhang: Imagine, like, Beauty and the Beast, but they live in a trap house instead of a castle, and Belle is really, really thicccccc.
[5]
Katie Gill: This song pretty much entirely hangs on that "if you can see it from the front, wait till you see it from the back" line and honestly, it's such of an earworm of a line that it justifies a solid chunk of the views for this otherwise middle of the album song. I'm not sure if it justifies the feature credit. Tyga's just happy to be here, y'all.
[6]
Tim de Reuse: Okay, that part about "wait 'till you see it from the back-back-back-back-back" and all that? That's pretty great, actually. I can see that getting caught in my head. Solid stuff. The rest is also there, I guess, if you want to listen to that.
[6]
Joshua Minsoo Kim: Doja Cat's best single, hands down. The plinking synth melodies are constantly in motion, precious and twinkly but grounded by a booming low end. Their mesmerizing, cyclical nature is mirrored by Doja's nimble handling of the topline: she switches between lines that firmly end with a single word, and those that are accompanied by ad-libs or tasteful repetition. While she aims for a more self-assured tone in the bridge, most of the song finds her opting for a more conversational style of vocalizing. She doesn't quite whisper the main hook, but it's delivered with the same knowing sensuality.
[8]
Oliver Maier: Doja is not an exceptional rapper or singer but she plays both roles which such humour and panache that I find her hard to resist, particularly on recent singles. Her yowling ad-libs and ability to make catchy melodies catchier with her odd affectations call Young Thug to mind, and she fits just as well over the sparkling xylophone loops here as she did over the cartoonish stomp of "Tia Tamera". Tyga is predictably sleazy on the pointless remix, but not disastrous. More like this please, ideally minus Dr. Luke.
[8]
Will Rivitz: Doja Cat absolutely flies over this one, pinballing between genuine hilarity ("How long it take to pull my pants up" is an incredible image) and swaggering confidence with aplomb, over a beat that splits the difference between Mustard and Moving Castle. Tyga, as per his wont, does the remix no favors.
[6]
Stephen Eisermann: Never has Nicki's influence felt this prominent, but man if I can't imagine a (better) version performed by Miss Minaj. Equally boring, certainly, just a more theatrical version.
[3]
Kylo Nocom: I really like Doja Cat's hyper-sexual bubblegum R&B/rap more consistently as an aesthetic idea than in execution: "Go to Town" was amazing and works as better Instagram-caption-bait than any Lizzo song, but "MOOO!" was an unfunny drawn-out shitpost and "Tia Tamera" got annoying quickly with its ey-uhhhh rhyme scheme. "Juicy" was always going to get promo, and I had to endure her COLORS show throughout this summer thanks to my sisters, but any remix of this would have fucked it over, no matter the guest. The music box melodies managed to provide ample room for Doja Cat to flex her own quirks over the course of the original song, no matter how dead-eyed it felt. Though some portions--that bridge cannot be fixed, no matter what--felt awkward, it was all in service of Doja trying to prove her own starpower. Adding another person to the mix removes the satisfaction of the dynamic explored in her second verse, leaving her so little to pick up after. Adding Tyga, of all people, just seems cruel and unusual, like they were trying to figure out how to make this new version as sedated and uncomfortable as possible; letting him talk about how it's "tighter than a virgin, like Madonna say" is a crime against humanity.
[3]
Jacob Sujin Kuppermann: Doja Cat is nothing if not persistent. For the past year and a half, the L.A. rapper/singer/producer has been a regularly scheduled fixture in the pop conversation: in March 2018, she released her debut album Amala, which positioned her as a true crossover star: an R&B vocalist with the easy charisma of 2 Chainz and the sonic tastes of a Fader article come to life. Predictably, it didn't sell very well. So in August of that year we got "Mooo!," which wasn't very good but was incredibly fun and popular, and was probably like 5% responsible for "Old Town Road," so overall a positive for humanity. But the memetic popularity of "Mooo!" didn't make Doja Cat into an overnight sensation, and so 6 months later we got "Tia Tamera," which once again reframe Doja as a perfect foil to Rico Nasty. 6 months after that and here we are with "Juicy," the sixth single off a middling pop-rap album that came out in spring 2018. Also, Tyga's here for some reason. But despite the generally extraneous feeling that "Juicy" carries, Doja Cat can't help but charm. The song's the kind of earworm that's so catchy that it's hard to even identify one coherent, capital-"H" Hook-- it's really just Doja bouncing lyrical and melodic ideas over a faintly Wii-shop-channel-music-type-beat, with a short interlude of Tyga to show you how much worse you can have it. Sign me up for another one in six months, I guess!
[8]
[Read, comment and vote on The Singles Jukebox]
0 notes
Text
[ANSWERED] How Do I Save Groups Of Hashtags For Reuse On Instagram?
SocMedSean - Social.Media.Sean
[ANSWERED] How Do I Save Groups Of Hashtags For Reuse On Instagram?
Hey Sean,
Do you have any clever tricks for saving hashtags so they can easily be re-used on Instagram? I want to make it easy to copy and paste hashtags that I reuse and I need to have access to it on my mobile device since Instagram is such a mobile-focused app.
Thanks in advance!
–Michael
Now THIS is a great question!
In fact, it was a very timely question for a couple of reasons:
My wife and I are in the process of starting a new travel blog (check it out at FlatlandersIn.com if you like travel tips and photos).
When I received the question, we were just getting ready to take our family on a trip to Iceland and we had planned on posting a bunch of the photos on the @FlatlandersIn Instagram account.
Since the goal of the trip was to share our adventure and grow the following of the account, hashtags were definitely part of the process.
As you can see, hashtags and hashtag groups are an important part of exposing our content to a larger audience beyond our current followers.
Why Are Hashtags So Important To Instagram Success?
Like it or not, if you want to grow an audience on Instagram the right way (meaning NO buying of followers or skeevey follow/unfollow schemes), then you need to understand the important role that hashtags play.
While many people like to simply view the photos/stories in their feed of the accounts they follow, others really like to follow topics. As an example, I like to follow photos of topics like:
#Nature – https://www.instagram.com/explore/tags/nature/
#Outdoors – https://www.instagram.com/explore/tags/outdoors/
#Hiking – https://www.instagram.com/explore/tags/hiking/
#Photography – https://www.instagram.com/explore/tags/photography/
#Travel – https://www.instagram.com/explore/tags/travel/
When I search for any of those terms in the Instagram app, I can also view the most popular photos that use the hashtag, as well as the most recent photos. Additionally, I can follow the entire hashtag, which means that those photos that include the hashtag in their caption will also get included in my feed.
By searching for the “Photography” hashtag on Instagram, you can click the “Follow” button and photos posted with this tag will appear in your feed.
Cool, right?
That means, if you post your amazing photo of a hike and also include the #hiking hashtag, then your photo has the chance of showing up in the feed of anyone who is following the #hiking hashtag.
That means more exposure for your photo beyond just your followers.
NOTE: If your Instagram account is private, then hashtags won’t really expand your reach at all. Since your account is private, the photos will only be shown to the people who you have allowed to follow you. If you want to expand your following and the reach of your photos, make your Instagram account public.
Going Beyond The Hashtag To Harness The Power Of The Hashtag Group
The idea of using groups of hashtags kicks the concept of hashtag reach into overdrive. Rather than using just one or two hashtags, you can use a group of up to 30 hashtags in a single post to reach a broad range of potential viewers and possibly attract them to like your content or follow your account.
By incorporating more than one hashtag into each of your posts, you exponentially increase your potential reach and engagement.
As an example, if you were hiking while on vacation in Iceland, you might want to also include hashtags like:
#Iceland – https://www.instagram.com/explore/tags/iceland/
#WhenInIceland – https://www.instagram.com/explore/tags/wheniniceland/
#DiscoverIceland – https://www.instagram.com/explore/tags/discovericeland/
#IcelandTravel – https://www.instagram.com/explore/tags/icelandtravel/
#ExploreIceland – https://www.instagram.com/explore/tags/exploreiceland/
By adding these hashtags to your post, it’s possible that it will be displayed to those who follow the hashtags. By thinking ahead and identifying a collection of highly-followed hashtags, you can potentially expose your Instagram photos to a lot of people.
Cool, right?
Adding a group of hashtags to your photo caption can help expose your photo a larger group, beyond your followers.
Well, it sounds cool until you have to type in 30 different hashtags every time you want to create a post.
One of the best parts of Instagram is how quickly you can publish your photos. Snap a pic, frame it properly, add a filter, add a caption…Boom! Published.
Having to type in 30 different hashtags can take quite a while, and add a bunch of extra work.
…And That’s Why We Save Instagram Hashtag Groups
So, let’s make this easier. Imagine that this is our hashtag group about hiking in Iceland:
#nature #outdoors #hiking #photography #travel #iceland #wheniniceland #discovericeland #icelandtravel #exploreiceland #visiticeland #everydayiceland #unlimitediceland #icelandphoto #icelandphotography #icelandair #ig_iceland #guidetoiceland #igersiceland #traveliceland #instatravel #wanderlust #guidetoiceland #icelandtoday #icelandadvice #whyiceland #exploreiceland #wonderlusticeland #wheniniceland #goiceland
It would suck to have to type all 30 of those hashtags every time you posted a photo. Yuck!
It would be so much easier if you could just flip over to an app where you had saved the hashtags and that’s why we need a solution that allows us to type the hashtags once and then copy/paste them into an app for saving and re-use.
Here’s the cool thing…you probably already have the app on your phone!
The Simple And Free Way To Save Hashtag Groups On Your Mobile Device
As my wife and I were planning our recent trip to Iceland, I knew that we would be posting a lot of photos to the @FlatlandersIn Instagram account and since we’re in the growth phase of the blog and the corresponding social media accounts, hash-tagging would definitely help us attract visitors and potential followers.
In preparation for the trip, I researched quite a few popular hashtags and created a group that I could re-use and customize for each photo.
NOTE: It’s important that you don’t just copy/paste the same hashtags over and over, as the Instagram algorithm can view that as spamming. Instead, what you want to do is leverage your hashtag group and customize it slightly for each photo. More on that in a few, but wanted to give you a quick heads-up that it’s important!
Once I had the hashtag group identified, I simply typed them into an email called “Good Iceland Hashtags” and emailed it to myself. Then, throughout the trip, I simply switched over to Gmail, searched for the email, and copied/pasted the hashtags into my Instagram post.
Send your Instagram hashtag group to yourself as a Gmail message. That way, you can easily find it and copy/paste the hashtag group into your photo caption.
Super-simple, right?
Hey, sometimes we don’t need another app installed on our phone. We don’t need a complex solution. We just need something simple and the Gmail solution worked for me throughout my Iceland trip.
What makes it even better is I forwarded the email to my wife in case she wanted to use the hashtag group for her personal Instagram photos. So the solution is simple, functional, and shareable.
Not sure I could ask for anything better.
A Note On Customizing The Hashtag Group For Better Targeting
As I mentioned in the note above, you want to make sure you customize each hashtag group before you post a photo to Instagram. This ensures that the caption/tags are customized and Instagram doesn’t view you as hash-spamming (I don’t think that’s a real word…but you get what I mean).
Trust me, the last thing you want to do is get your account banned by Instagram. Trust me, getting in contact with Instagram is not easy and you don’t want to deal with unblocking your account in the middle of your vacation.
Trust me, I have been through the whole ordeal of having an Instagram account blocked. You don’t want any part of that, so customize your hashtags so you don’t appear to be spamming.
So, let’s go back to that amazing image of your hike. Let’s assume that your hike is in Iceland and you are using the hashtag group above. What if the hike was also to a secluded beach? What if that secluded beach also had a hidden cave and an overhead waterfall with an amazing pirate-like cove? Wouldn’t it be great to include hashtags that also featured those elements?
What you want to do is paste your hashtag group into your post and then customize it to include those elements. Maybe something that looks like this:
#hiking #outdoors #nature #photography #travel #ilovetravel #goexplore #wonderfulplaces #beach #cave #cove #waterfall #hiddenplaces
NOTE: Remember, you are limited to 30 hashtags in your post, so if your hashtag group already has 30 items, you’re going to have to delete a few in order to fit your new, tailored hashtags into the post.
So, with the custom hashtags, maybe your new hashtag group looks something like this:
#waterfall #cave #beach #privatecove #nature #outdoors #hiking #photography #travel #iceland #wheniniceland #discovericeland #icelandtravel #exploreiceland #visiticeland #everydayiceland #unlimitediceland #icelandphoto #icelandphotography #icelandair #ig_iceland #guidetoiceland #guidetoiceland #icelandtoday #icelandadvice #whyiceland #exploreiceland #wonderlusticeland #wheniniceland #goiceland
Still at 30 hashtags, and now I have some custom items that will keep Instagram happy.
One Important Note Before Pressing The “Post” Button In Instagram
One very important step to take before you press that “Post” button is to long-press your photo caption and click the “Select All” and then “Copy” link. This copies your entire photo caption and the hashtags to the memory of your phone.
Be sure to select and copy your entire Instagram description before you post it. This way, if something goes wrong you don’t have to do all the work again.
Once you have copied the caption, then click the “Post” button.
The reason for this is because if Instagram doesn’t like your caption, or you maybe miscounted and have 31 hashtags then Instagram will go ahead and post the photo without any description.
Yep…all that hard work to come up with a catchy caption and add your hashtags will go out the window.
Since you were smart and copied the caption to the clipboard on your phone, though, you can easily edit your photo and paste it back in and make any edits to get it back in-line with Instagram requirements.
Creating A Library Of Reusable Hashtag Groups For Future Use
The Gmail solution is a great one for most folks, but as I think about our upcoming trips, I wanted to create a library of hashtags that I could refer back to easily. When we return to Iceland in a couple of years, I want to be able to re-use that hashtag group without having to dig through Gmail.
Sure Gmail search is pretty amazing, but I want to create a place where I create a mini-library of these hashtag groups. The solutions that I’m going to try on our next trip are:
A folder on Dropbox that includes text files for each destination. So, I might create a folder called “Hashtag Groups” and then a sub-folder called “Iceland”. Inside the Iceland fold would be text files for any hashtag groups I’d like to use. This solution is appealing to me because I can share that Dropbox folder with my wife and she can access it on her mobile device, as well.
Using the Notes app on my Samsung Galaxy. It’s a nice app that allows me to create simple notes and would work well, but it wouldn’t be shareable like the Dropbox approach.
So, there you have it. I hope this article helped you understand a few things:
Why hashtags are so important to reach of your Instagram posts
How hashtag groups can amplify the reach of your Instagram photos
Why saving hashtag groups for re-use can make your life a lot easier when posting photos to Instagram
A surefire way to easily save, copy, and paste your hashtag groups to your Instagram photo captions
A couple of other options to consider trying if Gmail isn’t your thing.
Some tips for ensuring that your Instagram hashtags are posted properly (e.g. hashtag limits and copying the caption before posting).
If you have other ways of managing your hashtag groups for Instagram, feel free to share them in a comment. As always, feel free to ask questions via a comment or reach out via my contact form.
Cheers!
–Sean
Share This Post With A Pin!
[ANSWERED] How Do I Save Groups Of Hashtags For Reuse On Instagram?
Sean R. Nicholson.
This post originally posted at SocMedSean.com - SocMedSean – Social.Media.Sean http://bit.ly/31GSnD5
0 notes
Text
Putting up the Christmas Tree – Xmas in New Zealand
Christmas in New Zealand is completely different from what appears in movies.
In this video we will be talking about Christmas in New Zealand and typical things associated with Christmas, all while putting up a Christmas tree with some special helpers.
youtube
What does Xmas mean?
Xmas = Christmas
Xmas is a short informal way of WRITING the word Christmas. Even though the informal way is written with an X, we do not pronounce it as an X as in “X-mas”. We still say “Christ-mas” with the T being silent (it sounds like Chris-mas).
Phrasal Verb – To Put Up
To put up is a phrasal verb that means to construct or erect something.
You put up a tent, you put up a Christmas tree
Put up is a transitive phrasal verb which means it needs an object, you need to put something up. The object can go in the middle of the phrasal verb or at the end.
We put up the Christmas tree. (correct)
We put the Christmas tree up. (correct)
Putting up the Christmas Tree
One of the most common traditions about Christmas, apart from opening presents, is having a Christmas tree.
A Christmas tree does not magically appear in your living room. No, you need to force your children to put the Christmas tree up …(just kidding)… I mean, it is a wonderful experience for the entire family to share this magical moment together, in unity, putting up the Christmas tree.
And that is what we did today. We put up a Christmas tree.
In our family, the tradition is to put the Christmas Tree up on the 1st of October … no just kidding, the 1st of December. (They don’t let me put it up earlier)
And to help me put up the Christmas tree this year, I had some special helpers. They were not exactly Christmas elves but close enough.
Note: ELF with an F is singular, and its plural form is ELVES with a V.
Elf (singular)
Elves (plural)
The same happens with the word scarf (that long piece of clothing you wrap around your neck to keep you warm)
scarf (singular)
scarves (plural)
Types of Christmas Tree
There are two main types of Christmas tree:
You have an artificial Christmas tree which can be reused every year.
Some people have a real Christmas tree which is normally a pine tree that has been brutally cut down.
They smell good, they look good, but you have to buy another one the following year.
As you can see in the video, we have an artificial tree.
You could always use artificial air freshener with the scent of pine if you want that “real Christmas tree” smell.
Or you can just open a can of reindeer meat and leave it sitting under the tree.
Christmas in New Zealand
I am from New Zealand so Christmas is a little different from what you see in the movies.
Santa Claus still wears a fur-lined suit, his red hat and his black boots… but when it is 30 degrees outside, that’s Celsius (about 86ºF), you should feel sorry for him because it must feel like he is in his own portable sauna, sweating away all those excess kilos (we also use kilograms in New Zealand, not pounds).
So, Christmas for us in New Zealand is not snow and fireplaces and ice-skating and ugly sweaters. No, in NZ we associate Christmas with going to beach, wearing shorts, and jandals (known as flip flops in the rest of the world), t-shirts are optional for men, and families often go camping near a beach or river over the Christmas break (the time between Christmas and New Year).
I just had a thought, what type of fur does Santa use? Is it polar bear fur maybe? Kids, next time you get a photo taken with Santa, ask him if it is polar bear fur… and don’t get up his knee until he tells you the truth.
My memories of Christmas
I only remember two Christmases as a child … one when I was around 3 years old and I was given a batman costume… I still remember the toxic smell of the mask… I’m sure it contained rubber mixed with plutonium or something similar… it was quite toxic… but I still loved it.
The other Christmas I remember was when my cousins came from another city to visit us when I was about 8 years old. We all slept together on a mattress on the floor in the living room and there was the smell of a real pine tree throughout the house during the Christmas period. I cannot remember any of the presents anyone got but we had so much fun together. This shows that experiences can create more important memories than getting “things”.
Now that I have my own family, I remember every Christmas and I enjoy watching my kids experience it.
Typical things associated with Christmas
Christmas candy canes: Some people, usually old people, use a cane to help them walk. Many years ago teachers used to use canes to “educate” children that were naughty. Well at Christmas time we have candy canes which you eat and they are sweet and often have a peppermint flavor. Traditional candy canes are red and white though sometimes they come in other colours.
Advent Calendar: This is a type of calendar that is numbered from 1 to 24 for the days before Christmas. Behind each number is a little box or pocket with some type of surprise in it. Usually it is chocolate or some other sweet thing. You open up one number a day to see what special thing you received.
Christmas lights: These are also know as Fairy lights in some countries. This is a long string of small individual lights that are wrapped around the Christmas tree as decoration or to decorate the house. Sometimes these lights are one colour, sometimes they are multiple colours. Often the individual lights flash on and off to make them appear like they are sparkling. Some Christmas lights come with annoying Christmas jingles (music).
Just a recommendation for when you are decorating your Christmas tree… the first decoration should be the Christmas lights as you have to wrap them around the entire tree. If you already have other Christmas ornaments already on the tree, they are likely to get accidentally knocked off the tree while you put the lights on it.
Christmas stockings: These look like giant red socks. Traditionally these would hang from the fireplace of the chimney. On Christmas day children wake up to find Christmas stockings filled with small toys or treats.
Star or Angel: The final decoration that you put on a Christmas tree is the one that goes at the top of it. Usually it is a star or an angel.
Tinsel: a form of decoration consisting of thin strips of shiny metal foil attached to a long thread.
Do you celebrate Christmas?
Do you have an artificial Christmas tree or a real Christmas tree?
Next Activities
See our Christmas Vocabulary in English – Video and Chart
See our English vocabulary about Christmas Traditions and things associated with Christmas.
from Woodward English https://www.woodwardenglish.com/putting-up-christmas-tree-xmas-new-zealand/
0 notes
Text
Yes, last Motivational Monday, we talked about how to better use the drawers we already own in our bathrooms. We mentioned one thing we learned from Martha Stewart years ago, that our make up and hair area does not have to be in the bathroom. Wait….is that where your make up warehouse is?
Our Make Up Area Inspiration
Before we delve into one of the areas of our homes that can use a good de-cluttering and organizing, we want to share a fellow bloggers morning make up area. How perfect is this repurposed dresser for a spot that is all hers?!
un-fancy.com always inspires us to do more with less. In a nutshell, she reminds me to perfect what really works for me and not be drawn into doing more when it does not fit my lifestyle.
Organizing The Bathroom
It’s hard to say how many bathrooms laurel bledsoe design has designed for our wonderful clients. No matter the decor, all bathrooms have to do the same things for each of us. The number one request we get for a new bath design is to add more storage. Reality check. The thing with more storage is that if it’s not the right storage soon the same problems come back bigger! A good design plan will allow for an auxiliary area, away from the steam and too deep vanity, with individual storage that is easy to maintain.
Why The Skinny Make Up Area?
So We Can See Up Close!
Being able to get up close to a mirror, with good natural light is the ideal situation to create our best selves each day. I’ve seen younger gals sit in front of a stand up mirror that reflects the natural source of light in a room. Good plan, but if I did that I might need help getting up each day! Here’s what is working for me in our current home.
This TJ Max, 15″ deep, $69 cabinet, has made the cut in several homes. In it’s previous life it housed candles. Now it fits nicely in the hall between the bed and bath. The mirror, which never got hung on the wall, used to hang over a bed. It’s a funky little space with just enough surface to hold a speaker and to spread out the things I use everyday.
Organization in the cabinet is with several flat acrylic trays that slide out easily, a pair of Burma Shave jars (a memory of my Dad), and a deep sided perfume box. The small travel mirror is lightweight and good for closeups. A pair of travel make up bags stay close for quick packing. Baby wipes are a quick way to clean brushes daily and wipe up the counter. The photo to the right are the only items I keep in the bathroom by the sink. Basically, things that require a hand wash after application.
Quick Make Up Stash In A Medicine Cabinet
Years ago I started stashing a duplicate set of my absolute make up must haves somewhere other than in the master bedroom/bathroom. When someone in the house is retired, (Mr. LBD) schedules are hours apart. When I travel I use a glass to keep things on the counter but easy for housekeeping to move. Currently I use a tall Tervis 16oz Tervis Tumbler that holds what I use on most days and it is in the guest bathroom medicine cabinet. It has also been on my desk and kitchen counter more times than once.
Sorry…It’s All Staying In The Bathroom!
Other Ways To Free Up The Vanity Drawers
Again, we stress that what works for one might not work at all for another. If you’ve got a system that works seamlessly for you now, does not create stress hunting for that perfect shade of lipstick you know you bought last month, or is so organized there is no hair or goop in site, then you don’t need to do a thing.
Or if you are like the rest of us, take some time to rethink how the area that you count pretty heavily on everyday is working for you. A remake could be just what you need for a few extra minutes each day.
Enough Storage For Most Make Up Needs
Look around and see if you can find three to four feet of wall space near natural light. Decide if you want to sit or stand so the new space works best for you. Perhaps existing furniture can be used in a different way. We reuse kids desks all the time to make gals a personalized finish up spot. Think about how fewer fights in shared bathrooms there will be some school time again. Creating a personal make-up station, with new pieces, does not have to be expensive. The more unique the pieces the more fun! Here are a few universal pieces we suggest often. We’ve got one savvy Mom who even attached a hair tool holder to the vanity she made for her daughter. Smart!
Wall Mirror with Shelf
Parsons Console Table
Make Up Organizers
Hair Tool Organizer
Subscribe Here
To be the first to get the upcoming weeks of our Summer De-Cluttering and Organizing Tips
Are You Following Us On Pinterest?
No Stainless Steel Appliances!
Why A Skinny Make Up Area Outside The Bathroom Is Best – Week # 3 Yes, last Motivational Monday, we talked about how to better use the drawers we already own in our bathrooms.
0 notes
Last Seen Blogs