#alterations
Text
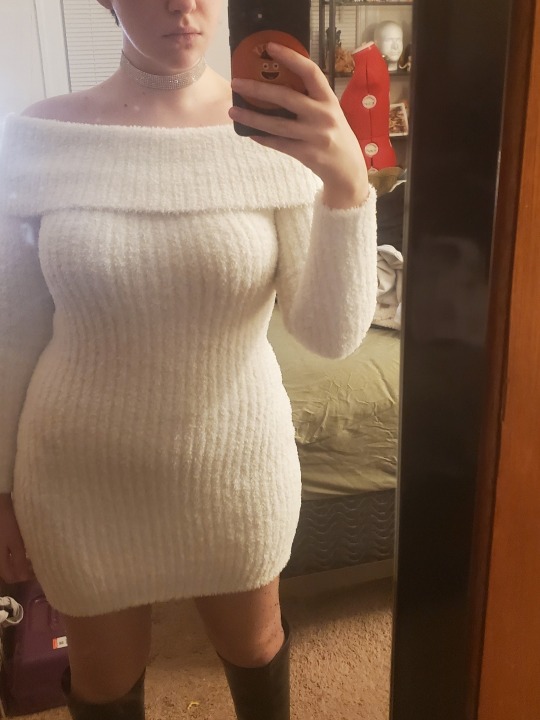
turned this dress into a shirt and legwarmers set

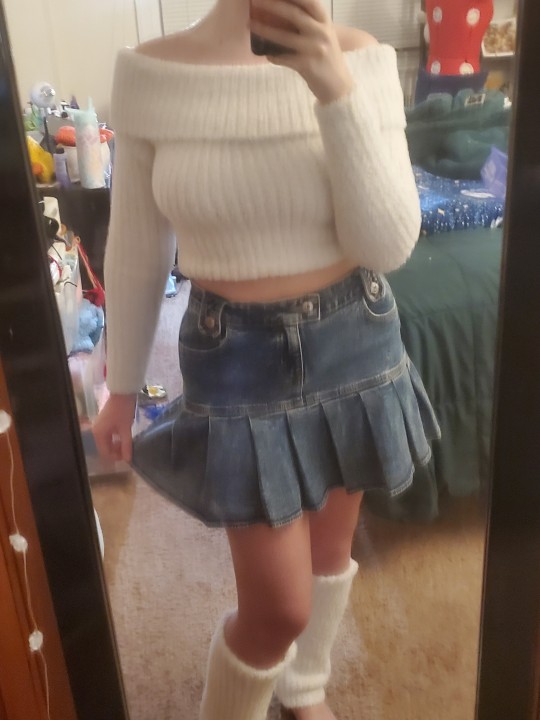
the original dress (i got it months ago and never wore it bc i do not like wearing bodycon dresses)
just a fun little experiment
196 notes
·
View notes
Text


More progress on my green jacket......... I did the overlaid panels on the chest/pocket/collar ages ago, but I've been putting off the sleeves because. I wasn't sure if I wanted to keep them or not lol.
But I think it's turning out good! Mismeasured a bit between the panel width and the cuff extension but a cute pleat fixes everything :3c
#fiber arts#sewing#battle jacket#alterations#diy clothing#i have one more sleeve to re-cuff but im tired#next up is some brassy spikes if i can ever get this damn website to work lololol#green jacket#crafts
415 notes
·
View notes
Text
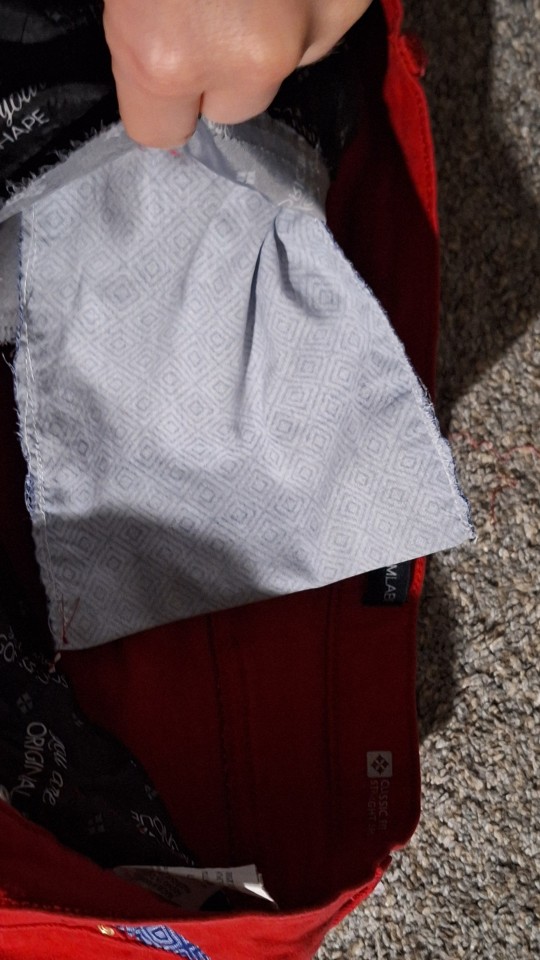
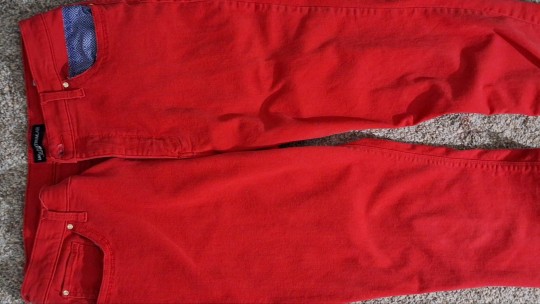
Embiggening Pants
Hello everyone! I finally got a project off my mending pile, and I want to gloat about it.
Heads up, I'm talking about sewing for a body change. For me it's mostly a positive change, but I'm not attaching any moral judgment to it. Clothes need to fit me, not the other way round. But, if this isn't something you're game for, maybe sit this post out.
I got these dress pants before I came back to college and got seriously ill. I go up 15 lbs like clockwork during school semesters, and sickness adds more. They stopped buttoning around the waist and tum. So, last March, I pulled off the side belt loops, ripped these open down the side seams, cut the waistband apart, and took the hems out.
And then I...couldn't get it. It wasn't working in the brain. Got torn between canvas and ribbon and bias cut strips and hem finishes, and just couldn't make sense. So I chucked them in the "out of my sight" pile, took a trip to Germany, and gave up on them for a bit.
I then got a physical labor job, and I beefed up quite a bit. My waist measurement has gone down a smidge,,, but I now have Quads too. So.
I'm living with a quilter now who has marked mats for the rotary cutter, and everything clicked. In a fit of inspiration, I cut straight-grain canvas strips like three inches wide and French seamed them on the outside of each leg.
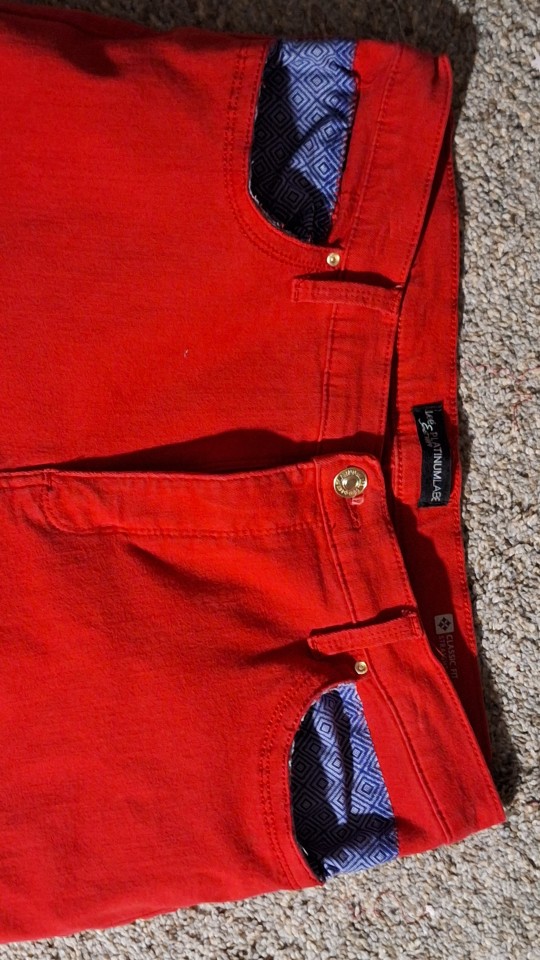
Then I cut a little cover patch to fill in the waistband. This took several tries and was hard.
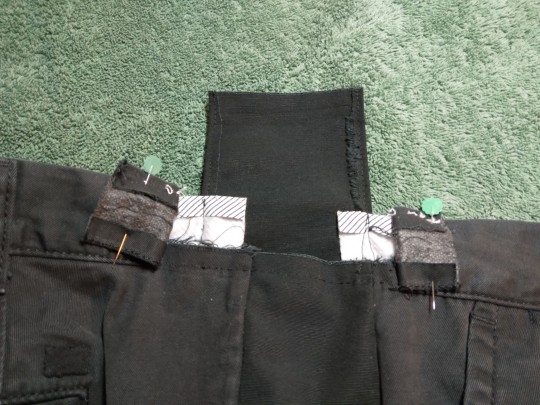
(Also you can see in the bottom corner how I patched over the Tommy Hilfiger logo by the back pocket. My ass is not a billboard.)
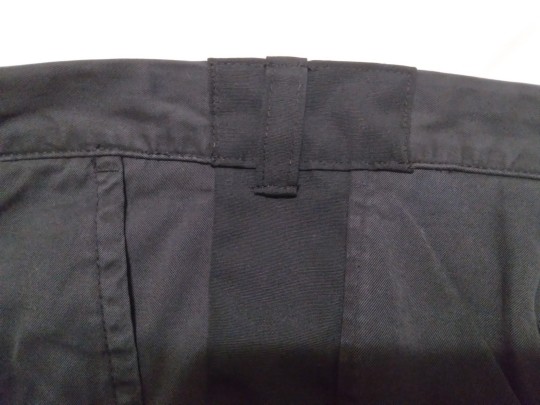
But here's the result! I have a straight stripe down the outside of each leg, so it looks original to the pants. Nobody's gonna see the Frankenstein waistband under my belt or through my shirt. I also lost the original belt loops, so I hope my replacements hold up!
I probably will want to elasticate the center back to help them stay up. (Sew my last sewing post about doing that to a skirt.) But I'll give them a few washes and wears first to see if the fabric settles. Or my body changes!
#cj sews#sewing#diy#solarpunk#beginner sewing#visible mending#alterations#it's not waste until you waste it#embiggening pants
125 notes
·
View notes
Text
@karadin replied to your post “Wait are you saying your ribcage got bigger just...”:
can you let out side or back seams to make waistcoats fit? stripes in these areas might look cool.
Sort of, but it would take a lot more work than that to have it not look weird. The fronts are so much narrower on the old patterns that the armholes would be scooped out really far forwards if I added that much onto the side seam.
I do have an old embroidered waistcoat from 2017 that I want to pick apart and remake someday, and I'm going to have to piece extra material back into the armhole and re-cut that whole side edge in order for it to look decent again.
34 notes
·
View notes
Text


Finally finished altering the bone tail! This was absolute HELL of an alteration as the belt kept getting in the way of machining the zipper, whilst the extra fabric from the zip tape made it extremely difficult to pass the needle through when closing. And lets not forget I had to resew the interior straps together, blind!
#craft#crafts#wip#sewing#stitching#maker#animals#fursuit#fursuit making#costume#costume tail#tail#fursuit tail#bonetail#miwak#fursuit alterations#alterations#fursuit maker#personal fursuit#fursuits#fursuiter#fursuiting#costume maker#skelebear
49 notes
·
View notes
Text
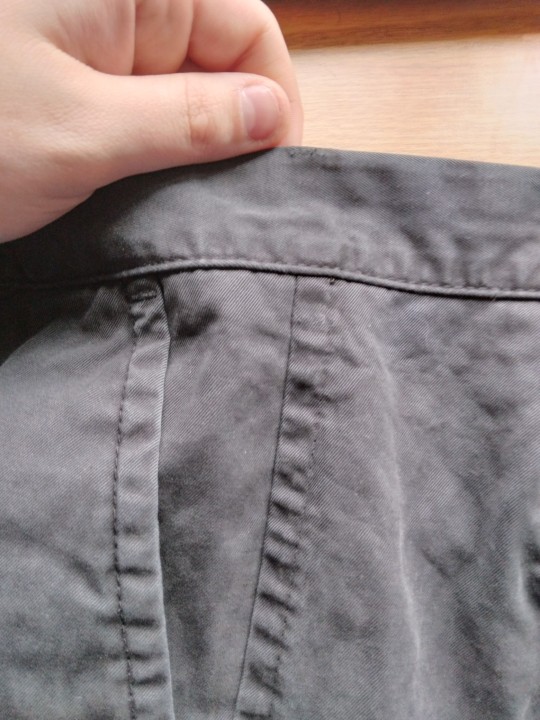
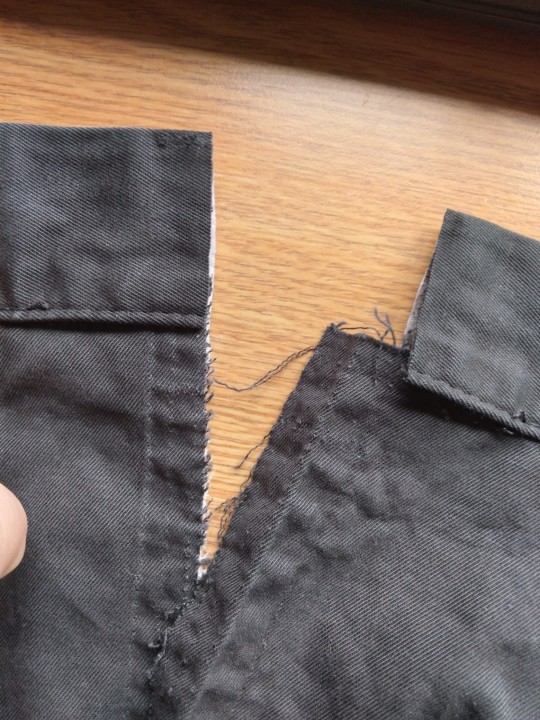
Always give the customer what they ordered UNLESS he's bought a jacket and had the sleeves shortened and then discovered that part of a seam has come unstitched, and it's easily fixable and won't be at all visible (and would actually be stronger than the old seam) but he wants to order a second, identical jacket and have you shorten the sleeves on it too, meaning you cannot sell the already altered but otherwise perfectly fine jacket and will have to write it off as damaged, so he's losing the store money and he wants a discount for the "inconvenience" of having to come back to the store again, even though he already got the original jacket on sale for 70% off, AND even though he has something else on hold so he's got to come back anyways.
In that case it's totally fine to sew up the small split in the seam so it looks good as new, and just take the tag off a new jacket and put it on the already altered one.
#customers#irksome things#alterations#work#discount for your 'inconvenience'?? well maybe it's inconvenient for ME to spend 45 minutes shortening sleeves and wasting a jacket#when I can just close up that hole in less than 5#he absolutely 100% Cannot tell the difference
200 notes
·
View notes
Text

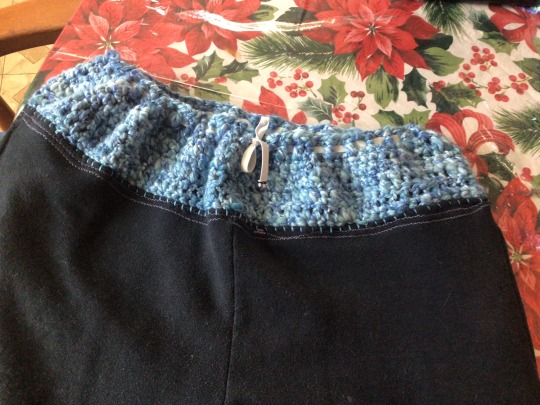
Altered a pair of sweatpants that no longer fit me in the waist and Im in love with how they came out. 😍
1. Cut off the waistband and then hemmed the edge and top of the pockets.
2. Sewed a second hem around the bottom edge of the hem just to make sure it was tacked down really well and wasnt going to bother me when it rubs against my skin.
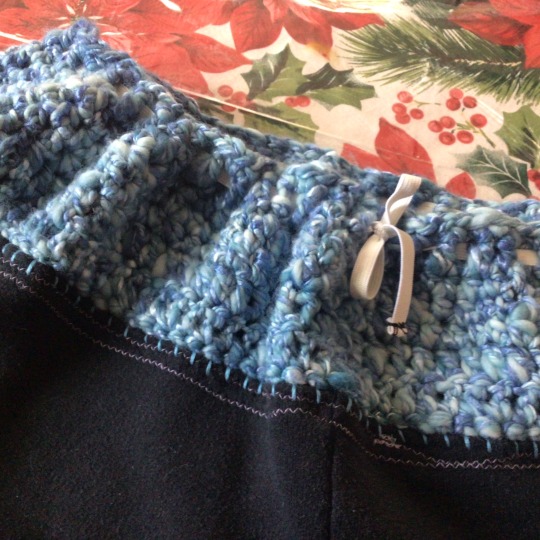
3. Hand sewed a blanket stitch around the top with embroidery floss. I picked out a color that matched the yarn I planned on using.
4. Crocheted thru the top of the blanket stitch using some hand-dyed, hand spun bamboo yarn. (I just winged the pattern but it was something like, first row sc, two rows of dc, two rows of hdc, last row single crochet, and I started decreasing during the hdc rows.)
5. Threaded some elastic through the top row to use as a drawstring and hemmed the raw edge of the elastic.
6. Fashion!!
#elliott's art#sewing#visible mending#crochet#alterations#fuck fast fashion#anticapitalism#anarchy#witchcraft#irl#yarn#handspun yarn#hand dyed yarn#ej2022
238 notes
·
View notes
Text
Baby's first alteration!
So, I got my old sewing machine fixed and serviced, and I set up a sewing table! So of course I've been going through and happily mending holes in pajama pants and backpacks and sheets and what have you. And because I've also been sucked into the whole "visible mending" thing, I took a bag of not-so-great clothes that I was going to scrap, and started reevaluating them as potential patches for visible mending projects.
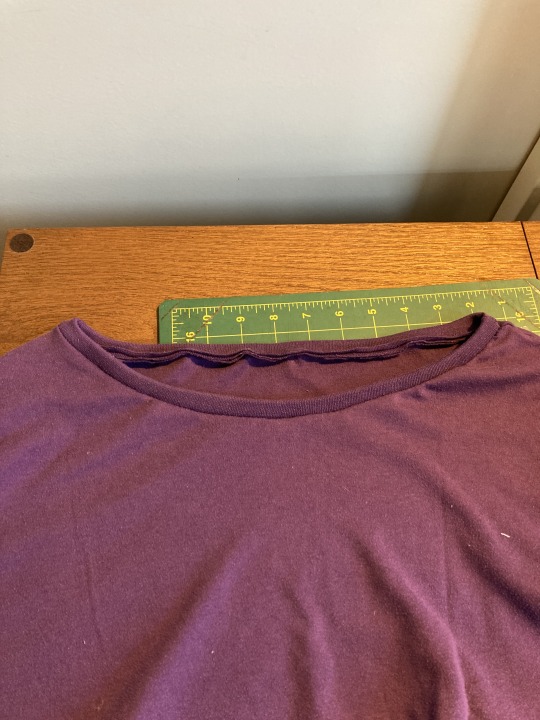
Which is when I came across this shirt:

The reason I was going to get rid of it is because of the turtleneck. The very, very, VERY small turtleneck, that made me feel like it was going to strangle me every time I wore it. And then I started thinking that having a sewing machine means that you can change things about clothes that you don't like....oh no, I'm going to start learning alterations and tailoring, aren't I? Oh. No.
So I came across this very excellent tutorial:
youtube
And I figured, I was going to get rid of that shirt anyway....what if I tried to take off the strangle-neck and make it into something wearable?
And then I got intimidated. I've never done anything like this before.
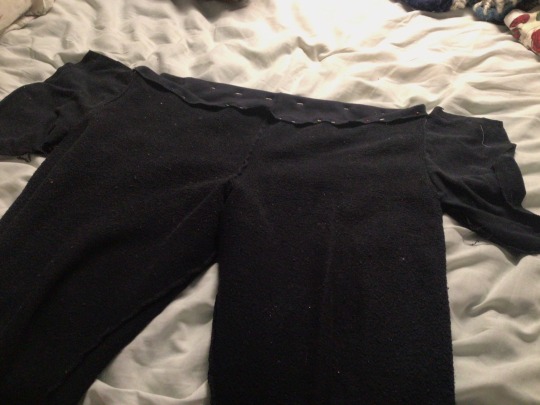
And then I remembered another turtleneck in my scrap pile, that was there because it doesn't really fit me very well:
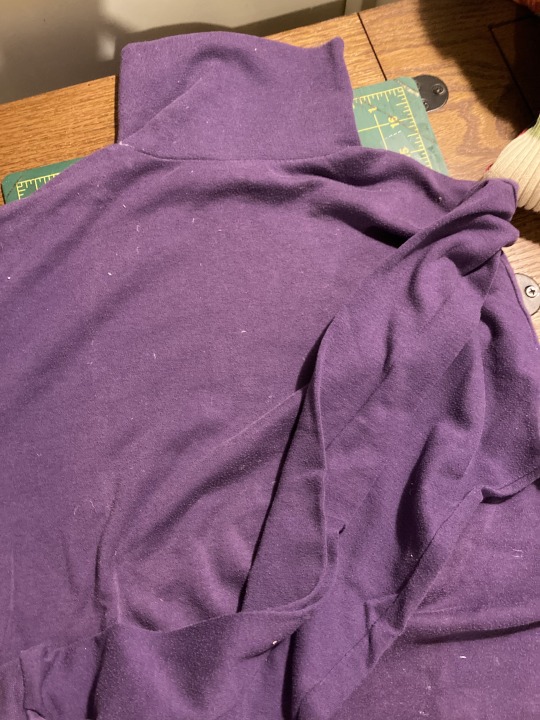
I figured I could use this as a practice piece, because there's a lot more cloth in case I screw up (it's always been very baggy on me), and there's basically no way I would be wearing it again anyway.
So I started going through the tutorial:
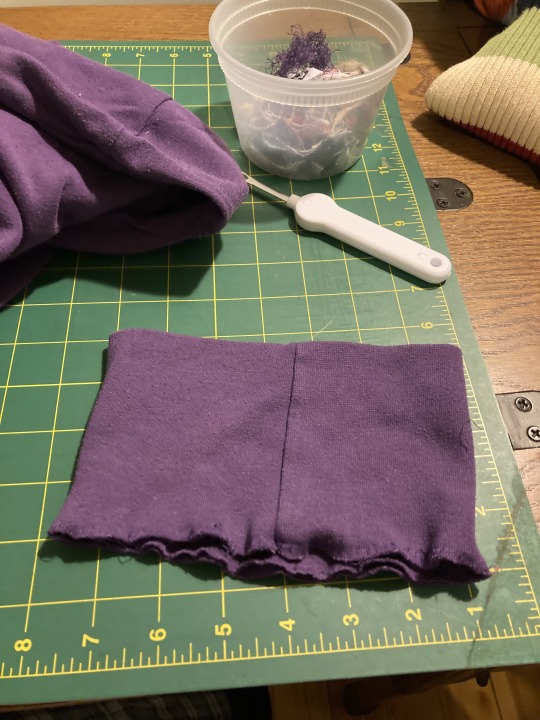

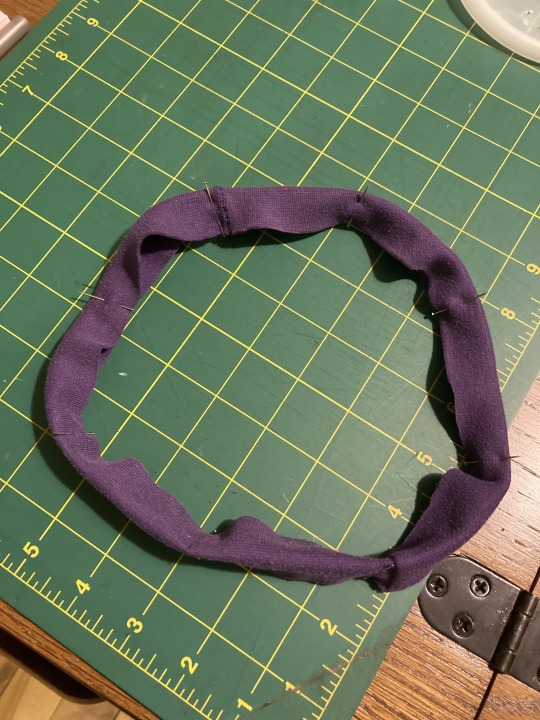
I removed the turtleneck part and picked it apart
(Look at how much longer the purple turtleneck was compared to the blue!)

The tutorial was for a scoop-neck, but I always look better in a boat neck, so I marked the fabric with soap and cut a boat-neck neckline into the shirt (which was scary, but I was pleased with how it turned out!)
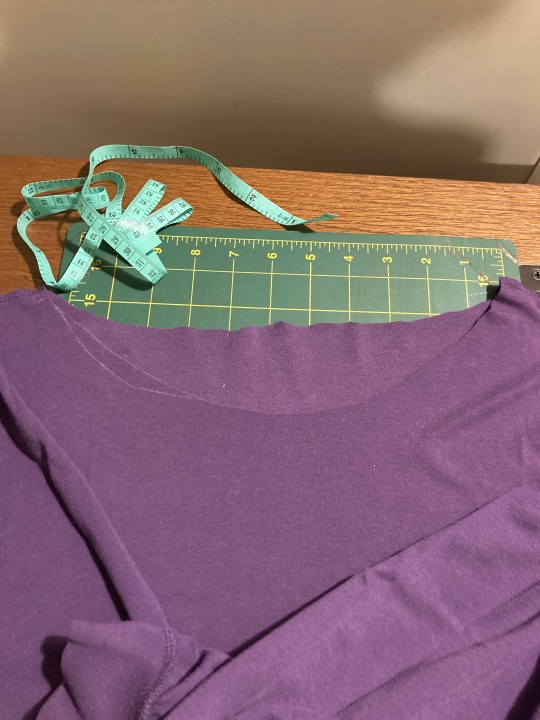
Then I followed the tutorial for how to measure and estimate the lengths of the strips for the front neckline and the back neckline seams:

Then I sewed them together

Panicked because one of the seam attempts caught in the sewing machine and was drawn UNDER THE FEED DOG PLATE which caused all kinds of problems including a broken needle! And I was worried that the fabric of the seam was so chewed up that I'd have to start over......
But then realized that the chewed-up part was going to be folded up and oversewn with the seam. So I pinned it up:
then got scared and added more pins
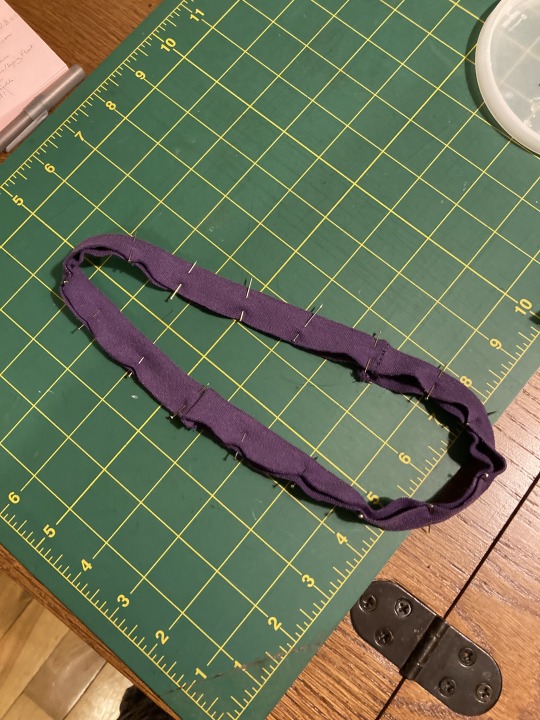
Matched it up to the shirt

And then I SEWED IT ON!

The shirt still doesn't fit at all, but I'm pretty pleased with the neckline now! (Oh no....does that mean I'm going to have to learn how to tailor an overly-baggy shirt?)

(Side note: Starting off new with super-stretchy fabric made some interesting problems. But! I now know how to replace a broken needle, pick a new foot that's better suited to the fabric, fight with stretchy fabric without a serger, etc etc etc. Good learning project, all in all. :D )
#sewing#mending#upcycle#sewing machine#new skills#first time#newbie#turtleneck#boatneck#tutorial#alterations
40 notes
·
View notes
Text
For my friend solstice celebration thing my friend gave me some clothes that used to be her grandpas, it's pants and a jacket and it's very cool
I need to alter the pants though and this will be my first alteration project
I definitely need to make them a couple inches bigger, but I didn't know if there was a way I could also make them high waisted
Any suggestions would be appreciated
#punk#queer#punk diy#diy projects#diy fashion#diy punk#diy or die#diy ideas#diy crafts#diycrafts#diy#alterations#folk punk#folkpunk#patch pants#battle jacket#queer punk#fag punk#feralpunk#mag barks
36 notes
·
View notes
Text


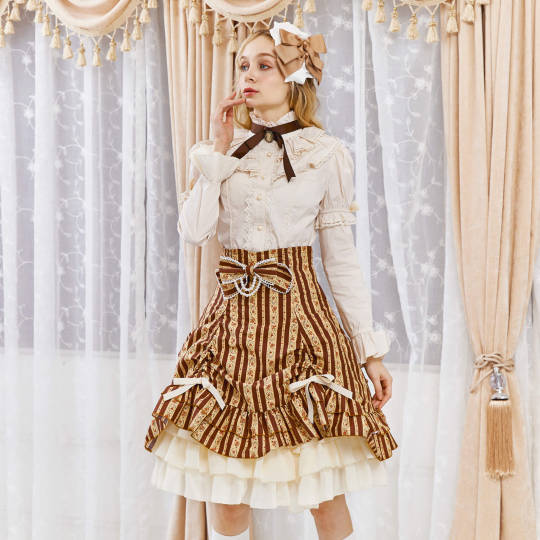
New dress, baggy on my lower ribcage, any tips on how to alter?
#me#selfie#my photos#my life#myself#my face#tattoed girls#dress#ootdwomen#ootd#ootdfashion#dresses#alterations#dress making#tips
60 notes
·
View notes
Text
A few months ago I bought a bodyline dress second hand for $20, and the construction of it was so bad! It bothered me enough that I couldn't wear it without some alterations.
Here is the dress in all its problems:

1: one of the straps was sewn on inside out, I had to take it off and flip it over so they matched
2: the stripes didn't match up at the waist seam. This might not bother a normal person but I absolutely hated it. I ended up using the waist ties that came with the dress to make a waistband to cover it up.
3: the most egregious problem imo, the ruffle at the bottom was completely uneven. Like some parts were very densely gathered and others were totally flat. It looked extra stupid when the dress was bustled. I had to take the ruffle completely off and re gather it.
And here's how it all turned out!:

I think it looks 10x better even though I didn't do anything super drastic!
Dress hunting tangent:
As a side note I cannot find a bodyline jsk made in this fabric! The lace market listing said it was this dress:
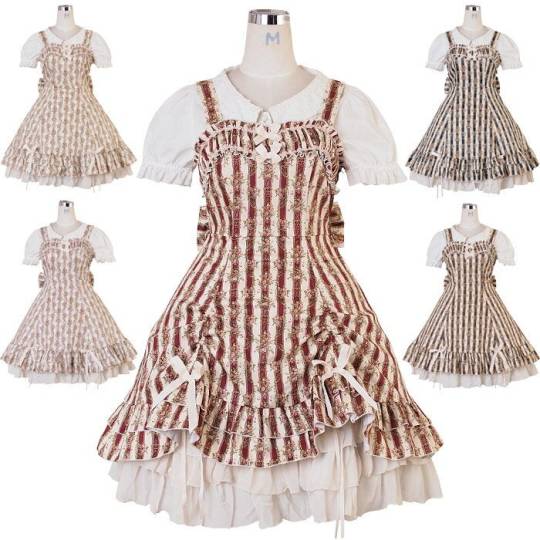
And while it's very similar that's just not the same fabric? Searching through lolibrary and some some old blog it looks like other people have had a dress with the same item number as this one in the same fabric as I have too. Unless bodyline just made it with different fabric than what they advertised? Or switched fabric partway through the run? They're selling a skirt from this fabric on their website right now
But I can't find my evidence of a jsk they've ever made with it.
#lolita fashion#sewing#bodyline#alterations#i did this months ago but just never got around to posting it
74 notes
·
View notes
Text


Sewing pockets into all of my pocketless bottoms;
Starting with this pair.
One pair down...
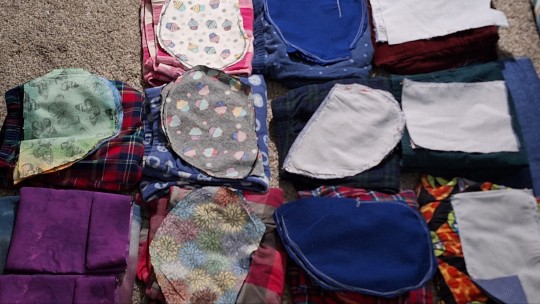
11 more to go!
Wish me luck!
12 notes
·
View notes
Text
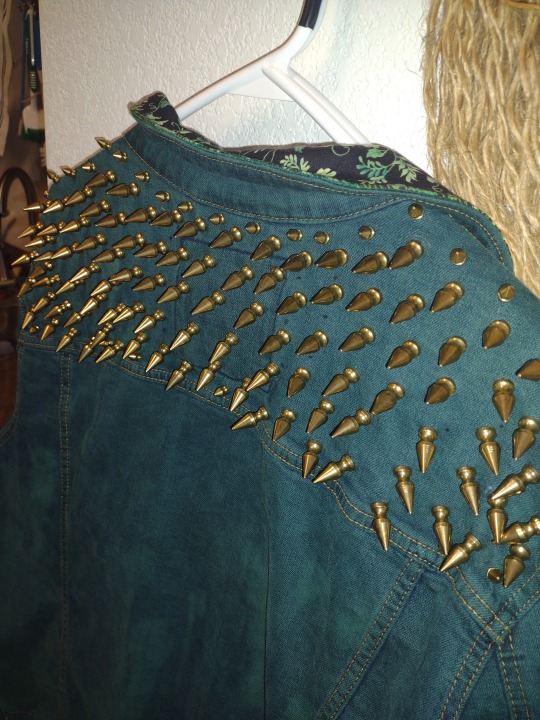
SPIKES.... DONE🎉✨
next up is making some side panels out of this rad plant fabric and doing pocket-flap overlays 👀
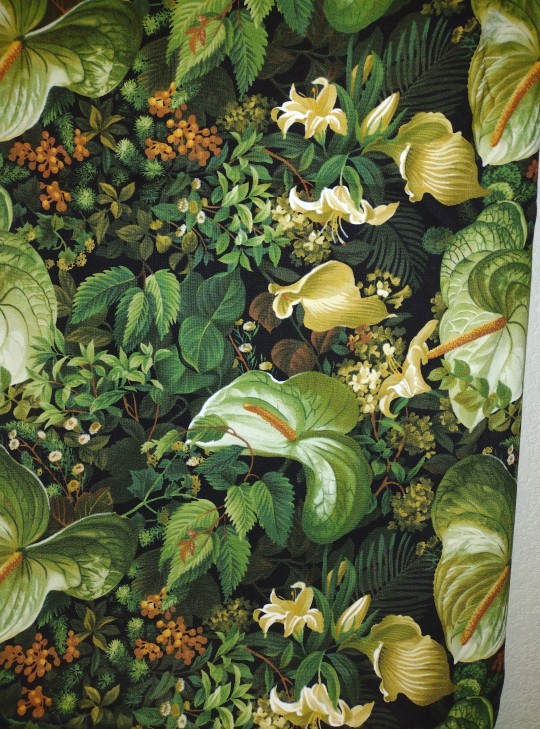
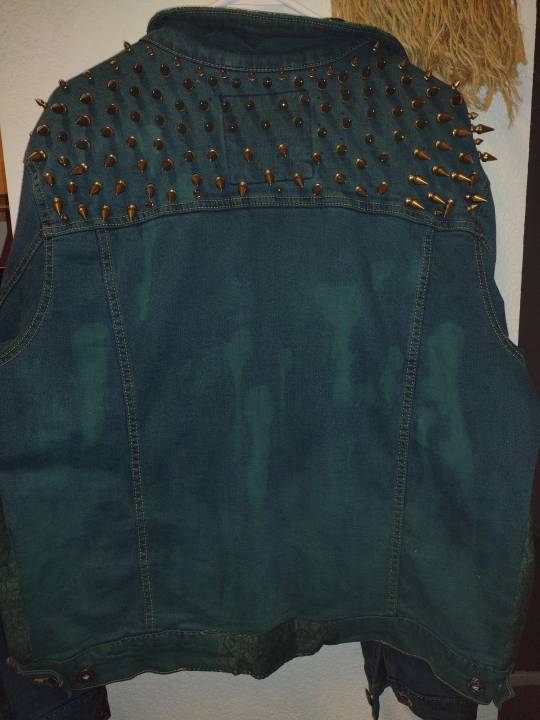
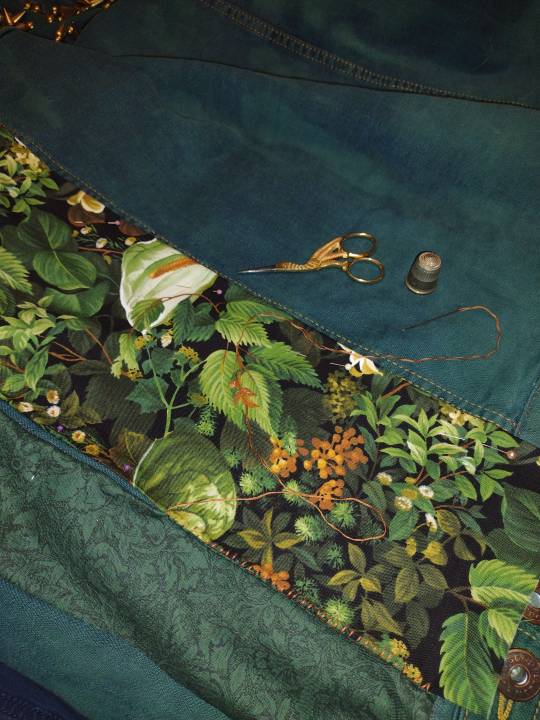
#fiber arts#sewing#battle jacket#alterations#diy clothing#WIP#I've got some (differnt) rad plant fabric I'm going to do the pocket-flap overlays with next#but i think ill have to take the pocketflaps off entirely to make it blend best so that's after I do these side panels in the back#green jacket#solarpunk#crafts
315 notes
·
View notes
Text
Elasticating a Waistband Back
The first skirt I ever machine-sewed was this gorgeous medium blue with dark blue flowers. I made it so I could pull it over my head, so no zip or button or anything. Which means that it doesn't stay up on my waist. I tried a drawstring (sensory bad) and suspenders (not good for every outfit). Then I saw a creator do this to her jeans and I had a glorious revelation. Here's what I did!
1. Put on inside out. And, since it's a skirt, backwards, so I can see.
2. Pin it at desired tightness.
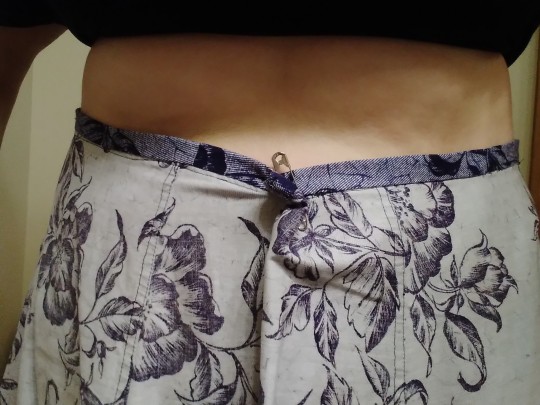
3. Pin on a little bit of elastic, taut but not stretched.
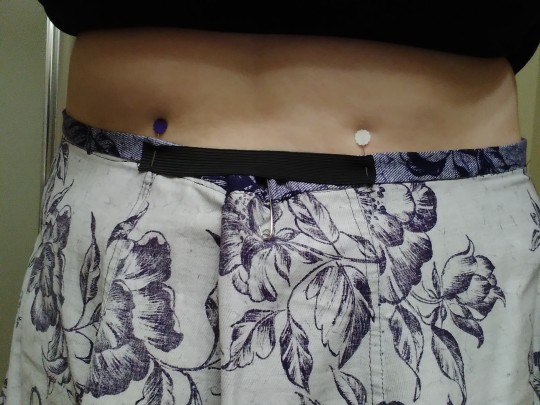
4. Take out the safety pin and stretch the waistband 'til the elastic is flush with the fabric. (I just pulled it up over my bust.) Secure carefully with a few more pins.

5. Sew the elastic in place while stretching it. My machine has a bad history with stretchy things, so I chose to hand-sew while stretching it bit by bit. I forget the stitch name, but the needle always points opposite to your sewing direction. The seam stretches when done and lies flat against my skin. Also, contrasting thread color for the whimsy.

6. Done! My skirt is now elastic in the back.

#cj sews#sewing#diy#solarpunk#it's not waste until you waste it#beginner sewing#elastic#mending#alterations#elastic waistband
85 notes
·
View notes
Text


Current project is adding embroidery to a very tired sweatshirt. I was inspired by the black top, but have no idea how it will look in the end. Other plans include chopping the full length sleeves to 3/4 length and adding some kind of ruching to the sides to add a neat detail and shorten the top.
Who knows if it'll look great? At least it will look unique.
23 notes
·
View notes
Text
Bridal alterations, past, current and future. Yes, it is a job.
41 notes
·
View notes
Last Seen Blogs

alunasky-blog
Alunasky

mythsofaphrodite
renegade heart

athena1138
Athena1138

lao-tse-el-precursor-en-china
LAO TSE
jadoreleconcept
J'adore le concept