#diy fashion
Text
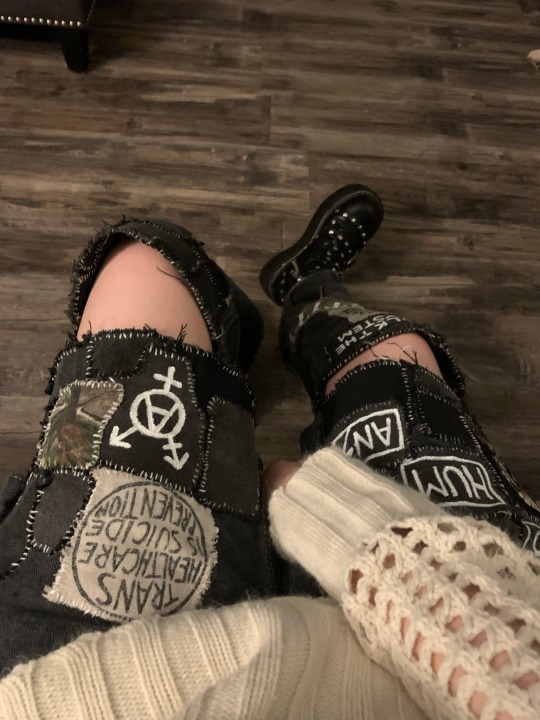
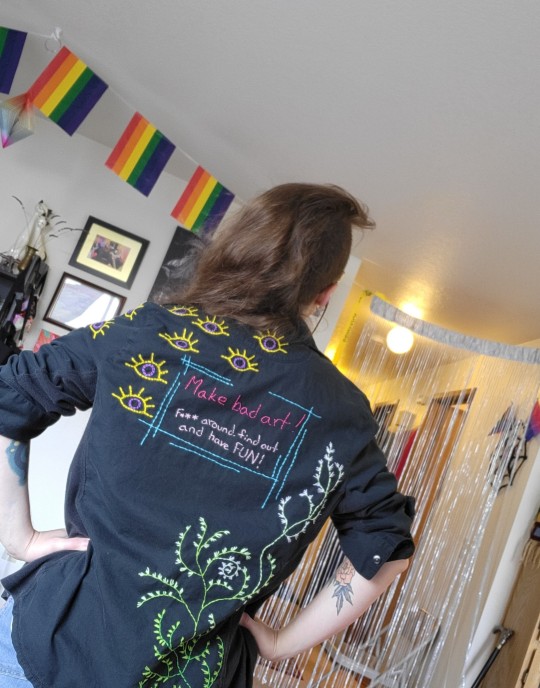
i finally finished phase 2 of my scrappants!! scrappie for short, cause he was originally made of scraps

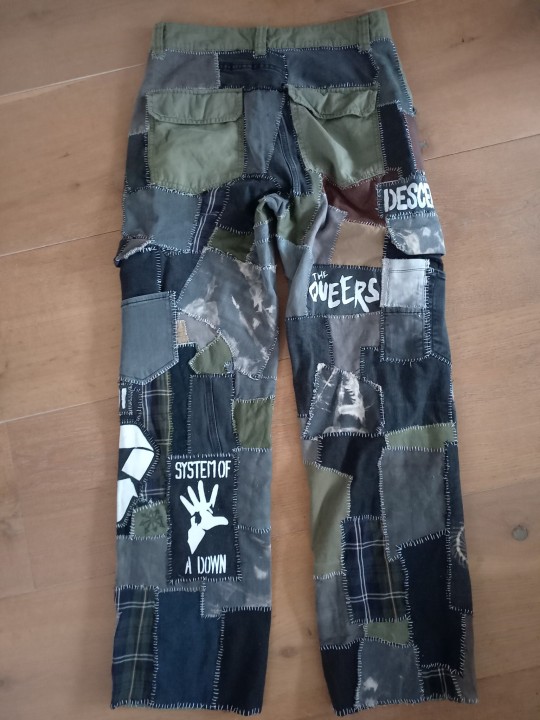
my boy! i gonna add a lot more painted patches but at least the base is finally done. still gotta figure out what to do with the back pockets. might just remove em and add bigger ones
also made this very useful belt pouch, it has two compartments and is made of a piece of pants, a patch and two buttons. you can put it on a belt and fold it up so it isnt bothering you when you dont need it! useful for when i dont want to or cant have a bag with me.


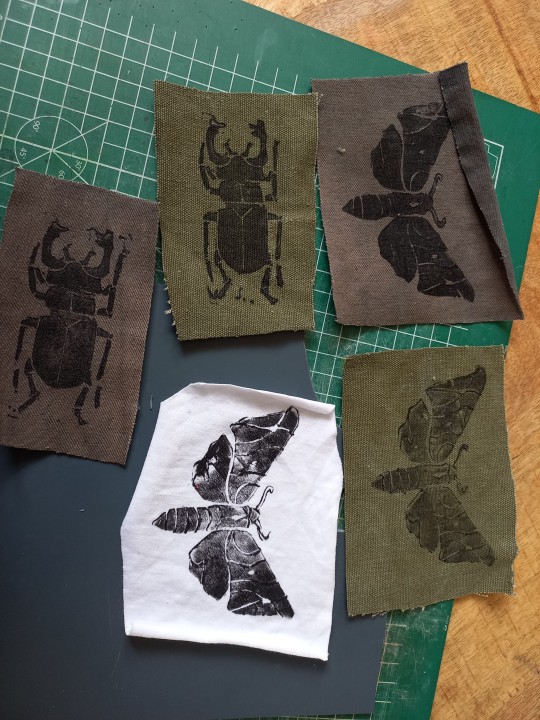
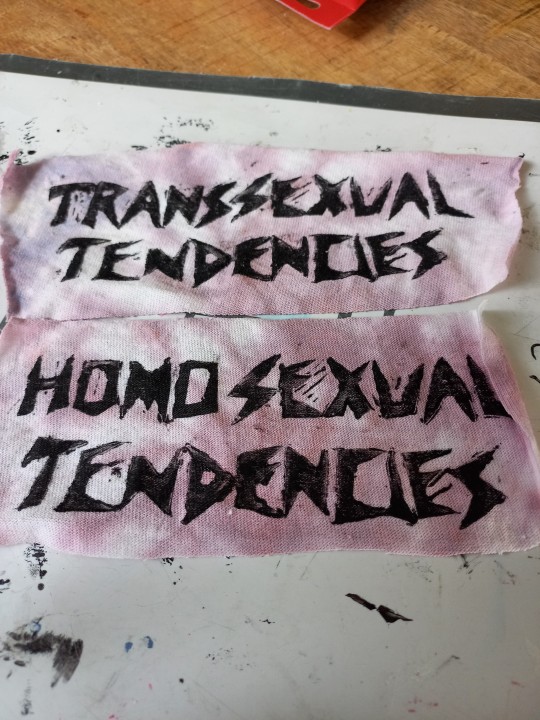
andd some patches i made, finally got lino to do some linoprinting with so ive been printing away
#punk diy#diy fashion#diy punk#punk clothes#punk style#queer punk#punk#punk patches#queercore#my stuff
103 notes
·
View notes
Text
So I stumbled across this Etsy that sells dog accessories, and like 50% of the patches they sell (intended for use on dog jackets) go harder than anything made with humans in mind. Like am I crazy or
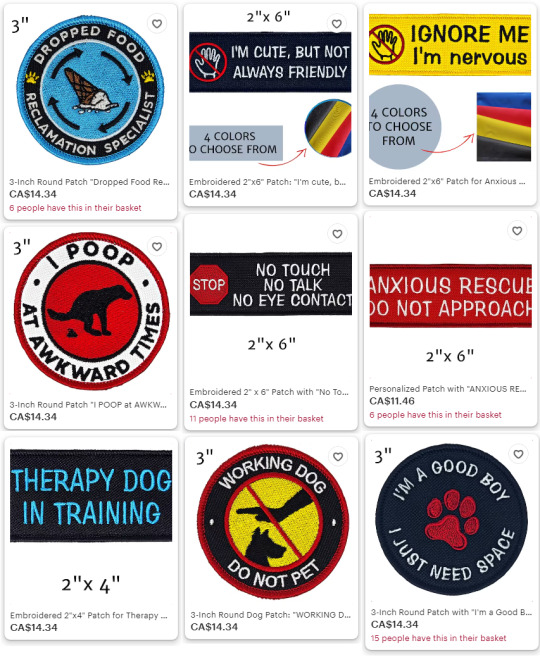
battle jacket exclusively featuring dog patches
#unfortunately they also sell blue lives stuff#patches#dog accessories#dog#dogs#punk#diy punk#punk diy#diy fashion#battle jacket#battle jackets
26 notes
·
View notes
Text
diy!
#altfashion#punk fashion#diy punk#punk aesthetic#diy fashion#punk#crust punk#crust pants#patch pants#emo fashion#sewing#diy patches#patches
2K notes
·
View notes
Text


DIY Bat Shoe Wings made with duct tape, scissors, white pen, and pen knife.
Make a big sheet of duct tape by laying it out and making sure the creases face different ways so its less flimsy.
Then use white pen to draw out your bat wings template. Use your shoes to mark out the holes. Then cut out the holes with a pen knife and check if they fit. Wipe off pen with a lil acetone and qtip. Lace onto your shoes and ur good to go!
#i just had my first tome#toke#at 9:30pm#so late#ive been awake#im so stoned#the difference#makes it higher#punk#diy#shoe diy#goth diy#diy punk#punk fashion#diy fashion#goth tiktok#punk tiktok#diy tiktok
5K notes
·
View notes
Text
I added a water bottle pocket to my pants!
This came up due to the fact I use Lyft bikes to get around and they don't have bottle holders, so I placed this pocket here because this part of my leg remains relatively upright while pedaling.
Heres the initial proof of concept

But it looked rather silly especially when not in use. It also flopped around a lot when a full drink is being held and I was walking around so I started to look into ways to collapse it and secure it when in use.
First attempt came up with this:

Which looks nice, but wouldn't help restrain the movement of the pocket with a bottle in it.
So I moved to this belt design, using straps I had designed for the pants in an earlier iteration.


And it works like a charm.
Holds the bottle in place, is easy to fold away, and looks nice in use.
Though not sure I like the red and might switch to black straps but I'd love to hear all your thoughts and possible improvements!
771 notes
·
View notes
Text

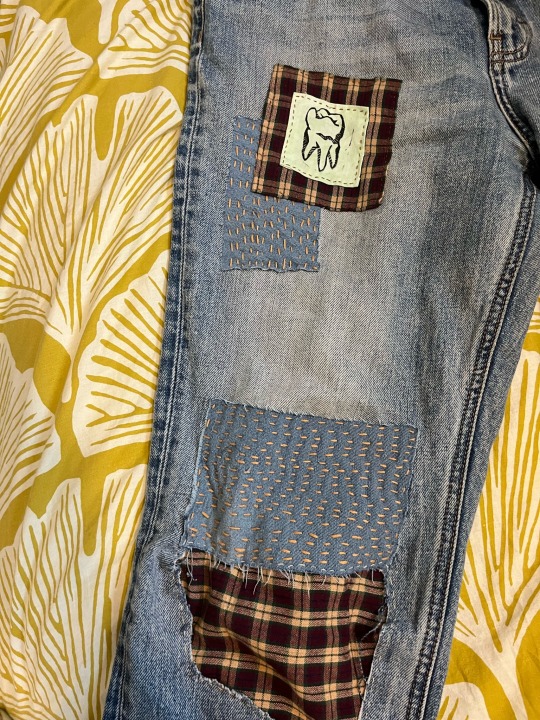

Finally got around to finishing this visible mending project from this fall.
#solarpunk#printmaking#punk patch#punk#diy fashion#blockprinting#punk patches#diy punk#patches#solarpunk fashion#eco fashion#visible mending#mending#clothing repair#sewing
572 notes
·
View notes
Text


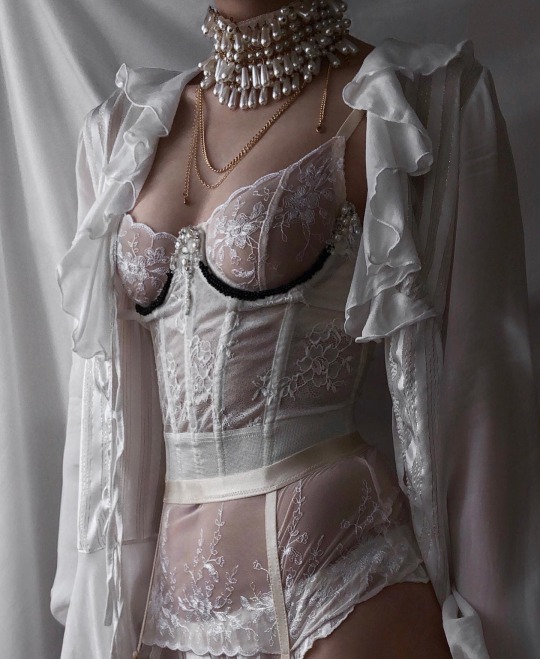
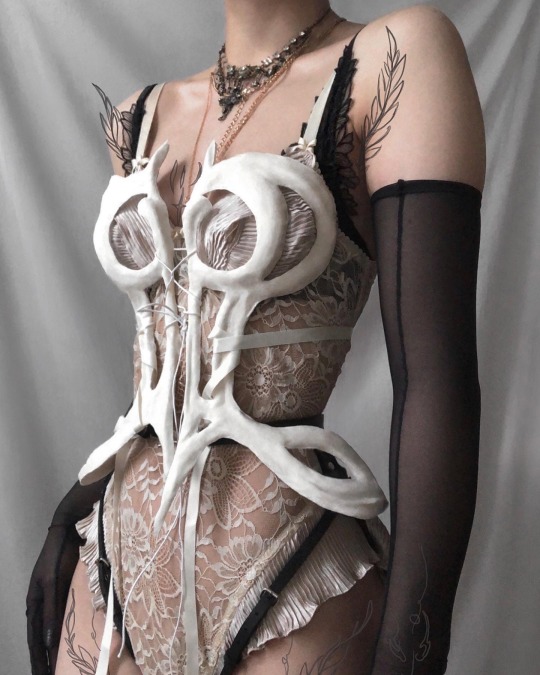

Angel inspired outfits🤍
…
https://instagram.com/caminimm
#outfit#outfit inspo#angelcore#angelic#embroidery#fairy core#hautefashion#vintagestyle#kitsch#haute couture#dark fashion#diy fashion#fairytalecore#alt fashion#pinterest style#renaissance#gothic
993 notes
·
View notes
Text

repainted some patches :p
#punk pants#diy punk#diy fashion#crust punk#folk punk#punk#queer punk#crust#diy patches#punk diy#patch pants#battle jacket#patches#patchwork#fashion#alternative#alt boy#alt fashion#alternative fashion#pants#diy#sewing#sewblr#punkblr#punk boy
924 notes
·
View notes
Text


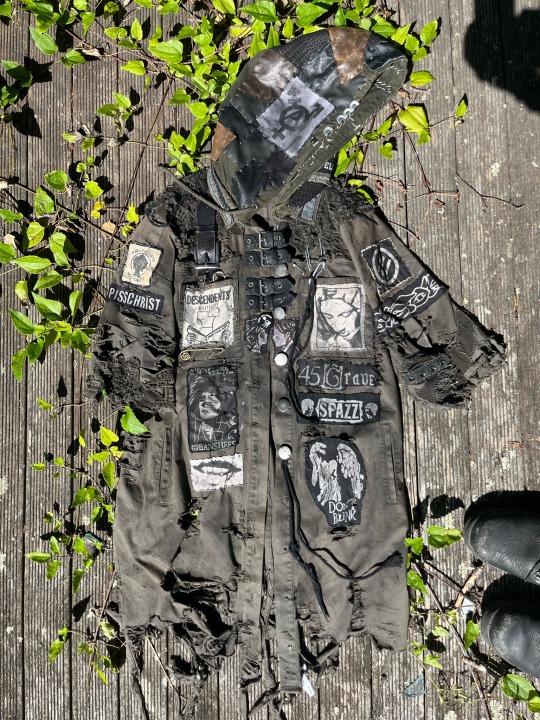
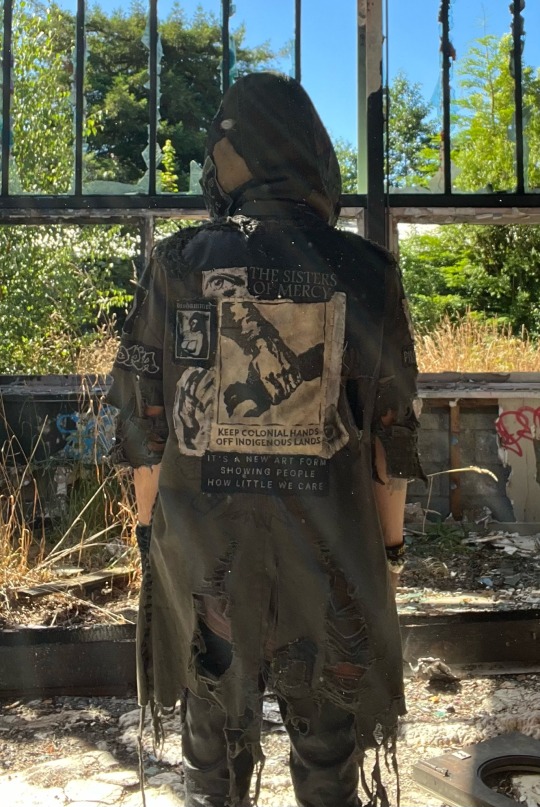
diy punk fashion by c4b1n.1n.th3.wxxds on ig
#stim#alt fashion#punk#diy fashion#sfw#black#brown#white#gray#grey#silver#hats#bags#shoes#boots#clothes#pants#patches#spikes#gloves#hands#grunge#alternative#people#long nails#ishy gifs#postish
479 notes
·
View notes
Text

Made my own skeleton gloves
340 notes
·
View notes
Text

🌱🌻🌸🌼🌺🏵💐🌿
324 notes
·
View notes
Text
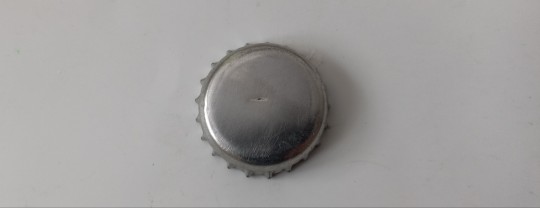
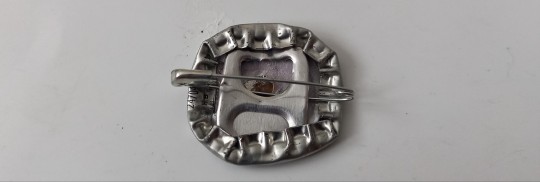
simple tutorial on how to make those bottlecap buttons you see everywhere
you'll need:
bottlecap•soda tab•safety pin•pliers•sandpaper/file•paint/paint markers/smth to decorate with•clear nail polish
remove the print on the buttons using a file or the sandpaper
(if you wanna keep the print skip this step, use a cloth to protect the print from scratches when folding down the sides of the cap)
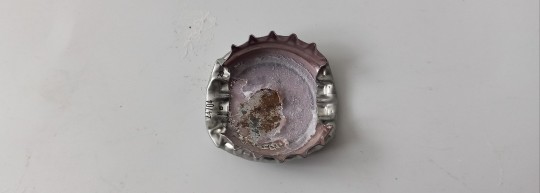
fold down opposing sides of the cap, to help add in the safety pin
bend the tab at a slight angle, insert it into the cap. make sure the side of the safety pin that can not open is the one stuck under the tab
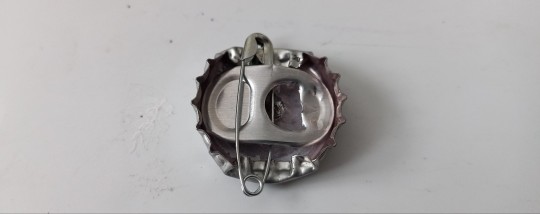
fold down one side of the cap to lock the tab in place, then try and press the tab as flat as you can, to lock the safety pin in place (prevents the buttons from moving on the safety pin, if you like rattling buttons, skip this step)
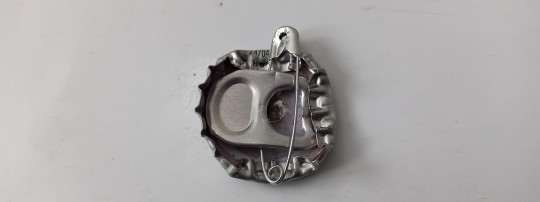
fold down all other sides of the cap
cover the button in one or more base layers of paint
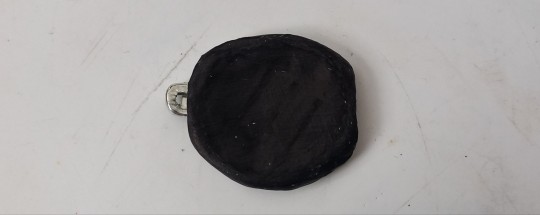
add ur design (i use paint or paint markers for good coverage and vibrant colors)

cover that in one or two layers of nail polish, it will protect the button from rain and the paint from cracking

thats it, lemme know if you want tutorials on anything else, i like making em.
10K notes
·
View notes
Text
i made these the other day what do we think

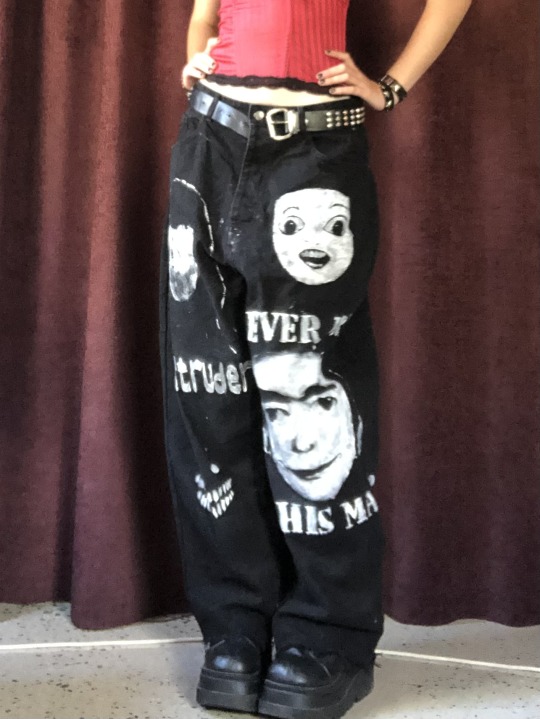


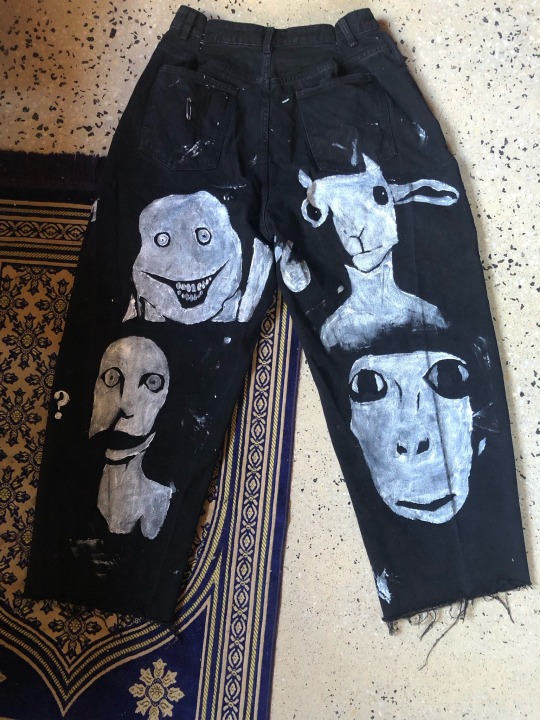
#alternative fashion#alternative#crafts#diy#diy fashion#diy clothes#fabric painting#sewing#creepypasta#scary#please take me seriously#original ?
3K notes
·
View notes
Text


🍃🍃
#altfashion#punk fashion#diy punk#punk aesthetic#diy fashion#punk#crust punk#crust pants#patch pants#emo fashion
1K notes
·
View notes
Text

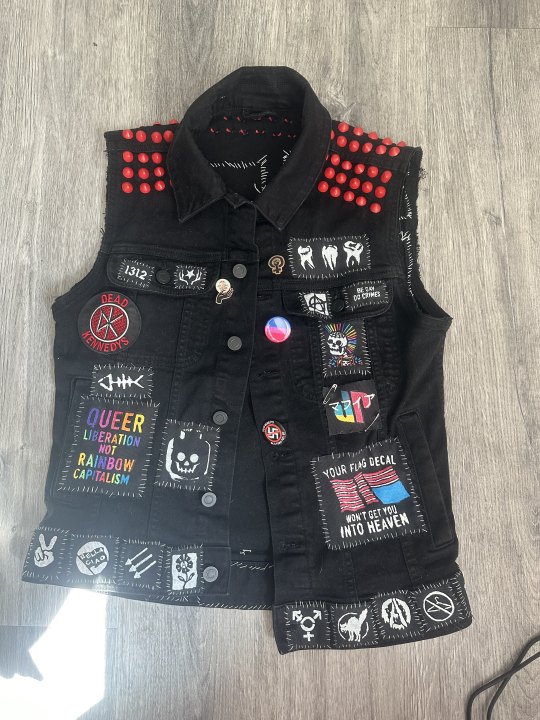
First semi-finished battle vest. Kinda want to make an outlaw/queer country-themed one next.
#battle jacket#battle vest#punk diy#punk patches#diy fashion#punk#ajj#harley poe#folk punk#queercore#diy or die
573 notes
·
View notes
Text
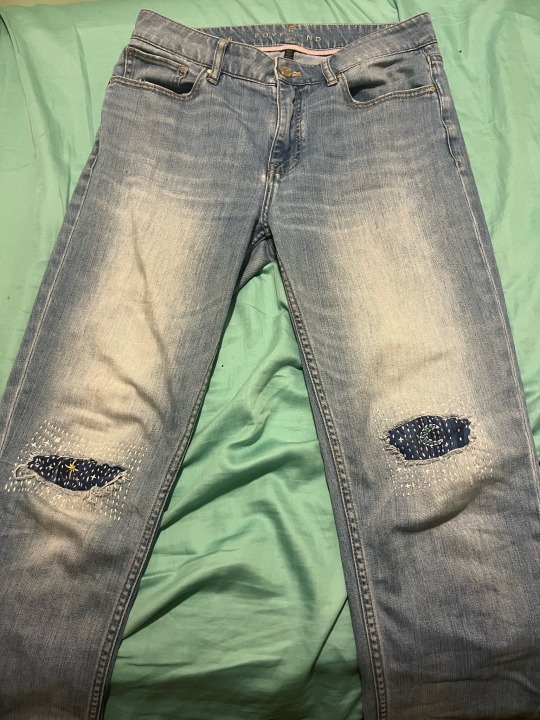


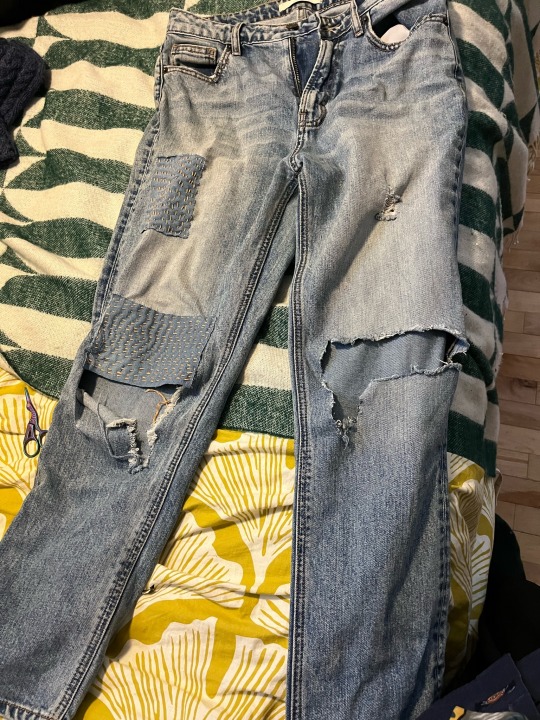
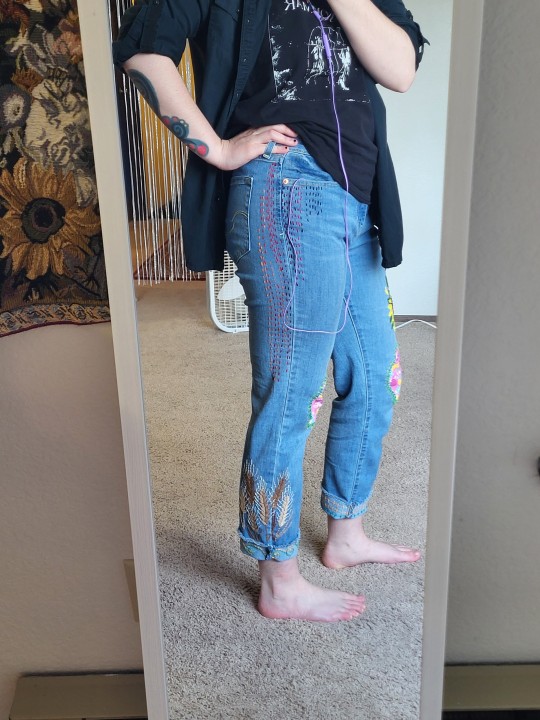
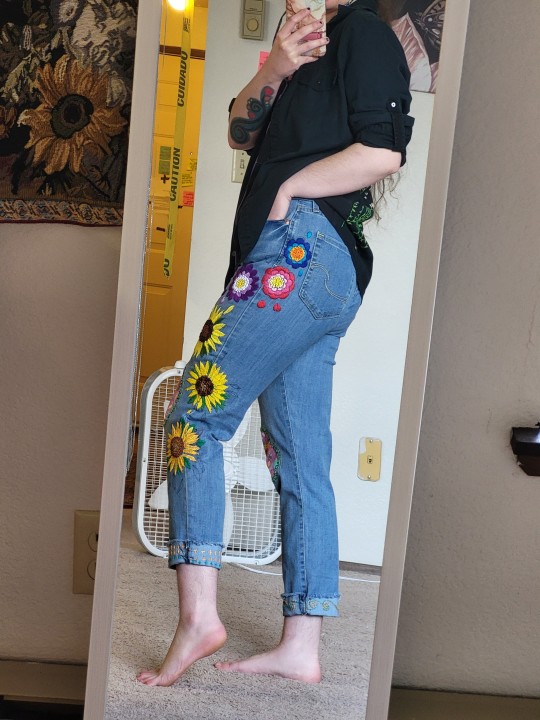
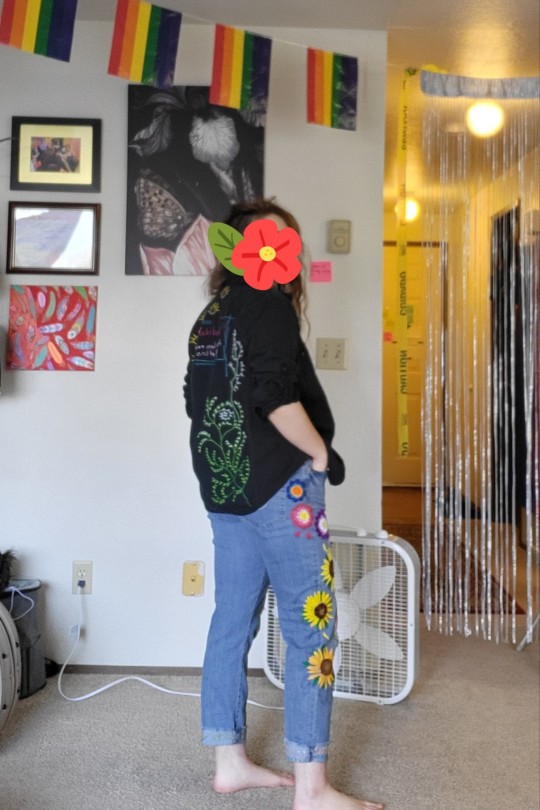
My first ever visible mending! I made these jeans way back in high school and still wear them all the time.
#slow fashion#visible mending#solarpunk#diy fashion#patches#diy punk#celestial#celestial art#sewing#embroidery#mending#artists on tumblr#solarpunk fashion#upcycled fashion#sustainable fashion#sustainability#thrifting
253 notes
·
View notes
Last Seen Blogs

read-and-believe
Read and Believe

airytown
moved to lazyrabbit

markie-foley
wouldn't i?
peanut-butt
♥ Oh hello

fast-and-food
Love wins in the end