#Windows Mac Compatible
Text
Boost Efficiency and Accuracy with Our Industrial Grade Barcode Scanner
Are you tired of slow and inaccurate barcode scanning in your warehouse or home library? Look no further! Introducing the Pro Extreme Performance Industrial Grade 1D 2D QR Barcode Scanner, a game-changing tool designed to revolutionize your scanning experience.
This powerful wired scanner comes with a convenient stand, making it hands-free and easy to use. Whether you're running a bustling warehouse or organizing your home library, this scanner is the perfect fit for Windows and Mac devices. Its drop-resistant and dustproof design ensures durability, even in the toughest environments.
With plug-and-play functionality, setting up the Pro Extreme Performance Scanner is a breeze. Say goodbye to complicated installations and hello to seamless scanning efficiency.
Get ready to take control of your inventory management and enhance productivity. Upgrade to the Pro Extreme Performance Industrial Grade 1D 2D QR Barcode Scanner today!
Hashtags: #ProExtremePerformance#BarcodeScanner#WarehouseProductivity#HandsFreeScanning#EfficientInventoryManagement#IndustrialGradeScanner#WindowsMacCompatible#DustproofDesign#DropResistantScanner#HomeLibraryOrganization
#Pro Extreme Performance Scanner#Industrial Grade Barcode Scanner#1D 2D QR Scanner#Wired Barcode Scanner#Warehouse Inventory Management#Home Library Scanning#Hands-Free Scanner#Plug and Play Scanner#Windows Mac Compatible#Heavy Duty Scanner#Dustproof Design#Drop Resistant Scanner#High-Performance Scanning#Efficient Barcode Scanning#Productivity Booster#QR Code Reader#Warehouse Efficiency#Professional Scanning Solution#Inventory Control System#Streamlined Scanning Process#Accurate Barcode Reader#Easy-to-Use Scanner#Industrial Warehouse Scanner#Barcode Technology#Advanced Scanning Solution#Reliable Barcode Scanning#Home Library Organization#Fast Scanning Speed#Rugged Barcode Scanner#Scanner Stand for Warehouse
0 notes
Text
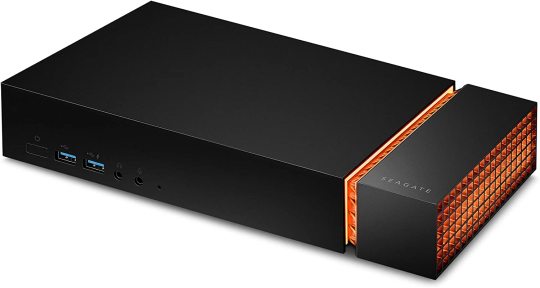
Seagate Firecuda Gaming Dock 4TB External Hard Drive HDD Review
Seagate Firecuda Gaming Dock 4TB External Hard Drive HDD is a game-changing product that is revolutionizing the gaming industry. It is a perfect solution for gamers who are looking for a reliable and fast external hard drive to store their gaming data. Seagate is one of the most popular brands in the external hard drive industry, and it has proven its worth with the Seagate Firecuda Gaming Dock…
View On WordPress
#Built-in Cooling#Data Storage#External Hard Drive#Game Storage#Gaming Accessories#Gaming Gear#Gaming Performance#Gaming Storage#HDD#Mac Compatibility#Multi-Port Hub#NVMe SSD#PlayStation 4 Compatibility#Product Review#Seagate Firecuda Gaming Dock 4TB#Thunderbolt 3#Windows Compatibility#Xbox One Compatibility
2 notes
·
View notes
Text
the plus side to using a big ass wacom tablet is that it has made me quite techy and i now understand drivers, hard drives, scratch disks, and certain software bugs with installation and usage. the bad news is that i have a mac so i run into these problems so frequently that i have to set aside an hour for trouble shooting before i can even start drawing with it.
#i could buy a PC / windows laptop or computer#but they are so expensive#and i honestly have an issue with the already insane amount of devices i already own#specifically for drawing purposes#and it would make my macbook obsolete which puts all the money i spent on it senior year of HS down the drain#like i cannot justify owning so many things or spending money on something that will only make my WILDLY expensive poor purchase of a lapto-#laptop obsolete or no longer necessary#like dont blame me i was in HS when i got this and wanted to be able to texdt from my computer#but now im miserable bc a macbook really is the LEAST compatible computer software with absolutely anything#i swear... its so shit#DONT buy a mac if you have to choice#DONT DO IT
4 notes
·
View notes
Text
my villain origin story is wanting to render, in blender, make cc, use g-shade and edit but I’m on a Mac that can’t do shit when it comes to TS4 and nothing I mentioned is compatible with Mac (only works for windows)
#stupid shit#is it just me#villain origin story#mac#mac os x#apple macos#apple#windows#please please please#make it compatible
1 note
·
View note
Text
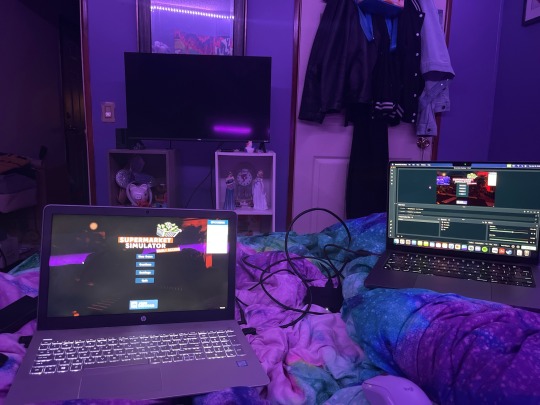
not only have i brought my 6 year old laptop back from the grave (left), but i am about to use it to stream this silly ass (/pos) game. just putting this here to say literally anything is possible with a little patience
#txt#i never thought this thing would run again i was gonna scrap it#bc i got this new mac but this game is only windows compatible
1 note
·
View note
Text
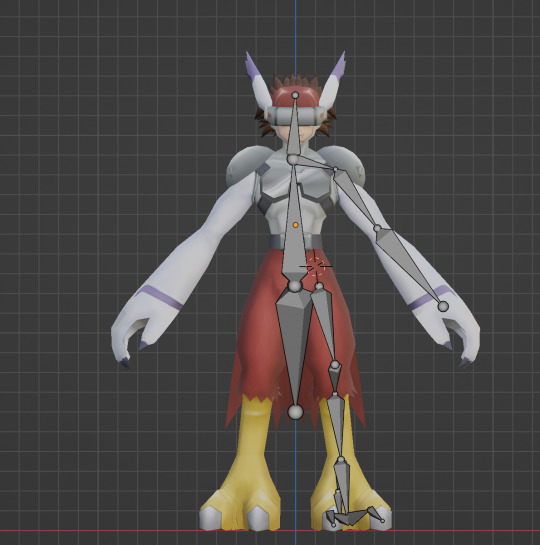
I have never used blender before and i think it shows
#yadda yadda yadda#not entirely sure why im doing this considering i cant. really use it for anything#gmod and vrchat both arent m1 mac compatable and vrchat is too much for my windows comp#and i havent opened gmod in a While#wheres that post that like ''saying 'im going to learn blender' is 'im going to exercise regularly this year' for artists''#this model is a rip from digimon masters btw#wanted to use the cyber sleuth one but it had a lotta. texture stuff?? i guess?? i didnt understand#one looked like a tiny image of a downtown area??????
0 notes
Video
youtube
Revolutionary Solution: One USB Drive for All Operating Systems
#youtube#OneUSBDrive AllOperatingSystems Windows Mac Linux Compatibility FileTransfers Storage MultiFunctional Installation Tutorial Convenience Flex
0 notes
Text
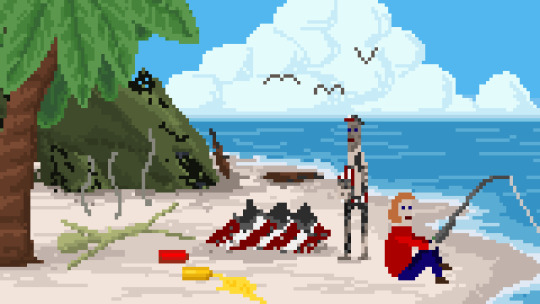
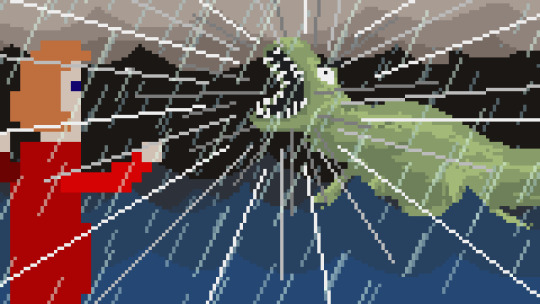
REVIEW | "McPixel 3" | B3 - Boston Bastard Brigade
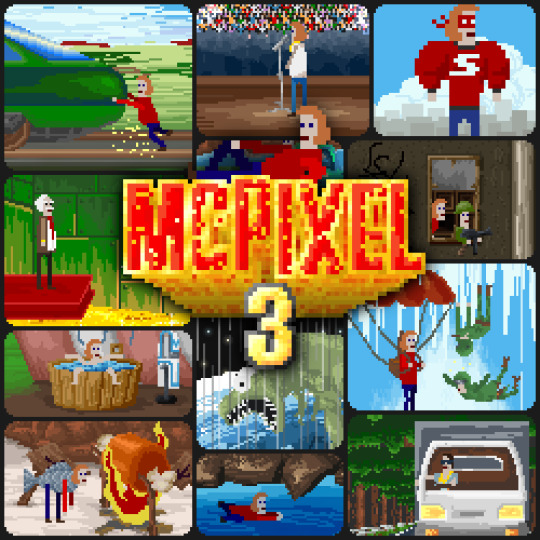
My dearest McPixel,
It has been over a decade since your gorgeous orange hair first appeared on my screen. I remember it quite well: ‘Twas a free giveaway on IGN for your debut video game. Knowing nothing of it of the sort, I went in blindly, and found myself simply captivated. The way you disarmed bombs was unlike anything I had ever seen. Dare I say, you were a connoisseur of the art of bomb defusion.
And yet, soon after you had made your debut, you vanished without a trace. Oh, my heart ached for those dark blue eyes and succulent red shirt, in a way that makes many a gamer salivate over a hero with charm and ruggedness. They said you were a bad influence, claiming that you had a habit of causing more harm than good, which is why you went away for awhile. But I said “Nay” to them, and said that McPixel was a hero as noble and brave as a Commander Keen or a Jazz Jackrabbit.
Lo and behold, just as I was nearing my last drop of hope, there came a trailer. And you, my darling McPixel, were the star of it. Fans cheered for your returned, myself included. As the reel ended, there it was in red and gold lettering: McPixel 3, coming soon! Oh, how excited I was to see you again!
Yet I grew curious: why 3, when there was nary a sign of McPixel 2 on the internet? Had I missed your initial return? You hadn’t written or called me, so I figured you were still working undercover, saving the world from terrifying threats. No matter: you had come back, and that’s all that I cared about.
Click here to read the rest of this love letter review!
#king baby duck#review#reviews#video games#PC#Steam#nintendo switch#windows 95#windows 98#windows nt#xbox series x#linux#mac#mcpixel 3#mcpixel#sos sosowski#devolver digital#boston bastard brigade#black compat
1 note
·
View note
Text
An adversarial iMessage client for Android
Adversarial interoperability is one of the most reliable ways to protect tech users from predatory corporations: that's when a technologist reverse-engineers an existing product to reconfigure or mod it (interoperability) in ways its users like, but which its manufacturer objects to (adversarial):
https://www.eff.org/deeplinks/2019/10/adversarial-interoperability
"Adversarial interop" is a mouthful, so at EFF, we coined the term "competitive compatibility," or comcom, which is a lot easier to say and to spell.
Scratch any tech success and you'll find a comcom story. After all, when a company turns its screws on its users, it's good business to offer an aftermarket mod that loosens them again. HP's $10,000/gallon inkjet ink is like a bat-signal for third-party ink companies. When Mercedes announces that it's going to sell you access to your car's accelerator pedal as a subscription service, that's like an engraved invitation to clever independent mechanics who'll charge you a single fee to permanently unlock that "feature":
https://www.techdirt.com/2023/12/05/carmakers-push-forward-with-plans-to-make-basic-features-subscription-services-despite-widespread-backlash/
Comcom saved giant tech companies like Apple. Microsoft tried to kill the Mac by rolling out a truly cursèd version of MS Office for MacOS. Mac users (5% of the market) who tried to send Word, Excel or Powerpoint files to Windows users (95% of the market) were stymied: their files wouldn't open, or they'd go corrupt. Tech managers like me started throwing the graphic designer's Mac and replacing it with a Windows box with a big graphics card and Windows versions of Adobe's tools.
Comcom saved Apple's bacon. Apple reverse-engineered MS's flagship software suite and made a comcom version, iWork, whose Pages, Numbers and Keynote could flawlessly read and write MS's Word, Excel and Powerpoint files:
https://www.eff.org/deeplinks/2019/06/adversarial-interoperability-reviving-elegant-weapon-more-civilized-age-slay
It's tempting to think of iWork as benefiting Apple users, and certainly the people who installed and used it benefited from it. But Windows users also benefited from iWork. The existence of iWork meant that Windows users could seamlessly collaborate on and share files with their Mac colleagues. IWork didn't just add a new feature to the Mac ("read and write files that originated with Windows users") – it also added a feature to Windows: "collaborate with Mac users."
Every pirate wants to be an admiral. Though comcom rescued Apple from a monopolist's sneaky attempt to drive it out of business, Apple – now a three trillion dollar company – has repeatedly attacked comcom when it was applied to Apple's products. When Apple did comcom, that was progress. When someone does comcom to Apple, that's piracy.
Apple has many tools at its disposal that Microsoft lacked in the early 2000s. Radical new interpretations of existing copyright, contract, patent and trademark law allows Apple – and other tech giants – to threaten rivals who engage in comcom with both criminal and civil penalties. That's right, you can go to prison for comcom these days. No wonder Jay Freeman calls this "felony contempt of business model":
https://pluralistic.net/2023/11/09/lead-me-not-into-temptation/#chamberlain
Take iMessage, Apple's end-to-end encrypted (E2EE) instant messaging tool. Apple customers can use iMessage to send each other private messages that can't be read or altered by third parties – not cops, not crooks, not even Apple. That's important, because when private messaging systems get hacked, bad things happen:
https://en.wikipedia.org/wiki/2014_celebrity_nude_photo_leak
But Apple has steadfastly refused to offer an iMessage app for non-Apple systems. If you're an Apple customer holding a sensitive discussion with an Android user, Apple refuses to offer you a tool to maintain your privacy. Those messages are sent "in the clear," over the 38-year-old SMS protocol, which is trivial to spy on and disrupt.
Apple sacrifices its users' security and integrity in the hopes that they will put pressure on their friends to move into Apple's walled garden. As CEO Tim Cook told a reporter: if you want to have secure communications with your mother, buy her an iPhone:
https://finance.yahoo.com/news/tim-cook-says-buy-mom-210347694.html
Last September, a 16-year old high school student calling himself JJTech published a technical teardown of iMessage, showing how any device could send and receive encrypted messages with iMessage users, even without an Apple ID:
https://jjtech.dev/reverse-engineering/imessage-explained/
JJTech even published code to do this, in an open source library called Pypush:
https://github.com/JJTech0130/pypush
In the weeks since, Beeper has been working to productize JJTech's code, and this week, they announced Beeper Mini, an Android-based iMessage client that is end-to-end encrypted:
https://beeper.notion.site/How-Beeper-Mini-Works-966cb11019f8444f90baa314d2f43a54
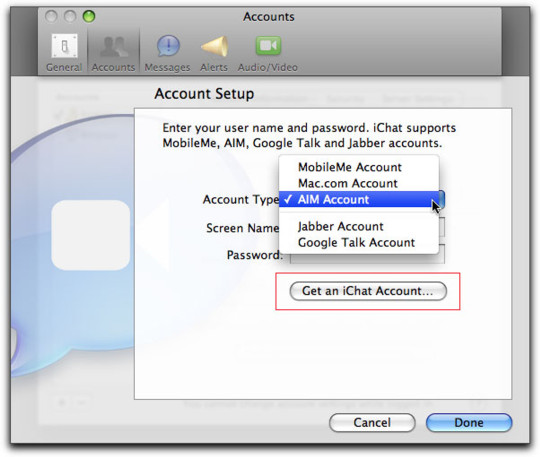
Beeper is known for a multiprotocol chat client built on Matrix, allowing you to manage several kinds of chat from a single app. These multiprotocol chats have been around forever. Indeed, iMessage started out as one – when it was called "iChat," it supported Google Talk and Jabber, another multiprotocol tool. Other tools like Pidgin have kept the flame alive for decades, and have millions of devoted users:
https://www.eff.org/deeplinks/2021/07/tower-babel-how-public-interest-internet-trying-save-messaging-and-banish-big
But iMessage support has remained elusive. Last month, Nothing launched Sunchoice, a disastrous attempt to bring iMessage to Android, which used Macs in a data-center to intercept and forward messages to Android users, breaking E2EE and introducing massive surveillance risks:
https://www.theverge.com/2023/11/21/23970740/sunbird-imessage-app-shut-down-privacy-nothing-chats-phone-2
Beeper Mini does not have these defects. The system encrypts and decrypts messages on the Android device itself, and directly communicates with Apple's servers. It gathers some telemetry for debugging, and this can be turned off in preferences. It sends a single SMS to Apple's servers during setup, which changes your device's bubble from green to blue, so that Apple users now correctly see your device as a secure endpoint for iMessage communications.
Beeper Mini is now available in Google Play:
https://play.google.com/store/apps/details?id=com.beeper.ima&hl=en_US
Now, this is a high-stakes business. Apple has a long history of threatening companies like Beeper over conduct like this. And Google has a long history deferring to those threats – as it did with OG App, a superior third-party Instagram app that it summarily yanked after Meta complained:
https://pluralistic.net/2023/02/05/battery-vampire/#drained
But while iMessage for Android is good for Android users, it's also very good for Apple customers, who can now get the privacy and security guarantees of iMessage for all their contacts, not just the ones who bought the same kind of phone as they did. The stakes for communications breaches have never been higher, and antitrust scrutiny on Big Tech companies has never been so intense.
Apple recently announced that it would add RCS support to iOS devices (RCS is a secure successor to SMS):
https://9to5mac.com/2023/11/16/apple-rcs-coming-to-iphone/
Early word from developers suggests that this support will have all kinds of boobytraps. That's par for the course with Apple, who love to announce splashy reversals of their worst policies – like their opposition to right to repair – while finding sneaky ways to go on abusing its customers:
https://pluralistic.net/2023/09/22/vin-locking/#thought-differently
The ball is in Apple's court, and, to a lesser extent, in Google's. As part of the mobile duopoly, Google has joined with Apple in facilitating the removal of comcom tools from its app store. But Google has also spent millions on an ad campaign shaming Apple for exposing its users to privacy risks when talking to Android users:
https://www.theverge.com/2023/9/21/23883609/google-rcs-message-apple-iphone-ipager-ad
While we all wait for the other shoe to drop, Android users can get set up on Beeper Mini, and technologists can kick the tires on its code libraries and privacy guarantees.

If you'd like an essay-formatted version of this post to read or share, here's a link to it on pluralistic.net, my surveillance-free, ad-free, tracker-free blog:
https://pluralistic.net/2023/12/07/blue-bubbles-for-all/#never-underestimate-the-determination-of-a-kid-who-is-time-rich-and-cash-poor
#pluralistic#multiprotocol#interoperability#adversarial interop#beeper#reverse engineering#blue bubbles#green bubbles#e2ee#end to end encrypted#messaging#jjtech#pypushbeeper mini#matrix#competitive compatibility#comcom
1K notes
·
View notes
Text
gratuit | 100% sans spyware
Alternatives à PDF24 PDF Creator pour Mac · Adobe Acrobat DC · jPdf Tweak · Sejda · Infix PDF Editor · SodaPDF · PDFwriter for Mac · Save as WWF · CUPS-PDF.
PDF24 PDF Creator Télécharger - PDF24 PDF Creator (PDF24 PDF Creator) 11.3.0: Un convertisseur gratuit de fichiers PDF. PDF24 PDF Creator est un logic.PDF24 Tools. Outils PDF en ligne gratuits et faciles Puis-je utiliser PDF24 sur Mac, Linux ou sur un Smartphone? Oui, vous pouvez utiliser les outils de
Les meilleurs programmes pour PC et Mac PDF24 : utilitaire multifonction pour les fichiers PDF. (Windows - MacOS - Linux)
</p><br>https://vogunajovido.tumblr.com/post/694397196039290880/40-ans-mode-demplois-vk, https://vogunajovido.tumblr.com/post/694397196039290880/40-ans-mode-demplois-vk, https://cudopiqahele.tumblr.com/post/694397012724039680/eux-mon-compte-mairie-de-gravigny-recrutement, https://vogunajovido.tumblr.com/post/694397196039290880/40-ans-mode-demplois-vk, https://wegeseteli.tumblr.com/post/694396792922603520/emploi-photographe-drone.
#http://vk.cc/c7jKeU#nofollow#_blank#<p> </p><p> </p><center>PDF24 MAC >> <strong><u><a href= rel= target=>DOWNLOAD LINK</a></u#<br> pdf24 compresser#<br> pdf24 tools#<br> pdf24 download#<br> pdf24 android#<br> pdf24 fusionner#<br> pdf24 creator portablepdf24 creator avis#<br>#<br> </p><p> </p><p> </p><p>Non#le Créateur PDF ne peut être utilisé que sur les systèmes Windows. Linux et MAC ne sont pas compatibles actuellement. Le Créateur PDF fonct#PDF24 est un bon PDF Editor#mais il ne prend pas en charge Mac OS X. Trouvez ici la meilleure alternative à PDF24 pour Mac (compatible à Sierra)#PDF24 Tools · PDF24 Fax. NEWS. Le nouveau PDF24 Creator gratuit! PDF24 Creator 11.4.0. Download. 100%
0 notes
Text
anyone happen to know a reliable way to make screen recordings with audio on mac? i wanna get funny tv show clips but mac doesn't allow video recording with internal audio so. and not every episode is available to just download off youtube
i've been looking at browser extensions on both firefox and chrome but none seem to be any good. so if anyone happens to know, please. tell me
0 notes
Text
helpful (free) utility programs for artists
Allusion
reference image organizer. shows all the images in any folders you assign it to look in, and provides an easy interface for tagging and searching them. you can nest tags within each other, and when you apply a tag to an image it also applies all the parent tags. so if you tag 'tank top', and tank top is in the 'shirt' tag, it'll include that image when you search 'shirt'. also open source!
compatible with windows, mac, and linux

Pureref
reference image viewer. can create reference image collages, add notes, lock the window to stay on top, set the window to be partially transparent, and save 'scenes' so you can quickly pull up whatever character ref you need without searching for all your references images and re-adding them every time. supports loading images from file and copy-pasting from web.
compatible with windows, mac, and linux
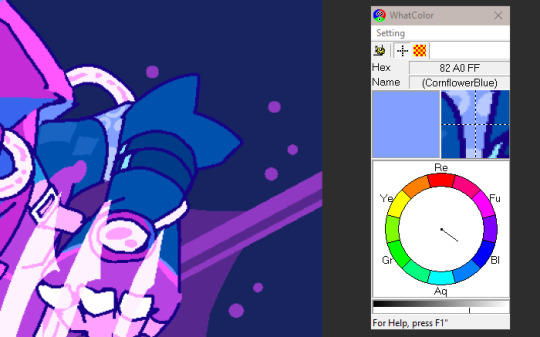
WhatColor
color describer. shows you details about the color your mouse is over. it's designed for colorblind folks, and I mostly use it because I have strong color filters on my screen 90% of the time for health reasons. however it's also helpful when you're learning to dissect color palettes and are trying to see how the perception of a certain color is affected by the colors surrounding it. use it to see how often ur brain gets duped into seeing purple when it's actually blue
compatible with windows 7/8/10
#talking#ngl made this mostly bc i found allusion a couple days ago and i'm still living off the hype of finding it#also cause not enough ppl know abt pureref#whatcolor isn't specifically an art tool but i think it's useful as one
610 notes
·
View notes
Photo


Rotoscoping Tutorial by @antoniosvivaldi
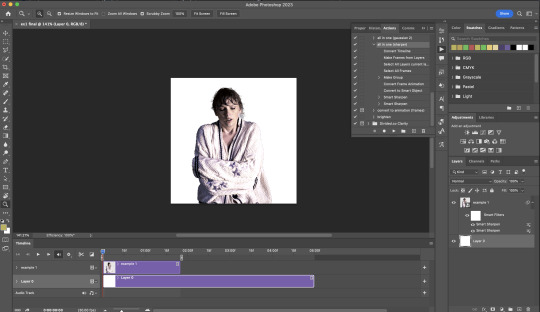
Hi everyone! I’m excited to announce my long-delayed Rotoscoping Tutorial - requested by a number of people over the past calendar year.
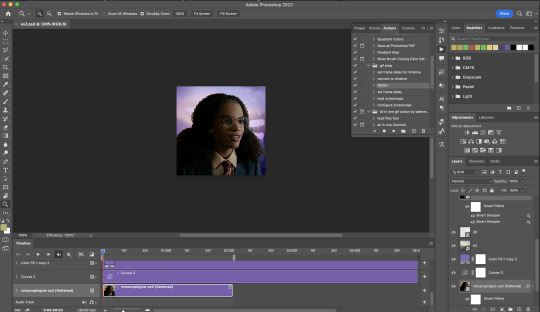
In this tutorial, I will show you how to create the cutout gifs like this (and seen in most of my gifsets under this tag) with Rotoscoping on After Effects. I’ll also provide additional examples and a number of things that I do to optimise my giffing / Rotoscoping workflow (e.g. useful shortcuts & other things to be aware of).
This is the structure of the tutorial:
Why Rotoscoping? Photoshop video timeline’s limitations
Photoshop workflow pt 1: Preparing your gif
After Effects workflow: Interface, shortcuts, and Rotoscoping tools
Photoshop workflow pt 2: Assembling your gif; with multiple examples
Bonus content: Rotoscoping tips* & workarounds to common issues
For quick reference, here are example gifsets (and where Rotoscoping is used in the posts) that I will mention in the tutorial:
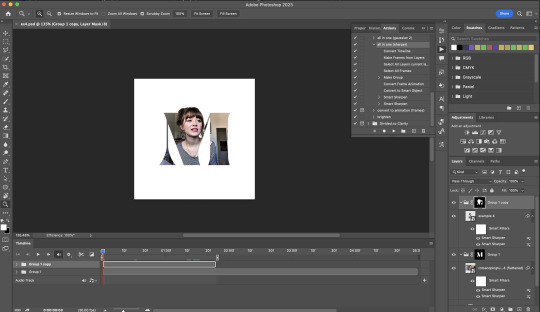
Example 1: Cutout gif effect | panels 2 + 4
Example 2: Changing a gif’s background colour | all panels
Example 3: Cutout gif effect in a shape | all panels
Example 4: Putting it all together | panels 1, 3, & 5
What you need & need to know:
Software: Photoshop & After Effects (After Effects 2021 or later for Rotobrush 2.0)*
Hardware: 16GB RAM required to run later versions of AE*
Difficulty: Advanced; Knowledge in making gifs, applying layer masks, and using video timeline interface assumed
Key concepts: Rotoscoping (AE) / Video Timeline (AE+ PS) / Layer Masks & Groups (PS)
Supplementary files: tutorial resources
*I’m currently running the latest version of PS & AE on an M2 Mac, but I’ve also used older versions (CC 2015 & 2020) on Intel-based Macs. I’ll outline some known compatibility & performance issues, and workarounds later in this tutorial that could help streamline your giffing workflow.
Tutorial under the cut. Like / Reblog this post if you find this tutorial helpful. Linking this post / the example gifsets in your post caption, will be greatly appreciated if you read this to create effects seen in Examples 3 + 4.
1) Why Rotoscoping?
My Rotoscoping journey is motivated by the shortcomings on Photoshop - namely the limited options to manipulate the Layer Mask keyframes in the video timeline interface, as well my need to gif more efficiently.
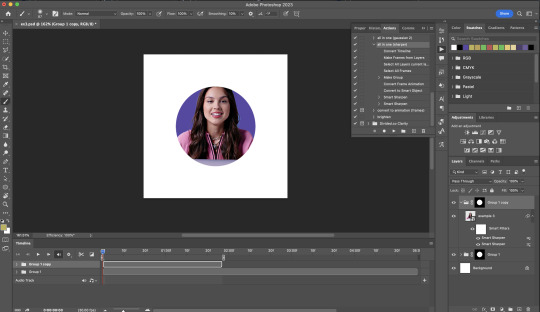
Suppose I want to cutout this subject or recolour the background of a gif on Photoshop: I personally classify the gifs that I prepare on PS into 3 types based on the motion of the subject
These are the common Photoshop-only approaches when attempting to mask the subject in the gif.
Case 1: minimal motion in the subject → a simple layer mask will do the trick
Case 2: some linear panning of the subject in the gif → using the Layer Mask Position keyframes in the video timeline interface will do the trick
Case 3: subject moves around a lot (e.g. zoom motion) → Unfortunately this is where a Photoshop-only workflow will require frame by frame masking. Layer Mask Position keyframes only apply positional translation (but not transformation / rotation) on the layer mask
Enter Rotoscoping on After Effects: Instead of resigning to frame by frame procedure on Photoshop, I opted to make my life easier by learning to Rotoscope on After Effects. This essentially provides me an opportunity to cutout / recolour a wider range of gifs with relative ease.
2) Photoshop pt. 1: Preparing your gif
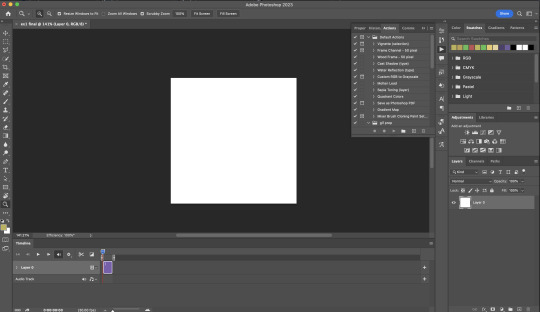
Prepare your gif the usual way - whether you screencap or import frames from video.
Then your Photoshop should look like this:
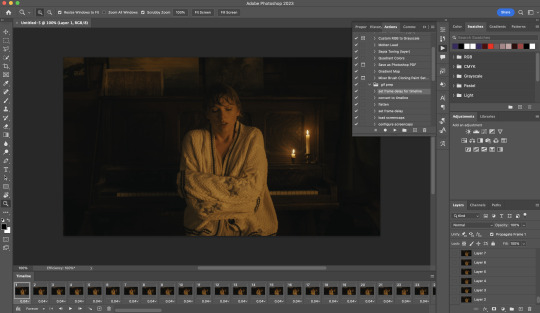
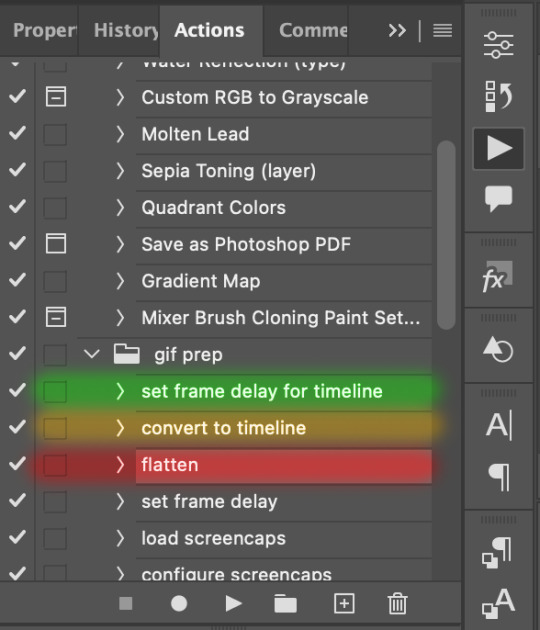
Now, I shall walkthrough & explain my personal giffing workflow (as of 2023) after loading the gif frames. To speed up the process, import my gif prep action file to Photoshop.
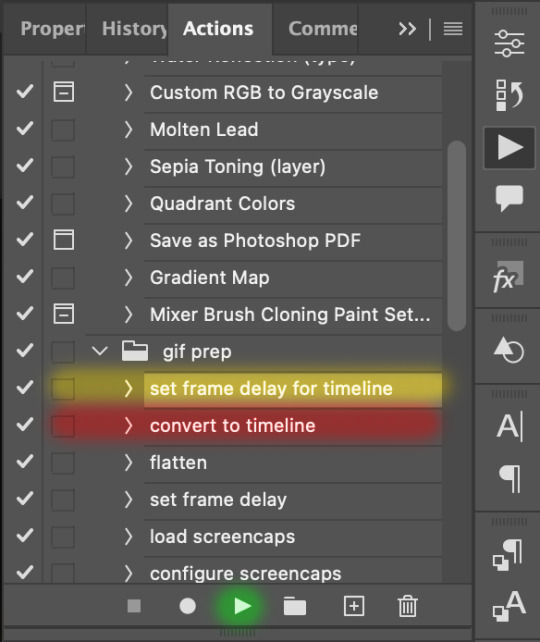
Going to Window > Action, you’ll see a set of actions under the “gif prep” folder.
"set frame delay for timeline” (highlighted in yellow) will set all of your entire gif’s frame delay to 0.03s
“convert to timeline“ (highlighted in red) will take you to the Video Timeline interface
To play an action, press on the Play button (highlighted in green)
i. Set the frame delay of the entire gif to 0.03s. (play “set frame delay for timeline” from my gif prep action pack)
I work with everything in 0.03s frame delay (or equivalently 30fps) at first. It’s always possible to change the frame delay of the final gif to 0.05s before uploading onto Tumblr.
ii) Convert this gif to a Smart Video Layer (play “convert to timeline” from my action pack)
Note: I personally don’t resize the gif just yet. That’s because Rotoscoping in full video resolution will render higher quality details around the edges as well as more flexibilities later on in the editing process.
Performance optimisation: If your computer has 8GB of RAM or less, you might find it helpful to crop / resize your gif to Tumblr dimensions now for a less sluggish performance in After Effects later on.
(I have giffed on a desktop with 8GB of RAM and it’s quite slow at rendering individual frames of a 1080p short clip on AE)
iii) Add colouring adjustments on the gif. This will save you A LOT of time when you Rotoscope gifs that are originally very dark / poorly lit (e.g. the uncoloured Taylor Swift gif shown just above).
If you usually colour your gifs at the very end of your giffing process (i.e. after sharpening), this will be a bit of a change.Nevertheless I still highly recommend adding some base colourings now to at least increase the contrast between the subject and the background.
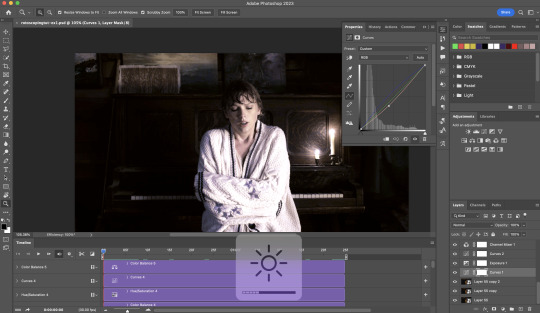
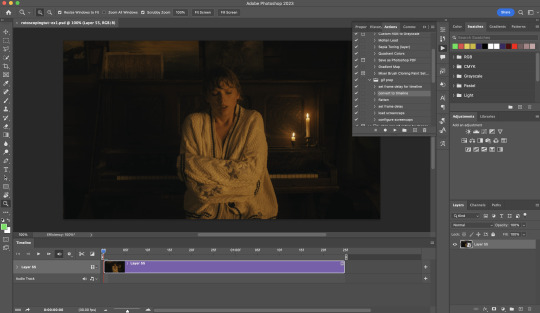
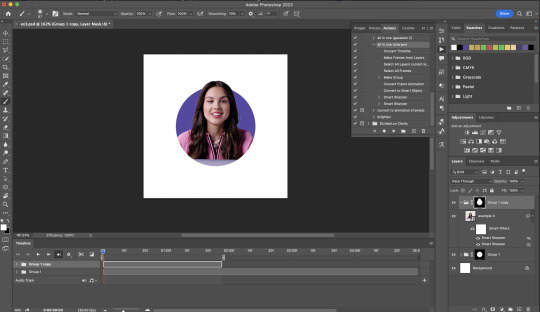
iv) To minimise lagging on After Effects, simplify this gif file as follows:
Flatten / Unsmart this gif file back to frame animation mode: play “flatten” (highlighted in red) from my gif prep action pack
Set the frame delay to 0.03s: play “set frame delay for timeline” (highlighted in green)
Convert the simplified gif file back to the video timeline interface: play “convert to timeline” (highlighted in yellow)
After “unsmarting” and converting back to the video timeline, your interface should look like this

And voila! This gif PSD is now ready to be imported to After Effects for Rotoscoping work!
3) After Effects: Interface and useful shortcuts
Open After Effects and Import (Cmmd / Ctrl + I) your gif PSD that you’ve just prepared.
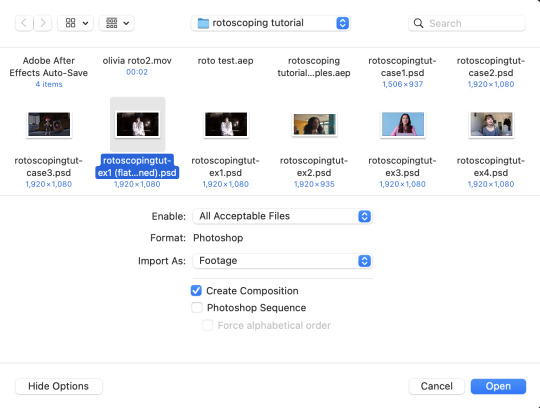
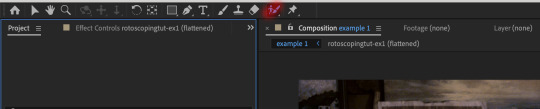
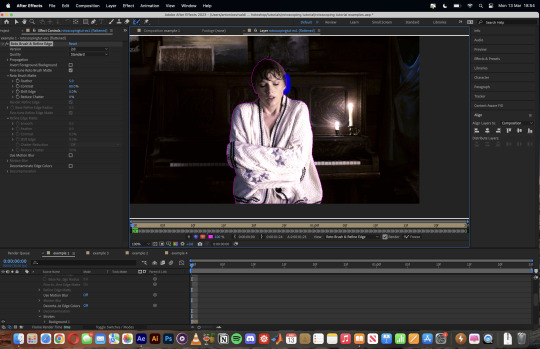
After importing your gif PSD to After Effects, the interface should look like this.
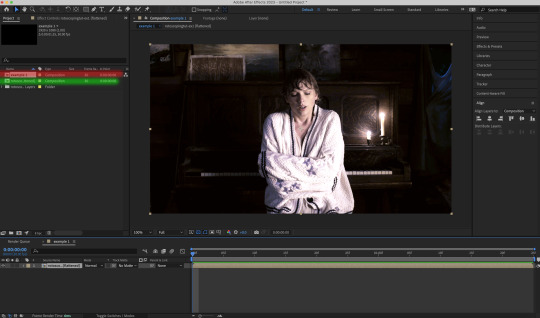
In the screenshot below, there are two compositions: the imported gif (highlighted in green) & another composition file made from selecting the imported gif (highlighted in red)
For the rest of the workflow, we will edit from the clone composition (the one highlighted in red), so select this one.
Before we take our plunge into the Rotoscoping, here are a few useful shortcuts to remember. I’ll explain the Roto Brush tool in the next section.
Preview the previous: fn + up arrow
Preview the next frame: fn + down arrow
Add to Roto Brush selection: holding Shift while you’re using the Roto Brush Tool
Subtract from Roto Brush selection: holding Alt while you’re using the Roto Brush Tool
Change Roto Brush size: while holding Cmmd / Ctrl, click + drag your mouse left / right
4) After Effects: The Rotoscoping Process
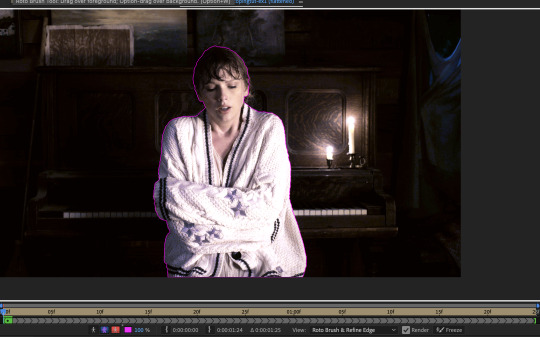
To access the Rotoscoping tools, click on the Roto Brush icon (highlighted in red in the screenshot below)
Then you’ll get the following dropdown options with two Rotoscoping Tools
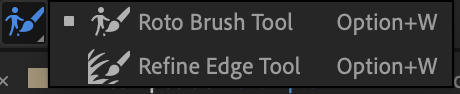
Roto Brush Tool: This is where you add / subtract your Rotoscoping selection in your composition
Refine Edge Tool: Paint around the edge of your selection for more refined edges. Very helpful for Rotoscoping fuzzy edges / hairs
To make some Rotoscoping selection, first grab the Roto Brush Tool and click on the subject you want to cut out from your composition.
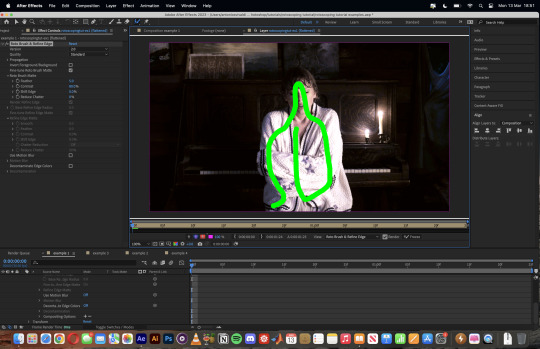
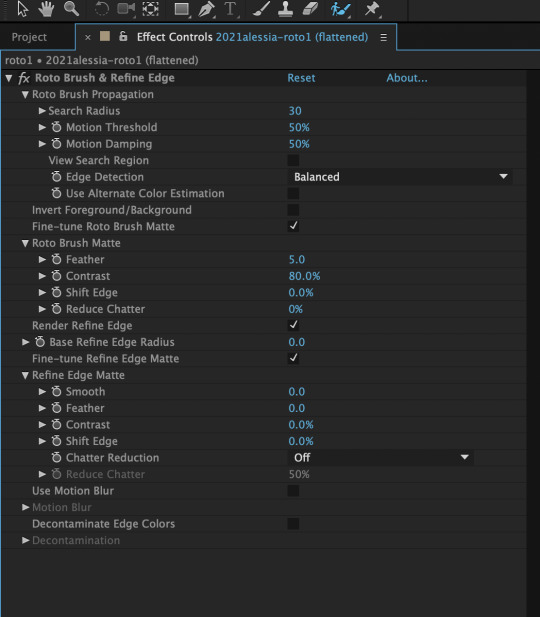
When you’re Rotoscoping you’ll see this in the Effect Controls panel.
There are two versions of Roto Brush:
Version 2.0: The Rotoscoping selection is powered by AI for higher accuracy when you propagate the frames.
Version 1.0 (Classic): This is the legacy Roto Brush Tool that uses a lesser algorithm. Recommended only if Roto Brush 2.0 is unstable on your machine due to RAM issues.
And two quality settings for Roto Brush 2.0:
Standard
Best
Note: I am currently unable to use Roto Brush 2.0 with Best quality model on my machine to compare the differences myself, so I’ll link this page that explains the two quality settings.

Note: if you’re using an older version of After Effects you’ll see this instead. This corresponds to Roto Brush 1.0 / Classic in the newer versions of AE.
When you’ve made a selection using the Roto Brush Tool, you’ll see the pink lines around the subject. This is the region that you’ve selected to Rotoscope!
To bring out some details around the edges, grab the Refine Edge Tool and paint around the edges
Then the interface will look like this

To view the Rotoscoping selection that you’ve made more intuitively, you could click on the following buttons.
Personally I like the viewing my selection using Toggle Alpha (the second box from the left) & Toggle Alpha Boundary (the 3rd box from the left)

Toggle Alpha
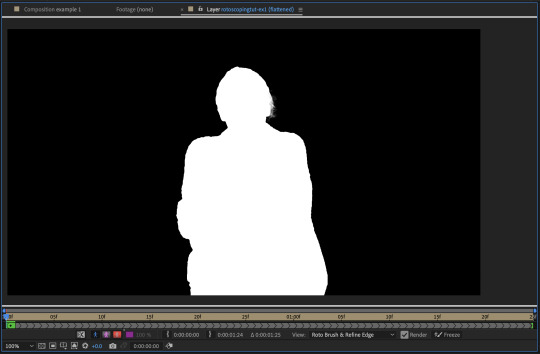
Toggle Alpha Boundary

Note: If you aren’t happy with the initial Roto Brush selection, you can always add (press Shift while using the Roto Brush Tool) / subtract (press Alt / Option using the Roto Brush Tool) your selection.
After you’re happy with your Rotoscoping selection in the first frame of your composition, press fn + down to view the next frame.
Repeat pressing fn + down and fix the selection along the way (e.g. I subtracted a small area from my Rotoscoping selection with the Roto Brush tool to make the edge look cleaner).

After fixing the selection along the way, go back to the composition file (select the clone composition again) and you will see that a cutout gif is made!
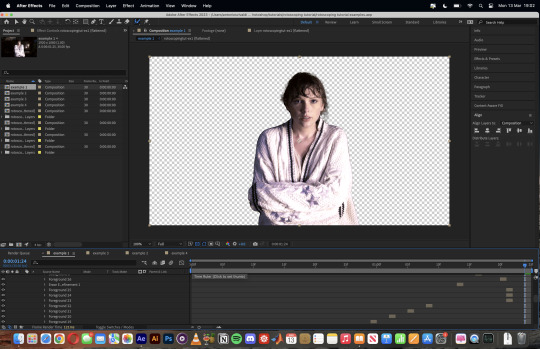
To export this, go to File > Export > Add to Render Queue. You’ll be redirected to the Render Queue panel at the bottom of After Effects.
Highlighted in red: click to change export setings
Highlighted in green: click to change save destination
Highlighted in yellow: click to render video

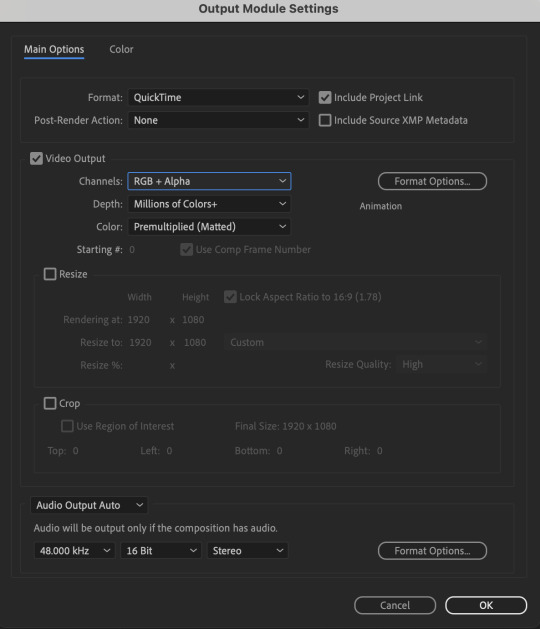
To preserve the transparency of your cutout gif, you need to change your export settings in the Output Module.
Under the Video Output section, change your Channels to RGB + Alpha. Press OK. Then Render the video.
5) Photoshop pt. 2: Assembling your final gif
The essence is to drag the cutout gif (aka the video file that you’ve just rendered on AE) into a new PSD composition file. This will be where you’ll do the rest of your giffing. Your workflow will contain the follow steps:
Make a new blank PSD composition file in Tumblr dimensions
Enable the Video Timeline
Follow the instructions detailed in the individual examples i.e. drag the cutout gif into the PSD & adjust the timeline start / end points
Exporting the final gif. If you’ve worked in 0.03s frame delay all the way up to here, just play the action that I’ve provided in the tutorial in the following order to set the frame delay to 0.05s.
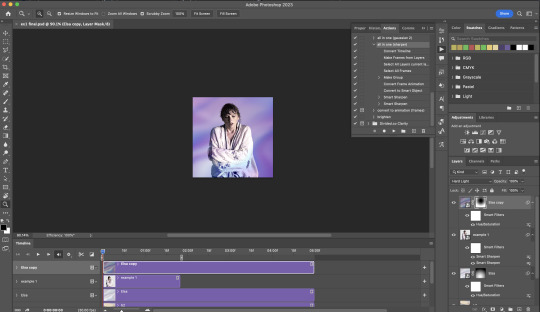
EXAMPLE 1: finalising your cutout gif | sample gifset
After enabling the Video Timeline in your PSD composition file you’ll see something like this
Go to your folder, drag the cutout gif you’ve made on After Effects, resize / reposition, then press Enter.
And also make sure to adjust the Video Timeline’s start / end values.
Add some finishing touches. Because I did the Rotoscoping at full HD resolution, I’ll also need to sharpen my gif in this step.
After you’re happy, you can export this into a gif file and do what you usually do to change the frame delay to 0.05s.

Notes on my “Unsmarting” approach:
To prevent accidentally writing over a PSD composition file that I’ve spent time editing, I personally render this into a short video (File > Export > Render Video) and use the following export settings (to prevent quality loss)
Then I open the rendered clip and play the actions in my gif prep action pack as follows:
flatten: this “Unsmarts” the clip / video
set frame rate: this sets all frames to have 0.05s frame delay
This is the final interface that I get before I pull up the Save For Web window.
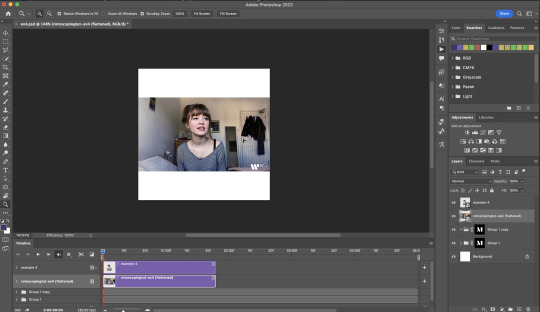
EXAMPLE 2: changing your gif’s background colour (for Case 3 gifs) | sample gifset
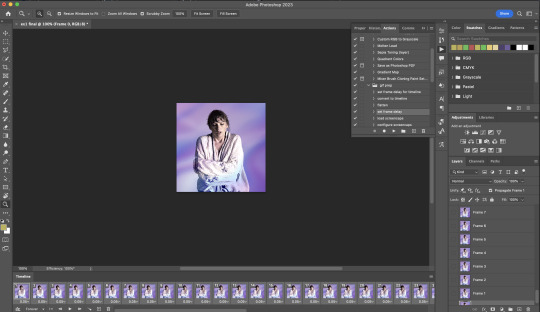
From your folder, drag BOTH the cutout gif (rendered on AE) and the original gif to your blank composition.
Important: you need to make sure that both layers are properly lined up in the composition file (i.e. selecting both layers when repositioning / resizing)
On Photoshop, press Enter twice and place the cutout gif on top of the original gif from the Layers panel. Then you should get something like this
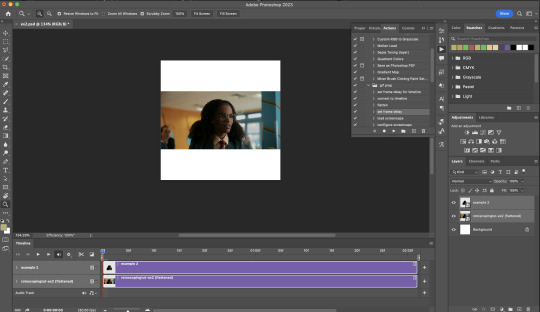
Select both layers and resize / reposition them in your PSD composition until you’re satisfied with the placements.
The basic idea here is to add some adjustment layers / other things in between the cutout gif and the original gif. To do this, select the original gif layer in the Layers panel.
Then you can start adding.a bunch layers e.g. textures, onto the composition.
And then here’s the exported gif!

6) Fancier Rotoscoping examples
Note: knowledge in using layer masks / groups and making shape / text layers assumed
In the next two examples, I’ll show you how to combine the two previous examples with shape / text layers.
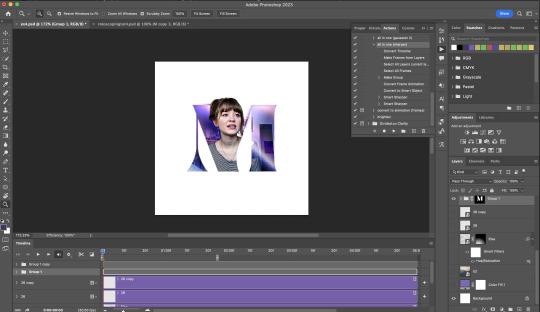
EXAMPLE 3: Placing your cutout gif into a shape / text layer | sample gifset
Add a text / shape layer to your blank PSD composition
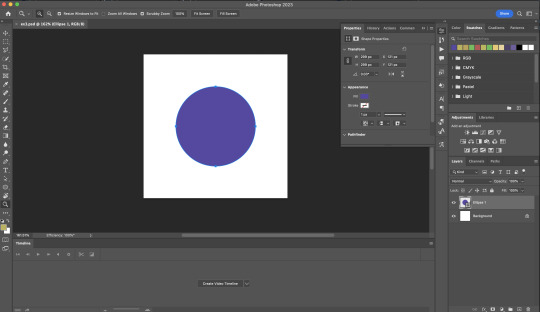
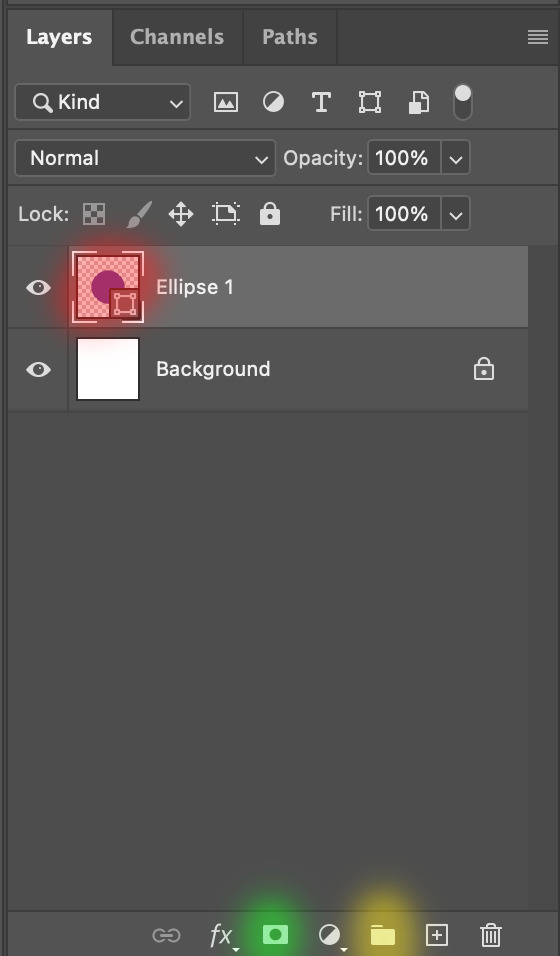
We want to prepare a masked group so in the Layers panel:
Make selection from layer: Cmmd / Ctrl + Click (highlighted in red)
Make a new group: click on the folder icon (in yellow)
Create layer mask: click on the icon (in green)
After duplicating the masked group you’ll get something like this in the Layers panel
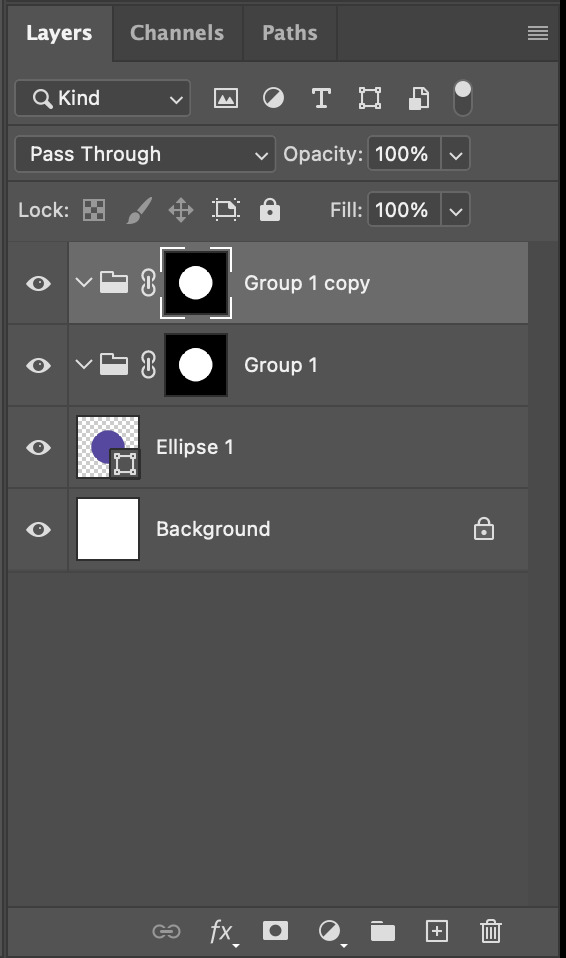
Drag your cutout gif into the PSD composition

Place the cutout gif into the masked group on top
Select the mask of the top group and paint (in white) over the region you want to reveal for the cutout gif
Add some finishing touches & export the gif!

EXAMPLE 4: Putting it all together | sample gifset
You follow the same approach as in Example 3 to prepare the masked groups, but you need to drag two gif layers in (and resize them using the approach outlined in Example 2)
Place the gif layers as follows
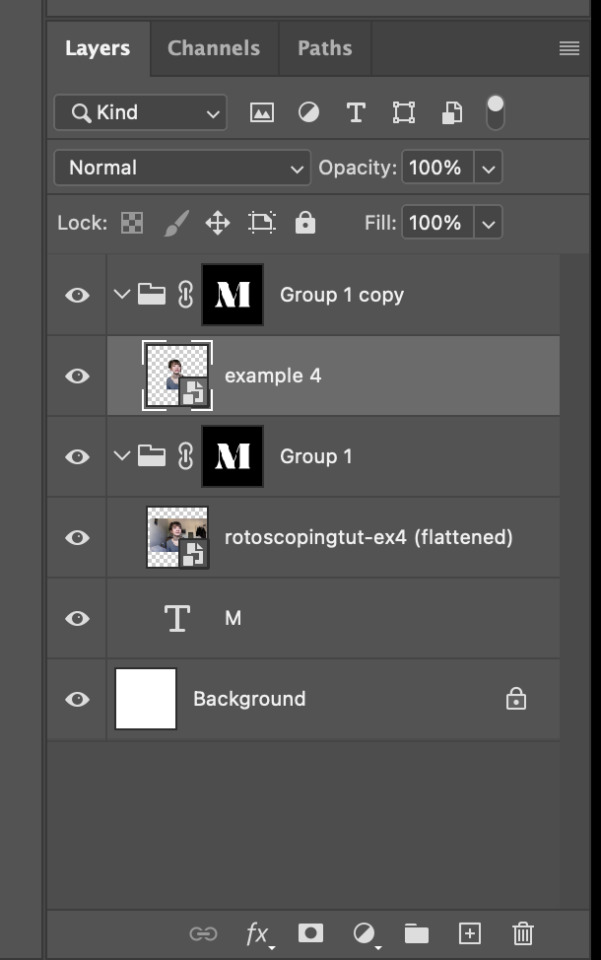
While selecting the mask of the group on top, paint (in white) over the region that you want to reveal in the cutout gif
Now select the original gif (placed within the other group) and add some adjustment layers
After adding some finishing touches & exporting the gif, I get this!

Note: you can do even more overlay effects in the background portion of example 4. There will just be more masked groups + adjustment layers
7) Bonus: Some useful Rotoscoping / giffing lifehacks
GIFFING LIFEHACKS:
— Use best quality footage that you could find & Rotoscope in full video resolution, for better details around the edges
— Poorly lit scenes & low contrast edges are harder to Rotoscope (e.g. Toy Story set / TS evermore set).
If you’re new to AE, I would recommend choosing videos with well-lit gifs with simpler backgrounds and high contrast edges (e.g. Maisie Peters Cate’s Brother set)
— Use Rotobrush 2.0 if you’re using After Effects 2021 or later. It’s more difficult to Rotoscope / change background colour for gifs with a lot of movements with the classic Rotobrush tool. If the scene is tricky, you might want to switch to the “Best” quality model.
HARDWARE-RELATED PERFORMANCE OPTIMISATION:
— The recent versions of Photoshop require at least 8GB of RAM. If you have less RAM, it will still work provided you have enough scratch disk space. For better performance, it’s best to close other applications when you’re using Photoshop.
— The recent versions of After Effects require at least 16GB of RAM. If your machine has less RAM than this, there are some workarounds to prevent your machine from hanging:
Essential: close other applications that you’re running on your computer
Resize your gif down to Tumblr dimensions & sharpen it before importing to After Effects.
Install an older version of AE
8) Bonus: Some known software + hardware issues, and workarounds
KNOWN ISSUES ON PHOTOSHOP:
I currently have minimal issues in my giffing workflow, but I’ll nevertheless outline a few common known Photoshop issues for anyone who needs some workarounds.
— Video Timeline interface missing: this affects Apple Silicon Macs (i.e. M1 / M1 Pro / M1 Max / M1 Ultra / M2 / M2 Pro / M2 Max)
Update to newer version of Photoshop (updated 2022 or 2023)
Open Photoshop with Rosetta
— Scratch disk full error: This is a common issue with machines that lack RAM & have nearly used up internal storage. Editing video layers in the timeline interface uses a lot of memory hence will require a lot of scratch disk space.
Make sure that you have enough free storage space while using Photoshop. Alternatively you can use an external hard drive as a scratch disk.
KNOWN ISSUES ON AFTER EFFECTS:
These are a few issues that I have personally ran into over the course of giffing on multiple devices & multiple versions of After Effects.
Note: Inputs from M1 / M2 Mac users with regards to experiences on using the After Effects Rotoscoping tools are welcome!
— Rotobrush 2.0 set to “Best” quality model causes AE to crash: this affects anyone who’s using MacOS Ventura
I’m currently experiencing this issue on my M2 Mac. The workaround right now is to change the Roto Brush 2.0 quality setting to Standard.
This is due to some software compatibility issues on Adobe’s side specifically with MacOS Ventura. Fingers crossed that they will properly fix this bug in the future updates!
— Cannot re-open project files with Rotoscoping: this affects anyone using the initial release of After Effects 2020 (I had installed this on an Intel-based machine and it sucked)
The only option here is to update to a later version of After Effects.
8) More useful Rotoscoping resources
Rotoscoping + Keyframes Tutorial by @jenna--ortega
Rotoscoping + Masking Tutorial by @usergif
Rotoscoping For Beginners in After Effects | Motion Graphics Tutorial
I hope you enjoy reading this! If you have any questions / need any help related to this tutorial, feel free to send me an ask!
#after effects#tutorial#gif tutorial#photoshop tutorial#dearindies#tusermelissa#usernik#useryoshi#usershreyu#usercim#userrobin#useralison#userannalise#userkosmos#userisaiah#usergiu#userives#*#my resources#my tutorials
2K notes
·
View notes
Note
Please, please explain how to install and use linux like I'm 5 years old. I'm so sick of windows adding AI and other bullshit to my already struggling elderly laptop but I'm really not good with computers at all so I have no idea where to start with Linux.
Okay, so, I'm going to break this down into steps I would give the average tumblr user first, and then if any of them are confusing or use words you don't understand, ask me and I'll explain that step in greater detail.
Step 0) BACK. UP. YOUR. SHIT.
NEVER EVER EVER CHANGE YOUR OPERATING SYSTEM WITHOUT A COMPLETE BACKUP OF ALL YOUR FILES.
Step 1) Learn your machine. You need to know:
How much RAM you have
If your processor is 32 or 64 bit
How big your hard drive is
On windows, you can find out all of this by going to the start menu, typing "about" and opening the first result on your system instead of the internet.
For additional instructions, visit this page.
Step 2) Pick your Linux.
There's like 10,000 kinds of Linux, each tailored to particular functions that the end-user (that is you!) might want to have. The sheer amount is very daunting, so first I'm going to give my suggestions, then I'll explain how to pick for yourself.
For Mac users, I suggest Kubuntu. For windows users, I suggest Mint Cinnamon. If your laptop is really REALLY old, I recommend Sparky Stable, which is the lightest weight Linux I would ever suggest for a new user. In every case, download the version suited to your processor (32 bit can be labelled "x86" or "32 bit"; 64 bit is always labelled "64 bit").
If you want to try a different type of linux, you'll need to make sure your laptop meets the "minimum specs" or "system requirements." These numbers tell you how much RAM, processor and hard drive space the linux will use. (That's why you needed those numbers at the beginning.)
Step 3) Collect your supplies. You're going to need:
An ISO burning program compatible with your current system, like Balena Etcher.
A copy of the ISO file for the Linux you want to use.
Your laptop.
An 8gb or larger USB flash drive.
Step 3) Make a bootable USB drive
Install Balena Etcher, hitting "okay" and "next" when prompted. Last I checked, Etcher doesn't have adware attached, so you can just hit next every time.
Plug your USB drive into the laptop.
Open Etcher.
Click "flash from file" and open the ISO file with your Linux on it.
Click "Select target" and open the USB drive location. Hit the "flash" button. This will start writing all the linux installer data to your flash drive. Depending on the speed of your machine, this could take as long as 10 minutes, but shouldn't be much longer.
Step 4) Boot to the USB drive
This is, in my opinion, the trickiest step for a lot of people who don't do "computer stuff." Fortunately, in a rare act of good will, Windows 10 made this process a lot easier.
All you'll need to do is go to settings, then recovery, then advanced startup and pick the button labelled "use a device."
This tutorial has images showing where each of those is located. It's considered an "advanced setting" so you may get a spooky popup warning you that you could "harm your system by making changes" but we're not doing anything potentially harmful so you can ignore that if you get it.
Step 5) Try out linux on the flash drive first.
Linux installs using a cool little test version of itself that you can play around in. You won't be able to make changes or save settings, but you can explore a bit and see if the interface is to your liking. If it's hideous or hard to navigate, simply pick a new linux version to download, and repeat the "make a bootable USB" step for it.
Step 6) Actually install that sucker
This step varies from version to version, but the first part should be the same across the board: on the desktop, there should be a shortcut that says something like "install now." Double click it.
Follow the instructions your specific linux version gives you. When in doubt, pick the default, with one exception:
If it asks you to encrypt your drive say no. That's a more advanced feature that can really fuck your shit up down the road if you don't know how to handle it.
At some point you're going to get a scary looking warning that says 1 of 2 things. Either:
Install Linux alongside Windows, or
Format harddrive to delete all data
That first option will let you do what is called "dual booting." From then on, your computer will ask every time you turn it on whether you want Windows or Linux.
The second option will nuke Windows from orbit, leaving only linux behind.
The install process is slower the larger your chosen version is, but I've never seen it take more than half an hour. During that time, most linux versions will have a little slideshow of the features and layout of common settings that you can read or ignore as you prefer.
Step 7) Boot to your sexy new Linux device.
If you're dual booting, use the arrow keys and enter key to select your linux version from the new boot menu, called GRUB.
If you've only got linux, turn the computer on as normal and linux will boot up immediately.
Bonus Step: Copy Pasting some code
In your new start menu, look for an application called "terminal" or "terminal emulator." Open that up, and you will be presented with an intense looking (but actually very harmless) text command area.
Now, open up your web browser (firefox comes pre-installed on most!), and search the phrase "what to do after installing [linux version you picked]"
You're looking for a website called "It's FOSS." Here's a link to their page on Mint. This site has lots and lots of snippets of little text commands you can experiment with to learn how that functionality works!
Or, if you don't want to fuck with the terminal at all (fair enough!) then instead of "terminal" look for something called "software manager."
This is sort of like an app store for linux; you can install all kinds of programs directly from there without needing to go to the website of the program itself!
158 notes
·
View notes
Photo

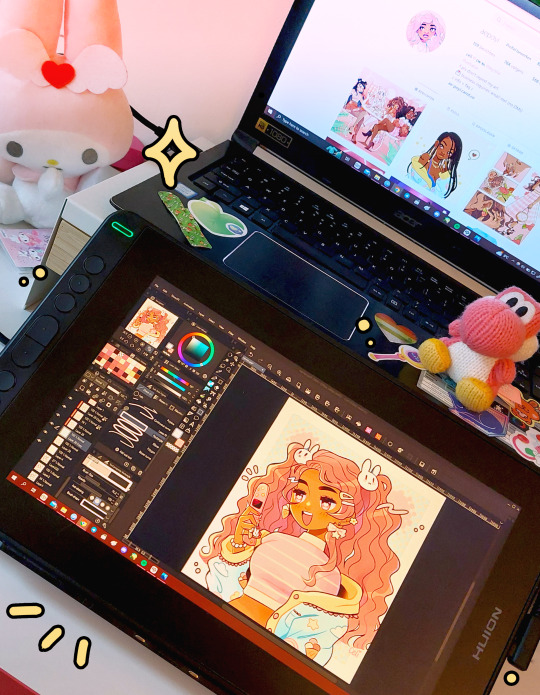
the lovely folks over @ Huion kindly sent me a Kamvas 12 to try !! ♡ a quick review:
🖥 Huion Kamvas 12 is a beginner friendly screen tablet with full HD 12″ display, compatible with windows, mac, linux and android phones. it is not a standalone portable tablet, it will need to be hooked up to a computer with a HDMI port!
🖼 i’ve been using this screen tablet for a month now and i’m really happy with it! this is huion’s smallest model, making it easy to carry and ideal for my small desk. it is a compact, lightweight but high quality screen tablet.
⚙️ set up is straightforward. i had some trouble figuring out pen calibration during set up bc there was some lag/offset, but after some fiddling around it works like a charm and i don’t experience any major lag when doing a stroke - i've tested this both in SAI and CSP.
🎨 the screen resolution is impressive for its size & the colors are popping on this one. its kinda like your drawing on paper bc the screen is semi-matte. it even got customizable hotkeys which i love + u can turn off the screen and use it like a regular drawing tablet no problem
🖊 the pen is battery-free and charges automatically, so if you’re like me and get annoyed by the pen running out while you’re working, this is ideal! it comes with pen holder + extra nibs, a drawing glove, and an optional adjustable stand, making it more ergonomic
tl;dr: i’m impressed! if you think larger screen tablets are a bit intimidating, or you’re used to non-display tablets and are looking to transition to screen displays - this is a great and affordable fit! 💞
i'm so happy to see more affordable options out there so more people can jump in and start drawing digitally. i can highly recommend huion tablets!! if you are interested, you can find more info here! ✨
581 notes
·
View notes
Text
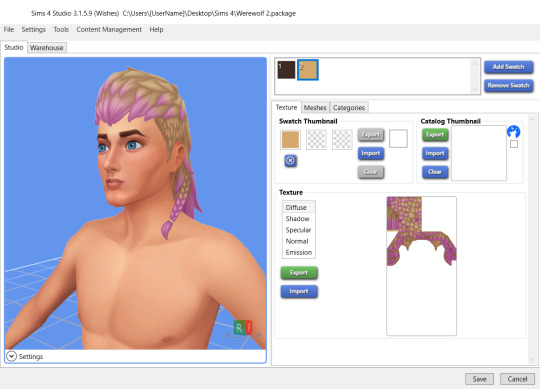
Studio update: Werewolves Gamepack & hair/slider batch fixes
Hi All, the Werewolves patch caused custom content hair that was compatible with the color sliders to look bad in the game. This version of Studio (for Windows and Mac) has:
1. a batch fix that will repair these packages so the hair will look right and still be compatible with the color sliders.
2. a batch fix that will change hairs that aren’t compatible with the color sliders so they are.
3. a batch fix that will fix face and body slider mods so they work in patched games.
The #2 batch fix can be used on packages that were converted back to color slider incompatible hairs using another application. PLEASE NOTE: these batch fixes are in beta, meaning we tested them on a limited number of packages. Due to the wide variety of Sims 4 custom content, we cannot ensure they are perfect yet. However, every time you run a Studio batch fix, Studio makes a copy of the pre-batch fixed packages it fixes. So, if you experience unexpected/unwanted results, it is easy to replace the unwanted “fixed” packages with the original you had in your mods folder before you ran the batch fix.
The download pages for the respective Studio versions include a more detailed explanation with illustrations that will explain the batch fixes and how to use them.
Creators reported that converting RLE2 hairs to LRLE hairs was causing a problem with the shadow images that had to be fixed manually. Studio now recognizes the shadow image and doesn’t convert it to an LRLE, so this manual repair will no longer be necessary.
The Mac and Windows versions are also updated for the Werewolves Gamepack and the Moonlight Chic, Little Campers, Decor to the Max kits. There are other fixes and additions that are detailed in the Changelog for each version.

Choose your version to download HERE.
1K notes
·
View notes
Last Seen Blogs