#Status Ailment Resistance Up Active
Photo

Happiness Melts in the Twilight
Obtainability: Limited to “A Bouquet for Tomorrow’s Happiness” event shop. This is event bonus memoria and should be kept in case of a rerun.
MLB Effect: MP Gain Up [10%] & Status Ailment Resistance Up [25%] (Self / 3 Turns)
Effect Definitions:
MP Gain Up will increase the MP gained from all sources, including Accele Discs, Charge Discs, damage taken by the equipped character, and when they activate an ability that gives them MP Restore or Regenerate MP.
Status Ailment Resistance Up will decrease the chance of the equipped target to be afflicted by a Status Ailment. Even at 100%, it is still possible for a character to be hit by a Status Ailment. This effect will stack.
TLDR: Another addition to the limited event shop MP Gain Up active memoria. It’s worth keeping and will be good on magia-oriented teams and in places like the Kimochi.
Review: “Happiness Melts in the Twilight” is the same as another memoria in the game: “The Luxurious Cake Way of Eating”. Both memoria have MP Gain Up and Status Ailment Resistance Up at the exact same percentages. The only difference between the two is that “Happiness Melts” has more passive DEF stats.
This memoria is another member of the growing number of welfare MP Gain Up actives:
(Limited 4*) “Sudden Pajama Party” MP Gain Up [15%] (Self / 3 Turns) & Magia Damage Up [20%]
(Limited 4*) “Like This Since When” MP Gain Up [12.5%] & Defense Up [22.5%] (Self / 3 Turns)
(Limited 4*) “Budding Sweetness” MP Gain Up [10%] & Accele MP Gain Up [20%] (Self / 3 Turns)
(Limited 3*) “Thoughts Sunken to the Darkness” MP Gain Up [10%] & Attack Up [15%] (Self / 3 Turns)
(Limited 3*) “Happiness Melts in the Twilight” MP Gain Up [10%] & Status Ailment Resistance Up [25%] (Self / 3 Turns)
(Limited 3*) “The Luxurious Cake Way of Eating” MP Gain Up [10%] & Status Ailment Resistance Up [25%] (Self / 3 Turns)
(Limited 3*) “Sisters” MP Gain Up [10%] & Regenerate HP [4%] (Self / 3 Turns)
(Limited 3*) “Talking About the Future, the Oni Laughs” MP Gain Up [10%] & Magia Damage Up [15%] (Self / 3 Turns)
(Limited 3*) “Hands Linked to the Unraveled Thread” MP Gain Up [10%] & Damage Up [15%] (Self / 3 turns)
(Limited 3*) “The Long-Awaited Choco Date” MP Gain Up [10%] & Attack Up [15%] (Self / 3 turns)
(3*) “In Dreams Are Sadness Permitted” MP Gain Up [10%] & Regenerate HP [4%] (Self / 3 turns)
(2*) “Inherited Bonds” MP Gain Up [10%] (Self / 3 Turns)
MP Gain Up as an active is hard to find outside of limiteds, making this memoria good regardless-- however if you are a long-time player, you’ll probably have a number of these on hand to use at this point. When compared to them all, “Happiness Melts” falls behind slightly as Status Ailment Resistance Up isn’t as enticing an effect as something like Attack Up or Magia Damage Up, and I’m not just talking about its usefulness in fights like the Kimochi. Depending on your lineup, or if you possess any kind of OP unit such as Madoka & Iroha, Status Ailments are something you don’t need to worry about or something you absolutely do, and a little bit of Resistance won’t cut it.
However, the MP Gain Up is what makes this memoria shine. This is a memoria worth keeping.
#Magia Record#Three Star Memoria#Event Shop Memoria#Event Bonus Memoria#Welfare Memoria#A Bouquet for Tomorrow’s Happiness#MP Gain Up#MP Gain Up Active#Status Ailment Resistance Up#Status Ailment Resistance Up Active#Kokoro Awane#Masara & Kokoro (Bridal ver.)
4 notes
·
View notes
Text
The Dubiously Needed, Unnecessarily Extensive Magia Record Stat Sheet Guide: Spirit Enhancement
Now we get into the stuff that really questions my ability to know what I'm talking about! Please correct me if I'm wrong. Please.
Spirit Enhancement is a form of upgrading your units introduced in the Japanese server. By using upgrade materials, a unit can gain further buffs beyond what is provided in their kit, such as increased stats, passives, and actives.
There are two types of Spirit Enhancement buffs: passives and actives. They work exactly as they do with Memoria: passives are always in play, while actives must be triggered manually. A character’s Spirit Enhancement tree will have a handful of passives and one unique active.
A character’s Spirit Enhancement tree will have around 12 passive nodes. 4 of these nodes will usually (but not always) be reserved for two Doppel Adept nodes (Doppel Damage Up and Magia Damage Up) and two MP Boost nodes (MP Gain Up When Over 100 MP). That gives you eight passive nodes to add whatever additional buffs that you think support your character’s playstyle.
I’ll use a recent release, Amaryllis, as an example.
Amaryllis is a Support type character with four Accele discs. Her Connect, Magia, and Doppel are all focused on inflicting and dealing damage via status ailments.
Her Spirit Enhancement passives play off of this kit. Many of her nodes support her MP gain with effects like this:
Fast Mana Up: MP Gauge Increased On Battle Start (40% full)
Endor Adept [VIII]: MP Up When Damaged [VIII] (8 MP)
Mana Spring Aura [VIII]: Regenerate MP [VIII] (Self / 13.5 MP / 5 turns from battle start)
By generating Magia quickly, Amaryllis can apply more ailments and deal more damage. She also has some nodes that support her ailment infliction:
Addict Killer [III]: Damage Up Versus Enemies Inflicted With Status Ailments [III] (25%)
Poison Edge [III]: Chance to Poison on Attack [III] (20% / 3 turns)
Addict Killer helps Amaryllis deal more damage with the ailments she inflicts. Likewise, Poison gives her access to a multi-turn ailment, doing more damage over time and giving her more turns to take advantage of the benefits she receives.
Spirit Enhancement provides the means for your character to have a more specific playstyle, outside of what they can do with their discs, Connect, and Magia. For example, a tank may not have the best MP generation. Their Connect and Magia won’t really be able to help that out. But their Spirit Enhancement may give them effects like MP Up When Damaged and Mp Up When Attacked By Weak Element. This creates a playstyle that encourages tanking hits to retaliate with the Magia. Or, maybe your unit deals the most damage with their Magia when their HP is low. Their Spirit Enhancement could have an effect like Crisis Bloom, which increases Attack and Defense at low HP. These are just ideas, of course. With Spirit Enhancement passives, you have access to nearly the entire skill list. Whatever playstyle you have in mind, there’s usually an effect or two that can define it.
As with the Connect, there are usually consistent effect percentages for SE passives. Here are the patterns I could find:
Attack Up: 10%
Attack Up At Max Health: 20%
Attack Up At Critical Health: 10-15%
Defense Up: 22.5%
Defense Up At Max Health: 40%
Defense Up At Critical Health: 30%
Damage Up: 10%
Magia Damage Up: 5%
Doppel Damage Up: 5%
Status Ailment Resistance Up: 25%
Accele MP Gain Up: 12.5%
Blast Damage Up: 16.5%
Charged Attack Damage Up: 25%
Charge Disc Damage Up: 10%
MP Gain Up: 7.5-10%
- Attribute Attack Up: 7.5%
Status Ailment On Attack Chance: 15%
Damage Increase: 10%
Damage Up Versus Witches: 15%
Defense Pierce Chance: 15%
Damage Cut: 10%
Accele Damage Cut: 10%
Blast Damage Cut: 15%
- Attribute Damage Cut: 15%
Magia Damage Cut: 20%
Critical Hit Chance: 15%
Evade Chance: 15%
Counter Chance: 20%
Follow Up Attack Chance: 20%
Damage Up Versus Enemies With Status Ailments: 20%
Provoke Chance: 15%
Regenerate HP: 4%
Regenerate MP: 9 MP
Skill Quicken Chance: 15%
Guard Chance: 15%
MP Up When Damaged: 4 MP
MP Up When Attacked By Weak Element: 11 MP
MP Gauge Increased on Battle Start: 15% full
Ignore Damage Cut: 45%
Blast MP Gain Up: 3 MP
If you’re thinking “hey, some of those percentages are kind of small”...Well, yes, they are. But like the EX skill described in the last post, Spirit Enhancement passives give small bonuses, with some exceptions. There are definitely some larger bonuses in there, but as they aren’t the majority, they don’t end up in the list. As always, I would recommend checking the wiki for percentages that fit your character.
An effect percentage may also look small because a character has more than one of that node. For example, the Doppel Adept node I mentioned earlier. This list describes an average of 5% for Magia Damage Up. But since most characters have at least two nodes with Magia Damage Up, the average is closer to 10%. This is also something you should keep in mind while planning your unit’s SE. Not every passive node has to be unique!
One more thing to consider is that there are occasionally “aura” effects. In Spirit Enhancement, an “aura” is an effect that lasts a certain amount of turns after the start of the battle, usually to an increased effect. Think of it kind of like an EX skill, but with a turn limit. Shizuka Tokime has an example of this with her SE node, Bloom Aura:
Bloom Aura [V]: Attack Up [V] (25%) & Defense Up [VI] (45%) (Allies / 5 turns from battle start)
Do you have a headache yet? Good! Let’s keep going. Don’t worry, there’s only a little bit left.
Every character gets one Spirit Enhancement active. It’s the equivalent of a third active memoria slot. The effects you have to choose from are the exact same as the passives, with the addition of turn duration, targeting, and different percentages. As always, you can decide the active based on your character’s playstyle.
Since we already talked about Amaryllis’ SE, let's look at her active.
Quell Bloom [I]: Defense Down [I] (5%) & Defense Down Further [I] (5%) & Attack Down [III] (20%) (All Enemies / 3 turns)
Amaryllis is a character who supports the team by crippling the enemy. This is mainly through ailments, but there’s a bit of debuffs in there as well. Her Magia and Doppel also inflict Defense Down. An debuff active gives Amaryllis more options to restrict the enemy and support her team.
There are no consistent percentages for actives. As with Magia, the differing targets and turn duration make things too variable. You can use other characters’ SE actives as reference, but memoria are also a good source to sample from. Many SE actives have effects that are similar to memoria.
…Oh right, you also get stats from Spirit Enhancement, don’t you. This is another thing that’s a bit too variable for me to jump into the Math Witch’s Labyrinth again. I usually determine Spirit Enhancement stats at the same time that I determine base stats. Just like with Growth Type, you can pick one or two characters with the same Type and Growth Type and average out the amount of stats they gain from Spirit Enhancement. From there you can determine how many stats your character might get.
There’s no real need to split the stats up into individual nodes unless you really want to torture yourself. I just total it all into a single number like I do with base stats. But it’s up to you how you want to approach it!
#magia record#droppel's magia record stat sheet guide#apologies for the wait with these posts#my motivation has been poor lately
12 notes
·
View notes
Text
Recently played through Final Fantasy 9, and it was pretty fun and cool, but the final boss was odd. It had an attack that applied every debuff randomly and dropped everyone's HP into the single digits. It basically forces you to hit recovery strats constantly and equip your party to resist as many debuffs as possible. Unfortunately, KO (instant death), Doom (delayed death) and Zombie (healing hurts) aren't defendable, meanign it's entirly possible for the final boss to go "lol I win" and you really can't do much other than have a character be too up to get hit. It made me realize that the game seemed to focus a lot on recovering your momentum.
This became very apparent when I was watching a casual playthrough where Mustard Bomb and Frost (two spells that inflict a debuff that can kill) always worked when the enemies used them, forcing the player to just equip an ability to immunize their party to those two debuffs. Mind you, you can learn Mustard Bomb and Frost, but you'll never use them in any meaningful manner because their accuracy is 20%. It sure doesn't feel like 20% when enemies use those spells since they always succeed, but it feels far worse when you try to cause 20% would be an improvement in some cases. I mention these two specific spells cause there was a dungeon the player hit that had a lot of enemies use these spells sorta frequently, slamming the brakes on any damage output possible.
Another time I watched someone speedrun the HD version with all of the boosters on. It was a silly category by nature, since you one shot everything, but the speedrunner didn't activate god mode since that put everyone in trance, thus wasting time. However the third to last boss almost killed the run immediately, and second to last boss wiped her Game Shark leveled party down rather quickly with a few abilities, making me realize that the game really leaned hard on status ailments and defense ignoring damage at the end, which feels a little cheap at times.
I'm not saying Final Fantasy 9 is bad, far from it, but the design choices the dev team made culminated in a game where eventually you always felt like something was gonna go wrong at some point.
0 notes
Text
How To Get Cheap Residential Loans With Credit Rating
Total Security is scamware which installs itself in your own computer and 'pretends' unearth a number of viruses and problems. Your pc causes every kind of problems for your PC, and has no way to uninstall it from your personal machine. Luckily, there's an easy method which even just starting out can caused by remove it completely from your computer.
Let's achieve bitdefender total security 2021 in this coffin" of lost resale value. Subsequent information is concerned with choosing a good real estate agent who'll properly handle your affairs, if actually you cant do them yourself, although need to actively join. Here is where this agent's ineptitude will seal these relocated owners' fate. Let's set the stage: Were now at 2003; our sellers are going to be transferred and tend to moving after five yrs. This is right in maintaining the national average which says that people tend go every a few years. So in conjunction the actual use of move, a relocation company becomes involved. Here comes the red record!
Run your alarm tests regularly with all your monitoring carrier. Something that often gets overlooked by homeowners is the status within the alarm itself. Unless you keep yourself aware of how the home alarm is functioning, is actually offline and useless without anyone seeing. Set up a schedule of running tests and make sure your monitoring service is on precisely page if you when talking about updates. If you don't remind them when the time has come, you may never understand more about an enhancement.
Nobody gets disability. Everybody gets ailment. The wrong people get disability. The reality is, the numbers of a very stringent rules and regulations that govern how disability is selection. If someone says, "I got disability and Certainly be a realistic even disabled," perhaps they got benefits when they were disabled and forgot to tell Social Security they were given better. Or even maybe they simply chose in order to not discuss such personal matters with you. On the other hand, the who seems to deserve disability and is denied benefits may not meet the non-medical necessity for SSD and have too much in assets or income for SSI.
The other is a bullet camera also. At the present time night color camera has 56 infrared LEDs which allows you discover and record in Bitdefender Total Security darkness. Could be wired or wireless possibly. The infrared illuminators allow you to see up to 60 feet away in one payemnt darkness which explains completely weather resistant.
Will MLM Traffic Formula 2.0 show me skills I make use of instantly without purchasing any outside courses right in the future? I do believe so. Having said that again, anyone be determined by the individual in whose hands Mike Dillard's Traffic Formula training winds in mid-air.
bitdefender total security free download can monitor so a good deal than just security break-ins. The alarms can be optionally constructed to monitor fire or smoke alerts. When the sensor detects smoke or fire the monitoring center is immediately alerted. The fire department can be quickly dispatched saving lives and terrain. The system additionally be be hooked up to monitor for co in factor way. Additionally, bitdefender total security crack 2021 can be used for water and freezing temperature conditions. These monitors are perfect for use within vacation homes or places where you're always discovered. Having an wireless home alarm is inexpensive and smart way to have total security and confirm that you and your family will almost safe.
1 note
·
View note
Photo

Gentle Breeze
Obtainability: Unlimited
Notes: This is event memoria for the event “Voices from Beyond” and should be kept in the case of an event rerun.
Effect: Status Ailment Resistance Up [50%] (Self for three turns)
5 notes
·
View notes
Text
One Hundred Evils and You: Stall Teams (for the F2P Player)
Introduction:
Here is a guide on how to defeat the Hundred Evils/Hundred Calamities with easy-to-acquire units and easy-to-aquire memoria!
Please note that this is not the only approach to the Hundred Evils, and it might not even be the best approach for you personally. However, it is the most generic approach that is made with Free-to-Play Players in mind. Stall teams are easier and more accessible to make than most Charge or Magia teams. Blast teams can work in the Hundred Evils (I’ve done them before) but it’s tricky and they’re not always applicable, depending greatly on who you fight. In the end a Stall team might be your best option!
This is an extremely long guide. I wanted to be thorough, but I might have overdone it. Still, I hope this is helpful! Some of these hints might be a little obvious, but I wanted to make sure that even new players could get some practical advice.
What is the Hundred Evils?

The Hundred Evils is located on the far right tab where you have three different battles to fight that only cost a reasonable 1AP each. Inside, you’ll battle against several different waves of Magical Girls (and only Magical Girls-- no Witches, Uwasa, Kimochi, or other kinds of minions will be found inside).
What is a Stall Team?
A Stall team is a team that
Uses Magia to protect its team + deal out damage
Uses memoria to protect its team and debuff enemy
Uses specific characters for buffing, debuffing, healing, ect
This is not a team that will kill fast, but is one that can take some serious hits and stick around.
Preparing Your Team
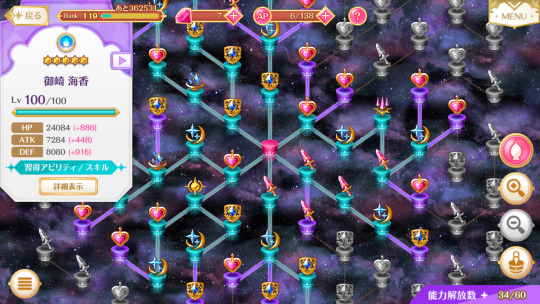
Like many strategies, most of the difficulty is in the planning. But before we talk about the characters themselves, let’s take a quick moment to talk about the preparation needed to make them excel at their work. Unfortunately this will require investment in both their Spirit Enhancement and in their Magia (you’ll want several of them to have Doppels).
More importantly, you’ll also want these characters to have multiple slots-- the worse your memoria are, the more slots you’ll want. Essentially, you really need each character to have four of them.
For more established players, it’s very possible that you’ll have several of these girls kitted out already with their required slots, but for very new players, it might take a few events to finally get them fully slotted. Luckily you can do this easily with Magia Chips and Destiny Bottles, unlike with natural four-stars, but this still might take time to build up.
As for Spirit Enhancement, it depends-- some characters you’ll really want that Active (for example, Kako’s party-wide HP Regen heal) and some characters... eh. It’s not as important.
But it’s still a good idea to grab as much as you can. Some characters, like Kako again, have SE that gives them more MP at the start of the battle or HP Regen. This is inconsequential for high-end content, but vital for a FTP Magia Stall strategy team. You want everything that will make a character live longer, heal themselves on their own, get them to Magia faster, ect. You don’t need to get them to 60/60 SE, but it’d be good to aim for them to have all their Passives and Active.
Who to Use:
Let me introduce you to a F2P’s saviors:
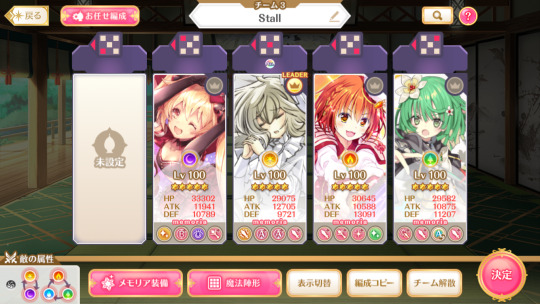
Let’s go through them and analyze why these girls in particular are so good for Stall teams.
Oriko Mikuni: Oriko is the team leader of this bunch. Why is that? She’s your go-to Magia damage dealer. She’s a Magia type, she deals a decent amount of damage for an uncapped girl, her Magia is an AOE, and her typing (Light) means that she should be able to deal decent damage against anything you throw at her. Her Spirit Enhancement is full of increased Magia Damage Up, and she also has the passive 15% chance to inflict Skill Seal on her enemies-- it’s not enough to be reliable, but I find that it’s still really useful when it pops off unexpectedly. The focus on Evade can be useful in some circumstances-- she’s fragile, and it’s an easy way to protect her. Lastly, her connect gives Accele MP Gain Up, which lets her help your team gain more MP.
Kako Natsume: The GOAT for F2P, Kako Natsume is pretty mighty. Her Accele Draw personal memoria is great for getting things set up, she offers good heals through her connect, her Magia/Doppel, and even through her Active SE, and her SE is also pretty decent with giving her lots of stuff that helps her survive. Her damage isn’t the best as a Healer, but her single-target Magia/Doppel can kill troublesome Aqua-types when needed. Her Magia/Doppel/Connect also gives “Remove Status Ailments” which can be extremely helpful. Lastly, her Doppel will provide “Remove Buffs” towards the target which can help with increasing damage potential.
Emiri Kisaki: Don’t let Emiri fool you into thinking she’s all giggles-- she's fearsome! She’s excellent as a Debuffer and will protect your team through inflicting Dazzle onto the enemies. Not only does Dazzle make them more liable to miss, but it also means the enemy takes increased damage from their weak element, so she can also help increase damage done. Additionally, her Magia/Doppel gives all enemies Damage Down for three turns, making her Magia even more protective. Lastly, she has Skill Quicken as part of her Spirit Enhancement, meaning it’s an excellent idea to equip memoria on her that you want to use more often than the cooldown let’s you.
Manaka Kurumi: Manaka is fucking incredible. Like Kako she’s a heal-type, but don’t be tricked into thinking that’s all she can do. She has one of the highest Attack Up connects in the game and her Magia/Doppel offers an excellent amount of Attack Up to all allies for three turns. This gives her the role of being the buffer-- if you’re facing a tough enemy, use Manaka’s Magia/Doppel first and then use the other Magia after. She has two Accele MP Gain Up passive nodes and an active that gives her more Accele MP Gain Up, so don’t be afraid to use her Magia/Doppel often.
Other Good F2P-Friendly Units
Now, you’ll probably notice that I only included four up there, but that you can use five in total for your team. If you need to use a Magia Stall Team, then I recommend using all five spaces so that you have more room for potential Magia/Doppels. The fifth slot can be swapped for anyone in particular, but if you’re looking for a F2P-friendly character then I’d recommend one of these girls.
Umika Misaki: Personally this would be my most recommended option. Umika is another healer, which makes your team even more protective than before, and she can fill a very protective role. First, her connect won’t just heal someone but it’ll also give them Damage Cut and almost 100% Defense Up-- making her excellent at protecting someone. Her Magia/Doppel act similarly to Kako’s, restoring health to all allies and also removing Status Ailments. Her SE is similarly useful-- like Emiri, she has passive 15% Skill Quicken, so she’s a good choice to equip active memoria you want to use often on. Like Oriko, she has a chance to Skill Seal on attack-- not enough to be reliable, but enough that it should still be good. Her SE active is MP Damage for 30MP-- situational, but it can be extremely helpful if you’re not able to kill an enemy before they can Magia you. Her DEF and HP make her solid, not as much as a proper tank, but as someone who can stand in for one.
Hotaru Yura: A bit of a bold choice, but Hotaru can be good. She’s another healer, but she has some excellent supportive capabilities. First, you don’t need to worry about her dying, unless she can’t Regen HP-- her SE Active gives her 100% HP Restore (with the cost of Attack down on self, but no one is using Hotaru for damage). She has passive HP Regen, Defense Up, and Status Ailment Resistance so she can take a bit of punishment. Her connect is a generic heal, and her Magia has a generic HP Regen, but what makes her really shine is the MP Regen from her Magia-- this means you can use her to keep your party having topped off MP gauges.
Haruka Kanade: If you have Haruka, she can be a good choice as a tank. Despite being a Support, she has a ton of tanking capabilities, and she can protect your team through a variety of methods. She has passive Provoke chance, meaning she can draw aggro away, Skill Quicken (you want to probably use her active slots for taunt memoria and for defense up/damage cut memoria though), and HP Regen. Her active lets her taunt the enemies while also inflicting a 52% chance of Charm onto them-- it’s a long cooldown, but can serve as a panic button when things are going wrong. Her connect gives Charm as well, meaning you can protect the party from hits. Her Magia/Doppel is also a good defensive panic button of sorts-- the target will deal less damage, Haruka gains Provoke and Damage Cut (and hp regen), and she can protect your team for that turn.
Sana Futaba: Sana has decent DEF and HP stats, so she will do well as a tank. She has a passive Provoke and a passive Endure-- meaning that she can draw hits and also stay alive past one potentially fatal one. Her SE gives her Accele MP Gain Up and MP Gain Up nodes, so it shouldn’t be too difficult to get her to Magia/Doppel. Her Anti-Debuff SE active is situationally useful. Her connect gives 100% Damage Cut, making it a good way to protect the user, and her Magia gives Damage Cut/Defense Up to all allies, again making her a good way to defend her team. Her Doppel has a chance of being very defensive or of inflicting Status Ailments (Burn, Darkness, Bind). This does make her more tricky to use if she gets to 150 MP as opposed to 100-- you can’t guarantee if she’ll protect your team or inflict ailments on the enemy.
Good Four-Star Units to Use
There are too many good units to list here-- believe me, I tried to actually do that and after the first twenty characters I realized I’d have to tackle this in a different way. However, here are some extremely notable characters, who you should bring even if they only have one slot:
Madoka & Iroha
Madoka Kaname
Mikage Yakumo
Outside of that, if you have someone with a few slots and you’re wondering if they’re good to bring, ask yourself these questions:
Do they have good disks? Characters with two or more Accele disks are better than ones with only one.
Do they help with MP generation in any sort of form? It’s not a must-have, but it’s a plus.
What do they provide to the party-- do they have a protective role, a defensive one, an offensive one? For example, you can swap out Emiri for a slotted Mifuyu since they share similar roles, or a Sayuki for a Manaka.
Last Notes on Choosing Characters
Here are a few last things to consider when choosing some characters.

First off, you don’t always fight every element. You might not know who you’re fighting, but you can know what element they’ll be-- you can then use your characters accordingly. For example, it might not be worth it to bring an Aqua-element if you could use another Forest type here. Just make sure that you don’t miss important team roles!
You can always try to use memoria to fill in missing character gaps. For example, some fights might have you face teams that build up MP to use on deadly Magia. You could try to get your one-slot Touka to work... or you could just use Magia Damage Down or MP Gain Down memoria instead.
Tanks can be really helpful here but also sometimes not. A tank really needs 3+ slots to work properly so that they can have enough defensive passives plus an active that grabs aggro. However, you don’t need to choose a proper tank-- any character with a passive Provoke or Guardian can work if they have the right memoria for it. Just make sure you keep them alive.
Three healers on a team might seem excessive, but personally I find it to help cover bases. This way you don’t run into a situation where your healer needs help but no one can help them, and you also are able to use Magia more strategically-- Manaka can heal, sure, but you don’t need to waste her Magia on someone when you don’t need the Attack Buff right then as long as Kako has her Magia up still. This is also really helpful if you don’t have any tanks on your team.
When it comes to filling in the fifth member of the F2P team (Oriko, Manaka, Kako, Emiri), I prefer aqua types so that you can fill in all elemental slots. Again though, make sure you check what elements you’re fighting first!

The formation you use can be important too. This one for example gives increased Status Ailment Resistance and HP Regen. Additionally, make sure you place your characters with consideration. Characters closer to the front will be targeted more than characters towards the behind. If you have a tank with Provoke memoria, then make sure whoever is horizontal and vertical with them can also take some hits when the enemy uses a blast attack.
Equipping Your Team: What Memoria to Choose?
Okay, so you’ve chosen your characters. What about memoria? Do you need top of the line stuff here?
Nah. You can do this with event rewards easily!

Going through a list of everything that could potentially be helpful would be extremely long, so the above provides some examples. Let’s go over some notes:
For passive memoria, I prefer to do one Accele MP Gain Up/MP Gain Up memoria paired with one Attack Up/Damage Up/Damage Increase memoria. That way your units can get to Magia easily and still deal decent damage when they get there. If your characters are fragile, then using memoria with Defense Up/Damage Cut are good ideas too. Memoria with passive HP Regen aren’t a bad idea-- you probably have a lot of good healers on your team, but a character who can passively heal themselves means you can use those Magia for more offensive purposes.
As for Actives, your choices are expanded. I mentioned above that memoria can fill in missing gaps that you couldn’t fit characters in for. Actives are part of that. Accele Draw memoria are always a must, and memoria that help increase your MP Gain is always a plus. The biggest key though will be Attack Down / Damage Down memoria. Memoria like Mito Rain are the best thing possible for a F2P-- it has a low cooldown, effects everyone, gives a ton of its percentage, ect. You’re actually better off keeping five separate copies of Mito Rain instead of max awakening it to one, because then you can give each character one copy-- this means you can use a Mito Rain on every turn. This will protect your units and keep them safe in addition to all the healing you can do, and it also will help you deal increased damage thanks to its Defense Down.
One memoria that can inflict MP Gain Down is generally a good idea.
Characters with passive Skill Quicken should be given memoria that you want to use more often-- Mito Rain is a good idea on them of course, but so are other debuffers.
Tailor your memoria to your needs. If you find that all your characters are constantly at 150 MP but you’re never in a good place to use it, try decreasing the amount of MP Regen memoria you’ve got going on and replace them with more damaging effects.
DON’T OVERLOOK THREE STAR MEMORIA. They can be extremely helpful and even better than some four-star ones! For example, Leila Rain is an overlooked hero and definitely worth considering! Three-star memoria are easier to max awaken too, so in some cases, a max awakened three-star memoria is going to be better than a single copy of a four-star one!
If you’re a newer player, then chances are you’ll struggle with having good memoria along with having good units. Memoria can be just as much an investment as characters can be-- so make sure you’re getting 3* Over Limiters from your events and spend them wisely.
Don’t forget you can negate Evade through Status Ailments-- memoria can be extremely helpful with that.
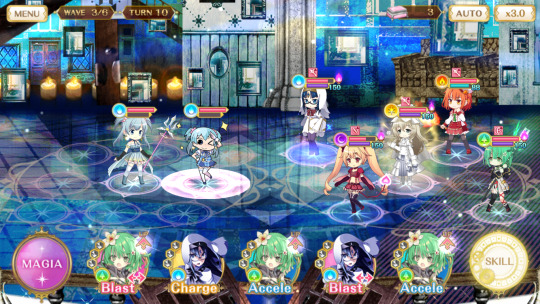
Actually Fighting
So now you’re fighting. Cool! What now?

First you want to build up your MP for everyone. If you have an Accele combo without needing to use an Accele draw memoria, take it!

For your first wave, try to build up MP slowly across everyone. Use your Accele Draw(s) here and prioritize Accele combos-- even if it means using an Accele disc for someone who already has max MP. For example, if I got an acele disc option from Umika, Manka, and Oriko, I’d still use Umika’s to get all of that MP.
Remember that the order the Accele disc goes in determines how much MP they get! The first character gets the least amount of MP with the last one getting the most. Using the previous example, I’d use Umika’s disc, Oriko’s disc, and then Manaka’s disc. Don’t forget that the characters get a flat +20 MP boost too.
Choose your target enemy wisely. For example, you can generally count on Touka featuring some sort of anti-MP gain/MP Gain on self, and Nemu to inflict a status ailment onto your team. Here, the Rena hits harder than her Rena-chan self. You can’t always predict who is going to use what, but general familiarity with the characters helps.
Some enemies are better for generating MP against than others. You can’t always predict who you’ll get and what they’ll do, but if you come across easy enemies, take advantage of the situation to farm some MP.
There are lots of tricks to getting more MP out of situations. For example, all characters will gain more MP after they hit 100MP than before they do-- so using an Accele disc before a Magia is an easy way of regaining your losses.
Using an Accele disc before any others will increase the MP gained by each subsequent disc, even for Blast. If your disc selection is bad, try to make the most of it with squeezing out what you can.
Additionally, if you’re confident a Magia will kill a target, use the Magia last. You can put two potential accele discs in front of it to get even more MP out of the thing.
This line of thinking can go with charging up connects. You don’t actually need to use the disc (if the enemy dies) to get the + for it, so if you’re confident a Magia will kill a target, pick discs that will give you a connect on your next turn.
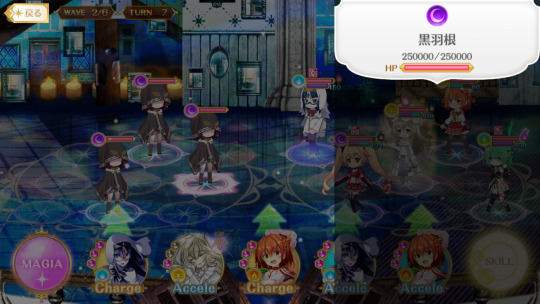
This is a little overkill, but personally I like to go into the last wave with as many Doppels and Memoria up as possible. Don’t stay on any character too long-- you can only use three doppel a turn after all, and using one of your five to finish someone off isn’t a bad idea-- but also don’t be afraid to sit for a bit either. Just make sure you’re under the 40 turn time limit. It’s possible that whatever you face in the final wave will need more than three doppels to die.

It’s time. It’s the final, toughest wave. You’re here! You’ve got all the Doppels ready and a bunch of memoria ready too. So what order do you do this in?
In general a safe bet is to go Manaka > Emiri > Oriko. This is so that Manaka will buff the entire team, making each Doppel hit harder, Emiri can inflict Bewitch (possibly making Oriko hit harder if she counters the element, though it doesn’t work in this scenario) and use your main damage dealer (Oriko) last.
If your characters have some lingering status ailments, or if the enemy has an annoying buff, Kako’s doppel might be a good idea to go first instead. It’s not a bad idea to save your defensive doppels/healing doppels for a potential second round though.
And that’s it! You did it! Congratulations!
Other Advice that I Don’t Have Screenshots For
You’ve got at least two healers who can heal through connects, magia/doppel, and one through her SE Active. Don’t blow a Doppel when a connect will do just as well.
If you don’t have enough debuff memoria to “blanket” the enemy every turn, then use Emiri’s connect to try and blanket them with Bewitch instead.
Connects in general are a tricky thing to use. You want to save them for times when their effects are needed, but sometimes you also want to give someone an Accele disk to get their MP up. Don’t get too greedy, but conversely don’t hoard them.
If you mess up and want to redo a wave, forcefully exit the game. When you bring it back up, you’ll have an option to go right back to the beginning of that wave (the answer “yes” is the right button).
Try not to overcap on effects. For example, don’t use two active Attack Up effects Oriko, have Manaka use her Doppel, then have Manaka connect to Oriko. Attack Up has a cap of 100%, and anything over that is completely wasted. Space stuff out over turns, or use a variety of different memoria to provide different buffs.
Conclusion
I hope this helps! I think I covered everything...? You might notice that some of these screenshots come from different events because I was lazy because this took a little while to write.
There are lots of strategies you can use for this challenge. But this one is for new players/F2P players who don’t have a lot of good units/memoria yet. Eventually you’ll outgrow this team and have better characters to use. There are all sorts of cool strategies one can employ with the right characters; lots of people will try to finish the Hundred Evil fights with as few turns as possible using Charge strategies for example.
But, if you need a tried-and-true method of defeating the Hundred Evils with easy-to-aquire characters, then the above method is for you. Good luck out there, you can do it!
23 notes
·
View notes
Text
Because @hasbedidoneanythingbad inspired me to do so, I am going to have a go at my take for the Lady of the Lake as a Fanservant. While most servants are pretty accurate representations of their mythological or historical self (or whatever their source might be, who am I to discriminate?), I tend to take it more easy and consider the source a kind of inspiration, at best. That said.... eat up the mess I made!!!
༶ ═════════════
Fanservant #1:
Caster - Vivian
Vivian, the Lady of the Lake of Arthurian legends, was an important benefactor to King Arthur of Britain, granting him the legendary sword Excalibur after the Sword of Selection Caliburn was damaged in combat. She is also known under the names of Nimuë and Ninianne. Once the unfortunate lover and pupil of the great Merlin, she became the one to seal him away for all eternity, after they parted their ways in an event that is still shrouded in mystery. For her to become an independent entity that is inscribed as a spirit in the Throne of Heroes, the circumstances about her disappearance short after imprisoning Merlin on Avalon must be solved first.
Appearance:
Though obviously not a human herself, she appears as a humanoid entity, but seems to be at least partially made out of clear and self-illuminating water. Sometimes she‘s completely made out of water, sometimes she does have a normal body, this woman can‘t make up her mind. At least not when it‘s about appearances. No matter what her body consists of, Vivian is a rather shy and petite appearing woman with sky-blue hair that covers her whole back and even the ground behind her, as well as almost emotionless grey eyes. Her mature and pure body is concealed by a shroud of pale light and a waterlike veil, that she wears like a dress. Even though she appears kinda on the revealing side, she has in now way on Earth a revealing personality.
Personality:
As a fairy born on the Reverse Side of the World from the soul of the World itself, possessing divinity as a Divided Spirit, Vivian embodies pure and undisrupted kindness and appears as the mother figure of many heroes throughout history. Those include King Arthur, whom she was the selfproclaimed protector of after deeming him worthy to receive Excalibur, the divine sword she was tasked to protect. She did also raise Lancelot as her son after the death of his father and prepared him to be a knight on the Kings side. But even though she has a kind and forgiving nature, a troublesome past with a certain Flower Mage has left her cautious of her surroundings. She tends to keep to herself, even after being summoned, and doesn‘t engage in conversation much, but answers to those who seem troubled by consoling them thorougly and providing advise and wisdom. While doing her best to avert the lustful eyes directed at her body, sometimes her past self takes over her kind soul, punishing indecent behavior with motherly force. This turns into extreme overprotective and somewhat aggressive motherly love, especially for the Child Servants and everyone she claims as her family. Which wouldn‘t be too many. In short, she has a very calming presence, that radiates peace and serenity, as long as it is certain she does not need to punish anyone for their horny thoughts.
FGO Skillset:
Active Skills:
Skill 1 – Kindhearted Charisma A+
Just another Charisma skill, buffing all allies attack by 20% for three turns and applying an one-time evade status on everyone. This one does not expire until it‘s used up.
Skill 2 – Llyn Ogwen Sealing Technique A
A special and unique sealing method incapable to hold anyone hostage but the strongest of mages. Vivian developed this spell out of spite and fear to imprison Merlin on Avalon for all eternity, until one day she may forgive him and release him from the hell of eternal life. If only she hadn't disappeared before his salvation.
Used in combat this skill heals the party for up to 3000 HP and seals the enemies NP for one turn.
Skill 3 – Lake of Chalk and Legends EX
Once born in the warm embrace of the World itself, Vivian found herself burdened. Fate ruled her as the one carrying Excalibur to the godless side of the World in order to choose who would be worthy enough to change history, only for her to hide behind the illusion of a lake as white as chalk, waiting for the worthy hero to appear.
This skill grants the party a 50% damage resist status for three turns, as well as applying a three turn 20% defense buff on Servants that are hit by enemy attacks. These defense buffs can stack up indefinitely, theoretically.
Passive Skills:
Territory Creation B+
Item Construction EX
Divinity C
Fae Eyes EX
Noble Phantasm:
Protected from Gods and Demons alike by the True Pillar of Light - Brocéliande Rhongomyniad
„Stranded between the border of worlds, chosen by fate to be envied by heaven and hell alike. Light and dark reunited, for a moment in eternity. Listen to my voice, as it is the voice of the World, and thou shall bear witness to the birth of a new hero. Tonight, the moon will shine upon us from the sky above and the ocean hidden on the far end of the world.“
Born from within the Soul of the World and tasked to witness both Humanity and the mysterious Reverse Side of the World, Vivian draws her power directly from the authority over Rhongomyniad, the pillar of light that seperates both sides to keep the world stable. While being able to harness this authority to not only grant the destructive power of the nearly indestructible anchor of the planet in form of the Holy Lance, by using her Noble Phantasm she decides to use the immense powerhouse of an overpowered Deus Ex Machina weapon directly from the tower between worlds itself. By concentrating her magical circuits to open a gateway between worlds, she summons a fraction of Rhongomyniad's power as a blinding image of the pillar itself to cast a protective veil as some kind of blessing over herself and her allies. Makes you wonder if a Divine Construct is needed to break through a veil created by a Divine Construct...
Using the Noble Phantasm grants her allies debuff immunity and buff removal immunity for three turns, as well as immunity to all incoming damage from three enemy attacks except for enemies with the Threat to Humanity trait. It also removes all debuffs and status ailments, and with each removed debuff/ailment the corresponding ally receives 50% NP generation, 100% star generation, 1000 max HP and 1000 additional flat damage for three turns, as well as 20% NP gauge.
Sword of Promised Victory - Excalibur
„Awaken again and rain down light from far beyond eternity. My heart beats together with the world.“
Just like Arturia, Vivian is able to harness the power of the Sword of Promised Victory by channeling a fraction of the power imbued in the Pillar of Light into the sword and the beam it produces from its tip, cutting through everything in its way in the process. If she were to use this Noble Phantasm, it would be much stronger and more destructive as when it is used by Arturia. Luckily she is not in possession of the sword right now, so no firing her laser anytime soon.
But if she would, it would have the exact same effect and strength as Arturias Noble Phantasm in FGO, just to balance things out. In another context than FGO it would be even more devastating than we‘re used to.
༶ ═════════════
Tags:
@justchibistuff @hasbedidoneanythingbad @has-gilgamesh-doneanythingwrong @hasquetzdoneanythingwrong @hasishtardoneanythingwrong
#fgo#fate series#fate grand order#fanservant#arthurian fantasy#arthurian literature#matter of britain#fate#lady of the lake#nimue#oc#my ocs#fan servant#servant#ocs on tumblr#original character#my writing#vivian
22 notes
·
View notes
Note
December 17th?? You're awesome!!
Language Of Birthdays: December 17 - Sagittarius
[You can find the rest of the series here; or check out my masterlist]
The Day Of Earthy Chemistry
Those born on December 17 are concerned with the underlying structure of things. Earthy individuals, they are very body-oriented and bound to practical considerations. What is substantive and solid in life interests them; that which is flighty, superficial or overly fanciful does not. Those born on this day live in the here and now, and want to know how things around them work. Similarly, they tend to judge people on the basis of their actions and what they produce.
December 17 people usually limit their philosophical speculations to what they can see, touch, taste, feel and smell. They are pragmatists who think less about motives and more about causes and effects. For them what is not present has little meaning, except of course as a goal toward which they can bend their physical energies, ideas, and creativity. Because of their capacity to concentrate on the matter at hand, they can accomplish a great deal without wandering off the track.
When social or interpersonal problems arise for December 17 people it is often due to their serious nature. In conversation, they have a tendency to dismiss many thoughts as trivial and fine points as mere semantics. An aversion to hierarchy or protocol may not do much to enhance their chances of rising in some social circles and work environments. But for many December 17 people, the social status and recognition they receive for their accomplishments is enough for them.
Those born on this day must beware, of course, of getting stuck in the material plane, their imagination and fantasy dulled by an overemphasis on objective reality. They should thus cultivate their love of elegance and grace which leads to a deep appreciation of the arts—particularly disciplines such as painting, sculpture and dance, which highlight earthy, sensuous qualities.
On a personal level, December 17 people can find it difficult to resist those who manifest such earthy or sensuous qualities in their makeup and may want to become involved with them as fully and for as much time as possible. When doing so they should beware of claiming behaviour, mutual dependency, relationship addiction and perhaps getting stuck. In general, being too firmly bound to ideas, individuals, structures or organizations can inhibit those born on this day and retard their individual development and growth. This is particularly true when circumstances dictate that it is time to move on.
Strengths:
Dependable
Stable
Structured
Weaknesses:
Earthbound
Claiming
Abrupt
Advice
December 17 people must beware of chronic ailments involving their veins, bones and muscles. Due to their earthy nature, they may be fond of diets that spell weight problems. They should particularly cut down on meat and fat, and possibly consider limiting their intake of dairy products. Physical exercise of a vigorous nature is recommended. If chronic health problems prohibit such activities, those born on this day should try yoga and milder forms of calisthenics. A tendency to overindulge in two primary pleasures of the bed—sex and sleep)—can for some dull their mental faculties and initiative, particularly if such pleasures become an escape or excuse for non-action in other areas.
Lighten up
Go out and have fun regularly
Develop your social lite a bit and find a way to share your interests with others
By allowing those you trust entry into your personal world, you build bridges that enrich your life
#sagittarius today#sagittarius meme#sagittarius sign#sagittarius sun#sagittarius reading#sagittarius life#sagittarian#sagittarius#sagittarius gang#sagittarius astrology#sagittarius tarot reading#astrolgy#astrology readings#sagittarius horoscope#sagittarius women#sagittarius girls#sagittarius zodiac#sagittarius monthly horoscope
18 notes
·
View notes
Text
I figured they were gonna do this when the latest magirepo comic came out. Well I ain’t goin’ for it, ya hear!
My translator app really didn’t want to translate her, but here’s what I managed to get!
Connect: Damage Up, Accel MP Up, and HP Recovery
Magia: Damage to all, Defense Down (All), Chance to Skill Seal (All/ 3 Turns), and Remove Granted Effects (All)
Her SE passives are:
Light Damage Cut (Self/ 15%/ 5 Turns at the start of battle)
Status Ailment Resistance Up (All/ 20%/ 5 Turns at the start of battle)
Anti Bind
Her active is:
Dark Attribute Resistance Down (All/ 15%/ 5 Turns)
(At least I’m pretty sure these are the percentages going off past figures!)

We will also get a 1400 days since launch celebration that’ll have paid bags! I’m probably going for these!
It’ll have the 500 paid gem bag that has an Innocent Gem that will unlock a slot for any girl and a 300 paid bag that’ll have a 4* girl selection ticket! I’m going for Mikage since she’s only one slot from being done (and probably Isabeau)!
It’s a bit strange we’re not getting a swimsuit event, I would’ve thought we’d have one by now!
#lotsa things happening#I guess we’ll be getting some folklore stuff now huh?#looking forward to that#although I won’t know until people translate it#nayuta satomi#magia record
16 notes
·
View notes
Photo
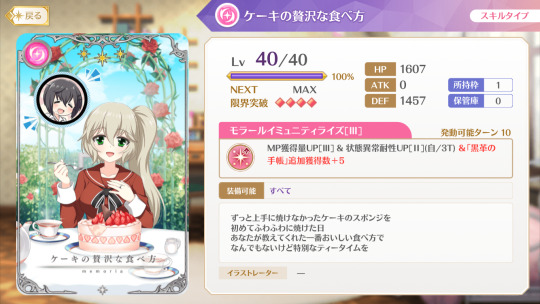
The Luxurious Cake Way of Eating
MLB Effect: MP Gain Up [10%] & Status Ailment Resistance Up [25%] (Self / 3 Turns)
Effect Definitions:
MP Gain Up will increase the MP gained from all sources, including Accele Discs, Charge Discs, damage taken by the equipped character, and when they activate an ability that gives them MP Restore or Regenerate MP.
Status Ailment Resistance Up will decrease the chance of the equipped target to be afflicted by a Status Ailment. Even at 100%, it is still possible for a character to be hit by a Status Ailment. This effect will stack.
TLDR: “The Luxurious Cake Way of Eating” is an extremely useful memoria. It’s always good to have MP Gain Up on hand, and the Status Ailment Resistance gives it a slight protective edge, making it useful for content like the Hundred Evils or Witches’ Paradox. This memoria is exclusive to the “My Only Salvation” event shop. This is event memoria and it should be kept in case of a rerun.
Review: “The Luxurious Cake Way of Eating” is another good event shop memoria. The effect “MP Gain Up” is extremely important and good to have on hand, and it’s worth having as many different memoria with the effect as possible. This is so you can have multiple MP Gain Up per unit along with being able to equip multiple MP Gain Up on other units.
This is especially important for battles like Kimochi, where powerful players will calculate out to the last percentage what they need to hit certain thresholds in order to squeeze out as much MP as possible. On units like Holy Mami (Anime ver.), this can mean hitting a Doppel without ever needing to actually use an accele disk.
Of course, memoria like this are useful outside of Kimochi situations as well, particularly when one realizes that unlimited MP Gain Up memoria is rare to find:
(Limited 4*) “Like This Since When” MP Gain Up [12.5%] & Defense Up [22.5%] (Self / 3 Turns)
(Limited 4*) “Hunger Sensor ON” MP Gain Up [12.5%] & Status Ailment Resistance Up [30%] (Self / 3 turns)
(Limited 4*) “Budding Sweetness” MP Gain Up [10%] & Accele MP Gain Up [20%] (Self / 3 Turns)
(Limited 3*) “Sisters” MP Gain Up [10%] & Regenerate HP [4%] (Self / 3 Turns)
(Limited 3*) “Talking About the Future, the Oni Laughs” MP Gain Up [10%] & Magia Damage Up [15%] (Self / 3 Turns)
(Limited 3*) “Hands Linked to the Unraveled Thread” MP Gain Up [10%] & Damage Up [15%] (Self / 3 turns)
(Limited 3*) “The Long-Awaited Choco Date” MP Gain Up [10%] & Attack Up [15%] (Self / 3 turns)
(3*) “In Dreams Are Sadness Permitted” MP Gain Up [10%] & Regenerate HP [4%] (Self / 3 turns)
(2*) “Inherited Bonds” MP Gain Up [10%] (Self / 3 Turns)
Only two of these are unlimited-- both offer the same amount of MP Gain Up as “The Luxurious Cake Way of Eating” does (and for the same amount of turns), but as said above, the more MP Gain Up memoria you have, the better.
Several of these memoria are also purchasable from their event shops. Memoria like “The Long-Awaited Choco Date” and “Hands Linked to the Unraveled Thread” can increase your damage potential, while memoria like “Sisters” might protect your unit with a little bit of HP Regen. “The Luxurious Cake Way of Eating” fills a new niche, by offering some Status Ailment Resistance.
For content like Kimochi, “The Luxurious Cake Way of Eating” falls behind the other options. You’re much better off increasing your damage potential than warding off Status Ailments-- most of the time, that won’t be a concern at all for high level play. But for other scenarios, such as The Hundred Evils or Witches’ Paradox, this might be an excellent way of both increasing your MP generation along with protecting your character from nasty Ailments.
So overall? A very good, very handy memoria that even Whales will find extremely useful.
#Magia Record#Three Star#My Only Salvation#Oriko Mikuni#Kirika Kure#MP Gain Up#MP Gain Up Active#Status Ailment Resistance Up#Status Ailment Resistance Up Active#Event Shop Memoria#Welfare Memoria#Magia Team#Magia Stall Team Memoria#Kimochi Memoria Standouts#Event Bonus Memoria
4 notes
·
View notes
Text
The Dubiously Needed, Unnecessarily Extensive Magia Record Stat Sheet Guide: EX Skill
Well, my intention was to get this done before the end of anni, but clearly, good ol' Life decided that wasn't gonna happen. Sorry, everyone! I'm still pretty busy, but in the meantime, here's a small post about EX Skills.
Ultimate and Exceed-type characters have an additional ability to express their power: EX Skills. EX Skills are akin to a passive ability that is active all of the time, even when the unit providing it falls in battle.
EX Skills cannot be leveled. They can only be improved by acquiring more slots for the character. An EX skill has two different stages: its base state, at one memoria slot, and its maxed state, at four memoria slots.
To give an example, let’s look at the first Ultimate unit added to the game: Ultimate Madoka.
Ultimate Madoka’s EX Skill: Prayer for Salvation
1-slot effect: Regenerate HP [I] (2%) / Status Ailment Resistance Up [I] (20%) (Allies)
4-slot effect: Regenerate HP [II] (3%) / Status Ailment Resistance Up [III] (30%) (Allies)
Ultimate Madoka is a unit whose kit does a lot for supporting her allies, boosting their disc damage and reducing the damage they take. Her EX skill provides the same support: it regenerates ally HP and protects them from status ailments for the duration of the fight.
Now, let’s look at the first Exceed type added to the game: Little Kyubey.
Little Kyubey’s EX Skill: Serenity Adept
1-slot effect: Damage Up [I] (5%) / Regenerate MP [I] (3 MP) / Status Ailment Resistance Up [I] (20%) (Self)
4-slot effect: Damage Up [II] (10%) / Regenerate MP [II] (4.5 MP) / Status Ailment Resistance Up [II] (25%) (Self)
The main difference between Ultimate and Exceed types is that while Ultimate types support their allies, Exceed types buff themselves. You can see this with Little Kyubey, who buffs its own damage output with flat buffs and MP regeneration.
An EX skill typically has two or three effects.
You can decide the effects of your character’s EX skill the same way that you would for their Connect and Magia.
Keep in mind that since it is a passive effect with no activation requirement or turn limit, an EX skill usually has a small effect. Many EX skills are defensive, and those that don't have much smaller percentages than the buff you would get from a Connect or Magia.
3 notes
·
View notes
Text
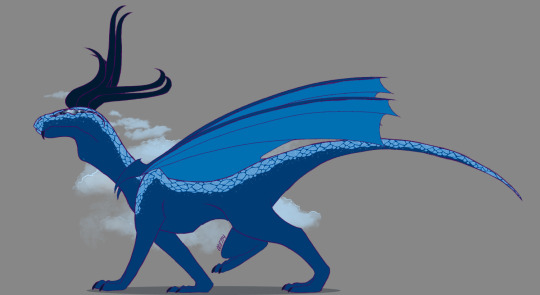
Name: Uersang
(Guerra which is Spanish for war and Sang which is Norwegian for song, so basically WARSONG)
Title: Singing Star Dragon
Monster Class: Elder Dragon
Element(s): Thunder
Ailment(s): Thunderblight, Paralysis, Deadly Poison, Bleeding
Weakest To: Fire (☆☆☆), Dragon (☆☆)
Susceptible Status: Blast (☆☆☆) Sleep (n/a), Stun (☆), Paralysis (n/a), Poison (n/a)
Immune To: Thunder, Ice
Weak Point(s): Head, throat
Size: Large
Related Monster(s): Meteorburst Uersang (Variant)
Signature Attack: Event Horizon
Info: The first thing anyone will notice about this dragon is that it communicates using its vocal cords to create a plethora of songs. Every roar, growl, howl, hiss and screech has a musical undertone that varies depending on this monster's mood and what it's trying to communicate. Second thing to notice is that the thunder and electricity it generates is hot pink in hue. This monster also has very small particles embedded into its scales that glitters in the light so if one flies low enough during the night it'll look like a distant shooting star while a wispy song trails behind.
Because they make their homes in the stratosphere and are seldom ever seen on land there's not much known about them.
Habitat & Diet: This elder dragon makes its home in the lower parts of the stratosphere where temperatures are freezing giving it an unnatural tolerance to the cold. For the most part this creature spends all day and night flying through the stratosphere. It does this by gliding to save energy. It requires a lot of hydration which it easily gets as it flies through clouds when it flies down to the troposphere where it collects water vapor to hydrate. Uersang doesn't require much food but its diet consists of fish. On the rare chance it touches ground it's been known to eat Aptonoth and fruit.
Abilities: Despite the fact that this elder dragon spends most of its life flying it has a poor chance at winning dog fights. Before attacking Uersang will give off a warning, its usually calm singing roar will turn violent and loud. If ignored it will strike the enemy hard and force it to land by paralyzing it. Once on the ground it will stand on its hind legs, spread its wings and give a secondary warning roar. If the target ignores this second warning it'll commence attacking by overwhelming the target with incredible speed and thunder attacks as well as an array of status effects. Uersang likes to get close and personal as its saliva is toxic and each bite will cause deadly poison to the hunter. The edges of its wings are sharp enough to cause bleeding. It can also envelop itself in crackling electricity after which it'll accost the hunter with a barrage of physical attacks such as body slams, hip slams, tackles, headbutts and tail slams that can cause paralysis. However, it does have a few ranged attacks to get the hunter off of it. It'll stand on its hind legs and let out a roaring song that'll cause lightning to strike it 5 times and as it runs through its body, this causes no harm to it, the lightning will be released through its back feet and spread on the ground in a ripple affect with small gaps in some areas. Being hit by the ripples will cause medium to high damage and leave the hunter with thunderblight. It's signature move, called Event Horizon, sees Uersang letting out a powerful roar that'll cause hunters to flinch, it then goes flying high into the sky and once it's high enough it unleashes a catastrophic white beam of energy with hot pink lightning crackling through and around it. The beam is targeted at the hunter it locked onto before it took to the sky but the lightning will spread through the entire arena causing tic damage that can kill if the hunter doesn't have a full health bar and/or full thunder resistance. Eating health items usually negates a faint but it has to be done fast. Those caught in the beam vanish without a trance only leaving behind a smell of burning flesh. It's possible to block Event Horizon but only if using Guard Up, however, 80% of your stamina will be used up and there is some significant recoil especially if blocking the beam.
The longer the fight goes the more aggressive, faster and angrier Uersang becomes. It's best to concentrate on the head to get the two breaks which will slow it down drastically. Easier said than done though, its habitat has shaped this monster's entire body to become extremely hardy. On top of that it WILL notice when hunters concentrate too much on its head and given the fact that THAT is its weak point it will use a combination of range and close attacks to prevent serious injuries to its head.
Pre-broken head 2x:
At this stage Uersang's thunder is not as potent but its speed is grueling. While the thunder element won't do catastrophic damage it can build up due to the constant attacking
Post-broken head 2x:
This stage sees Uersang moving at a far slower pace but its thunder element is heavily increased. It does more ranged attacks and tries to keep any threat away from its head. It will continue to fight until it perishes or the threat is taken care of.
1 head break:
At this stage Uersang is at its deadliest. It's already been injured so it needs to prevent further injuries to its delicate head so it interchanges between ranged and close combat. Its thunder element has gotten a boost in power but it lost a small portion of its speed.
Behavior: Uersang is an extremely docile monster. When it lands, as rare as that is, it will explore, eat, drink and relax. It's been known to let humans and wyverians get close though not too close. In even rarer occasions if it doesn't feel like the humans or wyverians closing in are a threat it'll stick around, some reports say this monster has been known to play around in the snow and is no stranger to chucking snow at anything or anyone near by to bait them into a bit of play. It might even get curious and approach a human or wyverian as it seldom gets to see them.
However, it's best not to agitate this monster as it angers quickly and retaliates even quicker. For the most part it's docile and calm but it severely lacks patience. Once it's engaged in a fight it'll go all out until either it dies or the threat dies.
Researchers have reported that even when this dragon lands it doesn't land to sleep. This is because during the day one half of the brain shuts down while the other is active. At night the active part shuts down and the other activates therefore this monster never needs to sleeps.
During breeding season Uersang will partake in risky courtship rituals high in the stratosphere and when it comes time to lay eggs these monsters will make nests in very high places away from people and other monsters. However, given Valstrax's tendency to also live in places of high altitude they have been known to engage in turf wars. These turf wars are often fought by the Guersang that isn't about to lay eggs. If the partner loses then the Uersang carrying fertilized eggs and its partner will retreat. This is the only time a Uersang will flee from battle. While one Uersang watches over the eggs the other will bring food, specifically fish. After hatching, the babies will be able to fly after 9 days and the family will abandon the nest to return to the stratosphere. Once the babies are 9 months old they all go their separate ways.
Extra Deets:
Before it's first head break Uersang's head is extremely tough.
Anything under purple sharpness will bounce off, this can also be circumvented by use of the skill Mind's Eye. This affect is nullified after 1 head break.
After 1 head break Uersang uses a combination of close and ranged attacks. Some of the attacks vary in this stage.
Uersang's roar requires level 5 earplugs to block.
Uersang's front claws, throat, jaw, head, horns, wings can be broken. The tail can be broken but not cut off.
Uersang has a grab attack that cannot be blocked. It grabs a hunter by the head with its front claws and slams the hunter down with all its strength. This will cause a faint regardless of health. If using Guts Uersang follows that attack with a quick swipe. Best to avoid the grab.
Using Flash will work but it will also immediately put it in rage mode.
Once Uersang's throat has been broken it will no longer be able to roar.
It has two kinds of scales: the scales on it’s skull, back, shoulders and tail are much bigger than the scales on the rest of its body which are very tiny yet durable.
Monster materials:
Star Shard
Meteor Cortex
Uersang Claw (break front legs)
Uersang Sabertooth (break jaw)
Uersang Lash (break tail)
Ozone Webbing (break wing(s))
Strato Horn (1 head break)
Starlight Amethyst (2 head breaks)
Lålning Cord (break throat)
Uersang Weapons:
Each weapon has purple sharpness and comes with the skill Gliese 436b which gives Mind's Eye/Ballistics. All weapons have hot pink lightning crackling through and around them. All are thunder element.
Cosmic Lålning (Insect Glaive)
Lightyear Aria (Long Sword)
Supernova Symphony (Light Bowgun)
Nebula Choir (Heavy Bowgun)
Galatic Canción (Hunting Horn)
Hubble's Reprise (Great Sword)
Pulsar Rhapsody (Bow)
Constellation Opera (Charge Blade)
Shootingstar Crescendo (Dual Blades)
Exosphere Cadenza (Switchaxe)
Lunar Rhythm (Sword & Shield)
Planetary Staccato (Lance)
Protostar Harmony (Gunlance)
Stellar Melody (Hammer)
* all Uersang and Meteorburst Uersang weapons gives off a faint musical note when swinging them. The Hunting Horn sounds like a violin
IG Kinsect bonus: Spirit and Strength boost
Bow coatings: power, +paralysis and +poison
DBs: one is thunder and the other is poison
Horn songs: Movement Speed Up, Health Boost (L), Attack Boost (L), Thunder Resistance Boost (L), Melody Durations Extended, Impact Echo Wave, Elemental Effectiveness U
Kinsect:
Name: Kepler 438b
Attack Type: blunt
Dust Effect: poison
Element: level 20
Power (ele): lvl 14
Power (non ele): lvl 15
Speed: lvl 20
Heal: lvl 1
Armor Skills and Set Bonuses:
2 pieces give the skill Exoplanet Orchestra (Complete invulnerability while dodging. Think Bloodborne).
4 pieces give the skill Exoplanet Concert (True Critical Element).
Orbital Helmet - Critical Eye lvl 4
Orbital Chest - Attack Boost lvl 4
Orbital Arms - Thunder Attack lvl 6
Orbital Waist - Health Boost lvl 3
Orbital Legs - Constitution lvl 3
Vs Fire -5
Vs Water 1
Vs Thunder 4
Vs Ice 0
Vs Dragon -3
** Here’s the Insect Glaive and the Kinsect! Here’s the female armor set!
#008714#fanart#Monster Hunter#Mon Hun#MonHun#Elder Dragon#MHWI#Monster Hunter World#Iceborne#sketch#doodle#artists on tumblr#artblr
11 notes
·
View notes
Text
One final long gander through my Magia Record NA account.

First up is my home screen. I mentioned earlier today, but I have it set to best girl Ashley Taylor rocking it to Sayuki Fumino's music.

Here's my profile. I used the name "leaf" because of the character limit. I was able to make it to Rank 111, the same rank as my JP account which I played for nearly 1 year longer.
As you can tell, with over 60 million CC and 7777 Mirror Coins I played this game a lot.
Made it to the end of Mirrors for NA, and racked over 10000 wins by the final day. Unfortunately I couldn't make it to S3 this time. Got an unlucky loss on the final day. 😪

Here's my support list. All limited girls, and I think among the best for their respective element in NA. Only change I'd make is Nanoha for Suzune, but I don't have Nanoha fully slotted.

Took me quite a while to get all these Memoria leveled, and I think I picked some excellent choices for all of them.
Some of them are rather self evident, but for Holina I really like how her active that gives blast up and status ailment resistance down pairs excellently with her passive memoria that inflicts Blindness. I would also have equipped Ashley's Memoria to her if I had another copy.
Ultimate Madoka was also awesome, having Sword and Entwined Paths for the largest available boosts to atk in their respective categories, and a 5% health boost to keep Sword active. For My Friends further improves her health recovery each turn to 13% (16% with another Ultimate Madoka), and the Status Ailment resistance prevents the enemy from turning it off.


Final team for mirrors. Not my best, but it allowed me to get through them quickly, so I liked it.

I had a lot of AP Pots left over, even after @muffinrecord helped me grind through about 400 of them. I had them all because of the Beginner Booster Bags that I shelled out for. If I hadn't done that, I probably wouldn't have been able to fully slot and max awaken each girl though, so I'm happy for that.

Logged in every day, because I loved this game so much.


The final state of my girls and Memoria after all is said and done. I wish I could've 4 slotted everyone at some point, but this is what I'll have to settle for.
25 notes
·
View notes
Photo

☆ REGULUS BLACK —
BASICS
★ BIRTH DATE / 25 June, 1961
★ BLOOD STATUS / Pureblood
★ PRONOUNS & IDENTITY / he/him; cis male
★ FACECLAIM / Felix Mallard
ACADEMICS & ROOMING
★ SECONDARY SCHOOL / London School of Withcraft, class of 1979
★ HOUSE & YEAR / Slytherin, class of 1982
POINTS OF INTEREST
★ At 11, Walburga and Orion Black were positive that they had struck gold with Regulus. He was bright, but easy to mold,, his sponge-like quality making him easy prey in comparison to his unruly brother. Where Regulus saw conflict, he melted. Where he saw suffering, he looked for the easy path to avoid it. Sirius resisted. Regulus submitted. One could have said it was a survival technique, a direct reflection of what he saw his brother doing, and instead of fighting alongside him, he chose the easy approach. At 11, Regulus decided to be the easy child, whether conscious, or unconscious.
★ A year later, right after his 12th birthday, Regulus suffered from his first seizure. The initial reaction was that he must have touched a cursed object, one hidden away in one of the many rooms at No. 12 Grimmauld place. After his second one, a Healer was called, and a diagnosis given. There were potions of course, but he could never be cured of the ailment. Instead he was to be looked over. To be treated delicately, and with added care. Words that Walburga and Orion knew nothing about, but they would try. They would try for their one hope of keeping their malleable offspring alive and easy. Epilepsy couldn’t eclipse their faux-adoration for him, it only meant they’d have to treat him with gloved hands.
★ Years fluttered by, and although the brothers used to be close, the divide only grew as soon as Sirius went off to Hogwarts. Regulus, for as hard as he tried to keep the peace, couldn’t exactly blame his brother for wanting to leave. He wasn’t stupid, nor blind, he was only weak, and incapable, unsure of how to navigate this life that seemed impossible from the start. A maze with no exit. The final nail in the coffin had been Sirius’ betrayal. His leaving of Grimmauld Place, and the silence that his absence left. An uncomfortable void. Shoes that would be impossible for anyone to fill. He loved his brother, even still, but what was war if not bitter?
★ Regulus is skilled at many things, but none so much as distraction. He keeps a journal, carefully studying any incidents of seizures, making sure that any potential trigger that day is marked down. Anyone is likely to stumble upon him writing, whether it’s informative or not, his quiet and unassuming disposition (quite the contrast to his brother), lead him to be almost invisible at times. Even still, he has a love for Quidditch, a thirst to fit in with the Warlocks of Great Britain, and a hope that he can be the person his parents so desperately hope for, his failings and all. One particular extracurricular activity worth noting is Regulus’ interest in rare wizarding artifacts. Whether it’s tied up in familial lineage, or simply just unique, he has a habit of collecting what he can, or at the very least, researching the latest piece of history that has enthralled him. There’s no telling what he might stumble upon next, but at bare minimum, it keeps him busy and entertained. And who knows, maybe someday someone might be interested in this proclivity.
★ As for Regulus’ opinions on the Dark Lord, what else could he do but support him? His parents, ever eager to feel superior, had made sure that Regulus too understood there some people were better than others from birth. While he has yet to join the Death Eaters, it’s only a matter of time before the only real son of Walburga and Orion Black took his place in the organization. Bonus fact: terrified of the water/open ocean
TRAITS
✓ gentle; curious; fastidious
✗ follower; manipulable; pushover
☆ OOC — WRITTEN BY ALYSSA, SHE/HER
5 notes
·
View notes
Text
I've been thinking of this oc for a while now and I just had to post more about her. A magical girl who'd be in Magia Record, I made stats for her as if she were a unit in game. I hope you enjoy reading about her.
@muffinrecord Thanks for giving inspiration to actually post this oc.
I hope y'all enjoy and I'll probably make more posts about Mao now that I've done this.
Mao Akiyama
Element: Forest
Rarity: ★★☆☆☆
Discs: Accele Accele Accele Charge Blast(H)
Type: Support
Growth Type: Defense
School: Kōshō School
Personal Memoria: Memories Shall Now Fade
Obtainability: (Would Be) Unlimited
2 Star Stats
HP: 3210-10924
ATK:2375-3552
DEF:2217-4129
3 Star Stats
HP:4142-13078
ATK:2913-4432
DEF:3283-5234
4 Star Stats
HP:6083-18202
ATK:3176-6725
DEF:3832-6933
5 Star Stats
HP:7275-26606
ATK:3428-8030
DEF:4732-7613
Spirit Enhancement
HP:23434-26606
ATK:8030-9167
DEF:7613-10864
Lore: Mao became a magical girl at a younger age than a typical magical girl. However, she is known for being hardworking, responsible, and caring to any newbies that arrive in Kamihama. A workaholic, Mao strives to make the most out of any situation and hopes that one day her family can rest easy without working themselves to death first.
Spirit Enhancement Effects and Skills
MP Boost [II]: MP Gain Up When Over 100 MP [II/20%]
Guard Adept [III]: Defense Up [III/22%]
Magia Adept [II]: Magia Damage Up [II/5%] and Inflict Burns [50%]
Magia Adept [III]: Magia Damage Up [III/15%] and Status Ailment Resist Down Target [33%]
Doppel Adept [III]: Doppel Damage Up [III/20%] and Magia Damage Up [II/10%] and Chance to Restore MP All Allies [20MP/12.5%]
Resist Adept [III]: Status Ailment Resist Up [III/40%]
Accele MP Up [III]: MP gained from Accele Disks Up [III/15%]
MP Gain Up [II]: MP Gain Up [II/7.75%]
Fast Mana Up: MP Gauge Up From The Start of Battle [15 MP]
Crisis Adept [II]: Defense Up at Critical Health [II/30%] and Defense Up [II/15%]
Bewitch Adept [I]: Chance to Inflict Bewitch [I/7.75%]
Reduce Magia Damage [III]: Reduces Damage Received from Enemy Magia [III/50%]
Rising Magia [II/Allies]: Restores MP to Allies [II/6 MP] and MP Gain Up to Allies [II/10%] and Defense Up to Allies [II/25%] Active Skill, Lasts for 3 turns, Cooldown: 9 turns
Connect: Royal Jelly Distribution
2 Star
HP Restore (30%)
Defense Up (12.5%)
Provoke Chance (40%)
3 Star
HP Restore (35%)
Defense Up (25%)
Provoke Chance (60%)
4 Star
HP Restore (40%)
Defense Up (35%)
Provoke Chance (85%)
5 Star
HP Restore (47.5%)
Defense Up (45%)
Provoke Chance (100%)
Counter Chance (25%)
Magia: Bumble Bee Bombardment
(Stats shown at Magia Level 1. The Stats are increased by 10% each time the magia level increases)
2 Star
Damage One Enemy (960%)
Burn Chance for 3 turns (10%)
Defense Up (All Allies) (15%)
3 Star
Damage One Enemy (992%)
Burn Chance for 3 turns (15%)
Defense Up (All Allies) (25%)
Guardian Chance (1 turn) (10%)
4 Star
Damage One Enemy (1056%)
Burn Chance for 3 turns (25%)
Defense Up (All Allies) (40%)
Guardian Chance (1 turn) (40%)
5 Star
Damage One Enemy (1120%)
Burn Chance (40%)
Defense Up (All Allies) (55%)
Guardian Chance (2 turns) (90%)
Mao summons multiple faceless clones of herself, which then stampede on the target selected for the magia. They continuously pummel the target until there is one last explosion, which causes the magia animation to end and the damage and effects start being shown.
Doppel: Maeve
The Doppel of Making Amends
Nighttime Pollinator Shaped
Damage One Enemy (VIII / 2692.8%) and Bewitch Enemy Chance (40%) and Defense Up Allies (80%) and Guardian Chance Self (110%) and Restore MP Self (20 MP)
Lore: The Master of This Emotion yearns to make up for her past mistakes. She wants to reverse the damage done by the group she was once a part of, but her doppel knows that it cannot be done without some violence. The master of this emotion sincerely believes in helping all magicals be saved, but is unsure if it is ever feasible. The doppel only seeks to harm the perpetrator and is easily nurturing to the master’s teammates. While the doppel feels no shame in its appearance, the master of this emotion is unsettled on how she becomes while using the doppel.
Doppel Description: Maeve resembles Mao to an eerie extent, but also has striking features of a moth. Maeve has wings that seem to extend from a cloak from Mao’s time as a black feather. Maeve also has an extra set of arms and antenna, which helps her have that moth person aesthetic. The Doppel itself is summoned by Mao creating a Black Feather’s robe and Maeve jumping out from her back and transforming to the creature she more is like. Mao then uses another black feather’s robe and throws it at the target, eventually creating a pillar of fire. Then, Maeve ambushes the target, flapping their wings and generally attacking with all their might until the last attack. Afterwards, Maeve turns into a bunch of magic moths, which fly away from the whole battle scene.
6 notes
·
View notes
Photo

The Bonds of Fate
Obtainability: Limited to the “Nagisa’s Wish” event.
Effect: Defense Up [37.5%] / Status Ailment Resistance Up [35%] (Self for three turns)
#Nagisa’s Wish#Defense Up#Defense Up Active#Status Ailment Resistance Up#Status Ailment Resistance Up Active
5 notes
·
View notes
Last Seen Blogs

hizliingilizceogrenmek
Hızlı İngilizce Öğrenme Yolları

monokerus
Monokerus

kitty-kaiby
Sup

claudefrollosreddiamondring
Armitage Hux Kisser