
thegeekstressart
The Geekstress
Cosplayer | Artist | Dorkasaurus
66 posts
Don't wanna be here? Send us removal request.
Last Seen Blogs


Text
I enjoy reading a little…

That was a pun. Yes it was necessary.
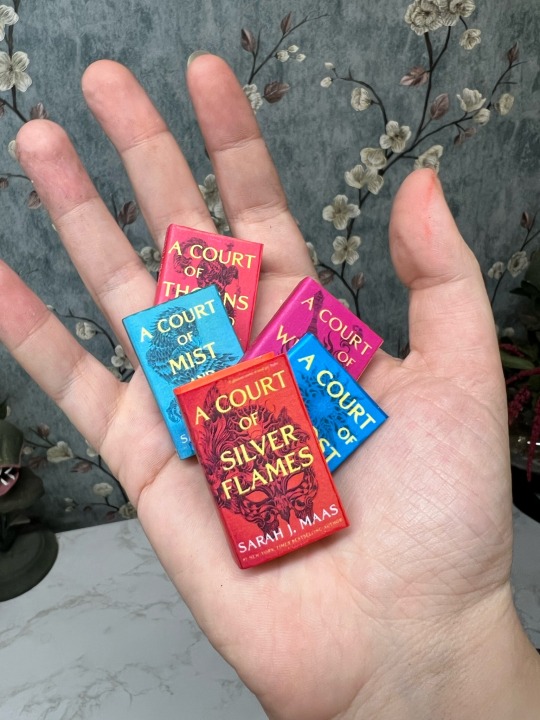
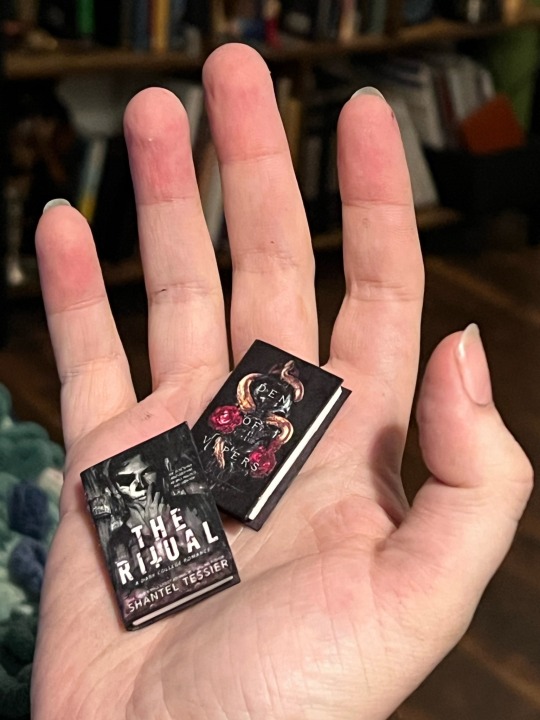
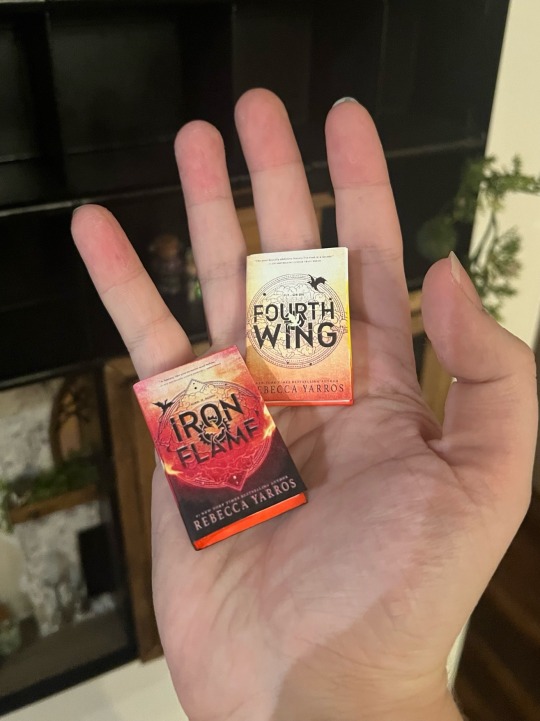
I LOVE to read. And I’ve been wanting to make a tiny library of my favorite books for a while. When the perfect drawer showed up on marketplace I snatched it up!

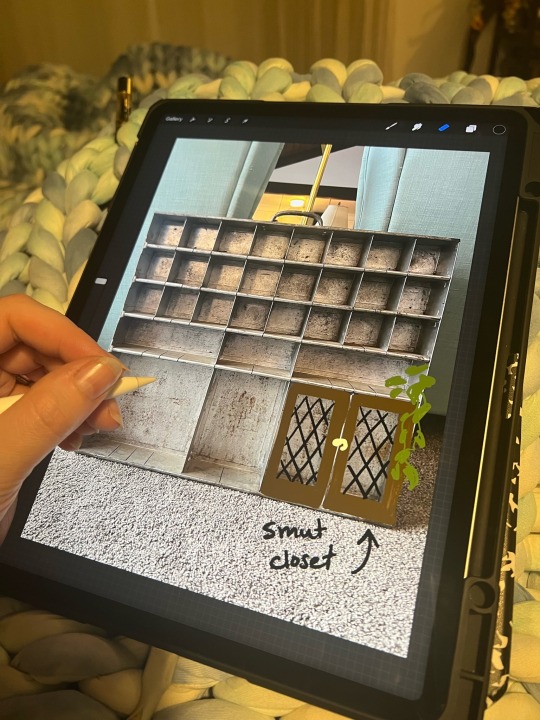
I noodled for a while on how I wanted it to look. But then I decided to dive right in!
I painted the tray matte black and installed doors on the lower outside bays. This was for interest, plus other reasons.

In the center I built a replica of my readin’ spot.


I have so. many. more. books. to make. Luckily, they are very easy:
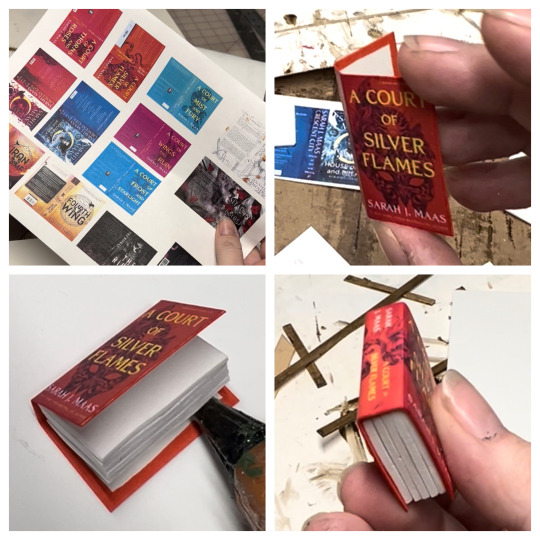
1. Print images of the covers and spine at your desired scale.
2. Glue the cover art to smooth cardstock and carefully cut out the cover. If the inside edges of the cardstock do not match the main color of the cover, fill in with marker.
3. Fold the covers and spine around layers of craft foam for paper and glue. You can also use folded paper with pages printed on them if you would like the books to open, but in my experience that style rarely wants to stay closed, so I only do it for things like graphic novels where the pages look more unique.
I generally read between 50 and 75 books a year. So I already have dozens of favorite books in the queue to be miniaturized. It will take me a while to fill it I’m sure, I’ll also include little oddities and tchotchkes.
This is one of those projects that’s only for my own personal joy, but I hope it brings you some too.
#art#crafting#diy#mini art#miniature#mini library#miniature books#miniatures#booktok#bookish#bookcase#book art#reading#acotar#crescent city#smut#fairycore#artists on tumblr
20 notes
·
View notes
Text
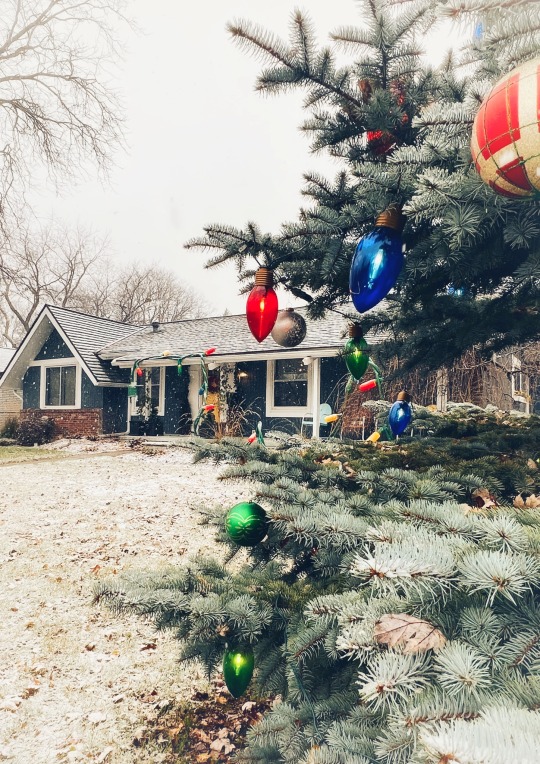
I really wanted to refresh my holiday decorations this year. So when I stumbled on the idea for giant Christmas lights I knew I had to make some.

The process was very simple. I started with a 50’ string of outdoor LEDs, and wrapped that in pipe insulation. Then I twisted a second tube of insulation around for the second “wire”. The plug is a small trash can and the bulbs are two liters mounted on solo cups.
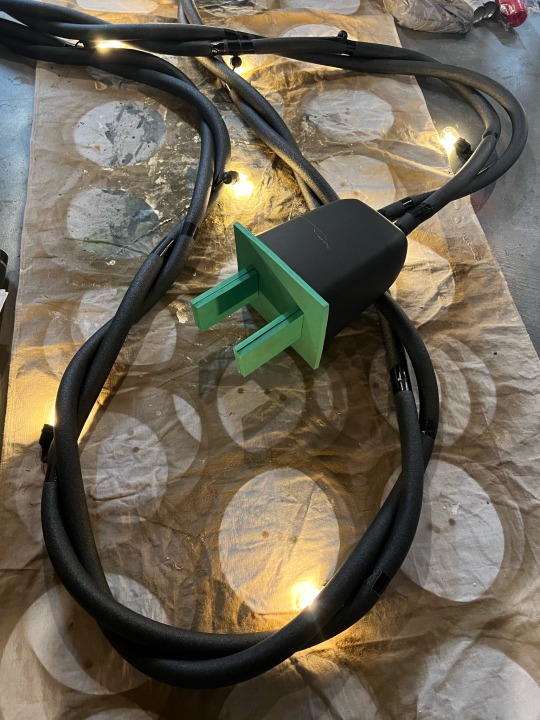

Everything was painted with spray paint and assembled with gorilla tape and hot glue.

Everything all together is pretty effective.
After we hauled the string outside I was tempted to leave it in the yard in a heap…
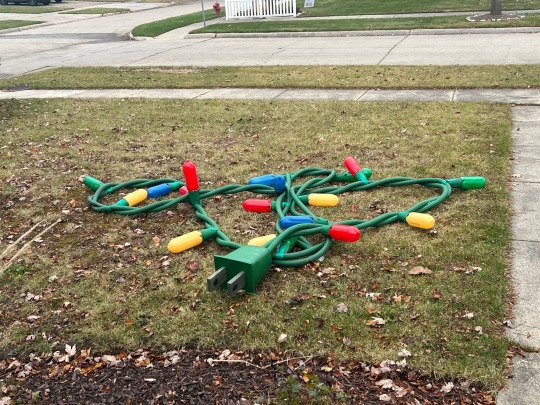
But we didn’t. All in all these lights cost less than $100 and came together in a weekend. I really enjoyed this and love how they came out.

After Christmas I plan to weave them into the garage rafters and use them as lights out there the rest of the year.
#diy#diy decor#holiday#christmas#christmas lights#christmas decoration#christmas decor ideas#giant lights#prop making#art#crafting
6 notes
·
View notes
Text

I love the idea of conditional limbs. Whenever I watch our black cat going about her day I always get the impression that she considers the whole concept of bones as merely a suggestion from an exhausted universe.
#art#art for cats#cat art#black cat#illustration#black cat nonsense#witchcore#familiar#procreate#scientific illustration
72 notes
·
View notes
Text
I love my cats, but sometimes…….

This lamp belonged to my grandparents. I don’t know a whole lot about it other than that they bought it in the 1970’s and it was very expensive.
One of our cats knocked it over and broke it into about a million pieces.

My grandma was a neat lady. And she never would have thrown in the towel, or thrown away such a nice lamp over such a minor detail as it shattering into thousands of tiny bits of sharp pottery.

Grandma was an admirer of the concept of Kintsugi, and she passed that appreciation down to me.
The idea that the things we go through and the scars we collect are part of the story and beauty of it all is comforting - especially in an ever-more airbrushed world.
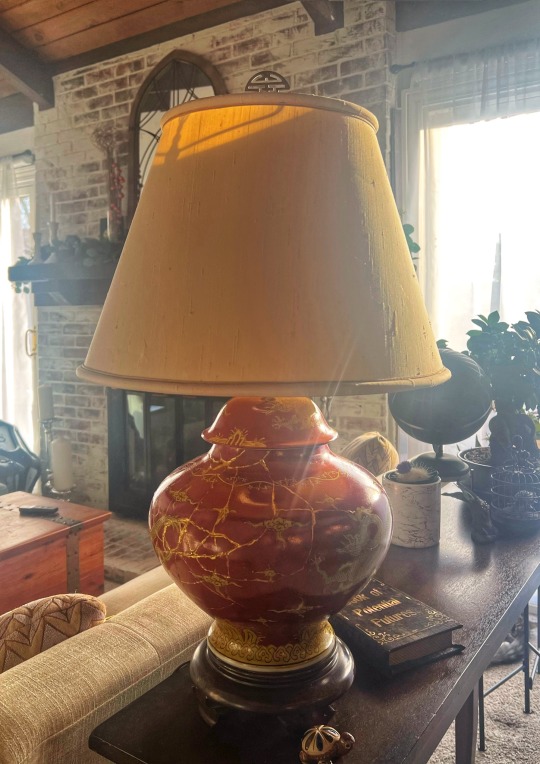
I am not skilled in traditional Kintsugi. But I’m happy with my personal interpretation, and I think Grandma would be too.
I kind of want to make it an ornate fringed lampshade, too … what shape though? 👀
#ceramic repair#kintsugi#broken lamp#art#crafting#lamp#table lamps#vintage lamps#gold#repair#diy repair
59 notes
·
View notes
Text
Who hasn’t dreamed of their own wings?

I can’t believe they’re done, and I made them! I bought this crochet pattern by Crafty Intentions on Etsy a year ago because I stumbled across it and wanted my own wing shawl so badly!
Only one problem: I didn’t know how to crochet.

And so the PDF sat in my inbox for an entire year.
Then, earlier this summer I finally got around to teaching myself the basics of crochet and how to read a pattern.
This is my second crochet project following a pattern 😬 - that’s what hyper focus and a dream will do for you!
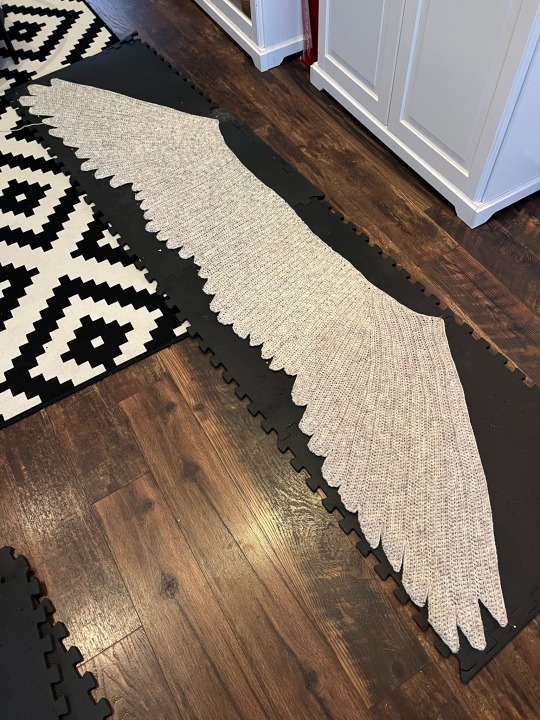

I used a wool and acrylic blend, worsted weight yarn in three different shades of brown.
This pattern was fantastic. Each feather felt like an accomplishment, and everything was so well explained, it came together just naturally. All in I think it took around 50 hours over 3 weeks.
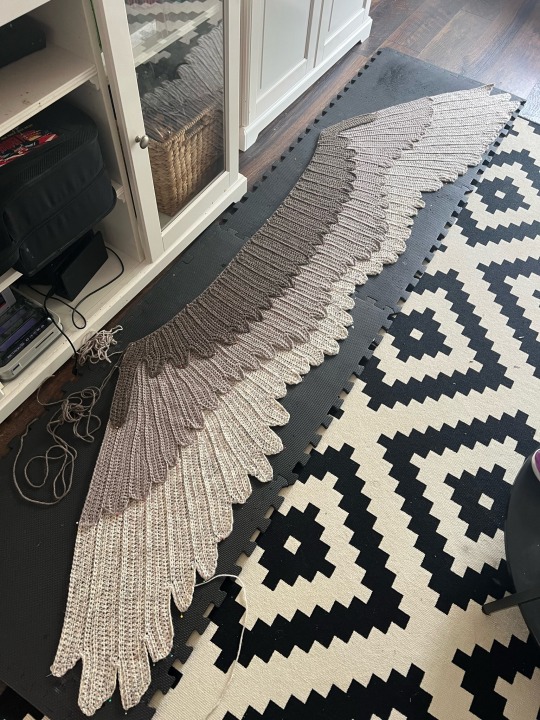
The wings are over 6’ long! And the bottom two rows of feathers are bordered with single crochet in the color of the row above it. I didn’t border the top row.

I love how they came out, it’s wonderfully heavy and I feel like some sort of great owl witch in it which is a vibe I can get behind.

Also many thanks to my 5yo for the photoshoot and taking these great pictures of mama! ❤️
#geek#yarn crafts#crochet#angel wings#wing shawl#bird wings#crafty intentions#owlbear#barn owl#crochet witch#witchcore
1K notes
·
View notes
Text
I’d heard of potatoes having eyes, but pumpkins?!?
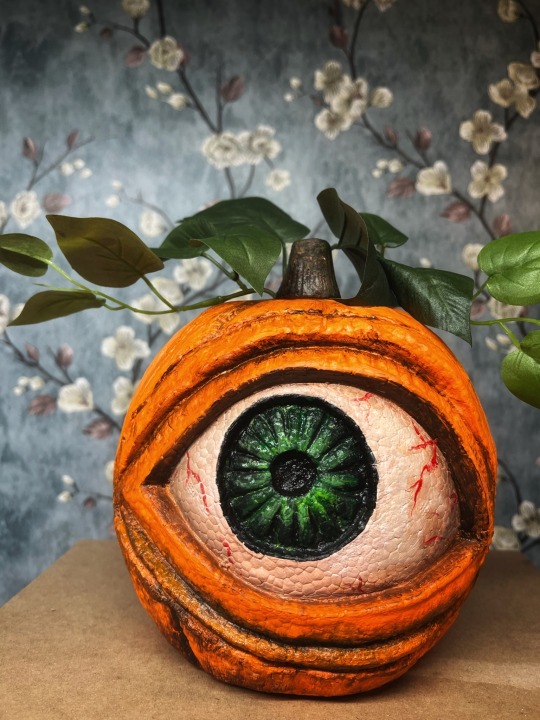
I got these two styrofoam pumpkin mimics at the craft store and I’ve painted one of them so far. I also added some green vines.
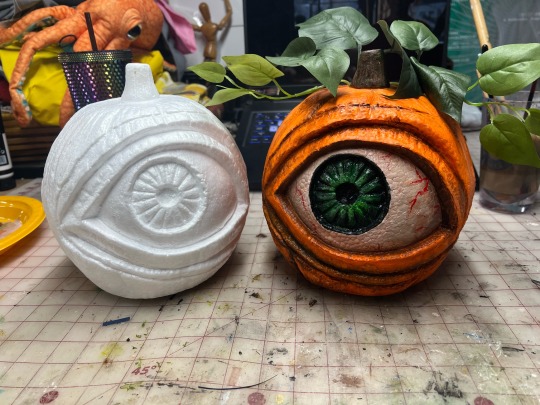
This was such a fun little project. And I’m loving how well they go with my Halloween season decor!

Now to decide how I want to paint the other one... 🤔
5 notes
·
View notes
Text
I captured this spider web off my front porch this afternoon.
There’s a large orb weaver that’s taken up residence by the front door. And she spins a new web a couple times a week. So I hope she won’t begrudge me this one.
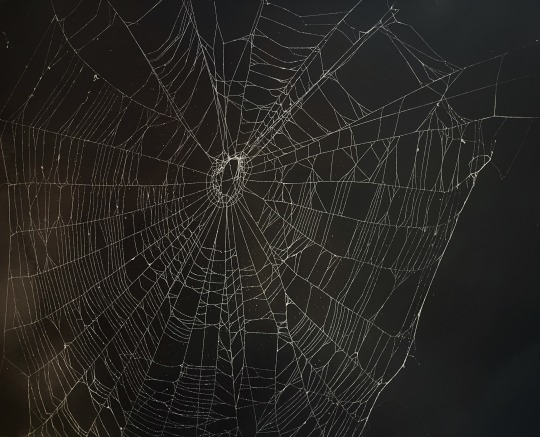
I sprayed the web lightly with white primer, adhesive, and a bit of glitter. And then carefully scooped it up with a piece of matte black poster board.
#goblincore#art#spider web#web art#nature#natural art#goblin vibes#witchcore#witch aesthetic#web design#halloween#halloween decorations
1 note
·
View note
Text

I finally finished a box of matches. So I used it to make a diorama of why you should be careful with matches.

It’s mostly paper, chip and foam board and paint. With some miniature landscaping material for the charred bits.
I particularly love the bits of pink felt for the insulation falling out of the ceiling.
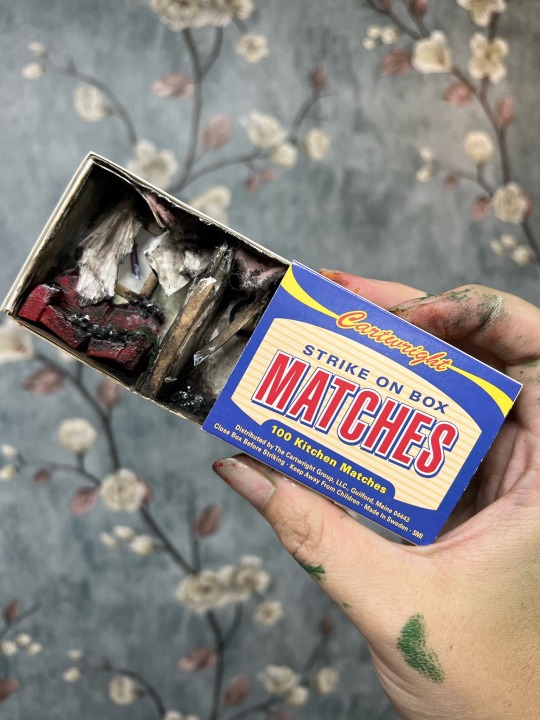
The fire might not stay inside the box next time. Don’t play with matches.
#art#miniature#matches#matchbox#matchbox art#diorama#fire#don’t play with matches#crafting#room box#mini art
16 notes
·
View notes
Text
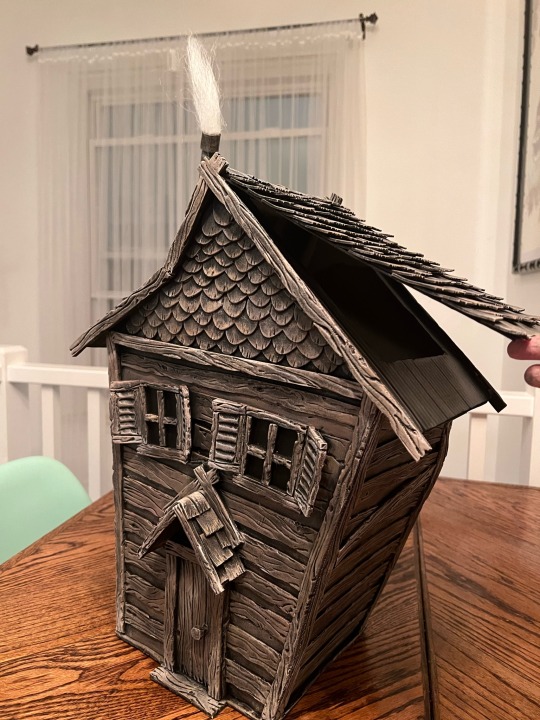
After a bit of a dry spell where I dealt with a lot of real life nonsense, I found myself back in the studio this weekend. I’ve begun my next cosplay project - Marisha Ray’s Laudna on Critical Role got a new look, so I must make it!

Character art by Hannah Friederichs
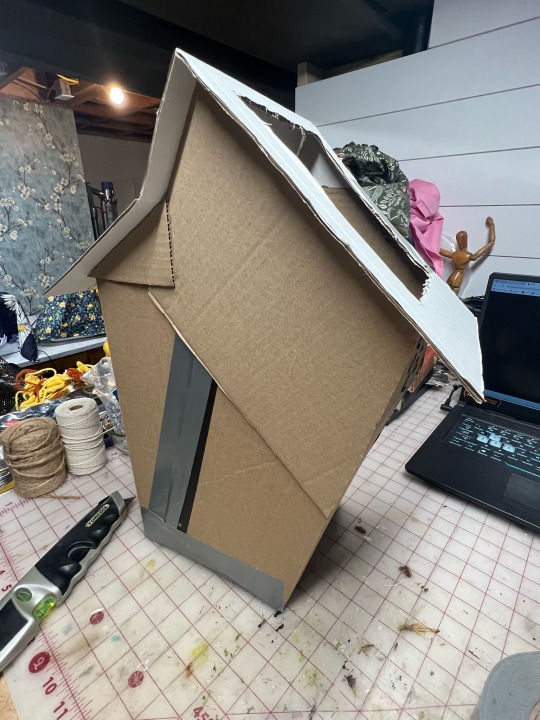
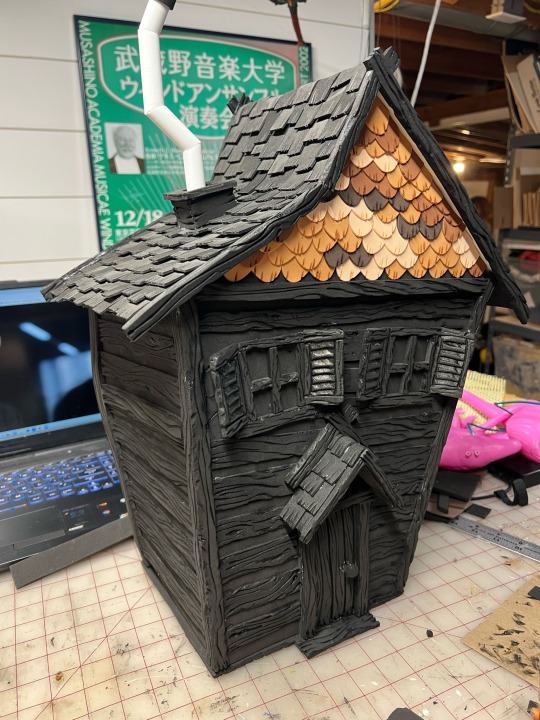
While I wait for a few more things to arrive before I begin work the dress, I started in on the wooden house backpack… and it is already complete! It took 24 hours start-to-finish and it weighs less than 4 oz.
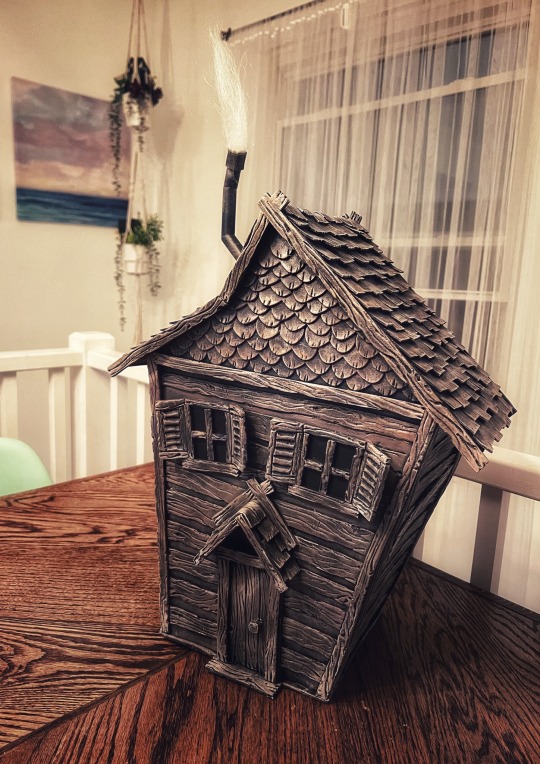
I need more projects like this in my future, I really enjoy this kind of model making/fabrication.
It’s mostly cardboard (Amazon boxes) under EVA foam, but it will be able to hold things as a backpack! I love heat carving EVA foam, it’s almost therapeutic. Smells horrible though - always wear a respirator!

#cosplay#critical role campaign 3#dungeons and dragons#critical role fanart#critical role cosplay#laudna cosplay#Laudna bag#props#prop making#eva foam#foam smithing
133 notes
·
View notes
Text
The moment I finished my first viewing of the Barbie movie, I knew I needed to see it again. I also needed to draw a Barbie Yaga Dreamhouse.

I’ve seen a few different takes on this concept but I really wanted to lean into that day-glo, violently joyful and glam vibe. So I used the actual dreamhouse instead of a cottage.
#art#barbie#barbenheimer#barbie movie#Barbie Yaga#illustration#procreate#greta gerwig#the barbie movie#tshirt design
19 notes
·
View notes
Text
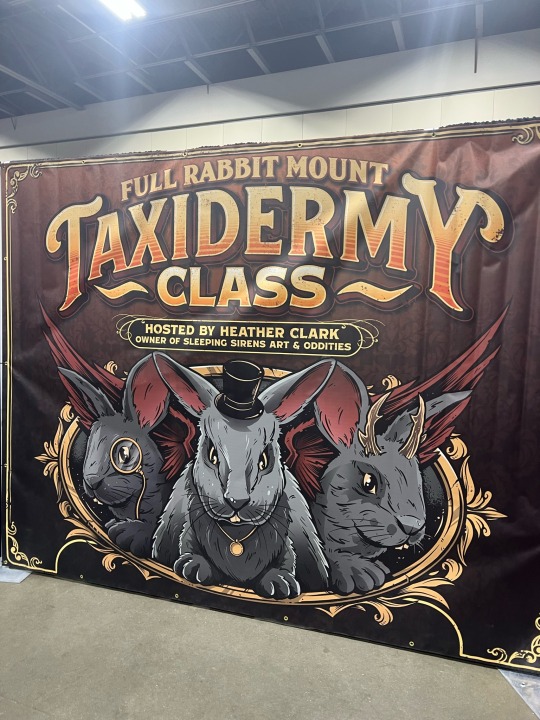
I took a taxidermy class today! It was super fun and the first time I’ve ever done this… method of model making. I definitely want to dabble some more.
It’s not everybody’s cup of tea though. So I’m hiding the pictures below a ‘read more’ link. If you’d like to see my project, please click through. Don’t worry, I didn’t include any pictures of anything gross (though I have them), but if taxidermy isn’t your thing you won’t hurt my feelings if you skip this one. 😘
Detroit Oddities & Curiosities Expo 2023

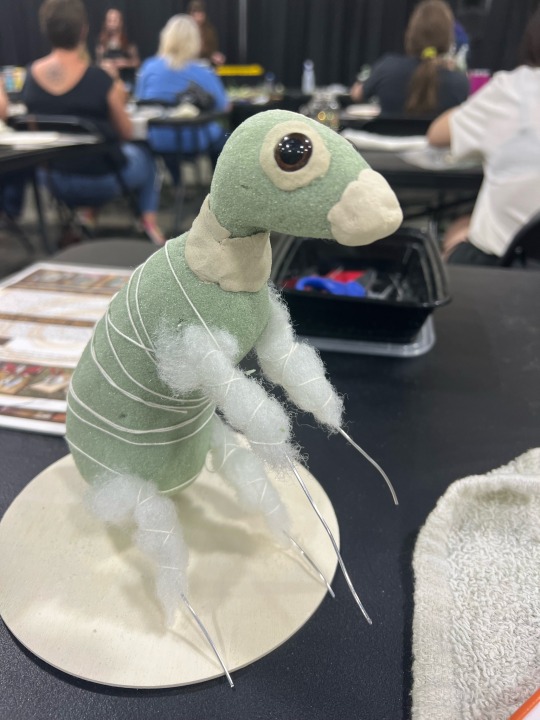

The ear forms and remaining pins need to stay for 1-2 weeks before I remove them.

Safety first!

28 notes
·
View notes
Text
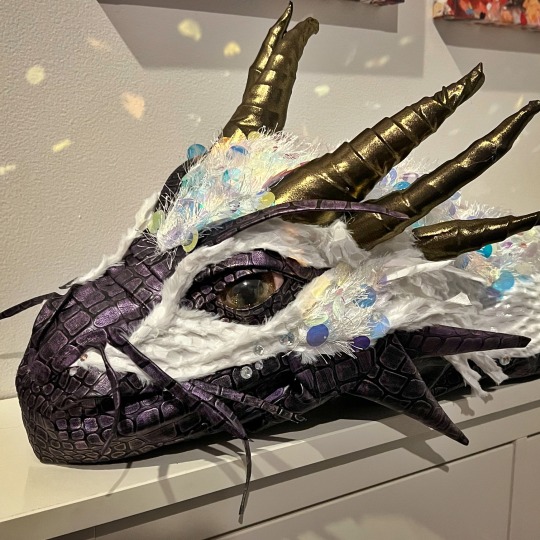
You ever go off on an expedition and while you’re traversing the highest peaks you stumble across a lone egg?

Have you examined it’s smooth, iridescent surface and then watched as it cracked open in your palm? Then out tumbled a tiny wet dragon hatchling and it imprinted on you so you have to raise it as your own?


Well it happened to me.
This little fellow and I have been adventuring together ever since. He’s still young, and learning his manners.
But I’ll train him up best I can.
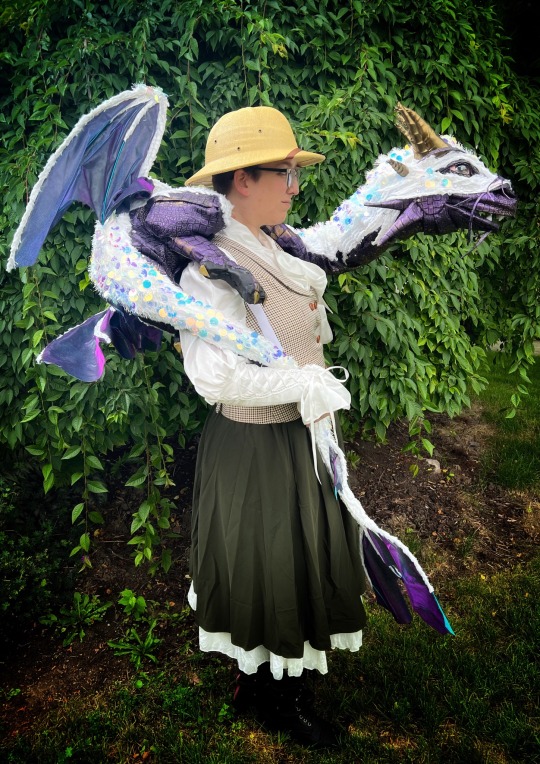
And what an opportunity to study these rare, magnificent creatures!
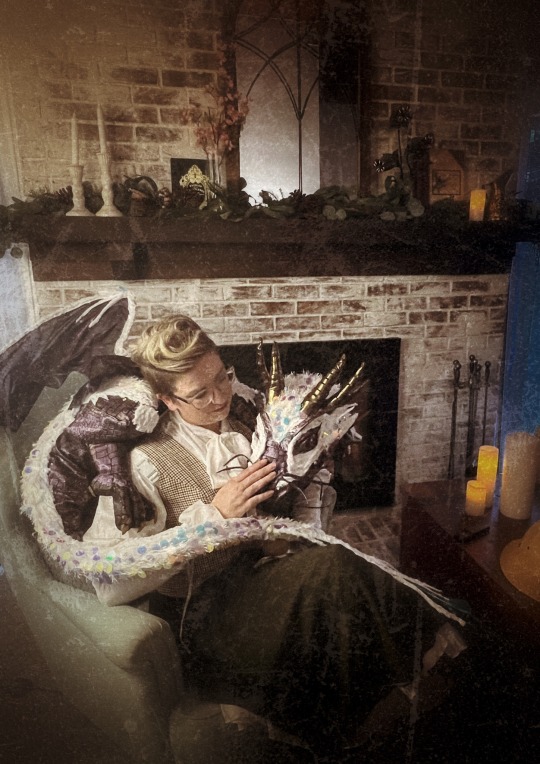
And on rainy nights, my new friend seems to enjoy scritches by the fire. I am happy to oblige.
#geek#cosplay#puppetry#puppet oc#dragon puppet#dungeons and dragons#dnd oc#dnd props#dnd cosplay#explore#expedition#handmade#crafting#costume#character concept
12 notes
·
View notes
Text
Hey friends! I desperately need your help on a project I’m working on…
I need to know: what would you name him?
1 note
·
View note
Text
I spent a relaxing Sunday afternoon re-covering a favorite paperback into a fancy custom hardcover! Why? I dunno, it sounded fun.

As with most things when trying them for the first time, it has mistakes and things I’d like to change. But I really enjoyed the process and look forward to re-covering the rest of the series as well.
Bonus: it’s all shiny now

#geek#bookstagram#booktok#acotar#custom book cover#a court of thorns and roses#rebinding#book binding#book art
22 notes
·
View notes
Text
“To the stars who listen…”
I’ve been doing more experimenting with gouache - this time in Velaris!
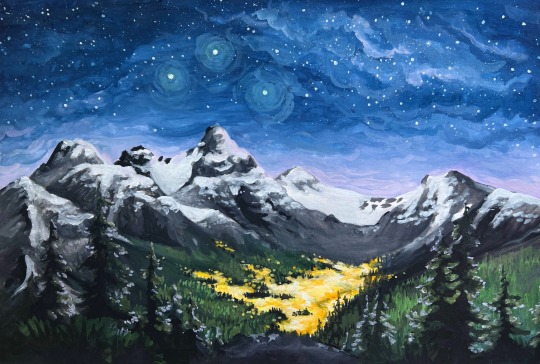
Gouache and acrylic. 140lb cold press watercolor paper. 12”x18”
And it’s a gorgeous day, so I spent several hours painting on the front porch watching the world go by.

#art#geek#acotar#velaris#a court of thorns and roses#a court of dreams#a court of mist and fury#fanart#acotar fanart#landscape painting#gouache#to the stars who listen
24 notes
·
View notes
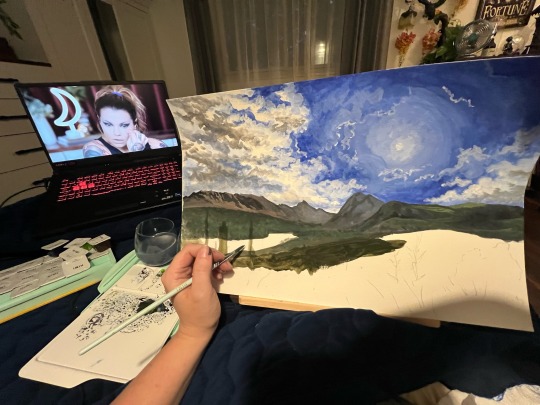
Text
This weekend I tried experimenting with gouache for the first time! I have a lot to learn, but I really love this paint. You can manipulate it so many ways, I’m excited to keep practicing with it.
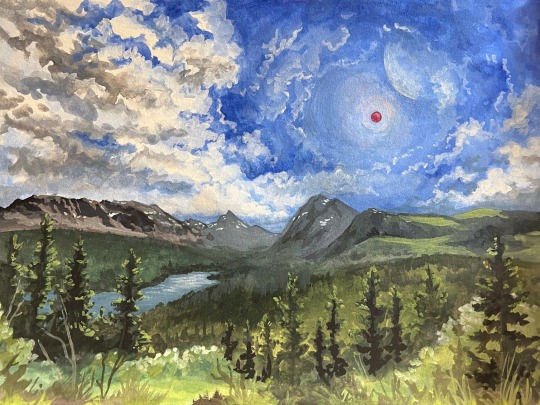
“Under Exandrian Skies”
Whoever thought such a small red dot in the sky could cause such drama!
Media: gouache on 140 lb cold press watercolor paper, 12”x18”
Bonus #wip shot of my extremely chill setup from last night:
#painting#geek#critical role exandria#exandria#critical role fanart#critical role campaign 3#ruidus#gouache#art#landscape#landscape painting#dnd art#dungeons and dragons#apogee solstice#Applebee soul cycle
82 notes
·
View notes
Text
I spent some of my weekend making our cats a new cat “tree”. I wasn’t finding anything I liked out in the wild, so I made my own mushroom tree.
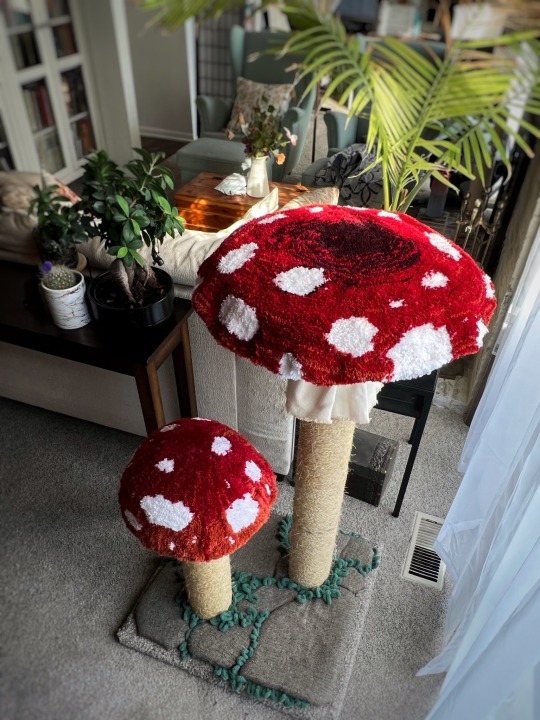
It’s mostly wood and a heavy-duty carpet tube wrapped in sisal, foam batting, and then upholstered. The tops I made custom with my rug tufting machine.
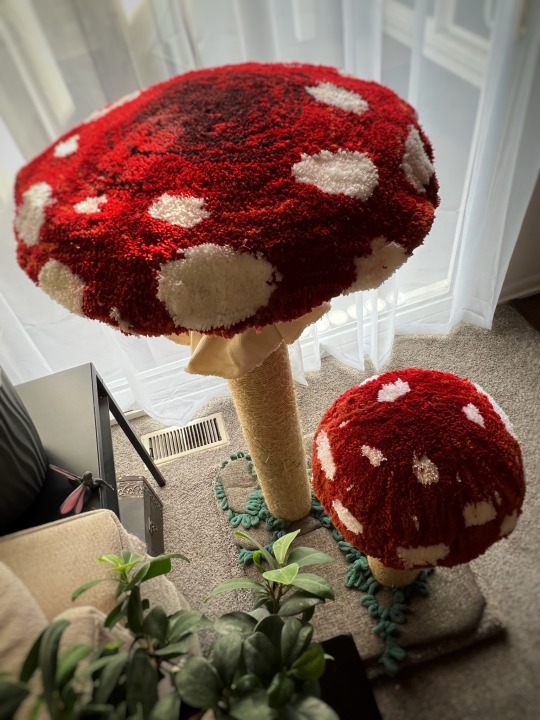
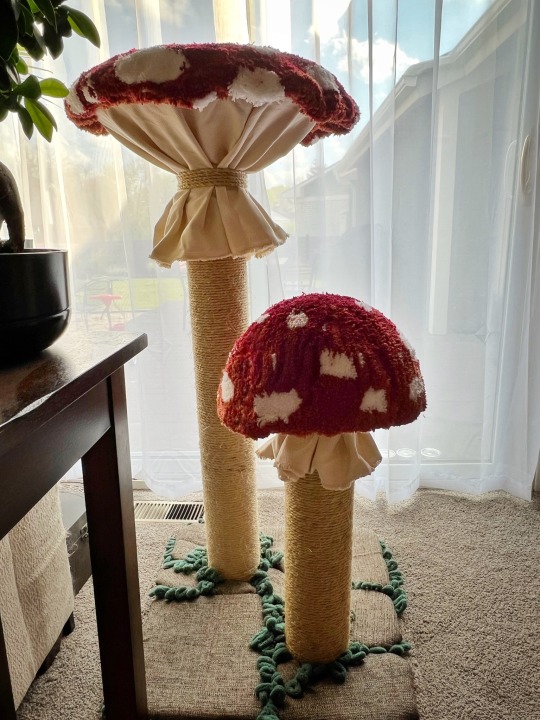
I’m hoping within the next few days it’ll be thoroughly investigated and claimed by the house beasties.
🍄 🐈⬛ 🐈 🐈

#art#cat tree#mushroom#mushroom art#mushroom cat tree#Art for cats#cottagecore#mushroomcore#rug tufting#diycrafts#diy decor#fantasy#forest
128 notes
·
View notes