#tutorial templates fonts coloring
Text
HAPPY MELISSA DAY!
The Rookie
1x01 (2018) // 5x19 (2023)
(in/sp)
#the rookie#therookieedit#lucy chen#melissa o'neil#chenford#femalecharacters#dailytvwomen#dailywoc#userladies#userladiesblr#femalegifsource#pocfiction#credits#anya-chalotra#barbie#usergif#tutorial templates fonts coloring#lucylessons
125 notes
·
View notes
Text
fitness inspired instagram posts
https://cnrdigitalstudio.etsy.com
https://cnrdigitalstudio.etsy.com
Introducing our game-changing Instagram templates! Designed to effortlessly elevate your online presence, these templates are your shortcut to success in the digital sphere. Say goodbye to the headache of hiring a social media manager or grappling with the complexities of designing posts from scratch – we’ve got you…

View On WordPress
#Affirmation Posts#bonus package#Bonus package: 105 Affirmation Posts#Canva tutorials#Canva tutorials for mastery#captivate audience#Captivate audience with ease#color combinations#color palette generator#Color palette generator tips#Creative and functional templates#Creativity#design#Design shortcuts#digital sphere#Digital sphere success#drive engagement#Drive engagement effortlessly#elevate online presence#Elevate online presence effortlessly#Expert guides on color and font combinations#font combinations#Free stock image sources#free stock images#functionality#Instagram Templates#make waves#Make waves together#Online presence#Online Presence Enhancement
0 notes
Text
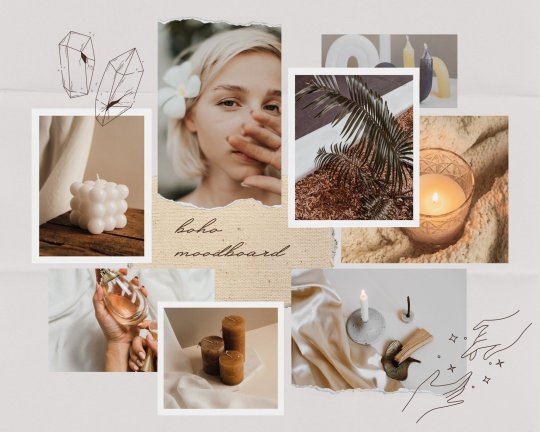
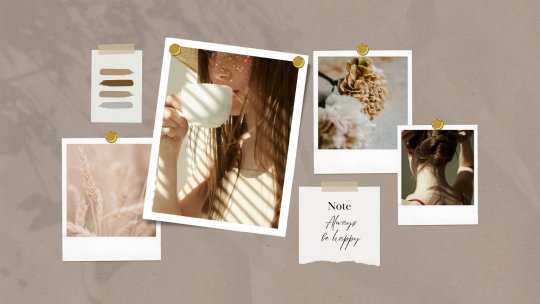
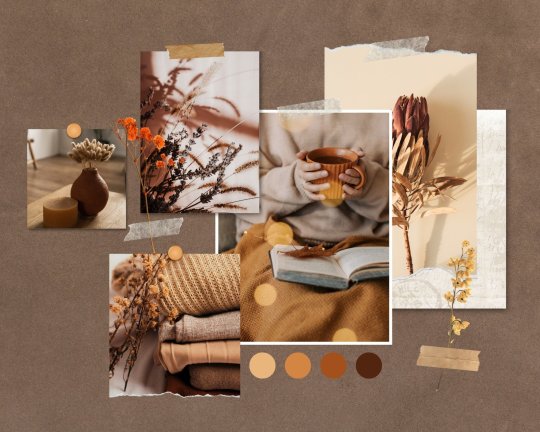
—HOW TO USE CANVA TO MAKE MOODBOARDS

I got a kind message asking how I make moodboards in Canva, so I wanted to do a little tutorial! Canva is a free graphic design app/website, and I use it for everything.
To start - open the app/page and use the search bar at the top to search for a template. I usually use: photo collage, scrapbook, aesthetic moodboard - all of these will pull up pre-made templates for you to use.
[I have a couple linked below that I’ve used and liked, or have bookmarked to try:]
one | two | three | four | five | six | seven | eight
Anything with a crown is for Canva Pro members - you used to be able to use the templates as a free member (just not the paid assets) but that changed recently. The linked templates above are all free ones that you can use right away.
PHOTOS:
Once you’re in the template, you can press the + in the bottom corner to bring up the menus. The Elements tab have items you can add in (more on that later) - for now you want to go to Uploads, and add the photos you want to use. I mostly get mine from Pinterest and Google Images.
[If you are writing an x reader fic and are looking for tips for creating an inclusive moodboard, there are some awesome resources here: one | two !]
After that, go back to your template and click on the different photo frames, and use the Replace button in the toolbar - it will let you replace the template photos with your own. Double tap to move and resize your image within the frame, (and there are also filters you can use if you want!)
When working on moodboards, I like to move things around. You can replace the frames they use by clicking on the item and then clicking the Trashcan. Then go back to the + menu, and then Elements, and scroll down to Frames. You can scroll through them all, but my fave keywords to use in the search bar is: polaroid, torn, and ripped.
Once they’re added, you can move them wherever you want. There’s a button on the toolbar that says Position, and you can shift the object forward/back between the items around it.
DETAILS:
Once you add your photos, then comes the details! You can change the background color and add/change the fonts (or upload your fave font to use!) Try out all the tools on the toolbar to see what you can do, there’s a lot of options.
I love love layering with my moodboard, so I will go back to the + / Elements tab, and then search for things to layer in. My fave searches for Graphics recently are: ripped paper, grunge patterns (to use in the background), star patterns, dried flowers, and dried leaves.
You can use the Position tool on them to fit them in-between or in front of your photos. I usually use them to hide harsh edges or in places that look a little empty.
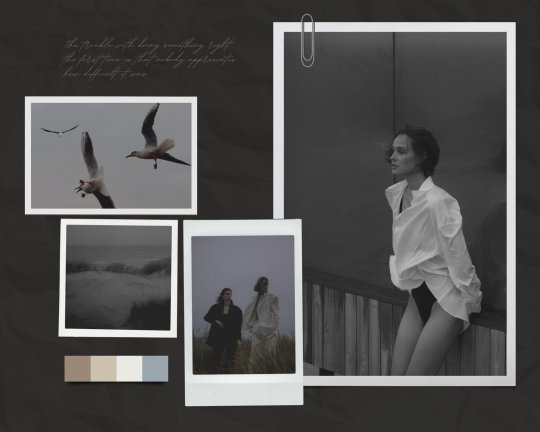
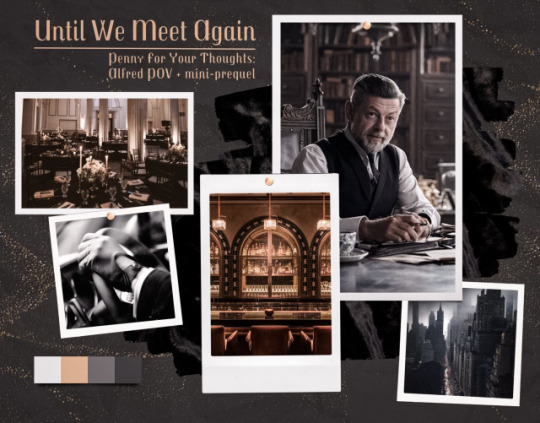
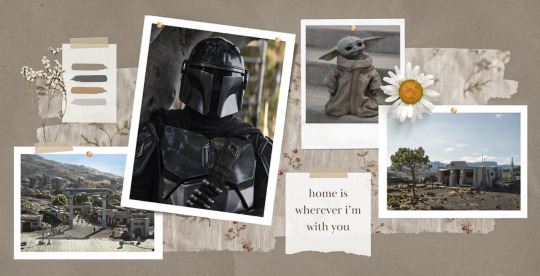
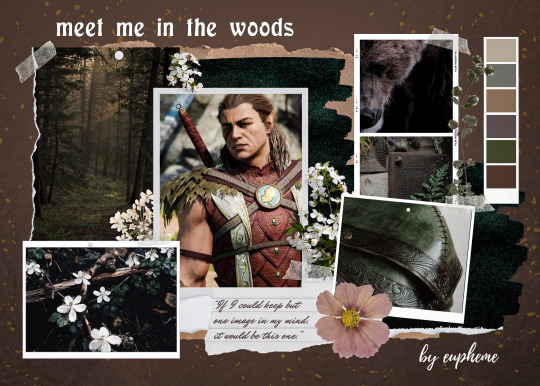
I also like adding fabric texture to the backgrounds, to fill the space between the photo frames. There isn’t an easy way to do this - the best way I figured out is to find an image of the texture you want, and then to add a photo frame with a torn or jagged edge in the very back (and then use your new texture there). You can duplicate and move it, to cover the space (you can see some examples below - the beige flower pattern in the Din one, the black velvet for Alfred).
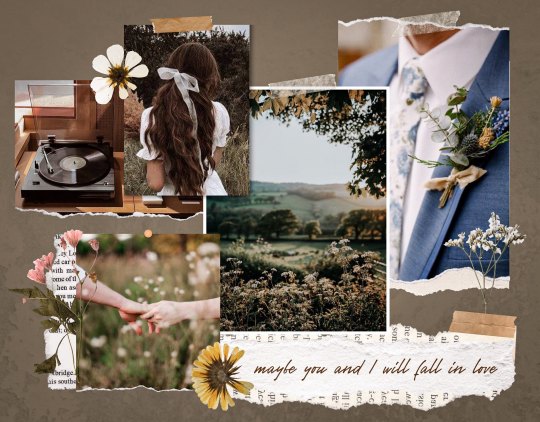
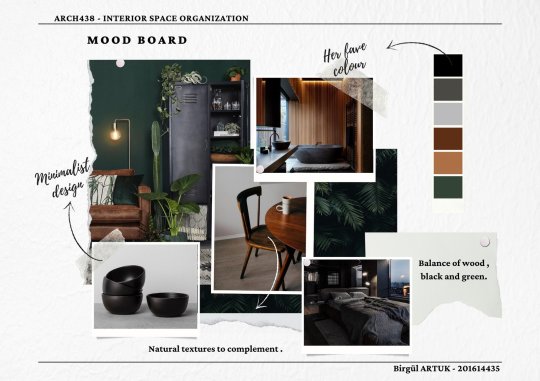
Here are some examples of the original templates, and then what my finished ones look like. You can see what I swapped out, moved, and added:
original image | my moodboard

EDITING:
Once I am happy with the design I download it, and then edit. I love this part - pop it into your fave editing app, and play around with the exposure/contrast/hues/sharpness. I will mess with the color balance & vibrancy as well - this can really take a moodboard I like, to one I love.
Here’s some gifs I made showing before /after editing - both are pretty before but I think the after has an oomph that I really appreciate.

[When you finish with one and want to use the same template, you can click Make a Copy, and it will duplicate it. I began with templates but everything I do now are copies of heavily/edited templates or ones I’ve made from scratch. But for starting off, I think a template is the way to go!]
And that’s it!! I would really suggest just opening it up and seeing what you can do. Not all of mine turn out great, but each time I think I get a better handle on all the different options and what my moodboard style is.
I really hope this helps! And feel free to tag me if you post any you make, I’d love to see them (or drop me an ask if you have any questions!) 💖💕
#please give this a reblog if it was helpful! 💖#and just a note the 4th example is an OC x Character fic moodboard#moodboards#graphics#tutorials#aesthetic moodboard#resources#fic moodboard#fan fic meta#fic writing#writing resources
670 notes
·
View notes
Text

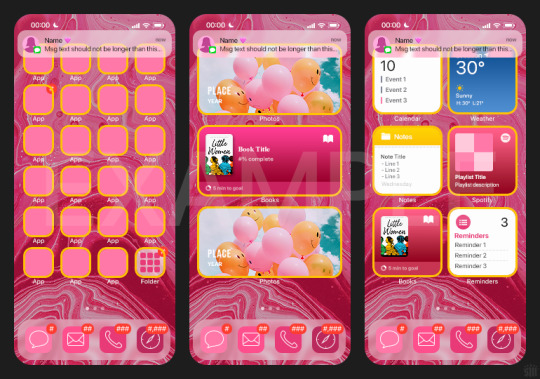
HOW TO: Make an iPhone Layout
+ Downloadable Template
Hi! I've gotten a few messages asking for a tutorial on my iPhone gifsets — but instead of only doing a tutorial (that would probably be triple the length this one already is), I decided to turn my layout into a template with all the bits and bobs! In the "tutorial" under the cut, I'll share everything you'll need, a free template download, and quickly go over how to use this template. :)
Disclaimer: This template uses Video Timeline and this tutorial assumes you have a basic to intermediate understanding of Photoshop.

PHASE 1: THE ASSETS
1.1 – Download fonts. These are the fonts used for all assets I've included in my template:
– SF Pro or SF Pro Display (Regular, Medium, Bold): Either version works, they look nearly identical. You can download directly from https://developer.apple.com/fonts/ or easily find it via Google
– Bebas Neue: Free on Google Fonts, Adobe Fonts, and dafont
– Times New Roman (Bold): Should be a default font in Photoshop

Make sure to download and install any of the fonts you don't already have before opening my template. That way, once you open the template file, all the settings (font size, weight, spacing, color, opacity, etc.) are as intended.
1.2 – Download my template.
Before you use my template, all I ask is that you don't claim or redistribute it as your own and that you give me proper credit in the caption of your post. Making these iPhone gifsets takes me a longgg time and turning this layout into a template took several hours too.
DOWNLOAD TEMPLATE VIA KO-FI ← This template is completely free to download (just enter $0), but if you feel inclined to tip me, I appreciate you! 💖

BTW this template also includes some of my frequently used icons!
NOTE: If, for some reason, you open the template and see the pop-up shown below, click "NO" — otherwise, the fonts will be all messed up:
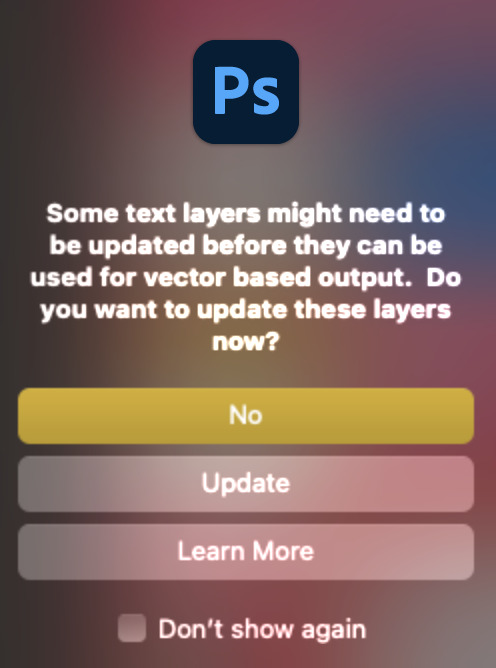
And if you see this triangle with an exclamation point by a text layer, don't double-click it — it'll mess up the font as well:

PHASE 2: THE GIFS
I'm just going to briefly go over gif sizes and my recommendations. Also, keep in mind when grabbing your scenes, you'll want all of these gifs to be the same amount of frames.
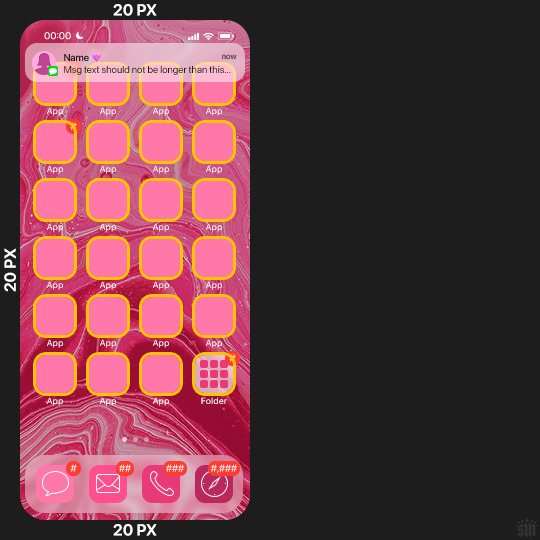
2.1 – Background Gif: 540 x 540 px.
I recommend this size so you have a good amount of visibility for the gif behind the iPhone wallpaper. I also recommend making this black and white (or in my case, black and white with a slight blue tint — idk I just like the way it looks) so the wallpaper coloring can stand out.
2.2 – Wallpaper Gif: 230 (w) x 500 (h) px.
Keep in mind the very narrow dimensions of the wallpaper! And also keep in mind that you'll have a bunch of apps and widgets covering the image. I try to use wide shots (or layer my clips into looking like wide shots). Also, keep in mind your color scheme for your set and your character's aesthetic! I tend to focus on one or two colors for the wallpaper.
I usually position the wallpaper to the side with 20px bumpers, so there's lots of space to see the background:
2.3 – Large Photo Widget Gif: 201 (w) x 96 (h) px.
2.4 – Small Photo Widget Gif: 94 x 94 px.
PHASE 3: THE TEMPLATE – "IPHONE" FOLDER
In this section, I'll try to quickly walk you through how to use this template and some bits that may require extra instructions. I'll be going through each folder from top to bottom.
3.1 – Status Bar.
Time, Service, and WiFi are pretty self-explanatory. In the Battery folder, you can use the shape tool to adjust the shape layers labeled "Fill (Adjustable Shape!)" to customize the battery level.
3.2 – Message Notification.
Again, these are pretty self-explanatory. I've already masked the circle for the contact photo, so you can simply import any photo and use the transform tool to shrink it down. The circle is 24x24 px. If you don't want to use a photo, there's another folder called Default Initials.
If your message text can't fit the text box, the message should end with ellipses which is how iOS caps off long texts.
3.3 – Blurred Banner (IMPORTANT)
This folder is easy to miss because there's only one placeholder layer in there. On iPhones, the area behind a banner notification and the dock get blurred (including the wallpaper and any apps).
What to do: Make a duplicate of the apps in Row 1 and/or widgets that intersect the message banner, convert them all into one smart object, apply a Gaussian Blur filter (Radius: 3.0 pixels) on the smart object, and move the smart object into this masked folder!
(There's another masked folder in the Wallpaper folder for the dock which I'll go over in that section.)
3.4 – Apps
Turn off the yellow guide if you don't need it to keep things aligned and turn off layers you don't need by clicking the eye icon. Replace the "App" placeholder text with your app name, change the color or gradient of the square to compliment your color scheme, and add your custom app icon overlay!
If you can't find an app icon you need from the ones I provided, flaticon.com is a great resource. Also, if you can only find the filled version of an icon, check out this tutorial for how to make any text or shape into an outline.
Also, each app folder has 4 notification bubble options (1-4 digits). Again, you can toggle these on and off as you need!
3.5 – Big Widgets
I like using these when my wallpaper has A LOT of negative space to fill. I included the Photos and Books widgets in my template, but there are lots of widgets available on iPhones. You can check some of the other ones I've done here, or if you have an iPhone, simply try adding some widgets to your phone!
There are also widgets bigger than these, but they would take up half of the phone screen which is why I don't use them for these edits.
3.6 – Small Widgets
The only thing I'll say about these — because they're pretty straight forward — is there are a lot more weather themes than I included in my template. Also, if you set your character's phone to evening, the weather widget will show a dark background (sometimes with stars), so keep that in mind.
Speaking of, I've included Light Modes and Dark Modes for, I think, every applicable widget.
3.7 – Page Dots
These barely perceptible dots indicate that your character has more pages of apps than shown in your gifset (so if an anon tries to come at you, you can just say "it's on the next page of apps" /j /lh)
3.8 – Dock
Again, the dock has notification bubble options and I've included the default app designs, custom filled designs, and custom outlined designs for iMessage, Phone, Email, and Safari (there's also a FaceTime alternative if that's how your character rolls). These are usually the apps people keep in their Dock, but this is fully customizable too. So, if your character is, like, super obsessed with Candy Crush or something and needs it in thumb's reach — you can put it in the dock.
3.9 – Wallpaper
This whole folder is masked already to a 230x500 px rounded rectangle.
Inside, you'll find another "Blurred Portion" folder for the area behind the message banner notification and the dock.
What to do: Duplicate your gif layer and place it in this folder, remove any sharpening filters, and apply a Gaussian Blur filter (Radius: 3.0 px). Be sure to add any coloring/adjustment layers ABOVE this folder and your original sharpened gif layer.
PHASE 4: EXPORT
We made it!
I hope this template makes it super easy for you to recreate this layout! If you decide to try it out, feel free to tag me with #usernik.
If you notice anything wonky about the template, kindly let me know so I can fix it! And if you have any questions about how to use this template, please don't hesitate to send me a message! I just ask that you try to be specific in your question so I'm able to answer you the best I can!
#gif tutorial#completeresources#userpickles#usersmia#userabs#usertreena#alielook#userkosmos#usershreyu#userzaynab#tuserabbie#useryoshi#usersalty#tuserlucie#usernanda#userelio#userhella#usercats#gfx*#resource*
751 notes
·
View notes
Text
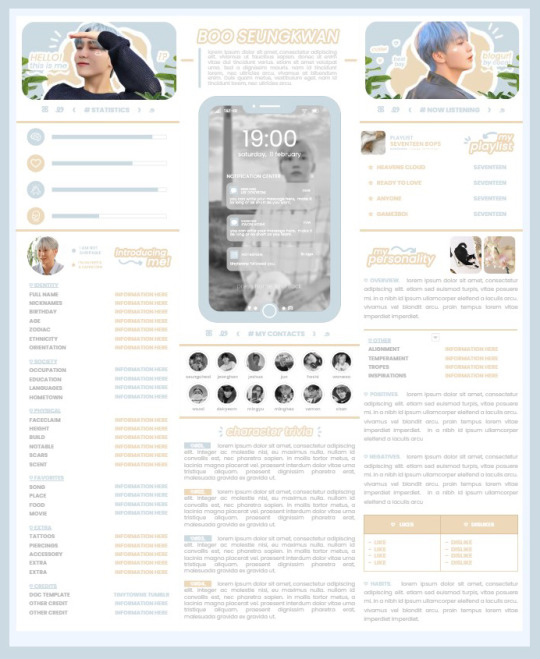
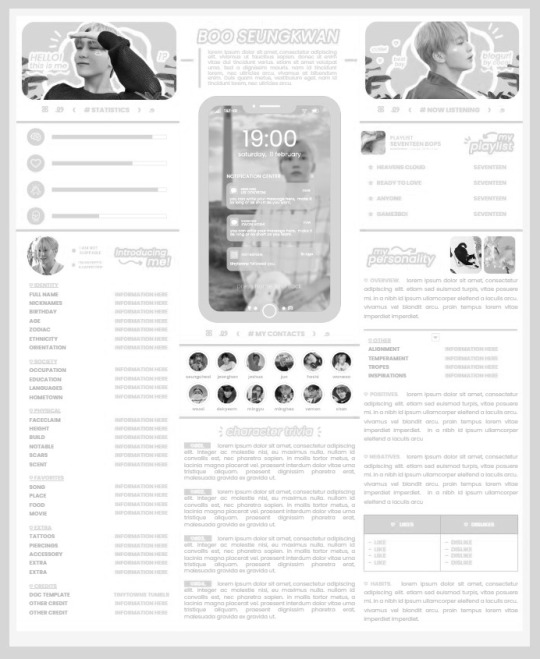
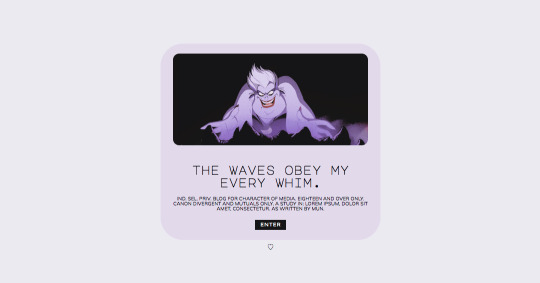
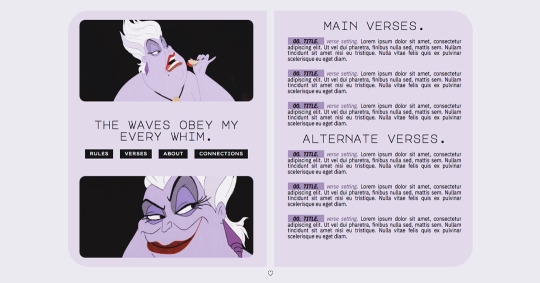
* ( ❀ ˆ꒳ˆ˵ ) ♡ Ꮺ 𝗧𝗜𝗡𝗬𝗧𝗢𝗪𝗡𝗦 — 𝟩𝖯𝖬 ੭

— introducing 7pm , the latest original google doc from tinytowns ! this document is designed to display the basics of a single - muse in one page &. captures a fun & youthful vibe with the inclusion of simplistic yet busy design , bright colours &. doodles ! features statistics , a playlist , basic info section along with character trivia & personality info ❀ the contacts section can be used as an exclusives section if desired ! space is left at the end of the doc so you can adjust easily & not have any of those annoying blank pages but it would be wise to take note of image positions as they are prone to moving. this doc can be considered moderate to difficult to edit due to the amount of edits that you will need to make in photoshop or photopea - but if you don't mind that then the document should be relatively simple to edit ❀ you can find the document link in the source code or under the cut , along with a known position issue + how to fix it , psd temps provided for this document , a video tutorial for adding your gif into a circle &. icon credits ! ( ˘͈ ᵕ ˘͈ ♡) ~
❀ PSD DOWNLOADS ( REQUIRED ! )
GIF CIRCLE - HERE
PHONE TEMPLATE - HERE
TOP IMAGES - HERE
♡ note : you will need to download the title cards to change the color , but if you don't mind the color then you don't need to - also , for full transparency on my end , i did need to touch up a few of the pngs after saving because the top text overlapped with the bottom text. be aware of that ! fonts used are poppins &. sant joan despi !
NAME TITLE - HERE
TRIVIA TITLE - HERE
INTRO TITLE - HERE
PLAYLIST TITLE - HERE
PERSONALITY TITLE - HERE
♡ note : you must change the color via layer style -> stroke for the title cards &. then save as png after deleting the background layer .
❀ KNOWN ISSUES
01. as a gdocs creator i use an external add-on called page resizer which is helpful for customizing the sizing of my canvas , as docs limits us with pre - set sizes. while this is nice to use , i'm aware that it can specifically cause an issue when you change the color of your background page. to fix this you must actually download the page resizer add-on through extensions -> add-ons -> get add-ons &. you should search for page sizer & download the one by nat burns. then you can access the sizer through extensions -> page sizer -> set page size &. what should be set for this document is a width of 9 &. a height of 12 !
this should fix the document , but i also know that sometimes , for what ever reason , the height &. width will flip. if that happens just make the height &. width opposite; so instead of a width of 9 , put 12 & for height , put 9 instead of 12.
02. i cropped the title cards in the document so that you wouldn't be trying to click something &. accidentally click on the titles ! however this means that when you replace image on the title cards they might go off center &. crop halfway through the word. just double click the title card that's bugging out & drag it to about the center of the black box. then it's fixed !
❀ DOCUMENT DOWNLOAD
7PM - HERE !
do not remove the credit , redistribute or profit off of my work.
❀ TUTORIAL
#01. go to file -> make a copy , in order to edit .
#02. to change the top two images double click on them &. a window should appear - in there you're going to click on it once &. hit replace image. the psd for this has been provided so it should be sized correctly !
#03. to change the title cards ( ex. boo seungkwan , my playlist , introducing me etc. ) you just need to click on them once &. hit replace image - please refer to #2 in the known issues section above this if you're going to do this though !! many thanks.
#04. to change the phone you're going to download the psd provided above &. when you've finished editing it you will click on the phone in the doc one time &. hit replace image !
#05. to change the thin color lines around seungkwan's name card you will press them once &. click edit - from there a window should open up &. you will click on it again & find the bucket tool which has a small yellow ( or blue if you clicked the long one ) line under it. that is where you change the color !
#06. the statistics represent intelligence , empathy , friendliness &. fighting skill ; to adjust the levels or colour you're going to double click &. a window will appear. from there you can either change colors with the bucket &. pencil tool ( pencil = outline color ) or you can shift the bars by clicking on the coloured parts of them and literally just dragging them.
#07. to change the playlist cover &. title you'll double click &. adjust inside the window by replacing image &. renaming things. the actual songs on the playlist can be typed normally !
#08. to change the gif circle , personality , &. contact images you again just double click &. replace image inside those windows. for the gif circle you must use the psd.
#09. to change the little bulletpoints beside the gif circle you will double click &. edit the text inside the window.
❀ VIDEO TUTORIAL 4 GIF CIRCLE
watch the tutorial right HERE !
make sure your timeline is checked ( the first thing i showed )
ignore the mistake i made while trying to show you where to end your gif LMFAOOO . . . im clumsy <3
to highlight all of your layers / frames click on the first one , then press shift + click on the last layer.
to bring up the list of options ( when i click convert into smart object ) you just right click.
❀ CREDITS
brain icon - Brain icons created by Vitaly Gorbachev - Flaticon
heart icon - Heart icons created by Chanut - Flaticon
support icon - Sport team icons created by Freepik - Flaticon
boxing icon - Boxing icons created by Freepik - Flaticon
plant png - josh ca.la.brese on unsplash
battery icon - Battery icons created by Stockio - Flaticon
wifi icon - Wifi icons created by Uniconlabs - Flaticon
signal icon - Signal icons created by Freepik - Flaticon
speech icon - Comment icons created by Freepik - Flaticon
close icon - Close icons created by ariefstudio - Flaticon
instagram icon - Instagram icons created by Prosymbols Premium - Flaticon
camera icon - Photo camera icons created by Kiranshastry - Flaticon
torch icon - Ui icons created by yaicon - Flaticon
#google docs#template#supportcontentcreators#gdocs#rph#google docs template#oc template#rpc#free rph#free rpc#docs#roleplay template#oc sheet#rp template#free#muse template#tinytowns#m: gdocs#m: original
1K notes
·
View notes
Text


RESOURCE DIRECTORY 2.0 + HOW TO NAVIGATE USERGIF
Hello! We hit 10k followers! I want to take this moment to thank all our wonderful followers and the talented members of usergif! We created this blog less than 2 years ago and are constantly blown away by your support and beautiful creations. As a thank-you, we're proud to announce our new and improved resource directory!!! Shout out to arithemes' custom page which allowed us to create a more streamlined and organized directory for everyone to use. Under the cut, you'll find a guide to help you find exactly the resource you're looking for on our blog. Happy gifmaking! :)

THE UPDATED DIRECTORY
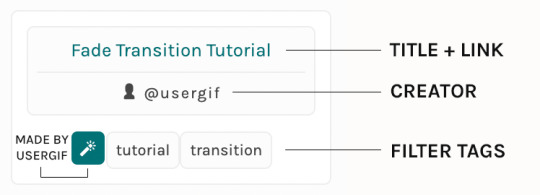
All resources are in alphabetical order first by the creator's URL (at the time of entry), then by the resource's title. Each title is a clickable link that'll redirect you to the original post. Beneath that, you'll find the creator's URL and the resource's relevant filter tags:
As always, whenever I add new entries to the directory, you'll see the last date listed on the right side of the blog here:
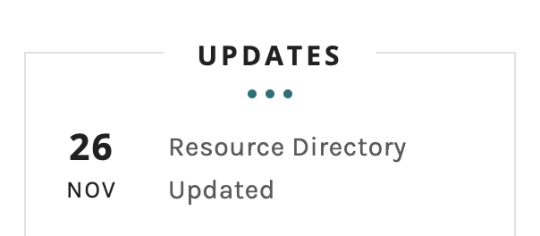
If you don't see one of your recent tutorials listed there, please be patient. I update the directory on a monthly basis, but only add resources that have already exited our queue.
THE FILTERS

Please note: the Source section has exclusive filters, meaning you can only select one at a time. In the Type and Effects sections, you can select as many filters as you want. However, if you select 2 filters in one section, like "animated" and "blending," it'll show results for any resource with either of those tags, not necessarily resources that include both of those tags.
Here's a breakdown of how we categorize our resources:
Source:
↳ all: posted by any creator
↳ usergif: posted by usergif
Type:
↳ all: click this to reset filter selections
↳ action: pre-recorded photoshop functions that can be replayed
↳ basics: non-effects-related resources to help new gifmakers get their feet off the ground (please remember usergif is not a resource for beginner-level gifs and focuses on intermediate to advanced gif effects. however, we thought it would be helpful to keep some basic resources available)
↳ brush: various brush shapes like ripped paper edges or intricate textures
↳ fonts: names and links to fonts or font packs
↳ template: pre-made, downloadable layouts and designs
↳ texture: overlays that add a different finish to a gif such as Ben Day dots (retro comic dots) or glitter
↳ tutorial: any post that provides an explanation for a gif effects process
↳ other
Effect:
↳ all: click this to reset filter selections
↳ animated: an effect that applies movement to an element such as rotating text or wiggling shapes
↳ blending: aka double exposure, this effect combines two or more gifs layered on top of each other
↳ color: specifically for color manipulation, an effect in which the original colors are completely different (e.g. a blue sky colored to look pink)
↳ glitch: an effect where color channels are toggled and layered over the original gif to give a flickering effect
↳ layout: multiple gifs on one canvas like a collage (e.g. hexagon layout) or poster-style templates
↳ overlay: an added element layered above a gif (excluding text) such as a shape, another gif confined to a shape, a texture, etc.
↳ transition: an effect that stylizes the passage from one scene/clip into another, such as a fade, glitch, linear wipe, or motion blur transition
↳ typography: any kind of stylized text added over a gif (does not include basic captions)
You can find examples of all these gif effects via their respective tags on our Nav!
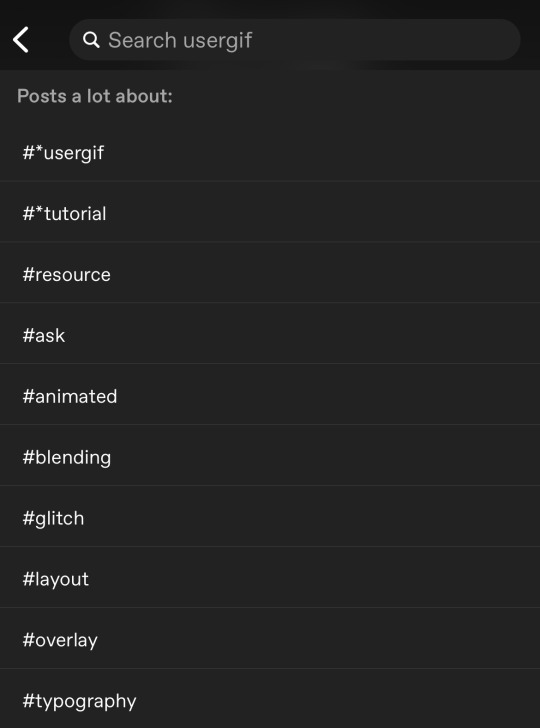
THE SEARCH BAR

This search bar functions the same way as the search bar in the upper right corner of our main blog and the search function on Tumblr's mobile app.
Tumblr search allows you to generate results using keywords found in the body of the post or the tags. So, if you're looking for a post but can only remember it having the word "rotoscoping," you can type that in either in the directory's search or blog's search and find any post on our blog that mentions the exact keyword "rotoscoping."
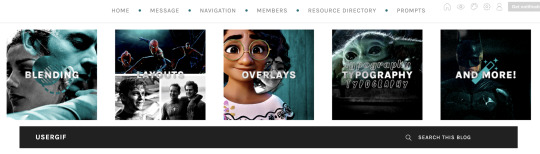
THE NAV & TAGS
Tags function differently from search keywords as these relate to exact words and phrases found only in the tags, not the body of the post. Our members use tags to categorize original posts and reblogs. Some of our most frequently used tags are listed on our Navigation Page and saved in the mobile search function pictured below:
But if you ever want to quickly navigate a tag, simply add /tagged/word to the end of our url to find that tag! For example, if you want to see all the posts we've tagged as a #tutorial, just go to usergif.tumblr.com/tagged/tutorial.
BROKEN LINKS
Whether it's due to a creator frequently changing their url, the absence of an automatic blog redirect, or my own mistakes when coding the directory — you may stumble upon a broken link. Here's what to do:
If a creator has changed their username but their blog doesn't automatically redirect you to the new blog, check if they listed their new user name in the title of their old blog like I did:
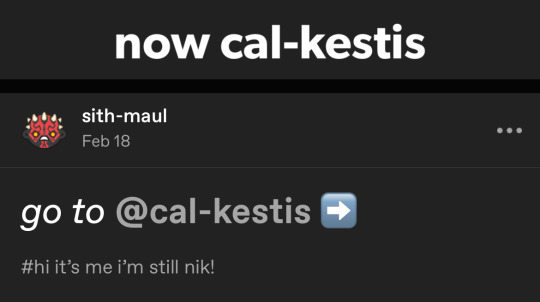
In this case, simply replace the url you landed on with this new url. For example,
https://sith-maul.tumblr.com/post/692130400398704640/how-to-make-an-animated-google-search-overlay-a
→ would become →
https://cal-kestis.tumblr.com/post/692130400398704640/how-to-make-an-animated-google-search-overlay-a
However, if you can't figure out the creator's new url or in the case that I messed up the link due to human error, feel free to send us a message so I can help find the source or correct the mistake!
WHERE TO FIND THIS INFO AGAIN
If you ever need to access this guide while using the directory, simply click the "i" button here:

And that's it! We hope this revamped directory is a lot more efficient and helpful. Thank you again for all your support and for helping us reach this follower milestone!
#*usergif#*usergifdirectory#completeresources#usershreyu#userace#uservivaldi#userbecca#usertreena#userzaynab#alielook#usernanda#userhella#userelio#useraish#userabs#tuserabbie#tusermona#usersmia#tuserlucie#usercats
240 notes
·
View notes
Text

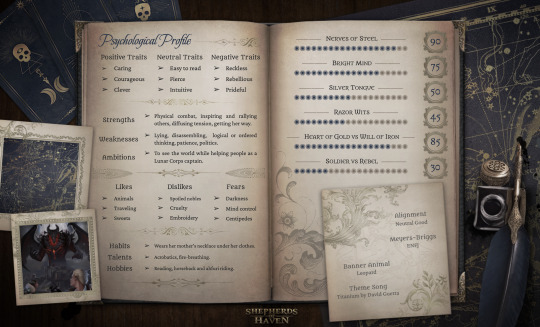
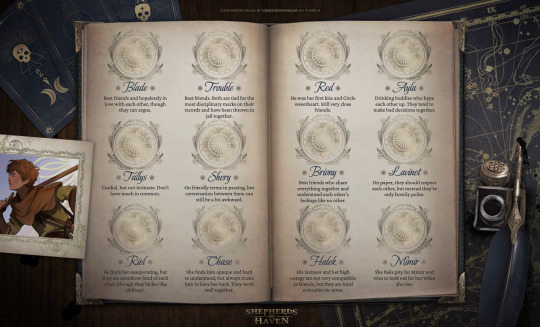
SHEPHERDS OF HAVEN | MC TEMPLATE — [link]
This month marks five years since Shepherds of Haven has been on Tumblr! That's five years of fun, fandom, and the mutual blossoming of the Shepherds of Haven world through your asks, fanworks, jokes, memes, theories, and inspiring details about your personal Brightburners!
To celebrate, I thought I would share this stunning MC template I commissioned from the incredibly skilled and creative @lemondaydream! It's a gorgeous one-stop shop for all of the details about your MCs, so please enjoy and share! I wanted to share this template with all of you as thanks for your support, so nothing would make me happier than to see you use it for your own Brightburners and share what you've made with the community! 💖 If you post your creations, please tag them with #shoh or #Shepherds of Haven, or directly @ me so I can see them! 🥰💖
Terms of Use:
✦ Please don't remove the credit or logo
✦ Don't pass the work off as your own
✦ Don't use the images included in this template elsewhere
This template is quite simple to edit and use, but there are some tutorials below the cut if you need them!
How to Use:
Open the link -> Select File -> Select Make a Copy
How to Change Pictures:
Click on the image until it's surrounded by a blue box and a floating toolbar appears beneath it
Select the Edit button with the pencil icon in the toolbar (or double-click on the blue-boxed image). This will open a Drawing window.
Click on the image that you want to change until it's surrounded by the blue box again.
Select Replace Image near the top-right hand corner of the window.
Upload the image you want to use instead.
Select Save and Close.
How to Change the Stat Meters:
Highlight the amount of suns you want to change, click Font Color, select the blue (#253348) or gray (#786A5F) colors found at the bottom of the box as part of the Custom colors.
Tips on Changing Text:
Things will get shifted around and may break the format if you try to put a lot of text in one spot, but highlighting the text and changing it to a smaller size helps preserve things!
How to Share Screenshots:
Change the mode (underneath the Share button) from Editing to Viewing.
Turn your window fullscreen (F11 on Windows, Control + Command + F on Mac).
Take a screenshot of the page and crop it to your liking.
Post and share!
I hope you enjoy! ✨
#Shepherds of Haven#Shepherds of Haven template#Shepherds of Haven MC template#template#MC template#google docs template#google docs#commission#lemondaydream#MC#recruit form#Shepherds of Haven recruit form#I used Arainia as an example in the screenshots but please ignore most of the details I put in for her lol a lot of them are made up#my brain was not working well at the time lol
776 notes
·
View notes
Text
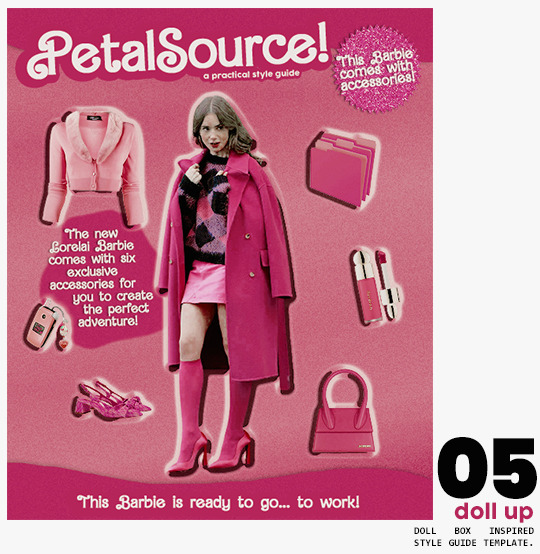
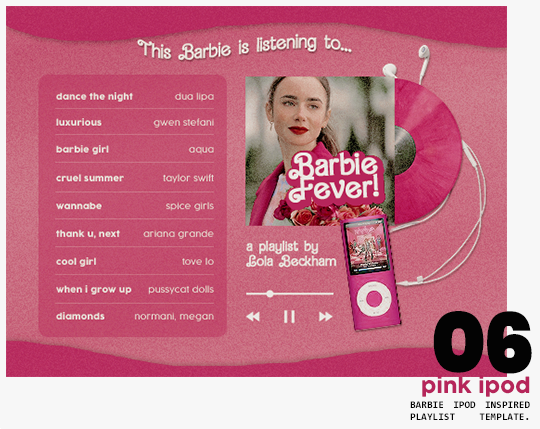
⋆ barbie fever . . . by petalsource .
. . . a complete blog makeover inspired by barbie .
hi, barbies! today, i bring you a complete makeover fully inspired by our favorite pink lady, barbie herself, to allow all of you to bring your own characters into her world in plastic!
feel free to tweak and adjust to your needs, add different background colors and overlays, but kindly do not claim as your own or use it for commercial purposes. feel free to tag me on your creations with this on #petalsource! seriously... i can't wait to see what comes of this!
💐 click the source link to get it as a package or individually on deviantart or payhip !
and . . . keep reading to find more details about the graphics, hq live previews and important tips to use the templates !
✩ about the items!
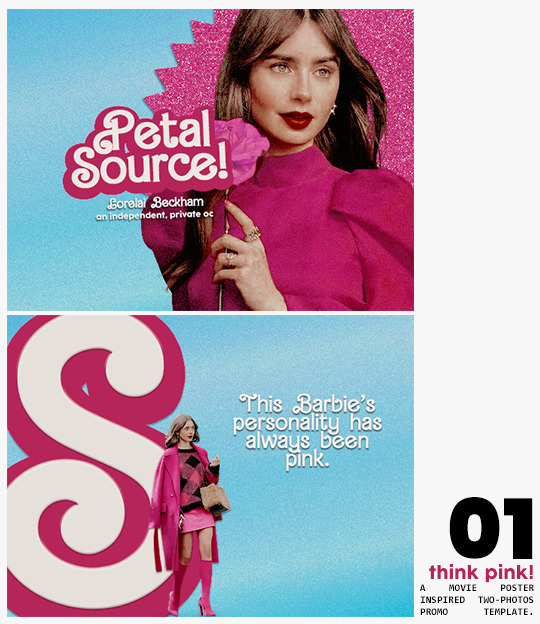
➷ think pink! -- a two-picture promo template inspired by the iconic 2023 movie posters. you'll need: two pngs of your faceclaim of choice, and the custom fonts (listed below). the glittery polygon of the first picture is available in 7 different glitter colors! high quality examples.
➷ this barbie -- two options of transparent dash icons; one matching the "initial" poster and one matching the "glittery polygon" poster. high quality examples.
➷ so plastic -- two options of centralized headers; one matching the "initial" poster and one matching the "glittery polygon" poster. to use it at its best quality, disable the "stretch header image" option when uploading the header. high quality examples.
➷ magenta -- version 1.0: pinned post (or miscellaneous) banner inspired by the 2023 barbie poster. version 2.0: pinned post (or miscellaneous) pair of banners mimmicking the layout of a barbie doll box. one banner goes on top of the postbox, insert pinned post or text, and the other banner goes on the bottom! high quality examples.
➷ doll up -- lookbook template inspired by the barbie doll box, featuring a "doll" picture and six customizable objects / accessories. you'll need: full body png of your faceclaim of choice, custom fonts (listed below), and 6 pngs of random objects or clothes to "come with" your doll. i've added a short tutorial down below on how to find and use some easily! high quality examples.
➷ pink ipod -- playlist template inspired by the barbie ipod, featuring a cover art and nine songs. high quality examples.
you can purchase all items as a package (deal price) or individually!
✩ important tips & useful information!
➷ needed fonts: bartex, cocogoose.
➷ object pngs + removing background of images: i found a super useful pinterest board with photos that can be used on your graphics: oxfordcommah's object pngs. additionally, the clothes png search on p*nterest is really diverse, and you can narrow your interests like "pink clothes png" or "vintage shoes png" and find a lot of options. once you found your images, go to remove.bg and paste their urls in there. it'll remove the background of those images for you and you can just paste them on your template and have fun!
➷ used coloring psds: the beautiful and super pink psds i used on the previews were not made by me and are NOT included in the downloads. in case you want to use them, they can be found here: dreams, 003.
➷ styles: the download includes two styles, one for a subtle drop shadow used in a few layers and one for the plastic box effect in the lookbook template. you can install them by opening the styles tab on photoshop > the four lines > load styles > find the barbie styles on your downloads!
➷ in case you have any questions, pop into my inbox or ims and i'll be happy to help you!
#template psd#template psds#barbie psd#character psd#character psds#𓂅 ♡ ⋆ 𝐦 ‚ templates .#i really really really hope you guys like this!!! i had so much fun doing it
275 notes
·
View notes
Text

page 001: juliette — preview + code + spreadsheet
a minimalist responsive character page with no images, but with enough imagination, it can be used as a media or network page. instructions are in the code.
a huge thank you to @nonspace for helping me with the google sheets integration and taking a good look at the javascript part of the code!
features
google sheets integration
css variables
navigation links, toggeable filters menu and hide/show controls
endless muses boxes with a title and an optional subtitle, description, a section for any extra information and a section for love interests and links in each box
responsive
customizable colors (backgrounds, text, gradient, links and accent), font-size, body font and title font, boxes width, optional glow
terms
reblog this post if you like it or use it. reblogs are more than appreciated!
do not edit, move or delete the credit
do not use as a base code and take credit for it
full terms of use
credits and notes under cut:
credits
google sheets integration by @nonspace
masonry layout by desandro (+ tutorial by @suiomi)
isotope combination filtering by metafizzy (+ tutorial by @magnusthemes)
dropdown menu by @acuite
hide/show controls by @seyche
phosphoricons by helena zhang and tobias fried
full list of credits
notes
html/css knowledge are necessary to edit and adapt the code to your needs
instructions on how to integrate google sheets are both in the code and in the spreadsheet, as well as on this page
if you prefer to add boxes manually, you can find the template in the code
to change any of the icons in the code, visit phosphoricons, find the icon you want to use and change the style and icon like in the example:

#rph#themehunter#theme hunter#supportcontentcreators#completeresources#allresources#dearindies#*#* page#* juliette
300 notes
·
View notes
Text

Hello everyone! Recently, lots of new people joined Tumblr, so I think it's a perfect time to talk about gifmaking again. In this post, I collected all the tutorials that I found helpful in the past year.
how to make a gif:
basic gif making tutorial + mvp player installation
gifmaking for beginners
how to install mvp player on a pc
film downloading & screencapping tips
correct photoset dimensions
coloring
how to fix orange-washed characters
how to: colouring east & southeast asian celebs
channel mixer
colored background
color manipulation
vibrant coloring
how to brighten dark scenes
color isolation
effects
glitch effect
blending
crossfade transition
gradient effect in the text
gradient text
red colour accent on the b&w gifs
how to add a gif in a template
blurring gif backgrounds
using templates
text
text tutorial 1
font resources
understanding fonts and typefaces
split text
subtitles
other
icon tutorial
gif headers
I hope this post helps some of you. For more resources and tutorials, I highly recommend visiting @usergif. Good luck :D
810 notes
·
View notes
Text
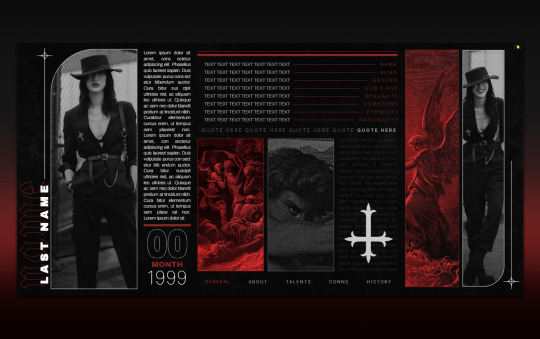
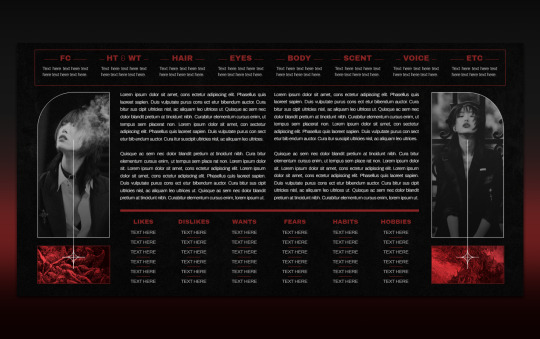
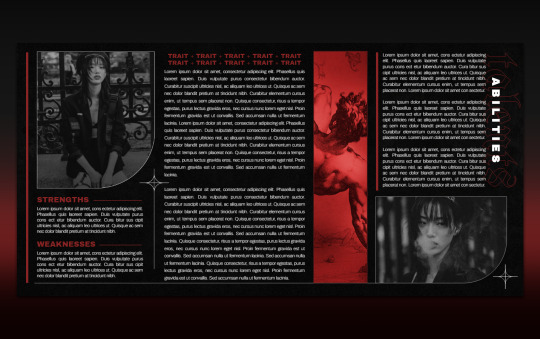


012 . PONDEROSA — [ 𝚕𝚎𝚖𝚘𝚗 𝚍𝚊𝚢𝚍𝚛𝚎𝚊𝚖 ] ...... DOWNLOAD NOW
Gothic, dark, Wednesday, The Sandman, vampires, demons, I don't know what I was on making PONDEROSA. For those who love red and moody, this is like EUREKA's evil cousin. Along with this template, you receive a free docs tutorial on how to edit it with detailed instructions. It's not complicated but it might teach you some new tricks. Edit it in any way, shape, or form just please don’t remove my credit and link to lemondaydream.
These are meant to be only used by one person per purchase. Allowing others to make copies off of your copy is stealing. Please read the instructions on how to prevent this.
how to use
After accessing the full Google doc through the link on the PDF, select “file” and then “make a copy”
Do not remove the credit from the top and bottom of the template
how to edit
This template comes with its own tutorial, read those instructions first if you have questions. They are on the PDF that is emailed to you.
The easiest way to edit and change any of the images is to right-click on the image and then click “replace image” in order to change it. Do not copy and paste images into the doc, it will ruin the formatting.
Some images might need you to first right-click on the image and click "select image" if it does not automatically create a bounding box. After this step, you can change it to be "in front of text" and then proceed with the instructions above. Just make sure to change it back to behind text after.
This document has "Drawing" elements! To edit the "drawing" simply right-click, "select image," and the box that pops up underneath has a button that says "edit." Edit will bring you to a pop-up window that will allow you to change the images by clicking replace image at the top right of the toolbar when clicking the picture.
Do not resize or paste any images into the doc, only use the method above.
The pictures on this doc are of Sora Choi colored with the PSD Circles by divinefem (darkened with a 40% opacity layer of black) The PSD is not included, please go support this fantastic creator to grab your own if you want (in notes). The background texture and red images are made from elements found on Pinterest, most of them recolored by me.
Changing the fonts may cause tables to shift and resize, be careful in doing this, and remember, ctrl+z is your friend, if something messes up, immediately undo. Do not recommend doing this.
The tables are structured in a way that will move pages and elements if their limit is exceeded, if you need more space, I highly recommend linking to a continuation at the end of that space.
Thank you so, so much for your support!
Likes and reblogs always appreciated!!
#google docs template#google doc template#Google Docs#rp template#rp resources#character template#docs template#rp docs template#rp doc template#rp resource#google#docs#template#character#character sheet#character sheets#OC template#discord rp#discord#gdoc template#discord oc#muse template#discord template#discord rp template#[ 𝚕𝚍 ] templates
889 notes
·
View notes
Text

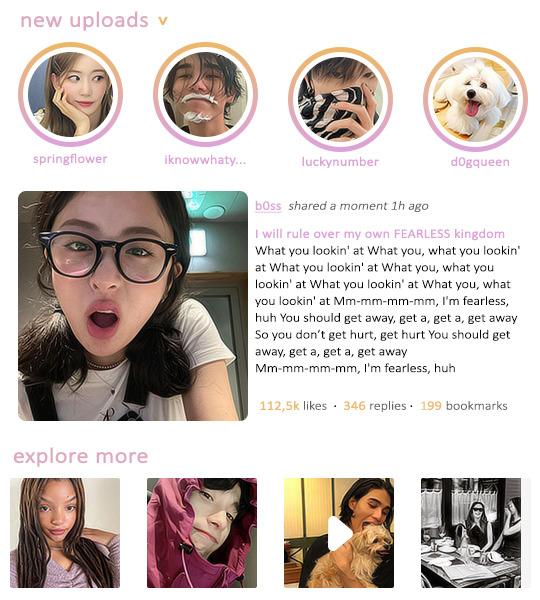
shared moments template
I was annoyed about the new large story pfp on instagram all weekend which resulted into this template. It comes with an option for a profile with user information or to explore more moments of others as I wasn't able to decide. All text colors have been kept neutral in the template so you can use it quickly without having to deal with it. All is customizable. Have fun 💖
Note: if you change the general bg color, you'll have to adjust the color in the new uploads activity circle. you either can just change it or use the option to make them transparent, i forgot to do this before posting.
Font: calibri
Size: 540/600 px
Uses: Clipping Masks, rectangle (Tutorial)
Rules:
- Edit it as much as you'd like but please do not use this in other creator's templates.
- Do not repost this or claim it as yours.
- Please like/reblog this post if using.
- Do not use this to for real celebrity rps or real people
[ Click the Source Link to access the download ]
#rph#rp template#social media template#roleplay template#instagram template#mine: template#by: r.#i'm awful at naming these...
186 notes
·
View notes
Text


004. TRUE LOVE. — $7. adjustable carrd template. made with single muse blogs in mind, but is fully customizable and includes a template paragraph for a muses list. pages included are home, rules, about, verses, & mains. about page features space for stats and biography. home page features space for a small description.
fairly easy to edit, but does require knowledge of adjusting multiple containers colors, highlight text colors, etc. small tutorial included inside with editing notes/tips. multiple spots for quotes/extra info either below or above buttons, and optional images. each page includes spots for two images. does not require pro lite.
- do not claim as your own or redistribute. personal use only.
- adjust and edit as needed! (adding or removing containers and sections, fonts, colors, etc.) please do not remove or move credit! as long as there's credit, please feel free to edit / customize as desired!
- if you're thinking of signing up for or upgrading your carrd account, consider using my code VRPH !
- demo available & purchase here !
I'm open to kind and constructive feedback! please reach out with any questions or suggestions for future templates, things I can do better, etc! if there's any problems with purchasing or editing, don't hesitate to message me. thank you so much !
interested in custom work or custom graphics for this template? I offer commissions !
65 notes
·
View notes
Note
Hi!! I saw your blog and it's beautiful! I'd like to ask if you could share some tips about editing posts, specifically changing the font color and doing that cool effect where it has more than one color on the same font ☺ if you're not comfortable teaching that's okay too! Have a good night

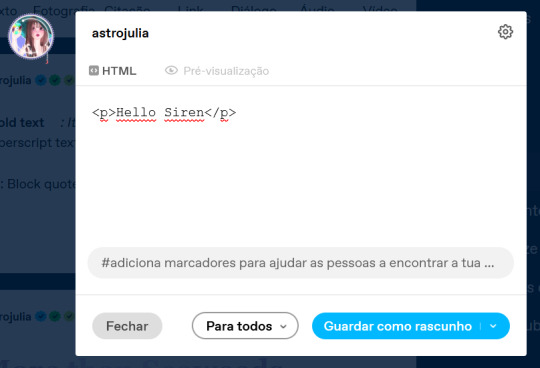
Hello Siren,
Thank you for the compliment. Yes, I can teach you. Just follow a tip from Auntie here: do it because you genuinely like the aesthetic. The time you spend writing the post is sometimes the same as editing it, and in my experience, this won't necessarily translate into more likes or reblogs. So, do it because you think it's beautiful.
As comical as it sounds, I won't be using HTML in this post because using the codes could cause problems. I've seen some tutorials, but I just really learned when I searched on my own.. I also do all my editings on my notebook. So, here's everything I use:

Websites I use for editing:
HTML Code Editor: While you're creating your HTML, you can simultaneously see if it's working
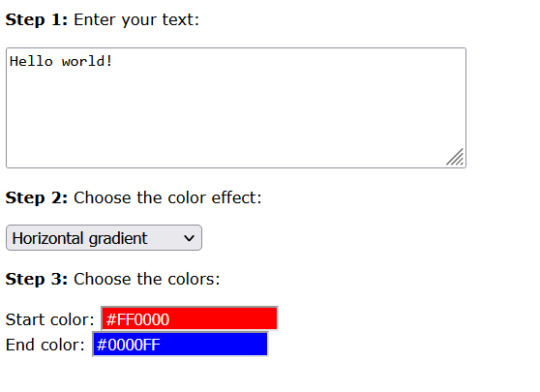
BBcode & HTML Text Colorizer: This is where you'll create the gradient
Browserling: I use this site to make the gradient code compatible for Tumblr
Aesthetic Symbols: this is for that cute symbols
Piliapp: more copy/paste symbols
Fontes e Letras: copy/paste fonts
Canva: This is where I create some of my designs. I also use Photoshop
Deviantart: a lot of material for Photoshop like templates, PSDs and Renders (PNG image with a good resolution), you can see the ones I use the most in my sources
@animatedglittergraphics-n-more: dividers
@saradika: dividers
@engrampixel: cute material
Color Hunt: if you don't have a color pallete in mind, here you can find a lot of options
Adobe Color: if you want to create your own HTML color palette this site can help
DaFont: where I download my fonts, the ones I use the most are: Betterfly, Arcadepix, Starborn, Lemon Milk, Cursive Sans and BubbleGum
EmojiTerra: as I use tumblr on my notebook, this is where I get my emojis
HTML Text Editing
Important:
Go use the HTML Code Editor in this part and your life will be way easier.
Some things I do right here in the tumblr editor, like putting the images and different fonts like Lucille.
All HTML code starts with < > and ends with , that is, when you start a paragraph you will write <p> and when you finish you will write </p> (HTML Code Editor ends your coding automatically)
I'm teaching all this because if you want to make gradients in your entire text and not just in the title, you'll need to know about html
To start your HTML you will need to go to the gear that appears on the right side when you are writing your post, go to the bottom until you find the Text Editor and switch to HTML.

The Codes
<p> start a paragraph </p>
<br> to make a space between text less than a paragraph (good to use in indented text) you don't need to put </br>
<b> make the text bold </b>
<i> leave the text in italics</i>
<strike> leave the text crossed out </strike>
<small> make the text small like this </small>
<h1> make the text large like this </h1>
<h2> make the text large like this </h2>
<ul> Create unordered list (dotted) </ul>
<ol>Create lists with order (numeric) </ol>
*instead of making paragraphs you will create new items in the list using the code <li> </li>
<blockquote class="npf_indented"> make the text indented </blockquote>
<span style="color: #HTML"> Code to color your texts, pay attention that it uses (") instead of (') and doesn't use (;) </span>
Tutorial on creating invisible spaces, just like I use to do the navigation, if I put it here everything bugs. PT-BR
<a href="URL">Link Text</a>: Creates a hyperlink
Making your Gradient
Go to BBCode and HTML already with your HTML text and colors in hand. Write or copy your text in the box, choose the gradient type (I use middle) and select your colors (from one to three different colors)

Now copy the text in the "HTML code for this text: (To use on your website)" box and go to the Browseling, you will replace the (') to (") and the (;) for nothing
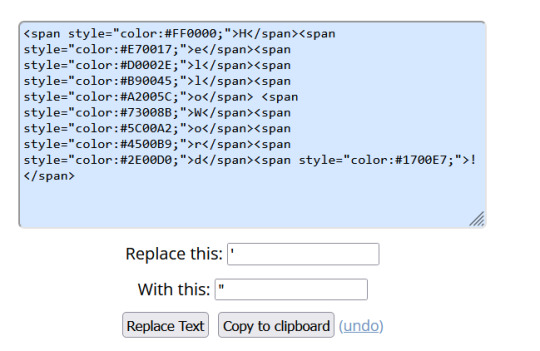
Copy and paste your new code direct in your tumblr post editor or in the HTML Code Editor. Success!!
I think that's all. Kisses from the Sea! 🐚
125 notes
·
View notes
Photo
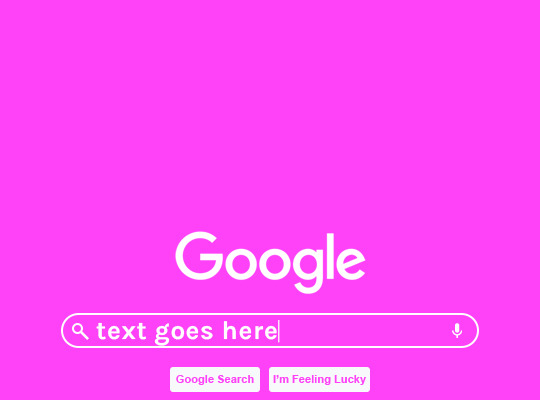
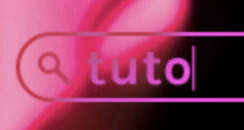
HOW TO: Make an Animated Google Search Overlay
A few people have asked how I did the effect in my pinned post and this set. So, in this tutorial, I’ll show you how to do this typing animation and give you a download to a template I made for the overlay! Disclaimer: This tutorial uses Video Timeline and assumes you have a basic understanding of gif-making in Photoshop.
PHASE 1: THE BASE GIF
I’m not going to show how I made this gif, but if you need any tips on basic gif-making, I have my full gif tutorial here. Instead, here are some tips for making a gif with this effect:
1.1 – Make your gif 540px width, especially if you’re using my template. My gif is 540x400.
1.2 – Use more frames. If you have a lot of characters in your search bar text, you’ll want to make a longer gif (i.e. one with more frames). The gif I made above was only 50-ish frames, so I doubled them and reversed the duplicates so it would play like a boomerang. That gif is a total of 98 frames 😅
1.3 – Have a “feature color” aka choose one color to make pop and make it the same as the overlay. Also, lots of contrast is especially ideal when you have an overlay set to Difference/Exclusion. (Check out the color tutorials on @usergif if you need help making your colors pop!)
PHASE 2: THE OVERLAY
2.1 – Download my template if you’re doing this layout
I made this template myself, so all I ask is that you don’t claim it as your own and that you give me proper credit if you decide to use it! Get the PSD with the transparent background here!
2.2 – Download the font Karla (optional)
The font I used for the search bar is Karla, a Google Font. It’s not THE Google Font, but I like the way it looks — which is more important to me than accuracy for this part. Here’s the Google Font link.
2.3 – Import the overlay
You can either drag the whole folder onto your gif from tab to tab or right-click the folder, select Duplicate Group, and select your gif as the destination document. Just make sure this overlay group is above your base gif!
2.4 – Set the overlay blending options
If you’re using my .psd, all the settings are already in place! If not, to get the metallic color effect, simply set the overlay to Difference:
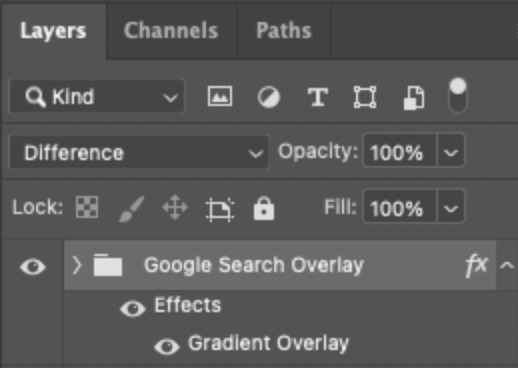
Then, add a gradient overlay that matches your base gif feature color. Here are my settings:
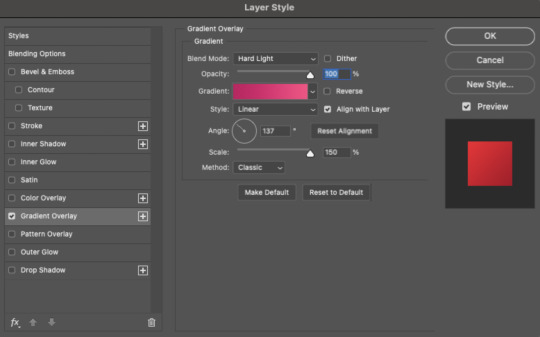
PHASE 3: THE TYPING ANIMATION
*Anakin Skywalker voice* This is where the tedious stuff fun begins...
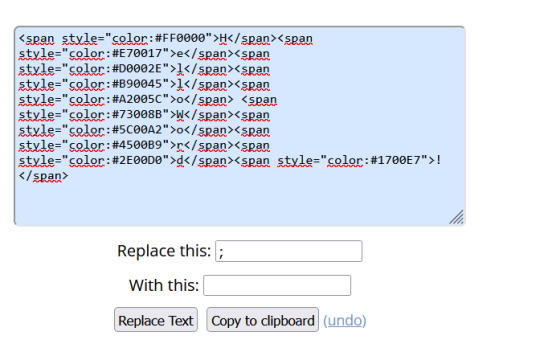
3.1 – Add your full text
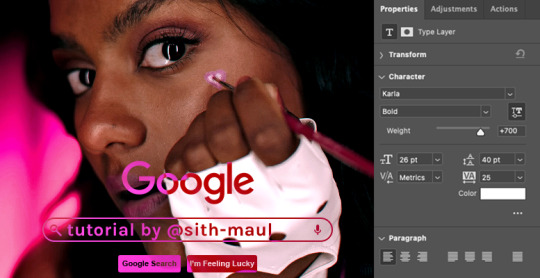
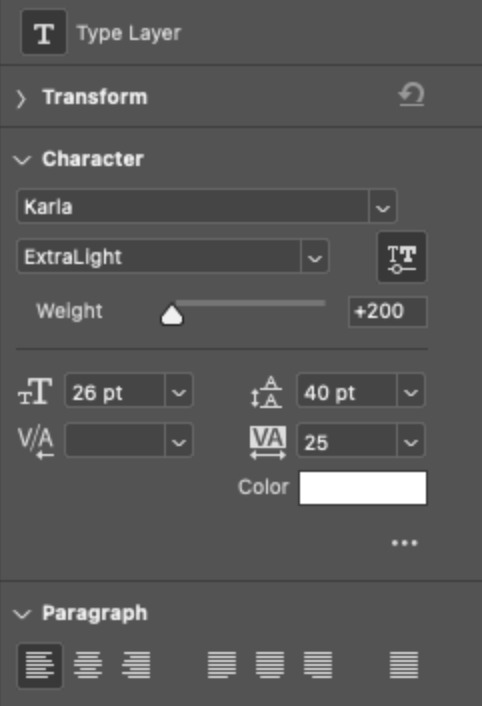
Create a text layer with the full text you want in the search bar! Here are my text settings:
— Font: Karla Bold
— Size: 26 pt
— Letter Spacing: 25
3.2 – Create a layer mask
This is how we’re going to create the typing effect without typing a new layer each time. You can add a layer mask to your text layer, use the Marquee tool to create a box around all but the first letter of your text, then fill the box with black to erase it. Now, all you can see is the first letter ‘t’
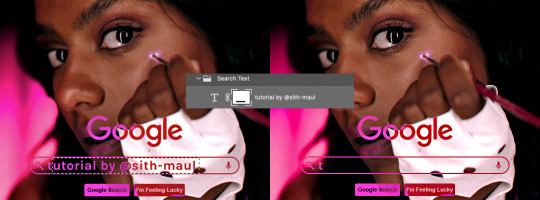
Btw the reason we wouldn’t use keyframes for something like this is because we want each letter to appear in a flash, not with a smooth, sliding reveal like a fade transition.
3.3 – UNLINK THE LAYER MASK
This is super important so you can freely move the layer mask with each letter. Just click that chain so it disappears!

3.4 – Trim the text clip SEVERAL times
When I say several times... I’m not joking lmao:

Btw, you can click these images to view them at full size and zoom! Now, this part is a little tricky for me to break down into steps, but here are some key tips:
TIP A – Trim, Move Layer Mask, Repeat
To make it as easy as possible on yourself, the best method is this:
— Start with your original text layer (pre-trim) with the layer mask only exposing 1 letter
— Move the playhead (red vertical line with the blue arrow) to the spot you want to trim (see Tip B) and click the scissor icon to split the clip
— On the copied layer, move the layer mask (white box in the layer panel) to the right to expose another letter. Make sure your layer mask is unlinked (See Step 3.3)! You can see my layer mask moving by the dotted lines in the gif below.
— Move the playhead the same amount of spaces as before and trim again: you should now have the original trimmed clip (first letter) and a second trimmed clip (second letter)
— Repeat until you’ve done all the letters AND the spaces
TIP B – Make your trimmed clips about 0.03 seconds long.
I’ve found this works well for me, especially because I’m working in Video Timeline. It reduces the amount of duplicate frames I get because, for whatever reason, Timeline pauses every 0.03 seconds (at least for me when I click the forward button).
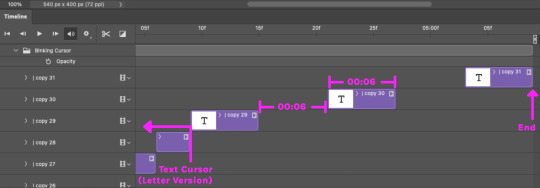
In the section above the pink line (image below), you can see I started with my full text clip. Then, under the pink line, you can see how I used the scissor/trim tool to clip them each to a duration of 00:03.

↑ Note: That screenshot is zoomed into the Timeline 100%. The other screenshots are zoomed out which is why the clips look bigger here.
TIP C – Your text shouldn’t start at the very beginning.
Give yourself some space to let the cursor blink a few times, just like when you pause while typing on a computer. Where you start your typing animation is up to you! In the image below, you can see the first small purple block starts about 1.06 seconds into the gif:

TIP D – Backspace
I’m sure you’ve probably figured this out already, but to get the backspace effect I have in my gif, you just move the layer mask to the left to cover the letters you want to “delete.” Then once they appear “deleted,” just edit your next text layer clip with the new word you want to replace it with! (In my gif, I deleted “nik” and replaced it with “@sith-maul.”)
Here’s what the gif looks like without the blinking cursor animation:
Now that’s all explained, you basically do a similar thing with the blinking cursor! But no layer masks are involved :)
PHASE 4: THE TEXT CURSOR ANIMATION
4.1 – Create a text layer with just a vertical line like this one → |
I’m using the same Karla typeface as before, but thinner. Here are the settings:
— Font: Karla ExtraLight
— Size: 26 pt
4.2 – Trim, Move, Repeat (Letter Version)
This step will be super easy because each cursor clip that follows a letter will be the exact same duration as the letters you’ve already done: 0.03 seconds long. Take a look:
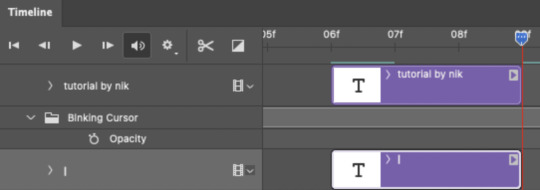
For each letter you reveal, move the text cursor so it’s slightly to the right of the letter, like this:
Do this for all the letters and even the spaces!
4.3 – Trim, Move, Repeat (Blinking Version)
This type of text cursor is slightly different because:
— These clips are “slower.” The reason is that the Letter Version cursor goes too fast for the Blinking Version. So I doubled the duration of the blinking cursor to 0.06 seconds!
— There are spaces between these clips that are the same duration as the clips themselves: 0.06 seconds.
— This text cursor starts at the very beginning of the gif and continues after the text is finished “typing,” directly after the last Letter Version cursor.
Just add however many blinking cursors you want to the beginning and end of your gif, skipping over the parts where you already did the Letter Version!
Here’s how it looks in the Timeline at the beginning of my gif:

Here’s how it looks in the Timeline at the end of my gif (note: it continues directly after the last Letter Version cursor):
Here’s how the blinking cursor would look at the same speed (0.03) as the letter version:

Here’s how the blinking cursor looks at double the duration (0.06):

PHASE 5: EXPORT
That’s it!! Just convert from Timeline back to Frames and export your gif! As always, I recommend checking your frames when you convert from Video Timeline back to Frame Animation — just in case you may have gotten any duplicate frames. Again, if you want to know more about that process, my full gif tutorial is here!
And ta-da, here’s the final gif!

And that’s it! I really hope this makes sense because I’m not really sure it does 😅 But if you have any specific questions, my ask box and DMs are open! <3
Also, check out these gorgeous recreations of this effect from @steverobin (Keke Palmer set) and @jakeyp (Jake Peralta set)!
#gif tutorial#completeresources#allresources#userelio#userannalise#usershreyu#useryoshi#useralison#uservalentina#userkosmos#usernums#tuserkay#userk8#tuserabbie#uservivaldi#userstar#usersole#resource*#gfx*#google*#this tutorial is long overdue oops lol
2K notes
·
View notes
Text
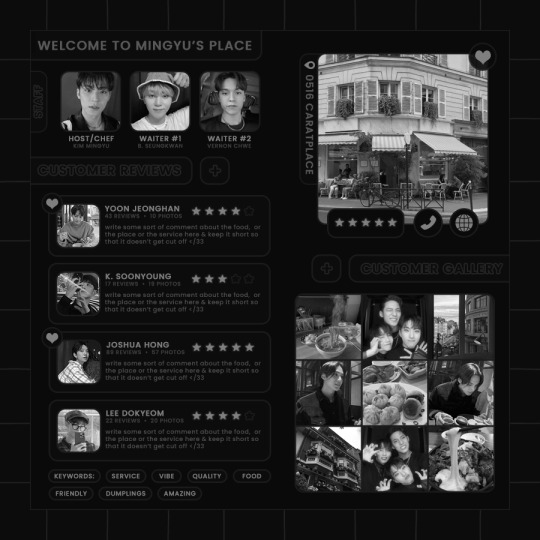
ପ( ໊๑˃̶͈⌔˂̶͈)੭ ✶⠀𝑚𝑖𝑛𝑔𝑦𝑢'𝑠 𝒑𝒍𝒂𝒄𝒆⠀!

introducing mingyu's place , a fun photoshop template designed to show off your muses' business ! this template is quite busy & utilizes clipping masks &. colour overlays , so basic editing knowledge is required otherwise you may struggle ! credit is needed somewhere in your tags , or you can reblog &. like this post as credit ♡ download link is in the source & linked below. you may come into my askbox for help editing this template !
❀ CREDITS.
star icons - Star icons created by Pixel perfect - Flaticon
website icon - Internet icons created by srip - Flaticon
phone icon - Phone call icons created by Ilham Fitrotul Hayat - Flaticon
location icon - Location icons created by Freepik - Flaticon
❀ NOTE.
to change the colour of most things, double click the "color overlay" style in your layers & change it in that window.
font used is poppins because it's my favourite font to use in documents hehe . . . download it here !
a clipping mask tutorial i wrote a few weeks ago can be found here - ignore everything about smart objects !
comes with two background options for funsies.
❀ DOWNLOAD.
download mingyu's place here !!
#m: resources#supportcontentcreators#photoshop#free rpc#rph#free rph#rpc#photoshop templates#muse template#photoshop template#ps template#template psd#template#resource#rph resource#rpc resource#free resource#free psd#rph template#rpc template#tinytowns
395 notes
·
View notes
Last Seen Blogs
rsd2005
Untitled
spitfireale
Spitfire Ale

gourmetgdl
GOURMETGDL
memoirsofasiren
B. 🇩🇴♋️
Have U Ever Met A Trap Fairy? 🧚🏽♀
callme-holly
- Can't Handle the Randle -