#sustainable sewing
Text
Embroidered a free hat with a prickly pear

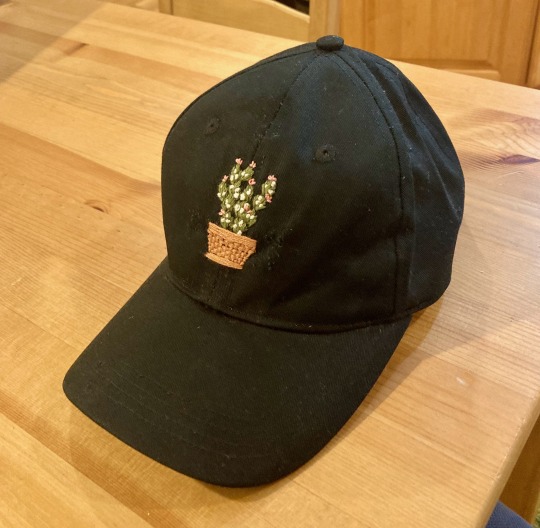

Not a big embroiderer, but this was a fun little project.
#sustainable sewing#sustainablefashion#sustainable fashion#sustainability#sustainable#sustainableclothing#hand sewing#sewing#customized#ecofriendly#reduce reuse recycle#reuse#recycle#recycling#reclaimed#upcycle#upcycling#upcycled#wastelesscrafts#wasteless crafts#diy#recycled#embroidery#embroidered#hand embroidery#crafts#succulents#succulent#plantblr#plants
74 notes
·
View notes
Text
I wanted a pair Regency-style trousers and so I made my own pattern for them (secondhand leftover wrapping paper makes great pattern paper). I used brown fabric I found at a secondhand materials store. I still need to add closures and buttons, but yeah this took me three days and throwing out my back to make haha
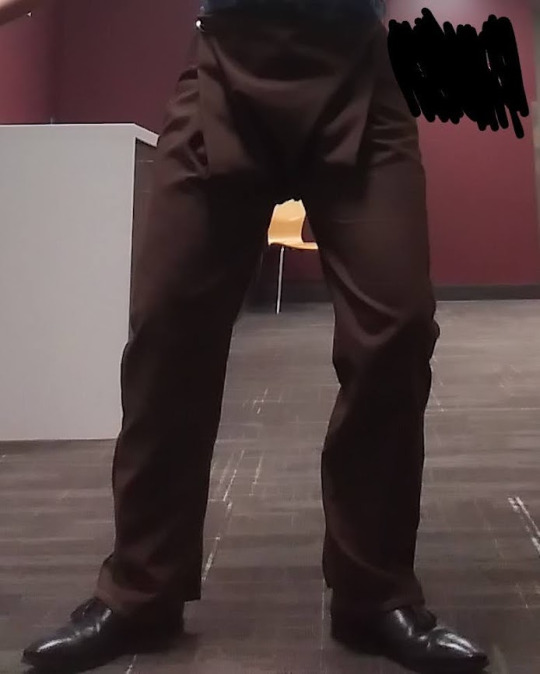
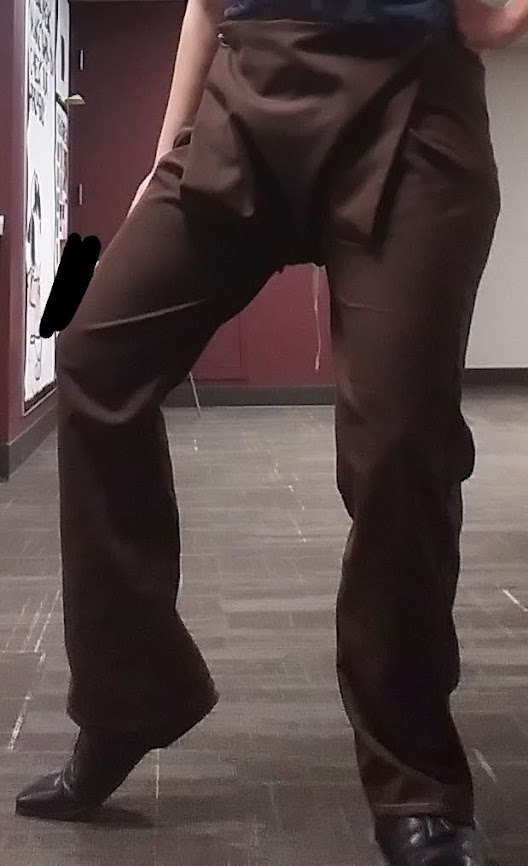
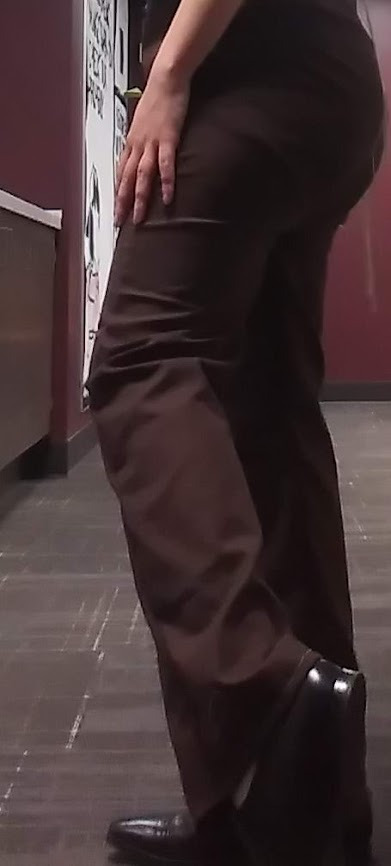
Will update once I add the buttons
[id in alt text]
45 notes
·
View notes
Text
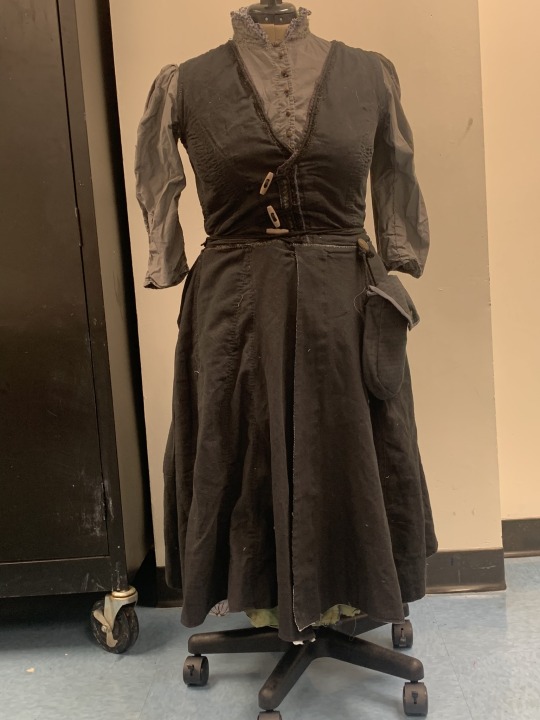
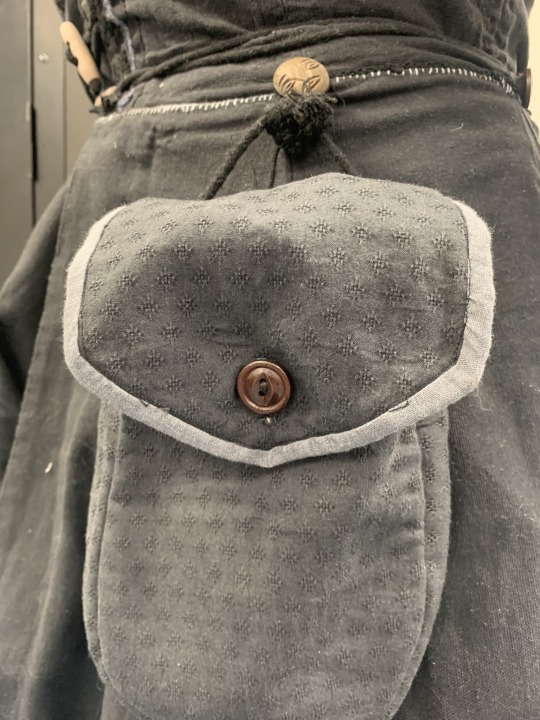
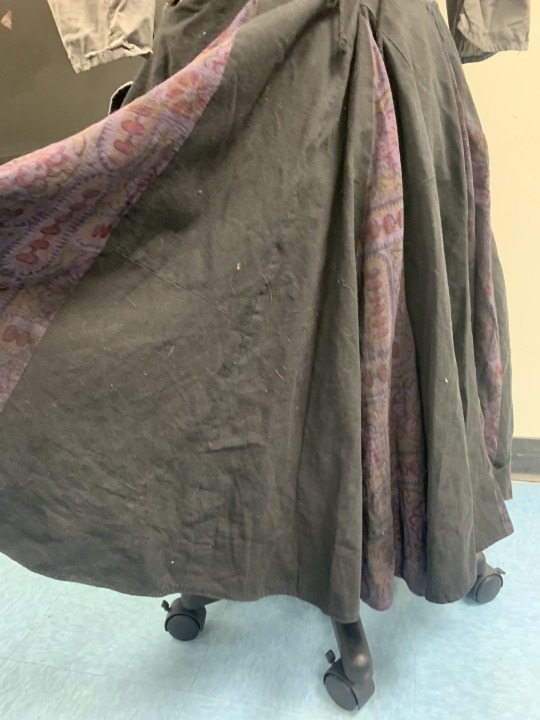
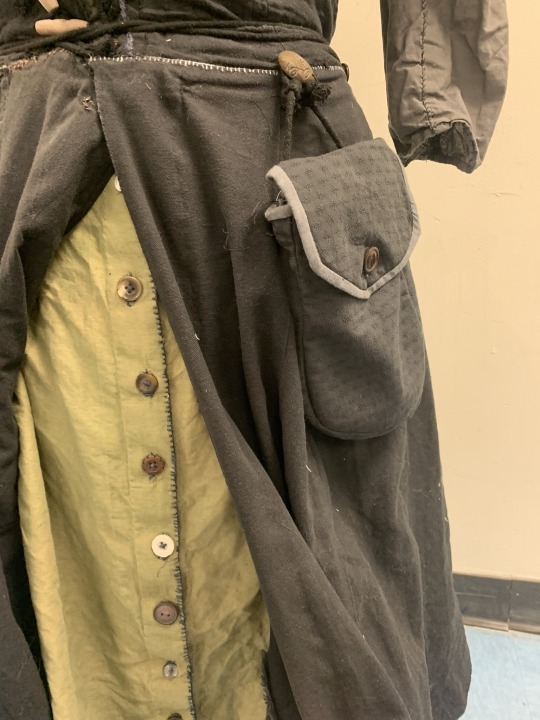
My favorite overdress. Made by me. Ft. Blouse and skirt with special guest pocket.

3 notes
·
View notes
Text
Part 1 of my mending series! I embroidered the edge of the right pocket!
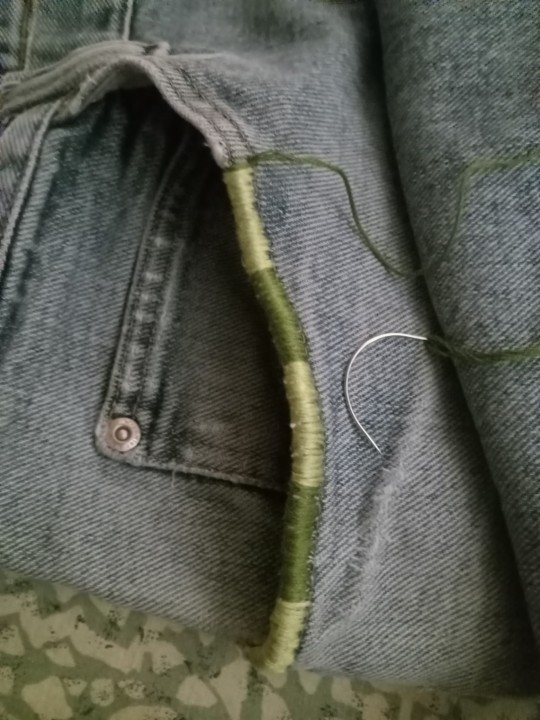

This alone took a while so I'm definitely taking my time with this project lol. But I'm making progress :)
I think I'll use browns or maybe blues for the left pocket for asymmetry and then next I'll tackle the waist band. Idk yet we'll see
[Image ID: two pictures of the right pocket on a worn out pair of light blue jeans. The top edge of the pocket is reinforced with light green and dark green embroidery thread and it alternates in-between the colors. Each block of color is about an inch long before it changes to the other color. The first image shows when it was almost done with the needle in the frame and the second image is the finished product. End ID]
#trash pants: reborn#solarpunk#solarpunk fashion#solarpunk aesthetic#punk#punk fashion#hopepunk#ecopunk#sewing#embroidery#mending#visible mending#sustainable fashion#sustainability#diy#solarpunk diy#punk diy#hatchet mends things
730 notes
·
View notes
Text
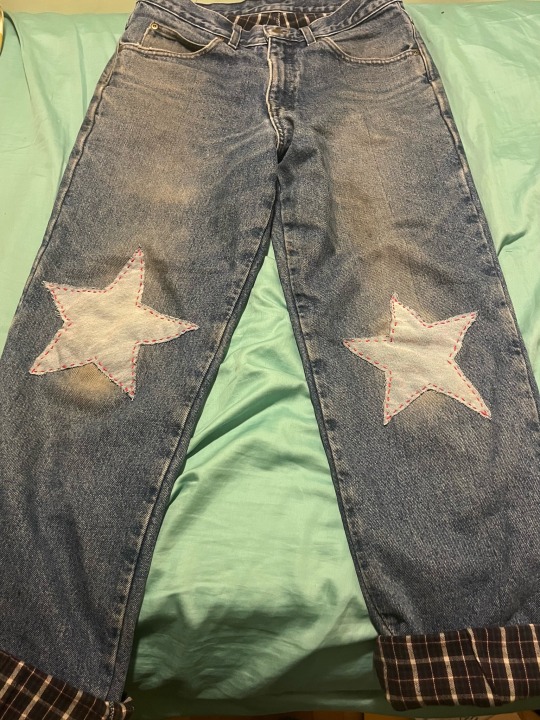
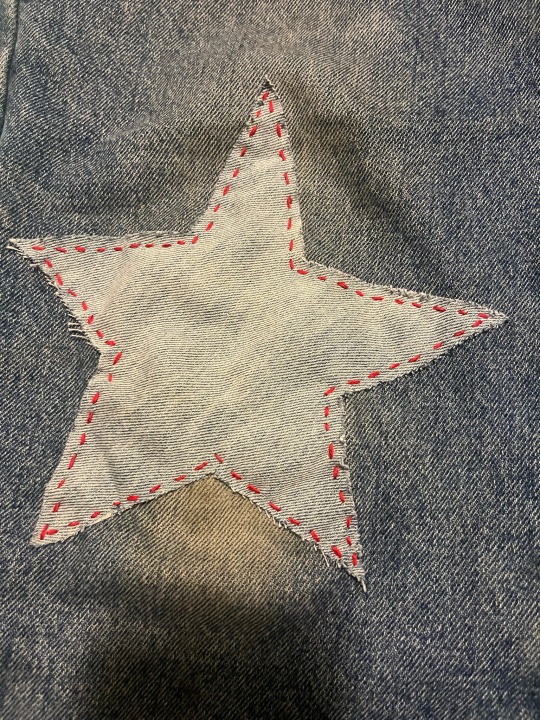
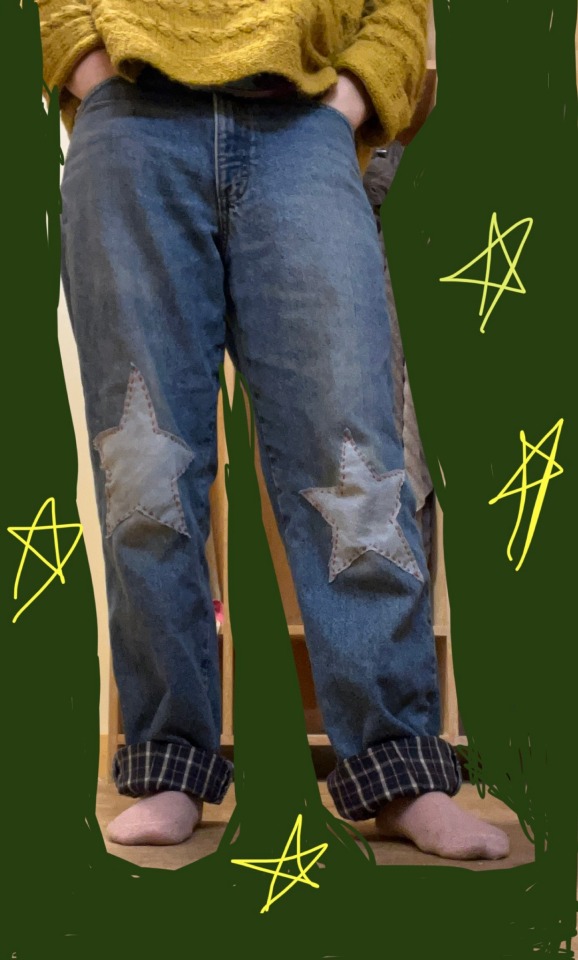
Latest visible mending! Might make a post explaining how I made these, breaking down costs and materials etc.
#solarpunk#diy fashion#patches#diy punk#punk fashion#sustainable fashion#sustainability#solarpunk fashion#visible mending#mending#thrifting#sewing#embroidery#artists on tumblr#slow fashion
377 notes
·
View notes
Text
After:


Before:
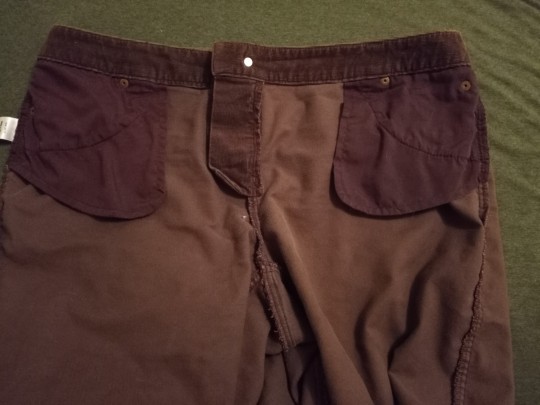
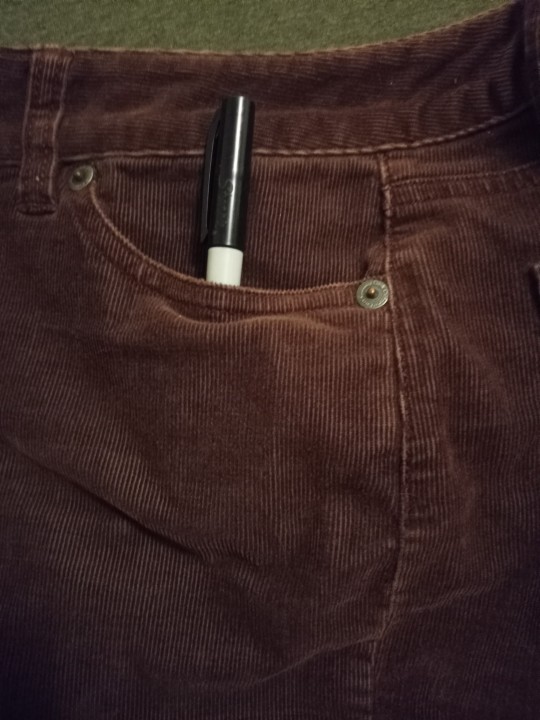
Fuck tiny pockets!! I finally got around to extending the pockets on these corduroy pants I thrifted over a month ago! My handsewing looks like shit but they're functional
306 notes
·
View notes
Text
#Visible mending#anti fast fashion#anti consumerism#sustainable fashion#Tiktok#sustainability#Mending loom#mending#sewing#loom knitting#knitting#Anticonsumerism
852 notes
·
View notes
Text
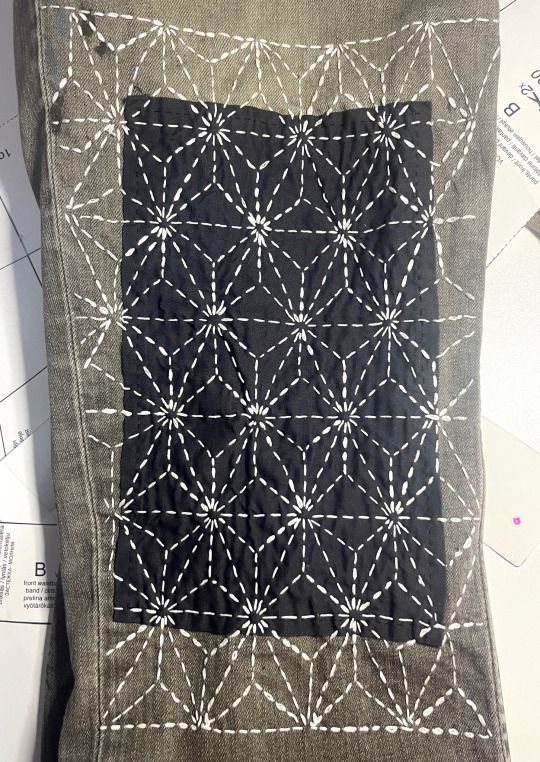
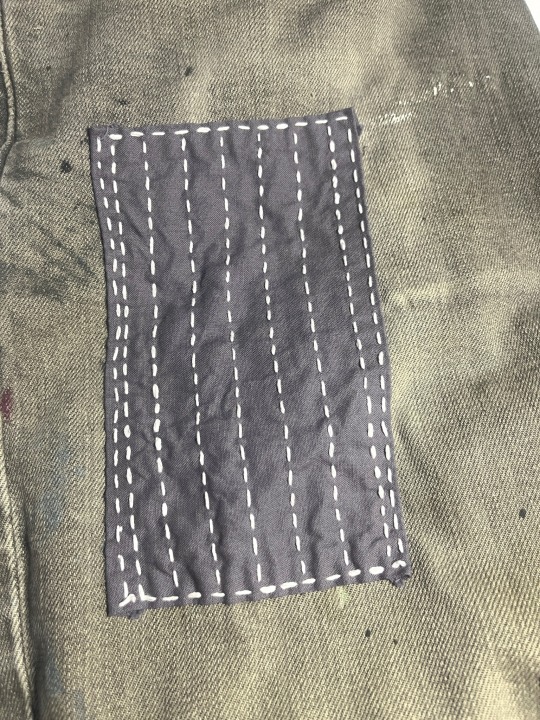
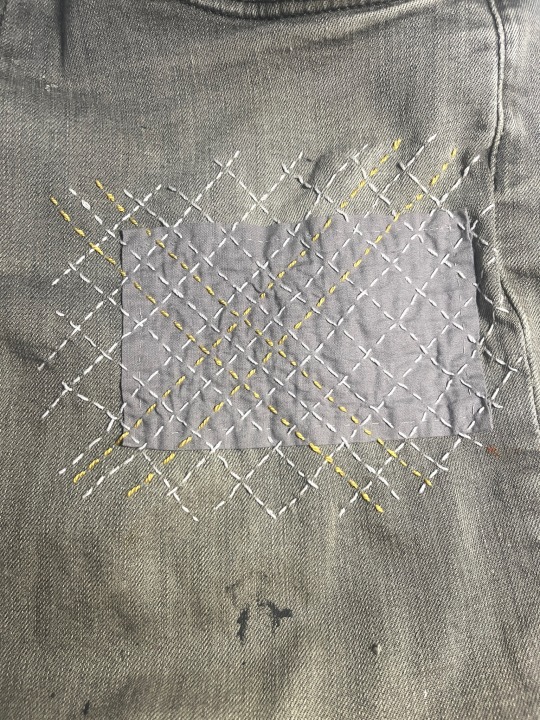
More sashiko inspired patches and mending!
I didn’t know that the traditional way to do a sashiko mend is to stitch the patch with the pattern and and then attach the patch to the clothing… but i still think it looks really cool! And it should still be plenty strong lol.
#sashiko stitching#sashiko#sashiko mend#visible mending#mending project#mending#hand sewing project#sewing project#diy mending#sustainable fashion
182 notes
·
View notes
Text
shouto has never cared about things, never assigned value to blankets or clothes. he’s never had a favorite mug. in the todoroki house, things were easily acquired and replaced when the time came.
so he doesn’t quite understand your commitment to patching jeans and refastening buttons. he’s told you more than once that he’s more than happy to buy new dishes or sweaters or pillowcases.
but one night, he comes home to find you bent over one of his sweatshirts, taking a needle and thread to a hole in the the left arm, carefully making each stitch small and neat.
before, shouto wouldn’t have thought twice about tossing out the torn garment, but when you hand it to him with a satisfied smile, he runs his thumb over the slightly-puckered line of thread — a token of your love and effort — and finds that this sweatshirt is no longer replaceable.
#you’ll be sewing up that sweatshirt until it’s nothing but scraps#i was mending a pillowcase and thought about this#just like…. showing love through small gestures#while also promoting sustainability hehe#bc you love the man but sometimes the Rich Kid vibes are too powerful#todoroki x reader#shouto x reader#mha#my writing: mha
236 notes
·
View notes
Text
Visible/Invisible Pocket Mend
Fixed ripped pockets by recreating pockets with scraps of the ripped pocket and scraps from another project
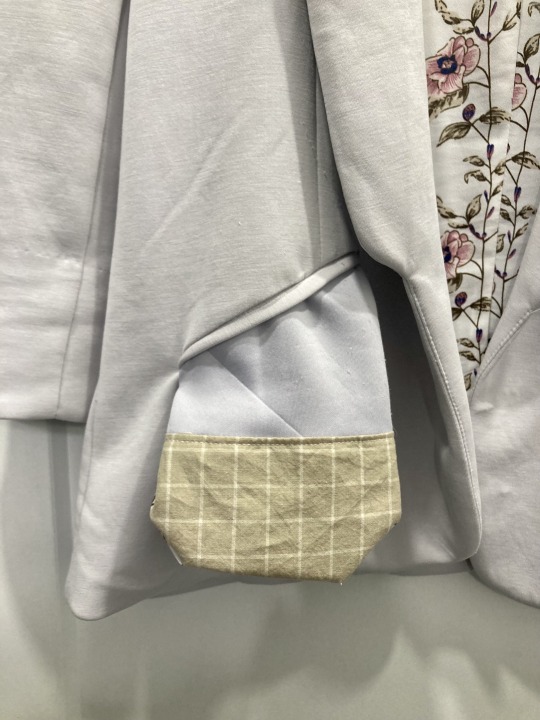
When my coworker tried to rip the stitches on her blazer pockets that were sewn shut, she accidentally ripped the pocket (and missed the tacking stitches)
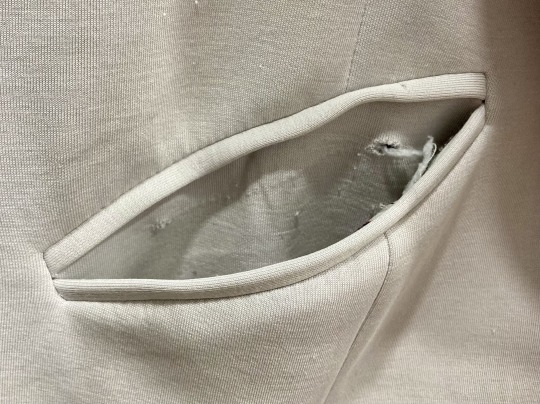


I took out the ripped pockets, made a pattern, and then moved the unripped portion up on the pattern. I added scrap fabric to the bottom of the pocket to compensate for the part that I removed.


I put the Franken-pocket back in the blazer, and now you can't tell that there's a mend unless you take the pocket out completely.

The pockets aren't perfect, but they're better than they were.
#visiblemending#visible mending#invisiblemending#invisible mending#diy#upcycle#upcycled#upcycling#handmade#crafts#sewing#sustainable fashion#sustainability#sustainablefashion#sustainablesewing#sustainable sewing#sustainable#ecofriendly#recycling#blazer#fabric#textile#textiles#craft#reduce reuse recycle#mending#patches#patching#patch#slow fashion
133 notes
·
View notes
Text
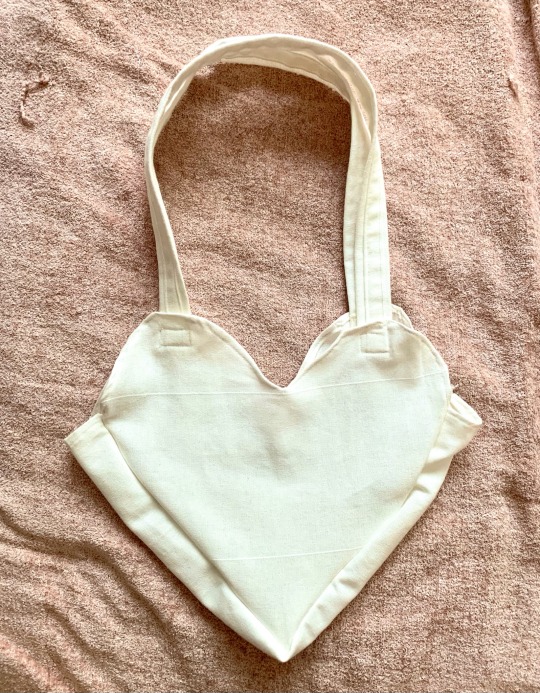
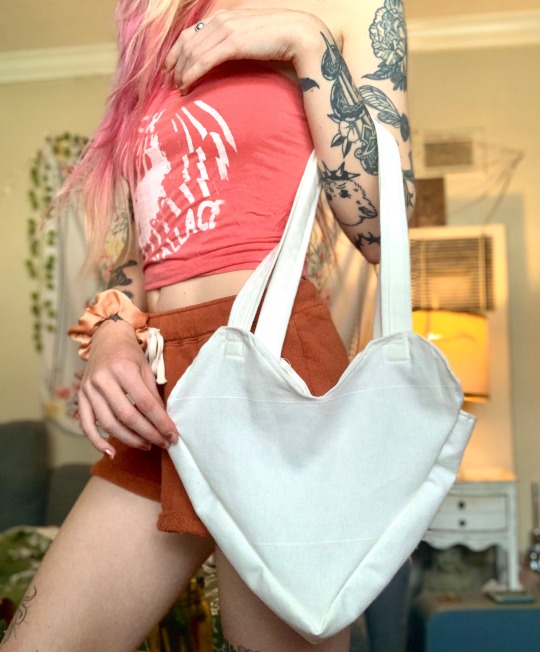
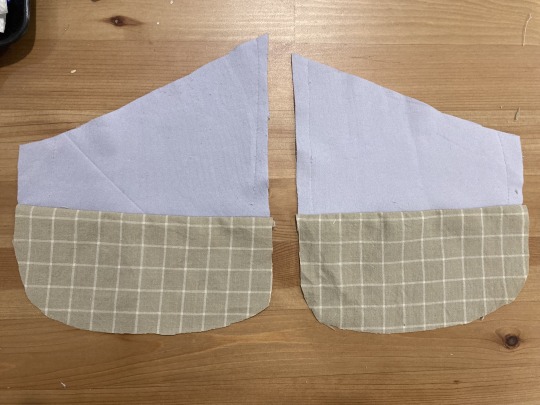
another thing i made recently! a heart shaped tote bag ❤️ one of my first projects made on my vintage singer sewing machine. it’s been sitting in storage for a while but i decided to pull it out and get it fixed up and in working order last week and i’ve been teaching myself how to use it since!
this bag was made from salvaged cotton i rescued from the side of the road 🤘
etsy // patreon
#i inherited the singer from my horrible grandma lol#she was a fuckin bitch but at least she had good taste in sewing machines#mine#my art#sewing#crafts#fashion#slow fashion#handbag#tote bag#textile art#fiber art#heart shaped#heart#heartcore#lovecore#solarpunk#traditional art#sustainable fashion#sustainability#upcycling
86 notes
·
View notes
Text
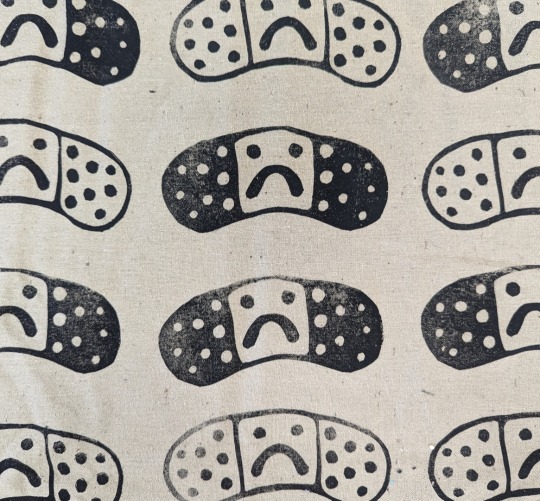
First run of my new ouchie patches :3c
#block print#alt#patches#punk diy#sustainable fashion#trans artist#alternative#sewing#handmade#fashion#art#goth#designer#ooak
64 notes
·
View notes
Text
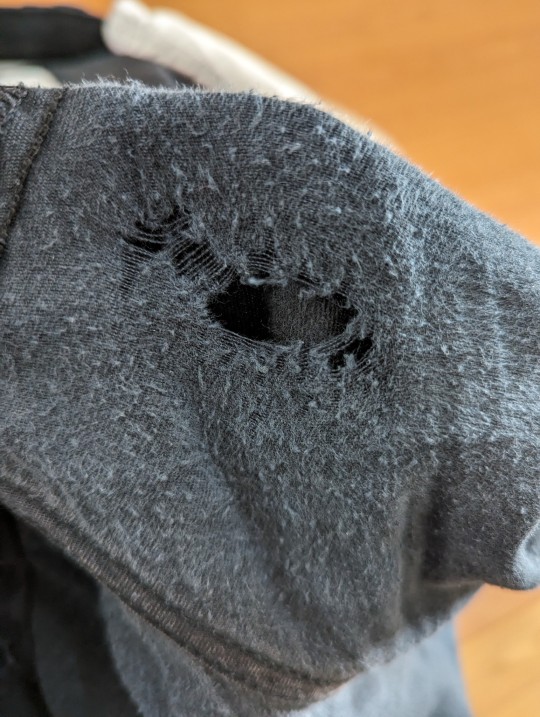
Just a silly reminder that u do NOT have to throw out ur favorite pants when u wear a hole in the thighs. This took me about 15 minutes (if that, idk exactly how long it was) to fix and I can't feel it when I wear the pants, nor can you see it when I have them on. I'll also link a video (it doesn't have added captions but I watched it through with YouTube's auto-generated captions and they seemed nearly exactly correct. And even without them you could probably learn it just from the visuals) about how to do the stitch I used below the cut and do a brief explanation of my process:}

Backstitch tutorial:
https://youtu.be/sjHm8CL9WDA
Steps for mending:
1) Pin the patch to the inside of the hole-
I used safety pins because I find regular pins endlessly annoying. Since we'll be sewing from the front (you usually want to be looking at the side you want to be the neatest when you sew) you might find it helpful to hold your fabric up to the light and mark where the edges of the patch are, but I was able to figure out that sewing from end to end of the pins would keep me on the fabric.
2) Thread your needle-
I used crochet thread because that's what I had on hand. If you're using regular thread you might want to double it up so it's stronger. If you're mending something white or if you don't care whether the color matches, you can also use dental floss for something very strong. Here's a video on how to thread a needle (again with no official captions but good auto-generated ones)- https://youtu.be/S6u173Ap2mc If you want to use your thread as-is just tie a knot in the long end after threading. If you want it doubled up you can pull your needle to the center of the length of thread (so your tail and your working thread are equal lengths) and tie the two strands together to essentially create a big loop through the needle.
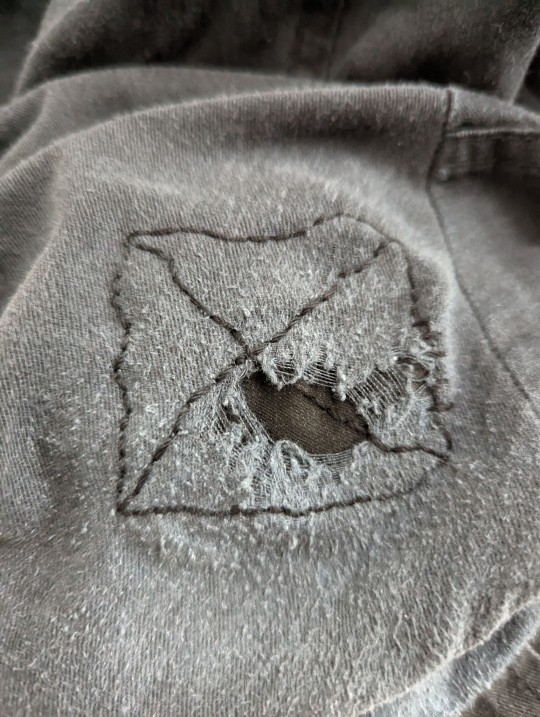
3) Backstitch around the edges of the patch (backstitch tutorial above) -
A backstitch isn't the only strong stitch you could use, but in my experience it's the easiest to learn and keep track of. You can also stitch across your patch in an X like I did, or in lines across it or on any other pattern you want. Your patch will be perfectly secure without these extra stitches, but I like to do them because they hold it flatter against the fabric.
4) Tie off your thread-
Video tutorial for this (same caption situation as the other videos) https://youtu.be/f3Hqv9n95R4
5) Done!!!-
That's it! Enjoy your newly repaired clothes and be free:}
#mending#visible mending#sustainability#sustainable fashion#slow fashion#anti fast fashion#sewing#b1rdie's room
225 notes
·
View notes
Text
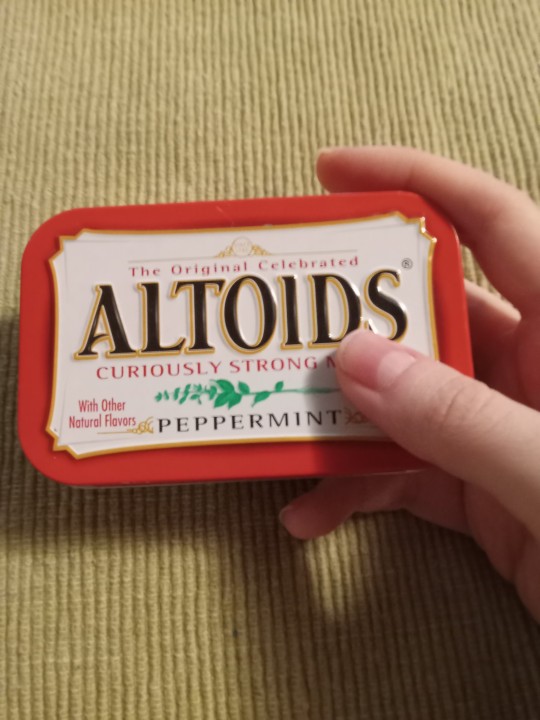
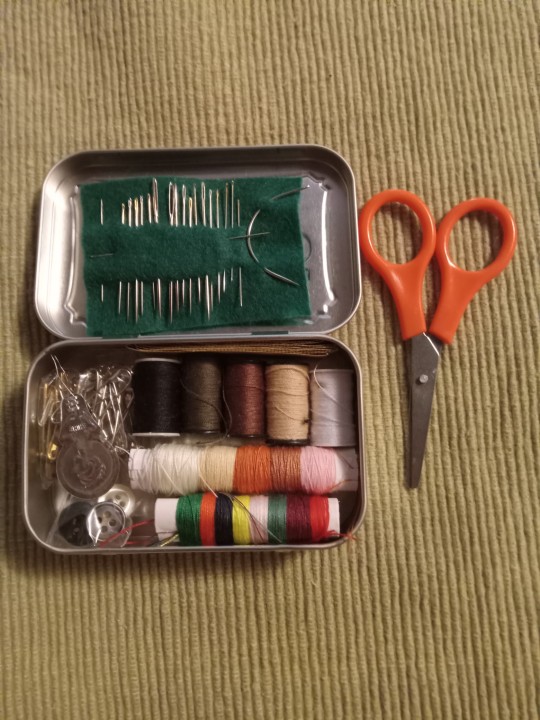
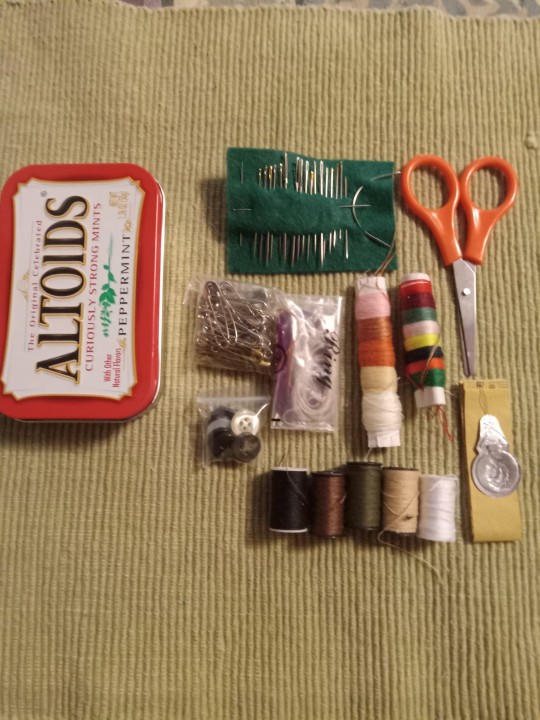
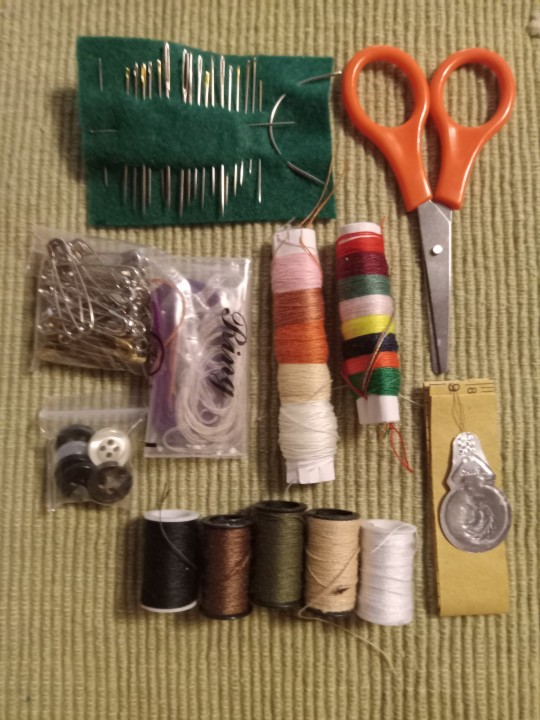
I upgraded my altiods tin sewing kit! (More details are in the image ID)
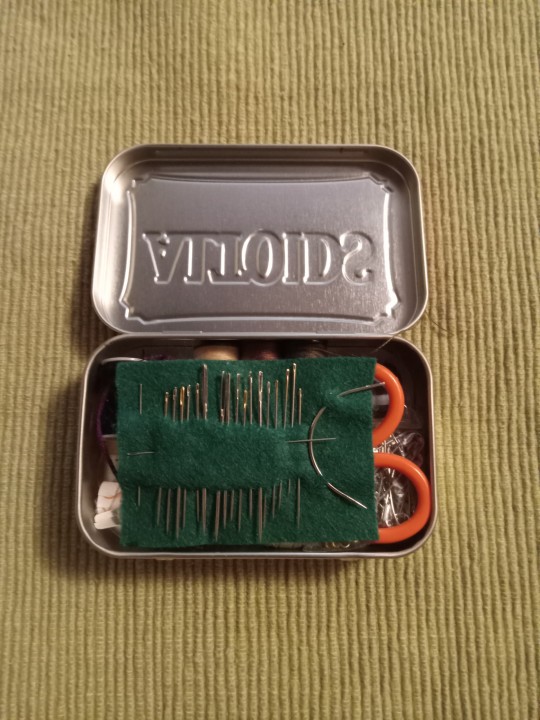
I added more needles, safety pins, thread, and a sharp pair of thread scissors just small enough to fit inside the tin. There's usually two needle threaders in here but one is in use atm. And there's enough stuff inside to fit perfectly so that the lid can close all the way and nothing slides around so that's nice
I am gonna post my little altiods tin emergency chronic pain/migraine kit within the next few days as well so keep an eye out for that if you're intrested
[ID: various pictures of a metal altoids tin, about 3.5 inches by 2 inches, with sewing supplies inside. A little bag of silver safety pins, varying colors of thread on 5 small spools, more colors of thread wrapped around two small rolls of paper and inside a small plastic bag, a folded piece of paper measuring tape, a small pair of orange thread scissors, a needle threader, and some buttons inside a little bag. There are varying sizes and types of sewing needles that are stuck in a small rectangular piece of green felt that fits on top of everything inside the tin. It has sharps, darning needles, embroidery needles and one curved needle.
The colors of thread included are: light pink, a muted rusty orange, white, a few shades of light brown and off white all wrapped around one piece of rolled paper. The other paper rool has more vibrant saturated colors including red, blue, yellow, dark green, and orange. The little bag had extra recycled pieces of thread i salvaged from other projects that are long enough to still be used. And the colors on the 5 small spools are black, dark mossy warm green, dark brown, light brown and white. End ID]
#solarpunk#solarpunk diy#solarpunk aesthetic#punk#punk diy#sustainability#recycling#upcycling#hopepunk#ecopunk#diy#hand sewing#sewing#hatchet makes stuff
531 notes
·
View notes
Text
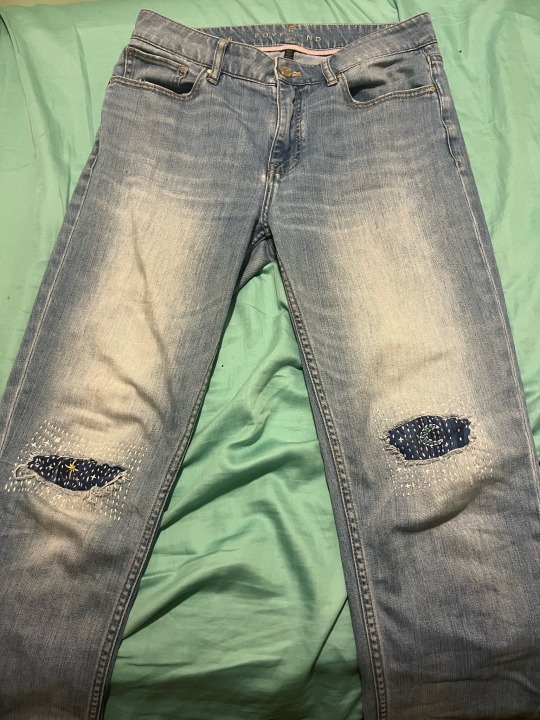


My first ever visible mending! I made these jeans way back in high school and still wear them all the time.
#slow fashion#visible mending#solarpunk#diy fashion#patches#diy punk#celestial#celestial art#sewing#embroidery#mending#artists on tumblr#solarpunk fashion#upcycled fashion#sustainable fashion#sustainability#thrifting
268 notes
·
View notes
Text
My low waste goal for today!!
Unpicking a dress I like the fit of but HATE the fabric.
I’m taking it apart piece by piece so I can copy the pattern. I’ll make a dress version, which is what this piece originally was, and then shorten the waist so I can use it to make shirts.
My goal is to eventually make all my own clothing. That way I can use natural fibers (cotton, linen, wool) instead of buying clothing that is almost always some blend of polyester. Micro plastics are no joke!
So I’ll take a few hours (oh no) to completely unlock this whole dress. And if I have the spoons (probably not) I’ll try to draft a pattern. It would be my first time drafting a pattern, and I am nervous/excited!
105 notes
·
View notes
Last Seen Blogs

umbe70-blog
Occhio Rumeno

kevloyd
Untitled

lanicolihe
Untitled

slowlybeautifulwerewolf
Untitled

adambstingus
News About Beer