#overscan
Text
101 notes
·
View notes
Text
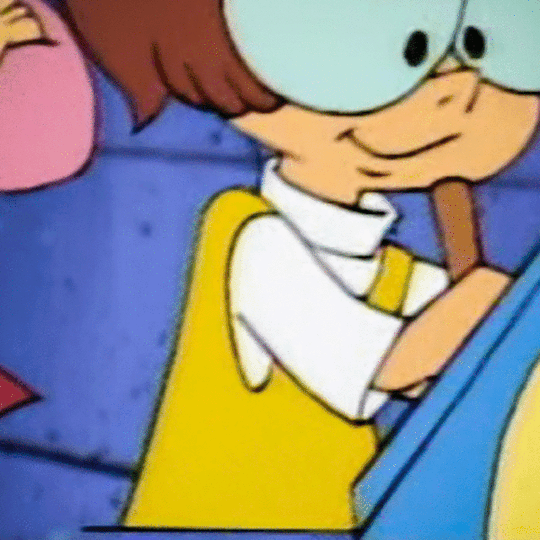
"Aaaaaargh, I'm so sick of filling in checkered floor squares."
Ted the Animator: “Be strong! The end is in sight."

Carl the Animator: “Can't I just leave it like this?! That's most of 'em, anyway."
Ted the Animator: “..."
Carl the Animator: “..."
Ted the Animator: “...actually, it will be obscured by TV overscan at the edge, so... hey, why not."
Carl the Animator: “YES! Finally!"
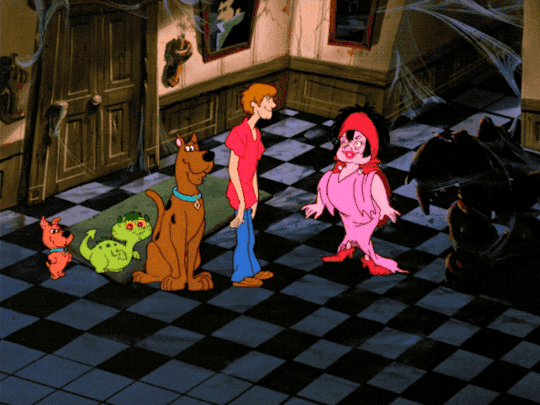
Ted the Animator: “We just have to hope no one invents new TV tech someday, or the ability to watch cartoons closely on computers."
Carl the Animator: “What, like someone would actually look for mistakes and stuff? To show people?"
Ted the Animator: “It's far-fetched, I know."
Carl the Animator: “Boy, that would be embarrassing for them."
#scooby doo mistakes#follow me for more#comedy#humor#cartoon#animation#lol#humorous#funny pictures#funny content#humor blog#cartoons#funny#scooby doo#ghoul school#halloween#halloween 2023#gif#gifs#cartoon gif
3K notes
·
View notes
Note
The first few pages of the character clean-up sheets have something that's got some of my interest… The provided storyboard examples have the artwork in a 4:3 square as expected, but also inside that box is a rectangle, and a smaller 4:3 box that overlaps it.
I get that the smaller 4:3 box is a safezone so that no vital imagery gets left out/obscured by the overscan area, but what was the 16:9 rectangle for? Was this the original plan for broadcasting Billy & Mandy episodes in widescreen?
This was from my "sane" revision to the official CN storyboard paper at the time. Since "widescreen was coming" we had to start boarding for it. But because of the way CN chose to handle framing, we'd be losing everything above and below the horizontal lines. CN was worried that black bars on the side of the screen would cause people to think their TVs were malfunctioning. That was actually a popular theory at the time, believe it or not.
The large inner box is 4:3 Title Safe - meaning that anything beyond that point might disappear behind a curve or obstruction on older Television sets. If you have text that needs to be read, you want it inside that box. At the time this panel was drawn, we were also supposed to consider a 16:9 Title Safe box and a "safe zone" for the CN logo. Hence my "sane" revision to clear up some clutter.
The worst part of this was that I had designed Billy & Mandy as characters that were, like, two heads tall. It was already difficult getting medium shots of the characters without the framing looking bizarre, but trying to do that in both framings was almost impossible.
There are definitely times when you look at the show and suddenly the kids will have these really long torsos that extend off the bottom of the screen. We sort of had to do that to avoid short people standing on the TV frame.
259 notes
·
View notes
Text

You can see past the edge of the set's wall! (in s02e04 of Will & Grace (which features Peter Paige of Queer as Folk fame! (that's the back of his head)))
I've never noticed that before. Like in any show. That's so much worse than catching the tip of a boom mic or whatever lol. I love it. Did they just expect 90s tv overscan to cover it up?
26 notes
·
View notes
Text

[MOCKUP, NOT REAL GAMEPLAY]
MCMXCVI will support native 4:3, and only 4:3 for that matter, so I figured along the way I'd design the game with CRTs in mind!
I have attempted to play official FNaF games on a CRT before, and while it does compliment the pre-rendered visuals really well, the interface is always cut off by the overscan. So to compensate, my game's HUD will be laid out to account for a safe zone.
#mario#fnaf#fnaf fangame#mcmxcvi#crt#crt tv#they dont call me annielogue for nothing#they is me#i need counselling
44 notes
·
View notes
Text


oh yeah, during those three days when i had a CRT i had to test some of my N64 mod stuff on it
top is an resident evil 4 inspired map in Goldeneye, bottom is my mario craft mod shrunk down to actually fit with the N64s tiny texture cache lol
i love seeing my stuff running on actual hardware but apart from the overscan it didnt look too different from how it usually looks on my oled
at some point i rly need to figure out how to release the mario thing. i had to use the decomp so i've no idea how to turn it into a patch
45 notes
·
View notes
Text
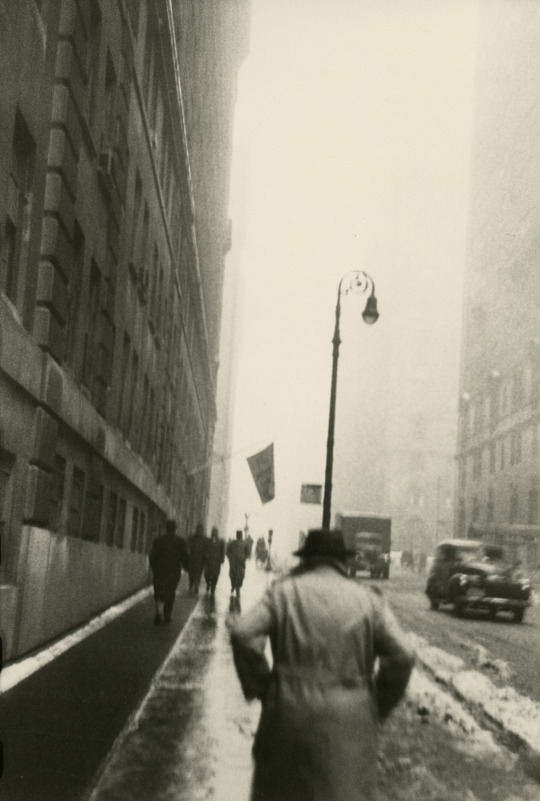
Inspired by Megan Abbott's IG post, I made it to the last day of the Saul Leiter Centennial exhibition at Howard Greenberg. I loved the photographs—visible at the above link until the gallery pulls them down—but was particularly struck by the visible perforations at the borders of some of the images. (The thumbnails on the HG site are honestly kinda cropped/"framed" scans, but it was so dramatic in the above—Untitled, #48 in the thumbnails at the HG link—that they left it partially visible in the scan.)
Is there a word for this? My brain wanted to call it overscan because previously I'd only encountered it in the context of digitization, but these were c.1970 gelatin silver prints by Leiter from 1950s negatives.
I assume—I considered asking, but let social anxiety win the day—that their being "original" Leiter prints available for sale is why, when they were matted for exhibition, the borders (with or without visible perforation) often remained visible?

I only flipped through the publication, but was disappointed that the images presented therein appeared to be more "traditionally" framed. Then again, for all I know, they were previously published or exhibited with that "traditional" framing per Leiter, in which case that's how they ought to appear. (Not that I have $80 for the book anyway.)
3 notes
·
View notes
Text
20231202_Schedule
ゼミ展まで
sky replacement
Bifrost 解決
light color - damp atmosphere
overscanしてカメラアニメーションを解決
ポトフォリオブラッシュアップ
main object develop
uv mapping
substance brush up
render layer setting
3 notes
·
View notes
Note
Punchy my man I did install Linux Mint on my computer, and it is one of the most finicky softwares i have ever seen. My trackpad keeps breaking and locking my mouse. The Firefox UI is tiny and illegible. To fix the overscan on my second monitor i need to edit a graphics driver config file that doesnt exist. It keeps locking me out of my own files. Every resource i can find is either vague as hell or five steps ahead of where i am in Linux knowledge.
Maybe one day ill love it, but right now i am stuck at the bottom of a steep learning curve 😡
Yeh brother there's a learning curve, and there's some tweaking to be done but there's a ton of tutorials online and you don't have to do a full install right from the getgo you can burn it onto a USB with a program called Rufus or Balena Etcher and try it live without installation or use a virtual machine to try it out first, hope you didn't lose anything man. If you decide to stick with it and keep trying it out, you'll see how amazing it us but in the very beginning it's gonna feel like a huge pain in the ass before you figure stuff out. Legit when I first tried it I got fuckin mad at it, it felt like a piece of shit until I realized I was still tryna use it like Windows but it's definitely it's own beast.
10 notes
·
View notes
Text
Someone came into my room at some unknown point today and fixed the overscan on my TV as I so so nervously requested at like 10 PM last night and I have no idea who they are but I am kissing them on the face. Unknown Gaylord Opryland employee I love you so bad
3 notes
·
View notes
Note
hello0s ! i was wonder how do you get your rendered sims on a flat background? im still rlly new with blender !

You click on the render properties button and then under film you click transparent and then overscan. Then it will render as a transparent psd
8 notes
·
View notes
Text
As somebody who's making retro inspired indie games, I've kinda grown to hate most retro inspired indie games.
A lot of it boils down to "hey look at this super esoteric feature of the hardware that I know how to replicate" and not the artistic merit of the game itself. Your polygon wobble or sprite flicker doesn't really add anything to the game beyond showing that you know how retro hardware works.
There's also this issue where no matter how authentic you make your game, there's always somebody even nerdier than you.
"You didn't include the glitchy overscan area on the side of the screen!", "The sound effects should cut off the music!", "The audio isn't bitcrushed in the exact way the original system would do it!", "You're supposed to be playing it on a CRT because that's how games from back then were designed to be seen!!!!", "The game engine you're using adds .001ms of latency!", "You shouldn't be using a game engine at all! You need to write everything in 6502 assembly!"
Also the NES palette looks like ass, goodnight.
6 notes
·
View notes
Text
I don’t think I really care for Babby Velma’s design.

Like, sure. The glasses, the Rick Moranis eyebrows, that’s all fine and good...
...but I just can’t get behind the “floating torso in the air” motif.
Ted the Animator: “Hey, that was hidden by analog TV overscan! Leaving that in doesn’t count as an error!”
Carl the Animator: “Overscan schmoverscan. I’m just in it for the levitation.”
#scooby doo mistakes#follow me for more#comedy#cartoon#animation#lol#humorous#humor blog#cartoons#funny#a pup named scooby-doo#80s#90s#1980s#1990s#gif#gifs
407 notes
·
View notes
Text
Capturing N64 footage using the GlideN64 plugin
In this continually-updated guide, I'll document my experiences using this plugin and provide tips for using it to render the highest-quality footage possible.
Resolution and rendering scale
GlideN64 gives you the choice of a specific output resolution or a small-integer multiple of your ROM's native rendering size. If you plan on using overscan (see below), I recommend using an 8x scale. Otherwise, you can just pick your monitor's resolution.
Aspect ratio and widescreen
Your emulator (e.g. Retroarch or Project64) likely has its own aspect ratio output setting. Set this first, and then configure GlideN64 to optimally fill in that space. It provides three options: Original, Widescreen (Stretched) and Widescreen (Adjusted).
Adjusted implements a rendering hack to increase the FoV for an output appropriate to 16:9 displays. For some games, this causes culling at the left and right edges of the render, because their frustum is tuned for a 4:3 FoV. For others, it can produce very good results - check out how Adjusted compares to a dedicated widescreen patch for Wave Race 64:

I couldn't find good documentation, but ostensibly "Stretched" merely takes a 4:3 render and interpolates it horizontally to fill a 16:9 area. Stay away from this option - besides outputting a geometrically incorrect picture, I also noted poor image quality and lower-res textures while using it.
For all other cases, chose Original. Notably, this encompasses running widescreen cheats and patches for N64 ROMs, which are designed to output anamorphic widescreen. This also includes N64 games which offer widescreen support, such as Donkey Kong 64*. Just be sure to configure your emulator for a 16:9 output so it can stretch accordingly.

*although DK64's widescreen mode has some UI scaling issues. My advice: always look for a ROM patch or cheat!
Overscan
GlideN64 allows you to specify different cropping values for all four sides of the screen. This is useful for selectively zooming your render to omit unwanted letterboxing, UI elements, etc.
Keep your desired aspect ratio in mind in order to configuring proportional cropping values. For example, if you want to crop 24 total pixels from the sides of a 16:9 output, then you'll want to crop ~42px total from the top and bottom.
From what I understand, cropping this way is theoretically advantageous to cropping in post-production, because you don't lose any rendered area - provided your configured scale/resolution exceeds your display size. But I'm not actually sure when/how the plugin applies overscan cropping so it might not matter.
Texture packs
See my dedicated guide here.
0 notes
Text
Finally got JJBA on the PS1 working, without the weird edges cut off! I used DuckStation, and in the display settings, changed the crop setting so it wouldn’t cut off the overscan.
Heh! Now I can enjoy a classic fighting game without getting distracted by graphical bugs I can’t fix!
Plus, if you have a PS4 controller, you can play it (sorta) as Capcom intended! There’s also at least one wireless mod kit for the original PS1 for even more authenticity. (Most authentic would be the actual hardware, of course, but those discs are expensive!)
1 note
·
View note
Text
What does a matchmoves artist d
In vfx classes in Pune, students learn how to modify images on the screen to create effects that aren't practical to capture in real life. You can enter the field as a professional with the help of a vfx education. The production of visuals that are impractical to make in real life is referred to as visual effects, or VFX.
Matchmove artists pair live-action and computer-generated (CG) sequences with specific shots in order to successfully merge the two types of scenarios.
They copy actual backgrounds (plates) on a computer in a way that precisely replicates the camera used on set, right down to lens distortion. They do this by tracking the camera movements to guarantee that the real and virtual scenes are perceived from the same angle.
On occasion, Matchmove's inventors travel to the shooting location to take measurements and set up tracking markers. Then, using these markers to track the camera movement, they determine the relevant coordinates in the 3D scene. In this procedure, 3D tracking software like Maya or 3DEqualizer is used.
Matchmove artists are also capable of performing body and object tracking by using markers to replicate the motions of people, cars, and other objects in computer graphics. In order for the compositor to eventually integrate them without any obvious gaps, the generated motion files (camera, object, or body track) are then transmitted to various departments via the VFX pipeline.
Matchmove artisans produce incredibly precise and painstaking work. It needs to be pixel accurate, thus they must have an eye for detail. The live-action and CG movements must be in perfect alignment, and they must figure out how to fix any errors.
What abilities do matchmove artists possess?
Learn how to properly model camera motion in virtual 3D space to reproduce a scene using math and physics.
Knowing the basics of a virtual 3D camera includes being aware of filming techniques and lenses, as well as overscan, parallax, and distortion concepts.
Software proficiency: be knowledgeable with a variety of relevant tracking, 3D, and compositing programs.
In your work, be careful, incredibly correct, and detail-oriented. Additionally, you should be very good at solving problems.
Keep the VFX teams and the on-set crew aware of schedules through communication.
Who does a matchmove artist work with?
Matchmove artists, the live-action production team, and data gathering specialists work together to put up markers on the set. After receiving the work from the matchmove artists, the layout artists check the framing, composition, and camera angle of each VFX shot.
0 notes
Last Seen Blogs

sooq7bh
سوق البحرين

thewitchzamira
Zamira Zatanna

fandompenguinocs
The Character Notebook

tahindia-blog
TAH India

devaheart945
Nene and Amane are my literal children