#data transfer tutorial
Text
Re: microsoft excel though, teaching myself to use it literally changed my whole career and got me out of the retail/call centre mines so I shan't slag her off too much
#the gamer mindset of looking up tutorials served me well here#vlookup and pivot tables are simply cheatcodes to me#.csv data transfers are a boss with high hp etc etc
9 notes
·
View notes
Text
16 useful 'Curl' Commands in Linux
Curl is a command-line tool used to transfer data to and from servers. It supports various protocols including HTTP, HTTPS, FTP, SFTP, and many more. The tool can be used to download files, upload files, make requests to APIs, and more. In this article, we will explore the different options available in Curl and understand how to use them with examples.
How to Install Curl in Linux
Curl is…
View On WordPress
#command-line#cookies#curl#data transfer#download#example#FTP#guide#headers#HTTP#internet#linux#options#protocols#proxies#redirects#transfer rate#tutorial#user-agent
2 notes
·
View notes
Note
how did you get started making music, tools-wise?
I've talked about this a bit before and I don't necessarily recommend doing this, so skip the following two paragraphs and go right to the one under the break if you actually want the method I recommend
I lied to a girl I liked from my school and told her that, because I could play guitar I could also play piano, so I could teach her to play piano. both of these statements were lies.
I had to panic and learn both guitar and piano one week ahead of the lessons I was giving her as an excuse to hang out. so I self-taught in a haze of panic and "maybe she'll like me" (she did not) (but she kind of did) (but she was bicurious) (but she was wishy-washy on if she wanted to get together and her parents didn't like me) (and her parents were homophobic) (I think she might have texted me at one point years down the line to tell me she had a girlfriend but it was after I deleted our text history and I'm chronically unable to remember to put people's names into my contacts so who knows)
but that's all an aside. that's a bad method.
anyway if you want to start making music in earnest, doing what I did when I got serious about making songs instead of trying to impress girls whose parents wanted to destroy me with their minds here's a better answer
go acquire FL Studio. it's apparently really easy to do this because people have been acquiring it for years, or so I've heard. FL is good for learning because you've got 20 years worth of free tutorials available to you on youtube to dig through and plenty of stock vsts to play with out of the box
FL Studio is, realistically, the only tool you actually need to start making music. you could get away with less, but it's what I used, and as long as you don't pick up Specific Bad Habits, your experience with it will transfer to other DAWs if you decide to switch it later
that's all, really
if you go this route, the golden rule I'm going to impart on you right now is that you need to have a limiter on your songs. the default FL studio song templates have one, so you should keep it until you know enough to know why you might adjust something like that
it doesn't matter if it sounds fine in the editor without a limiter. everyone thinks it's not a big deal at the time, but as you get more experienced, there's literally nothing short of getting in legal trouble that you'll regret more than realising that your old work is almost entirely unsalvageable because you didn't put a limiter on it and now half of the audio is just lost data to clipping
I'm gonna put a few more recommendations for things I've used, just so you can consider them if you need something else to chew on. everything past this point is entirely optional and you'll do just fine with FL Studio alone. in fact, probably don't worry about everything below the line
-=-
items marked with [F] are free.
DIGITAL AUDIO WORKSTATIONS THAT AREN'T FL
for tracker-based editing and chiptunes, use Renoise. you'll either love or hate trackers, and while they have a steeper learning curve than piano roll DAWs, they might come more naturally to you. I personally think that Renoise is a lot of fun to use. it kinda has an "addictive" quality to it, as funny as that is to say
for quickly sketching songs, use [F]Jummbox. it's an html workstation (multiplatform!) that writes your sketches to a url, meaning it's pretty easy to collaborate on musical sketches. Jummbox is good for making chiptune style instrumentals, but what makes it especially accessible is the fact that it works on a piano roll system, which will be familiar to you if you're working in FL
for writing sheet music, I recommend starting with [F]Musescore. I'll warn you right now that there aren't really any good notation editors and you're making lesser-of-evils decisions when you pick any of them, but it's probably the best compromise out there right now. it's the one I use when I need to hand something to a physical musician. you can also export pieces as midi, although there's better ways to do that lol
-
VSTs
if you can acquire Pianoteq, do that. if you feel uncomfortable with acquiring it, [F]Keyzone Classic is free and can sound pretty nice with a bit of work, but you really have to learn to work with it
if your workstation can handle it performance-wise, go pick up [F]Vital - Spectral Warping Wavetable Synth. there's tons of free presets for this out there and it sounds good. cool synth. Serum: Advanced Wavetable Synthesizer is also good and has plenty of presets, but it's on the pricy side, so consider how comfortable you are with [finding a friend to buy it for you]
[F]Decent Sampler doesn't do much out of the box, because it's just a tool for playing sample banks, but if you go to [F]Pianobook, you can find tons of weird and fun sample packs of just about everything you can imagine. sounds derived from folk instruments, industrial equipment, lego sets, stylophones, choirs, whatever. incredibly useful.
Valhalla VintageVerb. this is the reverb plugin. you want this one. [F]Valhalla Super Massive is also good but it's more focused on alien-sounding reverb effects and enormous spaces, so it's kind of got a niche use case and you should be a little careful with it
if you've heard a lo-fi hip hop song on youtube, it probably used [F]iZotope Vinyl. this one can save you a lot of time if you're going for that sound because it comes with all the little vinyl flourishes outside of compression (like dust crackling) that you'd otherwise have to add yourself
[F]Genny VST is advertised as giving a genesis/megadrive sound, but what actually makes it shine is that it's an actual synth emulating the YM2612 and SN76489 sound chips. this means you can create your own sounds that work within those specs, which is a lot of fun! definitely beats just using samples, if you ask me
-
HARSH VSTS THAT I PERSONALLY LIKE BUT WHICH ALSO MIGHT !!HURT!! YOU. SO BE VERY CAREFUL USING THESE.
[F]Tritik Krush is a bitcrushing plugin. it does a good job of bitcrushing and downsampling. I use it a lot in my songs, but you've really gotta know how to keep this one under control, because it's fully capable of making painful sounds on accident and can completely devour your mix
[F]FSA Latcher is a gorgeous noisebox. it screams in horrible ways and makes dying machine noises in various colours. this is the musical equivalent of working with radioactive material, so be extremely careful using this in anything you don't want to hurt the listener's ears
girlfriend just told me I have to recommend [F]Noise Engineering Ruina to you if I'm making a category with this heading. I don't personally use it, but she likes it (she's better at music than I am) and it's free, so you should go pick it up. "it annihilates sounds very deliciously" (maybe I should use it)
-
hope that helps a bit!
179 notes
·
View notes
Text
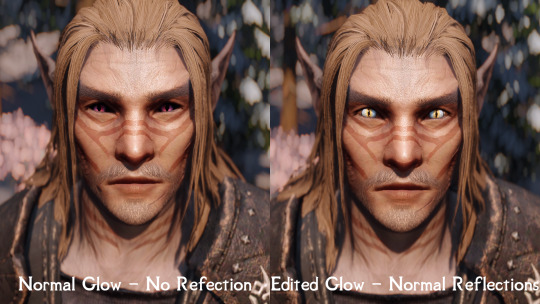
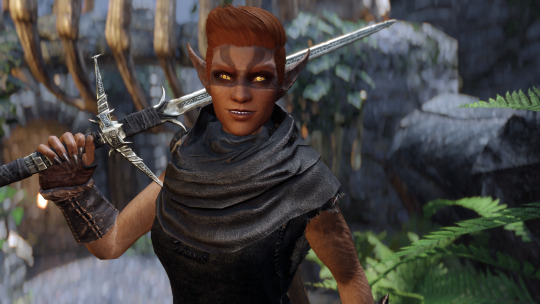
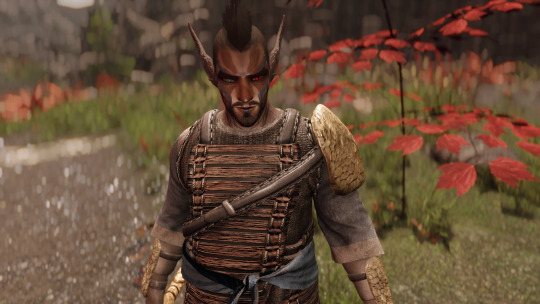
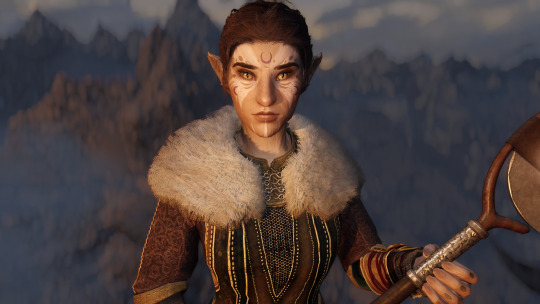
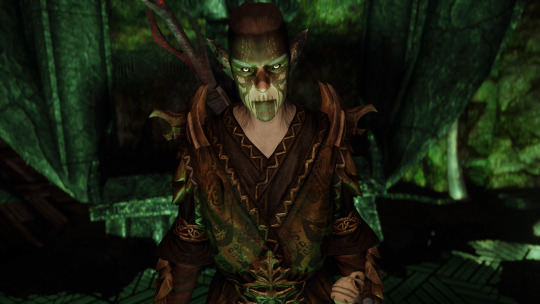
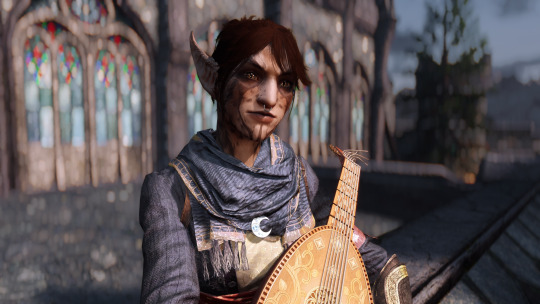
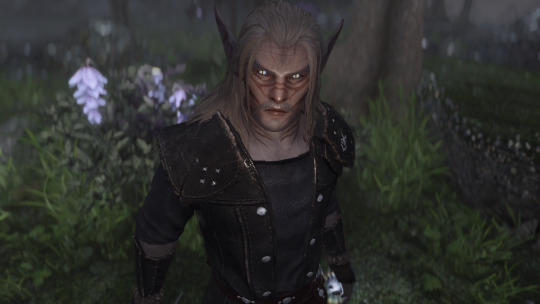
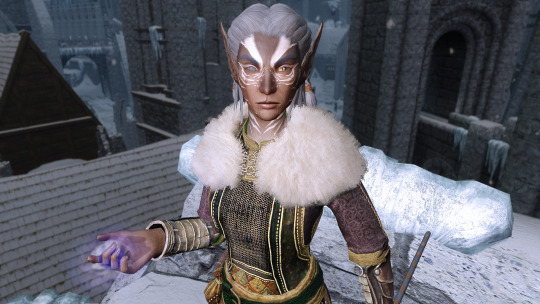
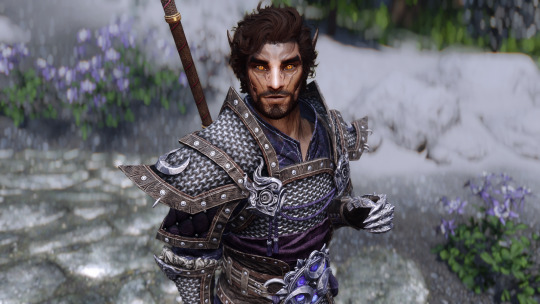
Upcoming Update: Lunar Lattice Tweaks Full Release
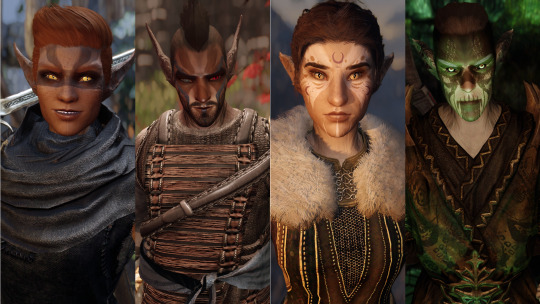
Helloooo Ohmes-Raht enjoyers!
First off, HUGE thanks to @littlemissf for helping me fix a lot of issues I was struggling with, and for being super nice and patient with me! I would not have done the full version without you!
Secondly, this mod will not work automatically with current Lunar Lattice characters. With a little effort, I have been able to update some presets. I had been considering writing a tutorial on how to port your old character heads, but ehhhh...
Anyways, what's new?
All old .tri files have been replaced with their appropriate HPH versions: this will fix crashes, issues with sliders, etc. They will no longer have a truly unique morph, however, though original-look presets can be converted
No longer based on the Default morphs: instead, they use Wood Elf morphs. The headparts/RaceCompatibility script have been updated to reflect this. This also means that Wood Elf presets should be transferable.
Removed the HP LLK brows/scars/etc.: they are simply duplicates of HPH and not needed any more
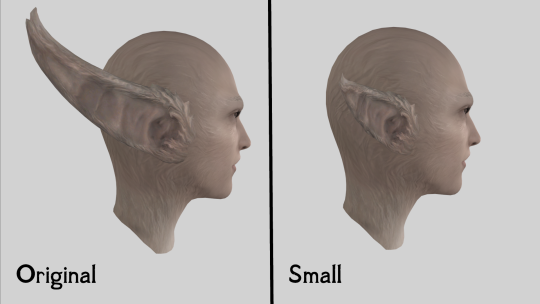
Separated male and female ear meshes. Edited all ear options to sit closer to the new head morph. Stick-out ears look a little better connected now.
Added two new ear options: Small and Small Stick-Out. These are as close to regular elf-sized as I could get.
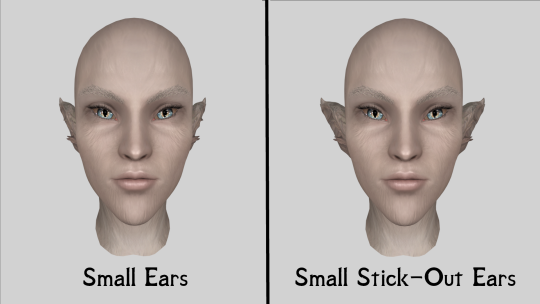
Changed up the ear selection: I've added the ear types as additional heads in the Face Part slider. This avoids the issue of ear parts stacking/deleting your eyes, while keeping compatibility with other head parts (like beards etc.)
All ears have been converted to BSDynamicShapes and I created .tri files: meaning they should follow some facial sliders and you can now use the Sculpt tool on them. Can't seem to get them to show facetints, unfortunately, so if the ear base overlaps with a warpaint, you may want to sculpt it down
Changed the eyeglow method: instead of using a mesh with a glowmap, the iris mesh now uses the regular environmental mapping and glows via emissive data. This allows for the iris to be cubemapped like the rest of the eye while still glowing
Changed the eyelashes to use the ones from Fair Skin
Adds the LLK hairstyles as options for all humanoids
The main caveat I've found with this version is that the regular elf ears exist under the merlike ones. As long as you don't enlarge them via sculpting or edit the ear sliders, it should be fine.
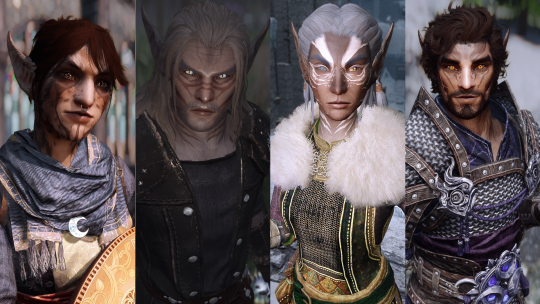
I am also releasing a new mod with RaceMenu presets for the LLT Full Release. It will have 4 Full Release Style presets, and 4 Classic Style presets that I've converted to work with the update.
Currently, I need to update all the earring meshes, which is going to be a big job.
Full-sized pics under cut (click to enlarge)
130 notes
·
View notes
Text
Tutorial: Adding Charms to Nails
was asked by @vexsims2000 for a rigging tutorial for adding charms to nail meshes.
This tutorial will assume you already know how to create meshes using blender, how to properly weight them and have a basic understanding of uv_1 transfer
make sure you have your nail mesh ready to go, confirm they are placed correctly, weighted and have a proper uv_1 map
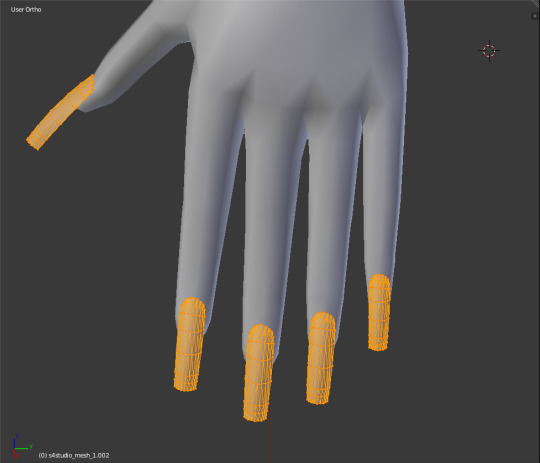
2. Add your charms, they can be any shape/size and place them onto your mesh

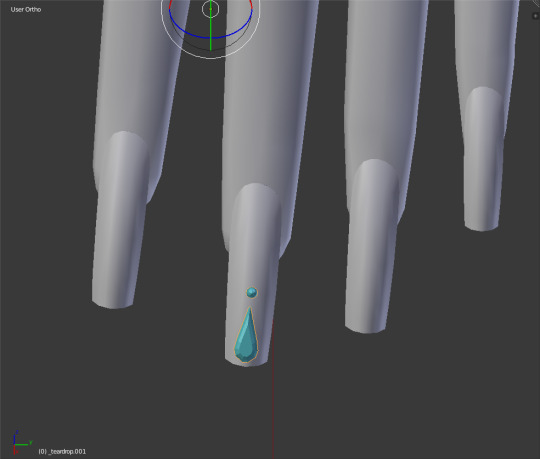
3. Using your base nails as a reference, transfer the finger weights onto your charms.
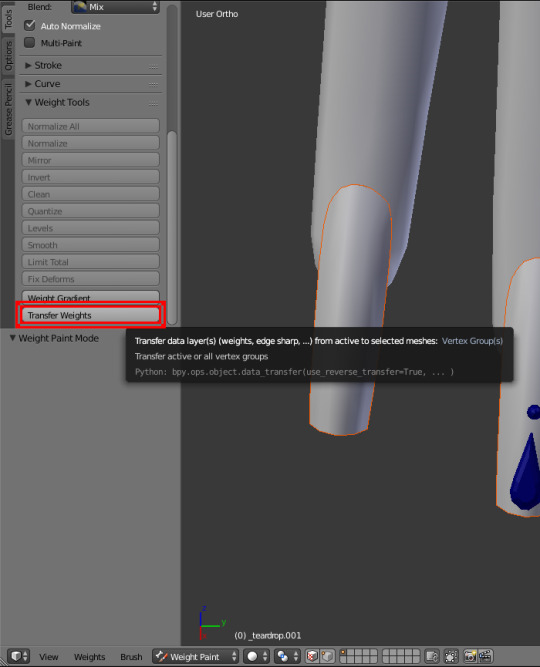
click your reference mesh, shift+click your charm then enter weight paint mode
click 'transfer weights' in the tools tab
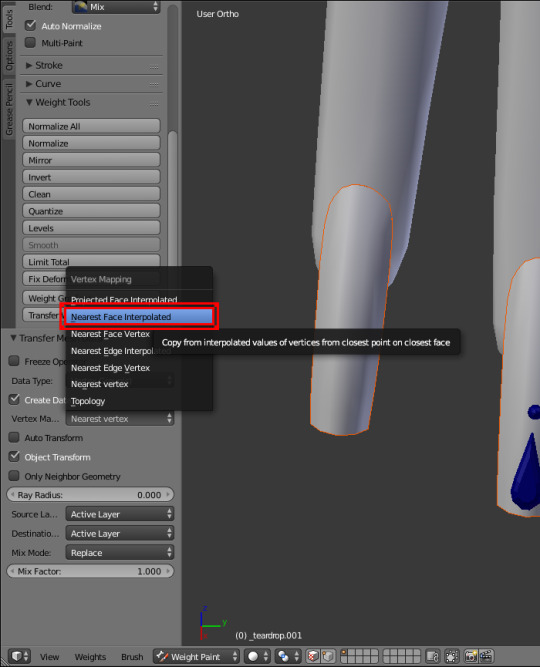
in the vertex mapping drop down menu click 'nearest face interpolated'
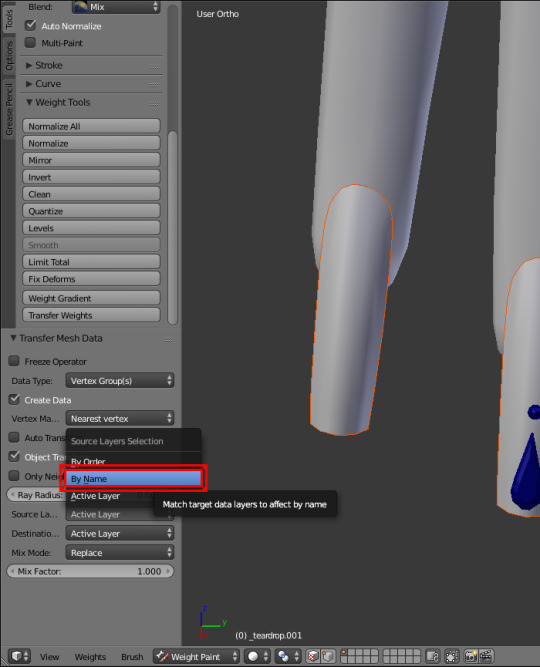
in the source layers selection drop down menu click 'by name'
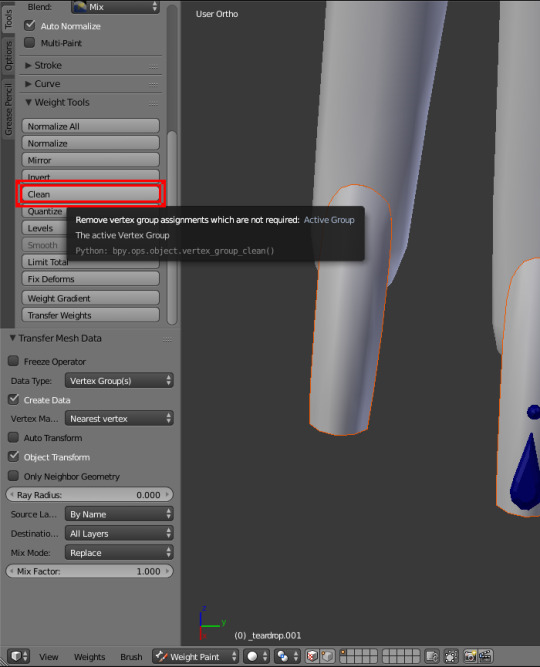
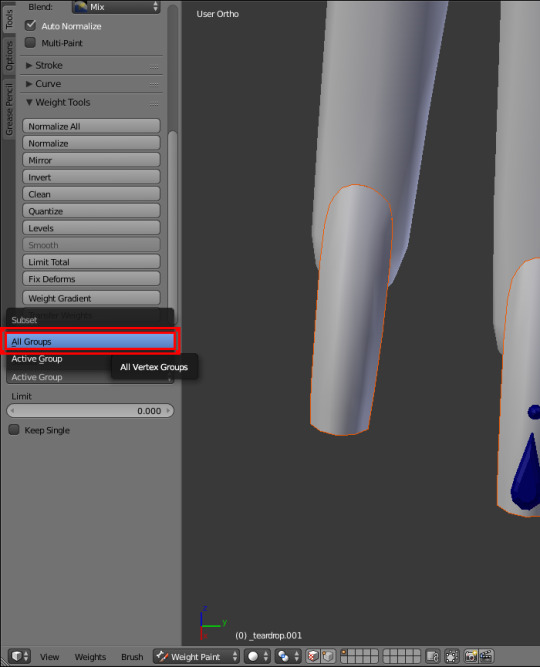
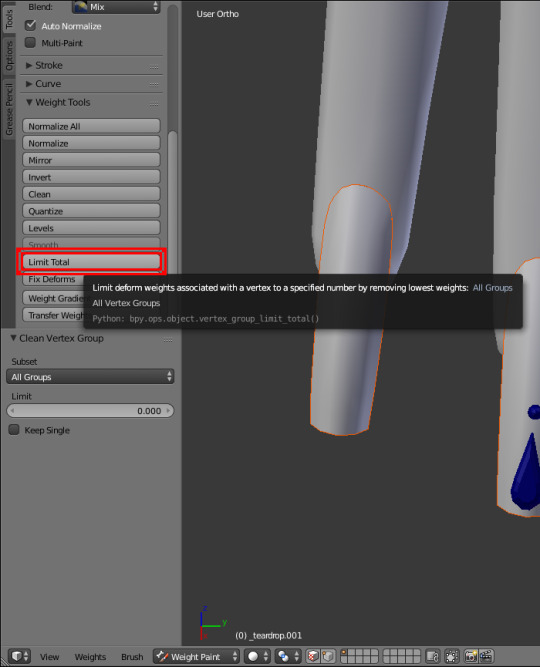
4. Then click 'clean' and in the subset drop down menu make sure it says 'all groups'. Finally, click 'limit total'
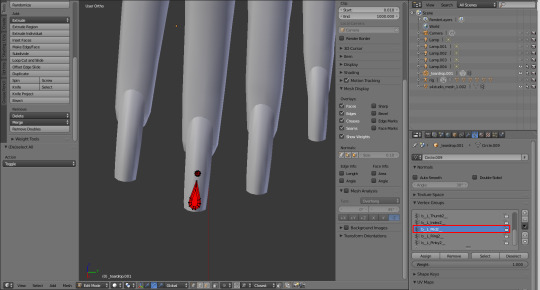
5. Check your weights: make sure none of the colors from the other groups are spilling onto the desired bone
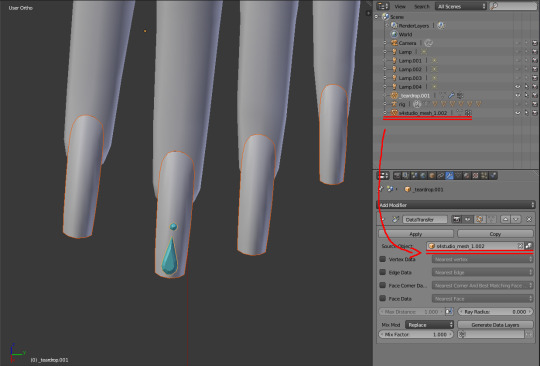
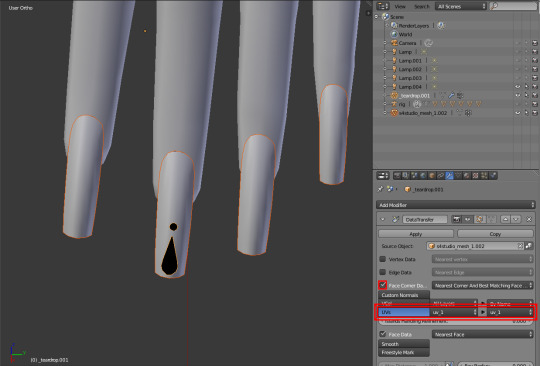
6. UV_1 transfer
make sure you're in object mode
click your charm mesh and head over to the modifiers tab, add the 'data transfer' modifier
in the source object drop down, find and choose your original nails mesh
check 'face corner data' and click UVs to highlight (this may change the color of your mesh)
click the 'all layers' drop down and select uv_1, do the same for the 'by name' drop down
click APPLY
7. now you can join your meshes together and test them out in game
Additional Notes:
I used the base game nails as a reference for my original nail mesh: they are the best meshes to use for weight + uv_1 transfer
sometimes if charms are big enough they can get mixed up in the weight + uv_1 transfer, always remember to double check weight paint and uv_1 (it can get confusing cause the fingers has so many bones)
hope this helps~
26 notes
·
View notes
Text
It seems Firefox and adblocker ultimate negate the anti adblock pop ups on YouTube. I keep seeing lengthy tutorials on how to get past the pop ups for YouTube on here when you just need Firefox and adblocker ultimate. It takes literally 5 seconds to Google Firefox and download it. It transfers your data from chrome automatically. It has adblocker ultimate pre installed. If you use chrome willingly that's on you babes
38 notes
·
View notes
Text
Obey Me (OG) Newbie Guide


Author's Note
There are multiple guides for this game existing already. Most could be found in Obey Me sub-Reddit or by searching in Google. Since the game is already 4 years old, this game has finished the main storyline and already moved on to a new prequel game called Obey Me Nightbringer (NB). Obey Me (OG) is still up and running at the time of this writing, since they run the events in both OG and NB, so if you want to still play this game, then that's up to you. Keep in mind though that this game is grindy.
In this post, I'll make a concise guide that will help new players (hopefully) traverse in the game. As always, this guide isn't only from my own experience, because I'm going to include tips from different sources here. The links for the sources could be found at the bottom of this post. I've created this guide with the idea that this is my game notes just in case I forgot about this game.
When starting an account
You can't reroll account in this game thru normal means.
It's not recommended to reroll in this game since you'll get a free UR Asmodeus card in mail but, if you're like other players who want to reroll just to get a card of their favorite guy or you want to get ahead by having more UR cards early in the game, then here are the steps.
Play the tutorial by skipping dialogues until you get a 10-pull. The cards you'll get is fixed.
Keep skipping until you clear 1-6.
Click the home button and go to mail after being bombed with announcements. Claim all. (You'll get enough to do a 10-pull.)
Roll in Nightmare. Preferably in event banner.
If you don't like the results, create transfer code for this account. (Walkthrough on how to setup Transfer Password here.)
Close the app in this phone.
Have a second phone or an emulator (e.g. Bluestacks) with Obey Me app.
Open the Obey Me app in the second phone or emulator.
From the title screen, click Transfer Data > Enter Transfer Code > Input your Transfer Code and Transfer Password > Tap Transfer
Once done, the account is now transferred to the second phone/emulator. Close the app.
You could use the first phone to create another account again.

All about UR or UR+ cards
UR/UR+ cards are the endgame goal to collect in the game. The difference is that UR+ cards either have outfit for character or moving background, while UR cards don't. Both have similar power level.
UR/UR+ card is the highest rarity. SSR cards could work for early game, but would need to be replaced once you reach harder content in game.
There are two types of cards needed to create a team - demon cards and memory cards. Demon cards can be obtained from Chapter A, any event banners, or event reward ladder, while Memory cards from Chapter M, from event reward ladder, or from shard farming in hard mode in lesson 61+. Chapter A and Chapter M are considered standard banners in game.
NOTE: You can't have 2 demon cards of the same character in 1 team. You need to have varying characters for each attribute.
Different ways to obtain UR/UR+ cards:
free pull in Chapter A for demon cards
free pull in Chapter M for memory cards
[RECOMMENDED] pulling in event banners with devil points (DP) or demon vouchers (DV)
[NOT RECOMMENDED] pulling in Chapter A and Chapter M with DP or DV
buying UR card shards in Akuzon with raven (Akuzon > Exchange Raven > Piece of Card)
grinding past events in Lonely Devil for UR cards
UR memory card shard grinding in hard mode of Lesson 61+
UR memory card from limited-time event login rewards (happens during holidays or anniversaries)
UR demon card from 10-pull birthday banner
** It is advised to save up the DP and DV for the limited-time event banners.
** It is advised to save up DP or DV enough for a 10-pull before your birthday. The date you write as your birthday will have a special 10-pull banner that will guarantee a UR card.
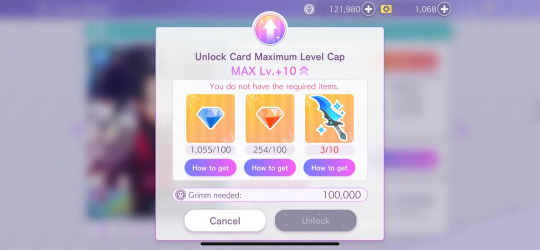
NOTE: You need 80 card pieces and 60,000 grimm to form a single UR card.
Surprise Guest
Surprise Guest randomly comes out after you manually battle a stage. One of the 3 guys in the demon cards you used will appear. Getting their 3 interactions right make them gain intimacy points.
Their preferred touch interactions after battles can be found here. Better go look at the list yourself because the options are many.
You can also get gifts when you get a heart reaction for all 3 interactions. You could get 6 gifts per day. Gifts include:
2 AP x10
2 Grimm x1,000
2 Raven x1
There are several ways to obtain gift items for characters during Surprise Guest:
can be bought in Akuzon > Items > Present, costs DP
[RECOMMENDED] can be bought in Akuzon > Exchange Raven > Present, costs raven
reaching certain point requirement in event reward ladders
unlocking gift nodes of Devil's Tree from cards (Click here to find out more.)
possible reward from sending characters in :D Jobs
** To know more about intimacy, click here to check Thal Fox's in-depth guide on intimacy.
** Here's the updated link for the Lesson Intimacy Bonuses.
All about Devil Points (DP)
Devil Points are premium currency used in game and can be bought using real money.
From one-time DP sources [free]:
unlocking gift nodes in Devil's Tree in cards (Click here to know the specific cards.)
clearing the boss stages in each lesson, DP found in To Do > Total > Tasks
reaching certain point requirements in event reward ladder
clearing the missions in To Do > Total
clearing the missions in To Do > Demons
claiming event login rewards (happens during holidays and anniversaries)
From recurring DP sources:
completing To Do > Daily (18 DP)
claiming Day 8 and Day 14 rewards in Attendance card for non-VIP players (10 DP)
claiming Day 8 and Day 14 rewards in VIP Login Bonus for VIP players (30 DP)
TIP: To do the level up card x3 and upgrade devil tree x5 daily mission, do these using N, R, SR, and SSR cards you have. You could easily get these missions done with minimal grimm cost.
All about Demon Vouchers (DV)
Demon vouchers are used to pull in Chapter A and Chapter M in Nightmare. These can also be used in limited-time event banners.
Ways to obtain DV:
unlocking gift nodes in Devil's Tree in cards. (Click here to know the specific cards.)
buying DV in Akuzon > Exchange Raven > Nightmare, costs 45 raven
completing missions in To Do (Click here to know what specific missions rewards DV.)
claiming event login rewards (happens during holidays and anniversaries)
reaching certain point requirement in event reward ladders
buying the flash sales with DP
TIP: Save enough DP to buy these flash sales. To learn more about these sales, click here to check out Thal Fox's comparison guide on different flash sales.
[PRIORITY] Level Up sale - costs 99 DP
Solomon's Summoning Sale - costs 150 DP
You Got This Set L - costs 500 DP
** Congratulations Set Flash Sale (Level Up sale) does not occur until the player has reached level 15. From that point, the sale will appear:
Every five levels from levels 15-40 (15, 20, 25, 30, 35, 40)
Every three levels from levels 43-58 (43, 46, 49, 52, 55, 58)
After reaching level 58, the sale will be made available at every level increase.
All about Grimm
Grimm is used for upgrading card level, unlocking Devil's Tree nodes, and pulling in Chapter G. This is a scarce resource if you are a F2P so you need to allocate this carefully on the cards you only want to use and level up.
Ways to obtain grimm:
sending characters in :D Jobs
doing x3 or x5 of the latest battle stages you've cleared
claiming Day 2 and Day 10 rewards in Attendance card for non-VIP players (7,000 grimm)
claiming Day 2 and Day 12 rewards in VIP Login Bonus for VIP players (30,000 grimm)
completing missions in To Do
unlocking Devil's Tree gift nodes in cards (Click here to know the specific cards.)
participating in event ranking
reaching certain point requirement in event reward ladders
buying the Congratulations set flash sale (Level Up sale)
buying the AP recovery set flash sale (appears every 12 hrs)
TIP: Unlock Ristorante Six as fast as you can so you could earn the max grimm you could get.
All about AP
AP is used to battle stages. Without it, you can't do anything in the game. Replenish rate is 1 AP = 5 min.
NOTE: It is strongly advised not to hoard APs by letting your AP bar capped. Better spend the APs to let the AP bar replenish itself.
From one-time AP sources:
buying the Congratulations Set flash sale (Level Up sale)
completing missions in To Do > Total
completing missions in To Do > Demons
participating in event ranking
claiming event login rewards
unlocking Devil's Tree gift nodes in cards (Click here to know what specific cards.)
reaching certain point requirement in event reward ladders
From recurring AP sources:
288 AP from natural regen (if no sleep, awake for 24 hours straight)
20 AP from Surprise Guest gifts
50 AP from watching x5 ads daily
50 AP from AP exchange in Friend list
30 AP from 12pm - 2pm Fridge Mission (local time)
30 AP from 6pm - 8pm Fridge Mission (local time)
30 AP from To Do > Daily
60 AP from claiming Day 4 and Day 12 rewards in Attendance card for non-VIP players
200 AP from claiming Day 3 and Day 13 rewards in VIP Login Bonus for VIP players
200 AP from buying the AP Recovery Set flash sale (appears every 12 hrs)
All about Raven
Raven is used to buy items in Akuzon > Exchange Raven. Pretty good resource to grind for if you need specific items.
Sources to obtain raven:
claiming Day 6 reward in Attendance card for non-VIP players (1 raven)
claiming Day 6 reward in VIP Login Bonus for VIP players (10 raven)
pulling in Chapter G with 27000 grimm until you max the skill level of your N, R, and SR cards, the next pull with max skill level would convert the card into raven
unlocking Devil's Tree gift nodes in cards (Click here to know the specific cards.)
potential reward from sending characters in :D Jobs
reaching certain point requirement in event reward ladders
All about :D Jobs
:D Jobs is where you can obtain grimms, Surprise Guest gifts, raven, keys, and daggers, and increase intimacy points for characters you send.

TIP: Always send the characters in :D Jobs.
All about Daggers
Daggers are used to uncap the max level of card. This is done in order to increase the power level of the card, to be used in harder lessons in main story.
For example, UR/UR+ card has max level of 100. You need 10 daggers of same sin attribute with the card, 100,000 grimm, 100 gems of main sin attribute, and 100 gems of secondary sin attribute of card in order to increase the max level of this card. Each uncapping of max level of card is increased by +10 levels.
Ways to obtain daggers:
potential reward from sending characters in :D Jobs
reaching certain point requirement in event reward ladders
maxing out the Surprise Guest encounters for rewards in To Do (1500 max per character)
participating in Otaku Boot camp (Do they still run this in OM OG?)
All about Devil's Tree Items
Devil's Tree items are needed to unlock the nodes in Devil's Tree.
Ways to obtain the said items:
doing the Akuber orders (each day has corresponding sin attribute)
completing missions in To Do
reaching certain point requirement in event reward ladders
unlocking Devil's Tree gift nodes in cards (Click here to find the cards.)
grinding the hard mode stage for RNG drop of items
All about Lonely Devil
Lonely Devil is a mode where you could rerun the past events in game. You could unlock a past event using LD tickets or by paying 10 DP.
Players who have missed their desired rewards from the event ladders rerun this event in order to continue what they have started. The total points acquired from previous run is saved and could be continued on your next run of same event. The event rerun lasts for 4 days. However, cheat cards don't work in here.
Lonely Devil is a great way to obtain UR memory cards in the game. Daggers could also be obtained here.
Ways to obtain LD tickets:
unlocking Devil's Tree gift nodes in cards (Click here to know the specific cards.)
reaching certain point requirements in event reward ladders
potential event login reward (happens on holidays or anniversaries)
** To know more about Lonely devil, click here to view the in-depth guide of u/SeriousLatte.
All about D-energy
D-energy is used to increase the chances you could have in capped battle stages. Battle stages that have x3 cap are event stages and hard mode stages. Using one D-energy gives 3 battles. If you run out of D-energy, 5 AP will be used to get 3 more battles.
Ways to obtain D-energy:
unlocking Devil's Tree gift nodes in card (Click here to know the specific cards.)
buying the Congratulations set flash sale (Level Up sale)
reaching the certain point requirement in event reward ladders
All about Card Mechanic and Total Power
UR/UR+ cards have max level 100 and could be uncapped until you reach max level 200. SSR cards has max level 80 and could be uncapped until you reach max level 160.
Each card rarity has their own power level that is used in battle stages. This part will be further explained in a separate post (because I think I'm almost reaching the 30 max image cap in a post). I will link the post here later on.
All about Lesson Summaries for Obey Me (OG) Main Story
If you don't want to grind the main story and just want to read the whole story, here's the link for the lesson summaries for lesson 1 to lesson 80.
Miscellaneous Info
You can drag your finger across the hearts that appear on screen during battle instead of tapping them individually. WAY more effective.
Choosing quick clear x3 or x5 on battles only gives EXP to player level, not including the card level, but you still get grimm and rewards.
Save glowsticks. Rainbow glowsticks are the more powerful buffs in battle.
You don't need to complete all daily missions in To Do. Just clear 7 missions in order to get the 18 DP daily.
You can leave your rewards sitting for as long as you want, and collect them whenever.
AP will carry over when you level up.
You can edit the game's graphics settings if you have lag. Just go up to the top right corner and hit the settings gear.
Work towards building a deck that covers all colors with a variety of characters, both demon cards and memory cards alike.
Try to keep your in-use cards (your deck, as opposed to your overall collection) evenly leveled.
Don't forget to level your memory cards. They are also important in total deck power.
Daily server resets at midnight JST or UTC+9. Convert into your local time to know when it will reset in your location.
Useful Resources
Resources to look into to know more about this game.
https://karasu-os.com/
https://obeymewiki.com/
https://obey-me.fandom.com/wiki/Obey_Me!_Wiki
Sources
Banner Image Source
How to reroll in the game using emulator by u/Guilty-Ticket
How to reroll in the game using second phone by u/AngelicaLily
How to setup Transfer Password walkthrough video by Obey Me Official
Transfer Data from Fandom Wiki
Surprise Guest
Devil Tree Rewards from karasu-os.com
Intimacy Guide by Thal Fox
Obey Me Flash Sales by Thal Fox
Flash Sale from Wiki
Obey Me Guide from VN Guides Wordpress
The Hidden 68 DV in OM by Thal Fox
F2P Guide to Obey Me! by u/gniehc
Daily Login Bonus from Wiki
How to obtain daggers? Question by u/Master-Computer4437
Ways to farm daggers by u/kindacutekindapunk
Guide on Lonely Devil by u/SeriousLatte
Unlocking a Card's Maximum Level Cap from obeymewiki.com
Using DP for getting more battles answer by u/Clarasiir
10 Tips for people who are starting out by u/RustyBoyo
Lesson Summaries for Obey Me (OG) from obeymewiki.com
Lesson Intimacy Bonuses from Fandom Wiki
Obey Me advice thread from u/LadyBastilla
➥ Back to my otome game masterlist.

Update Log
12/20/2023 - Uploaded this post.
01/01/2024 - Added Player's birthday info
01/27/2024 - Added the reminder line at the top and server reset in Miscellaneous info
20 notes
·
View notes
Text
"TUTORIAL HELL" is Both Harmful and Imaginary
Day 2862
Every time I go on a programming subreddit or other public forum, I see so many distraught learners in anguish that they can't start "A Real Project", and are "stuck" on tutorials, as state which has now come to be referred to as "Tutorial Hell."
It honestly makes me extremely mad that people have made Tutorial Hell into such a meme that new programmers are now scared of it. It's unnecessary gate-keeping around what counts as A Real Project, and it's harming programming students who could otherwise be happily progressing on their way to mastery if they hadn't been poisoned by this idea.
There are zero useful aspects to the concept, and it only prevents students from learning rather than helping them learn. Every programmer in the world, from you to the creators of Google, has to get their ideas based on SOMETHING:
A problem they want to solve for themselves (or a friend, or a customer).
Some knowledge they already had, applied in a new way
A new skill they've just picked up from another project or lesson
A new feature that was just introduced into some technology they use
There's literally no way to get an idea except to have had some experience that leads you to it.
So starting from a completely empty file, and divining a new project based purely on inspiration is of course a very intimidating task, but luckily we don't ever actually have to do that.
The process of developing projects is actually very natural (even inevitable???) if you transfer your code more gradually from "100% Tutorial" to "100% Project":
Start off by doing the tutorials as written. Make sure that you're actually coding along and checking in your code to a github repo.
Every time you finish a tutorial, think of some tiny change you can make to the code to "make it your own." This can start out as small as just changing some text on the screen, or the colors it's using.
Over time you'll naturally get some more ambitious ideas for how to make the project into something even cooler, and you'll start adding larger things like a new feature with its own functions.
Eventually you'll get enough practice expanding projects and applying ideas that the project is mostly your "custom" code instead of code the tutorial told you to write.
Now maybe you have an idea to make a clone of this project but make it even better.
Now you're making A Real Project, From Scratch, but it doesn't rely on you having some eureeka moment of inspiration.
Here's what those steps could look like in a more specific example, from a common tutorial:
Complete a tutorial on how to fetch data from a weather API.
Think, "how could I do some additional fetching to practice more?"
Decide to fetch some data from a movie API instead.
Think, again, "how could I do some additional fetching to practice more?"
Realize that you could use the skills you've learned to fetch two different movies, and iterate through the casts to see which actors they have in common.
Think, again, "how could I do some additional fetching to practice more?
Realize that you could do something similar by fetching two actors, and see what movies they have in common.
Remember that the meme "6 degrees of Kevin Bacon" is related to actors being in the same movies together.
Realize that you could make an app that tracks Kevin Bacon degrees by putting together your movie overlap code and your actor overlap code.
Take the code you've written to modify the tutorial and paste it into a new project, where start turning it into its own app.
https://apps.apple.com/us/app/six-degrees-movie-trivia/id328926385 (not my app)
Coding learners, you're going to be ok - you can take it gradually! Try to just focus on programming a lot, and what kinds of things you program will evolve naturally over time. If you want to consciously lead things in the direction of building your own projects from scratch that's great!
But trying so hard to make this transition that it discourages you from coding is hurting you for no good reason. If you stay curious enough and excited enough about programming, over enough time you'll reach this goal without even trying to.
113 notes
·
View notes
Note
hey, so i finally got around to dumping my gen 4-7 saves, and i'm dumping the pkm files with pkhex to make it easier to throw stuff into bank - i'm wondering if any of the mon files would be useful/interesting to you at all?
i have a lot of old event mons - i think most of them for gen 3/4 i put them on a flashcard and traded them over so the same ones might be floating around the internet, but i know for 100% certain i went to this distribution and at least one toys-r-us one so there might be unique ones of interest
i know i also have a bunch of ex-shadow pokemon as well as the ranch mew and phione
(and absolutely no worries if this isn't interesting at all - i just thought of your celebi story while categorising and figured i'd ask :)
anyone else sees this who's interested just let me know too
gen 3 i'll have to look into if i can use my flashcard and an old ds to dump it or if i have to just pal park stuff but. might be cool stuff i didn't transfer...)
oh super cool!! i’m unsure if i have any personal immediate use for anything but if you upload the files for the event mons in bulk i’d be willing to do the manual labor of crosschecking with publicly available distributions and separating which ones are original to you and which may have been downloaded and injected from the internet. always very cool to have new event pokemon backups even if they’re from an already backed up distribution (like, different IVs and whatnot).
on the note of gen 3 backups, you can back up gba games pretty easily with a ds flashcard and an old DS or DS lite actually, i used to do it that way before getting my GB/C/A backup device. you can find a tutorial for that here if you need one: https://projectpokemon.org/home/tutorials/save-editing/managing-gba-saves/using-gba-backup-tool-r55/
i definitely think it’s worth backing up the whole save in its original form not just for the pokemon itself but i would check all your games for any interesting wonder cards or in the case of gen 3, mystery event data as well!
13 notes
·
View notes
Text
📝Tutorial: Creating Premade Household Replacements
Some of you have been wondering how to make premade household replacements (as the ones shared here or here). So I have written down below what is known to me/what I was able to figure out so far. If anyone would like to share any additional info or tips, please do 😊

Note: If your goal is to do more than tweaking or replacing the premades, a save file is most probably the way to go. I actually ended up messing with the premade files because personally I wasn’t quite happy with EAs remake of the Goth family recently & was looking for a way to bring back the original version or replace them with my own instead.
Update/News: There’s now a tool by denton47 that you can use to replace sims from premade households. The tool came out shortly after I made this tutorial.
https://modthesims.info/d/669907/ts4-premade-household-tool.html
I keep the tutorial up for documentation and for those who prefer or might need to do things manually and/or are interested in understanding the process.
The basic process is rather simple:
Save the household that you want to use to your Library.
Create an empty package file and batch import the .householdbinary file of your household from your Tray folder.
Open the original premade household file as reference and replace all relevant household data entries in your file with those from the original file. As an optional step, you can also edit some of the sim related data.
Finally, you can also override the household thumbnails in a similar manner.
See additional note at the end of the tutorial about limitations for BG families and a heads up for non-BG sims, in particular occults - which come with an extra file (”PremadeSimTemplate”).
Below you will find more info elaborating on the steps.
1. Save the household that you want to use to your Library.
Create/modify the household that you want to use for the replacement and save it to your Library. As an alternative, download the household you want to use from the Gallery to your Library (naturally, make sure it’s ok with the creator in case it’s not your creation and you have intentions to share the mod).
Make sure that the household has all the info set-up before proceeding (like all outfits, genetic relationships, traits, likes & dislikes, jobs, skills).
Note that only household information that is transferred to and from the Library will be available. (This excludes, for example, any relationships to sims in other households as well as non-default relationship scores and sentiments. For the latter, there is an additional note at the end of the tutorial.) You can preview what information will be included by placing the household from your Library in game.
2. Create an empty package file and batch import the .householdbinary file of your household from your Tray folder.
Open Sims 4 Studio and create an empty package file:
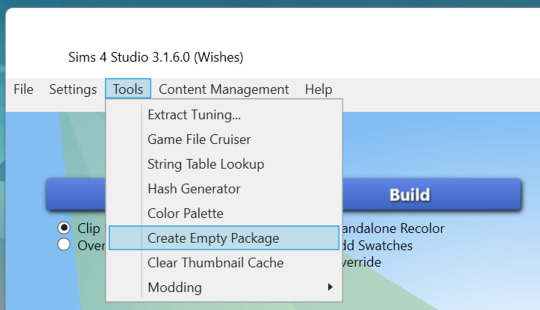
Batch import the .householdbinary file from your Tray folder to your package file. If the household was saved last, you can just select the last householdbinary file in the list. (The Tray folder is located one level above your mods folder and contains all households, builds and rooms that you have saved to your Library. Each of those creations is composed of several files.)

When you imported the file, it should show up as a “Household Template” file in your package file.

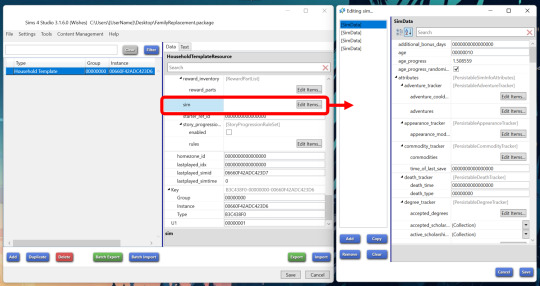
3. Open the original premade household file as reference and replace all relevant household data entries in your file with those from the original file. As an optional step, you can also edit some of the sim related data.
Open the S4S Game File Cruiser:
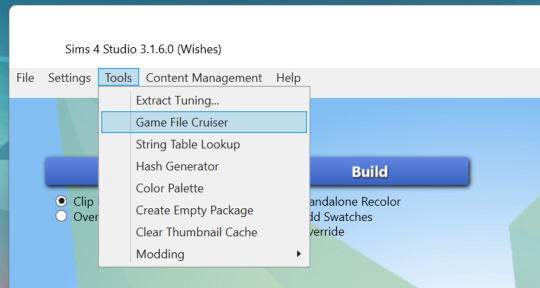
Select “Household Template” as file type and look through the families listed to find the one you want to replace. If you know the Instance ID already you can also search by this ID.

Now, you need to replace/match all relevant household data entries with those from the original household files.
As a rule of thumb, you can replace all household specific entries that don’t match.
Some of the entries might not matter or are optional, I haven’t looked into the purpose of each. But you need to make sure that the original family is replaced and that your override is placed on the correct lot, so matching the corresponding IDs is necessary.
You can/should leave the “lastplayed_simid” as it is. The data for the individual sims can actually stay as it is, in general (some more info below).
“Last_modified_time” determines the order in which the household appears unter “Household Management”. Leaving it at zero made the household appear somewhere towards the end/in the middle of that menu, so I also chose to replace it.
Below I marked the entries that I matched. (The entries in your file can also depend on the way you saved the household to your library, e.g. directly from CAS, or from CAS after putting the family into game, or as a download from the Gallery.)

As an optional step, you can then also view and edit the data for each sim that is included in the household:
Click “Edit Items…” next to the field “sim” (towards the bottom of the window).
This will open another window that will list various data about each sim (SimData). There is a very long list of sim related data and I have only looked into some of it.
If you understand what you’re doing, you can edit some of this data if necessary, like skills, careers and basic family relationships. I would avoid that, however, and make sure to include all necessary info in-game beforehand.
Most of the data, including all referenced IDs can be left as they are, based on my testing. In particular, you don’t need to match the sim IDs to make the household replacement work.
Now one thing I noticed while testing was that sometimes the premade household would spawn on the lot across the street, when I entered a new save on that lot. When you save a household from the game to your library, there is actually some additional gameplay data included. Some of it seems to be responsible for location and spawning position of the sims. Interestingly, for the issue I mentioned, resetting the value in the field “serialization_option” to zero seems to solve it. The other data, that sounds related, doesn’t seem to change anything.

4. Finally, you can also override the household thumbnails in a similar manner.
Now there are 2 options to export the thumbnails of your household: You can batch export the thumbnails from the file “localthumbcache.package” or use the Sims 4 Tray Importer, which is usually my preferred method. You can read more about the process in my post here (go to the last part “5. EXTRACTING GALLERY PICTURES FOR EDITING PURPOSES”).
The file localthumbcache will give you all of the 5 generated thumbnail size options. The Sims 4 Tray Importer, which reads the info from the tray files, will give you two sizes – but you will also only need those two sizes, as those two are the ones used to display the family in “Household Management” later in game.

Similar as for the Household Template files you can then use the Game File Cruiser to look up the original household thumbnails. Reset the file type filter (that you set to “Household Template” previously) to include all file types and then use the Instance ID of the original Household to look up the related files (this is, for example, “01BD3F7EDED01430” for the Goth family; btw., due to EAs remake, there are also the old thumbnails that you can ignore - they are actually not functional anymore as they have a different/old group assigned).

Batch export the files from the Game File Cruiser. The exported files should have a composed name as in the example shown below. The marked numbers (0, 1, 2, 3 and 4) represent the thumbnail sizes. You will only need the sizes 2 and 3.
3BD45407!8CC76500!01BD3F7EDED01430.SimHouseholdThumbnail.png
3BD45407!8CC76501!01BD3F7EDED01430.SimHouseholdThumbnail.png
3BD45407!8CC76502!01BD3F7EDED01430.SimHouseholdThumbnail.png
3BD45407!8CC76503!01BD3F7EDED01430.SimHouseholdThumbnail.png
3BD45407!8CC76504!01BD3F7EDED01430.SimHouseholdThumbnail.png
Replace the names of your custom thumbnails with the ones above (make sure to match the size) and batch import your custom thumbnails of the relevant sizes to your package file.
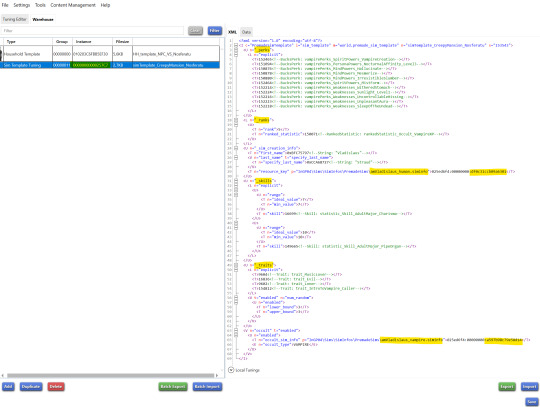
5. Additional Note
When you look through the set-up of the premade households, you might notice that the BG families have a slightly different set-up than the families from packs. Sims from non-BG families come with a so called “PremadeSimTemplate” which is referenced in the SimData of the Household Template files. The PremadeSimTemplate is a Tuning file, which you can find by its name or Instance ID via the S4S “Extract Tuning” option, via lot51s TDESC browser or using a tool like DocFetcher.
The PremadeSimTemplate contains or links to additional information for Non-BG sims.
For example, it can link to advanced relationship settings (like sentiments) via the so called ”premade_sim_relationships” file. Therefore, for example, the premade families from Cottage Living, have some sentiments set up in advance. And you can use the PremadeSimTemplate to manipulate this kind of info for Non-BG families. Now, unfortunately, the same thing doesn’t seem to be possible for BG families.
It also seems that for occult premades a lot of occult specific information incl. the occult form is outsourced to the PremadeSimTemplate. See example below. For Vladislaus, not only does the PremadeSimTemplate contain occult perks and ranks but also the occult form of the sim which is linked from a Sim Info.
Now, when you import a custom household template containing your sims, the occult form is stored in the household template itself (sim -> occult_tracker -> occult_sim_infos -> OccultSimData). However, this data will be ignored if you use/link to the PremadeSimTemplate with the additional occult data. Therefore, if you want to make use of the PremadeSimTemplate, you need to also override the Sim Info for the occult form that is referenced by the PremadeSimTemplate.
You can do so by saving your sims to your library, export their Sim Info via the S4S library viewer (details here; the export should contain the Sim Info for human and occult form) and then update the respective Instance ID to match the Sim Info Instance ID of the occult form that is referenced in the PremadeSimTemplate. Alternatively or in addition, you can also override the PremadeSimTemplate itself to change more details like perks. The most convenient way to do this is with the help of the above linked TDESC browser.
Interestingly, the PremadeSimTemplate also includes some additional non-occult data incl. the Sim Info of the human form. However, it seems that this data is not used by the game (the data from the household template is used instead).
(Disclaimer that I didn’t experiment much with occults myself. The info above is the result of trouble shooting an issue with a fellow creator.)

@thefoxburyinstitute
367 notes
·
View notes
Text
youtube
Stellar Blade - Demo Teaser
The demo for Stellar Blade will be available via PlayStation Store on March 29, 2024 at 7:00 a.m. PT / 10:00 a.m. ET.
Demo details via director Kim Hyung Tae on PlayStation Blog:
The demo features a portion of the game’s first section—up to the first boss fight—and save data can be transferred to the full game when it launches.
The demo takes place from the very beginning of the game when Eve, a member of the 7th Airborne Squad is sent to Earth on a mission to reclaim the planet from the Naytiba, up to the first boss fight. This first stage will include the tutorial phase to help you familiarize yourself with basic combat features as you explore post-war Eidos 7, a human city now infested by the Naytiba, giving you an early grasp of gameplay mechanics that will serve you throughout the game’s story.
We also have a little surprise included for players who complete the first stage.
From the smooth 60 frames per second combat to the haptics, you’ll feel through the DualSense wireless controller, there are various charms of the game that you can only confidently appreciate through hands-on experience.
For those who complete the demo stage, you can carry over your save data when the full game releases on April 26, starting from the last checkpoint. Please note that save data must be stored on your PlayStation 5 system.
The Stellar Blade demo will be available starting Friday, March 29 from 7:00 a.m. PT / 2:00 p.m. GMT.
Alongside the demo, the full game will feature the following language options:
Voice Over: Korean, English, French, Italian, German, Spanish, Brazilian Portuguese, Latin Spanish.
Text: Korean, English (United States), French, Italian, German, Spanish, Danish, Dutch, Finnish, Norwegian, Polish, Portuguese, Russian, Swedish, Arabic, Turkish, Thai, Japanese, Simplified Chinese, Traditional Chinese.
Stellar Blade will launch for PlayStation 5 on April 26, 2024.
9 notes
·
View notes
Text
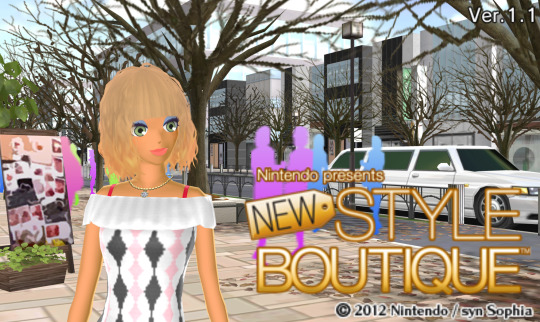
New Style Boutique DLC?
Someone on the Style Savvy discord asked about the DLC for New Style Boutique! (the EU version of 'Style Savvy: trendsetters')
So we'll be taking a little break from our standard 'My journey with Style Savvy' blog posts to take a look!
So first, I made sure we were on the latest version 1.1, (patch notes)
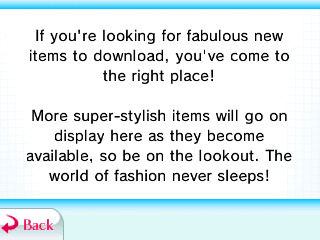
and clicked 'download' on the main menu.
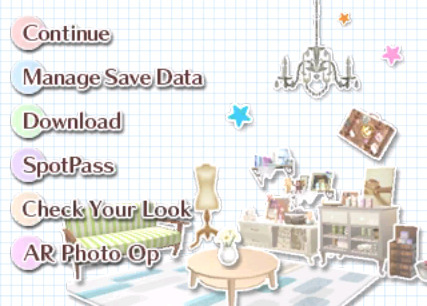
(Download option should unlock after the prologue)
This took me to a new menu, but it dose not work on citra (emulator)
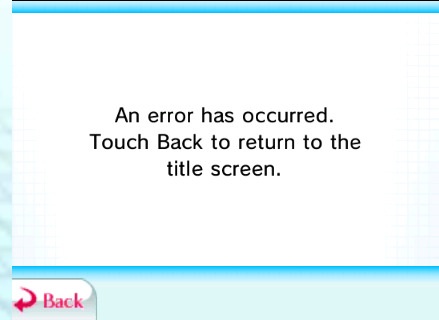
So, I decided to dig my 3ds out of storage, and I transferred my save..
I'm using a modded usa 3ds, so it's region free, but I still have a usa region eshop, so i was worried that I would not be able to download the DLC due to region restrictions. and the eShop shutdown, But...

It loaded up just fine, and I saw 3 outfit sets available for download!
It appears that Nintendo is not using the eshop servers to distribute these. It loaded up just fine, and I saw 3 outfit sets available for download!
Each one showed up with a preview, and brief description of what was included.
The first two were animal crossing themed:


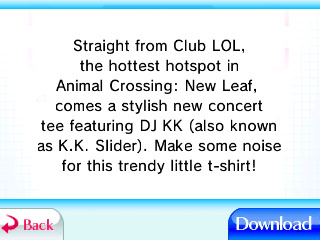
And the last one was a little different:


When downloading, any of these sets, you'll even see a 3d preview of each of the included items.
And they're not installed as packages like normal DLC, instead they're stored directly to the 3ds's SD card as 'exdata'

This may why you cant find easily installable downloads for this 'DLC' else where online (like you can for NSB2)
One you download a set, itgets removed from the list.
So once you have all three, the empty list looks like:
I don't know if the data's encrypted, So you probably won't just be able to copy it from one 3ds to another.
(This is NOT a tutorial)
But I backed it up with 'checkpoint' and copied the files to:
/citra-emu/sdmc/Nintendo 3DS/00000000000000000000000000000000/00000000000000000000000000000000/extdata/00000000/00000A90/user
and...

...not my preferred style, But it works!
Unlike Future games, they actually show original brands, instead of using purple moon!
And much like future game, DLC items have their own indicator:

I've already archived the DLC files, but I'll need to do some testing before I release them publically. (to make sure they don't break anything)
But yeah, I don't know if more DLC was added and removed before this,
But this is just a quick rundown of what I've learned looking into DLC for this game!
Hopefully someone found this interesting or helpful!
If you know the risk and want to test the files anyways, or want the raw version of these screenshots for your wiki, feel free to contact me!
Thanks again for reading!
#syn sophia#fashion game#fashion dreamer#style savvy#style boutique#3ds#new style boutique#trend setter#dlc#animal crossing#crossover#yerse#ariadne artiles#club design#club lol#DJ k.k#k.k slider#Giraffissima#trendsetters#stylesavvy#nintendo 3ds
6 notes
·
View notes
Text
sits down. hello enstarries i'm here to let everyone know the worst experience i've ever had with game account recovery. literally even aichuu was easier than whatever this fuckery is
(tweeter thread)
let me provide a little backstory first. everyone here knows i Love enstars—jpstars specifically. i grew up playing !-era enbasic, am still playing !!-era enbasic, and play the japanese version of enmusic as well. when engstars first released i gave it a try, got bigbang subaru and conquest hiyori, somehow became a vice prez for the society i'm in (and still get to mod for even months after quitting engstars. if anyone here needs an active society, contact me or toribuns on tweeter :DDD), got link click kouchan and mika... i was pretty happy with my account.
however, i quickly lost interest in engstars, since jpstars is my one and only love LOL but i kept engstars on my phone in case i wanted to return to it. and i did return to it! i played the campaign that ran during the secret swan gacha just to see if i could get natsume (i didn't ftr www)
and back i went to ignoring engstars for 476534 years. and that's where my personal problem arises. you see, i never linked my account to a tweeter acc, or google acc, or email, or whatever. my thought process was like "why would i need to do that? i still have engstars on my phone, and it isn't gonna randomly kick me from my own account right. RIGHT???" but that's precisely what happened. i opened engstars because i needed some info from the new spotlight event for the wiki, only to see engstars just kicked me out.
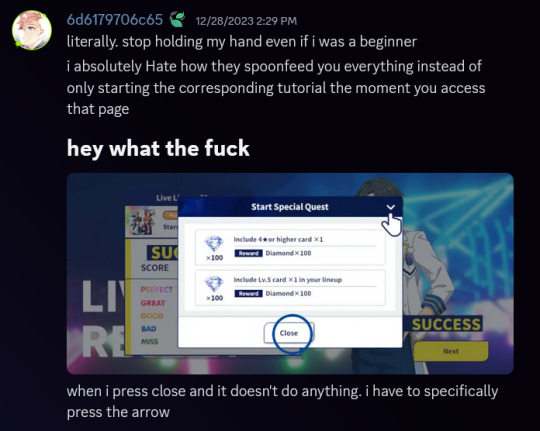
ofc i go "OH SHIT. I never linked my acc to anything." so i check support and they don't have Anything on account recovery. but they Do have something on data transfer :D it requires me to have a new engstars account in order for them to do the transfer, so i make a new account. and let me just tell you. fuck the engstars tutorial. legitimately, fuck the engstars tutorial.

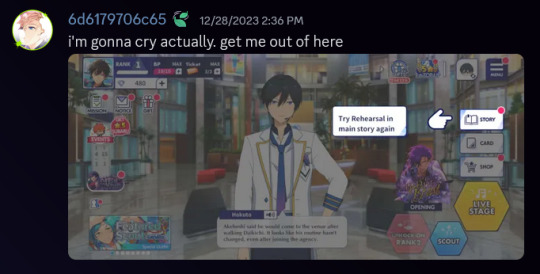
after 4753835 years i escape tutorial containment and fill out the rest of the support form, which included your typical "lost account" miseries. ("how the fuck am i supposed to know what my rank is. HOW THE FUCK AM I SUPPOSED TO KNOW ANYTHING......") eventually i do manage to fill the form and send it off. waiting game.
(also i still cannot believe engstars is an Official thing. it feels so fanmade and unprofessional. typos and spacing issues, And the app won't even let me scroll down further to read whatever it says on the second screenshot. i assume it says "Problem solving in progress" but me not able to scroll down in order to read it is bad design)

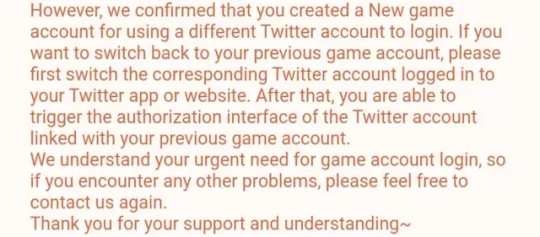
a day later—which, kudos to engstars support team, i did not expect them to only take a day—i receive a response saying they did find my account! but they also said my account was linked to a tweeter account that doesn't match the one my new engstars account—yknow, the one that they needed me to make to transfer data—is linked to.
i was pretty surprised because damn i had no idea my account was actually connected to something but okay! engstars support wanted me to switch tweeter accounts in order for me to do some.... authorization... things... seriously i can't read their response. revoking my kudos because i'd rather have a legible response than a quick one
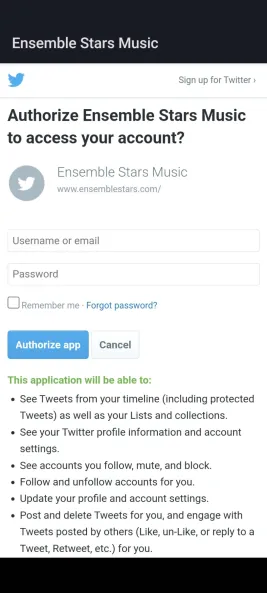
ANYWAY i try...??? to log in with a different tweeter account, but engstars won't let me, so i go directly into tweeter and revoke engstars access permissions. and after that? i expected to get back to the tweeter log in screen, but instead engstars won't even give me that, telling me that the login failed after tapping the "Login with Twitter" button.
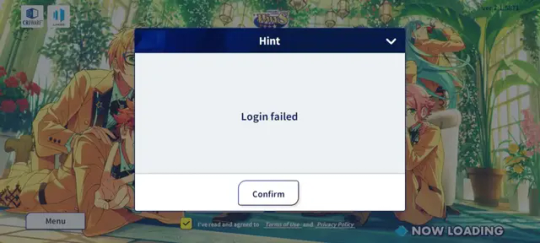
guys i'm so tired. but i'm doing my best. link click kouchan. i go clear app data for engstars, and after opening the app again, the support ticket i got was still there which is nice. i also get the tweeter log in screen again, nice. i also don't even get to log in because whatever browser engstars is using, it doesn't have javascript enabled so tweeter doesn't do anything :)))) i have to back out of the page, bringing me back to engstars and the, by now, very familiar "login failed" pop-up
that's where the story more or less ends? pauses? someone on the wiki server suggested to try login on the pc version so i let it do its downloading thing while i sat here writing this LOL it's done now. time to try that.
forgot the password for the account i was trying to get into DSGHSJDG anyway tweeter blocked my attempts because i had too many wrong ones. how long does it take until i can try again. whatever i'll end this post here... tell all your friends to keep your accounts safe because this is an absolute shitshow.
8 notes
·
View notes
Text
btw, the basic steps to do it are:
Enable virtualization on your computer
Install VirtualBox
Use VirtualBox to create a Windows XP virtual machine
Your choice of data transfer method to get the VOCALOID files into the XP virtual machine
Install the VOCALOID program on the XP virtual machine
#i just thought a tutorial wouldve been nice to have when i was trying to do that. but i couldnt find one#vocaloid
8 notes
·
View notes
Note
Mobile is a big market as ae live service games. Downside of long running games is their file sizes balloon and this isn't particularly friendly to the mobile platform. Any solutions to this problem the industry is working on?
There's a lot of tricks developers have been doing. The issue most players have with load times is that there are thresholds beyond which the player gives up and drops the game. If we can keep the player from experiencing too much loading, especially in one contiguous chunk, then we are probably good. This is usually handled in one of a several ways.

First, we try to reduce the amount of data that needs to be transferred. Lower resolution textures, compressed files, compressed audio, and so on and so forth. Reducing the overall file size through savings here and there is the first order of the day.

Second, we can try to break up the longer load times so that there isn't too much waiting in one sitting. This usually entails allowing players to play certain parts of the game without downloading the game's full assets. If we only have to download the tutorial and its assets at the beginning of the game, we can let the player play the tutorial and get into the action faster without having to wait for everything to finish transferring before we can play the game. If we only need these ten files to play this particular level, we don't need all of the others.
Third, during load times we can offer the player something to do. This can be a mini-game, a puzzle, a practice dojo, a buy/sell/equip gear interface for the chosen mission, or even an elevator ride while the player listens to character conversations. Another common thing many developers do is show bits of featured lore about the game's characters and places that can be scrolled through during the load screens. If players aren't just staring at a progress bar, it doesn't feel as annoying.

A fourth option is to enable background downloads (assuming the player allows it) while the phone is running and on wifi. Similar to how apps can be permitted auto-update while the phone is idle, the game can be permitted to download whatever files it needs while it sits resident in memory on the phone during downtimes. If we detect the device screen is off, we can use that opportunity to transfer some data.
This list is, of course, not exhaustive. There are other means of dealing with data transfer times being researched all the time. As long as transfer times are a problem, we'll keep trying to figure out better solutions for it.
[Join us on Discord] and/or [Support us on Patreon]
Got a burning question you want answered?
Short questions: Ask a Game Dev on Twitter
Long questions: Ask a Game Dev on Tumblr
Frequent Questions: The FAQ
17 notes
·
View notes
Text
Get Your Web Hosting on Cloud Nine with BigCloudy's Year-End Deals!

In today's ever-changing digital world, establishing a strong online presence is crucial for achieving success. Whether you are an experienced entrepreneur, an aspiring blogger, or someone who wants to share their passion with the world, BigCloudy is here to support you as your dependable and affordable web hosting partner.
BigCloudy has earned a solid reputation for delivering exceptional web hosting services at affordable prices. Our unwavering dedication to providing top-notch quality and ensuring customer satisfaction has gained us the trust of a diverse range of clients, including individual bloggers and well-established businesses.
We offer a comprehensive range of web hosting solutions that are tailored to meet your specific requirements and budget. Whether you need a simple platform for your personal website or a robust environment for your high-traffic e-commerce store, BigCloudy has the ideal solution for you.
BigCloudy's Year-End WordPress Hosting Deals!
Attention all aspiring bloggers! Celebrate with joy as BigCloudy's End-of-Year Sale presents an exceptional chance to kickstart your dream blog while enjoying remarkable discounts. Experience savings of up to 99% on your initial month of WordPress hosting, starting at an unbelievably low price of only $0.01!
1. Begin Small, Aspire Big
With our affordable introductory price, you can dip your toes into the world of blogging without straining your budget. Focus on crafting exceptional content while we handle the technical aspects seamlessly.
2. Effortless Integration with WordPress
Bid farewell to complex setups. BigCloudy offers a hassle-free one-click WordPress installation and automatic updates, allowing you to concentrate on what truly matters: writing and sharing your captivating stories.
3. Impeccable Security
We prioritize the safety of both you and your visitors. Enjoy peace of mind with free SSL certificates that encrypt your website, ensuring secure communication and fostering trust with your audience.
4. A Platform for Expanding Horizons
Whether you're a novice or already boast a devoted following, BigCloudy's WordPress hosting is tailored to grow alongside your blog. Our flexible plans and reliable resources are ready to accommodate your evolving needs.
5. Beyond Hosting
BigCloudy goes above and beyond by providing a comprehensive array of tools and resources to empower your success as a blogger. From informative tutorials and guides to round-the-clock support, we're here to support you at every step of your journey.
Here's what sets BigCloudy's WordPress hosting apart:
1 WordPress Site
Build a customized online presence with 1 WordPress Site, allowing you to showcase your content and engage your audience without any limitations.
Unlimited NVMe Storage
Bid farewell to storage limitations with Unlimited NVMe Storage, enabling you to store all your essential files, images, and data with complete peace of mind.
1 Email Address
Cultivate a professional image with 1 Email Address that is directly linked to your website domain.
1 MySQL Database
Efficiently and securely manage your website's information with 1 MySQL Database, ensuring smooth operations.
FREE SSL Certificate
Enhance website security and build trust with visitors by receiving a FREE SSL Certificate.
FREE WordPress Migrations
Seamlessly transfer your existing WordPress website to BigCloudy with our FREE WordPress Migrations service.
One-Click Staging
Test new features and updates safely and easily with our convenient One-Click Staging environment.
Daily Backups / Jetbackup
Protect your valuable data with automated Daily Backups / Jetbackup, allowing for instant restoration in case of any unexpected events.
99.9% Uptime Guarantee
Enjoy exceptional reliability and minimal downtime with our 99.9% Uptime Guarantee, ensuring your website is always accessible to your visitors.
30 Days Money-Back Guarantee
Experience the BigCloudy difference risk-free with our 30 Days Money-Back Guarantee.

BigCloudy's Secure and Optimized cPanel Hosting
Are you a developer, designer, or someone who desires complete control over your online presence? Look no further than BigCloudy's robust cPanel hosting solutions! We provide you with the ability to create the website you envision, without any limitations.
Embark on your journey at a fraction of the usual cost! With prices starting at just $0.01 for the first month, BigCloudy offers professional website management that is more accessible than ever before. This limited-time offer is the perfect chance to seize control of your online space and unleash your creative potential.
Discover the exceptional benefits of BigCloudy's cPanel hosting:
1. Unmatched user-friendliness
Experience effortless navigation through cPanel, even if you have limited technical expertise. Simplify website management with just a few clicks, allowing you to focus on creating remarkable content and expanding your online presence.
2. Exceptional performance
Our servers are optimized for speed and reliability, ensuring fast-loading and flawless performance for visitors worldwide. Rest easy knowing that your website is always accessible and running smoothly.
3. Robust security
We prioritize your website's security and have implemented advanced measures to safeguard it from malware, hackers, and other online threats. Your data and your visitors' information are always protected with BigCloudy.
4. Scalability
As your online needs grow, our web hosting plans can adapt to meet your evolving requirements. Choose from a range of cPanel hosting options and seamlessly upgrade your plan as your website traffic and resource demands increase.
5. Unparalleled control
With cPanel, you have complete control over every aspect of your website. Manage files, configure settings, install applications, and much more, all through a user-friendly interface.
Here's what you'll receive with our incredible CPanel hosting offer:
1 Website
Create your unique online space and let your brand shine.
5 Subdomains
Expand your online presence with additional websites under your main domain.
50 GB Disk Storage
Store all your content, images, and data with ample space.
500 GB Bandwidth
Accommodate high traffic volumes and ensure a smooth online experience for your visitors.
1 MySQL Database
Manage your website's data efficiently with a dedicated database.
1 Email Address
Stay connected with a professional email address associated with your website.
1 Core CPU
Enjoy reliable performance and the ability to handle moderate website traffic.
1 GB RAM
Ensure smooth website functionality with ample system resources.
2,00,000 Inode Limit
Host and manage a large number of files and folders effortlessly.
Daily Backups / Jetbackup
Protect your valuable data with automated daily backups for added peace of mind.
Conclusion
BigCloudy's Year-End Deals present a unique opportunity to enhance your online visibility and propel your website to unprecedented heights. With unparalleled dependability, extraordinary functionalities, and unbelievably affordable prices that will bring tears of happiness (in terms of hosting), there is no more opportune moment to embark on your online venture or elevate your current website to new horizons.
So come aboard the BigCloudy and prepare yourself for an exceptional web hosting experience like no other! Explore our website now and seize your Year-End Deal before it slips away!
3 notes
·
View notes
Last Seen Blogs