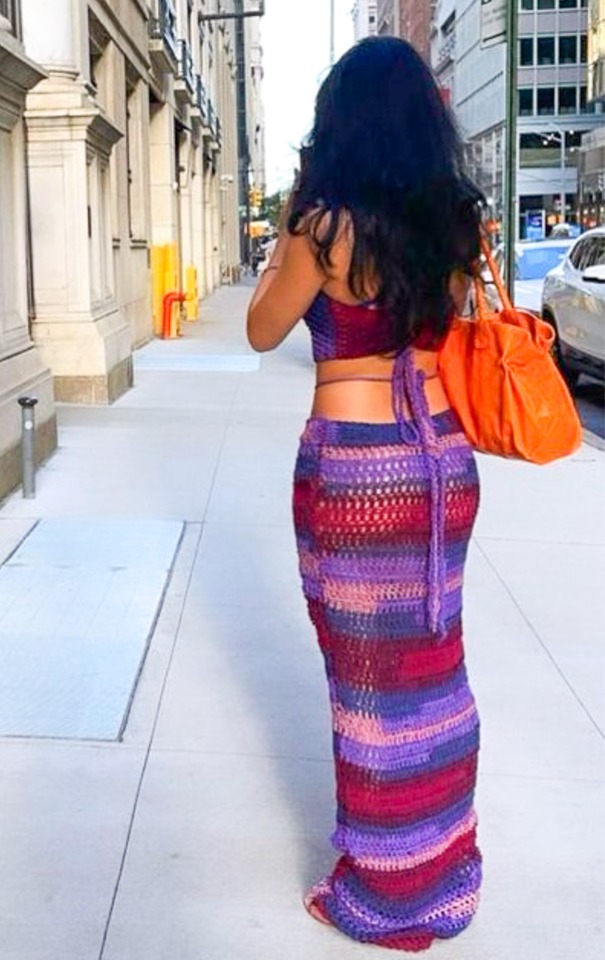
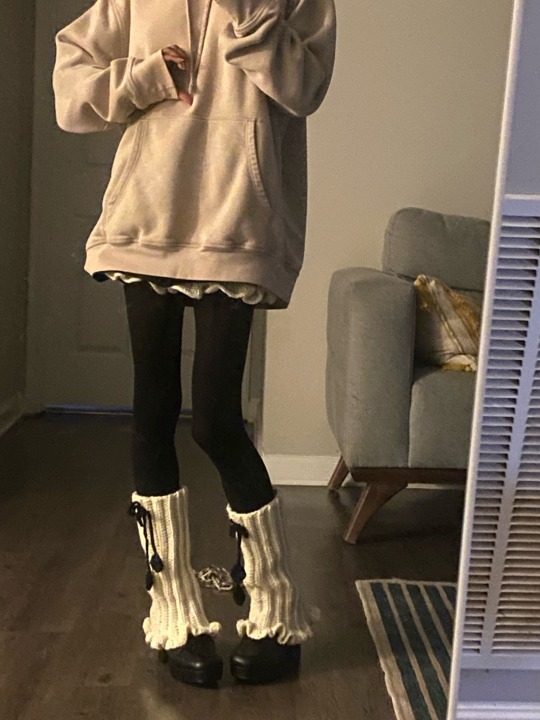
#crochet skirt
Text

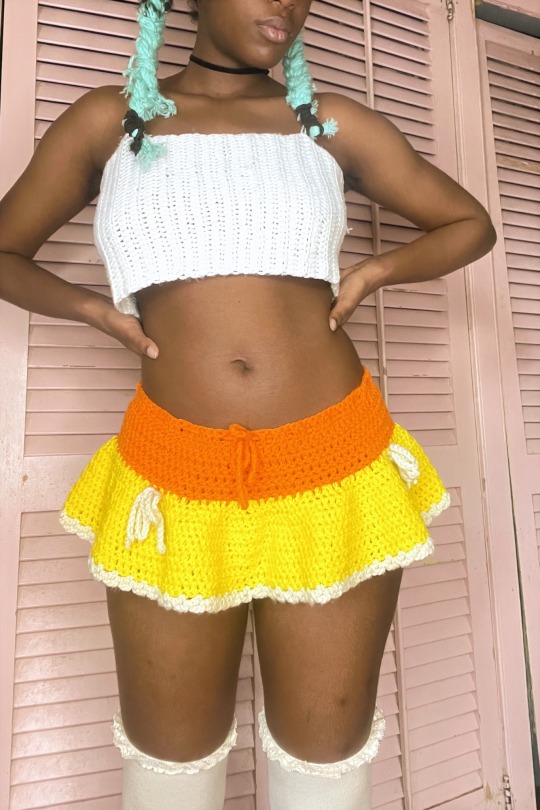
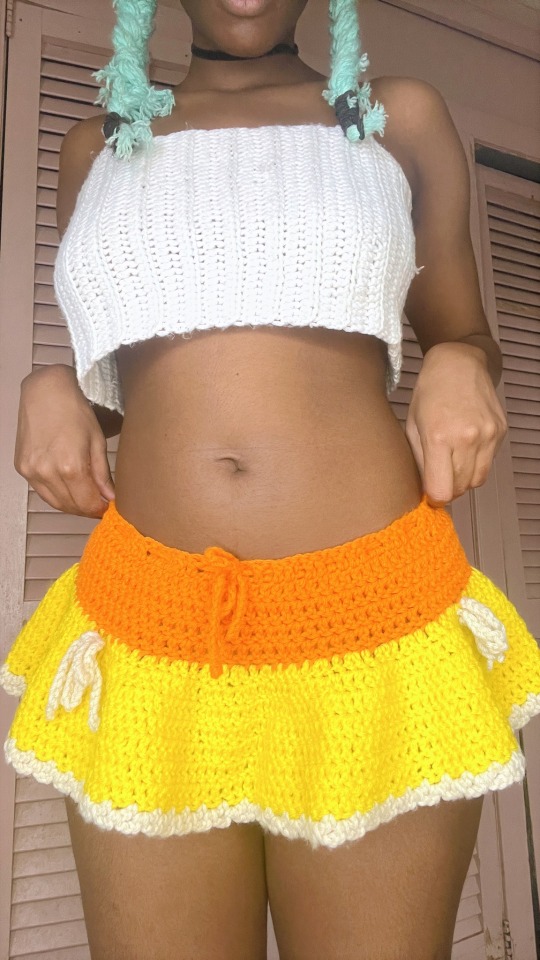
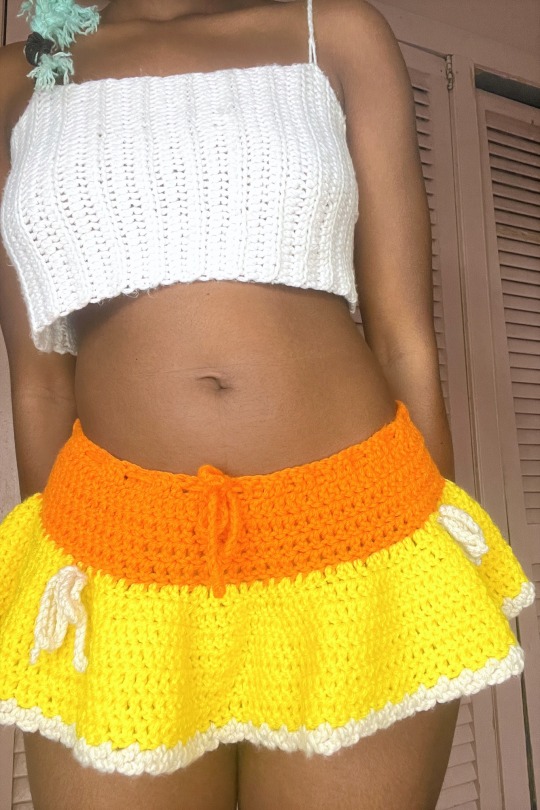
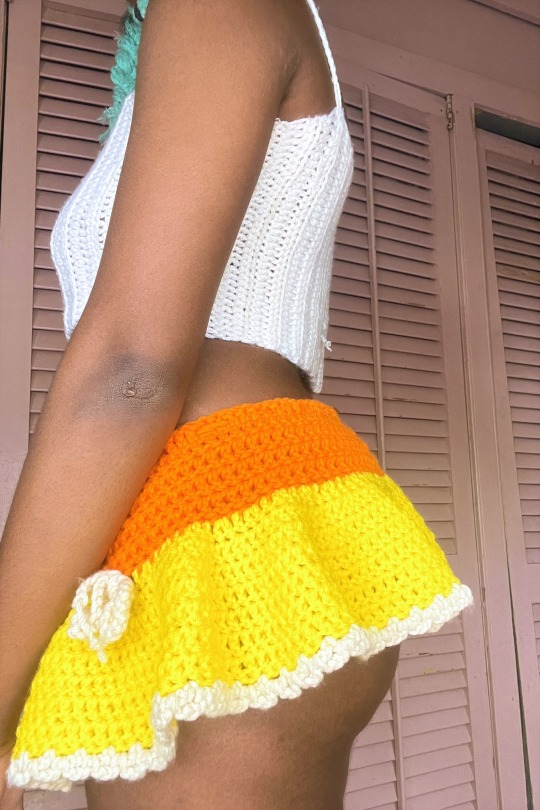
The twirl in this bad boy is spectacular.
Pattern: mine
#crocheters of tumblr#crochet#crochetblr#fairycore#goblincore#mermaidcore#crochet pattern#granny square#knitblr#knit#cottagecore#crochet skirt#kpop#outfit inspiration#festival outfit#festival fashion#outfit#aesthetic#crocheting
311 notes
·
View notes
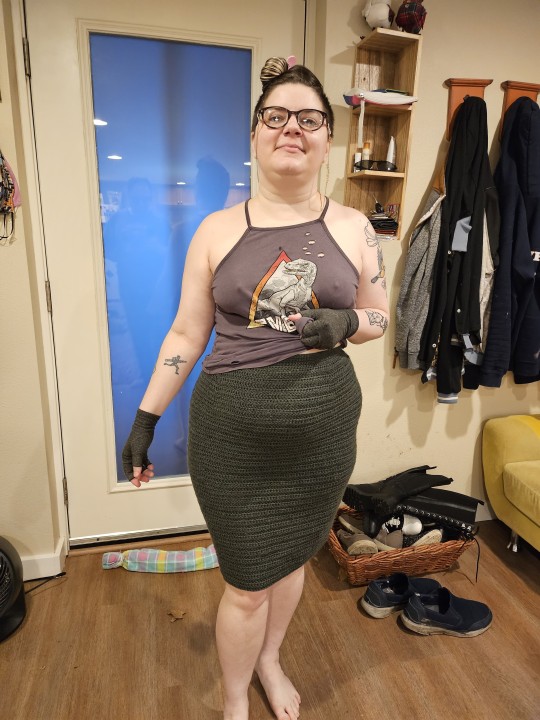
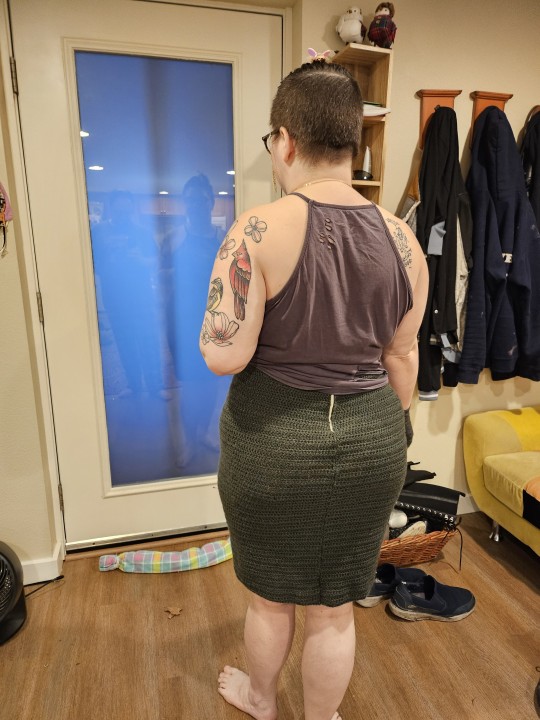
Text
Hey, you wanna crochet a pencil skirt? I got a tutorial for you!
Years ago, I made a video tutorial for making a pencil skirt. It ended up on the front page of ravelry, which was fucking wild.
Anyway, time has passed, I’ve kept making pencil skirts, and now I’m here with what we’ll call Tutorial 2.0. Let’s get to it:
Supplies:
Yarn
Hook
Clear Elastic Cord or woven belting
Buttons or Zipper
Step 1: Measuring
Measure the following things:
Your waist.
The widest part of your hips.
The length between your waist and the widest part of your hips.
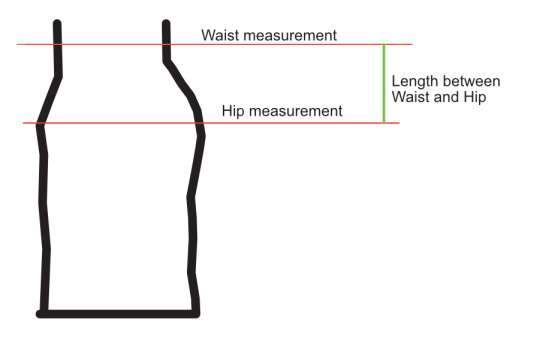
For example measurements, I will use my own:
Waist: 33”
Hips: 43”
Length between: 8”
Step 2: Gauge swatch
A gauge swatch will help you accurately size your skirt. Work a gauge swatch of ten stitches across and ten rows. You can use any stitch you want for your skirt, but I tend to use single crochet for the waistband and double crochet for the body of the skirt. When I do a gauge swatch, I work it in double crochet since that is what I use for the skirt body.
Write down your number of stitches per inch, and the number of rows per inch.
For our example, let’s say I get 4 stitches per inch and 2 rows per inch.
Step 3: Make the waistband
Crochet a chain to the same length as your waist measurement. Work in single crochet rows until the waistband is 1 inch tall. You can work clear elastic cord on the wrong side of the rows to add some stretch to your waistband. You can also work the waistband without elastic and use belting at the end to help hold the skirt in place. I have an example of belting in this video.
Step 4: Start the body of the skirt
Once you have the waistband 1-inch tall, you can start the body of the skirt by completing a row in pattern stitch. Once you’ve done that, wrap the waistband where you want it to sit, with the open ends at the back.
Step 5: Add increases
This pencil skirt uses raglan increases. There will be four points on the skirt where you will always increase. You will work 3 stitches into each increase, always placing the next increase in the second stitch of a previous increase.
These increases should shape close to your body to give you the classic pencil skirt fit. For best results, place increases in the same places on either side of the skirt. Line them up with the front curve and back curve of your leg (the green line is the leg).
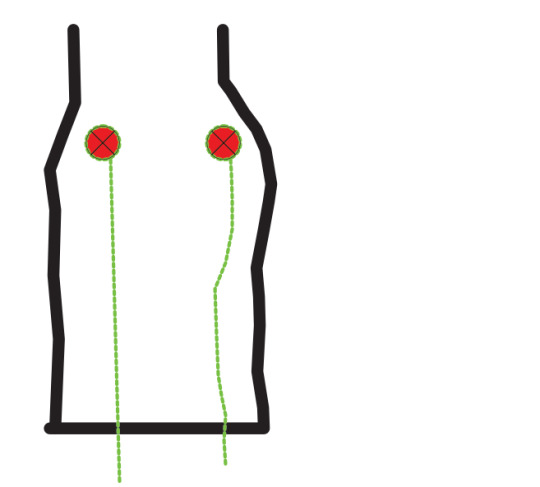
I find it easiest to mark one side of the skirt, then simply count over from the other end the same number of stitches for both increases on the other side.
Step 6: Let’s math it up!
To make sure your skirt’s gonna curve correctly, you need to be sure you can hit the last round of increases you need within the length you have between your waist and your hips. As I mentioned earlier, my waist is 33” and my hips are 43” with an 8” length between. I get 2 rows per inch and 4 stitches per inch.
First, I need to know how many stitches I will need to add to my starting count:
33 (waist measurement) x 4 (stitches per inch) = 132 stitches
43 (hip measurement) x 4 (stitches per inch) = 172 stitches
172 - 132 = 40 stitches
Second, I need to figure out how many sets of increases I need to do to add those 40 stitches. On every row I increase, I add 8 stitches.
40 / 8 = 5 rows of increases.
Third, I need figure out how many rows I have to work to reach the full 8 inches between my waist and the widest part of my hips. I know my waistband is 1 inch. I know the one row of pattern stitch I’ve completed for the skirt body is ½”.
8 inches (total length between waist and hips) - 1-½” (amount of skirt already worked) = 6-½” to work.
I get 2 rows per inch.
2 x 6 = 12 rows
And then 1 more row for the other ½”. So, that’s 13 rows I need to work, but I only need 5 rows of increases. This means that I can work increase rows, then work a row or two even. This will keep the curve of the skirt smooth. The increase pattern may look like this:
Row 2 of skirt body: Increase
Row 3: work even
Row 4: work even
Row 5: Increase
Row 6: work even
Row 7: Increase
Row 8: work even
Row 9: work even
Row 10: Increase
Row 11: work even
Row 12: Increase
Row 13: work even
I do recommend working one row even between each increase row. That is 100% a personal preference.
Step 7: Join and work in rounds!
After you’ve completed the final increase round, you can join to the first stitch of the row and work in rounds for the rest of the skirt. This will let you try it on as you add length, so you can see how it’s building. When it’s the final length you want, fasten off.
Step 7: Waist and fastenings.
If you carried elastic cord on the back of the waistband when you worked the waistband, you can either add a zipper or buttons, depending on what you’d prefer. I like zippers just because I’m bad at buttonholes.
If you did not carry elastic, you can either sew in a strip, or you can use belting to create a stronger waistband that will keep its shape over time. If you choose to use a zipper with the belting, I recommend putting the belting in first because then it can act as extra support for the top of the zipper.
Once you’ve finished off that way, you’re good to go. I bet you look great!
Final notes:
If you need more than 8 increases per increase row to get your skirt the right hip measurement at the correct point in your hip, you can add more increases. Here’s an example:

If you want a pencil skirt that is a big snugger in the butt, work an inch without increases, then complete decreases in the same spots you had previously been increasing (You’ll decrease over 3 stitches for each decrease to match your increase count). Work a row or two even, try on, and then decrease again if you want to. Repeat as much as you’d like to get a very close fit.
If you keep working increases, you’ll get an A-line skirt. You can still join at the end of the final increase you need to hit your hip width and work in rounds after that.
#crochet tutorial#tutorial#crochet skirt#pencil skirt#crochetblr#this will go on the official blog i have probably tomorrow#but it's done so have it now
51 notes
·
View notes
Text
28 notes
·
View notes
Text

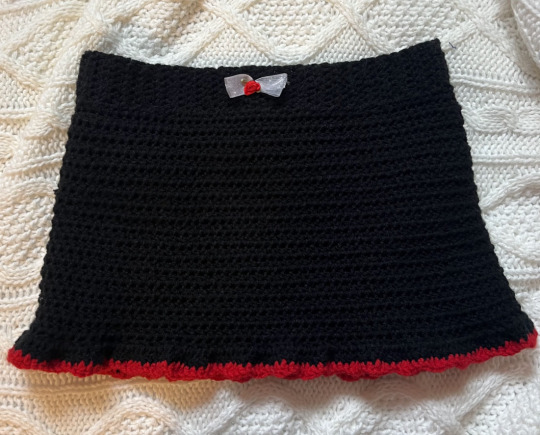
red & black crochet mini skirt by me *ೃ༄
#pls excuse the messy room lmao#crochet#crochetblr#crochet artist#fiber arts#fiber artist#mini skirt#red and black#crochet skirt#knitblr#fiber art#textiles#crochet design#crochet pattern#handmade#handmade clothing#yarnblr#yarn crafts#artists on tumblr
40 notes
·
View notes
Text


Crochet micro skirt I made. I’m so obsessed with bows and skirts ♡´・ᴗ・`♡
Insta:__.myst.ic.__
#crochet#fiber art#crochet aesthetic#crochet clothes#fashion#knit and crochet#crochet skirt#autumn#autumn colors#black girl fashion#knitlife#crochet top#fall colors
63 notes
·
View notes
Text


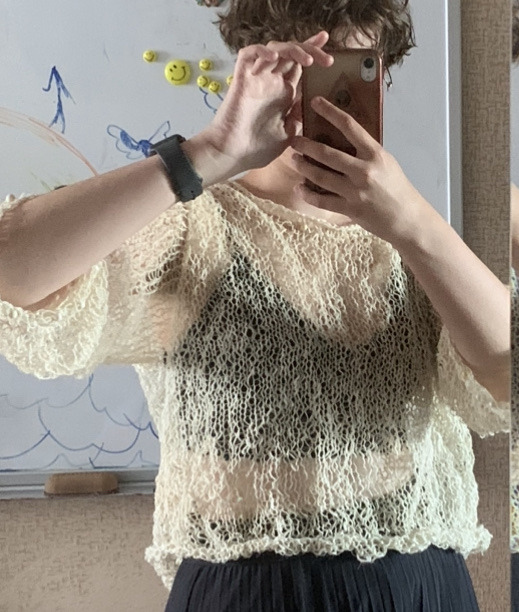


compilation of few things i’ve made in ~year and a half since i started knitting/crocheting
(there were few toys, some pillowcases, scarves and other stuff but some of these i don’t have anymore or just don’t want to post)
#crochet#crochet clothes#crochet blanket#granny square#crochet sweater#crochet skirt#crochet collar#knitting#knitted clothes#knitted sweater#knitted cardigan#crochet progress#knitting projects#crochet projects
127 notes
·
View notes
Photo
464 notes
·
View notes
Text

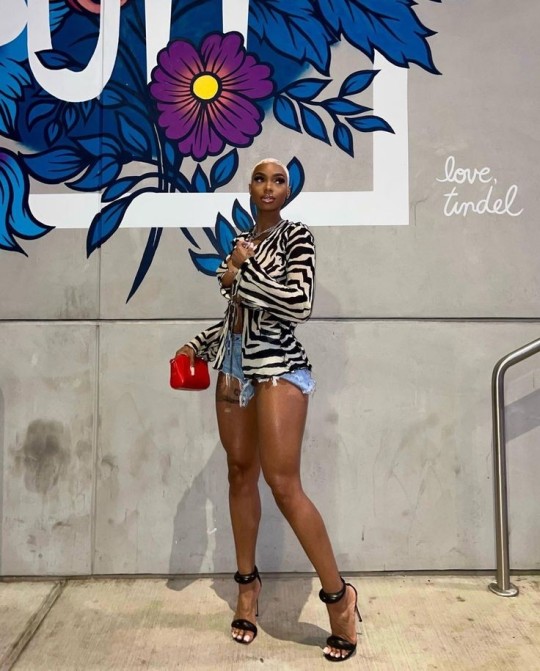


Sun's Out Legs Out, part 2 | Melanin Adorned
#melanin poppin#black women#summer fashion#spring fashion#natural hairstyle#blazer dress#high heels#bucket hat#crochet skirt#two piece#strappy heels
15 notes
·
View notes
Text
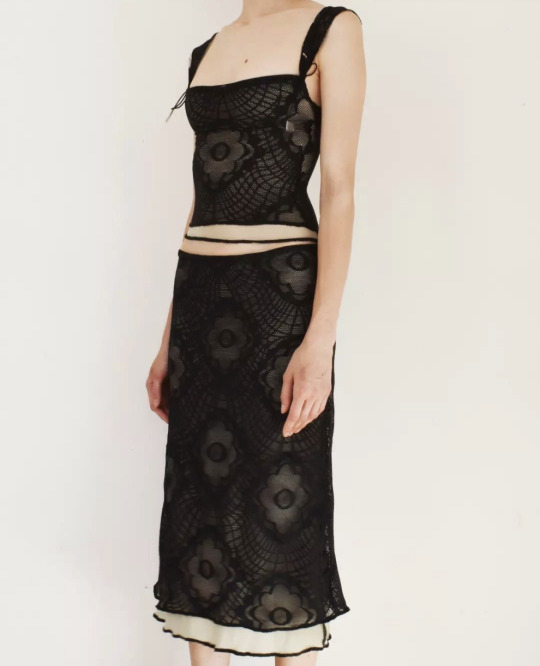
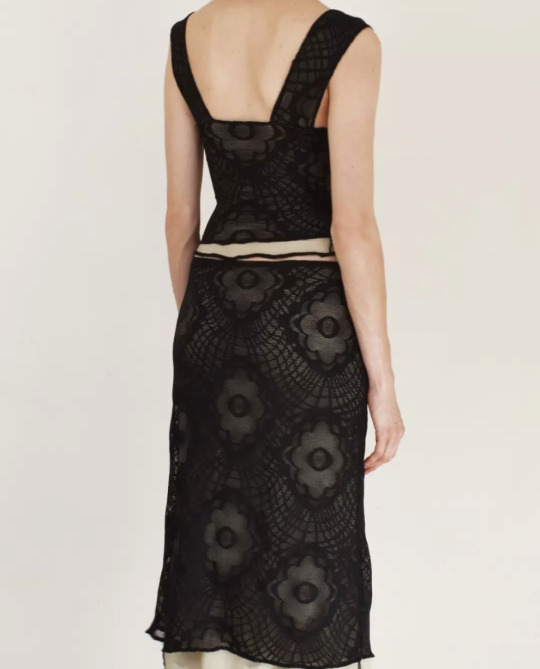
crochet lace set by ofplanet.earth
370 notes
·
View notes
Text
and she is all done !!
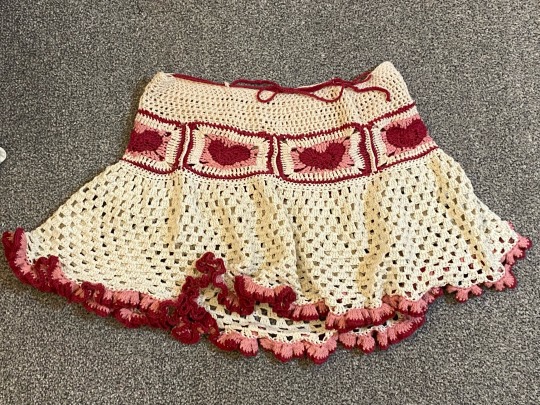
i actually finished this on the 28th…but i forgot to take photos…
also, happy new year everyone:]]
instagram
info and stuff !!
100% cotton yarn in red, natural/stone, and pink
no pattern followed/based off measurements and a dream
used a tutorial for the heart granny sqaure (link)
#crochet#crochet skirt#heart skirt#crochet heart skirt#fiber crafts#fiber arts#crochet clothes#yarn#heart#so so so fucking happy with this skirt omg#i wore it to a catchup with a friend !!#its a really good summer skirt to be honest 😭 though i wish i could make some minor changes to the measurements. but the belt works great !!#happy gal
13 notes
·
View notes
Text
i love a good skirt (+ another pair of legwarmers)
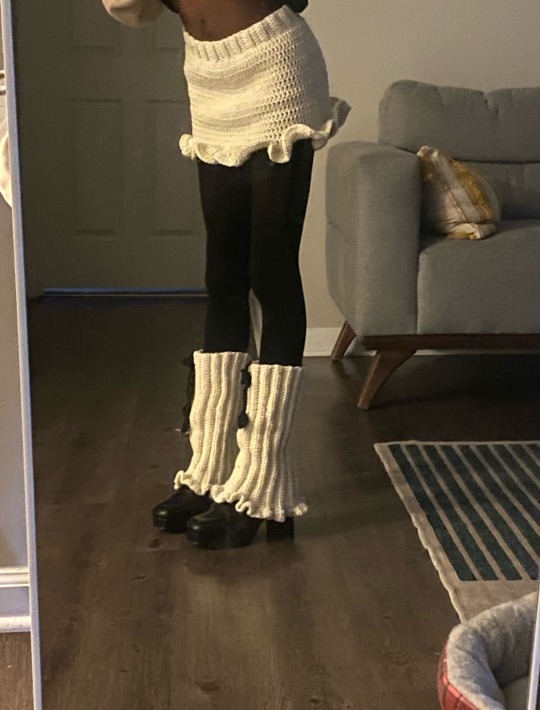
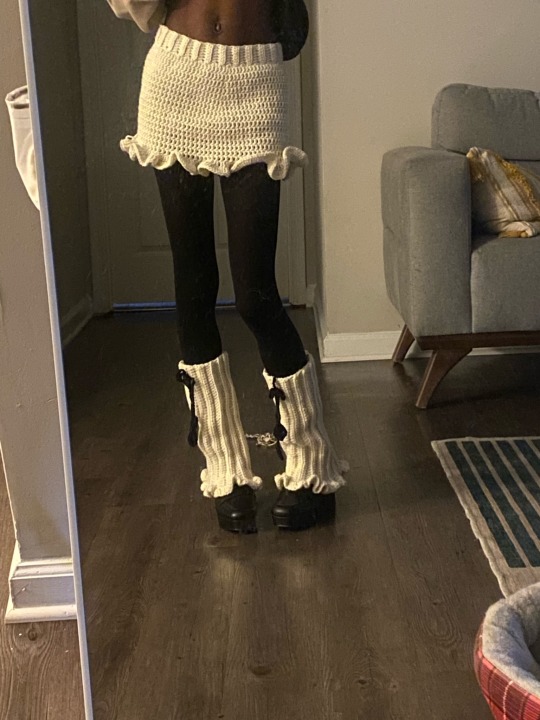
#crochet#crocheting#fiber art#fiber crafts#crochet blog#crochet stuff#crochet skirt#leg warmers#handmade
10 notes
·
View notes
Text
Freehand skirt. Part of a set I’ve been working on.

#fiber art#yarn#knitting#crochet#crochet skirt#mermaidcore#cottagecore#goblincore#fairycore#outfit inspiration#festival outfit#festival fashion#crocheters of tumblr#crochetblr
47 notes
·
View notes
Text
Finally got the new zipper put in the skirt. Fits like a dream.
14 notes
·
View notes
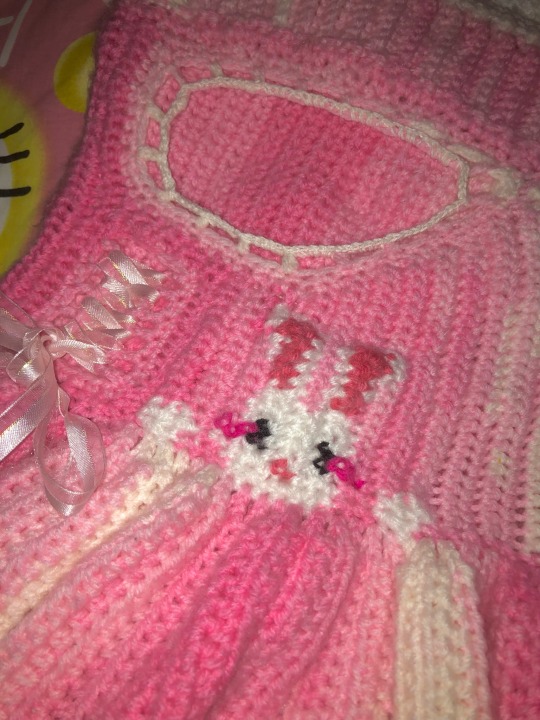
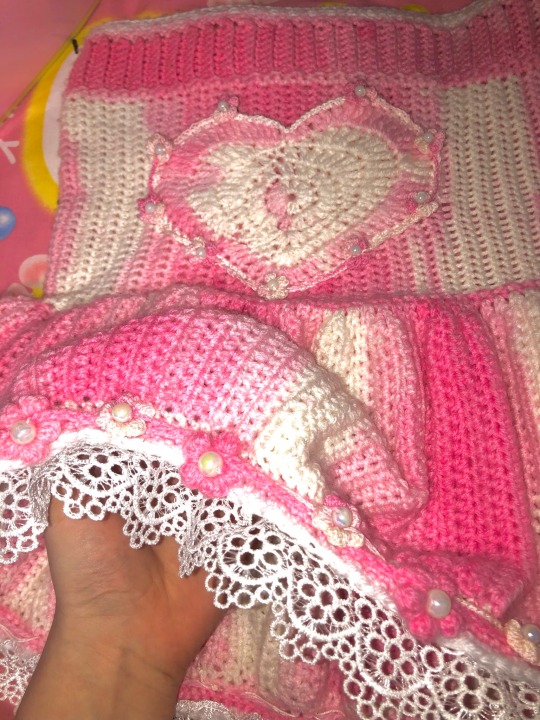
Note
Your clothes are so cute!! Did you make that crochet skirt?
(I think because I posted 3 drafts in 0.2 seconds, this didn’t show up on anyone’s following feed cause I don’t see it with my other posts in the main feed :( that’s unfortunate) Thanks, I did make that skirt! :) There are heart pockets on the back and I might add belt loops with heart buttons soon. It was my first time crocheting with beads, I put these iridescent pearls in the middle of the little flowers I crocheted. They show up a little weird with flash but they have like a blue/yellow shift. I think it came out super pretty! It was also my first time using colour changing yarn and it’s so much fun to see the yarn change colours as you go. Pleating can take a long time but it’s totally worth it cause the twirl on this skirt is so cute.💞 🌸
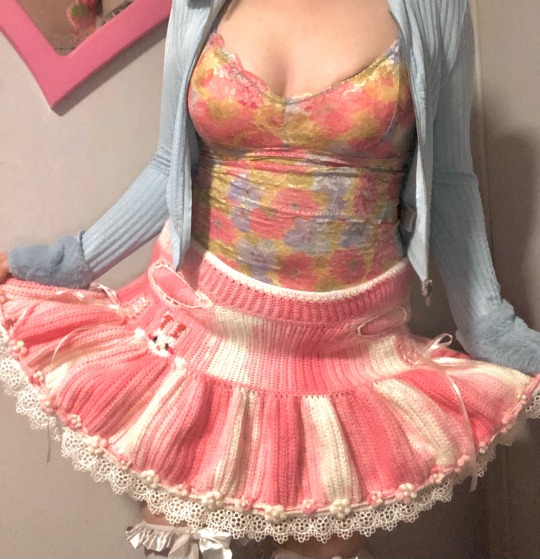

45 notes
·
View notes
Text

red & black crochet mini skirt by me ✧.*
#crochet#crochetblr#crochet skirt#handmade#handmade clothing#mini skirt#red and black#emo#crochet artist#crochet design#fairycore#knitblr#crocheters of tumblr#fiber art#fiber artist#acrylic yarn#yarnblr
16 notes
·
View notes
Text
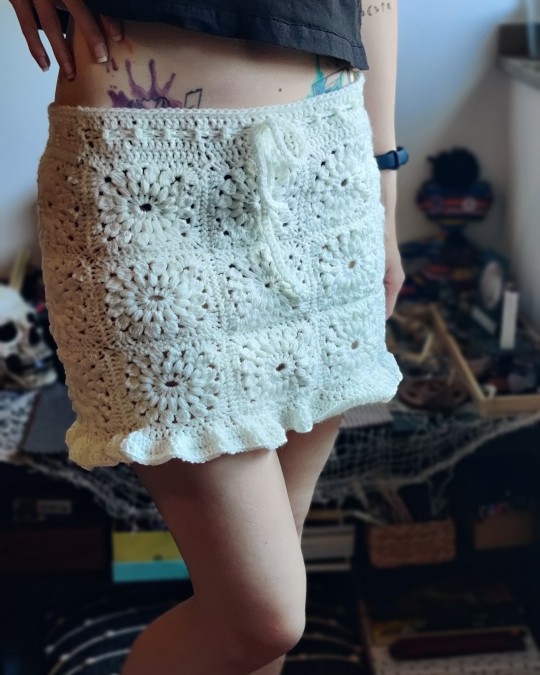
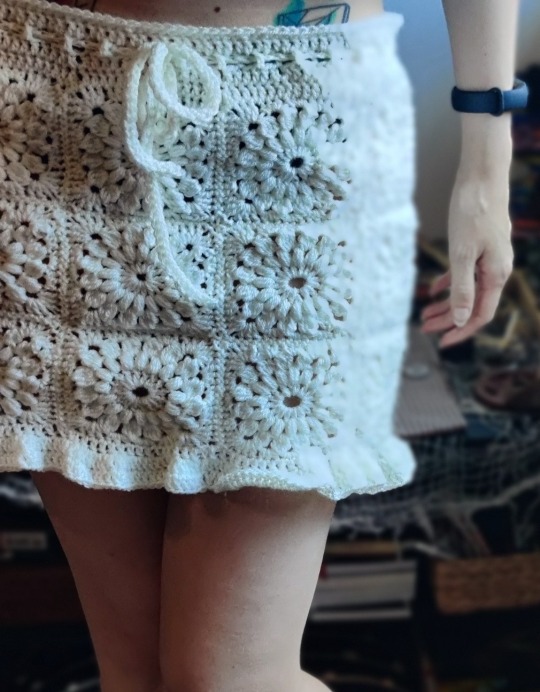
Granny square skirt done!! Turned out surprisingly well. Like what?! It's soo cute 🥺 Took me around 15 hours to complete.
16 notes
·
View notes
Last Seen Blogs

volpebionda
Volpe Bionda

greg1997
Untitled

hypequeenves
VESPER

mary1286
Mary Aaron
bangtan-oneshots
BTS Oneshots And Scenarios