#coloured fine liner and copic markers
Text
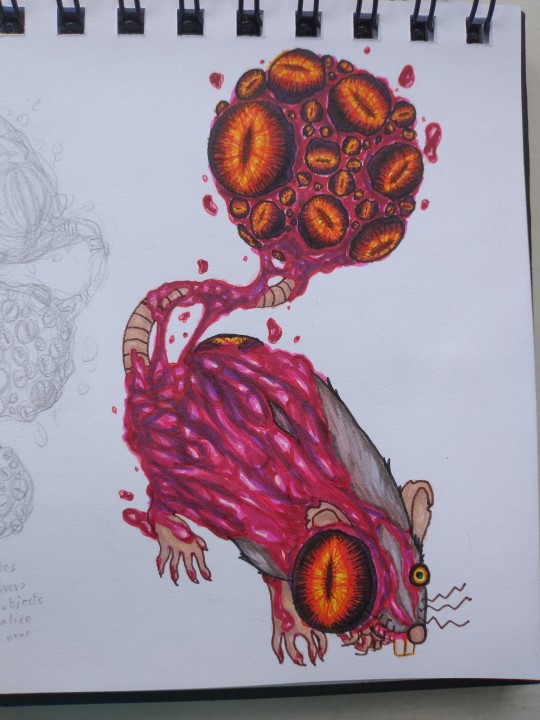
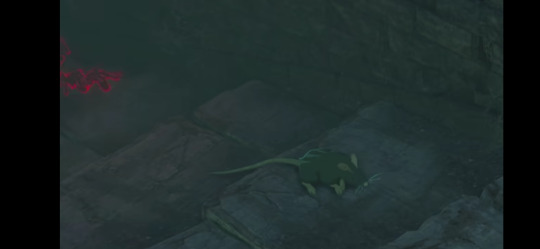
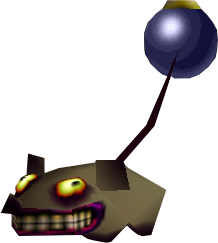
Been thinking about the rat in the first botw2 trailer for 3 years...real bombchu......

More details under the cut ⬇️
Here's the little fella who I'm choosing to believe gets to be a cool new enemy and not just immediately deleted from the game by the malice


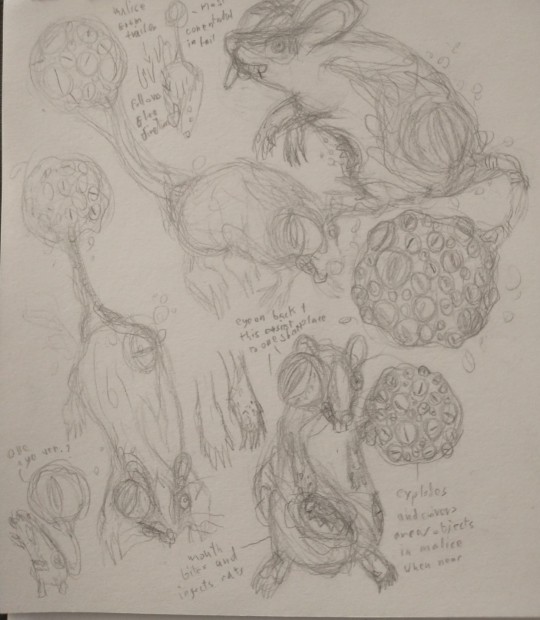
The malice grabs the rat as it flees, so most of the corruption is concentrated at the back and the tail. It runs around leaving a trail of malice from the mouth that forms on its stomach, spreading the corruption to other creatures, plague rat style.
When it spots Link, it charges for him as its tail swells with more and more malice eyes, until it finally explodes sending sticky malice all over. You can take it out quick before by shooting the large eye at the front.
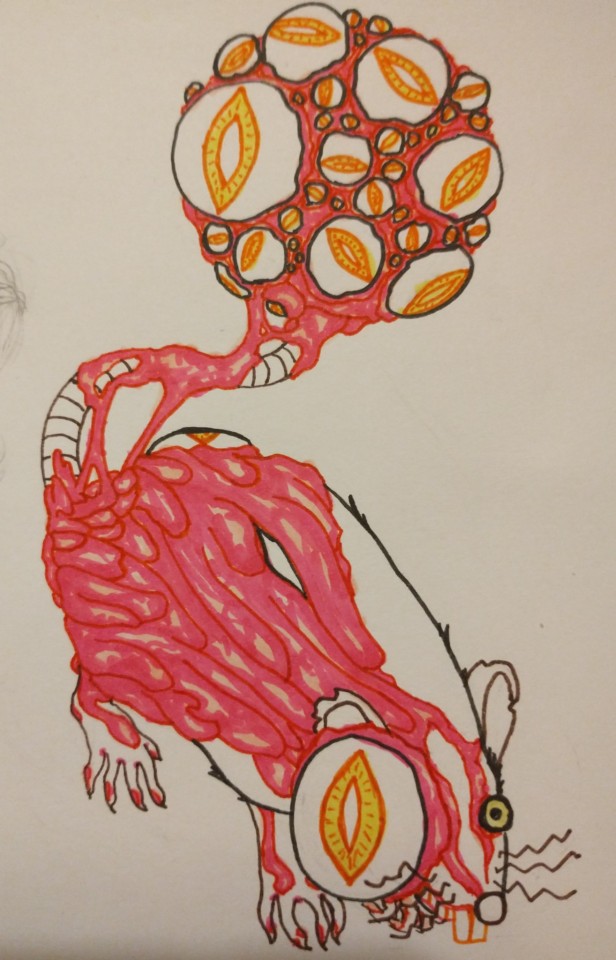
(I think it could have one big eye at first on its tail before they multiply, but I really wanted to draw multiple lol)
It's obviously mostly inspired by malice eyes in BOTW, but also from real bombchus from MM and a little bit of the malice pattern to match the markings on the WW chus!
I mean lookit these lil guys! They're great! Gotta be back in botw2 come onnnnn Nintendo!

#botw2#bombchu#loz#real bombchu#breath of the wild 2#botw#zelda enemy#trypophobia#body horror#eye body horror#multiple eyes#rat#I am completely biased in finding these enemies neat because of my linksona bombchu yes#i will cry if they're not in the sequel#or at least bombchu weapons#remote bombchus tho#coloured fine liner and copic markers#my art
15 notes
·
View notes
Text
Really Homophobic of them to put the only art supply shop in this god forsaken city right next to my uni.
#Gordan Harris whoever they are can just take a cut of my pay check honestly#the only place in the country's largest city to buy art supplies#and I mean quality art supplies#shit that will last#Not ware whare stationary shit#even the brands that overlap with places like paper plus or warehouse stationary is cheeper there#I could by a pack of alcohol markers for 45 dollars#or I could buy the same pack for 35 dollars#or I could buy Copic pens#not that I use markers for colouring#this is a colour pencil and fine liner household!#Sorry irl posting it will happen again#I love living in nz but sometimes a niche annoyance will send me over the edge
0 notes
Note
Do you have favorites? Like, notebooks, pens, paints, etc?
I keep using those canson xl blue multimedia sketch books because I feel like it gets the copic markers to do what I want. Those Robert Bateman goat ones are pretty good for the copics too, and I like that I can get them really small. That’s what I’ve been using for my pokedex challenge.
I’d started using micron fine liners when I was inking for copic work but find the staedler ones less likely to smear. Still use both though.
I don’t know if they’re my favourites per se, but for acrylic paint I’m usually using Golden.
If it’s just going to be a pen sketch I don’t think anything can beat an old fashioned blue ballpoint pen, I can actually shade with those lol
I’m starting to enjoy Posca, mainly as touch ups or for highlights to copic work. I want to explore using them straight up more though.
Gellyrolls would be so much more useful if they didn’t… clog all the F’ing time 🥲
For coloured pencils, the Prismacolors were good, I don’t have a problem using Crayolas or Laurentiens, anything else cheaper tends to be weirdly faint or waxy.
For coloured ink linearts either the micron or the triplus fine liners is what I’ll use. I got some pastel LePens that are ok too. I have to be careful though cuz the triplus will run if I get it too wet.
Hope this wasn’t too tdlr 😅
5 notes
·
View notes
Text
Media Experimentation 9/10

Firstly, I sketched the outline of the pose and garment. I then coloured the skin tone with copic markers. I used red, blue, white and grey copic markers for the garment. After, I used a colouring pencil to add texture to the jeans. Finally, I fine lined the drawing with a black fine liner.
1 note
·
View note
Text
Final 6 Designs 4/6
Size

To start with I traced the design from before. I did not change this design because I really like the shape and silhouette. I used copic markers and colouring pencils to create this design. I fine lined the whole design with a fine liner and added the print design. Finally, I painted purple metallic watercolour to the skirt and print designs.
1 note
·
View note
Text
i went to this mega fair today (the actual purpose of my trip) that was focused on all sorts of arts&crafts– from quilting and patchwork to crochet to painting to jewelry making and literally any kind of arts and crafts u can imagine and i got SO MUCH free stuff... a 24 colors watercolor set, one single copic-style marker, fine-liner pens, almost every colour imaginable of highlighter pens, two of those ink brush pens... im still so amazed that all of this was free lol bc its all high quality stuff!!!! im so happy omg
0 notes
Text

Fun little sketch I did while I was travelling home to visit my mom. I used Hb pencil to sketch it out first, then I used whatever coloured copic marker I had on my as well as a red fine liner for the outlines.
1 note
·
View note
Text
Primary Source Images Copy


To begin with, I sketched the outline of the ivy in pencil. I then used my light green, vibrant green and dark green copic markers to colour the ivy. Next, I coloured the ivy with dark green and light green pencils. After, I used my fine liner to add shadows and my white pen to add highlights to the ivy. Finally, I added the shadow of the ivy with my 2H-3B pencils.
I decided to sketch this ivy as it will later help inspire me to design my top. Also, I can take forward the colour pallet of this variety of greens.
1 note
·
View note
Text
Final 12 Designs

In this design I changed the colour of the dress to blue and roses to red so that they would appear more vibrant. To create this I used my red, dark red, light blue, dark blue, brown, dark brown and light green copic markers and my red, dark red, light blue, dark blue, brown, dark brown, black, light green and dark green colouring pencils. After colouring my design I fine lined it with my 0.1 fine liner.
1 note
·
View note
Text
I really didn't want to do this but I got a head injury a few weeks ago and was hospitalized for it. I was out of work for most of my pay period and today when I got my check I realized that unfortunately it means I'm down money for rent. I've included mu commission prices below and I would love for a reblog for visibility! I live with my partners (we're a queer poly thruple) and the other two are out sick from work rn. I'm short about $200 though I would like to save up more bc I still have over $200 in medical bills from the cat scan. If I can make like $400 I would have enough for rent and my hospital bill! $450 means I can also get groceries :D
Here's my prices as well as my caard which has visible examples:
https://sadtinytoaster.carrd.co/
I use copic markers and Staedtler fine liners
Prices:
$10 sketch
$15 ink
$30 Ink and Colour
If you can't rn I would love a reblog thank you!!!
0 notes
Text

Day 11 Of Quarantine:
I didn’t have anything to post yesterday, but I did spend time working on a coloured drawing of Molly that I was promising you guys earlier so here you go.
#edie jpeg#original art#sketches#coloured sketches#copic markers#fine liners#ocs#my ocs#original characters#my characters#alternative#alt girl#alternative fashion#mall goth#mall goth girl#90s mall goth
20 notes
·
View notes
Photo

Inktober Day 7 - Enchanted
(Marker pen, metallic pen & white corrector pen on card)
Process under the cut 😊
- this is most definitely not a tutorial because I really don’t know what I’m doing! 😄 But I learnt a few things today so I thought I would share.
I wanted to do this one in colour but my last Marker Pen pic didn’t go as smoothly as I hoped so I looked up a few tutorials. I found out that copic markers are generally considered the best (I don’t have those) and that you need to use Blending paper (I don’t have that either 😂) . What I did have was some shiny card and some cheaper alcohol pens. Shiny card doesn’t suck the ink up like regular paper does. And alcohol markers blend well because when you apply a second colour the alcohol in the first layer becomes wet again. So that’s what I’m using. They work much better for blending then the Sharpie pens on regular paper, but I’m sure it would be even better if I had the fancy stuff 🤷🏻♂️😂 oh well.
So I still had to do pencil first (as always with me) then I did a few key lines with a fine liner

I used a combination of my sharpie-type markers (which blend a little when the ink is still wet but I have loads of colours in them because they are cheap pens) and my alcohol markers (which are cheaper then copic but still more expensive then normal markers, so I only have a few colours)

Next I wanted a softer effect for the background and so I wanted to use a brush pen and black ink. But when I tested this on the shiny card I got a weird result. The black ink dried green 😋

And I actually liked the green so I kept it 😄

On top of the green I added blue/purple marker pen swirls and used a correction pen for the white sparks. I also tried to blend the alcohol pens into skin tone 😐 (I think that technique needs some more practice! 😂)
I then made the massive error of trying to add white highlights to her skin and hair using the correction pen. That totally doesn’t work with alcohol pens because the alcohol ink won’t cover over any mistakes you make with the correction pen. Plus the correction pen is meant for matt surfaces, so you get patchy areas where the texture is different between the shiny card and the correction fluid (that’s fine for white ‘magic’ sparks, not so great in the middle of her face 😂)
I covered up some of the blotched highlights in her hair with gold pen (liquid gold pen will cover ANYTHING 😋😄) but there wasn’t much I could do about the skin texture. And there you have it.
Lessons learned. Shiny paper and alcohol pens are pretty good for blending. Black ink on shiny paper dries an awesome green colour. Blending techniques for alcohol pens need practice. Don’t use white corrector pen for highlighting in this medium. 😄

#supernatural#inktober2019#midnightsilver#MidnightsInktober#day 7#enchanted#rowena macleod#spn fanart#my artwork#ruth connell#Rowena Supernatural#witchcraft#magic
30 notes
·
View notes
Text
Drawing 11

To start with, I sketched the outline of the ladybug. I used a variety of red and black copic markers for this drawing. I coloured the spots by using a dark grey copic marker and added a black marker in the centre of the spots. For the base of the ladybug, I used a light red marker and built up the shadows and detail by using darker shades of red. Finally, I used a fine liner to outline the ladybug and added highlights to its body by using a white pen.
1 note
·
View note
Text
Media Experimentation 4/10

To start with, I sketched the outline of the pose and garment. I coloured the skin tone with copic markers. I also used white, light grey, red and blue copic markers for the garment. I used a white pen to create the netting fabric. I added stripes to the top using blue pencil crayons to make the texture of denim fabric. Finally, I fine lined the drawing with a black fine liner.
1 note
·
View note
Photo

Dinovember 26 - Giganotosaurus Giganotosaurus was one of the largest therapods. It lives in the Late Cretaceous in Argentina. It is estimated that it could reach up 13m in lenght. It was most likely an apex predator in the region. This smooth cream colour paper is difficult to photograph. It comes out either too dark, or to shiny. And I think my markers are running out. Colours are getting a bit blotchy and it seems there is more solvent than pigment, so it ends up smudging the black fine liner marks. Well, only 4 more to go! . . . #sketchdaily #drawdaily #drawing #nature #natureart #dailydraw #copic #greyscale #markers #hkartist #hkart #inkstagram #inkfeature #inkdrawing #dinovember #dinovember2019 #dinosaur #dinosaurs #giganotosaurus https://www.instagram.com/p/B5WsdQHDDJx/?igshid=1ckm2sy7di1fw
#sketchdaily#drawdaily#drawing#nature#natureart#dailydraw#copic#greyscale#markers#hkartist#hkart#inkstagram#inkfeature#inkdrawing#dinovember#dinovember2019#dinosaur#dinosaurs#giganotosaurus
1 note
·
View note
Text
Art supplies
I can do more of my coloured drawings now. I’ve stocked up on fine liner paper and copic markers.
#artist problems#art#art supply haul#art supplies#morgan draws#my art#personal#morgan rambles#shut up morgan#iam
7 notes
·
View notes
Last Seen Blogs

cristianorohling
Cris Rohling

srrpnj
Support Roaring Rock Park

femminineworldofbois
LGBTQ-iloveanal

yumeyuki-ds
雪の徒

dr-chawla
Untitled